moparrob
Oct 16 2011, 03:30 PM
The prior owner of my car tried to coat the fuel tank in my 1974 914 but it ended up flaking off. I didn't feel like messing with trying to remove the coating so I ended up looking for another tank.
Thanks to fellow member Bruce Stone (bdstone914) I now have a usable fuel tank which I need to install. The problem I am now facing is how to get the old fuel lines off and remove the tank. The problem is how to get to those hose clamps given the lack of space.
I'm also concerned about getting them re-attached properly when the new tank goes in. So are there any tricks to doing this? I tried to lift the tank partway up to get to the lines but it felt like the lines were holding it in place.
Any suggestions would be greatly appreciated.
Thanks.
Tom
Oct 16 2011, 03:38 PM
Rob,
Might be able to get a small 1/4" socket + ratchet in there. I know one size fits those hose clamp screws, not sure which one.
Tom
sfrenck
Oct 16 2011, 03:40 PM
Could you lift the tank up a bit first so you have more room to work?
rjames
Oct 16 2011, 03:48 PM
If you aren't going to reuse the lines, just cut 'em.
swl
Oct 16 2011, 04:24 PM
he had to get it in there somehow. Most likely there is enough slack that you can pull up one end to access the bottom.
Generally those hose clamps are not recommended for fuel hoses. Might not be the case with stainless braid.
scotty b
Oct 16 2011, 04:33 PM
How much line is in the car body ? From the factory there is enough to pull the tank high enough to get to the clamps. Maybe whoever did this swap left enough line in there? Another option would be a crows foot to take the supply and return hard lines off of the tank, then you can pull the tank and get access to the flex lines
moparrob
Oct 16 2011, 04:34 PM
QUOTE(rjames @ Oct 16 2011, 02:48 PM)

If you aren't going to reuse the lines, just cut 'em.
I would still have the problem on getting new lines installed if I just cut the old ones...
sfrenck
Oct 16 2011, 04:39 PM
QUOTE(scotty b @ Oct 16 2011, 06:33 PM)
How much line is in the car body ? From the factory there is enough to pull the tank high enough to get to the clamps. Maybe whoever did this swap left enough line in there? Another option would be a crows foot to take the supply and return hard lines off of the tank, then you can pull the tank and get access to the flex lines

Has to be enough slack to lift the tank so you can get at the clamps from the top.
IronHillRestorations
Oct 16 2011, 04:40 PM
If you have a set of small ignition wrenches you might be able to loosen the clamps enough to pull them off the tubes.
Make sure when you re-install the tank the clamps are oriented so you can get to them.
moparrob
Oct 16 2011, 05:10 PM
Thanks Scotty - I'll check it out.
moparrob
Oct 16 2011, 11:33 PM
*SOLVED*
In the end brute force prevailed. Although I got one clamp off I could not get the other one. There was no way to get a wrench on it.
I ended up cutting the lines. What a PITA. I broke my Dremel in the process so I had to go to the big guns - the die grinder with a cut off wheel.
The tank came out easily then, but the PO left no extra fuel line so it would be the same problem installing it. I'm going to use some extra line when I re-install it so I can fasten the clamps before I install it.
Thanks again for the input.
StratPlayer
Oct 17 2011, 02:55 PM
Just make sure the extra fuel line doesn't kink when you install the tank....
Dave_Darling
Oct 17 2011, 05:35 PM
QUOTE(moparrob @ Oct 16 2011, 10:33 PM)
I ended up cutting the lines. What a PITA. I broke my Dremel in the process...
Whut? I used my Swiss Army Knife to cut the hoses! They should cut pretty easily, they're just rubber and fabric. I hope you didn't cut the metal fittings coming out the bottom of the tank!
--DD
Cap'n Krusty
Oct 17 2011, 05:42 PM
QUOTE(Dave_Darling @ Oct 17 2011, 04:35 PM)
QUOTE(moparrob @ Oct 16 2011, 10:33 PM)
I ended up cutting the lines. What a PITA. I broke my Dremel in the process...
Whut? I used my Swiss Army Knife to cut the hoses! They should cut pretty easily, they're just rubber and fabric. I hope you didn't cut the metal fittings coming out the bottom of the tank!
--DD
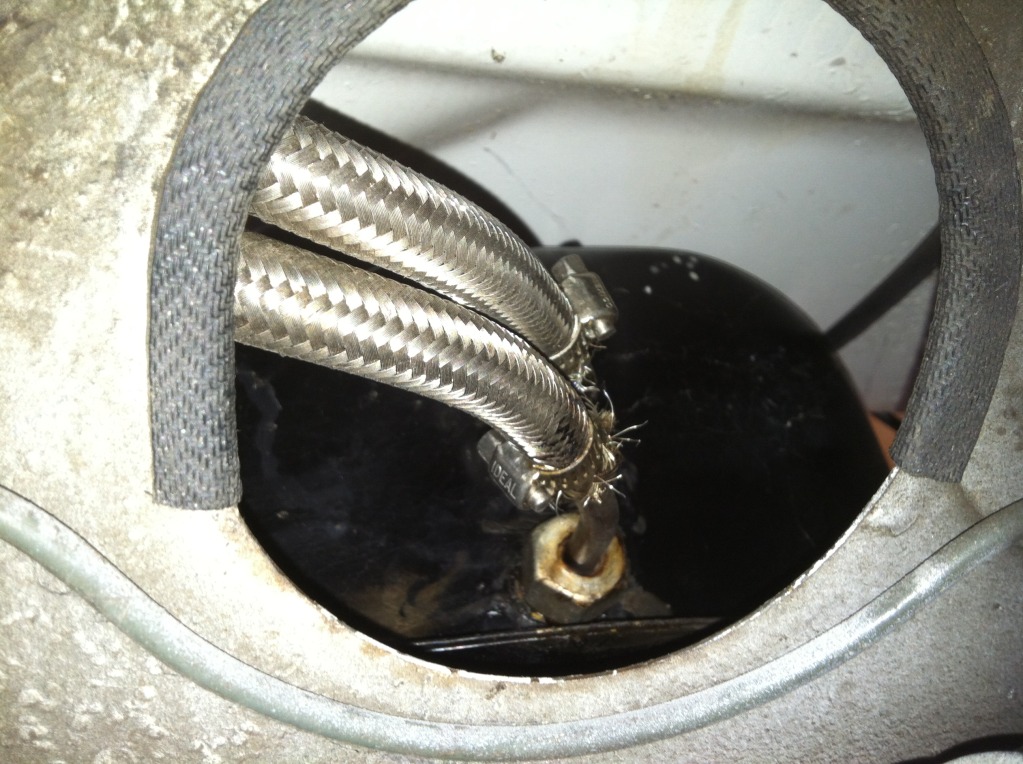
Uhhhhhh, Dave? You look at the picture? He's got those stupid SS braided bling covered hoses, the ones that don't fit properly and would leak anyway even if they did fit. And Strat Player's right, you have to leave just the right amount of slack so the hoses won't kink, and they have to be turned just right, too. It cost me a lot of money to find that out ..................
The Cap'n
ellisor3
Oct 17 2011, 06:25 PM
While you have the tank out, I would recommend doing a few things:
1.) Check to see if the fuel strainer (sock) is in the tank and/or replace it.
2.) Clean out the tank with an old piece of chain
3.) Consider sealing the tank, with the right product to make sure you never get any rust in the system. Here is what I used, and it works great.
http://www.caswellplating.com/aids/epoxygas.htm
Dave_Darling
Oct 17 2011, 08:39 PM
QUOTE(Cap'n Krusty @ Oct 17 2011, 04:42 PM)
Uhhhhhh, Dave? You look at the picture? He's got those .. SS braided .. covered hoses...
Oh shoot! I totally missed that!

I guess I thought the metal braid was just fabric with funky lighting.
Nevermind, then.
--DD
moparrob
Oct 17 2011, 09:26 PM
Naw, that stuff was a biotch to cut through. Now I need to find who sells replacement drive bands for Dremels - damn.
No, I didn't cut through the fittings.
I had thought about the proper slack issue, so thanks for bringing that up.
The funny thing is - now that I finally opened my original (resealed) tank up it looks pretty nice inside. I wish I had done that before I bought a used tank that is in worse condition than the original one.


bandjoey
Oct 17 2011, 10:25 PM
Right-t-o
Cut the lines. Install new lines about 2 ft long for a gentle curl with the tank installed. While ur there replace the filter sock. Unscrew the big brass nut and pull the pipe out of the tank and add a new filter sock. And while ur there take out the plastic fuel lines and install Tangerines metal lines through the center tunnel to the motor.

bigkensteele
Oct 17 2011, 10:59 PM
QUOTE(Cap'n Krusty @ Oct 17 2011, 03:42 PM)
QUOTE(Dave_Darling @ Oct 17 2011, 04:35 PM)
QUOTE(moparrob @ Oct 16 2011, 10:33 PM)
I ended up cutting the lines. What a PITA. I broke my Dremel in the process...
Whut? I used my Swiss Army Knife to cut the hoses! They should cut pretty easily, they're just rubber and fabric. I hope you didn't cut the metal fittings coming out the bottom of the tank!
--DD
Uhhhhhh, Dave? You look at the picture? He's got those stupid SS braided bling covered hoses, the ones that don't fit properly and would leak anyway even if they did fit. And Strat Player's right, you have to leave just the right amount of slack so the hoses won't kink, and they have to be turned just right, too. It cost me a lot of money to find that out ..................
The Cap'n
I just put my tank back in tonight, and that is what I worry about. I used the nice german cloth weaved kit from AA, which I suppose is kind of stupid, since nobody will ever see it, but it was easy at $30. The kit said that the return line was supposed to be 450mm from the tunnel line to the tank. I can tell you without question that 450mm is far to short to have any shot at tightening the clamps from above. Maybe it would work below, but I don't know. I put a longer piece of hose on it so I could tighten it up above before I dropped the tank down, but now I have no way of knowing if I have kinked hoses down there. I guess I will find out when I fire it upl.

moparrob
Oct 17 2011, 11:29 PM
So to hijack my own thread - if that is possible- what are my options for fuel line these days?
That stainless crap is out. I stabbed myself a dozen times trying to get those hoses off.
Is there some benefit to the fabric/woven hoses over plain old Pep Boys fuel hose?
VaccaRabite
Oct 18 2011, 07:24 AM
No, ther is no benefit. In fact, there is a detriment. The cloth covered hose has rubber that gets eaten by ethanol.
You need to replace the hose with something that is rated for ethanol, or you need to decide to change the fuel hose every few years as it degrades prematurely.
Zach
76-914
Oct 18 2011, 07:54 AM
That length is correct, Rob.With the left side down you just need to lift the right side of the tank enough to access that last hose clamp. As far as kinking the hose goes; no worries. Just look from below w/ an inspection mirror or inspection camera. If you change hose to (30R9 ?)as Zach suggested be VERY careful about kinking it as it is quite soft.
VaccaRabite
Oct 18 2011, 08:31 AM
I wonder if kinking was the reason the PO used stainless sheath hose? That stuff is very expensive, and under the tank would not seem to be the right place for it. Most of the stainless sheath hose from Summit is rated for ethanol. I would not use worm clamps though, but braze on AN fittings.
You know, if I wanted to spend ~$150 in fuel hose and fittings that would never be seen.
Zach
kconway
Oct 18 2011, 08:59 AM
QUOTE(Vacca Rabite @ Oct 18 2011, 07:31 AM)
You know, if I wanted to spend ~$150 in fuel hose and fittings that would never be seen.
Zach
Cheap, start here:
http://www.cbperformance.com/catalog.asp?ProductID=1709Click to view attachment
VaccaRabite
Oct 18 2011, 09:28 AM
You are evil.
Simply evil.
This will lead to a very slippery slope where every fitting is AN.
What do they do at the fuel pump?
Zach
moparrob
Oct 18 2011, 10:53 PM
Thanks Kevin. You got me totally screwed up, though. My credit card is still smoldering.
It started with the CB gas tank bungs - had to have them. Followed by 10 feet of the proper 30R9 fuel hose, and the proper hose clamps (not the screw drive ones).
While I was at it I decided to finish plumbing the rest of my system in -6 AN fittings, to the fuel filter, to the pump and back to the pressure regulator. Then new fittings out to the carbs.
Of course, while I was at it I HAD to get a new in-line fuel pressure gauge.
So, $125 later I now have my fuel system completely configured from stem to stern.

kconway
Oct 18 2011, 10:56 PM

It's all a slippery slope here isn't it?
Kev
moparrob
Oct 18 2011, 11:24 PM
kconway
Oct 19 2011, 06:29 AM
I know how that goes, I did a Racor 2 micron filter, PMO regulator (didn't need it but got it with my carbs and it has a gauge and plumbed for my return), and a cheapy Carter pump.
stugray
Oct 19 2011, 10:19 AM
"It started with the CB gas tank bungs - had to have them. Followed by 10 feet of the proper 30R9 fuel hose, and the proper hose clamps (not the screw drive ones).
While I was at it I decided to finish plumbing the rest of my system in -6 AN fittings, to the fuel filter, to the pump and back to the pressure regulator. Then new fittings out to the carbs.
Of course, while I was at it I HAD to get a new in-line fuel pressure gauge.
So, $125 later I now have my fuel system completely configured from stem to stern."
Sounds like you got off easy!
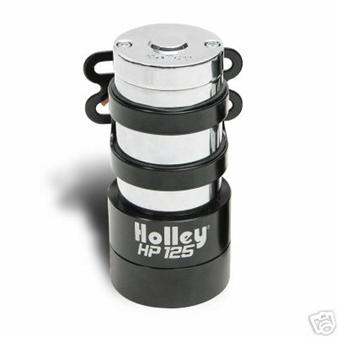
My Holley fuel pump cost almost that much alone.
Jegs wants $21 a FOOT for the 30R9, but found it a NAPA for ONLY $7 / foot.
Luckily I only needed ~5 feet to get to the 3/8" steel line in the tunnel.
I have a fuel cell where the spare used to be.
You can also get the "screw drive" hose clamps from Jegs that do not cut the soft hose.
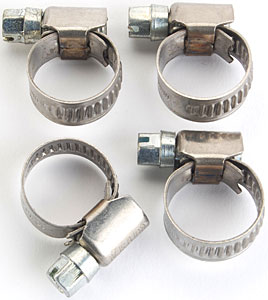 http://www.jegs.com/i/JEGS+Performance+Pro.../16050/10002/-1
Notice they did not cut the slots all the way through, so no sharp edges.
I searched about 10 local FLAPS and could NOT find a 3/8" fuel injection hose clamp that would go over the 30R9 WHEN IT HAD A HOSE BARB IN IT.
Stu
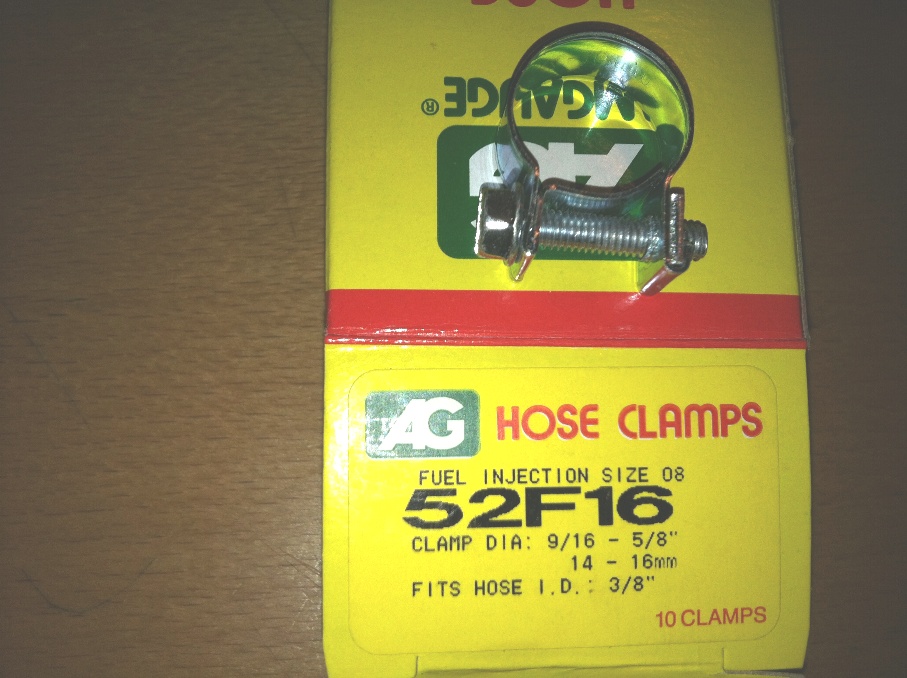
moparrob
Oct 21 2011, 11:04 PM
QUOTE
I searched about 10 local FLAPS and could NOT find a 3/8" fuel injection hose clamp that would go over the 30R9 WHEN IT HAD A HOSE BARB IN IT.
Stu
These look like they will work. I'll see when the hose arrives.
Mikey914
Oct 21 2011, 11:42 PM
Food for thought. If you take off the inspection plate underneath you can install the tank and hoses pretty easily.
EdwardBlume
Oct 22 2011, 07:23 AM
QUOTE(Dave_Darling @ Oct 17 2011, 04:35 PM)
QUOTE(moparrob @ Oct 16 2011, 10:33 PM)
I ended up cutting the lines. What a PITA. I broke my Dremel in the process...
Whut? I used my Swiss Army Knife to cut the hoses! They should cut pretty easily, they're just rubber and fabric. I hope you didn't cut the metal fittings coming out the bottom of the tank!
--DD
Oh yeah, the leaking gas tank sprint.
moparrob
Oct 22 2011, 11:08 AM
Fortunately that tank had been dry for 13 years.
I tried to get at those hoses from the bottom (see first pics) and it was impossible. Plus getting stabbed by the sharp edges of that braided hose was a PITA.
Problem is solved for the future now. Ill post pics later of the solution in a new thread.
This is a "lo-fi" version of our main content. To view the full version with more information, formatting and images, please
click here.