Help - Search - Members - Calendar
Full Version: what did you do to your 914 today
914World.com > The 914 Forums > 914World Garage
Pages: 1, 2, 3, 4, 5, 6, 7, 8, 9, 10, 11, 12, 13, 14, 15, 16, 17, 18, 19, 20, 21, 22, 23, 24, 25, 26, 27, 28, 29, 30, 31, 32, 33, 34, 35, 36, 37, 38, 39, 40, 41, 42, 43, 44, 45, 46, 47, 48, 49, 50, 51, 52, 53, 54, 55, 56, 57, 58, 59, 60, 61, 62, 63, 64, 65, 66, 67, 68, 69, 70, 71, 72, 73, 74, 75, 76, 77, 78, 79, 80, 81, 82, 83, 84, 85, 86, 87, 88, 89, 90, 91, 92, 93, 94, 95, 96, 97, 98, 99, 100, 101, 102, 103, 104, 105, 106, 107, 108, 109, 110, 111, 112, 113, 114, 115, 116, 117, 118, 119, 120, 121, 122, 123, 124, 125, 126, 127, 128, 129, 130, 131, 132, 133, 134, 135, 136, 137, 138, 139, 140, 141, 142, 143, 144, 145, 146, 147, 148, 149, 150, 151, 152, 153, 154, 155, 156, 157, 158, 159, 160, 161, 162, 163, 164, 165, 166, 167, 168, 169, 170, 171, 172, 173, 174, 175, 176, 177, 178, 179, 180, 181, 182, 183, 184, 185, 186, 187, 188, 189, 190, 191, 192, 193, 194, 195, 196, 197, 198, 199, 200, 201, 202, 203, 204, 205, 206, 207, 208, 209, 210, 211, 212, 213, 214, 215, 216, 217, 218, 219, 220, 221, 222, 223, 224, 225, 226, 227, 228, 229, 230, 231, 232, 233, 234, 235, 236, 237, 238, 239, 240, 241, 242, 243, 244, 245, 246, 247, 248, 249, 250, 251, 252, 253, 254, 255, 256, 257, 258, 259, 260, 261, 262, 263, 264, 265, 266, 267, 268, 269, 270, 271, 272, 273, 274, 275, 276, 277, 278, 279, 280, 281, 282, 283, 284, 285, 286, 287, 288, 289, 290, 291, 292, 293, 294, 295, 296, 297, 298, 299, 300, 301, 302, 303, 304, 305, 306, 307, 308, 309, 310, 311, 312, 313, 314, 315, 316, 317, 318, 319, 320, 321, 322, 323, 324, 325, 326, 327, 328, 329, 330, 331, 332, 333, 334, 335, 336
euro911
QUOTE(mepstein @ Oct 18 2018, 05:31 PM) *
QUOTE(drem914 @ Oct 18 2018, 08:20 PM) *
Dropped off my old worn out seats with the non factory plaid at Autobahn Interiors.
Tony is going to build up the side bolsters about an inch for a little more support on the street in the corners. redoing the center fabric with year and vehicle correct tartan. Should be back after next week.

Click to view attachment
I bet it will look fantastic when they get done with it.
I swear I had a flannel shirt just like that back in high school poke.gif

... it's going to compliment your car's exterior paint really nice.
drem914
QUOTE(euro911 @ Oct 19 2018, 11:27 AM) *

QUOTE(mepstein @ Oct 18 2018, 05:31 PM) *
QUOTE(drem914 @ Oct 18 2018, 08:20 PM) *
Dropped off my old worn out seats with the non factory plaid at Autobahn Interiors.
Tony is going to build up the side bolsters about an inch for a little more support on the street in the corners. redoing the center fabric with year and vehicle correct tartan. Should be back after next week.

I bet it will look fantastic when they get done with it.
I swear I had a flannel shirt just like that back in high school poke.gif

... it's going to compliment your car's exterior paint really nice.

Thanks. I get the car back from the painter next week and then its time to put the engine back in along with the interior and the carpets. Was hoping to have it back for the Cone Zone at PCA GPX, but it's highly unlikely that it will be back together by then.
DRPHIL914
QUOTE(cary @ Oct 18 2018, 10:18 AM) *

Still driving in the beautiful 70 degree days here in PDX.
Click to view attachment

Plus a shot of the new SuperBright LED bulbs I put in my gauges.
Click to view attachment

those look really great! i should try one behind the high beam indicator and see if it helps. i have a couple packages somewhere just never got around to trying them
76-914
QUOTE(milwlandrover @ Oct 19 2018, 11:10 AM) *

You guys make me look bad! I replaced the front and rear brakes (thank you PMB Performance) I replaced the exhaust (thank you Triad) I replaced all the bushing in the transmission linkage (thank you Pelican Parts) I ordered but did not install the Precision Shift (thank you Tangerine). The radio will be replaced on Tuesday (thank you Best Buy). I fixed a lot of small niggely things (thank you everyone at 914world). The drivers side passenger window fell off the track today (in the rain) so that will be my weeks end project. I would like to rebuild my inoperable horn this weeks end. I'd like to get some drone pictures if the weather is good but I am in Wisconsin so I expect anything from sun to rain to snow at any time.

@milwlandrover Do you know how many gas tanks have had a screw shot thru them by "Stereo Installation people". Quite common! beerchug.gif
76-914
QUOTE(euro911 @ Oct 19 2018, 11:27 AM) *

QUOTE(mepstein @ Oct 18 2018, 05:31 PM) *
QUOTE(drem914 @ Oct 18 2018, 08:20 PM) *
Dropped off my old worn out seats with the non factory plaid at Autobahn Interiors.
Tony is going to build up the side bolsters about an inch for a little more support on the street in the corners. redoing the center fabric with year and vehicle correct tartan. Should be back after next week.

Click to view attachment
I bet it will look fantastic when they get done with it.
I swear I had a flannel shirt just like that back in high school poke.gif

... it's going to compliment your car's exterior paint really nice.

Sweet! beerchug.gif
drem914
QUOTE(cary @ Oct 18 2018, 07:18 AM) *


Plus a shot of the new SuperBright LED bulbs I put in my gauges.
Click to view attachment

Which Superbrites did you use? I have already swapped out mine for the replacemetns from 914Rubber, but yours seem to be much brighter.
euro911
QUOTE(drem914 @ Oct 19 2018, 08:37 PM) *
Which Superbrites did you use? I have already swapped out mine for the replacements from 914Rubber, but yours seem to be much brighter.
Yes, do tell. I also installed 914 Rubber's LEDS in the BB years ago. They were definitely brighter then the oem incandescent lamps, but not that bright.
tvdinnerbythepool
Ordered all new bushings for my 1970 trans linkage, excited to get rid of some of the horrendous slop in the shifter. Lol!

Got the reverse light switch wiring repaired and boot installed. Just waiting on the little plunger for the reverse gear that goes into the switch.

Next up is a welder to fix the battery tray and a hole in the floor where the previous owner put a jack through it!
Mueller
Used my brand new Quickjack on Sandy's /6. I replaced the corroded front hub.

Also took my daughter Kennady for a ride in the car once done.

Click to view attachment
ValcoOscar
Got me a Teener stool

OscarClick to view attachment

tvdinnerbythepool
QUOTE(Mueller @ Oct 20 2018, 09:04 PM) *

Used my brand new Quickjack on Sandy's /6. I replaced the corroded front hub.

Also took my daughter Kennady for a ride in the car once done.

Click to view attachment


@mueller which model of quickjack do you have? This is just too cool, I need some of these!
Mueller
QUOTE(tvdinnerbythepool @ Oct 21 2018, 06:15 AM) *

QUOTE(Mueller @ Oct 20 2018, 09:04 PM) *

Used my brand new Quickjack on Sandy's /6. I replaced the corroded front hub.

Also took my daughter Kennady for a ride in the car once done.

Click to view attachment


@mueller which model of quickjack do you have? This is just too cool, I need some of these!


BL‐5000SLX, on sale at Costco for $1099 shipped to my door. Had to order it online. Supposedly if you find a Costco that has them in the store they are $100 cheaper.

Worked great and much easier than floor jacks and jackstands since I needed to get all 4 wheels off the ground due to also working on the rear brake calipers yesterday.
JFG
drove it driving.gif 162 mile trip up through the beacons and on through mid wales to england then a spirited drive back down the fast roads biggrin.gif

did not miss a beat until one of the ht leads snapped just above the rubber boot. quick fix and on with the fun.
porschetub
Trying for my monthly start up ,6 cranking ok but no fuel pump...WTF worked last time think it is pissed off with me due the lack of attention of late.....oh dear.
DRPHIL914
yesterday I finally took the time to move the door strike plates so that the driver's side door would shut flush. Turns out the driver side inner plate was stuck badly and it took quite a bit of effort to get it to move. Cleaned out the holes so that it could move in about 3/16", so alignment when shut is so much better!.

-Also took the car to first local Cars and Coffee in almost a year(since getting repainted etc) and got a ton of attention. more than ever. amazing what a new paint and body work along with new bumpers will do!. I was the only 914 again. probably over 250 cars, not sure where all the other P-cars were.

2 weeks I will be at the Hilton Head Concours event. If anyone is coming stop by and say hi!

any recommendations for prep - mainly just a show on Saturday with a car club show case but could be entered into the Concours as special addition from winners of people's choice voting on Saturday.
JFG
Washed it, the front was covered in bugs from yesterdays drive through the countryside.

Found an oil leak too!
cali914
QUOTE(ValcoOscar @ Oct 6 2018, 06:18 PM) *

Put my P hauler to work...Registered another stable mate.

Click to view attachment

Click to view attachment

The truck is even better hahahahahaha
napasteve
Drove to the gym yesterday and parked by this nice 86Targa
Click to view attachment
914 Ranch
Finished half of her ceiling. I think Mark wanted to see this.

Click to view attachment

It's really shocking in living color.
I took the picture right side up.
Get the other side done and I can put in A/C.
Chi-town
QUOTE(914 Ranch @ Oct 24 2018, 07:04 AM) *

Finished half of her ceiling. I think Mark wanted to see this.

Click to view attachment

It's really shocking in living color.
I took the picture right side up.
Get the other side done and I can put in A/C.


Just don't start the car in the garage if you want the white to stay white sad.gif
euro911
QUOTE(914 Ranch @ Oct 24 2018, 07:04 AM) *
Finished half of her ceiling. I think Mark wanted to see this.

Click to view attachment

It's really shocking in living color.
I took the picture right side up.
Get the other side done and I can put in A/C.
WOW drooley.gif

Nice touch, Joe thumb3d.gif


drem914
Picked up the car from the painter and delivered it to the mechanic to put the engine and trans back in.
Click to view attachment

Click to view attachment
76-914
Nice car, nice color, too! beerchug.gif
StratPlayer
Installed a new dakota digital cht gauge.
Costa05
Worked on my 914Ltd front sway bar bracket kit install. Not done but not difficult at all. Will be welding it in this weekend. Need swaybar and drop links still. Thinking the Tarrett is a good choice for street/autocross.

75914-L20C
Got the 914 on the road again for the first time in 10 years driving.gif I started working on getting it running in July. Fuel tank full of crud, fuel pump wouldn't run, injectors not flowing good, etc. Over the last 2 months, I cleaned the tank, installed new pump, new SS fuel lines, cleaned injectors and replaced all rubber fuel lines.

Now the car starts quickly and idles nice. Not bad after a 10 year nap. Gave it a wash to remove layers of dust and decided a trip to the post office about 5 miles away would be a good shakedown cruise. Went over my mental checklist before leaving: 5 gallons gas in tank, tires aired up, new plates on, insurance activated, engine runs smooth, oil pressure, fuel pressure, volt meter reading good - lets go! driving.gif Got about 3 miles down the road and realized I forgot the letter I was going to mail. As I turned around in a parking lot, I saw the oil pressure drop to zero and the idiot light came on. Panic sets in... Ok, pressure is coming back up. Doh, I forgot to check the oil level! Hmm, that oil soaked cardboard under the car might be an indication that the oil is low. I baby the car back home and pull into the garage to start an oil change. A little less than 2 quarts drained out. All in all, a successful day, if not exactly what I planned.

Click to view attachment
RickS
Having Teflon bushings made for my squeaky sway bar, So the old ones needed to come out. Front calipers are from a 72 911S.

Click to view attachment
RickS
Decided to ditch the over blingy gold key fob crest on the wheel and replace it with a more period 70s shift nob insert. IMHO, mo’ better.

Click to view attachment

RickS
The 70s version


RickS
Duplicate. How do you completely remove these?
DRPHIL914
QUOTE(StratPlayer @ Oct 24 2018, 10:12 PM) *

Installed a new dakota digital cht gauge.

I have this gauge but have not installed it yet. I have the wire run from the #3 spark plug up thru the tunnel into the center console area. How was it wiring it up? I was having a hard time figuring out which wire went to what for the light etc. I have to go back and do a search of what is what in the console. I already have the oil temp gauge , volt gauge and a AF meter wired up, so I assume I will have to do some splicing again and hack into the harness to wire it up. any quick hints ?
How accurate do you think the read out is?
JFG
i changed the leaky drive shaft seal. 20 minute job, nice and easy. hopefully this won't fail as there is no visible imperfections in either the casing or the shaft.
VegasRacer
Got new tires put on today. piratenanner.gif
The last 2 sets had been Toyo Proxes R1R No complaints. I thought I would try something different this time and went with Falken Azenis RT615K+. No chance to test them in the first 10 miles.


Click to view attachment
Not my actual tire. jpg from google
Shadowfax
Most of the work was done this weekend, but I started putting it back together after it came back from getting repainted. Front end is mostly done. Rear end is waiting on the rear valence to be painted. After that I'll have to install the sail panel trim, windshield and the remaining interior bits.

Click to view attachment

Click to view attachment

Click to view attachment
DRPHIL914
beerchug.gif amazing how getting your bumpers and lights hooked up and into place it makes the car look and you feel like you can see light at the end of the tunnel!
car looks super, love the white for sure.
Shadowfax
Thanks, Phil. It does look much better now compared to the washing machine white that was on there before.
mmichalik
Did all sorts of work. Body, brakes, etc....

You can read about it here http://www.2002and914.com/?p=727 if you're interested.

Got the doors left and then it's on to the rust in the trunk.

Having lots of fun, that's the main thing!
lierofox
Today I repaired my broken auto-cancel turn signals, on Monday while driving home from San Jose, I tried to hold the lever up while it was auto canceling and it snapped one of the existing spring hooks.

IPB Image

Took the dimensions of the good hook to figure out the profile I needed to make for the blank...

IPB Image

and went over to the milling machine.

IPB Image

I milled down some aluminum to match the profile and cut the pieces out.

IPB Image

And then after finalizing the shape with files, sandpaper, and a bandsaw, I reinstalled it in the steering wheel with some lubrication.

IPB Image
IPB Image

Attached the steering wheel and gave it a quick test before heading back home.
Works just like before now.
Cairo94507
Nice work. beerchug.gif
76-914
QUOTE(DRPHIL914 @ Oct 26 2018, 06:40 AM) *

QUOTE(StratPlayer @ Oct 24 2018, 10:12 PM) *

Installed a new dakota digital cht gauge.

I have this gauge but have not installed it yet. I have the wire run from the #3 spark plug up thru the tunnel into the center console area. How was it wiring it up? I was having a hard time figuring out which wire went to what for the light etc. I have to go back and do a search of what is what in the console. I already have the oil temp gauge , volt gauge and a AF meter wired up, so I assume I will have to do some splicing again and hack into the harness to wire it up. any quick hints ?
How accurate do you think the read out is?

IIRC, you just need a 12v & ground for the light in the gage. It is dead to the nuts accurate. Dakota's engineers are more than happy to assist with any questions or problems you encounter. Do they still offer only a 12 ft lead for the thermocouple? beerchug.gif
BeatNavy
I think they have a couple of different lengths for the thermocouple. Make sure you get/have the one that's the right size for our spark plugs. Wiring is pretty simple: 12v, ground, plus (if you want it), 12v connected to headlights for dimming.

I've been running a DD gauge for a few years now. I really like it, but I've noticed something interesting and would be curious if you have a similar experience. When I turn the heat on in the car, the CHT temp readings REALLY go up. I'm talking about the difference between say 310 degrees and reading 350 (or higher going up a hill). It seems to be worse if I'm blasting heat to the floor instead of defrost, and my gauge is under the dash.

I know little (very little) about thermocouples work, but I know it has to do with temperature differences. So I've pondered whether the increased temp readings I'm seeing are REAL or due to the thermocouple. Yesterday, for example, I had the top off driving home but ran the heat as it was a little cool outside. I didn't seem to notice particularly higher readings.

ndfrigi
QUOTE(lierofox @ Oct 31 2018, 03:18 AM) *

Today I repaired my broken auto-cancel turn signals, on Monday while driving home from San Jose, I tried to hold the lever up while it was auto canceling and it snapped one of the existing spring hooks.

IPB Image

Took the dimensions of the good hook to figure out the profile I needed to make for the blank...

IPB Image

and went over to the milling machine.

IPB Image

I milled down some aluminum to match the profile and cut the pieces out.

IPB Image

And then after finalizing the shape with files, sandpaper, and a bandsaw, I reinstalled it in the steering wheel with some lubrication.

IPB Image
IPB Image

Attached the steering wheel and gave it a quick test before heading back home.
Works just like before now.


nicely done! good job sir!
DRPHIL914
QUOTE(76-914 @ Oct 31 2018, 09:39 AM) *

QUOTE(DRPHIL914 @ Oct 26 2018, 06:40 AM) *

QUOTE(StratPlayer @ Oct 24 2018, 10:12 PM) *

Installed a new dakota digital cht gauge.

I have this gauge but have not installed it yet. I have the wire run from the #3 spark plug up thru the tunnel into the center console area. How was it wiring it up? I was having a hard time figuring out which wire went to what for the light etc. I have to go back and do a search of what is what in the console. I already have the oil temp gauge , volt gauge and a AF meter wired up, so I assume I will have to do some splicing again and hack into the harness to wire it up. any quick hints ?
How accurate do you think the read out is?

IIRC, you just need a 12v & ground for the light in the gage. It is dead to the nuts accurate. Dakota's engineers are more than happy to assist with any questions or problems you encounter. Do they still offer only a 12 ft lead for the thermocouple? beerchug.gif
QUOTE(BeatNavy @ Oct 31 2018, 09:50 AM) *

I think they have a couple of different lengths for the thermocouple. Make sure you get/have the one that's the right size for our spark plugs. Wiring is pretty simple: 12v, ground, plus (if you want it), 12v connected to headlights for dimming.

I've been running a DD gauge for a few years now. I really like it, but I've noticed something interesting and would be curious if you have a similar experience. When I turn the heat on in the car, the CHT temp readings REALLY go up. I'm talking about the difference between say 310 degrees and reading 350 (or higher going up a hill). It seems to be worse if I'm blasting heat to the floor instead of defrost, and my gauge is under the dash.

I know little (very little) about thermocouples work, but I know it has to do with temperature differences. So I've pondered whether the increased temp readings I'm seeing are REAL or due to the thermocouple. Yesterday, for example, I had the top off driving home but ran the heat as it was a little cool outside. I didn't seem to notice particularly higher readings.

Interesting, I will look for that when I get the gauge wired. I did order the longer wire I think it was 16ft so way more than I needed and I had the correct size for our plugs, I put all that in when getting new tin back on motor back in July, but just didn't have time to wire the Gauge in the tunnel but the yellow wire is run all the way up in there and ready for me to slice and dice into my console harness to add the 12v wire for the light. I have not done this due to the fact that it will be an all day ordeal to make a new face plate to fit 4 rather than 3 gauges.
I was thinking about having the guy that does the carbon fiber ones make one for me.
once I have the face plate made it should get done on a Saturday. I just didn't want to tear into it before the Concours show in HHI this weekend.

I will watch the heat and see if the temp gauge is effected by the cabin heat etc. you would think this should not effect that gauge reading at all, but as you said I am not an expert in this are either.
lierofox
QUOTE(ndfrigi @ Oct 31 2018, 08:37 AM) *

nicely done! good job sir!


Thanks! Went through a couple end mills making it unfortunately, not used to making slots that small, but it seems to be doing just fine so far!
anderssj
drove it, then a "pit stop":

Click to view attachment
euro911
QUOTE(lierofox @ Oct 31 2018, 03:18 AM) *
Today I repaired my broken auto-cancel turn signals ...

I milled down some aluminum to match the profile and cut the pieces out.

IPB Image
Nice work aktion035.gif

My old BMW had some plastic parts on the sunroof cable that, for some reason, would break every couple of years. They were part of the assembly that lifted the rear of the sunroof into place at the point of complete closure (I believe its the same mechanism that was used on Audi/VW, Mercedes and Porsche sunroofs of that time period). I got tired of replacing the cables, so I inserted a small chunk of wood to press the rear of the sunroof up into place and never opened it again laugh.gif - 
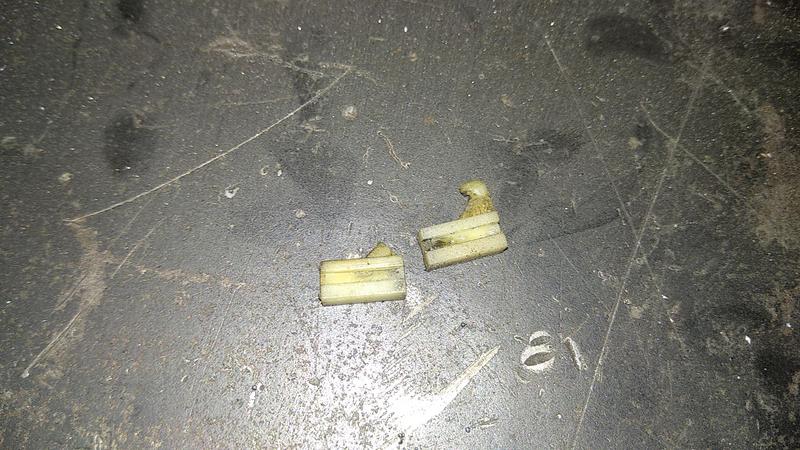
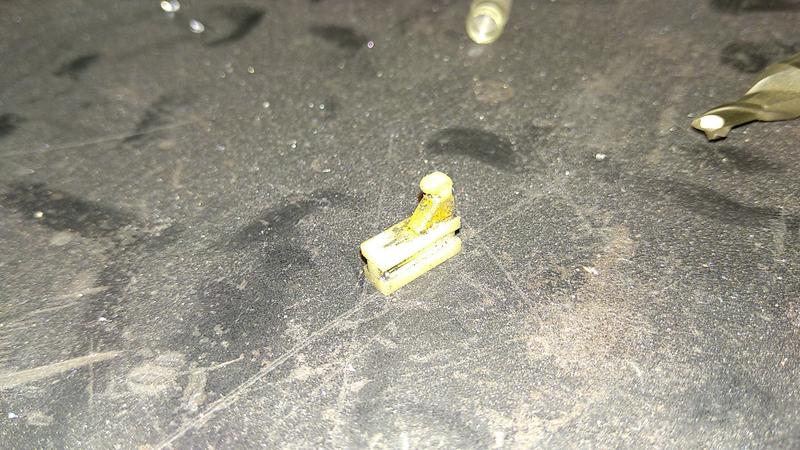
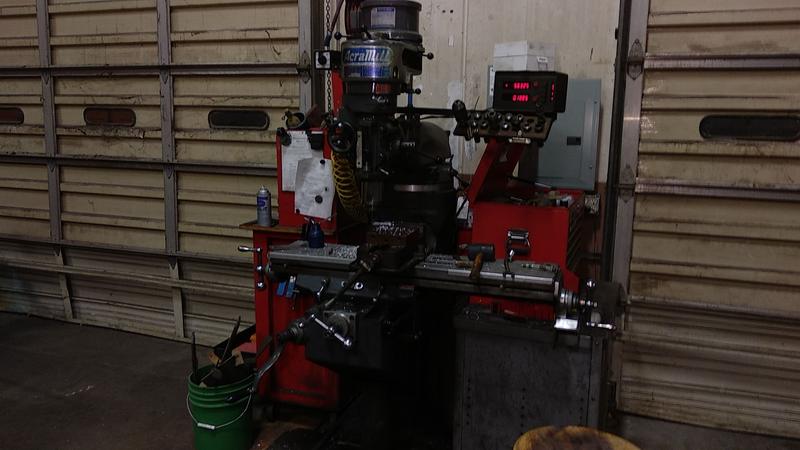
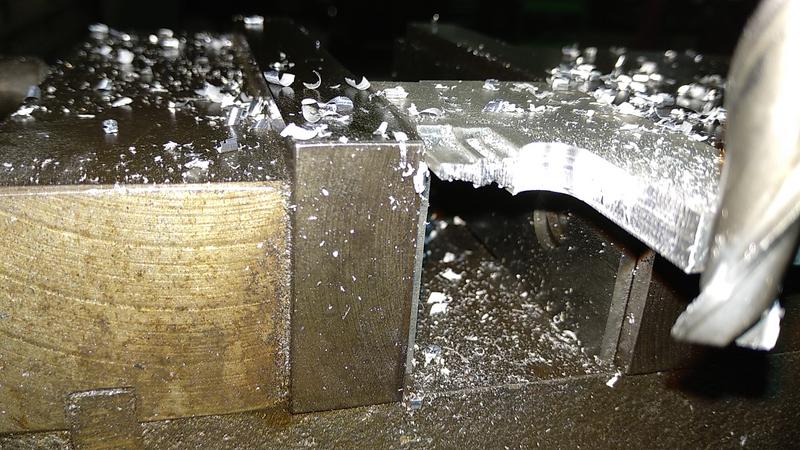
but many times I thought about machining those failing parts out of aluminum.

Same goes for some hinge bars for the 1/4 windows on my Tundra - plastic ones that are well known for their tendency to break. However, a guy started making them out of aluminum and sells them on ebay for about $10./pr. I purchased a couple pairs and installed them on my Tundra, as well as a friend's daughter's Tundra. Sure beats spending $80. for 2 new latch assemblies from Toyota every time (you cannot buy the hinge bars separately).
DRPHIL914
QUOTE(anderssj @ Oct 31 2018, 03:21 PM) *

drove it, then a "pit stop":

Click to view attachment

home made brunswick stew, yum! beer3.gif
SKL1
Drove both 914's and did some rearranging in the garage... big PCA concours in Scottsdale on Saturday and I'm entering the bahia '73...Click to view attachment
Larmo63
I took my car over to the tire shop to get exact accurate tire pressure on all four tires. They were actually all low on pressure, and the drive is much better now.

Something to think about......

I then took off down the coast toward San Diego just to dust the little beast off. I forget how much fun this car is.
This is a "lo-fi" version of our main content. To view the full version with more information, formatting and images, please click here.
Invision Power Board © 2001-2024 Invision Power Services, Inc.