
Full Version: what did you do to your 914 today
Pages: 1, 2, 3, 4, 5, 6, 7, 8, 9, 10, 11, 12, 13, 14, 15, 16, 17, 18, 19, 20, 21, 22, 23, 24, 25, 26, 27, 28, 29, 30, 31, 32, 33, 34, 35, 36, 37, 38, 39, 40, 41, 42, 43, 44, 45, 46, 47, 48, 49, 50, 51, 52, 53, 54, 55, 56, 57, 58, 59, 60, 61, 62, 63, 64, 65, 66, 67, 68, 69, 70, 71, 72, 73, 74, 75, 76, 77, 78, 79, 80, 81, 82, 83, 84, 85, 86, 87, 88, 89, 90, 91, 92, 93, 94, 95, 96, 97, 98, 99, 100, 101, 102, 103, 104, 105, 106, 107, 108, 109, 110, 111, 112, 113, 114, 115, 116, 117, 118, 119, 120, 121, 122, 123, 124, 125, 126, 127, 128, 129, 130, 131, 132, 133, 134, 135, 136, 137, 138, 139, 140, 141, 142, 143, 144, 145, 146, 147, 148, 149, 150, 151, 152, 153, 154, 155, 156, 157, 158, 159, 160, 161, 162, 163, 164, 165, 166, 167, 168, 169, 170, 171, 172, 173, 174, 175, 176, 177, 178, 179, 180, 181, 182, 183, 184, 185, 186, 187, 188, 189, 190, 191, 192, 193, 194, 195, 196, 197, 198, 199, 200, 201, 202, 203, 204, 205, 206, 207, 208, 209, 210, 211, 212, 213, 214, 215, 216, 217, 218, 219, 220, 221, 222, 223, 224, 225, 226, 227, 228, 229, 230, 231, 232, 233, 234, 235, 236, 237, 238, 239, 240, 241, 242, 243, 244, 245, 246, 247, 248, 249, 250, 251, 252, 253, 254, 255, 256, 257, 258, 259, 260, 261, 262, 263, 264, 265, 266, 267, 268, 269, 270, 271, 272, 273, 274, 275, 276, 277, 278, 279, 280, 281, 282, 283, 284, 285, 286, 287, 288, 289, 290, 291, 292, 293, 294, 295, 296, 297, 298, 299, 300, 301, 302, 303, 304, 305, 306, 307, 308, 309, 310, 311, 312, 313, 314, 315, 316, 317, 318, 319, 320, 321, 322, 323, 324, 325, 326, 327, 328, 329, 330, 331, 332, 333, 334, 335, 336, 337
The gauges look great, that's something I'd like to do as well. Thanks for the inspiration.
Had an errand down in the O.C. Took the teener. Stopped by to see Joe Sharp  on my way home to wish him well.
on my way home to wish him well.
QUOTE(KaptKaos @ Mar 8 2013, 10:35 PM) 
Had an nd down in the O.C. Took the teener. Stopped by to see Joe Sharp
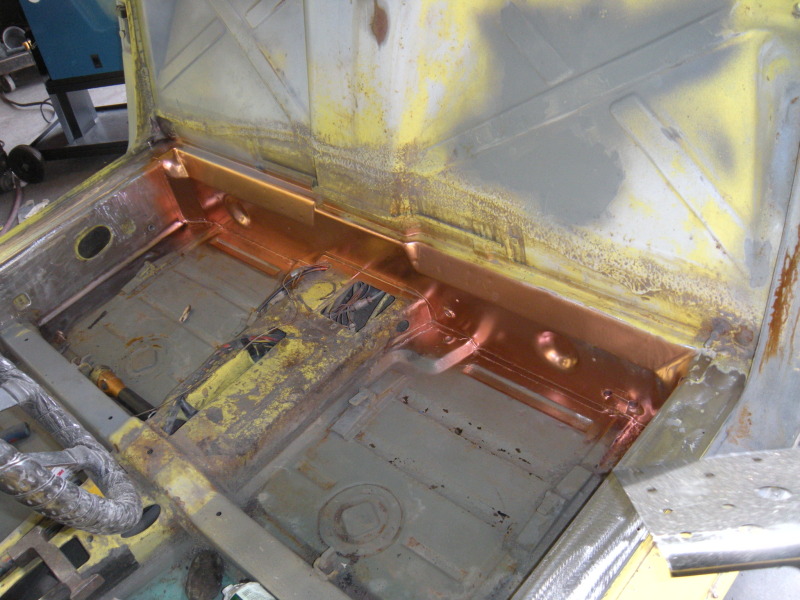
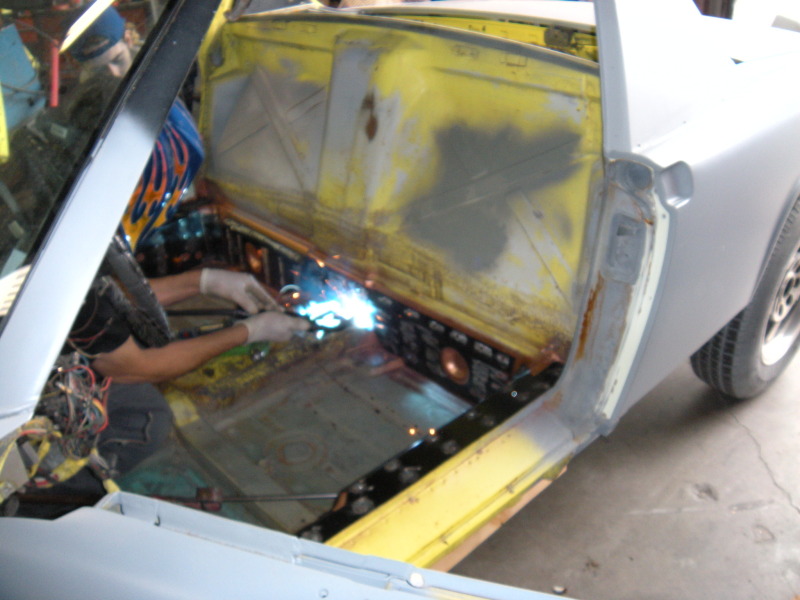
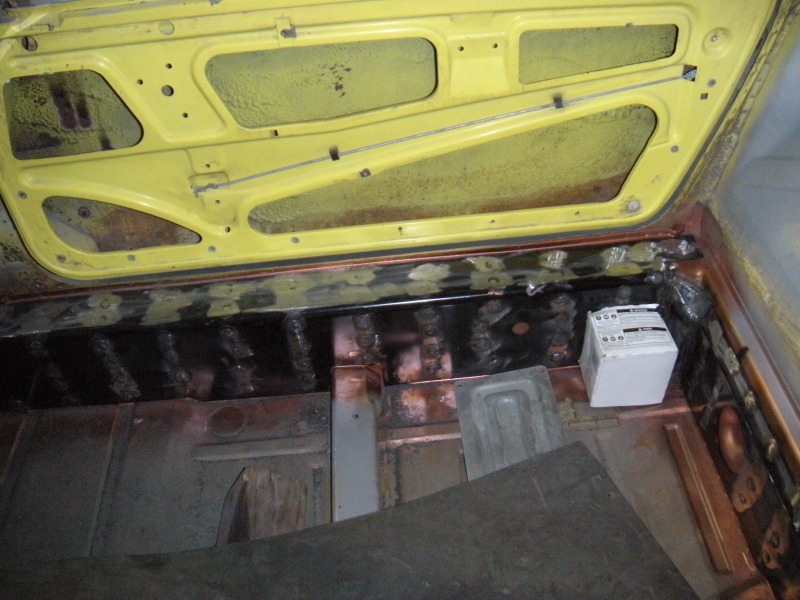
on my way home to wish him well.Well, I have finally gotten back to work on my '74 and had the Drivers side rocker rebuilt and then installed the front floor pan from RA Designs. Once all of that was done we installed the ENgman Long kit. Its all sealed painted and ready for me to get on with the brake plumbing, wiring clean up, and well a lot of other stuff.
I was saddened to hear that Mark had passed away recently. My thoughts and prayers are with his family. Grant
QUOTE(KaptKaos @ Mar 8 2013, 10:35 PM)
Had an nd down in the O.C. Took the teener. Stopped by to see Joe Sharp
on my way home to wish him well.Well, I have finally gotten back to work on my '74 and had the Drivers side rocker rebuilt and then installed the front floor pan from RA Designs. Once all of that was done we installed the ENgman Long kit. Its all sealed painted and ready for me to get on with the brake plumbing, wiring clean up, and well a lot of other stuff.
I was saddened to hear that Mark had passed away recently. My thoughts and prayers are with his family. Grant
I thought about heading over to the shop today, but my wife (who's also retired now) had other plans 
So we have a new washer and dryer ... and a fridge full of fresh groceries
So we have a new washer and dryer
... and a fridge full of fresh groceries
All new shift rod bushings for Betsy. Nice and tight now. 
QUOTE(slothness @ Mar 8 2013, 04:33 PM)
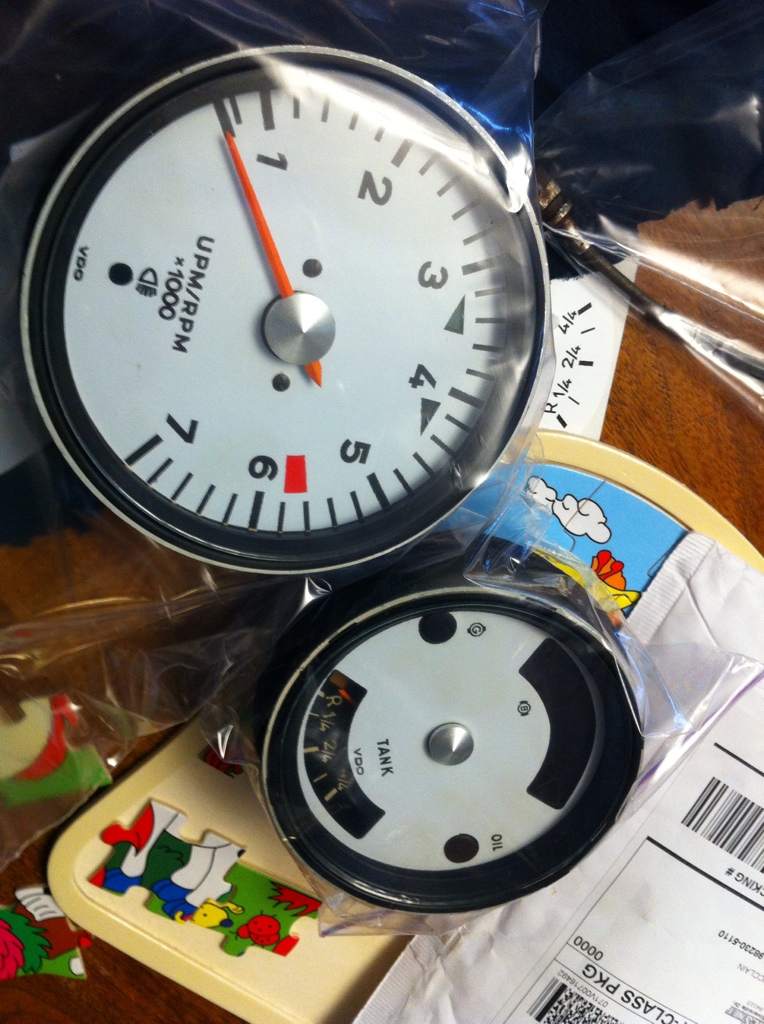
In honor of our COTM winner (Al Garcia), I decided to spruce up my gauges with some LEDs.

I had no idea what the hell I was doing but it came out pretty damn nice...and bright as hell.
Rubbed some rubbing alcohol on the insides to clear any oils and grime then stuck the led strip right behind where the glass circles sit. Taped them in with heavy duty masking to let the adhesive set.
Click to view attachment
Plugged the light holes with vacuum plugs, grounded the LED off of each gauge ground and spliced the wire into the lighting wire. Not too shabby
Click to view attachment
I really should have sourced some glass circles instead of reused the scratched plastic crap I have, but thats an easy enough change later. As you can see on full bright the scratches reflect so bad its just a bright light...doesnt look as blinding bright in person though.
Click to view attachment
Although I never met you Al, thank you for providing this great service to our members, RIP sir.
Interesting take on doing the led's in a strip form I was thinking of doing just a couple of led's but the strip might be better for me as I wanted to do orange/red led's to light up the face better against the new white face..
QUOTE(NS914 @ Mar 8 2013, 06:50 PM)
QUOTE(KaptKaos @ Mar 8 2013, 10:35 PM)
Had an nd down in the O.C. Took the teener. Stopped by to see Joe Sharp
on my way home to wish him well.Well, I have finally gotten back to work on my '74 and had the Drivers side rocker rebuilt and then installed the front floor pan from RA Designs. Once all of that was done we installed the ENgman Long kit. Its all sealed painted and ready for me to get on with the brake plumbing, wiring clean up, and well a lot of other stuff.
I was saddened to hear that Mark had passed away recently. My thoughts and prayers are with his family. Grant
Any photo's of this, this is the next for me the long kit after I repair the battery tray/engine tray area. Any special tips for the long stiffing kit to make things go smoother?
QUOTE(slothness @ Mar 8 2013, 04:33 PM)
As you can see on full bright the scratches reflect so bad its just a bright light...doesnt look as blinding bright in person though.
Are they hooked up to a dimming switch??? how are you manually adjusting the brightness?
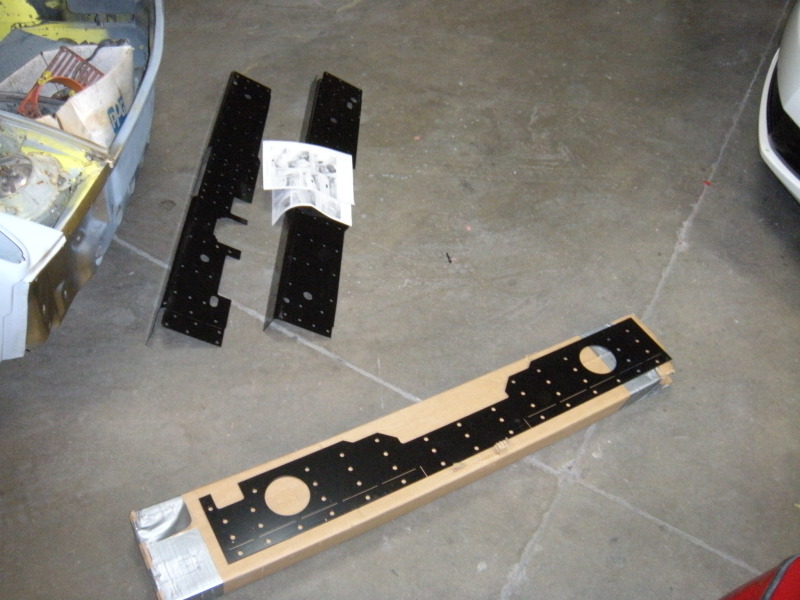
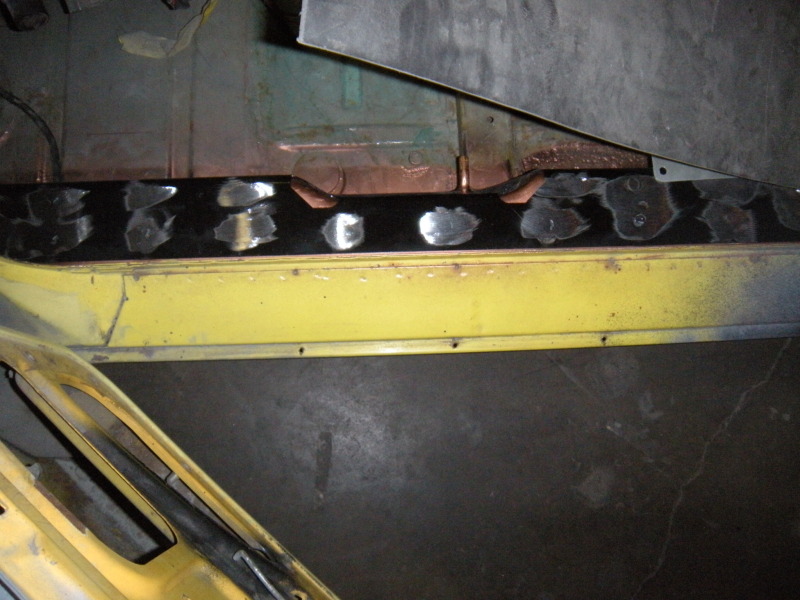
Chassis kit time:


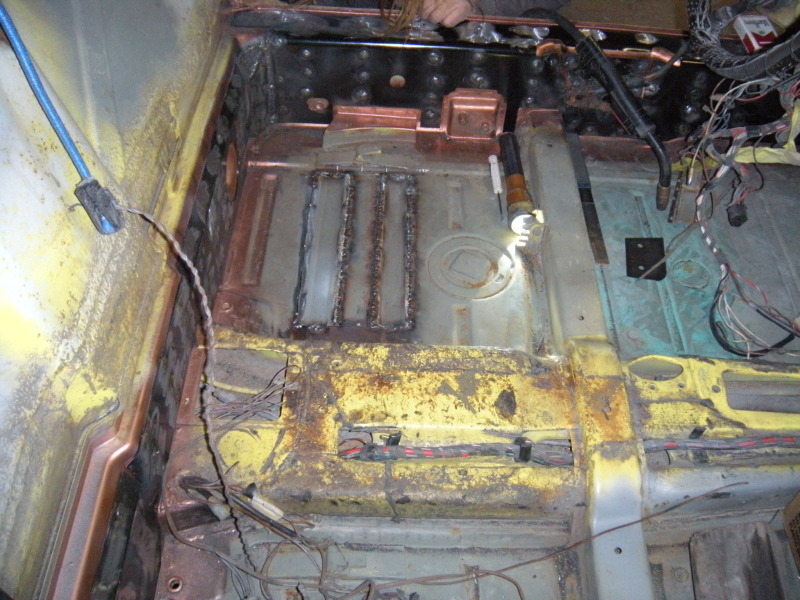
Small patching
Truly a great kit, awesome fit and finish !!!! godspeed Mr Engman
Small patching
Truly a great kit, awesome fit and finish !!!! godspeed Mr Engman
pulled it out, washed it and driving the hell out of it. running great!
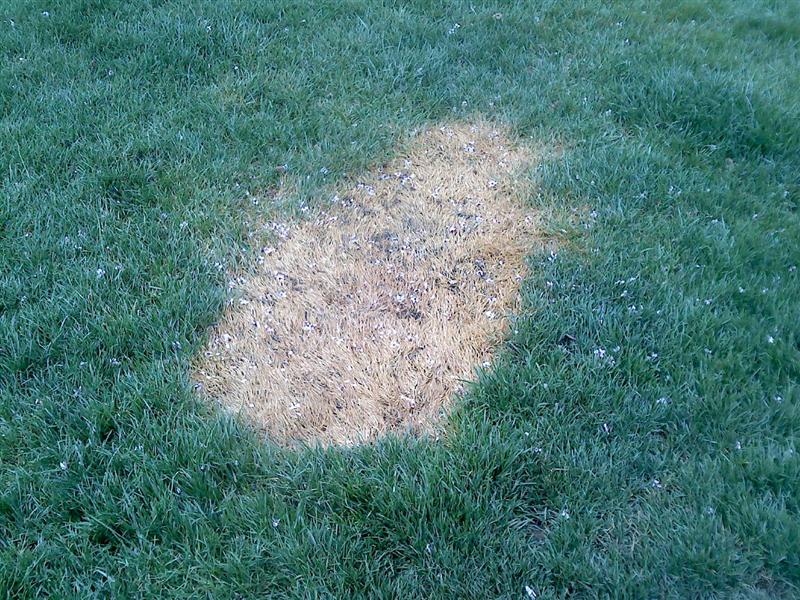
note to self..... never put soda in your blasting cabinet again. note to self.... wash it out in the driveway not the grass.
4 solid hours to get the crap out of my pressure tank.
4 solid hours to get the crap out of my pressure tank.
QUOTE(mrbubblehead @ Mar 9 2013, 02:42 PM)
note to self..... never put soda in your blasting cabinet again. note to self.... wash it out in the driveway not the grass.
4 solid hours to get the crap out of my pressure tank.

Sorry Doug....
Did you get my text last weekend? you didnt store my number so i texted you... like you asked
i got it david....
i think the soda got wet from the rain. and turn into a rock the side of a bowling ball. i only had a 3/4 hole to poke, stab, shoot water at to get it out. i almost took out my cutting torch and cut the friggin vessel in half to get it out.
soda sucks anyways. i wasnt that impressed. back to glass beads for the blaster cabinet for me. i'll use play sand ( 10 bucks for a 70 lbs sack) for the big stuff and blast if in the grass, with my little gravity feed blaster.
note to self.... soda = salt! i salted my own grass. like what the romans did to countries they conquered, salted the earth. 
I cleanded up the taillights, they were looking bad on the inside.
QUOTE(boogie_man @ Mar 9 2013, 11:18 AM)
Chassis kit time:
[img
Small patching
Truly a great kit, awesome fit and finish !!!! godspeed Mr Engman
Thanks I'm taking it you want it to be supported under the longs to keep the door gaps good while welding, to keep everything true? How much is the weld through paint?
QUOTE(gunny @ Mar 10 2013, 08:51 AM)
I cleanded up the taillights, they were looking bad on the inside.
It's the little things like this that make a difference..
Today and Yesterday, temps in the 60's Sunny Blue Skies, took the top off and drove all morning, came home and pulled the Stock Streeing wheel of and installed a new MOMO Adapter and smaller diameter Wheel that has about a 3" offset from hub to rim. Fantastic, so much easier to get my 6'2 body in and out plus the smaller diameter really changed the feel in the steering as if it's a quicker ratio. Easy install, Horn and Turn Signals work, had to pull it off twice to get it perfically centered. Then drove again for a couple hours. Ready for Hershey.
Adjusted the timing. It's snappy now!
QUOTE(Dasnowman @ Mar 10 2013, 11:50 AM)
QUOTE(boogie_man @ Mar 9 2013, 11:18 AM)
Chassis kit time:
[img
Small patching
Truly a great kit, awesome fit and finish !!!! godspeed Mr Engman
Thanks I'm taking it you want it to be supported under the longs to keep the door gaps good while welding, to keep everything true? How much is the weld through paint?
QUOTE(gunny @ Mar 10 2013, 08:51 AM)
I cleanded up the taillights, they were looking bad on the inside.
It's the little things like this that make a difference..
Yes, we put floor jacks under each long to lightly lift it all the while checking
the gaps, worked like a charm. I think the weld thru primer runs about 10-12 bux
a can.
Thanks
Scott
QUOTE(Dasnowman @ Mar 9 2013, 04:06 AM)
QUOTE(NS914 @ Mar 8 2013, 06:50 PM)
QUOTE(KaptKaos @ Mar 8 2013, 10:35 PM)
Had an nd down in the O.C. Took the teener. Stopped by to see Joe Sharp
on my way home to wish him well.Well, I have finally gotten back to work on my '74 and had the Drivers side rocker rebuilt and then installed the front floor pan from RA Designs. Once all of that was done we installed the ENgman Long kit. Its all sealed painted and ready for me to get on with the brake plumbing, wiring clean up, and well a lot of other stuff.
I was saddened to hear that Mark had passed away recently. My thoughts and prayers are with his family. Grant
Any photo's of this, this is the next for me the long kit after I repair the battery tray/engine tray area. Any special tips for the long stiffing kit to make things go smoother?
Yes absolutely....wetook a bunch and I may not get back til tomorrow but I will get some up. I have to say straight up....the long kit was a lot easier to install than I thought and the quality was in a word amazing...it was like Mark had measured my car to a T. Simply a cool piece of kit! Now if someone could just tell me where to get Marks Fuse Panel that would be great. I will get to that in good time.
QUOTE(dfelz @ Mar 9 2013, 12:55 AM)
QUOTE(slothness @ Mar 8 2013, 04:33 PM)
As you can see on full bright the scratches reflect so bad its just a bright light...doesnt look as blinding bright in person though.
Are they hooked up to a dimming switch??? how are you manually adjusting the brightness?
Yeah, they hook up to the existing light wire so they work off the same dim switch and dim properly.
QUOTE(slothness @ Mar 10 2013, 08:19 PM)
QUOTE(dfelz @ Mar 9 2013, 12:55 AM)
QUOTE(slothness @ Mar 8 2013, 04:33 PM)
As you can see on full bright the scratches reflect so bad its just a bright light...doesnt look as blinding bright in person though.
Are they hooked up to a dimming switch??? how are you manually adjusting the brightness?
Yeah, they hook up to the existing light wire so they work off the same dim switch and dim properly.
What models had a dim switch installed from the factory?? i didnt know that was a feature of these cars....?
Pushrod tube seals... Oil cooler seals... painted intake runners. Next weekend I plan to finish putting the engine "back together" and then start the long journey of learning how to fix rust 
Then SS fuel lines, new speedo cable, and installing the new windshield.
Then SS fuel lines, new speedo cable, and installing the new windshield.
QUOTE(dfelz @ Mar 10 2013, 08:22 PM)
QUOTE(slothness @ Mar 10 2013, 08:19 PM)
QUOTE(dfelz @ Mar 9 2013, 12:55 AM)
QUOTE(slothness @ Mar 8 2013, 04:33 PM)
As you can see on full bright the scratches reflect so bad its just a bright light...doesnt look as blinding bright in person though.
Are they hooked up to a dimming switch??? how are you manually adjusting the brightness?
Yeah, they hook up to the existing light wire so they work off the same dim switch and dim properly.
What models had a dim switch installed from the factory?? i didnt know that was a feature of these cars....?
Hmmm my 73 1.7 does

I drove my 3yr old granddaughter to her mother's house this afternoon. After strapping her into her car seat, I asked if she wanted the top on or off. Without hesitation, she said "OFF!" So off came the top. 
Before I was even seated in the car, she then stated, "I want to go on the Lizard" (our name for a 12+ curve, 1/2 mile section of road near the house).
Maneuvering the short section of twisties, she kept saying, "Faster! Faster!"
Once on the main road, she was fast asleep within 5 minutes.![yellowsleep[1].gif](http://www.914world.com/bbs2/style_emoticons/default/yellowsleep[1].gif)
Life is good
Before I was even seated in the car, she then stated, "I want to go on the Lizard" (our name for a 12+ curve, 1/2 mile section of road near the house).
Maneuvering the short section of twisties, she kept saying, "Faster! Faster!"
Once on the main road, she was fast asleep within 5 minutes.
Life is good
QUOTE(slothness @ Mar 10 2013, 08:31 PM)
QUOTE(dfelz @ Mar 10 2013, 08:22 PM)
QUOTE(slothness @ Mar 10 2013, 08:19 PM)
QUOTE(dfelz @ Mar 9 2013, 12:55 AM)
QUOTE(slothness @ Mar 8 2013, 04:33 PM)
As you can see on full bright the scratches reflect so bad its just a bright light...doesnt look as blinding bright in person though.
Are they hooked up to a dimming switch??? how are you manually adjusting the brightness?
Yeah, they hook up to the existing light wire so they work off the same dim switch and dim properly.
What models had a dim switch installed from the factory?? i didnt know that was a feature of these cars....?
Hmmm my 73 1.7 does
Ethan just informed me that all the headlight switches on our cars are dimmers as well. I did not know this since i have never driven a 914 before! haha
My progress.....was to put the car back up on jack stands!
I'm getting ready to convert the car to 5 lug. In prep for that, I sold my wheels (a set of 2 liter Fuchs and Mahle's) to help finance the change. I pointed out to the wife we would also need new wheels and showed her too many pictures. It surprised me when she said we need some "real" Fuchs. I had already been looking in all the usual web places for a couple of months with no luck finding a 15 x 6 set close to home. 15 x 6 "Flats" would be just fine, as the "Deeps" are pretty pricey.
I finally decided that I just wasn't going to find any that were within the local area or my budget. So, I placed a WTB ad on Thursday for Cookie Cutters. Wouldn't you know it, the right wheels showed up Friday. I showed them to the wife and she said, "Well, what are you waiting for, call the guy!
So, on Saturday morning in a snowstorm, we traveled across town and now have a set of 4 of these....
Click to view attachment
Roadtrip with the girlfriend!
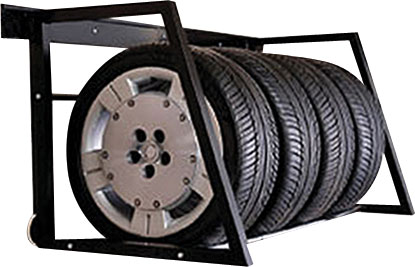
Did a lot of organizing of the garage today, put up a tire rack, a pulley system to lift the engine up to empi bolt on engine stand. I bolted the stand to a post in the garage but also modified it to fit my rolling stand too. I used a Thule box lift to store two trunks and a hood to get them off the floor and out of the way. I'll try to get some photo's once I get it cleaned and finished.
QUOTE(NS914 @ Mar 10 2013, 04:37 PM)
QUOTE(Dasnowman @ Mar 9 2013, 04:06 AM)
QUOTE(NS914 @ Mar 8 2013, 06:50 PM)
QUOTE(KaptKaos @ Mar 8 2013, 10:35 PM)
Had an nd down in the O.C. Took the teener. Stopped by to see Joe Sharp
on my way home to wish him well.Well, I have finally gotten back to work on my '74 and had the Drivers side rocker rebuilt and then installed the front floor pan from RA Designs. Once all of that was done we installed the ENgman Long kit. Its all sealed painted and ready for me to get on with the brake plumbing, wiring clean up, and well a lot of other stuff.
I was saddened to hear that Mark had passed away recently. My thoughts and prayers are with his family. Grant
Any photo's of this, this is the next for me the long kit after I repair the battery tray/engine tray area. Any special tips for the long stiffing kit to make things go smoother?
Yes absolutely....wetook a bunch and I may not get back til tomorrow but I will get some up. I have to say straight up....the long kit was a lot easier to install than I thought and the quality was in a word amazing...it was like Mark had measured my car to a T. Simply a cool piece of kit! Now if someone could just tell me where to get Marks Fuse Panel that would be great. I will get to that in good time.
I found this kit, there's others out there too. Hope it helps ....
http://www.jwesteng.com/porsche/914/fuse.htm
Scott
Epoxied and primered floors etc  :
:
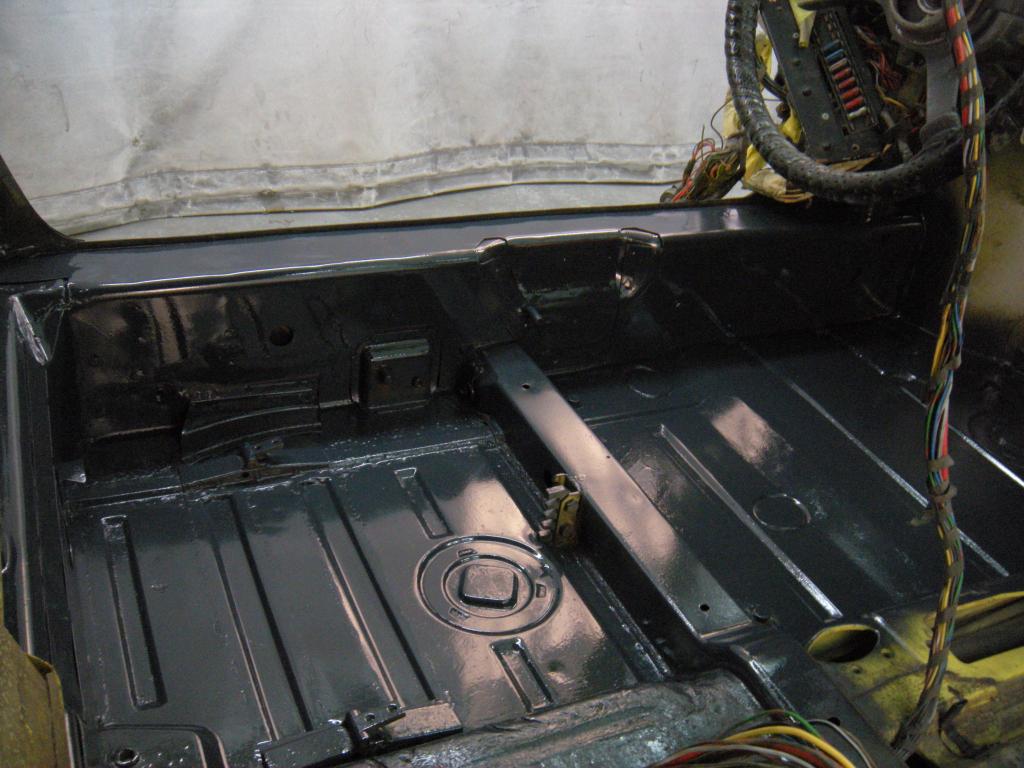
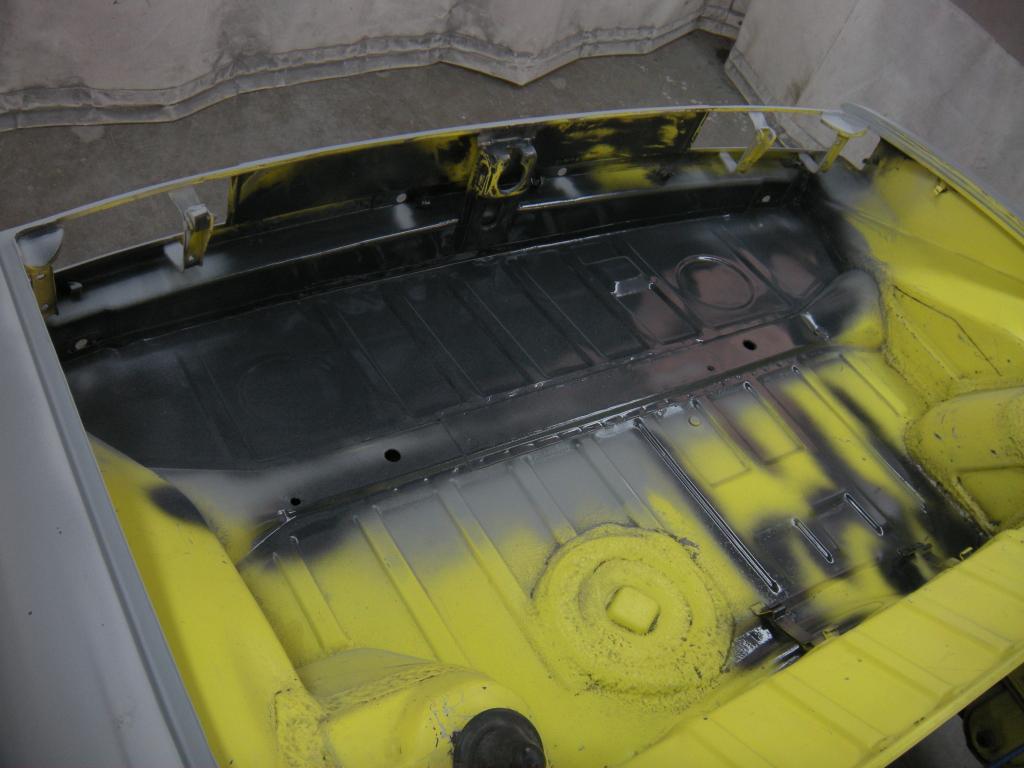
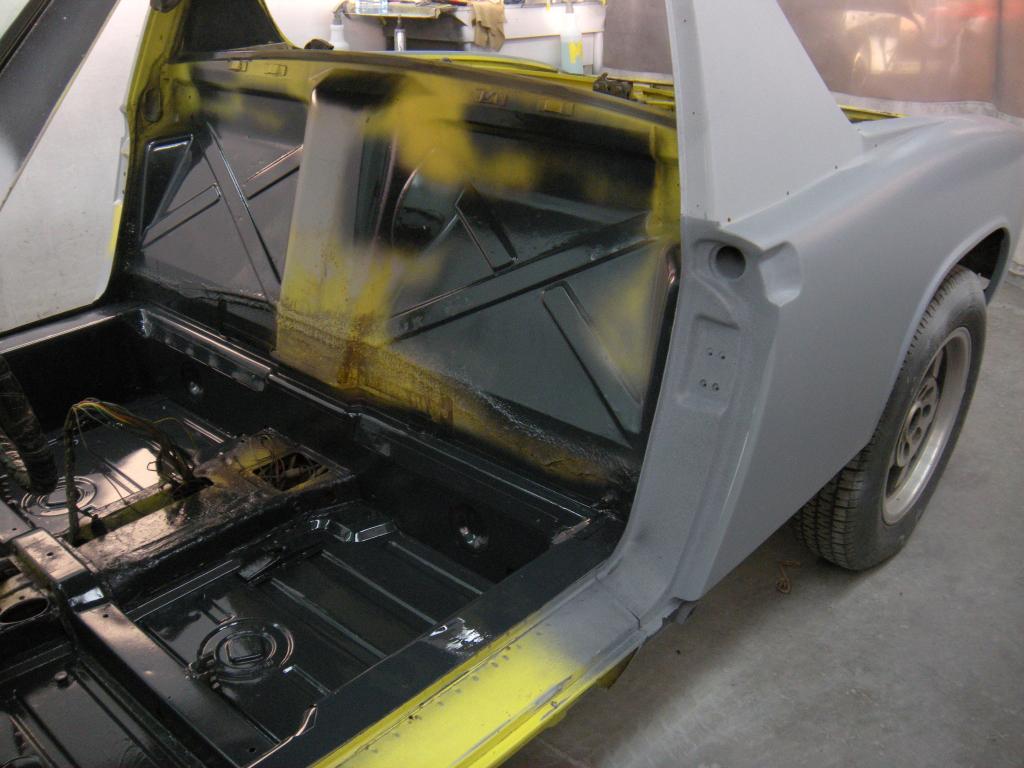
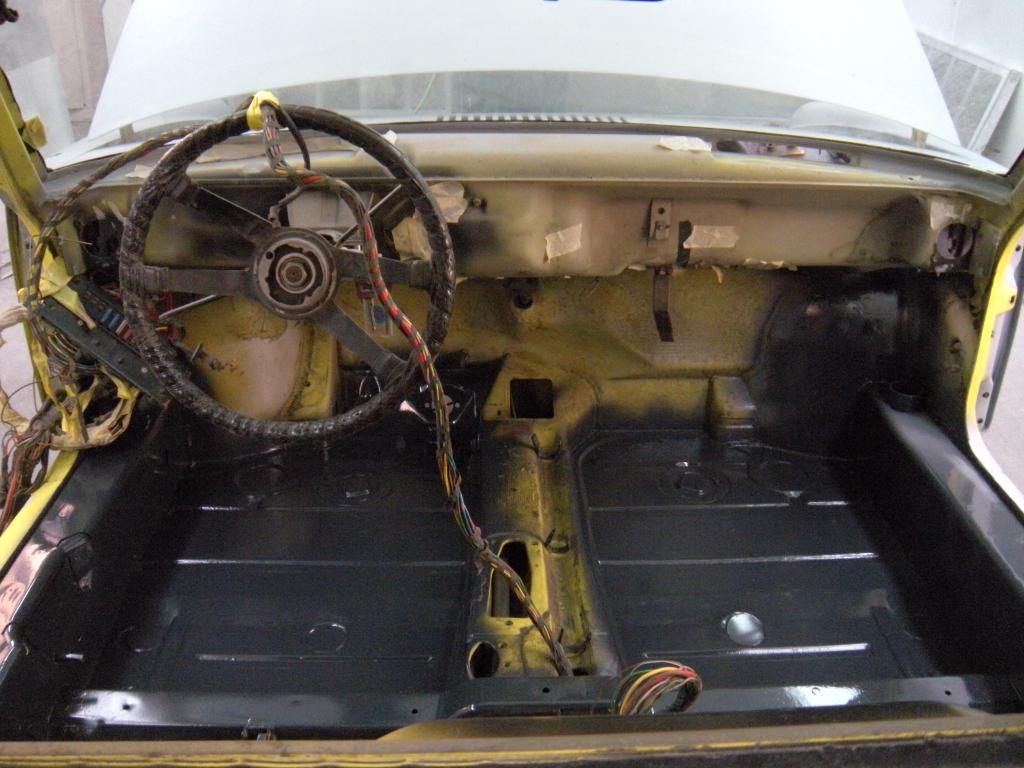
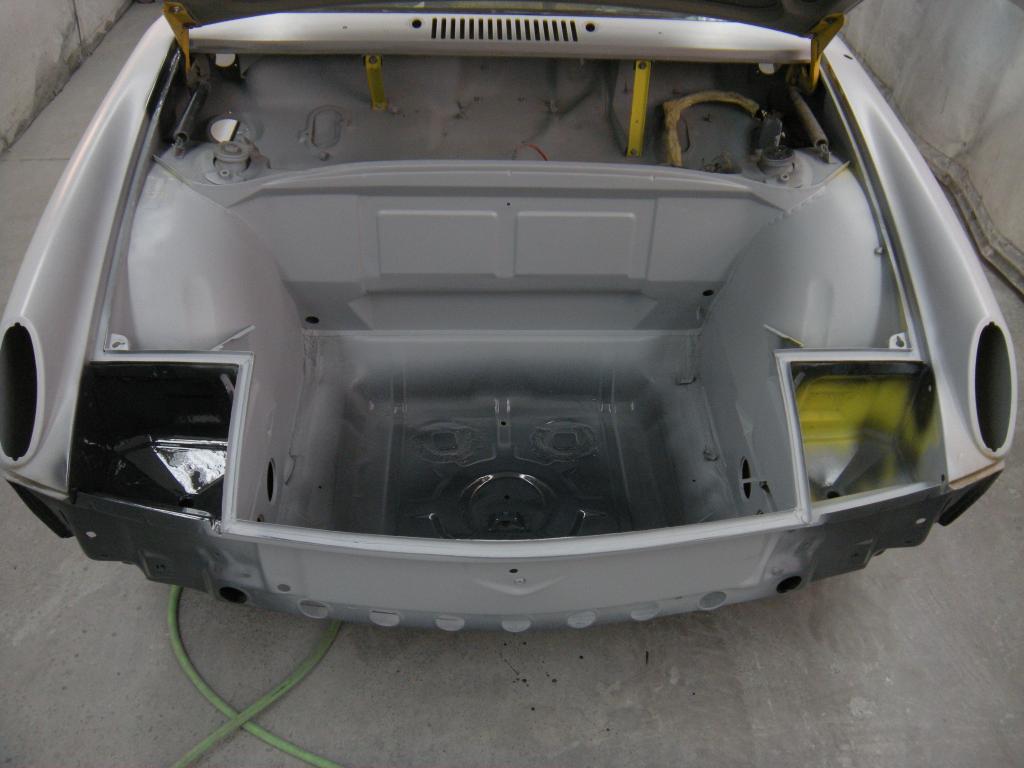
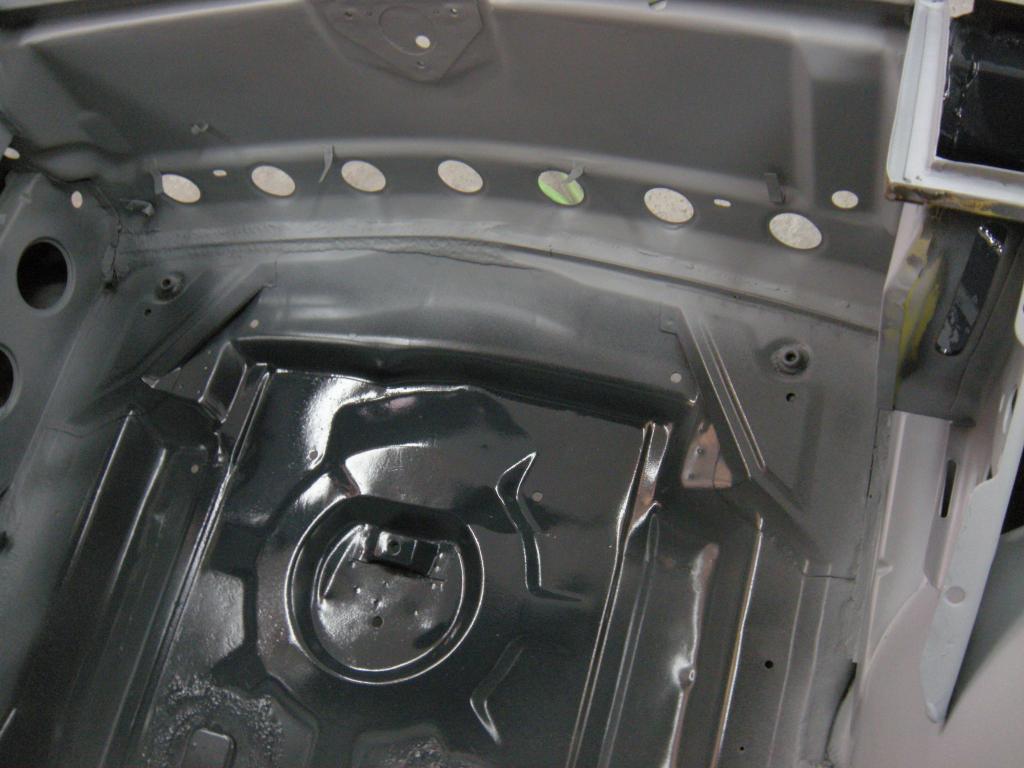
Blocking and re-prime outside next !! LOOK OUT SO COOL ANDY, ANOTHER YELLOW
ONE IS COMING
: Blocking and re-prime outside next !! LOOK OUT SO COOL ANDY, ANOTHER YELLOW
ONE IS COMING
just got these in the mail. nice and new vac hoses and they have that great new rubber smell. going to install them under the watchful eye of Mark aka euro911 when he helps me lower the front end. i have had a small idling issue for the last month or so, should cure it.
Gimme a call, JP 
Started tearing Dianne's 1.7L motor apart. Removed the FI stuff
Click to view attachment
Labeled and removed all the electrical wiring
Click to view attachment
Only got this far this evening
Click to view attachment
Looks like we caught it in time, some ugly stuff in there
Click to view attachment
The ODO stopped registering at 108k so I don't know what the actual miles are on this engine, and I got fluctuating readings the last time I adjusted the valve clearances. I suspect worn cam bearings, but we'll see what all it needs after the tear down and inspection.
Also bought an extra set of some 911 tools
Click to view attachment
Replaced the starter pinion on my IMI hi torque starter. CB Performance sells these for under $20 so I bought 2. That grinding noise is haunting when you hear it for the first time, and you cross your fingers that your ring gear is not destroyed. Thankfully my ring gear is fully in tact.
The kit comes with the pinion gear, retainer clip, gear spring, and a bushing.
Click to view attachment
Push down on the gear, and remove the retainer clip
Click to view attachment
Pinion slides right off
Click to view attachment
Remove the gear spring
Click to view attachment
Remove toothed washer
Click to view attachment
Remove if you can the bearing bushing to replace. I could not and I didn't have issues with my existing bushing so I decided to not attempt to break things (for once).
Click to view attachment
Assembly is the reverse of disassembly...duh!
Click to view attachment
Worn gear/New gear
Click to view attachment
Click to view attachment
I've been sorting parts a packing for weeks now.
Click to view attachment
Parts already sorted.
Click to view attachment
A space for the car to go thru.
Click to view attachment
Click to view attachment
Parts already sorted.
Click to view attachment
A space for the car to go thru.
Click to view attachment
I rplaced a broken fog lamp - lense cracked - with one that I picked up from PartsHeaven. I should have thought to order a new bulb for it at the same time .
.
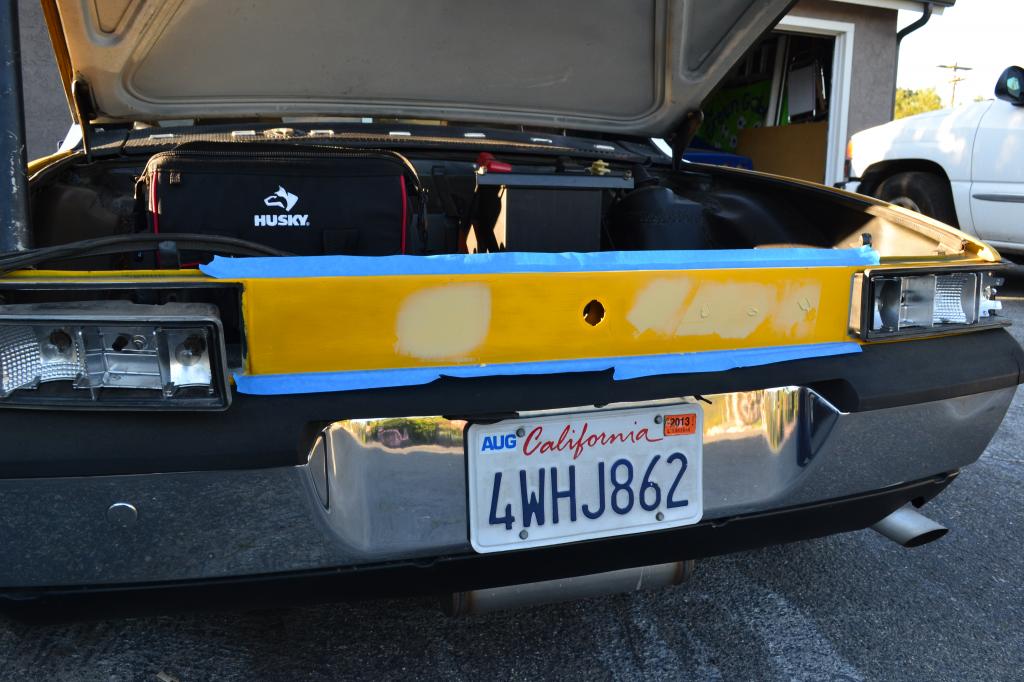
Weld, grind, fill, sand, prime, then paint. More to come tomorrow, all in the process of installing the badge that I've been looking for since I've owned my 914, courtesy of Dan Ellis. The back panel will get painted satin black to accent the gold badge. Thanks again man!

QUOTE(Joe Sharp @ Mar 15 2013, 03:24 PM)
I've been sorting parts a packing for weeks now.
Click to view attachment
Wow, you ain't foolin' around are you ...Click to view attachment
Do you need some empty (clean) plastic P-nut butter jars for your hardware collection?
LMK
My shop lease is up the end of April and I'm not sure I want to renew it (since the price is going up). My oldest brother is coming to the shop on Saturday to grab his Avanti parts and tools out of here. Since it's his birthday (69th), Jeremy and I gathered up all his stuff, then staged everything in one place, then disassembled his gantrys and loaded into his trailer for him.
Click to view attachment

I looked at a really nice 2k sq ft shop closer to home this afternoon, and going to look at a 4k sq ft shop (for about the same $) in Long Beach next week
Click to view attachment
I looked at a really nice 2k sq ft shop closer to home this afternoon, and going to look at a 4k sq ft shop (for about the same $) in Long Beach next week
QUOTE(euro911 @ Mar 16 2013, 12:14 AM)
QUOTE(Joe Sharp @ Mar 15 2013, 03:24 PM)
I've been sorting parts a packing for weeks now.
Click to view attachment
Wow, you ain't foolin' around are you ...Click to view attachment
Do you need some empty (clean) plastic P-nut butter jars for your hardware collection?
LMK
Thanks Mark, but everything that is sorted gets put in baggies and then gose into small boxs that I can handel esay. The baggies conform to what ever space I stuff them into. That is what I'm going to do with my tools. This way I can put all of the steel on the floor of the trailer.
Installed SS fuel line thru tunnel and engine compartment
Replaced all rubber fuel hoses, filter, and pump
Replaced fuel pump wiring
Welded clutch tube
Cleaned and painted gas tank
Hooked up charcoal cannister with new hoses
Polished the gas cap (it was really nasty)
Moved gauges from ash tray mount to under dash; reinstalled ash tray
Replaced Renn shifter with stock unit
Cleaned and waxed
Went for a drive, filled the tank, she's ready for Route 66 in 3 weeks
Removed deck lid grille with deck lid still attached to car. Removed PORSCHE letters and re-painted grille. Cleaned inside part of lid, including engine bay.
Damn those speed nuts are a bitch to remove!

Took Betsy to the PCA autocross and broke her. Got her fixed afterwards. Used duct tape to hold it together long enough to her her home, that shit will fix anything.
Scored a set of never mounted 'late' BRAG club hubs locally, thank goodness so many 914 owners are also parts hoarders!
Click to view attachment
Click to view attachment
I added another pair of jack stands, so I can work on the front brakes and wheel bearings.
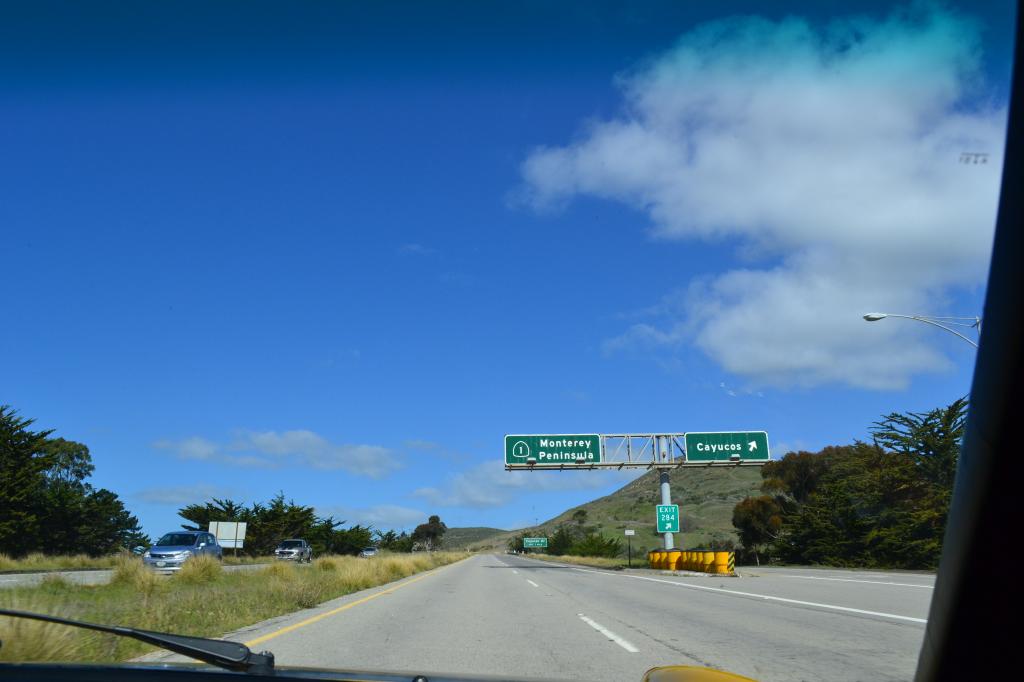
Drove it over the mountains to see my mother 35 miles away. Also saw two other teeners too! One is a fellow 914World member too! The other person is kinda eccentric. His 1.8 looked good from the distance but it really rough close up. He has three other teeners in various conditions too. With the temps in the 70's, it was great day to drive the twisties.
Yesterday I was an instructor at a PCA AX school at PIR (PDX).
Then had six fun runs with the 914.
New Falkens worked great. Impressive, 615-K's
Going to AX #1 today. Great course for a 914. Four Chicago boxes with just enough space for me............and those damn Miata's.
Then had six fun runs with the 914.
New Falkens worked great. Impressive, 615-K's
Going to AX #1 today. Great course for a 914. Four Chicago boxes with just enough space for me............and those damn Miata's.
Been swamped with other projects... Finally got my CSP bell crank linkage installed. Beats the hell out of the old hexbar linkage - easy to adjust, no slop compared to the old. Thanks Mark for arranging the GB!
Click to view attachment
Click to view attachment
Drove Betsy over to where Delilah is stored too see about getting her started since she has been sitting for at least 6 months or more. Took the battery out of her and replaced it with a hot one. Turned the key on and let the fuel pump do its thing. Turned the key the rest of the way and she FIRED RIGHT UP and purred like a kitten. 
This is a "lo-fi" version of our main content. To view the full version with more information, formatting and images, please click here.