Full Version: what did you do to your 914 today
Pages: 1, 2, 3, 4, 5, 6, 7, 8, 9, 10, 11, 12, 13, 14, 15, 16, 17, 18, 19, 20, 21, 22, 23, 24, 25, 26, 27, 28, 29, 30, 31, 32, 33, 34, 35, 36, 37, 38, 39, 40, 41, 42, 43, 44, 45, 46, 47, 48, 49, 50, 51, 52, 53, 54, 55, 56, 57, 58, 59, 60, 61, 62, 63, 64, 65, 66, 67, 68, 69, 70, 71, 72, 73, 74, 75, 76, 77, 78, 79, 80, 81, 82, 83, 84, 85, 86, 87, 88, 89, 90, 91, 92, 93, 94, 95, 96, 97, 98, 99, 100, 101, 102, 103, 104, 105, 106, 107, 108, 109, 110, 111, 112, 113, 114, 115, 116, 117, 118, 119, 120, 121, 122, 123, 124, 125, 126, 127, 128, 129, 130, 131, 132, 133, 134, 135, 136, 137, 138, 139, 140, 141, 142, 143, 144, 145, 146, 147, 148, 149, 150, 151, 152, 153, 154, 155, 156, 157, 158, 159, 160, 161, 162, 163, 164, 165, 166, 167, 168, 169, 170, 171, 172, 173, 174, 175, 176, 177, 178, 179, 180, 181, 182, 183, 184, 185, 186, 187, 188, 189, 190, 191, 192, 193, 194, 195, 196, 197, 198, 199, 200, 201, 202, 203, 204, 205, 206, 207, 208, 209, 210, 211, 212, 213, 214, 215, 216, 217, 218, 219, 220, 221, 222, 223, 224, 225, 226, 227, 228, 229, 230, 231, 232, 233, 234, 235, 236, 237, 238, 239, 240, 241, 242, 243, 244, 245, 246, 247, 248, 249, 250, 251, 252, 253, 254, 255, 256, 257, 258, 259, 260, 261, 262, 263, 264, 265, 266, 267, 268, 269, 270, 271, 272, 273, 274, 275, 276, 277, 278, 279, 280, 281, 282, 283, 284, 285, 286, 287, 288, 289, 290, 291, 292, 293, 294, 295, 296, 297, 298, 299, 300, 301, 302, 303, 304, 305, 306, 307, 308, 309, 310, 311, 312, 313, 314, 315, 316, 317, 318, 319, 320, 321, 322, 323, 324, 325, 326, 327, 328, 329, 330, 331, 332, 333, 334, 335, 336
See post about flange damage.
Took the old strut insert out and replaced them.
Look at these DAPO stuff......never even heard of these brand before. Manufacture date on them was 1998....hecho en Mexico...what POS..there was no dampening in them at all.
Click to view attachment
Put Boge's in. Smooth ride now.
Tie rods are next.
Look at these DAPO stuff......never even heard of these brand before. Manufacture date on them was 1998....hecho en Mexico...what POS..there was no dampening in them at all.
Click to view attachment
Put Boge's in. Smooth ride now.
Tie rods are next.
Took it out of the garage to get some photos for Jim and the WCR badge. Decided to take it "around the block". Made it back 2 hours and 110 miles latter....Click to view attachment
If I remember correctly, Mulholland were made by Mexican Boge. Boge has been making shocks in Mexico since the 1930's.
I spent several hours trying to bleed the clutch system... 
Eventually I bought a new master and slave and will try again next weekend...
Eventually I bought a new master and slave and will try again next weekend...
Just got back from my desert trip. Passed by the 'BB' numerous times while unloading Eileen. Have 2 doctor appointments on Monday, so I need to knuckle-down on Tuesday - new tires/wheels, rocker panels and a few other tasks to do.
QUOTE(914Sixer @ Mar 22 2015, 06:49 PM) 
If I remember correctly, Mulholland were made by Mexican Boge. Boge has been making shocks in Mexico since the 1930's.
Think you are right. I think Boge has since not made those in quite some time. I had never heard of them until today.
Displayed it in the 22nd Annual Bob Baker VW show.
About 200 cars there.
Then, lived went for a drive along the coast and lived dangerously:
.
About 200 cars there.
Then, lived went for a drive along the coast and lived dangerously:
.
I tore apart the CV joint and cleaned it. Now I need to reassemble.
1st time to visit a shop (not even a mechanic shop but just a tire shop) since I bought it last 2011, to fix 1 tire leaking air and replaced all valve stem and balancing.
Click to view attachment
Click to view attachment
Click to view attachment
Click to view attachment
Drove to work. The parking lot is covered in salt. Fuchs it, it was bought to drive, not sit in the garage.
Got my gauges back from Tim the other day after a very quick turn around.
With the new glass bezels he put in,they look freakin' brand new. Can't wait for the weather to warm up enough for humans to put them in. Amazing.
Click to view attachment
With the new glass bezels he put in,they look freakin' brand new. Can't wait for the weather to warm up enough for humans to put them in. Amazing.
Click to view attachment
I bought new tires today. I went with 195/65/15 Yokohama YK580's.
I haven't had four matching wheels on this car since 1984!

Click to view attachment
Click to view attachment
I haven't had four matching wheels on this car since 1984!
Click to view attachment
Click to view attachment
I took fellow member Stu(SKL1) for a ride around the block. Perfect day out today! 
QUOTE(Big Len @ Mar 23 2015, 06:05 PM)
Got my gauges back from Tim the other day after a very quick turn around.
With the new glass bezels he put in,they look freakin' brand new. Can't wait for the weather to warm up enough for humans to put them in. Amazing.
Click to view attachment
 Wow. Those look fantastic
I polished a wheel Click to view attachment

Got the oil changed and took care of a fuel line leak. Drove it around the neighbor hood and listened to all the rock salt being thrown by the sticky tires.
Next is to install a new battery. the 9 year old Optima just ain't turning it anymore.
Next is to install a new battery. the 9 year old Optima just ain't turning it anymore.
QUOTE(sb914 @ Mar 23 2015, 05:53 PM)
I polished a wheel
Click to view attachment
Nice. Mine won't look nearly as nice, but just having new rubber makes me feel good.Click to view attachment
I started cleaning up one of the ATS wheels. The back sides have years of some sort of crud on them, and I want the mating surfaces and bolt holes to be especially clean.
. . . . . . . . . . . . . . . . . . . . . . . . . Before . . . . . . . . . . . . . . . . . . . . . . . . . . . . . . . . . . . . . . . . . . . . . . . . . . . . . . . . . After . . . . . . . . . . . . . . . . . . . . . . . . . . . .
Click to view attachment
... three more to go. Not sure if I really need to do all this this right now, with the RT-66 being so close - but I want to at the least clean all the mating surfaces now

Pulled it out of the garage!
Finally no clouds, rain or cold! Time to pull sleeping beauty out and wash it off. Figure out where I left off and hope maybe this year it will be on the road!
Click to view attachment
Finally no clouds, rain or cold! Time to pull sleeping beauty out and wash it off. Figure out where I left off and hope maybe this year it will be on the road!
Click to view attachment
Drilled 21 holes in my car...
To install a lexan windshield
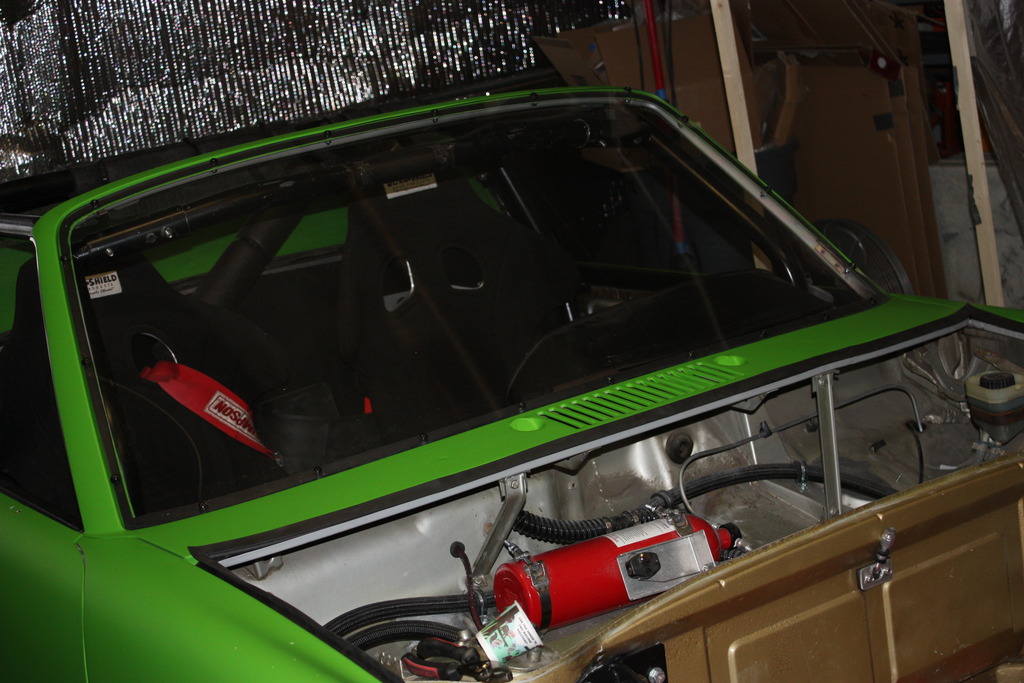
cut lexan
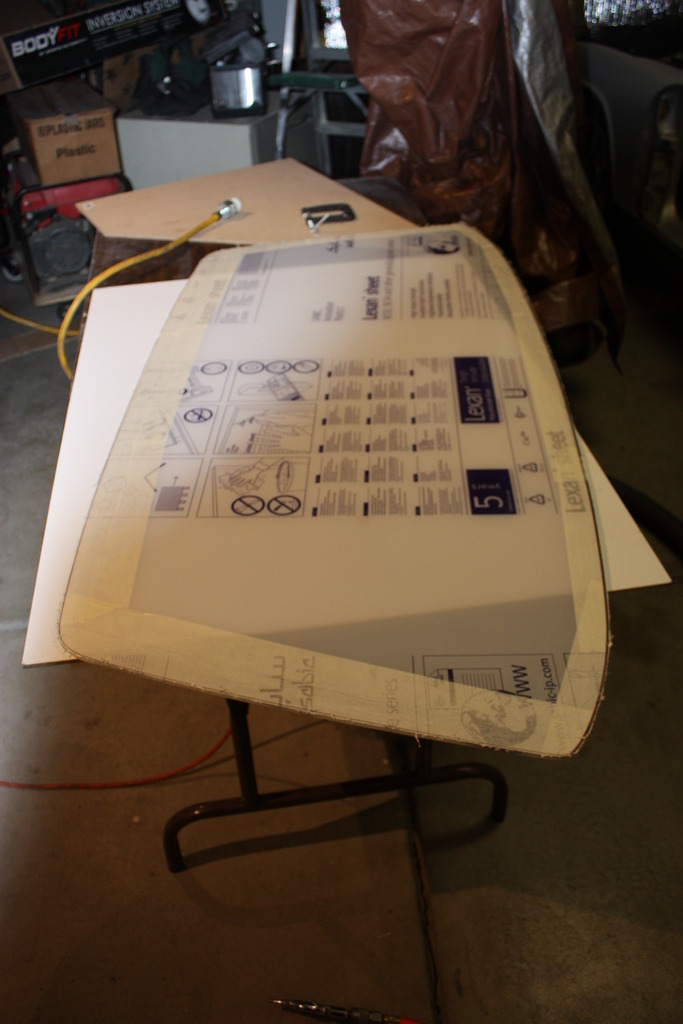
route lexan to template
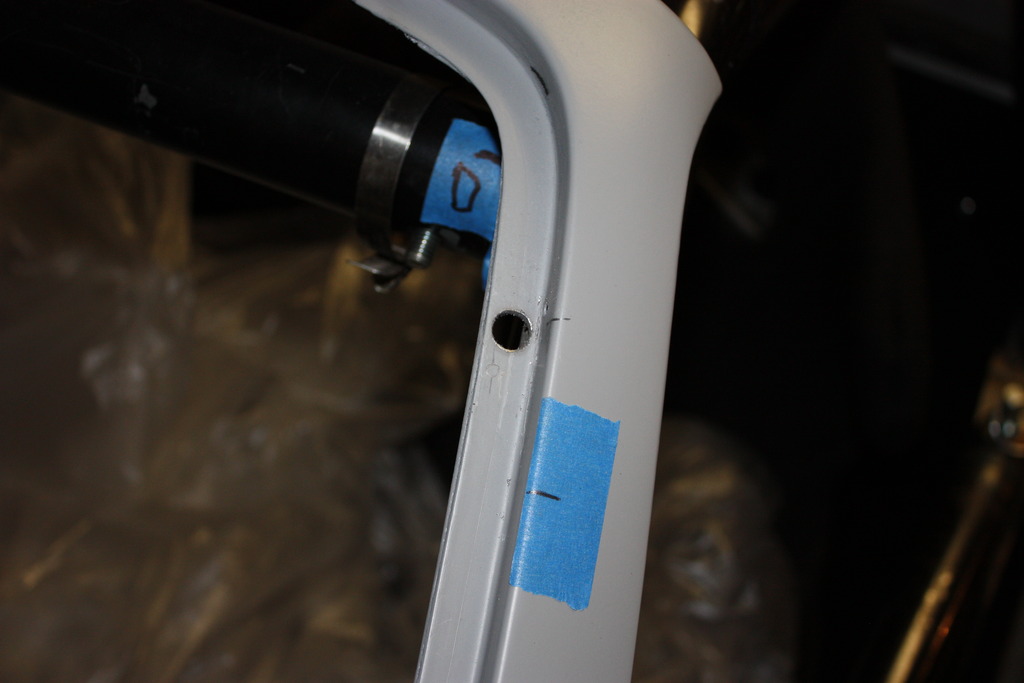
drill 21 holes in window frame
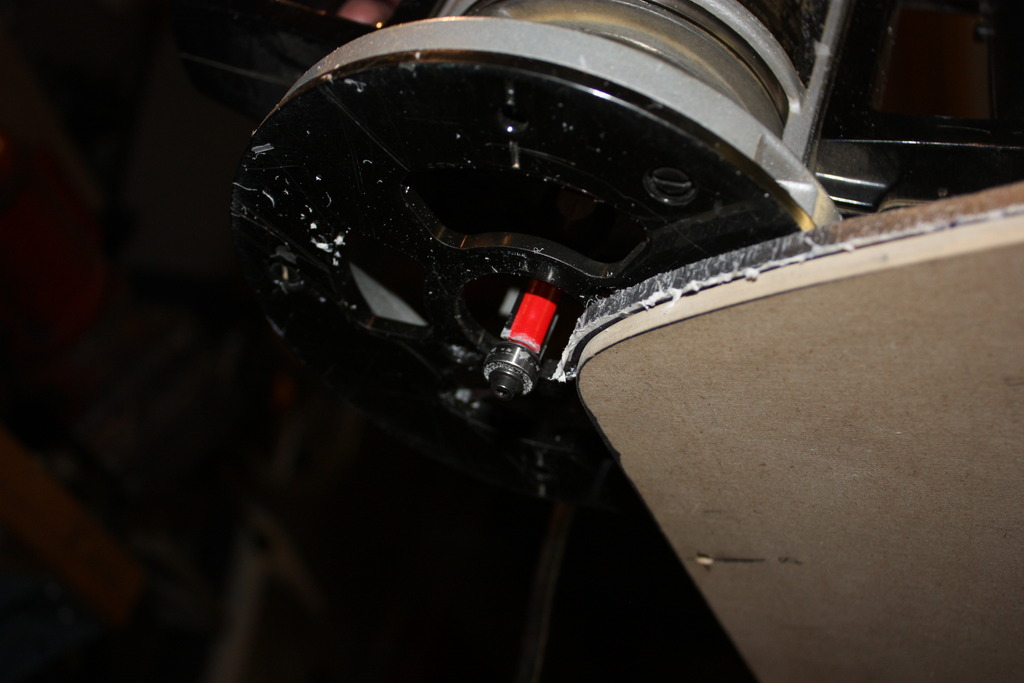
Install inserts
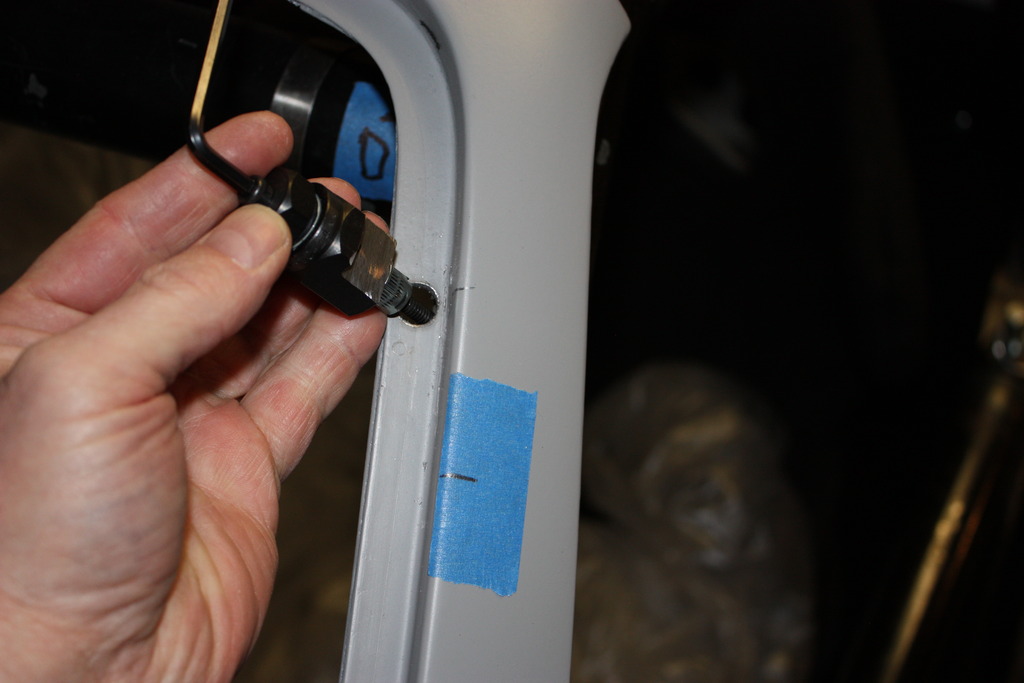
mark each hole thru windshield and match drill for each insert
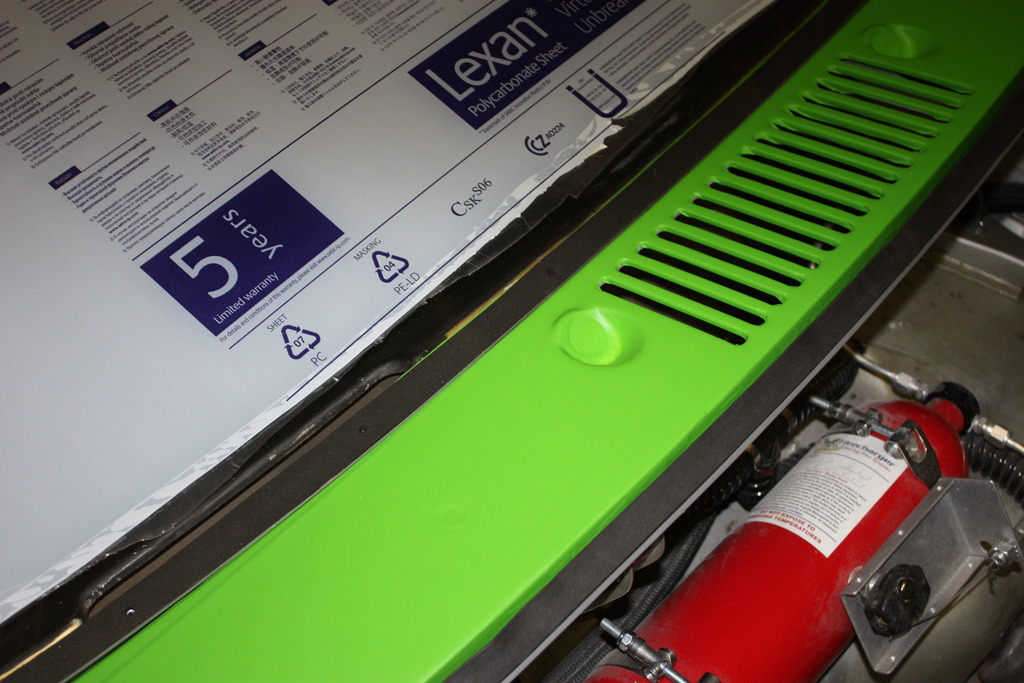
Almost have the look I am after:
To install a lexan windshield
cut lexan
route lexan to template
drill 21 holes in window frame
Install inserts
mark each hole thru windshield and match drill for each insert
Almost have the look I am after:
The 'BB' got her new shoes and socks today
Kumho Solus Expert 195/65-15s on ATS Classics (that will eventually need some TLC and new paint ... or Al Reed's magic touch)
Click to view attachment
Kumho Solus Expert 195/65-15s on ATS Classics (that will eventually need some TLC and new paint ... or Al Reed's magic touch)
Click to view attachment
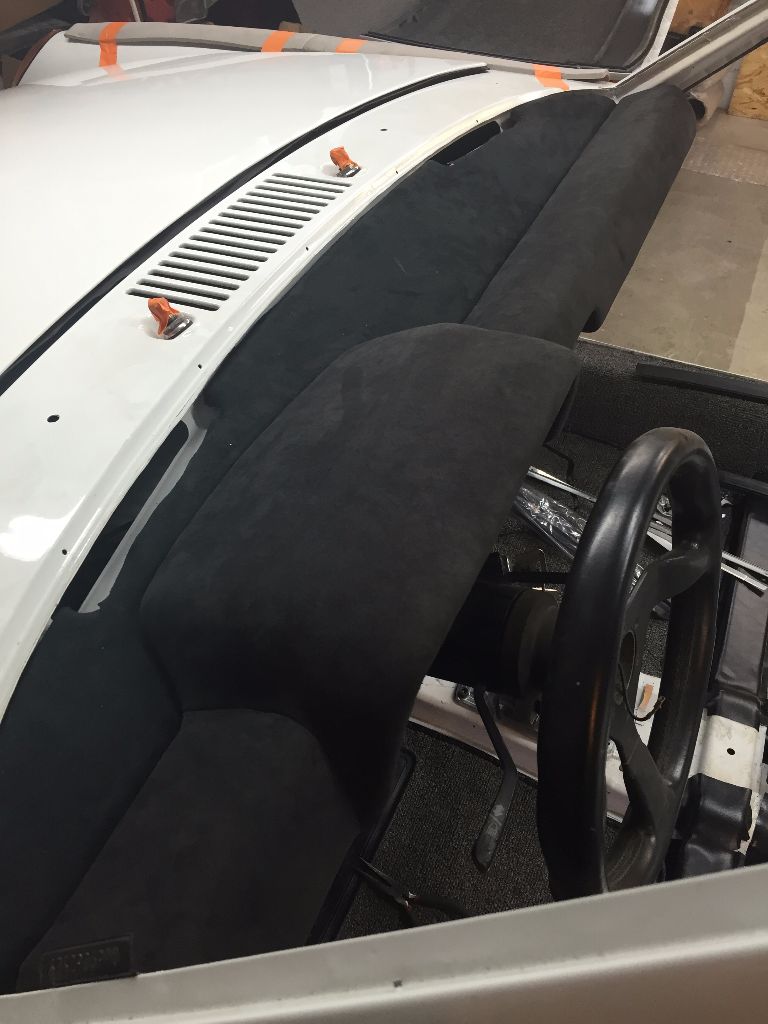
Picked up the dash from the upholsterer. No more cracked old vinyl.... 
QUOTE(falcor75 @ Mar 25 2015, 01:28 AM)
Picked up the dash from the upholsterer. No more cracked old vinyl....
That looks outstanding! Alcantara?
QUOTE(mgp4591 @ Mar 25 2015, 08:40 AM)
QUOTE(falcor75 @ Mar 25 2015, 01:28 AM)
Picked up the dash from the upholsterer. No more cracked old vinyl....
That looks outstanding! Alcantara?
Yes.
Your dash looks nice and plush
Just an FYI, Mark (914rubber.com) recently told me they're working on coming out with new reproduction injection-molded dashes
Just an FYI, Mark (914rubber.com) recently told me they're working on coming out with new reproduction injection-molded dashes
QUOTE(stugray @ Mar 25 2015, 01:48 AM)
Drilled 21 holes in my car...
To install a lexan windshield
cut lexan
route lexan to template
drill 21 holes in window frame
Install inserts
mark each hole thru windshield and match drill for each insert
Almost have the look I am after:
Question - Why do you have to drill it in? Isn't the normal windshield molding enough to hold it? Or is the Lexan too thin?
QUOTE(Big Len @ Mar 25 2015, 07:07 AM)
Question - Why do you have to drill it in? Isn't the normal windshield molding enough to hold it? Or is the Lexan too thin?
The lexan is thin and not molded to shape like the glass.
I have no idea how the regular "tape" would hold on the lexan and cleaning that crap out is a major PITA when I need to change out the windshield again in a couple of years.
I have not seen any other race cars with the lexan glued in place.
(I'm also following Brant's lead :-)
OK, thanks. Just wanted to know.
Heading riverside route but not for the event but for a kaiser appointment. hot but still cool inside the 914 cockpit with windows half way open.
Used her as a cup holder. Don't worry - I treat my 911 whale tail (not pictured) the same way...
Click to view attachment
Click to view attachment


QUOTE(sdoolin @ Mar 27 2015, 06:04 PM)
Used her as a cup holder. Don't worry - I treat my 911 whale tail (not pictured) the same way...
Click to view attachment
Bourbon?
Nice garage...
Polished it all up nice an shiny for Palm Springs... even polished the tail pipe!
.
.
QUOTE(mepstein @ Mar 23 2015, 02:38 PM)
Drove to work. The parking lot is covered in salt. Fuchs it, it was bought to drive, not sit in the garage.

I got a package from Canadian Santa Claus:
Click to view attachment
Now I have to get my rear in gear and get a new welder...
Click to view attachment
Now I have to get my rear in gear and get a new welder...
Dropped this (old, reliable 1.7 w/tailshift) today:
Click to view attachment
For this (2056 w/rebuilt side shaft once the Dr. is finished with it).
Click to view attachment
But, I can't put that in a dirty engine bay, now can I? Look at that battery tray
Click to view attachment
Click to view attachment
And that lid hinge is cracked. THAT'S got to go...
Click to view attachment
So, it's time to start cutting, grinding, and cleaning...
Click to view attachment
Click to view attachment
For this (2056 w/rebuilt side shaft once the Dr. is finished with it).
Click to view attachment
But, I can't put that in a dirty engine bay, now can I? Look at that battery tray
Click to view attachment
Click to view attachment
And that lid hinge is cracked. THAT'S got to go...
Click to view attachment
So, it's time to start cutting, grinding, and cleaning...
Click to view attachment
In the process of cleaning the engine bay, I've noticed:
1. Getting the engine bay rubber out is more difficult than I would have guessed. I've got new seals from 914Rubber. Anyone have a trick or advice for removing the pieces from the engine shelf channels (other than growing a pair and yanking)?
2. Getting the undercoating type material off of the firewall and everywhere is a PITA. Advice for getting it off? Brake cleaner or another stripper?
Click to view attachment
I've noticed there's some surface rust underneath this awful stuff. I guess it lasts a long time, but eventually it hides the rot, it doesn't prevent it.
Done for today. Try to finish cleaning tomorrow and hopefully weld in the new hinge and battery tray before my tranny gets back from the Evil One.
Rear trunk panel replaced.  Click to view attachment
Click to view attachment
Nice job, 914fahrer! That's on my to do list as well.
Have had occasional starting issues so I though I'd try working thru that today but it started and ran perfectly so no choice but to
.
It was kind of cold this morning, @40 degrees. It always seems to run good on the cooler days.
. It was kind of cold this morning, @40 degrees. It always seems to run good on the cooler days.
Click to view attachment
Finally got the washer off of this and on to mine and put the tranny BACK in for the 2nd time. This one is off my core. Basically it fell out with the threaded sleeve. The ball in the good tranny was a bitch. Had to modify the deep well 14 mm.
Nuthin' new with this car. Seems like I have to do everything 2 times.
Went to Alameda and got some oil ...
QUOTE(BeatNavy @ Mar 28 2015, 02:22 PM)
In the process of cleaning the engine bay, I've noticed:
1. Getting the engine bay rubber out is more difficult than I would have guessed. I've got new seals from 914Rubber. Anyone have a trick or advice for removing the pieces from the engine shelf channels (other than growing a pair and yanking)?
2. Getting the undercoating type material off of the firewall and everywhere is a PITA. Advice for getting it off? Brake cleaner or another stripper?
Click to view attachment
I've noticed there's some surface rust underneath this awful stuff. I guess it lasts a long time, but eventually it hides the rot, it doesn't prevent it.
Done for today. Try to finish cleaning tomorrow and hopefully weld in the new hinge and battery tray before my tranny gets back from the Evil One.
I pulled out my old engine bay rubber yesterday and it was a PITA. It was old and cracked (kinda like me!) so I ended up taking a flat blade screwdriver and gently prying until I had a good sized section coming out, then gently again pulled bit by bit the length of the piece out of the same spot where I started. Took awhile but it worked.
QUOTE(eric9144 @ Mar 29 2015, 09:20 AM)
Chased motorcycles through the local twisties 
Lemmy guess, iPhone?
PS: Repeat after me, "Button on the right" ...
I made a mold to produce a little panel for the hell-hole repair. Next step:
Click to view attachment
Click to view attachment
QUOTE(cn2800 @ Mar 28 2015, 12:36 PM)
I got a package from Canadian Santa Claus:
Click to view attachment
Now I have to get my rear in gear and get a new welder...
HO, HO! Nice pieces, Tex. I looked at several welders and went with the Longevity 140. It was decent price and had options I wanted down the road - like a spool gun for aluminum. Also has low temp mode for this thin sheet metal work. See project link, around page 17 is when I got new welder.
Speaking of welding, here's the reinforcements I just finished for the inner suspension mounts. I wanted to extend the support up the side and over the top of the long. Also added support on each side.
Got plenty of cleanup left to do - but happy with the results.
Left side
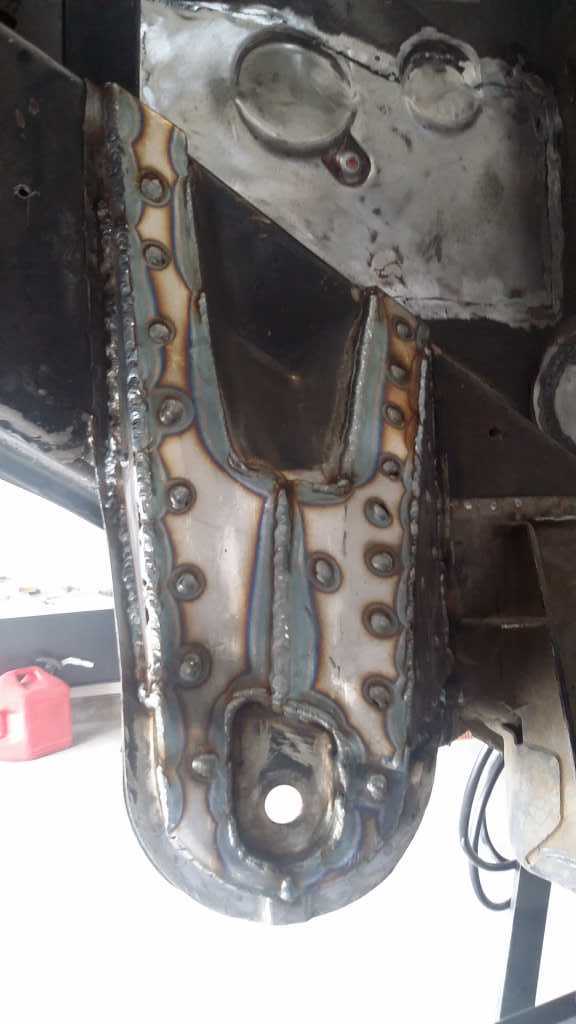
Right side
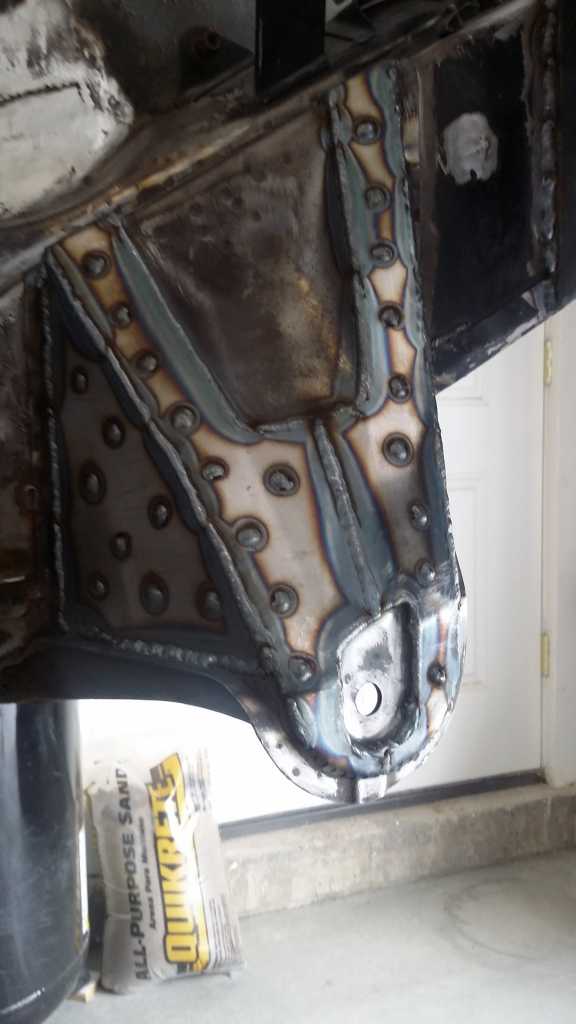
Got plenty of cleanup left to do - but happy with the results.
Left side
Right side
I made some toe plates to play with my alignment at home. Unfortunately I don't think I will get to use them before the autocross this Wednesday. Oh well.
Click to view attachment
Click to view attachment
This is a "lo-fi" version of our main content. To view the full version with more information, formatting and images, please click here.