Help - Search - Members - Calendar
Full Version: My first attempt at Refinishing and Polishing 914 Fuchs
914World.com > The 914 Forums > 914World Garage
74porsche914
What do you guys think of my first set of wheels I refinished? I am pretty happy with the way they turned out, especially for a 20 year old! Please no comments about how I shouldn't have painted the inserts. I think painted inserts look better on certain cars and my car is a driver so I'm not going for a factory look anyway.

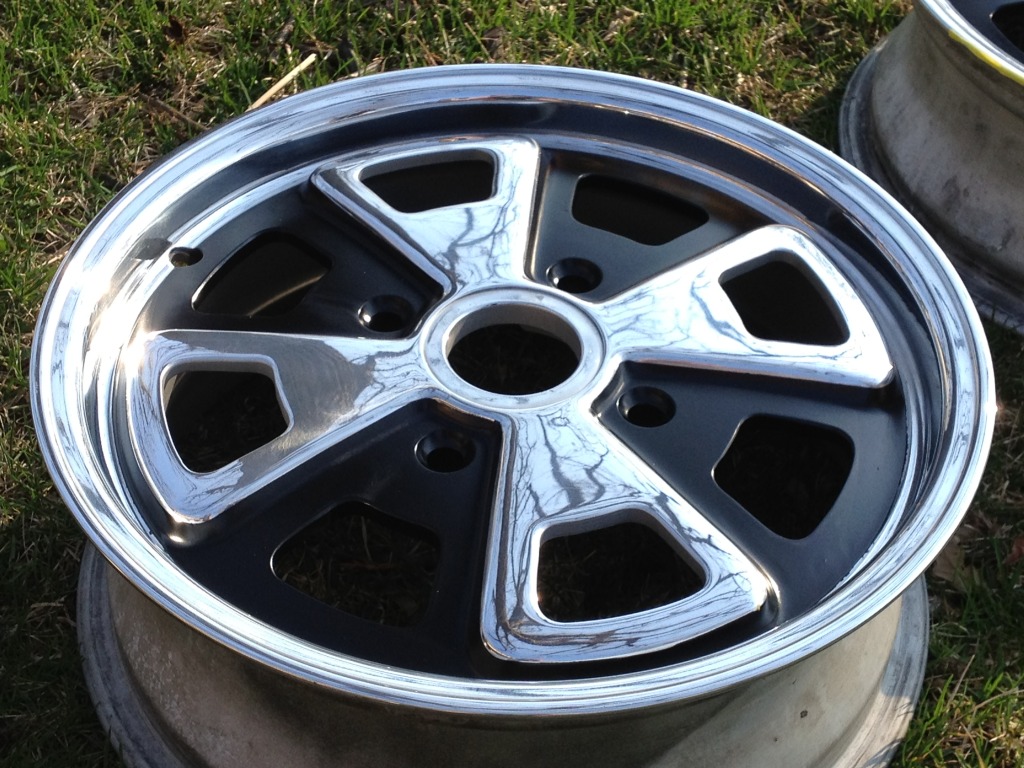
Steps I used for Refinishing:

First I removed the anodizing using Easy-Off oven cleaner. I did two coats for around 35 minutes for each. Then I began sanding the pedals using a DA 6" rotational sander with 220, 400, and 600. These were very pitted on my wheels and using a DA sander saved a ton of time and really planed them out nicely. I next moved on to dry sanding the lips. I used 80, 120, 220, 320, and 400 grit. This was the longest and most agonizing part of the wheels. Next, I dry sanded the pedals and flats with 400 grit. After this I moved onto wet sanding the lips and pedals with 400, 600, 1000, 1500, 2000, and 3000. I did all the lips first then moved onto pedals. After this I masked and sprayed the back parts of the wheels with silver. Then I began the polishing process using a wool car buffer pad and Mother's polishing compound (power ball compound). Next, I used a power ball mini to get areas unaccesable by the buffer and went over the pedals again. Finally, I masked the polished areas and sprayed the inserts. This entire process took over 60 hours and pretty much wrecked my hands. Worth it though!

IPB Image

http://i1238.photobucket.com/albums/ff490/...ipone329308.jpg

http://i1238.photobucket.com/albums/ff490/...ipone329306.jpg

http://i1238.photobucket.com/albums/ff490/...ipone329304.jpg
74porsche914
IPB Image
74porsche914
I try and get some better pics of them on the car once I get back home from school.
carr914
Looks Nice - Just a Warning, now peeps are going to want to know how you did it
Michael N
Looks Grrrrrrrreat!

Click to view attachment


gothspeed
looks awesome w00t.gif !!!! ............. when can you do my fuchs idea.gif ???
AZ914
Very nice!
7TPorsh
QUOTE(carr914 @ Mar 29 2012, 11:15 AM) *

Looks Nice - Just a Warning, now peeps are going to want to know how you did it


Yeah...what he said.

popcorn[1].gif
TravisNeff
Great job!
rgolia
how did you do that? couldn't resist and actually need to do mine.
etcmss
+1 want to know
dlee6204
Looks great! first.gif
biosurfer1
why would you paint the inserts?!?


j/k:)
jsayre914
Looks very nice, It is a crap load of work. I did the same job, after about 6 months I decided I did not like the black inserts and removed the black and polished again

I was tired of a super bling shine and chips of paint missing in the black dry.gif

You did an excellent job beerchug.gif

I have pictures of how I did mine in my blog, yours look better though first.gif
02loftsmoor
you did well beerchug.gif
74porsche914
I edited my initial post to include the refinishing process.
ww914
Very nice. You did a great job.
jim_hoyland
Wow ! Fantastic. I started down this path several years ago but ended up taking themo Al Reed in Anaheim, CA

And, thanks for including how-to. smile.gif

BTW- What is a DA sander ?
Tom_T
smilie_pokal.gif ... nice job - esp. for 1st try!

BTW .... 20 or 60 doesn't matter as much as how much experience doing it! shades.gif

The only thing about the black backgrounds for those of you which prefer them, is that a set of "real" Fuchs 2L alloys will get mistaken for the cheaper repros which are all produced with black backgrounds AFAIK - so many will assume your real are knockoffs!

.... aside from the paint chipping noted above.

FYI - the satin background of the original finish can be achieved by masking the polished parts then bead blasting (carefully so as to not blast thru the masking material, which has to be heavier/stronger than that used for painting.

Also FYI - the original finish was anodized after polishing & the the less polished or bead blasted backgrounds were finished, which knocks the shine down maybe 20% but gives you a much more durable surface which is more resistant to road grime & acidic brake dust.
mojorisen914
Those turned out really well. Nice job!
74porsche914
A DA sander is a rotational sander with 6" pads that hooks up to an air compressor.


quote name='jim_hoyland' date='Mar 30 2012, 09:49 AM' post='1656778']
Wow ! Fantastic. I started down this path several years ago but ended up taking themo Al Reed in Anaheim, CA

And, thanks for including how-to. smile.gif

BTW- What is a DA sander ?
[/quote]
74porsche914
Anyone know what al reed charges to refinish Fuchs like I did. Just curious.
gothspeed
QUOTE(74porsche914 @ Mar 30 2012, 01:17 PM) *

Anyone know what al reed charges to refinish Fuchs like I did. Just curious.

Al Reed is just a couple towns away and I have been trying to get a hold of him by phone with no success ........ sad.gif

Though my understanding is that his work is great and prices are fair ..... smile.gif
Porschef
So you went the route of maximizing the rim polish showing, meaning that you had to mask off the flat curve. Did you use tape or some sort of masking agent?

BTW, very nice work.
74porsche914
Just used masking tape which was very difficult because it would ripple easily around corners. Ended up sawing my role in half to make the diameter of the tape thinner.
74porsche914
Finally got some more pictures with the new wheel:

http://s1238.photobucket.com/albums/ff490/.../Porsche%20914/
74porsche914
Thanks to mikey914 for the beautiful center caps!
lonewolfe
Awesome job on the wheels! That's a pretty sweet ride for a 20 year old. Heck, that's a pretty sweet ride for a 40 year old! wink.gif
This is a "lo-fi" version of our main content. To view the full version with more information, formatting and images, please click here.
Invision Power Board © 2001-2024 Invision Power Services, Inc.