Help - Search - Members - Calendar
Full Version: Plaid seats upholstery tutorial.
914World.com > The 914 Forums > 914World Garage
Pages: 1, 2
johannes
This tutorial will show you how to make yourself the cushion and backrest with the famous plaid inserts. No special tool needed.
For instructions on how to remove and desassemble the seats please read the excellent thread by Nick Mironov.
http://www.914world.com/bbs2/index.php?showtopic=71844

This is not a difficult job. It is long but I found it fun to do, and I learned a lot is the process.
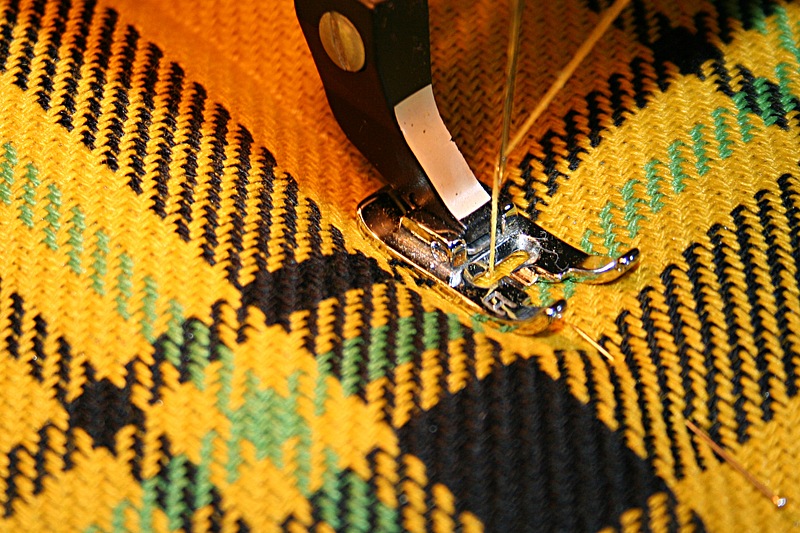
Basic instructions on how to use the sewing machine was given by my wife and the instruction book that I always had next to me.

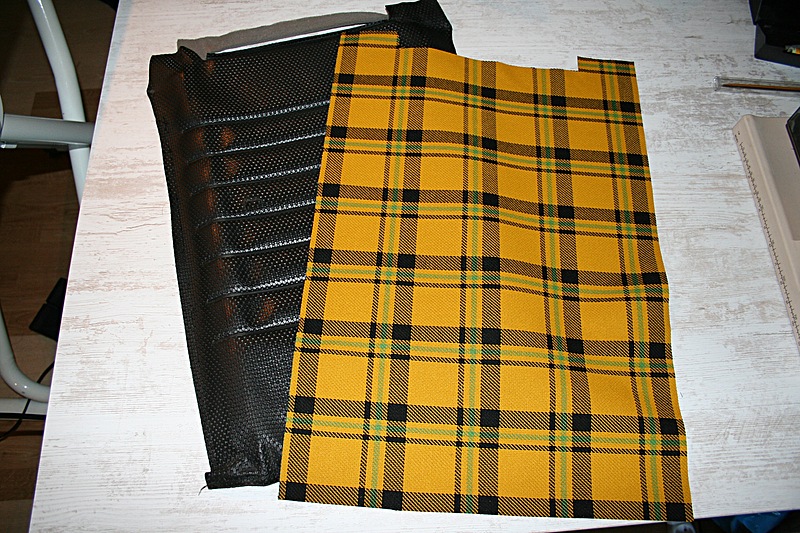
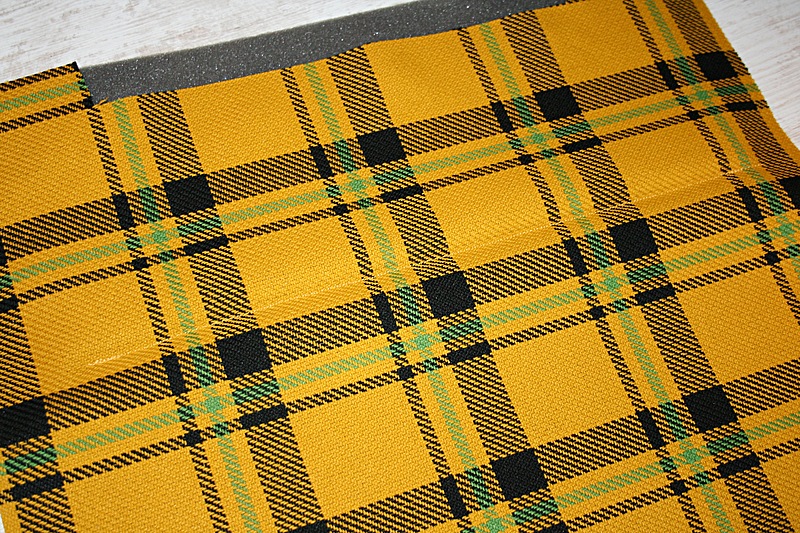
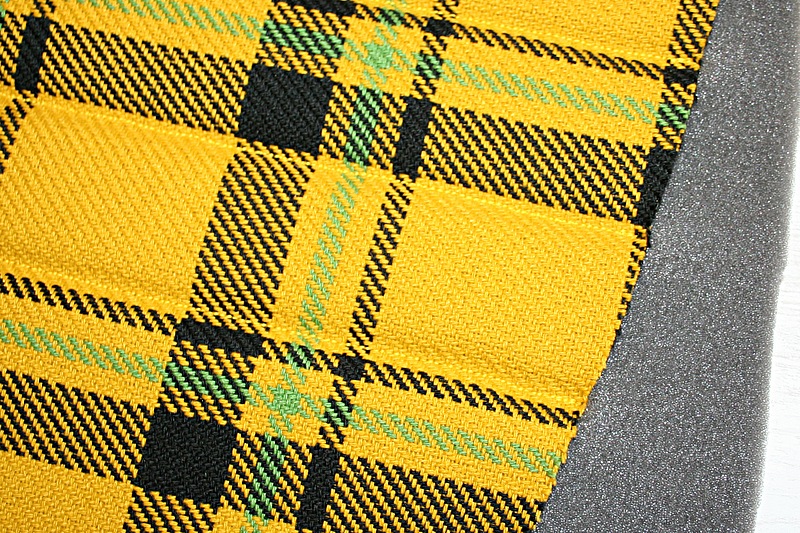
The plaid cloth was bought from Autoatlanta.
http://www.autoatlanta.com/porsche-parts/a...-and-Upholstery
I bought two yards as it was written somewere on this forum that on yard is for one seat.
I found out that I could cut 4 seats from theese two yards... but that was a very close (no error) fit.

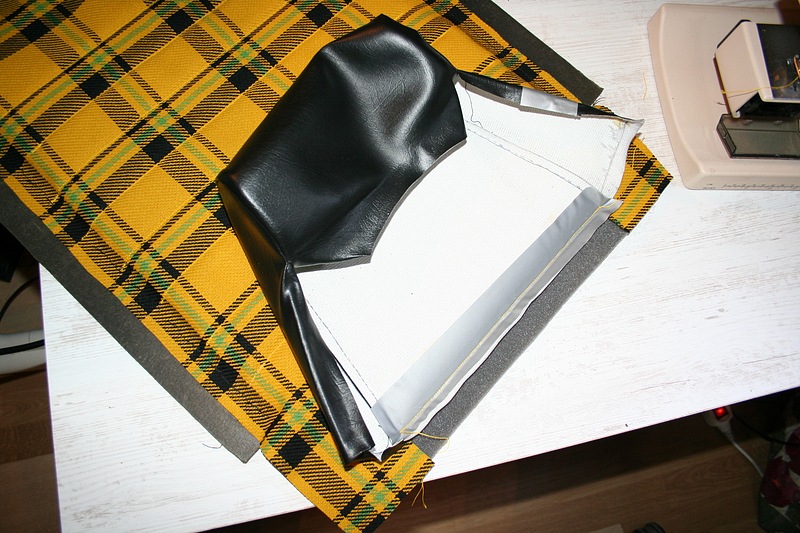
The vinyl bolsters from the seats (back of the shell) were also changed and sourced from the same page on Autoatlanta 's website.

The headrest vinyl was saved from the existing cover. It is attached to the backrest. If your old headrests are not usable you can make new ones as I have already done
Follow the instructions on this thread:
http://www.914world.com/bbs2/index.php?showtopic=69300

What you will also need

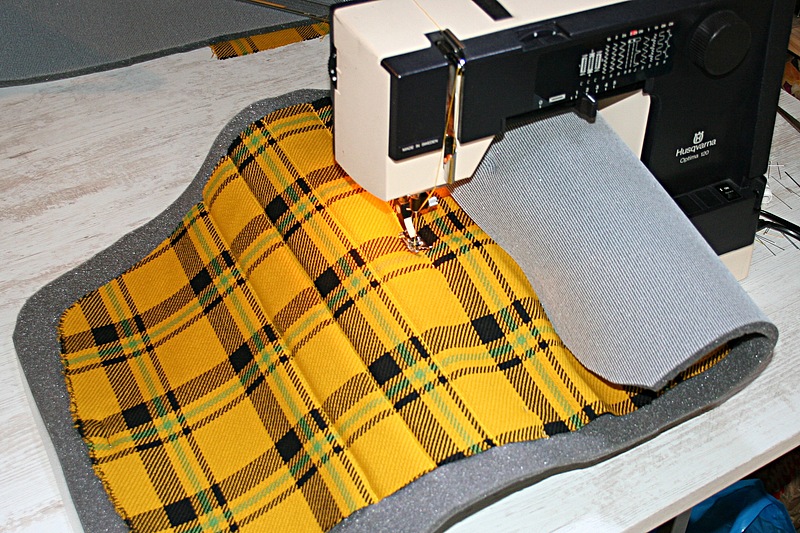
A sewing machine. No professional machine needed. I used a 20 years old Husqvarna Optima 120. This one is simple and strong.
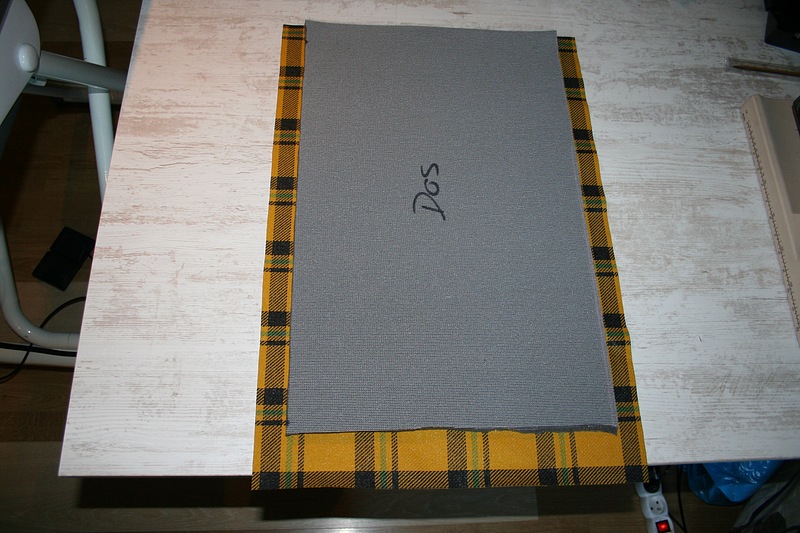
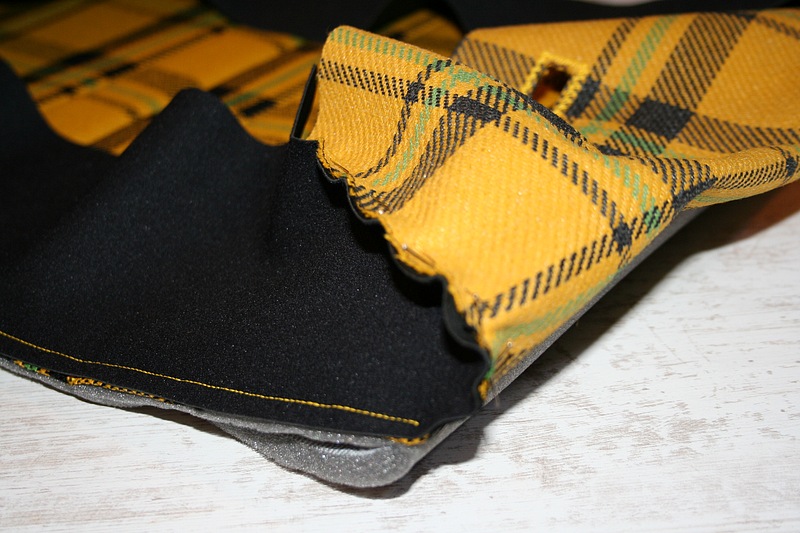
Vinyl for the side of the cushion
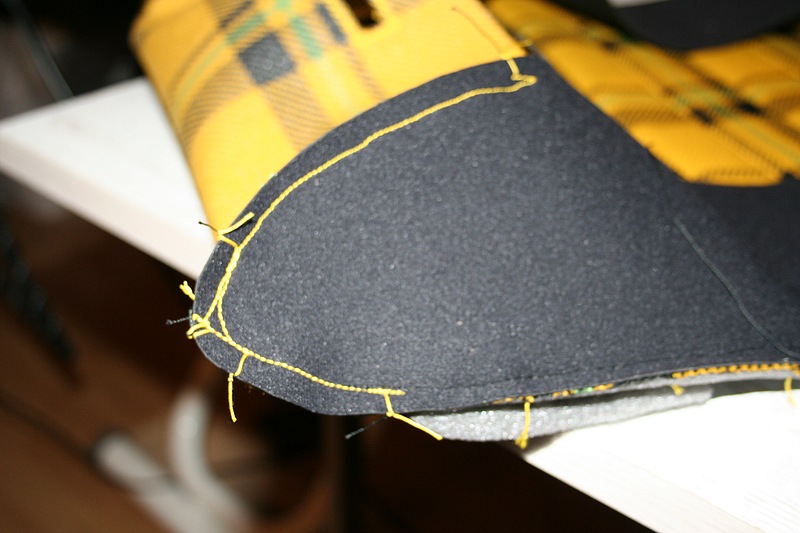
100 yards of thick yellow 100% polyester thread
50 yards of thick black 100% polyester thread
500g of Neoprene glue
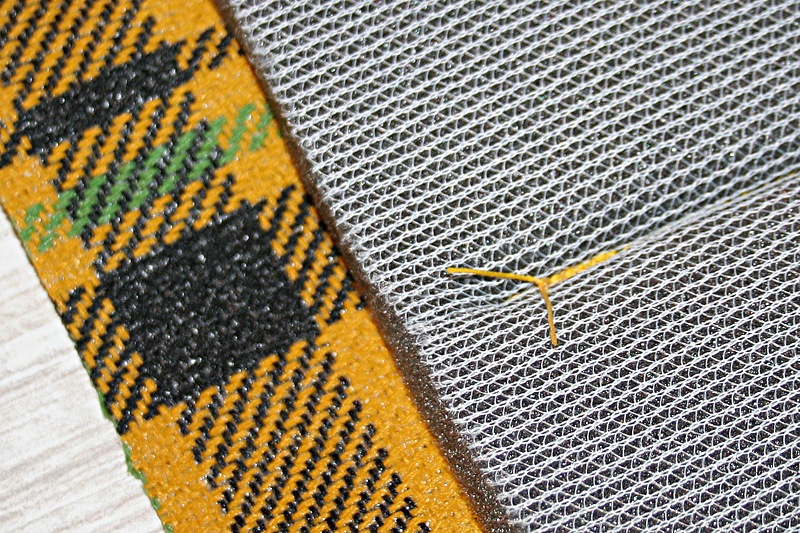
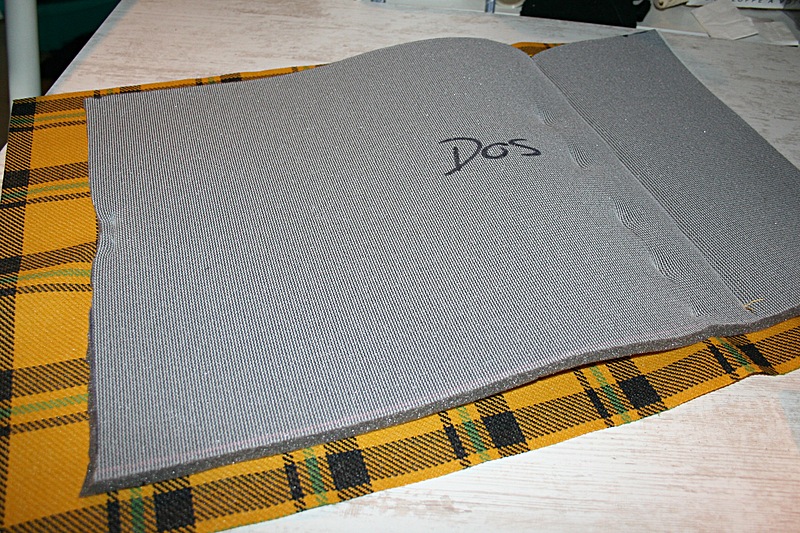
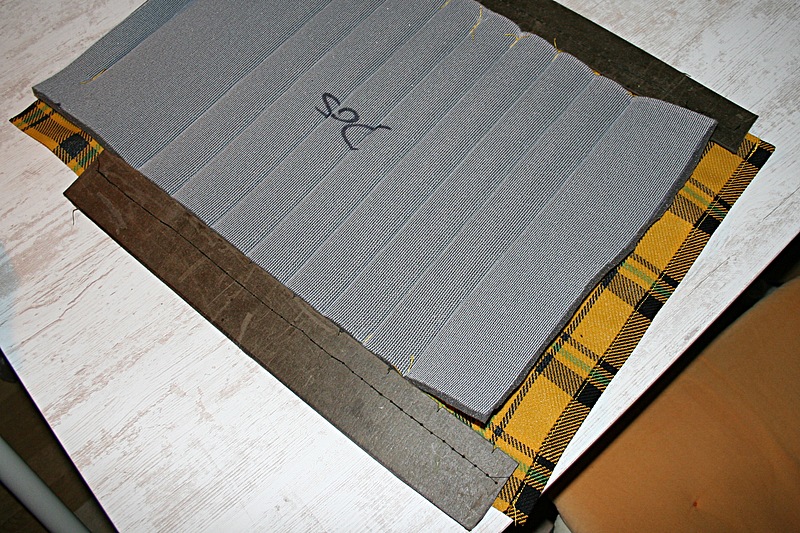
Foam in different thickness...
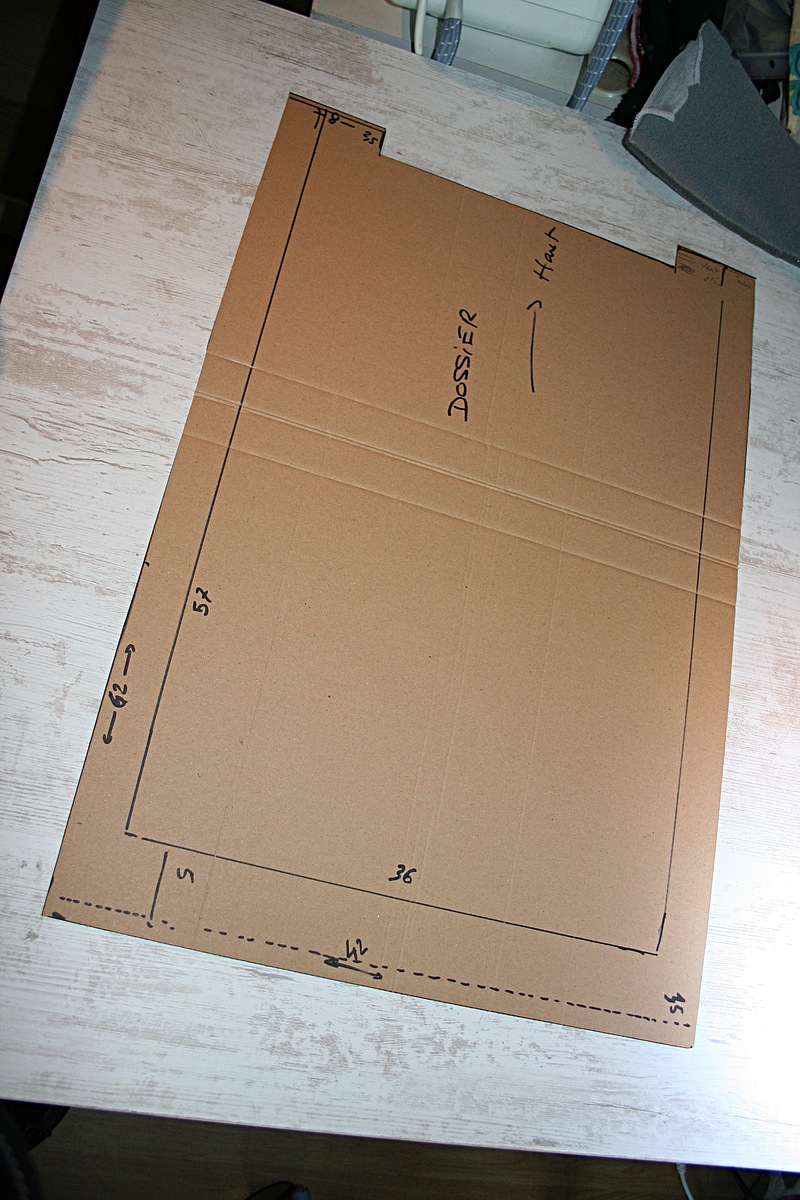
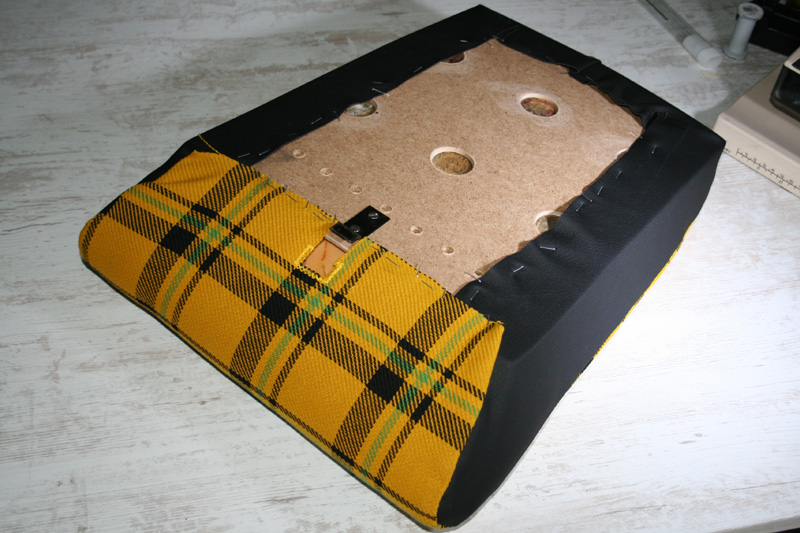
Cardboard...

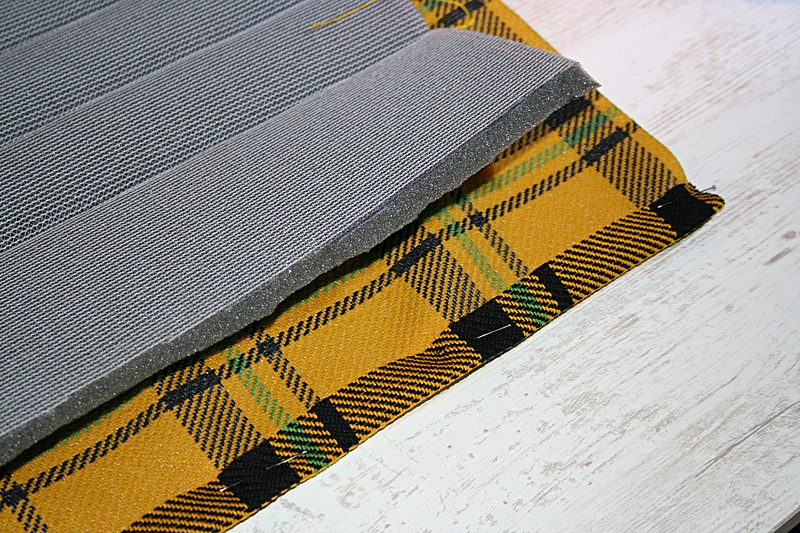
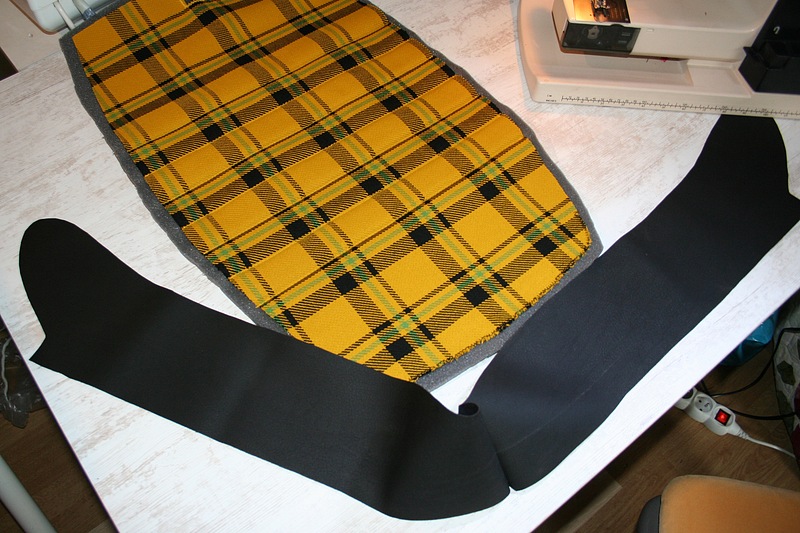
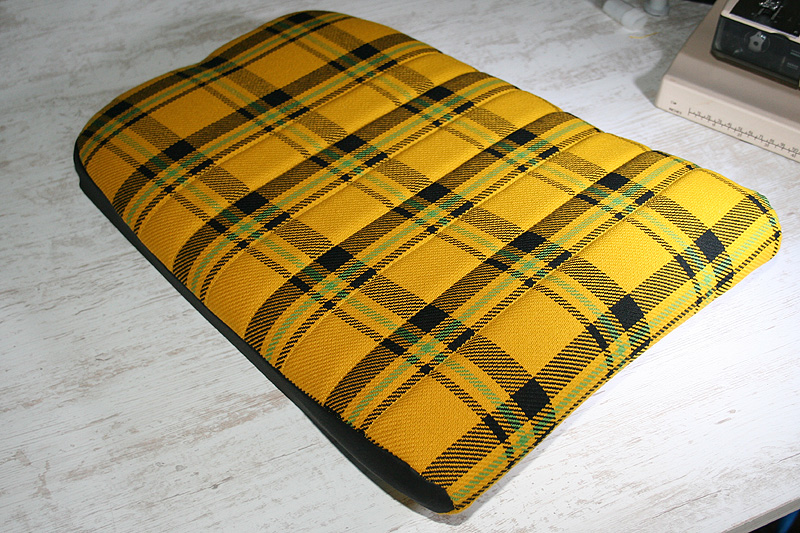
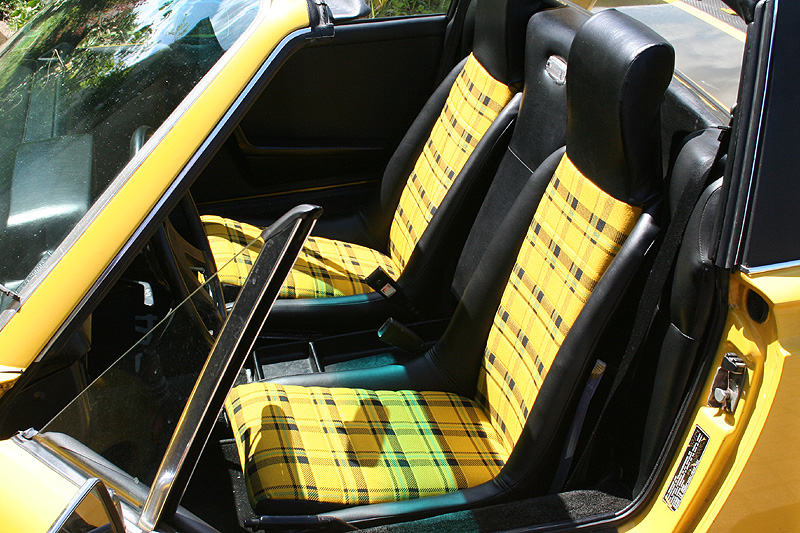
I cut the fabric using the pattern as reference. I used this picture found on this forum as reference. This is one of the few I found from an original seat.

Click to view attachment

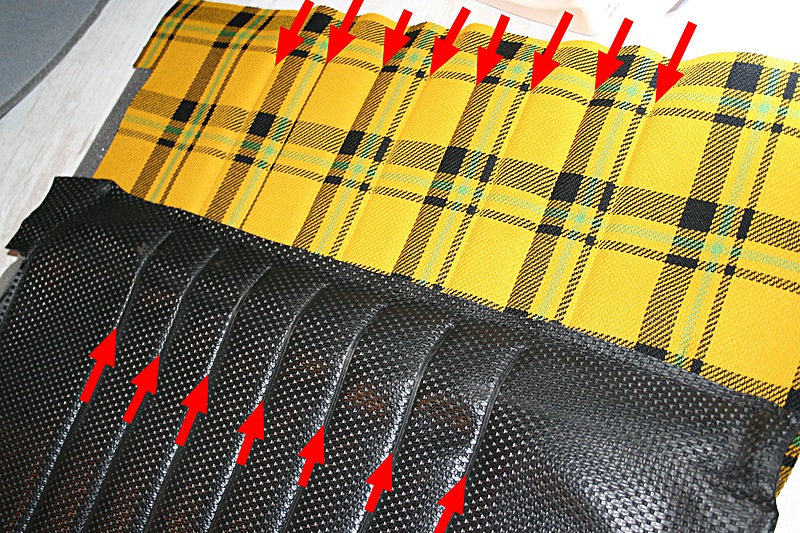
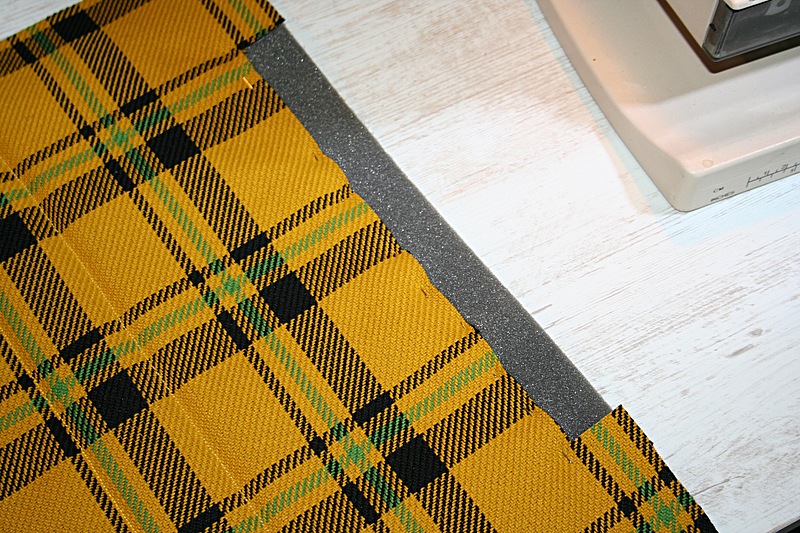
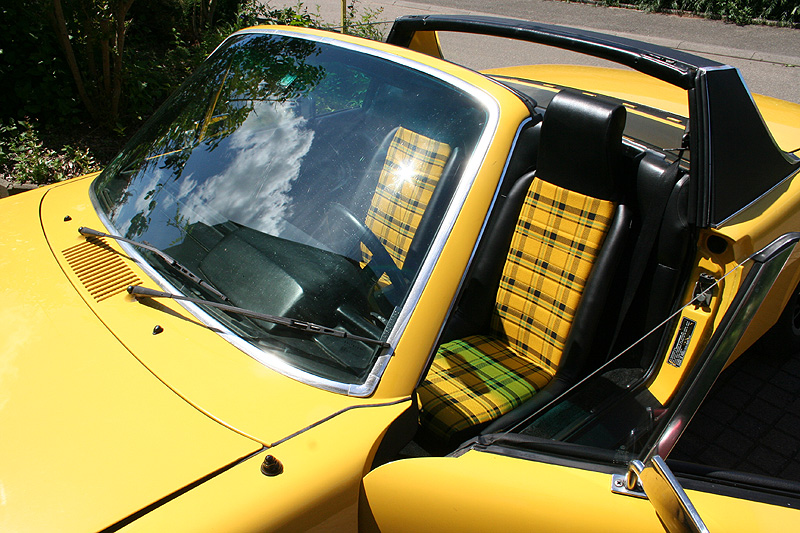
The goal was to have three large stripes visible and centered.

IPB Image
johannes
While desassamblig take pictures for future reference.

Use the desassembled parts as reference and draw the shapes on a cardboard that will be your template.

IPB Image
johannes
First job is to cut the foam that will be used for quilting.
I bought a foam that has a thin layer of fabric glued on one side. I bought it from an upholstery shop.
I suggest you buy the same kind of foam. Otherwise you will need to ad a layer of fabric over the foam and it will be a nightmare to sew.

IPB Image
johannes
I wanted to have the quilting on the yellow part and used yellow thread. I chose not to follow the original quilting position as it falls randomly on black or yellow parts of the fabric.
I have one more quilting line than the original, but I found it easier to sew following the lines of the fabric.
With this template the first and the last quilting line is almost aligned with the original.


IPB Image
johannes
Use needles to first attach the foam with the plaid cloth

As the thread is very thick you will have to set the "thread tension" of the machine next to the max. See instruction book of your sewing machine.

Quilting next to a black line is easier. You can use the pattern as a guide.

IPB Image
johannes
First quilting is a bit off the black line, so it is aligned with the original.

IPB Image
johannes
At the end of each sewing, I make a knot to secure the thread. As the plaid cloth will be later wrapped around a thick layer of foam, you can stop the sewing a centimeter from the end of the foam.
On this picture you can se the white weaving that is part of the foam.

IPB Image
johannes
I attached the foam to the fabric at the bottom (here on the left of the picture) so It won't move during the sewing and I gave a bit of tension (see the foam bending).

IPB Image
johannes
Once the quilting is over, you can sew the hew that will receive the wire at the bottom of the backrest.

IPB Image
johannes
Now sew the foam to the plaid at the top of the backrest. Later, the headrest will be sewed a few milimeters below so this sewing will not be visible.

IPB Image
johannes
Now sew the two side cardboards to the fabric. This has to be done by hand as your sewing machine will not be able to go thru the thick cardboard.
My cardboards were warped and in bad shape. I had to cut and drill new ones...

IPB Image
johannes
Now sew the headrest a few milimeters lower than the previous sewing.
I glued a stripe of woven tape inside the headrest (grey metallic). As the headrest was previously sewed it is a good idea to strengthen this place.

Put the wire in the hem at the bottom of the backrest.

IPB Image

Wrap the backrest around the foam and glue the cardboards. Here the foam is yellow. It is a new foam I bought from the upholstery shop as the old foam was in bad shape.

Attach the top of the plaid cloth to the wire.

Your backrest is now ready to install.

IPB Image
johannes
Now we start the cushion.

The cushion is more difficult to quilt and sew than the backrest.
Your quilting must stop on the edge of the foam.
When cutting the foam leave a lot of extra material. The foam and fabric will slip during the quilting process.
You will cut the foam later when assemled with the fabric because the two will have to match perfectly.

IPB Image
johannes
It is almost impossible to start a sewing precisely. But you can stop it with precision.
So, here is my tip: When quilting, start in the middle and stop at the edge of the fabric.
It should look this way.

IPB Image
johannes
Quilting the cushion. Start in the middle, stop at the edge of the fabric.

IPB Image
johannes
Once quilted you can cut the foam at the front of the cushion.
I used the green line as reference.
I made rectangular hole in the plaid for the metalic hook. I found out later the hole was not at the right place . I suggest you make this hole after you fit the cover on the cushion foam.

IPB Image
johannes
Now it is time to fit the vinyl to the cushion. I cut the vinyl using the old cover as reference.
I reported the shape on a cardboad, then used the cardboard as a reference to cut the vinyl.

IPB Image
johannes
First assemble with needles.
This is the tricky part because you will have three layers to sew togeter: Vinyl, plaid cloth and foam.

IMPORTANT !!!
You wont be able to sew the foam in the tight curve at the front of the cushion.
This is how I did:
I sewed the three layers from the back of the cushion to the beginning of the curve.
Then, from the curve I only sew the plaid to the vinyl. The foam is not attached from the curve.


IPB Image
johannes
once the straight line is sewed, you can cut the foam.

IPB Image
johannes
Wrap the foam so it won't be in the way when you will sew the tight curve...

IPB Image
johannes
Wrap the foam so it won't be in the way when you will sew the tight curve...

IPB Image
johannes
Assemble the plaid and the vinyl with needles in the tight curve.

IPB Image
johannes
Sew the tight curve. You can sew a few time. It can look messy, the important thing is to have a smooth inner line.

IPB Image
johannes
Stapple the cover on the cardboard. I had to redo the cardboard because it was warped and in bad shape.

IPB Image

Nice ?...

IPB Image
johannes
"Et voilĂ " (in french in the text)

IPB Image

IPB Image
ezbngreen914
Nice Thread! no pun intended... beerchug.gif Thanks for sharing. I love those seats and would love to try this myself.
johannes
QUOTE(ezbngreen914 @ Jun 9 2012, 07:33 AM) *

Nice Thread! no pun intended... beerchug.gif Thanks for sharing. I love those seats and would love to try this myself.


Watching your avatar you will need green plaid ...

smoke.gif
Valy
drunk.gif
ape914
very cool
johannes
Thanx ...
rick 918-S
I nominate this for Classic status! Nice work man!!! beerchug.gif
TravisNeff
I'll second that.. Nice work!
johannes
As I told earlier. I was able to cut 4 seats in the 2 yards.
But as I am a french idiot, I cut the second set reversed. That means the pattern is bottom on top, but it is on both the cushion and backrest and perfectly aligned (see picture). Only a concours expert with reference picture will notice.

The cushion fabric is also 1cm shorter. That means it will be stapled at the edge of the cushion cardboard... Or you can make it longer, this part is not visible anyway.

If you can live with that reversed pattern, you can have the set for 50$ worldwide shipping included.
In the box I will also put samples of the foam and vinyl I used
Paypal payement only. PM me if you are interrested.

Here is how it looks. Big picture you can zoom in.

Click to view attachment
bcheney
Great Tutorial! Thanks for sharing!
dreberg
QUOTE(bcheney @ Jun 11 2012, 05:38 PM) *

Great Tutorial! Thanks for sharing!

Very impressive! Would you be interested in making a set to sell to me?
johannes
QUOTE(dreberg @ Jan 1 2013, 03:49 PM) *

QUOTE(bcheney @ Jun 11 2012, 05:38 PM) *

Great Tutorial! Thanks for sharing!

Very impressive! Would you be interested in making a set to sell to me?

Sorry. I have no time.
Why don't you try yourself. Its not rocket science.
If you scared to do it yourself, every upholstery shop can do it for you.
blackjack
very cool, I have a yellow 76, this may be my next project. definately ads color to that black interior.
Steve
Very nice!! I had a Orange 1975 VW Sirocco with that very same plaid seat material back in 1978. Brings back some good memories!!
jdlmodelt
[quote name='johannes' date='Jun 9 2012, 04:21 AM' post='1690210']
"Et voilĂ " (in french in the text)

I did this to my white 72. But I wish I had read your tutorial before doing my own project. Mine would have turned out considerably better. I cut my plaid strips and quilted them back together. Obviously, a step I did not need to perform from the get-go. It would have eliminated a considerable amount of time and I could have focused my attention on some of the other finer details surrounding the cardboard and foam quilting. Thanks!!!!
Tonyorlo
Those turned out great! How does that machine handle sewing vinyls?
tumamilhem
Wow! First of all, EXCELLENT THREAD and instuctions! Second, I am INSANELY jealous because for a long time I was looking to buy a second set of seats just to have the (red) plaid in them for my Scarlet Red 1975, which would have been period correct. Not only would they be much more comfortable than vinyl here in NE FL where summers (and cars) are hot and winters are damp cold, but the are so funky cool looking just like our cars! I never found plaid seats (once, but they were a grand) and now Scarlet is up for sale. I'd put them in my LE Creamsicle, but they wouldn't be period correct and I have to keep it original. But hands down this is a fantadtic thread and there's not much out there regarding the plaid seats (or the all-white interior which is what my Scarlet had. All-white interior with plaid would really pop!). Great detail. Thanks for this! smile.gif

Hmm... maybe just get a second set of cushions to interchange in summer and winter...
tumamilhem
This is the plaid that I wanted to get for my Scarlet Red 1975. Alas, Scarlet is up for sale now and to put plaid in my LE wouldn't be period correct. Otherwise I'd DEFINITELY do red plaid cushions in my LE! smilie_pokal.gif


Click to view attachment
johannes
Nice suitcase. I also wanted to customize un suitcase like that.

.... first.gif
johannes
QUOTE(Tonyorlo @ Nov 19 2013, 05:30 AM) *

Those turned out great! How does that machine handle sewing vinyls?


Not a problem with my old sewing machine.
arkitect
Cool thread. I have recently ventured into sewing, doing a couple of seats for my daughter.
White plaid would look good in my white 73.

Dave.
tumamilhem
Dave, there was a white and black plaid. I have a picture of the seats. Will post it for you when I get home.

PS the red plaid and yellow plaid look awesome on a white car. I wish my Scarlet still had it's white interior.
Mikey914
Wanted to bump this up for the curious to see how to make these
Andyrew
This is an awesome thread!
nev914
This is an awesome thread, I actually created an account just to login and thank you for this.

I really would like to do this to my 914.

I was wondering, does anyone have photos of Plaid Seats in a IRISH GREEN 914?

I am wondering how this will look. Or if anyone has done it before, which material would look "right" in an Irish Green 914.

Thank you in advance.
DRPHIL914
QUOTE(nev914 @ Apr 1 2021, 11:23 PM) *

This is an awesome thread, I actually created an account just to login and thank you for this.

I really would like to do this to my 914.

I was wondering, does anyone have photos of Plaid Seats in a IRISH GREEN 914?

I am wondering how this will look. Or if anyone has done it before, which material would look "right" in an Irish Green 914.

Thank you in advance.

welcome.png

only thing i can offer to you is if you are not up to sewing these yourself the kits are available from www.914rubber.com, you might find some pictures of the green plaid on their site too.

welcome.png

i bought my kits from them and just did a second set of seats ,
lots of pictures on my instagram account drphils914 but also some here i posted on the thread "what did you do to your 914 today" http://www.914world.com/bbs2/index.php?sho...74&st=14220
good luck!
This is a "lo-fi" version of our main content. To view the full version with more information, formatting and images, please click here.
Invision Power Board © 2001-2024 Invision Power Services, Inc.