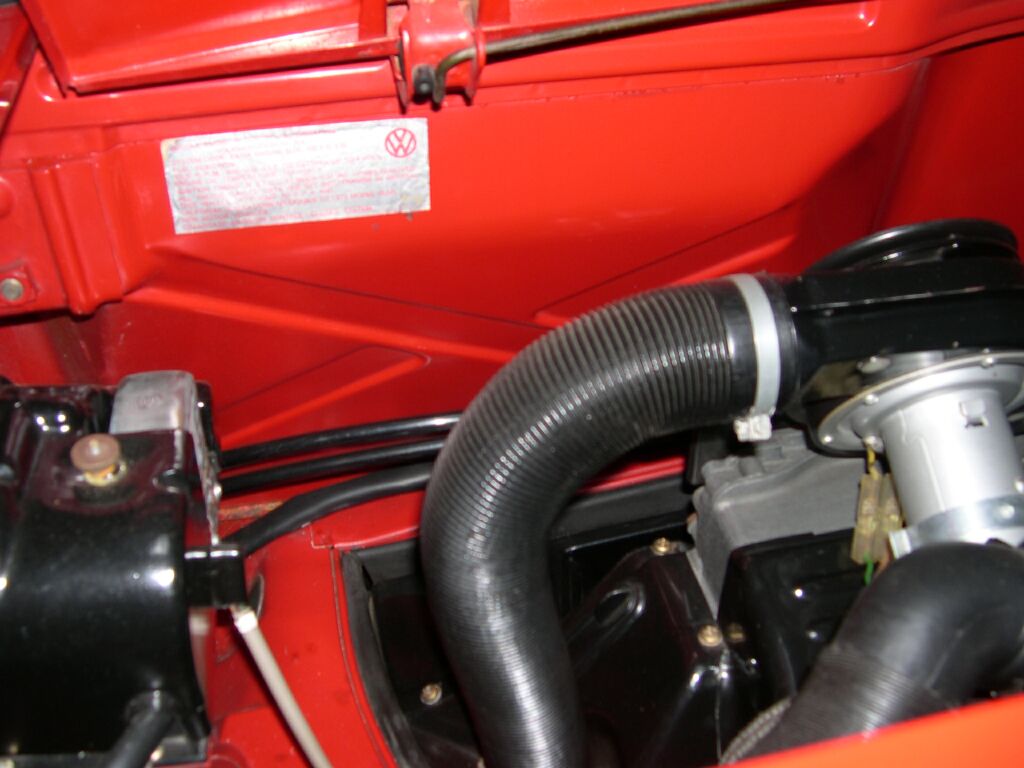
I put some new engine tin rubber seals all around. But things don't seem right. I'd think the lip of the engine tin would rest in the bottom lip of the rubber seal - making for a nice leak proof seal. Instead, mine looks like this:
Click to view attachment
The compartment deck and the engine tin are the same height.
The rubber is 2+ inches tall.
Engine tin lip is 1/2" above the rubber lip.
Full Version: engine tin rubber seal
Same issue on my car. I would think the factory would not have accepted that if it wasn't intentional. another 914 mystery
The rubber sags and the tin bends. Air flow should still be adequate.
That won't keep the dust and dirt out.
I have the seal laying on top of the engine tin.
I have the seal laying on top of the engine tin.
The engine tin should have a downward slant to it, not perpendicular to to shelf in other words. Your thinking is correct, it should fit into the lower lip of the seal.
the installation of the seal as illustrated is correct.
So which one is correct? The tin slanted downward or parallel to the shelf? Mine has a bunch of gaps too.
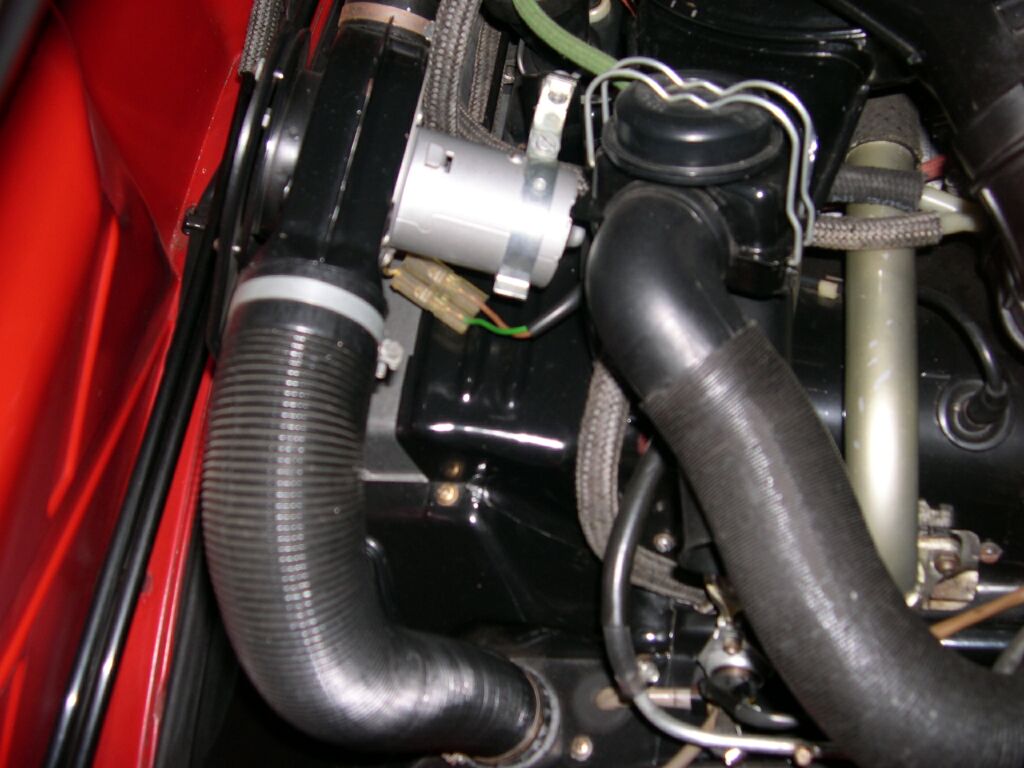
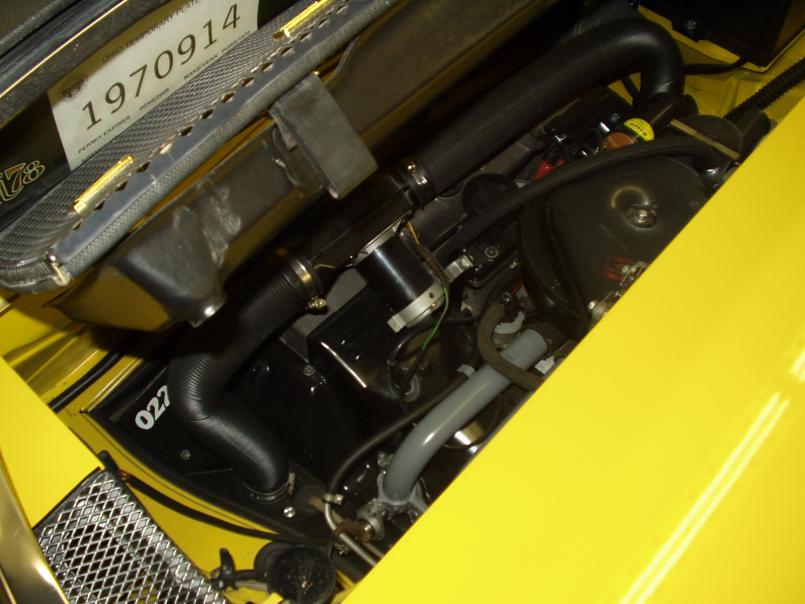
Here are a few pics from the engine bays" thread in the o&h forum. It looks like the tin should be down some from the shelf.
This is Pat Garvey's car, engine sitting quite low there.
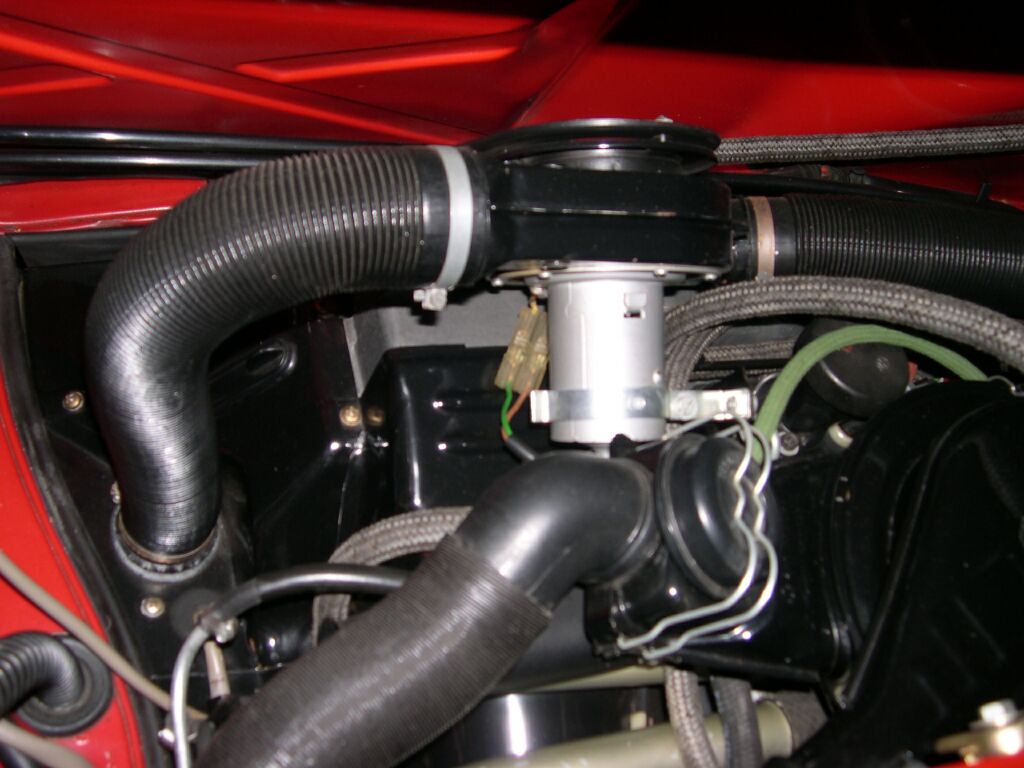
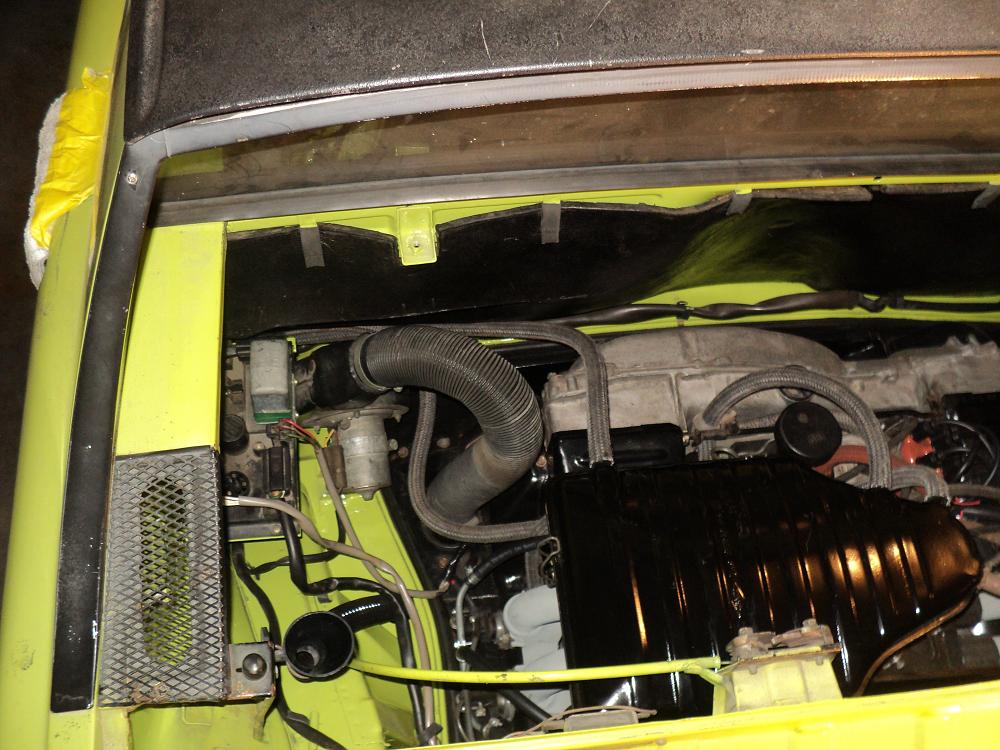
This one looks to be sitting a bit higher, like it would have the problem described above.
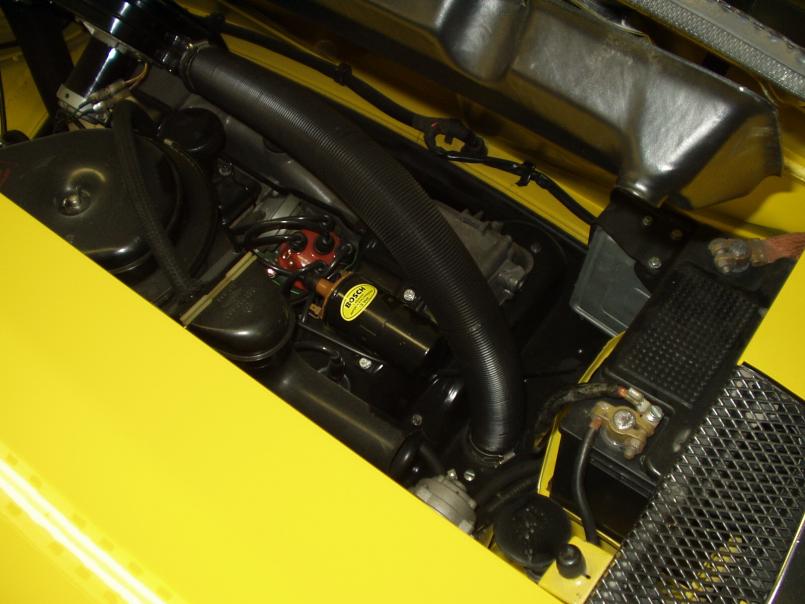
This one it looks like it is sitting down lower.
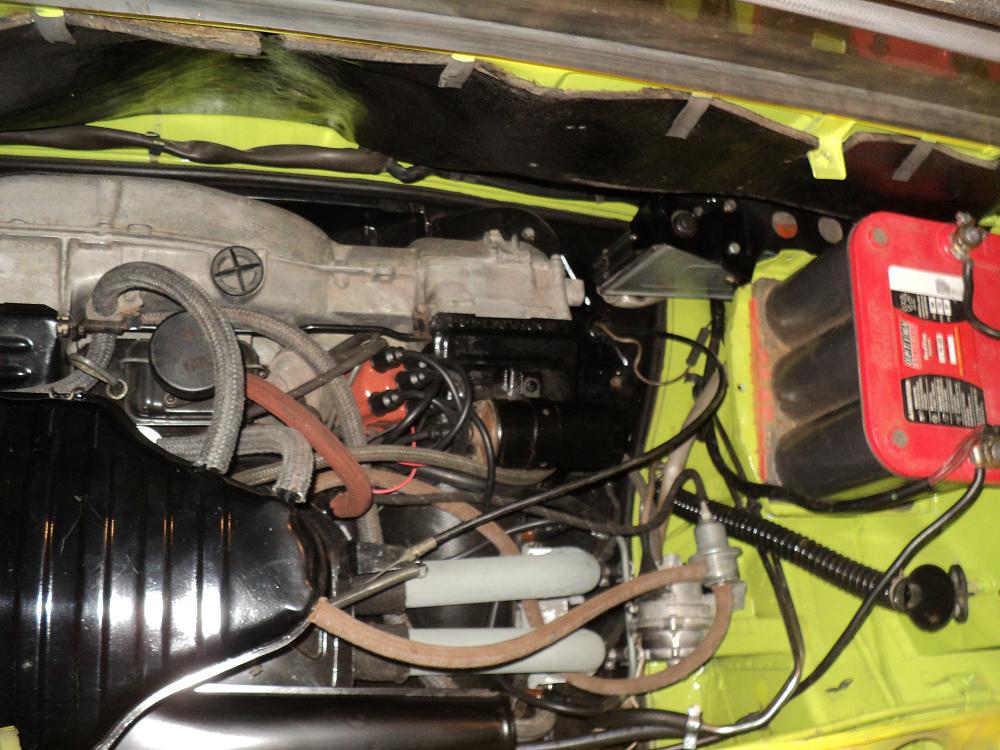
I'm thinking Pat's is right, but I wonder what adjustment there is for that ?
This is Pat Garvey's car, engine sitting quite low there.
This one looks to be sitting a bit higher, like it would have the problem described above.
This one it looks like it is sitting down lower.
I'm thinking Pat's is right, but I wonder what adjustment there is for that ?
Different tin? My 1.8 fit low and in the rubber but the 2.0 sits high. I took 3' foam pipe insulation, split it and inserted it in the gap to make a tighter seal. Looks ugly but seals the gap for low.
God I hate to be a Guinea Pig but I've got one good fit and one poor fit. Once it cools down (102 today) I'll compare and find the difference. Been meaning to do that anyway because it bugs the  out of me. But 1st a question for the those that know; are there any differences in Type 4 tin and could type 1 be incorrectly substituted? In other words I don't want to be chasing my tail.
out of me. But 1st a question for the those that know; are there any differences in Type 4 tin and could type 1 be incorrectly substituted? In other words I don't want to be chasing my tail.
QUOTE(76-914 @ Jul 11 2012, 01:50 PM) 
God I hate to be a Guinea Pig but I've got one good fit and one poor fit. Once it cools down (102 today) I'll compare and find the difference. Been meaning to do that anyway because it bugs the
out of me. But 1st a question for the those that know; are there any differences in Type 4 tin and could type 1 be incorrectly substituted? In other words I don't want to be chasing my tail. You mean like, bug tin? It's totally different.
I wonder if it is the late engine mount that makes it higher, as Pat's is a 72 with the early.
[quote name='nathansnathan' date='Jul 11 2012, 06:32 PM'
You mean like, bug tin? It's totally different.
I wonder if it is the late engine mount that makes it higher, as Pat's is a 72 with the early.
[/quote]
Wow, those all look GREAT compared to mine. I've got quite a bit of gap in several areas. The late engine mount is a distinct possibility, good call nathan.
The pics above - with the engine sitting lower is what I'd expect.
I have a 72 - converted to a side shifter. Conversion requires a different engine mount correct? Maybe conversion makes the engine sit higher?
I have a 72 - converted to a side shifter. Conversion requires a different engine mount correct? Maybe conversion makes the engine sit higher?
Are your new rubbers from Mikey914? His are not formed correctly, they hang straight down as opposed to the factory rubber which when new actually stands upward or at least parallel to the engine shelf. When tucked under the tins the factory rubber actually held some tension against the tins, that is until the rubber becomes old and heat cycled for 30+ years.
Oops hit add twice.
Mine are from Mark and they hang straight down. Wonder if there is a way to pin/screw/glue them to the tin then in several places?
If you cut the proper angles in the corners of Mark's seals and hog ring them together (like originally done) they fit correctly. The tins do angle down, not flat to the shelf.
My profiles are identical to the OEM ones. I went through many hours measuring and getting the radius and "hook" to match.
I suspect the problem you are looking at is a function of the mount. If the engine is higher, it will not engage under the tin like it was meant to. The rings on the edges will definately work to hold the edges together and eliminate some of the gap.
I would be most concerned with using an additional seal to take up the gap. While there is little chance it would be injested into the intake, there is a fan in the front that will suck it up and shread it. If that happens your airflow will be severly restricted and you could burn up the motor.
I'll help here any way I can, but I can guarantee you the profiles match OEM.
-Mark
[quote name='Mikey914' date='Jul 12 2012, 09:17 AM' post='1708178']
My profiles are identical to the OEM ones. I went through many hours measuring and getting the radius and "hook" to match.
I suspect the problem you are looking at is a function of the mount. If the engine is higher, it will not engage under the tin like it was meant to. The rings on the edges will definately work to hold the edges together and eliminate some of the gap.
I would be most concerned with using an additional seal to take up the gap. While there is little chance it would be injested into the intake, there is a fan in the front that will suck it up and shread it. If that happens your airflow will be severly restricted and you could burn up the motor.
I'll help here any way I can, but I can guarantee you the profiles match OEM.
-Mark
[/quote
I have Mark's seals.......they fit great.....after I had installed upside down the first time!
[quote name='914_teener' date='Jul 12 2012, 05:29 PM' post='1708433']
[quote name='Mikey914' date='Jul 12 2012, 09:17 AM' post='1708178']
My profiles are identical to the OEM ones. I went through many hours measuring and getting the radius and "hook" to match.
I suspect the problem you are looking at is a function of the mount. If the engine is higher, it will not engage under the tin like it was meant to. The rings on the edges will definately work to hold the edges together and eliminate some of the gap.
I would be most concerned with using an additional seal to take up the gap. While there is little chance it would be injested into the intake, there is a fan in the front that will suck it up and shread it. If that happens your airflow will be severly restricted and you could burn up the motor.
I'll help here any way I can, but I can guarantee you the profiles match OEM.
-Mark
[/quote
I have Mark's seals.......they fit great.....after I had installed upside down the first time!
[/quote]
If it makes you feel any better, I'm sure you are not the first.
Mark, I had no seals left to reference when I began, and its tough to see the "correct" way to install them via pics. I almost put mine in upside down too! Perhaps when I drop the engine again I'll take some pics for future reference 
On a side note, I guess I should try to push my tins down to see if I can get better fitmet, as well as hog-ring the ends. Great thread guys, thanks!
On a side note, I guess I should try to push my tins down to see if I can get better fitmet, as well as hog-ring the ends. Great thread guys, thanks!
40 year old engine tins are all beat to hell. most people forget to unhook the rubber before dropping the engine so they get pulled upward.
engine tin is below engine shelf
engine tin outer flange is not parallel to shelf. it should slant down
1st illustration in thread is incorrect
engine tin is below engine shelf
engine tin outer flange is not parallel to shelf. it should slant down
1st illustration in thread is incorrect
sean, don't you mean the engine tin aspect is incorrect and the seal install is right?
that is not what I mean but your statement is correct
the problem is teh tweaked engine tins
the problem is teh tweaked engine tins
This is a "lo-fi" version of our main content. To view the full version with more information, formatting and images, please click here.