Noodles
Mar 24 2013, 09:08 PM
So after slaving all day getting engine to run better than ever. Got valves adjusted right,hooked up new exhaust, found cause of miss fire (PO had cylinder 1 and two mixed up).
Go for a short drive and rocker arm bolts back out again on cylinder 4!!!! This is the third time this has happened and I really am at a loss of what would cause this. First time I torqued down to spec and this time I tightened as hard as I could. This last time the valve adjust screw was way backed out and the nut that goes on it also came off.
Happens very fast, I drove maybe half a mile before I could tell it happened again. Getting very discouraged...
messix
Mar 24 2013, 09:32 PM
sounds like the stud is pulling out
Elliot Cannon
Mar 24 2013, 09:50 PM
QUOTE(messix @ Mar 24 2013, 08:32 PM)

sounds like the stud is pulling out
Especially if you "tightened it as tight as you could".
Mark Henry
Mar 25 2013, 04:59 AM
Studs or nuts? Studs are 10mm you'd have to be a freaking gorilla to strip them out. My guess is you stripped the 7mm nut or the 7mm thread.
You would have to find a good set of studs from an old head. Do not over torque them.
wndsnd
Mar 25 2013, 05:14 AM
I fuched up a good head by reading the spec for a type 1 which uses only two bolts and torques to 18 ft pounds. Ours uses four studs and only torques to 10 fft lbs.
I bet. I am not the only one that makes this mistake. Head neads to be pulled and time certs. Installed for studs.
You. Can't have those arms floating arou nd.
John
nathansnathan
Mar 25 2013, 07:04 AM
The torque spec is wrong in the Tom Wilson book - It is like right in the caption for the pic, but wrong in the paragraphs below - or the opposite, can't remember. The lower figure is what to use.
Heavy duty rocker studs are a good upgrade there, as the 7mm step studs always seem to be on the verge of stripping.
rudedude
Mar 25 2013, 07:04 AM
Are you sure it has the 7mm nuts?
With solid spacers is there enough play for the arms?
Are those the 8mm upgraded studs?
Noodles
Mar 25 2013, 10:00 AM
I'm not sure what's on there now. Was told from PO that it was rebuilt up to a 2.0 and not sure what was all done. I have been using different size wrenches than what the haynes manual says to use. It has been bigger, think 14mm wrench on valve adjust nuts and maybe 11mm on the rocker arm nuts.
When I said tightened hard as I could it was with a 2.5 inch long ratchet so I could'nt have gotten to tight as there is no leverage, specially in the tight quarters.
If I remember right it was like 13 pounds of tourque, I went off of the haynes manual.
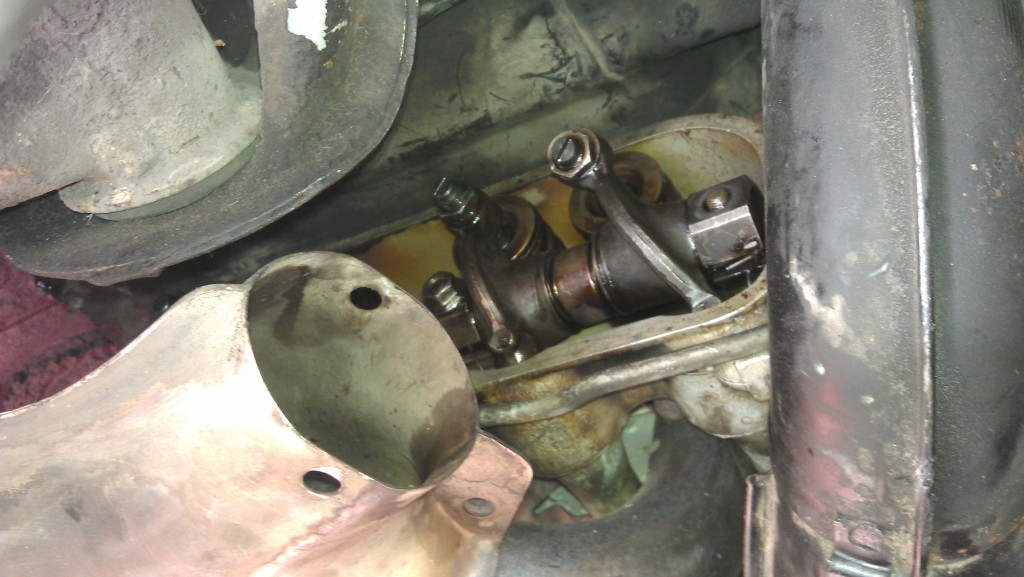
Would it be ok to use loc-tite? I don't believe anything is stripped out, and the stud don't look to be out any further than the other ones. When I get home from work I'll try and get a picture of what it looks like this time. That pic is from the first time it came off.
I'm a pretty big newbie so I'm sorry for all my ignorance.
skeates
Mar 25 2013, 10:30 AM
In the top picture it looks like the left rocker-arm nut is not fully threaded onto the stud. Was it loose too? This may sound like a stupid question, but are you sure that there is nothing behind the rocker-arms preventing them from seating all the way in the first place? If everything is seating correctly when you torque things down then I would agree that the stud is the likely culprit.
I've never dealt with this issue before, but you might consider pulling off the rocker arm and inspecting the base of the stud in question. I imagine that you'd see some shiny (less oil stained) metal at the base if the stud was pulling out.
messix
Mar 25 2013, 10:47 AM
All it takes is just a few thou of pull out for the tension on the nut to be released then it will back off from vibration.
flash914
Mar 25 2013, 11:08 AM
Try to get nylock nuts? Gordon
Mark Henry
Mar 25 2013, 11:34 AM
Hmmm...solid spacers... Hydraulic lifters? They run at Zero lash.
If you are adjusting them to .006 might have something to do with the issue.
BTW if it is Hydraulic lifters you most likely have a low CR bus engine.
rjames
Mar 25 2013, 12:08 PM
QUOTE(Mark Henry @ Mar 25 2013, 10:34 AM)
BTW if it is Hydraulic lifters you most likely have a low CR bus engine.
Not necessarily. He said he had a rebuilt engine. With my car the PO rebuilt the 2.0 engine with hydraulic lifters. I think several people back in the day thought this to be an 'upgrade' when it came time for a rebuild.
Dave_Darling
Mar 25 2013, 01:10 PM
QUOTE(Noodles @ Mar 25 2013, 09:00 AM)
It has been bigger, think 14mm wrench on valve adjust nuts and maybe 11mm on the rocker arm nuts.
Those are stock for a 73+ car.
QUOTE
If I remember right it was like 13 pounds of tourque, I went off of the haynes manual.
10 lb-ft. Only 10. Done with the rockers having slack, because you can't even get the shaft to seat against the head if you have one of the rocker arms holding a valve open against the spring. So set the cylinder at TDC and the torque to 10 lb-ft.
--DD
Noodles
Mar 25 2013, 01:35 PM
QUOTE(Dave_Darling @ Mar 25 2013, 12:10 PM)
QUOTE(Noodles @ Mar 25 2013, 09:00 AM)
It has been bigger, think 14mm wrench on valve adjust nuts and maybe 11mm on the rocker arm nuts.
Those are stock for a 73+ car.
QUOTE
If I remember right it was like 13 pounds of tourque, I went off of the haynes manual.
10 lb-ft. Only 10. Done with the rockers having slack, because you can't even get the shaft to seat against the head if you have one of the rocker arms holding a valve open against the spring. So set the cylinder at TDC and the torque to 10 lb-ft.
--DD
OH! I think your on to something on why it backed out again. I torqued down when the rotor was pointing at cylinder 4. I didnt even think about any of the valves being open and rocker arms not seating fully.
Going to dig into it again soon as I get home, I feel hope again!!!
Thanks so much for all the advice everyone! I would be lost without this place.
VaccaRabite
Mar 25 2013, 01:48 PM
Dave is spot on.
Both valves need to be closed or you will never get proper torque on the rockers.
Zach
worn
Mar 25 2013, 01:48 PM
QUOTE(Noodles @ Mar 24 2013, 07:08 PM)
So after slaving all day getting engine to run better than ever. Got valves adjusted right,hooked up new exhaust, found cause of miss fire (PO had cylinder 1 and two mixed up).
Go for a short drive and rocker arm bolts back out again on cylinder 4!!!! This is the third time this has happened and I really am at a loss of what would cause this. First time I torqued down to spec and this time I tightened as hard as I could. This last time the valve adjust screw was way backed out and the nut that goes on it also came off.
Happens very fast, I drove maybe half a mile before I could tell it happened again. Getting very discouraged...
Well I had a set of these rockers staring at me yesterday and I think that: Yes, you can strip the stud out of the head. But, I also know that if the stud is too far down and you don't have the nut engaged fully - as it looks to be for you - you can strip the nut right off. I was scared spitless that I had pulled the stud, but it was just the nut that was shot. Looking at the pedestal I would bet also they are up on shims at least some. Good luck!
sixnotfour
Mar 25 2013, 03:43 PM
I don't know pushrods,, but that adjuster is way different than the one to the left of it.. in terms of where its at thread exposed compared to each other.Why ??
Bartlett 914
Mar 25 2013, 04:04 PM
At least 2 reply's have stated that you must tighten the rocker assembly with THAT cylinder at top dead center. Have you done this? It looks like you haven't. Both rockers must be loose before and after tightening the rocker assembly. Otherwise any torque readings are useless.
Noodles
Mar 25 2013, 04:31 PM
QUOTE
QUOTE(sixnotfour @ Mar 25 2013, 02:43 PM)
I don't know pushrods,, but that adjuster is way different than the one to the left of it.. in terms of where its at thread exposed compared to each other.Why ??
At least 2 reply's have stated that you must tighten the rocker assembly with THAT cylinder at top dead center. Have you done this? It looks like you haven't. Both rockers must be loose before and after tightening the rocker assembly. Otherwise any torque readings are useless.
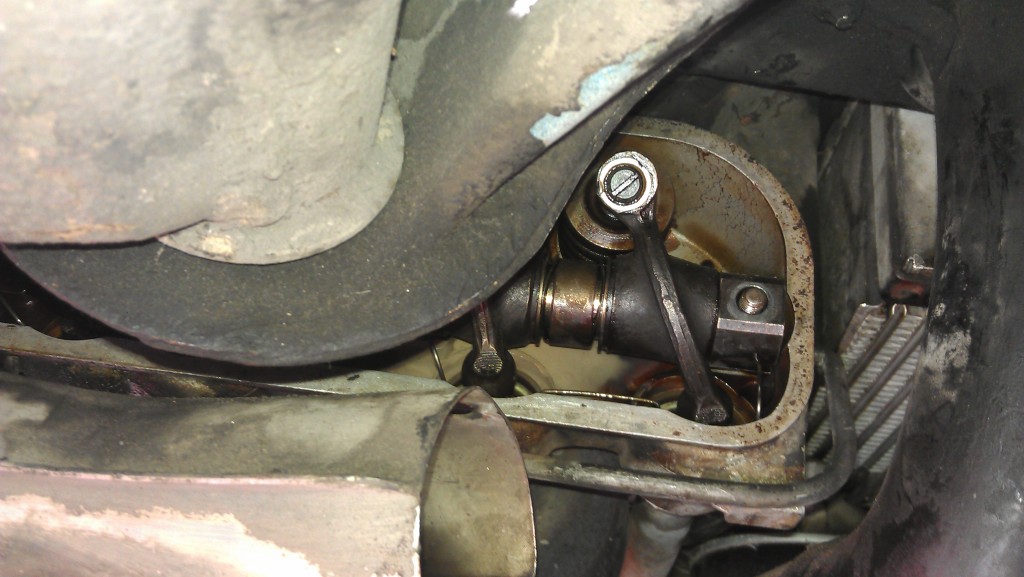
When the nut was all the way out I could move the rocker arm. Pulled it back a bit to get a better pic.
Still at work so I havent done anything yet. I had it at top dead center for cylinder 4 when I torqued it the first time. Is that the correct way of doing it?
From reading dave darlings post I was thinking I need to have it at TDC for cylinder 1 so both valves would be closed so the rocker arm assembly would be against the head.
markyb
Mar 25 2013, 04:43 PM
I have a box of wave lock washers for use under the nuts. being thin, they give you plenty of visible thread vs. split lock washers. if you'd like a set let me know, I'll send them in the mail. it took me a while to find them, and I bought a box of 100!
markyb
Mar 25 2013, 04:50 PM
I can't tell by your pics, although it looks like you aren't using any lock washers, wavy ones were standard equipment on those studs...
I can't remember the official name for them, maybe Miller washers?
Noodles
Mar 25 2013, 05:05 PM
QUOTE(markyb @ Mar 25 2013, 03:43 PM)
I have a box of wave lock washers for use under the nuts. being thin, they give you plenty of visible thread vs. split lock washers. if you'd like a set let me know, I'll send them in the mail. it took me a while to find them, and I bought a box of 100!
Ah thx for the offer but I got a bunch of them. Dealership I work at has porsche also so I got like 20 of them for 3 cents each. The markup for porsche parts is insane!! Even worse than Mercedes.
euro911
Mar 25 2013, 05:14 PM
Back off all of the rocker arm adjusters when installing the assembly. Torque the assembly to spec, then adjust the rocker arms. Don't try to short cut the job.
TheCabinetmaker
Mar 25 2013, 05:32 PM
Mark nailed it. That's the only way to do it. Eliminate all confusion.
r_towle
Mar 25 2013, 05:39 PM
to my weak and feeble mind, your valve adjustments do NOT look right.
rich
Dave_Darling
Mar 25 2013, 09:31 PM
QUOTE(Noodles @ Mar 25 2013, 03:31 PM)
From reading dave darlings post I was thinking I need to have it at TDC for cylinder 1 so both valves would be closed so the rocker arm assembly would be against the head.
Have it at TDC for whatever cylinder you are putting the rocker shaft onto. If that's #1, then have it at TDC#1. If you're putting it on #4, have it at TDC#4. The whole point is that both rocker arms must have slack on them so you can torque the nuts correctly.
--DD
ThePaintedMan
Mar 25 2013, 10:09 PM
QUOTE(Dave_Darling @ Mar 25 2013, 11:31 PM)
QUOTE(Noodles @ Mar 25 2013, 03:31 PM)
From reading dave darlings post I was thinking I need to have it at TDC for cylinder 1 so both valves would be closed so the rocker arm assembly would be against the head.
Have it at TDC for whatever cylinder you are putting the rocker shaft onto. If that's #1, then have it at TDC#1. If you're putting it on #4, have it at TDC#4. The whole point is that both rocker arms must have slack on them so you can torque the nuts correctly.
--DD
Yup, hopefully this does the trick for you. And then you'll know exactly how to replace the pushrod tube seals too when the time comes. Very similar process. Let us know how it goes... all hope may not be lost yet, be positive!

Noodles
Mar 27 2013, 05:21 PM
Got it back together again and started up smooth as silk! Just got to wait for the sun to come back again to go for a test drive!
Thanks again for all the advice! Hopeing I got it right this time.
NORD
Mar 27 2013, 06:17 PM
Noodles; see Kelty360's thread about going away party. Come join us.
Learn by just hanging out with 914 people.

Noodles
Mar 28 2013, 04:47 PM
QUOTE(NORD @ Mar 27 2013, 05:17 PM)
Noodles; see Kelty360's thread about going away party. Come join us.
Learn by just hanging out with 914 people.
I would love to be there but stuck doing family stuff. If I can think of a good enough excuse I'll make my way but the wrath of a wife can be vicious!
This is a "lo-fi" version of our main content. To view the full version with more information, formatting and images, please
click here.