New to this forum but I've been around 944s, 924Ss, Boxster and Cayman forums for years.
This one is going to take some time. Purchased for $900, non-running but otherwise complete '73 914 2.0. Certainly just beyond a viable restoration car but probably okay for what I plan to do with it. Here's some highlights of the tear down...
On the trailer going to the house.
Full Version: Rusty bucket into Solo toy
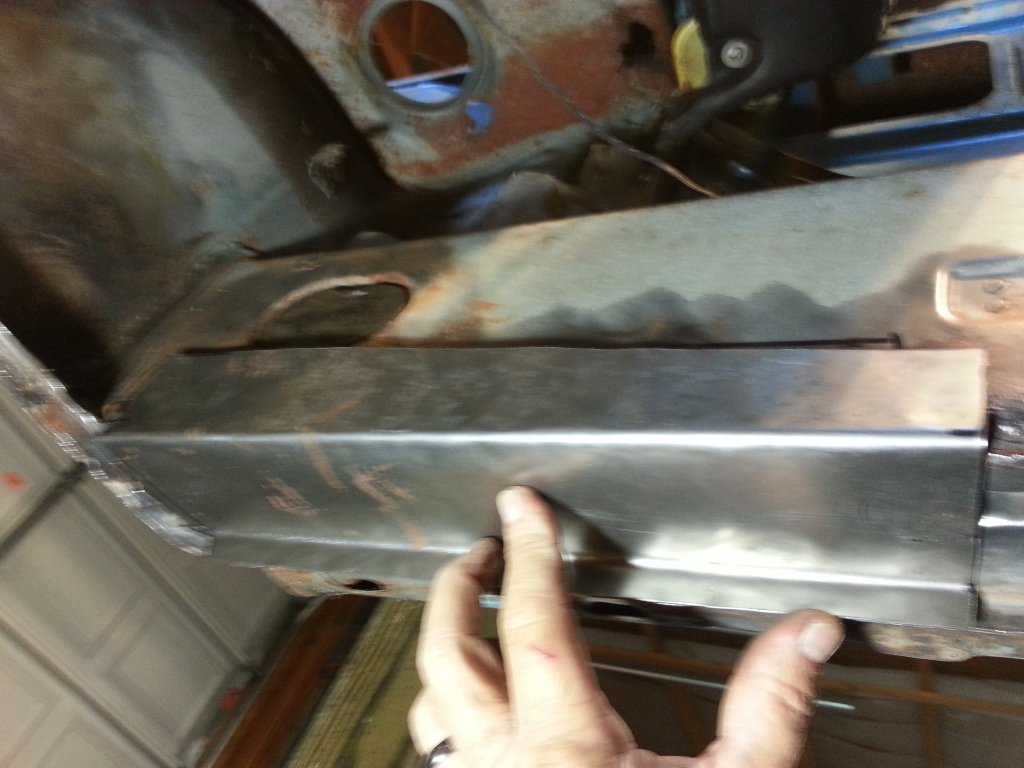
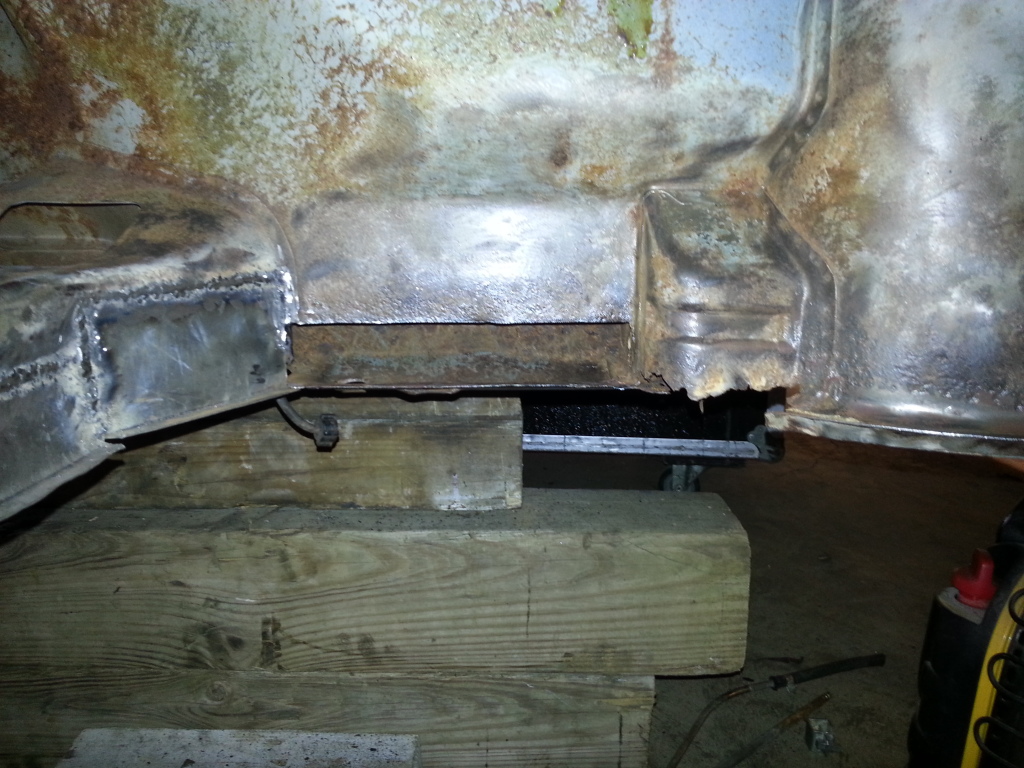
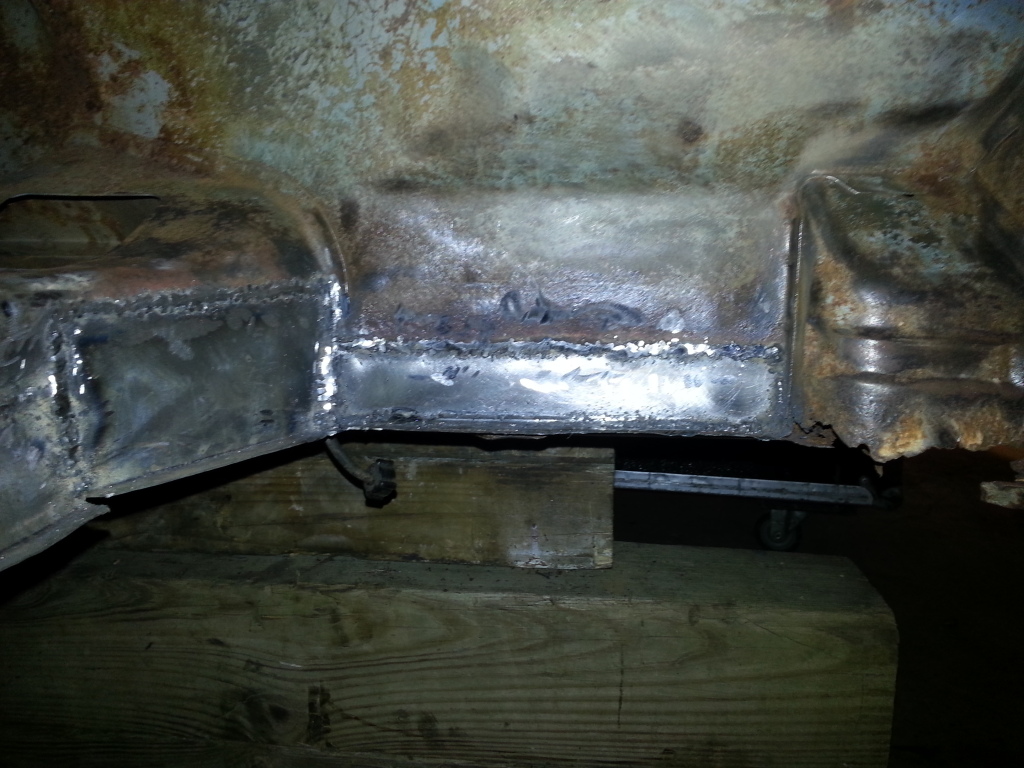
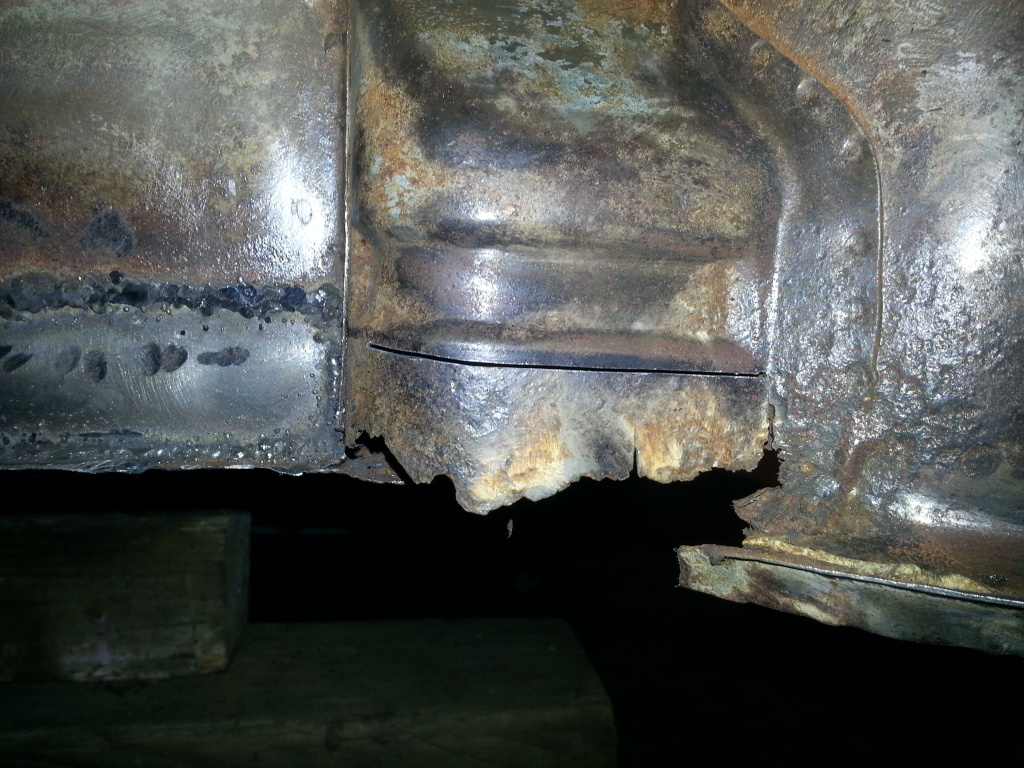
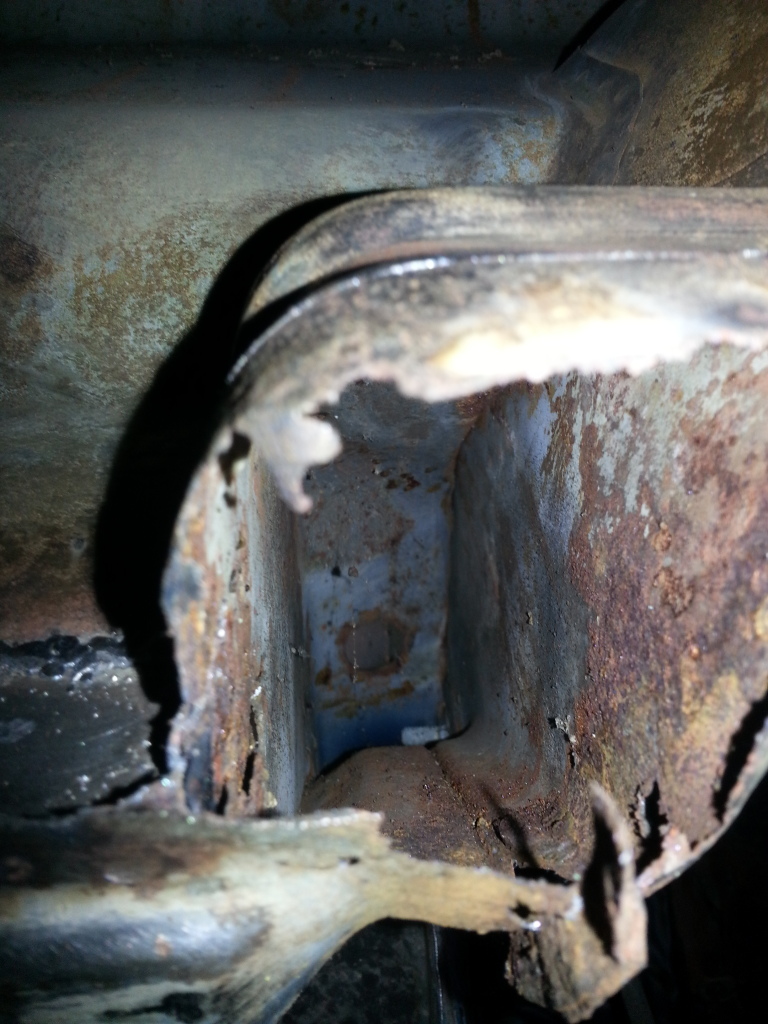
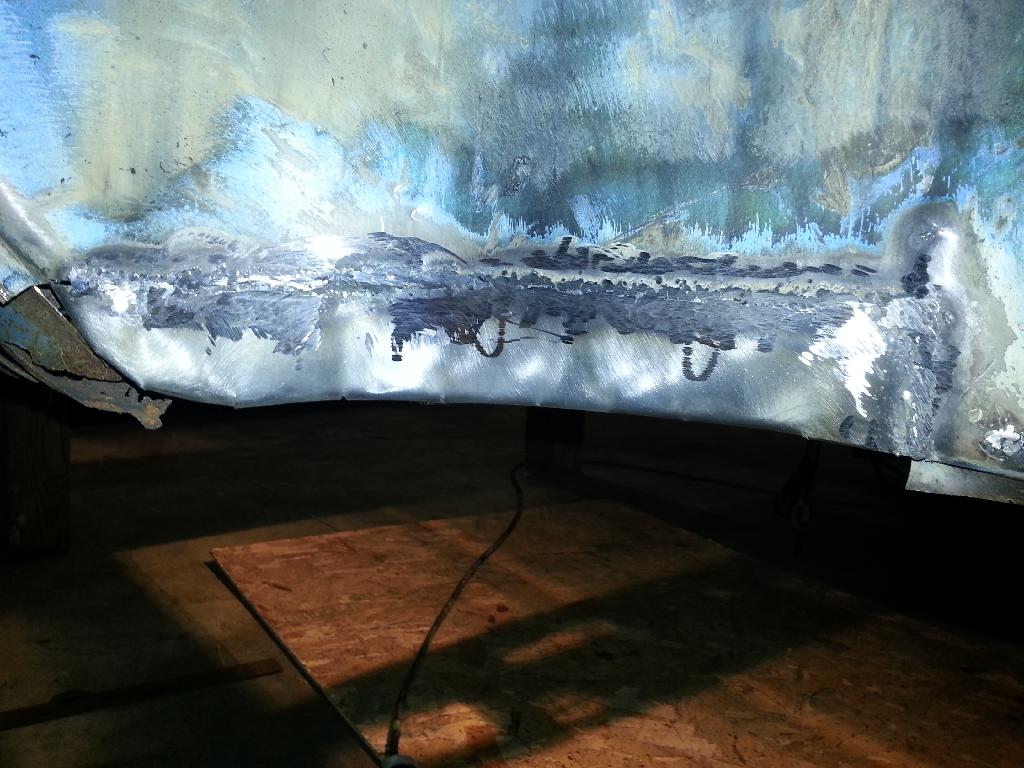
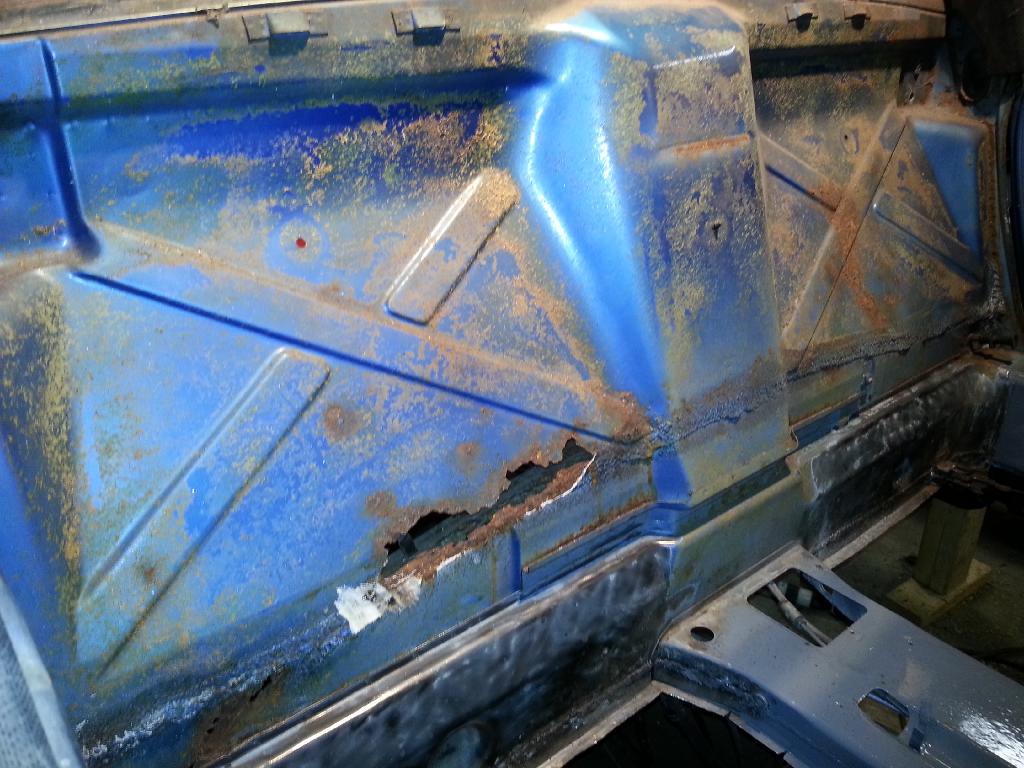
The front pan is just a tad rusty.
I've seen worse interiors but there's ants and a scorpion loose in there.
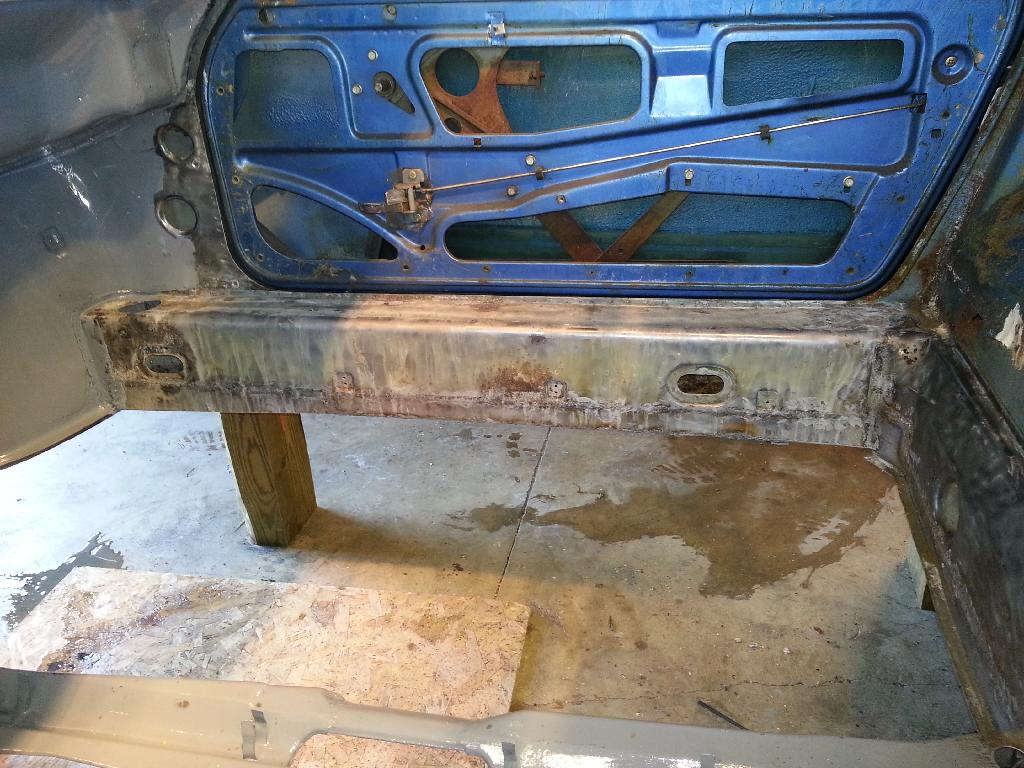
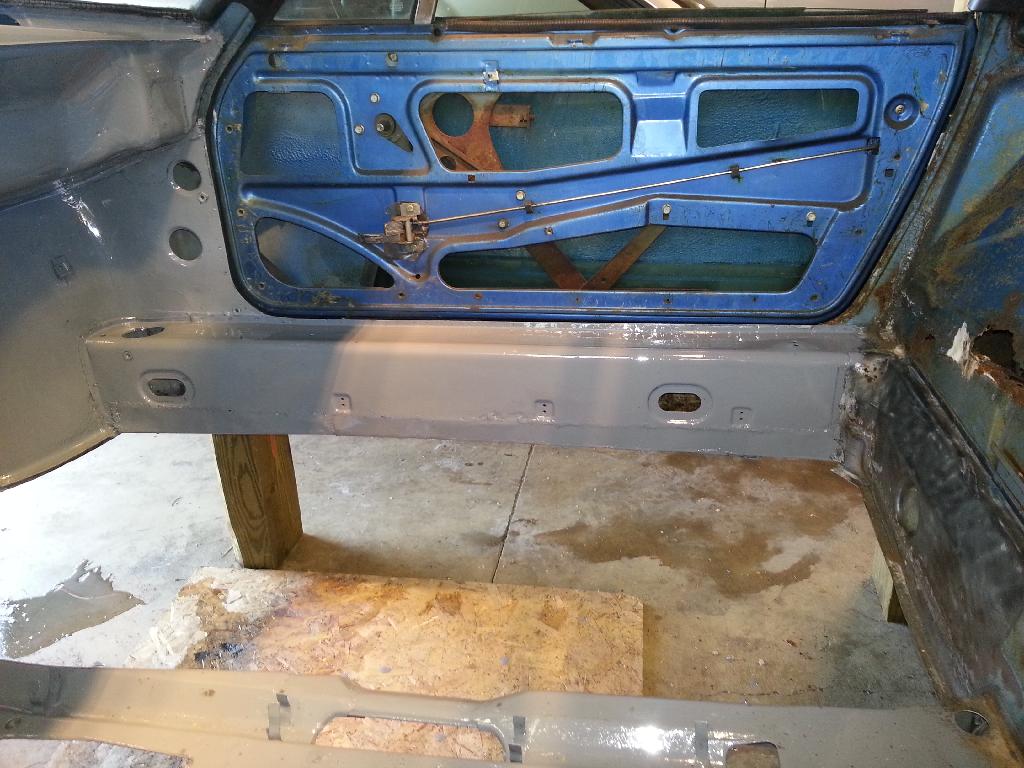
Floor pans are a little rough too.
There's daylight under those peddles.
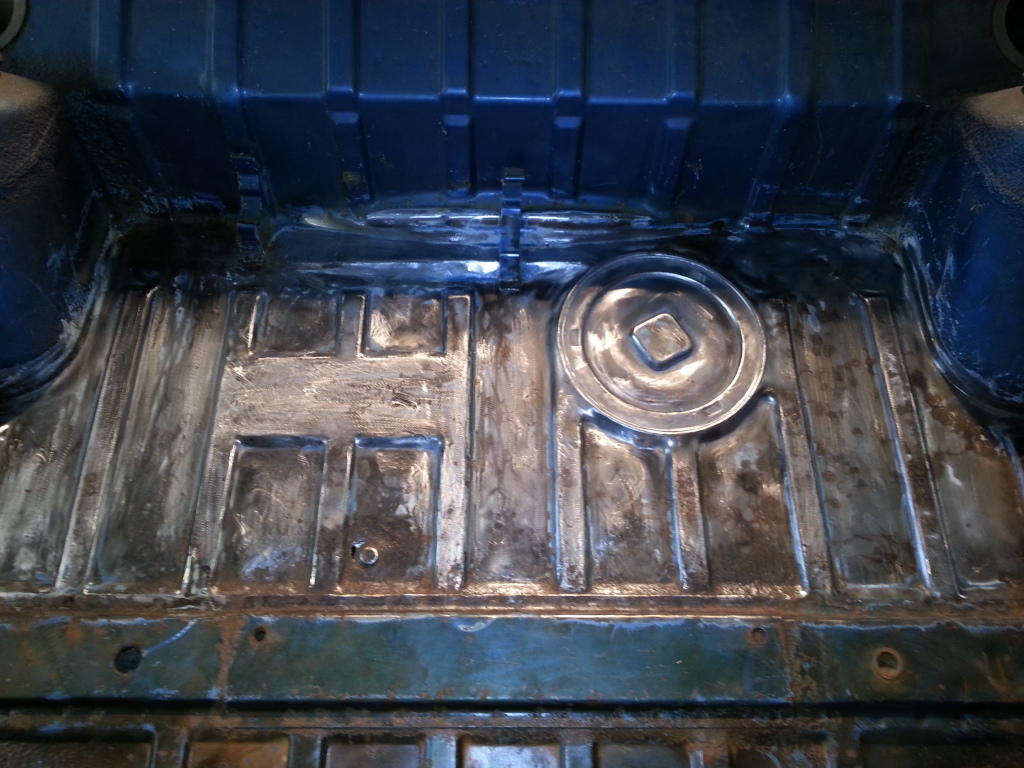
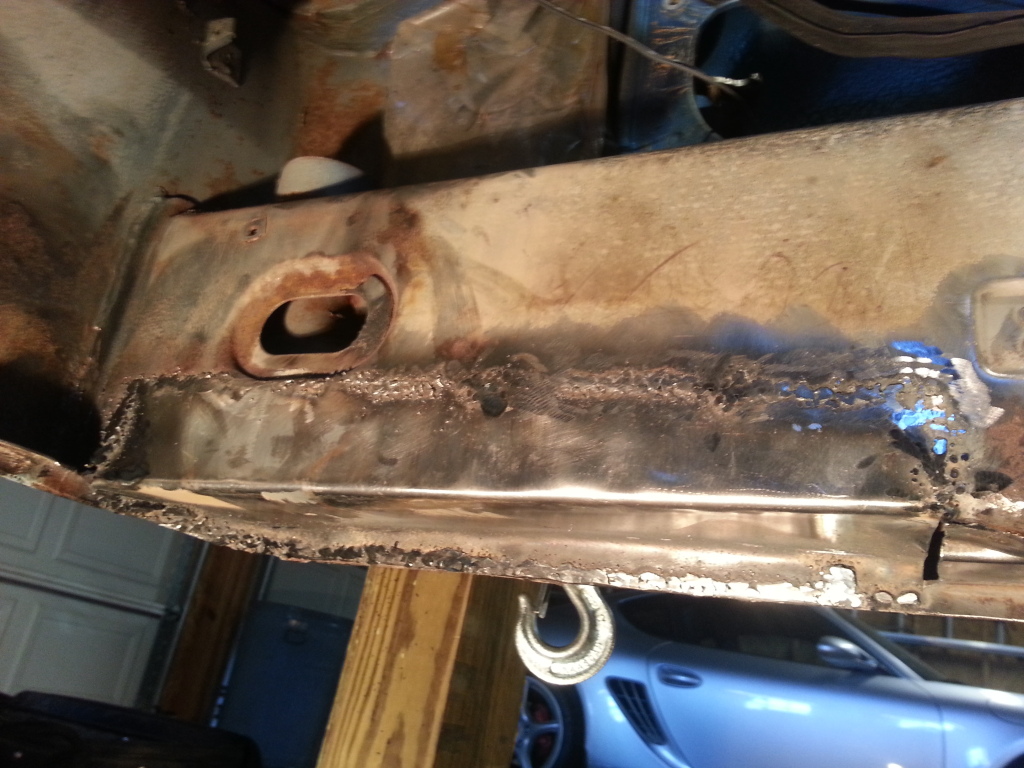
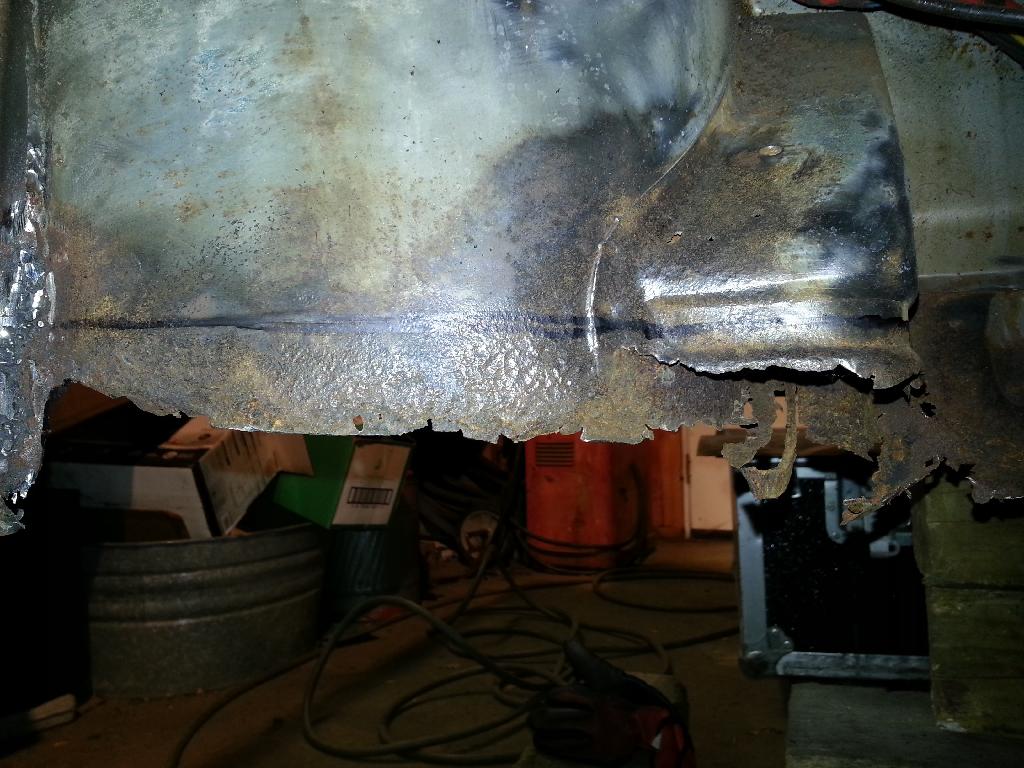
Rear trunk pan is toast also.
My hillbilly car lift before dropping the engine and transmission.
I got over my fear of spiders while dropping this. They are everywhere in this car and it appears there's quite a few food sources for them too.
And now it gets really ugly. Seller showed me he could turn the crank ALMOST all the way around. I found out why...
QUOTE(Han Solo @ Sep 30 2013, 11:58 AM) 
And now it gets really ugly. Seller showed me he could turn the crank ALMOST all the way around. I found out why...


![popcorn[1].gif](http://www.914world.com/bbs2/style_emoticons/default/popcorn[1].gif)
I vote for tube-frame ...

QUOTE(SirAndy @ Oct 1 2013, 12:37 PM)
I vote for tube-frame ...
It may come to that someday Andy

Meanwhile this is a great project for welding practice. I figure by the time I get all the pans replaced... I should be pretty good

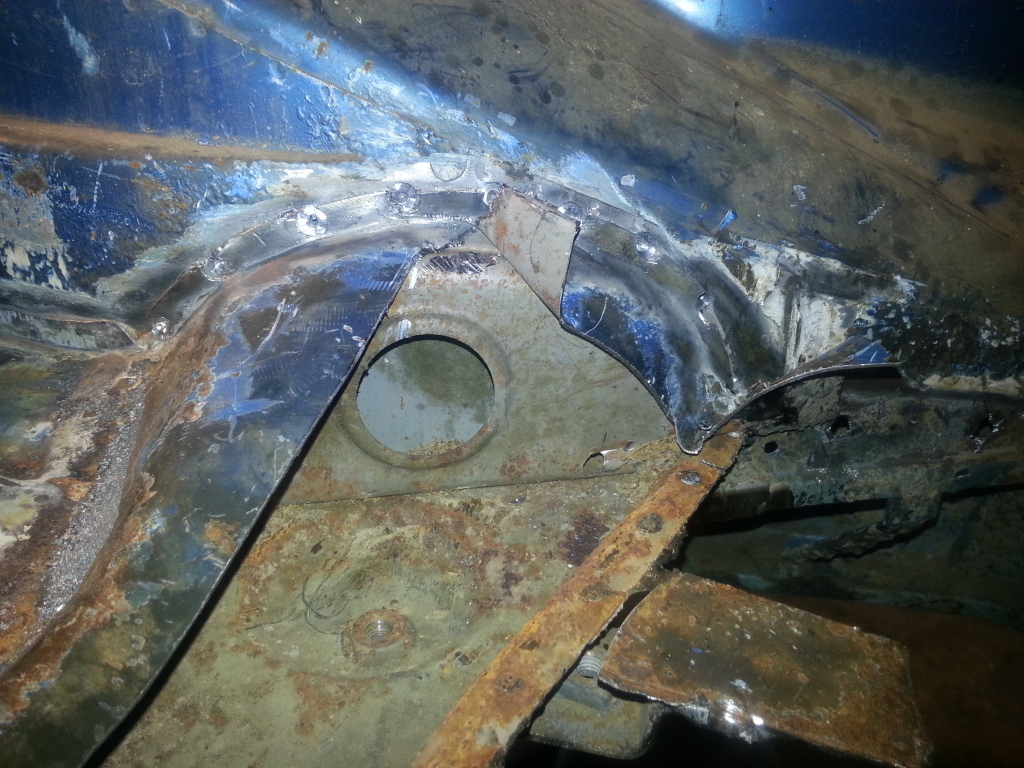
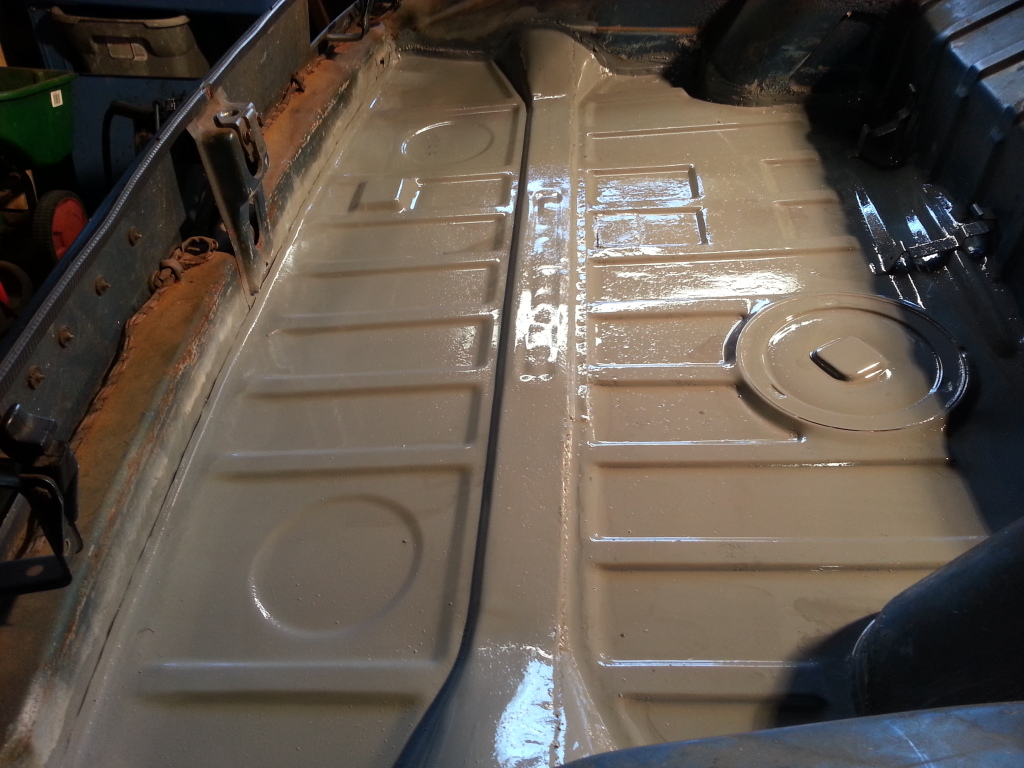
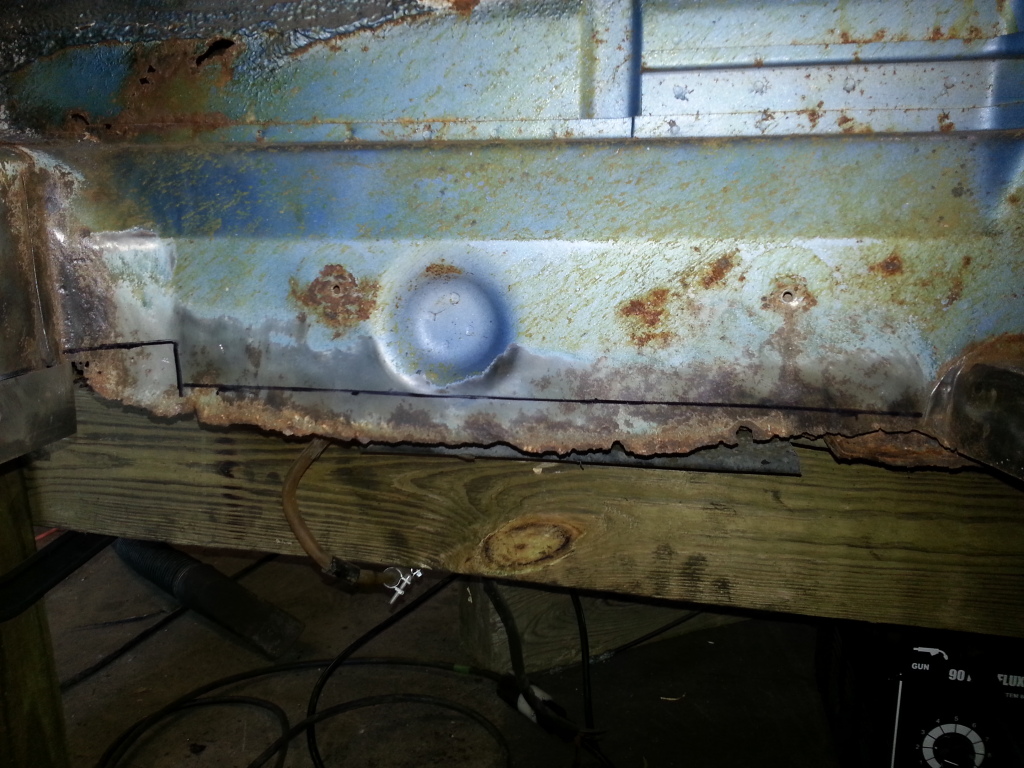
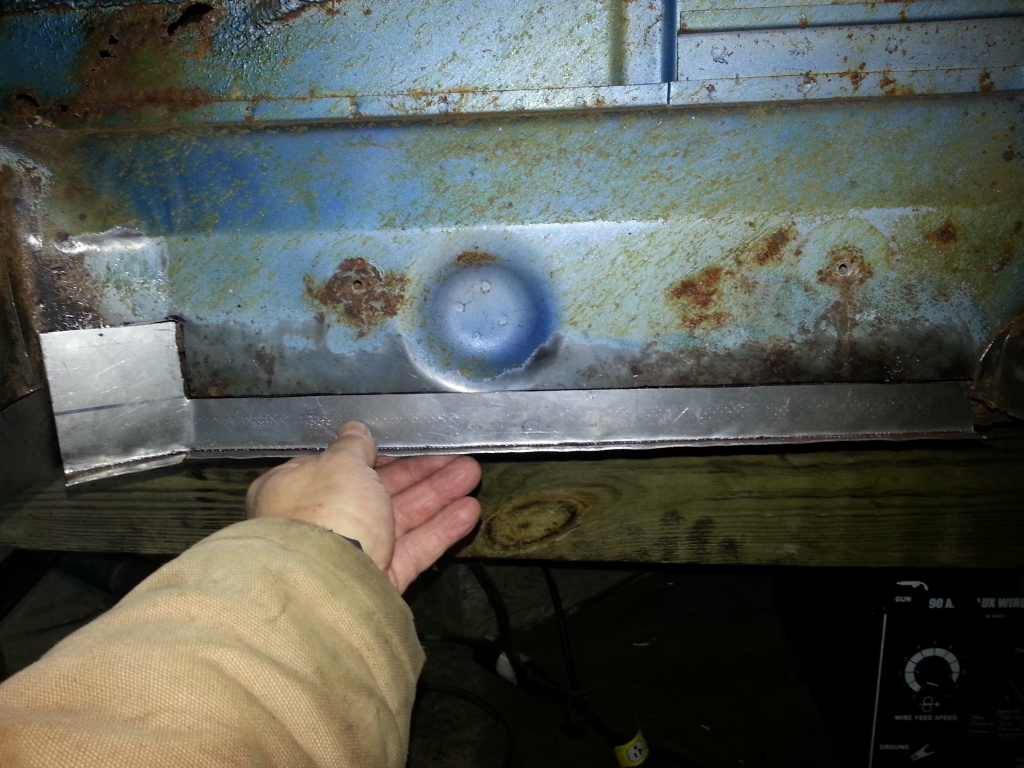
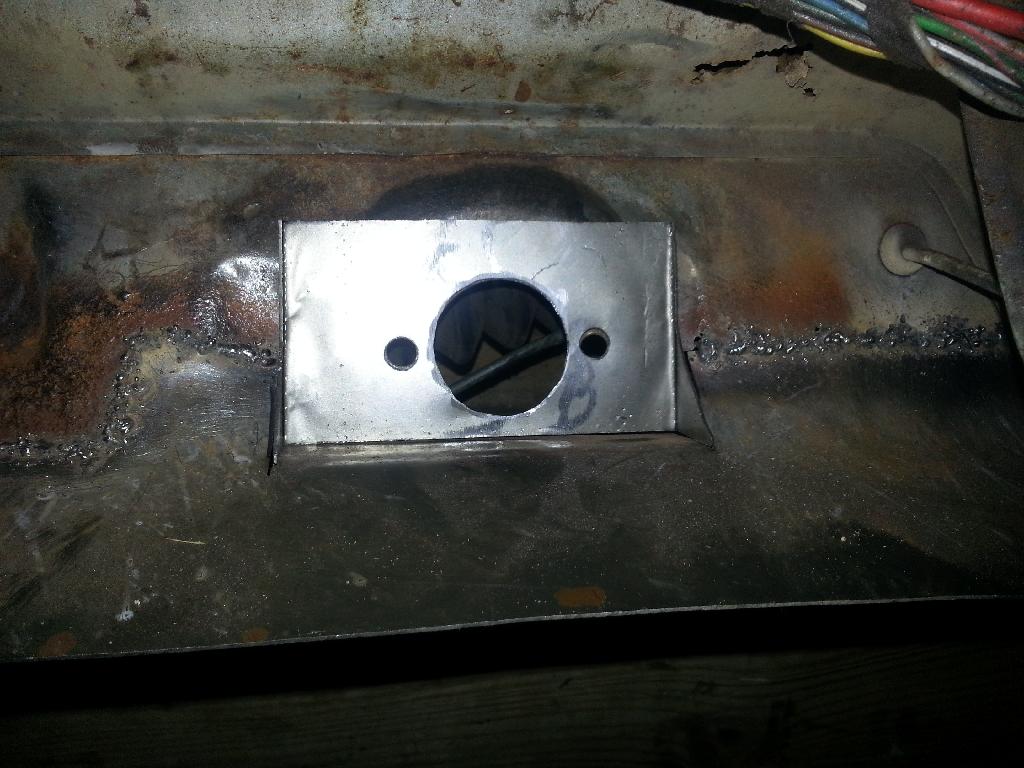
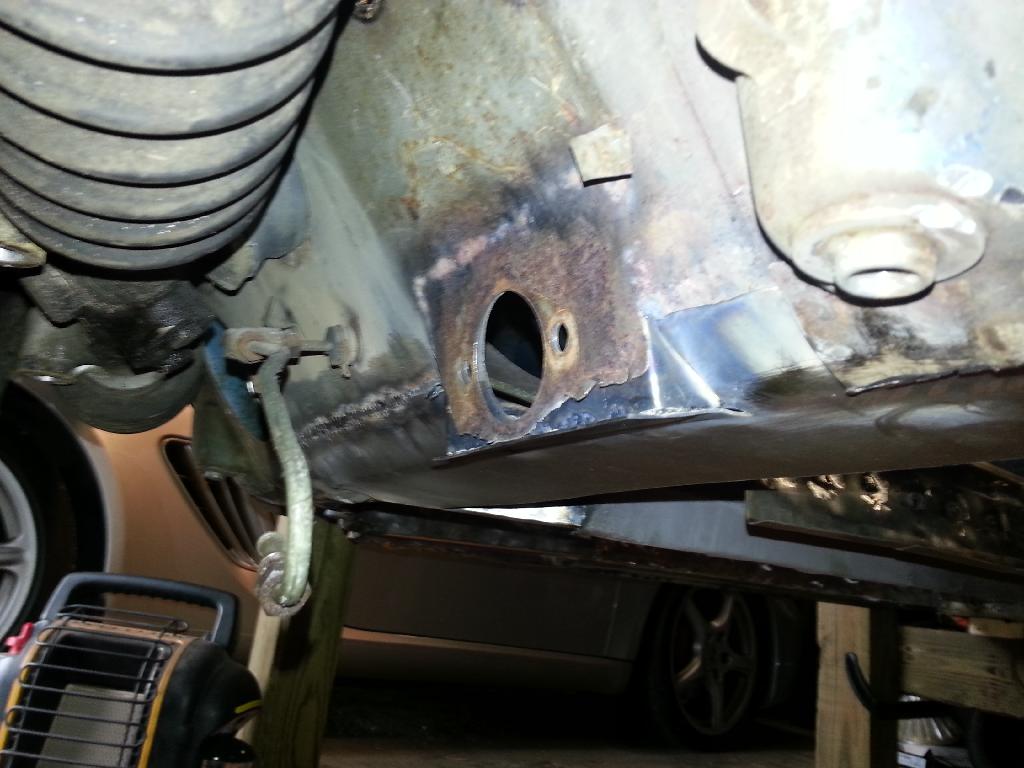
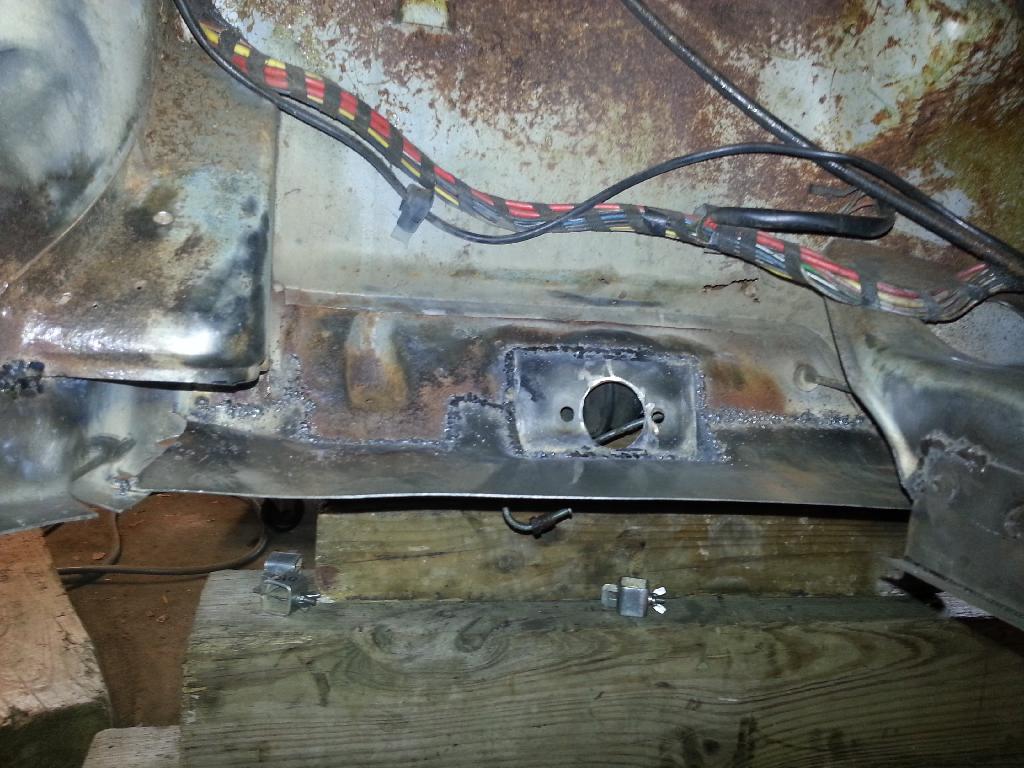
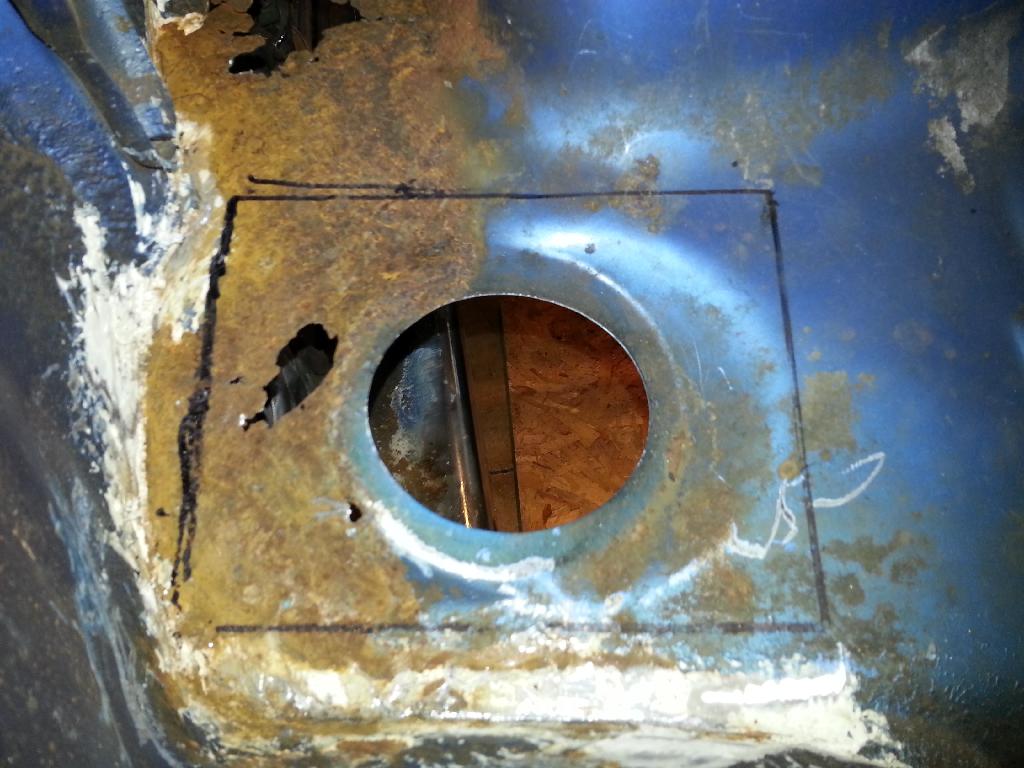
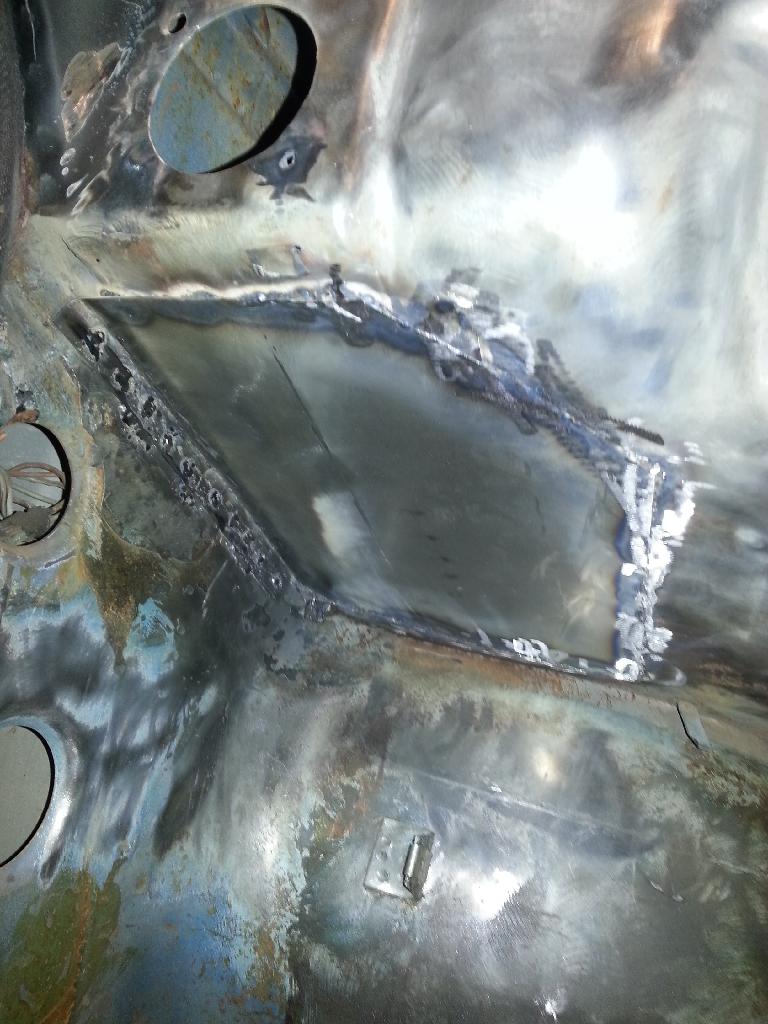
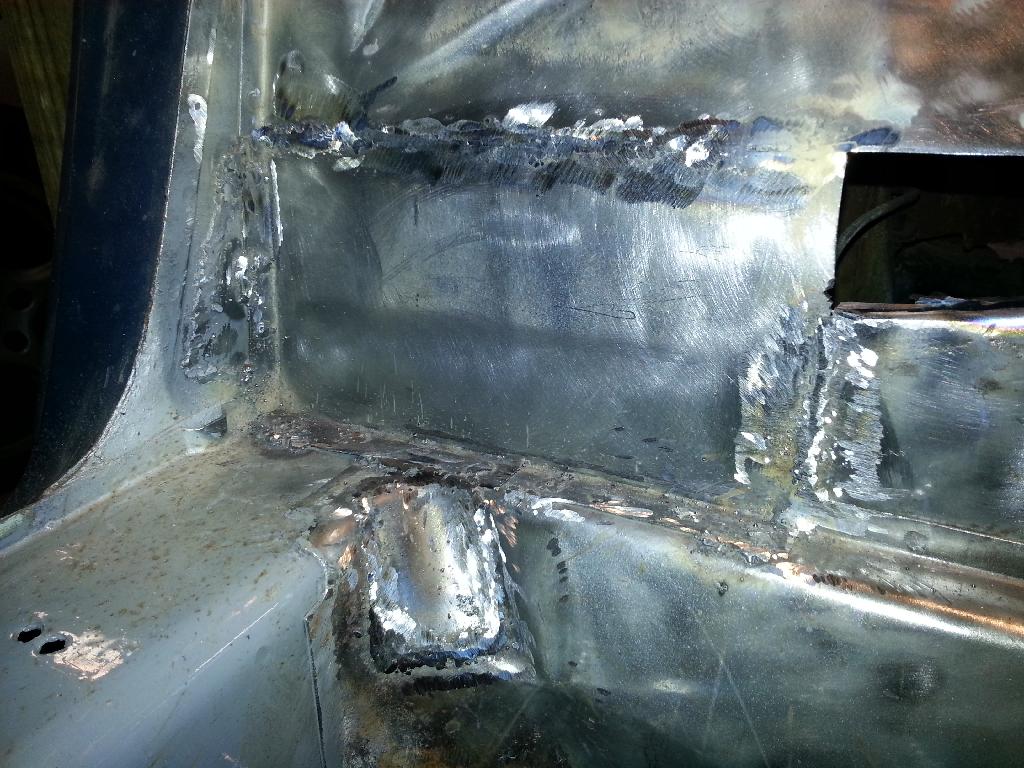
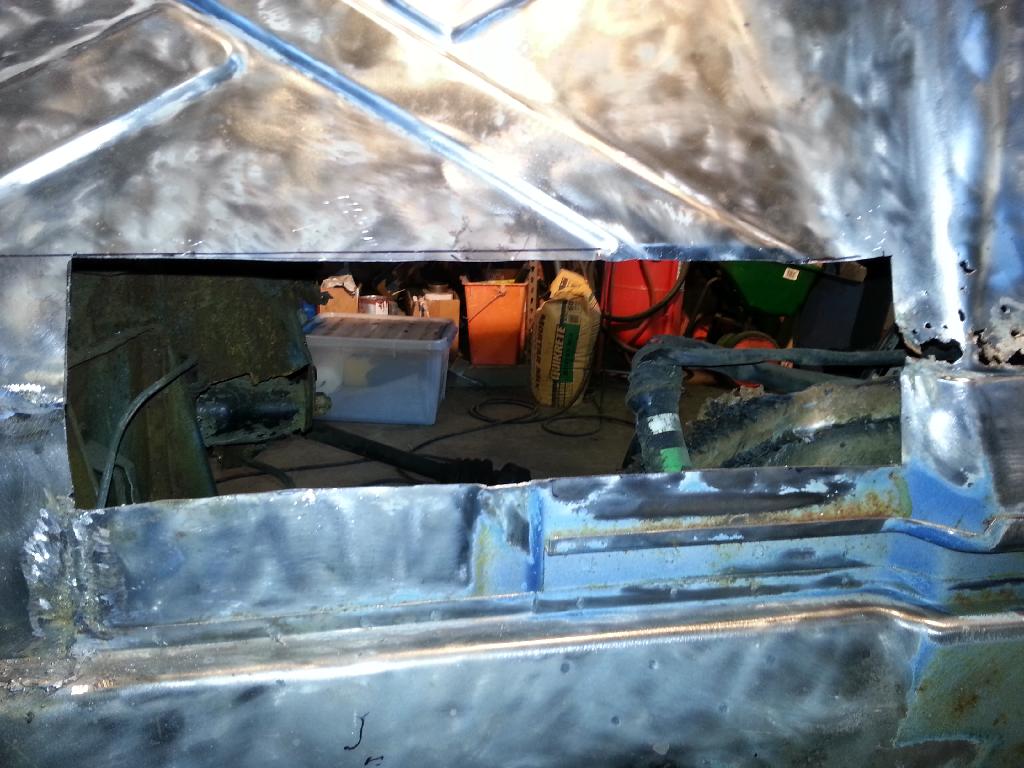
Pulled the fuel tank yesterday. More rust around the air ducts but otherwise not too bad. The tank has some residue but appears to be solid and without leaks. I'll use it until I get a fuel cell.
fuel tank compartment1
fuel tank compartment2
fuel tank compartment3
fuel tank compartment4
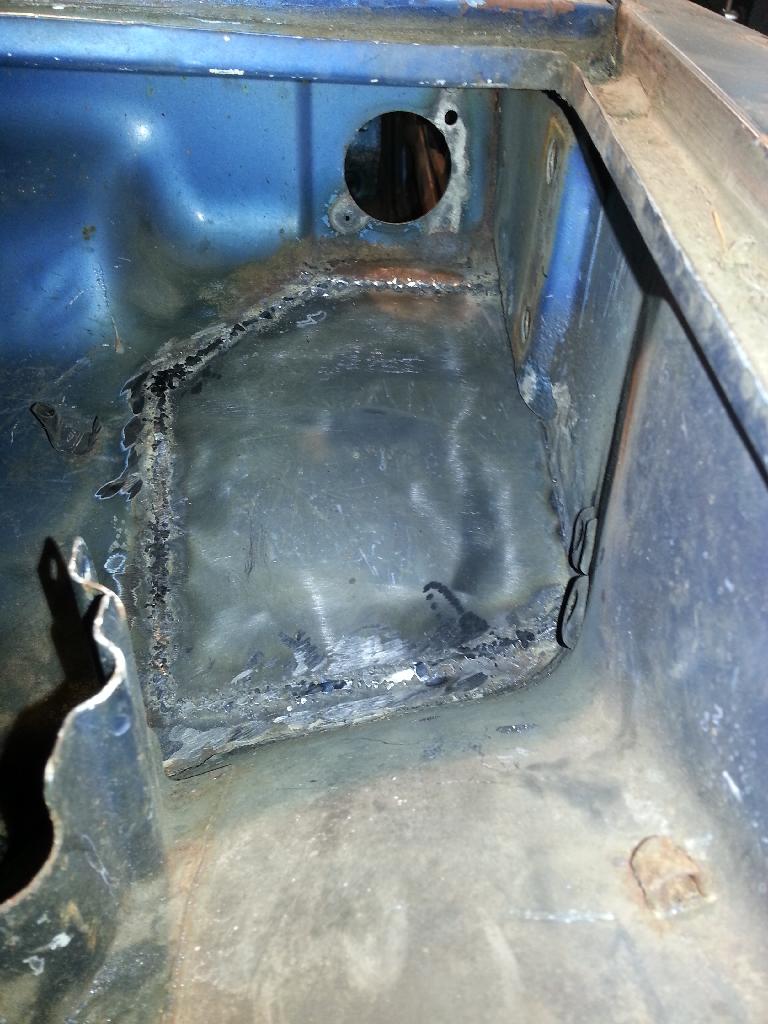
fuel tank compartment1
fuel tank compartment2
fuel tank compartment3
fuel tank compartment4
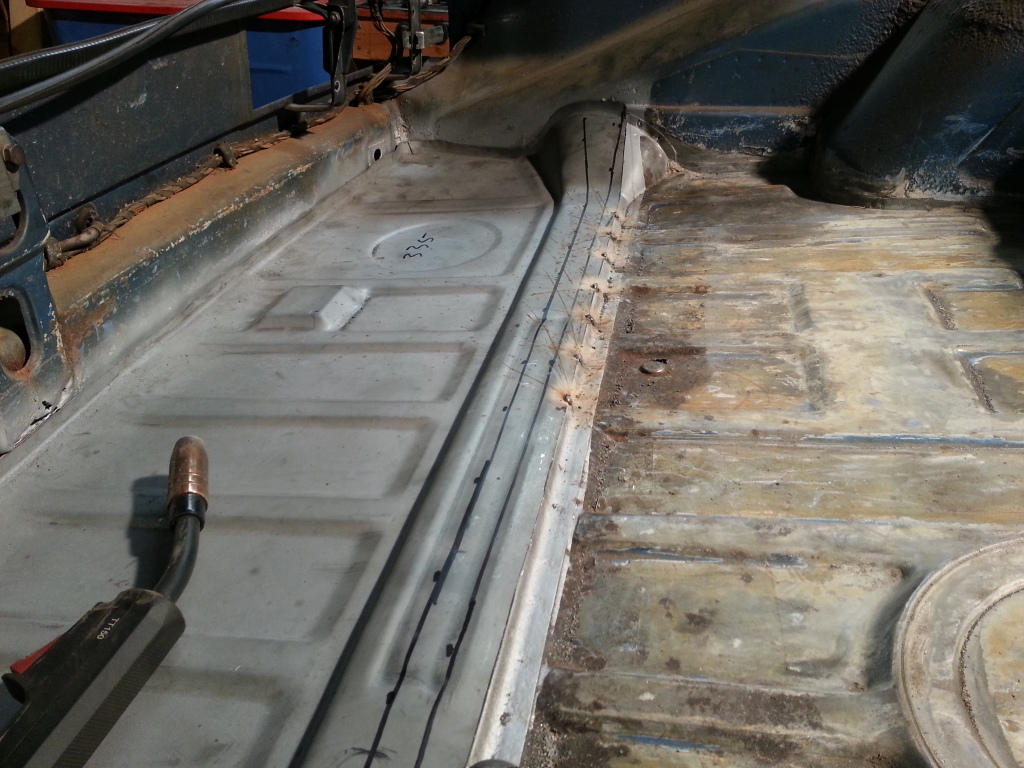
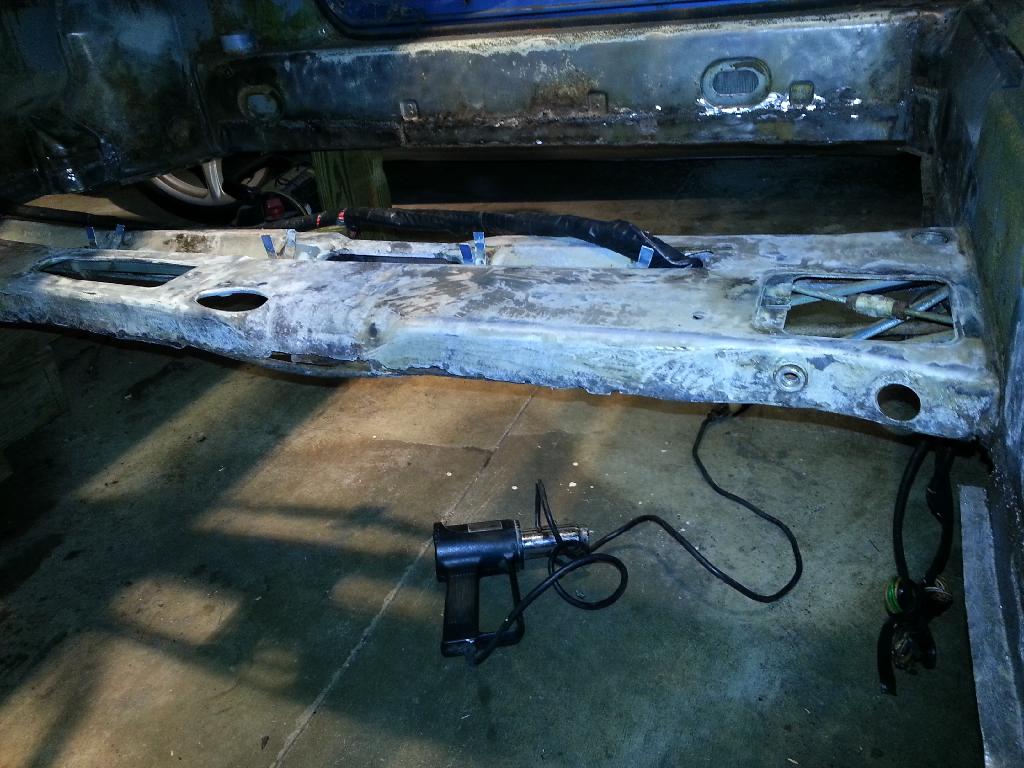
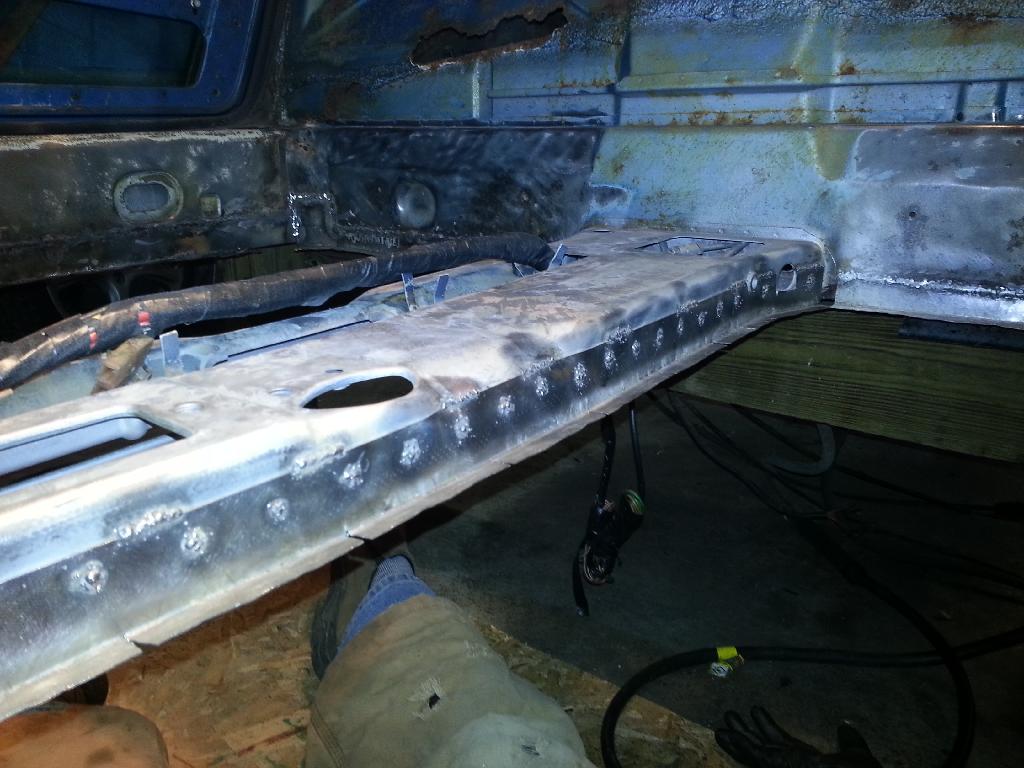
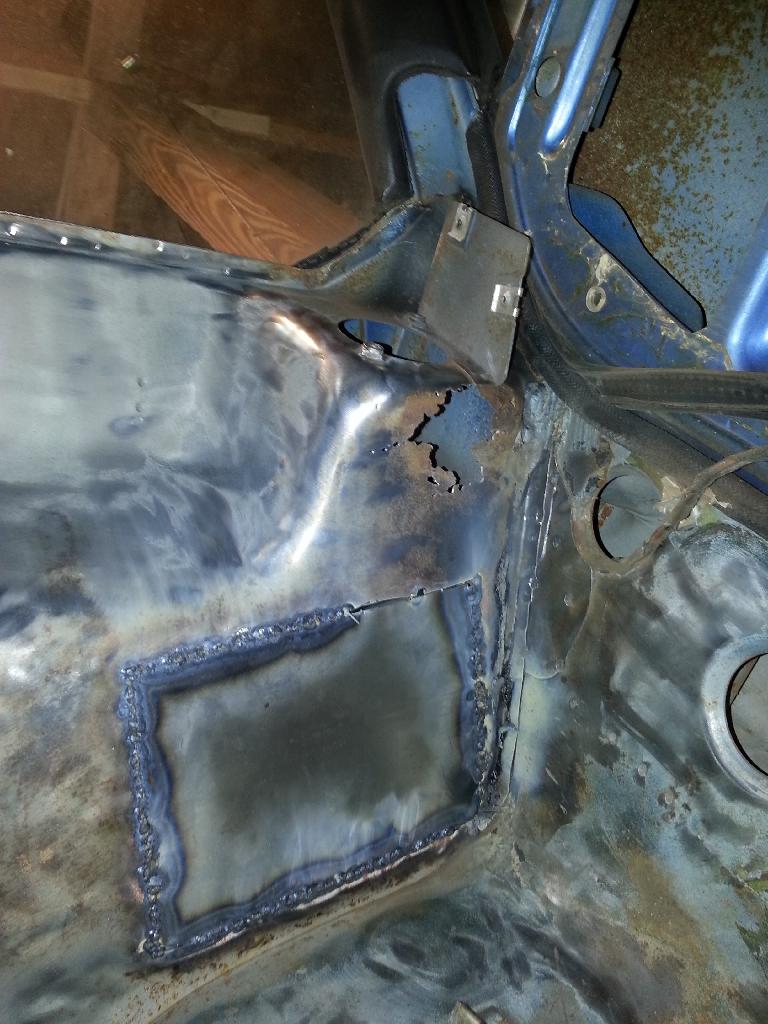
Moving on to rear trunk. Stripped and rust killed upper portion. Drilling out spot welds and preparing to replace the lower portion.


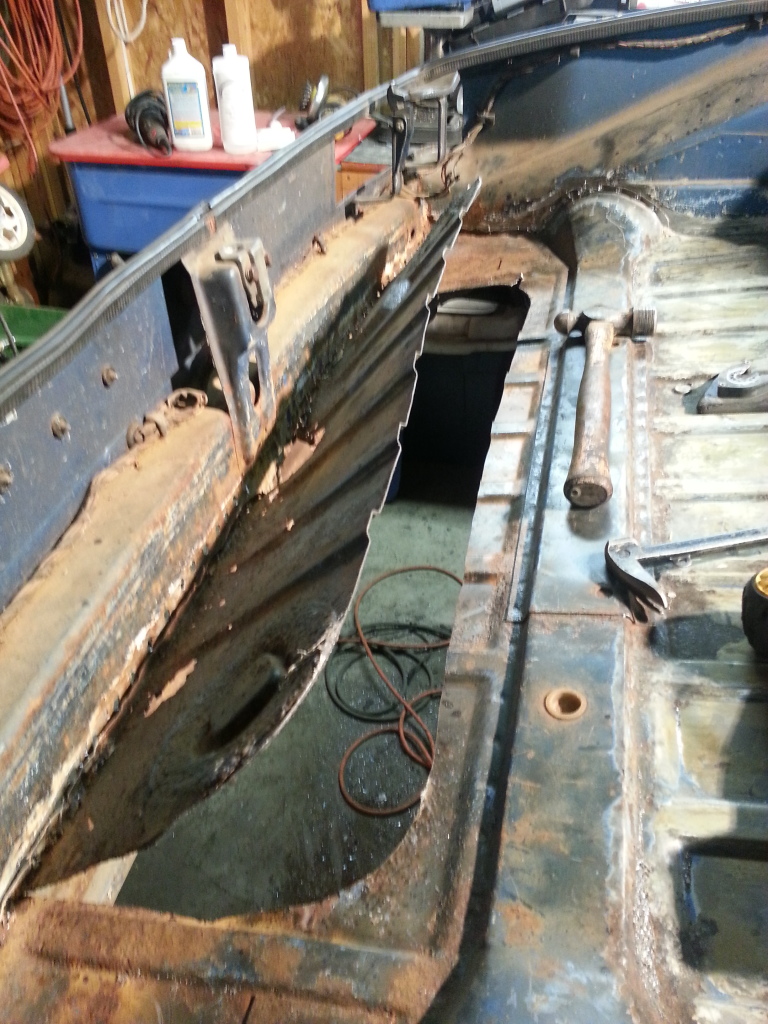
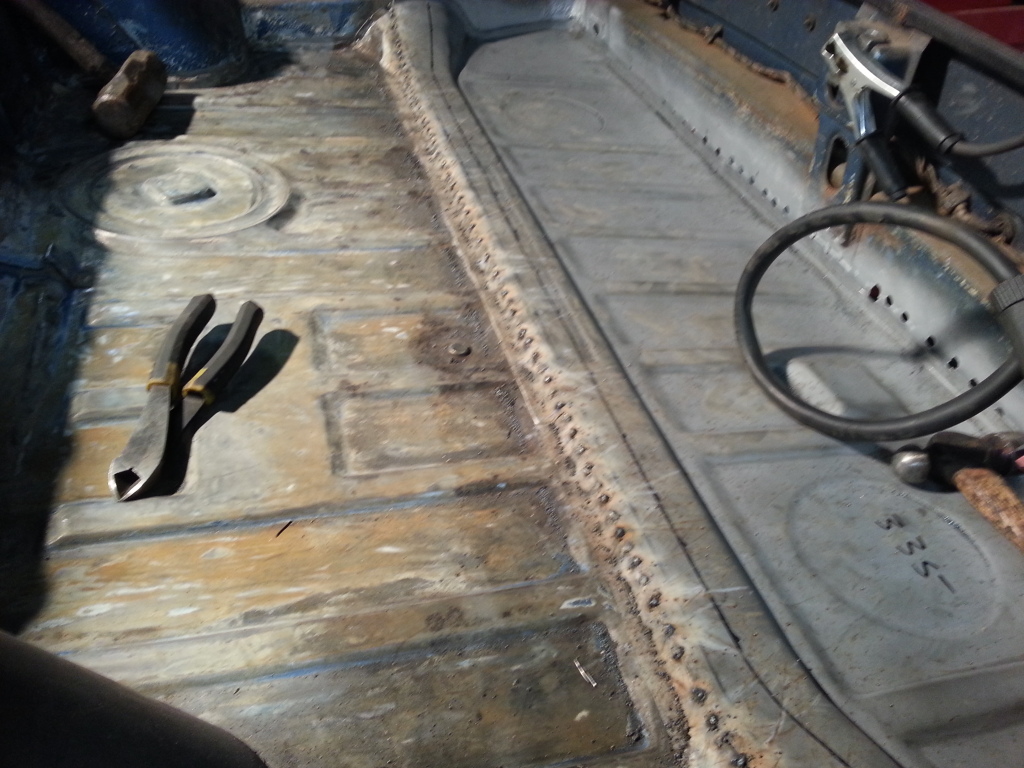
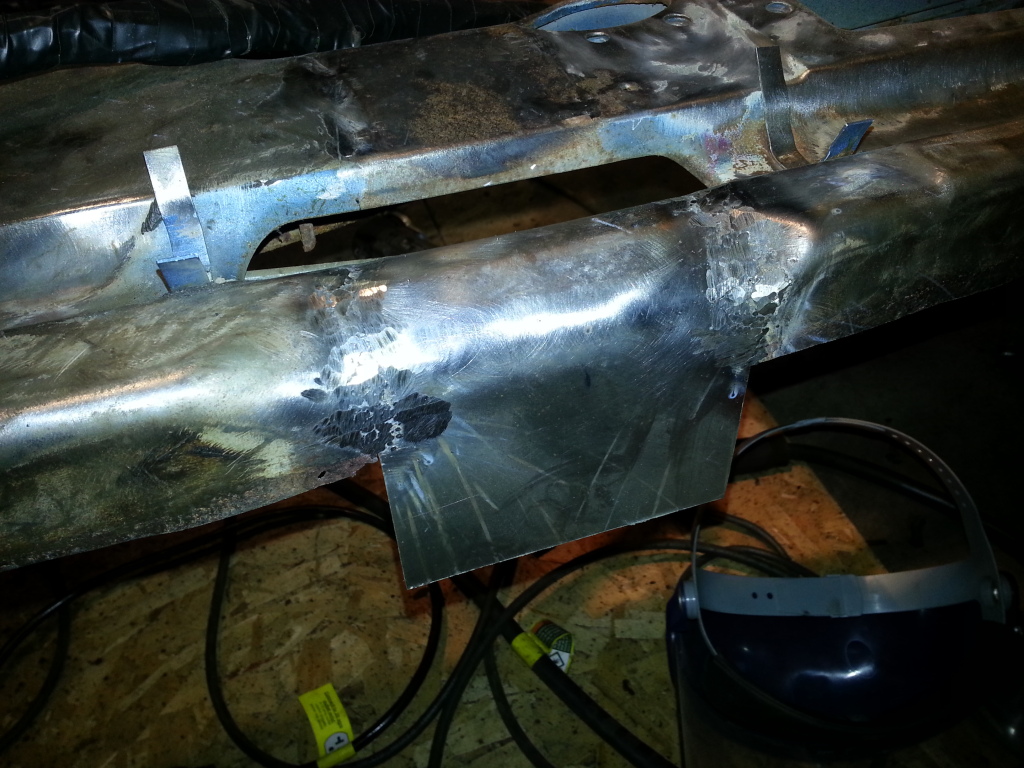
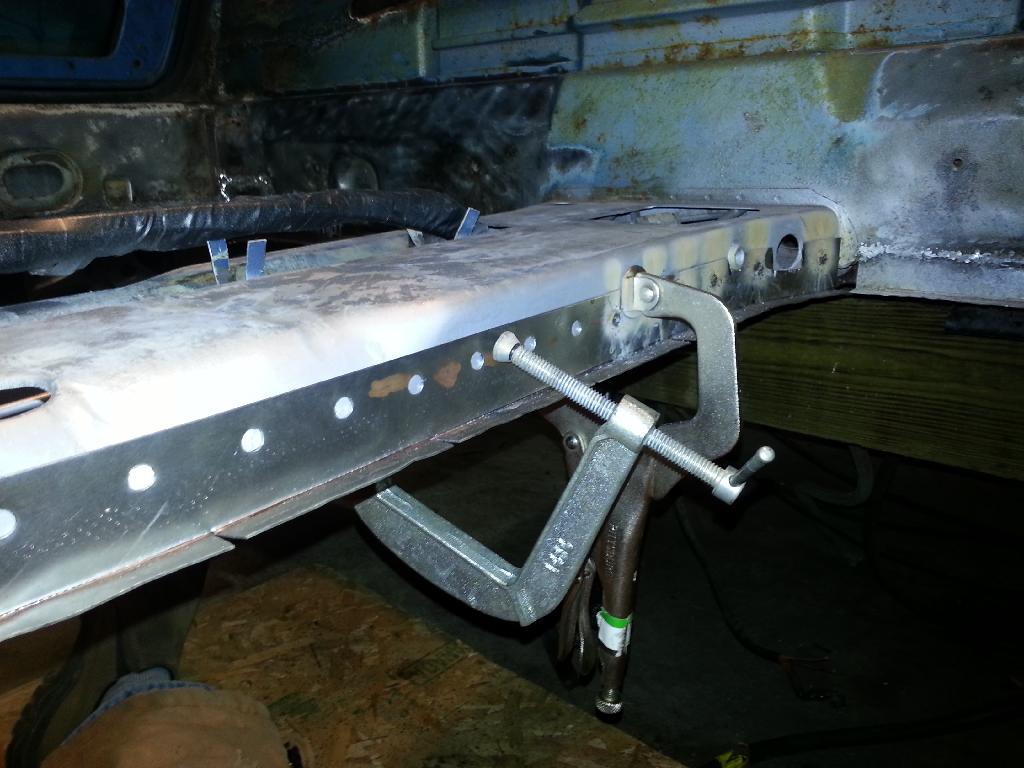
I finished up the rear trunk pan cut out but was unable to install the new sheet metal. Waiting on delivery of the panel flanger tool. I'll lap the top edge and spot weld. I did start in on the floor boards. Some serious ripping with a sawzaw made short work out of that. The next day I tidied upped the edges and started wire brushing rust. The wire brush reveals all! Passenger side inner clam shell has rust holes sides and bottom. Rather than replace the clam shell I decide to cut out the offending sections. The first was hopefully the most complex with two bends in the sheet metal but it goes in fairly well. Welding the bottom was very difficult and tedious. The next section is just the side so it should be quicker. Of course there was more evidence of rodent infestation with acorn shells and twigs mixed in the flakes of rust.
Lookin good! And nice trailer!  PM when the time comes to buy racey pieces. I have leftovers.
Mark D.
PM when the time comes to buy racey pieces. I have leftovers. Mark D.
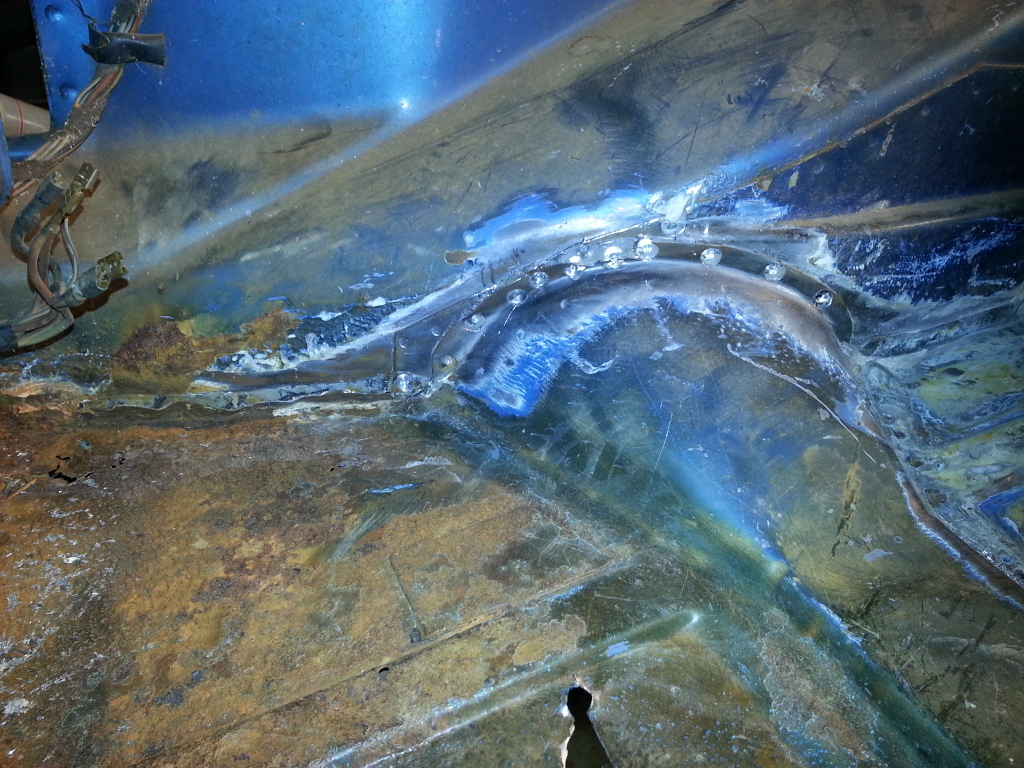
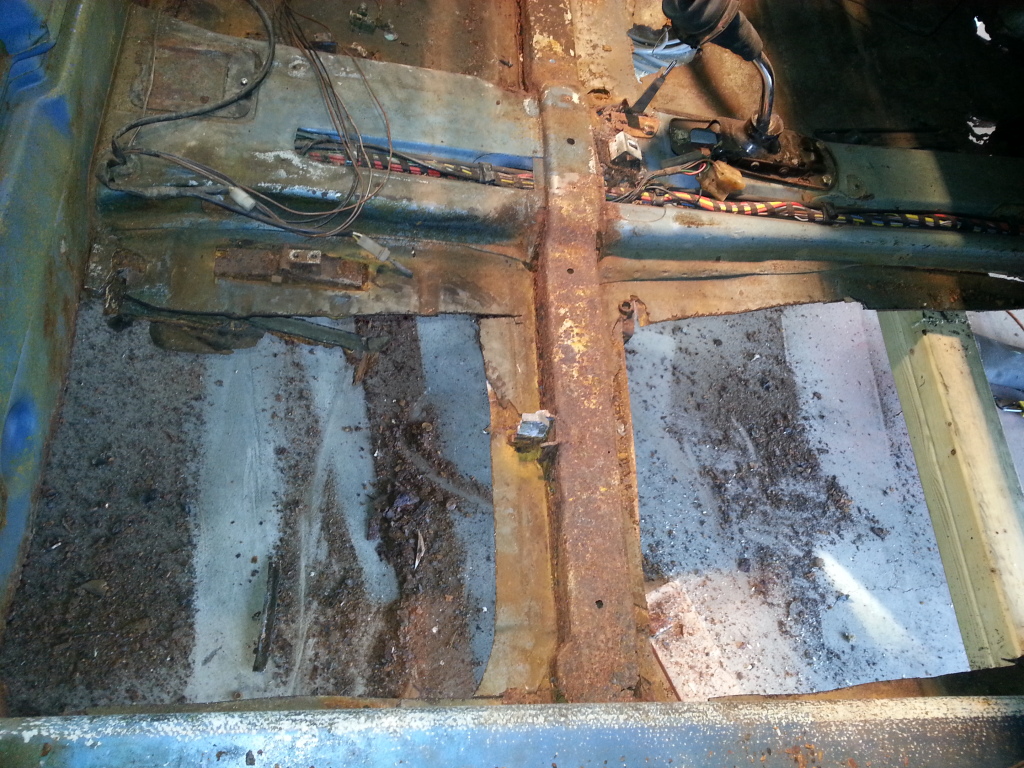
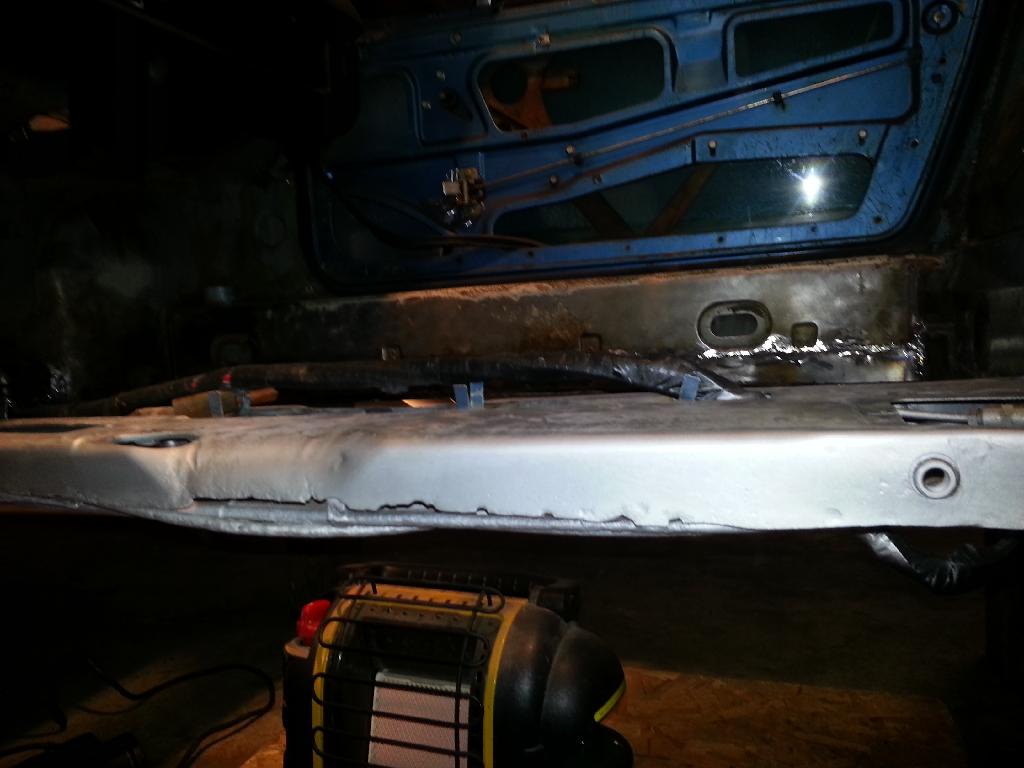
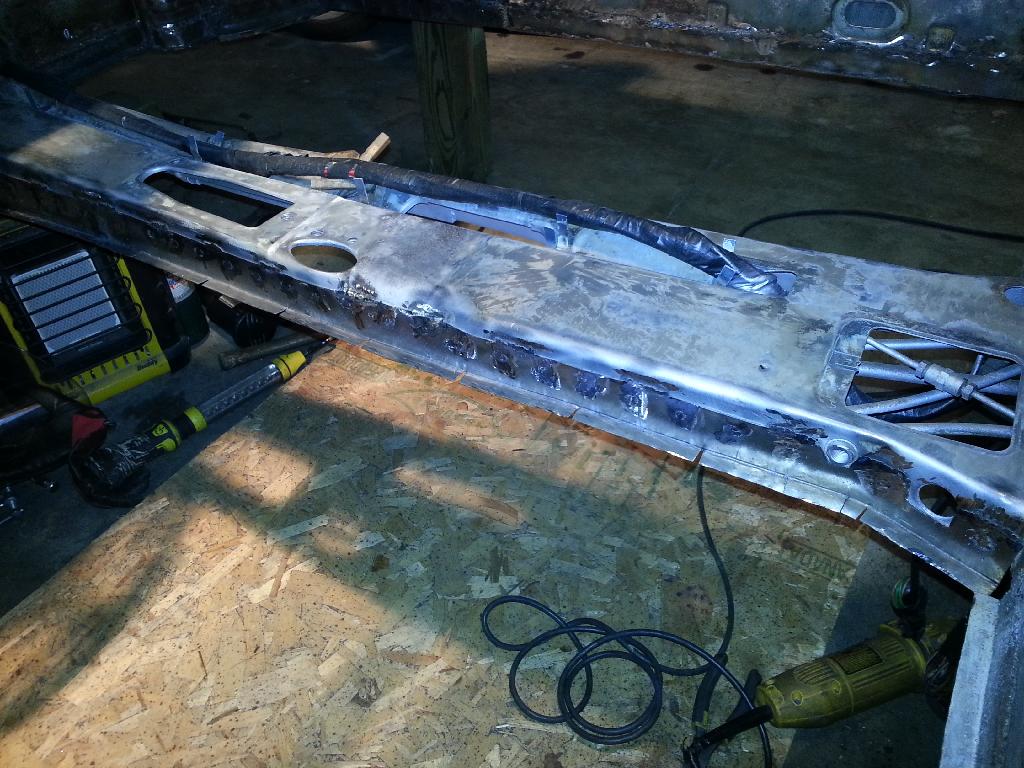
Moved back to the rear trunk pan. Welding the cross member was cake due to the multiple layers of sheet metal.
Welding completed in rear trunk pan. After grinding the beads, I'm coating with POR 15.
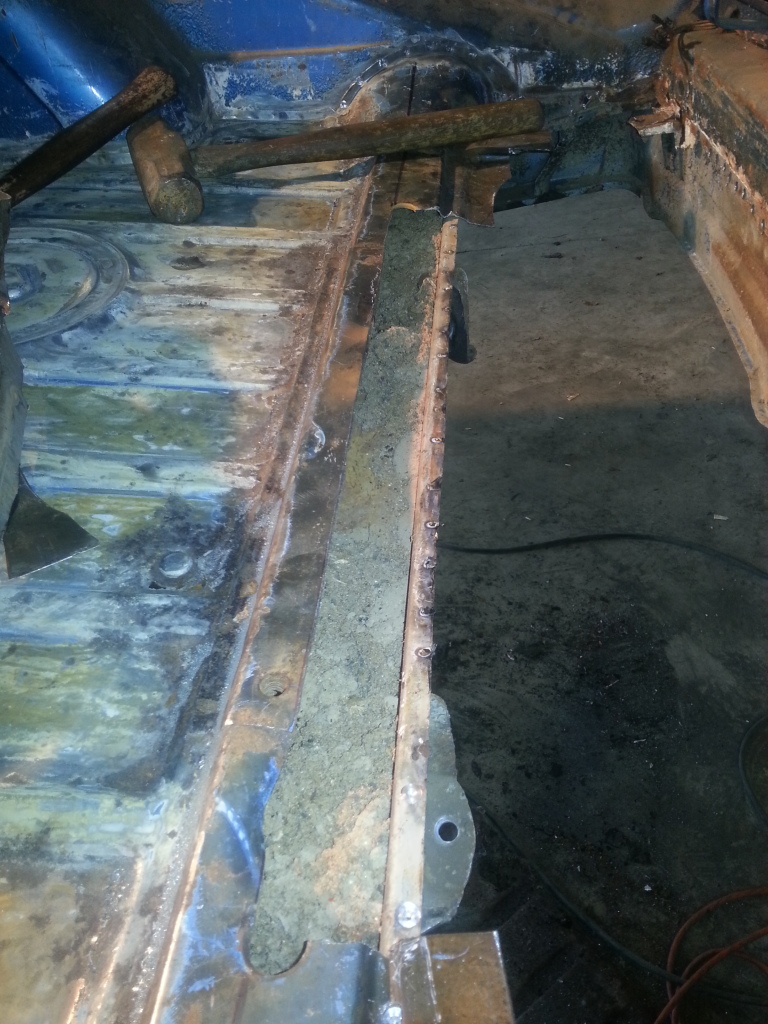
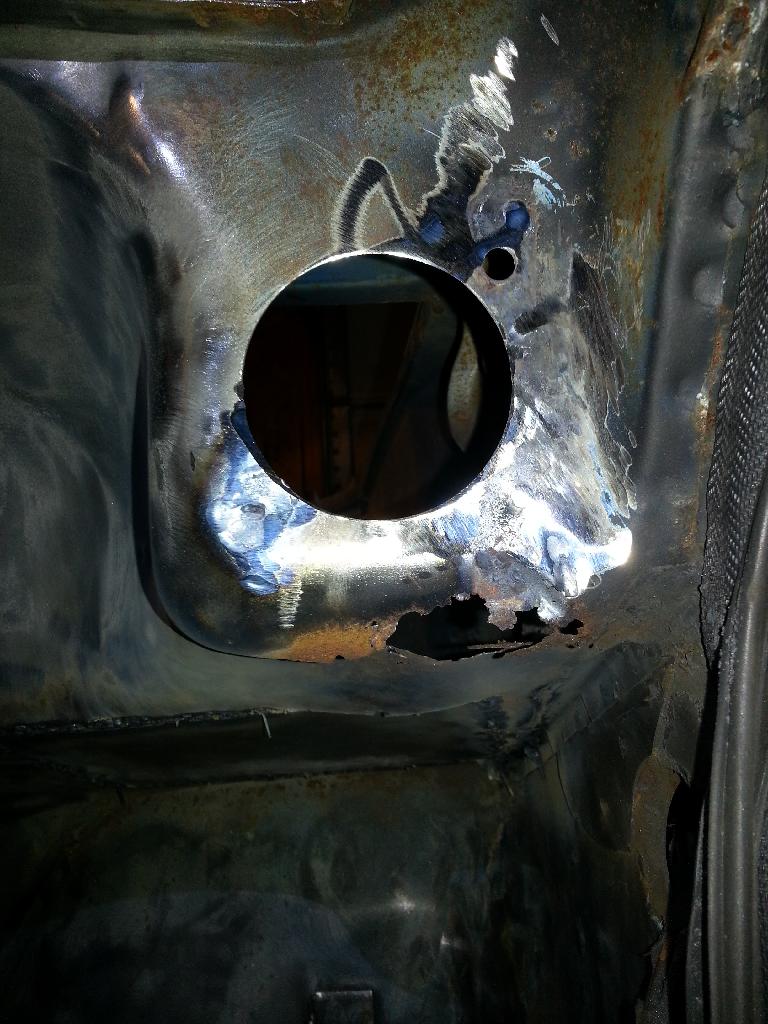
With the rear trunk somewhat completed, I'm working back in the drivers compartment. Last night I cleaned up the inner clam shell on the drivers side and looks like there will be more patches needed there. I also stripped the remaining floor pan off the bottom of the tunnel. Rather than trying to break the welds, I just cut the lower 1/4" off the sides of the tunnel. About 2/3 of that was rusted through anyway. I'll have to do just like TR and scab on about a 2" strip of sheet metal along both sides of the tunnel to join the floor pan. In fact, I'll need to do that also on the inner firewall and under the dash at the bottom of the front "firewall". It's amazing that anyone was able to drive this car with some much rust! The sheet metal where the master cylinder attaches only has about 1/4" of solid material. I'm not certain if it's best to add these strips before the pans go on or after. It's going to be a little difficult to determine exactly where to bend the new metal for attaching flanges when so much is missing. It certainly will be easier to work inside the open gaps (like now) than crawling around the small space after the pans are in 
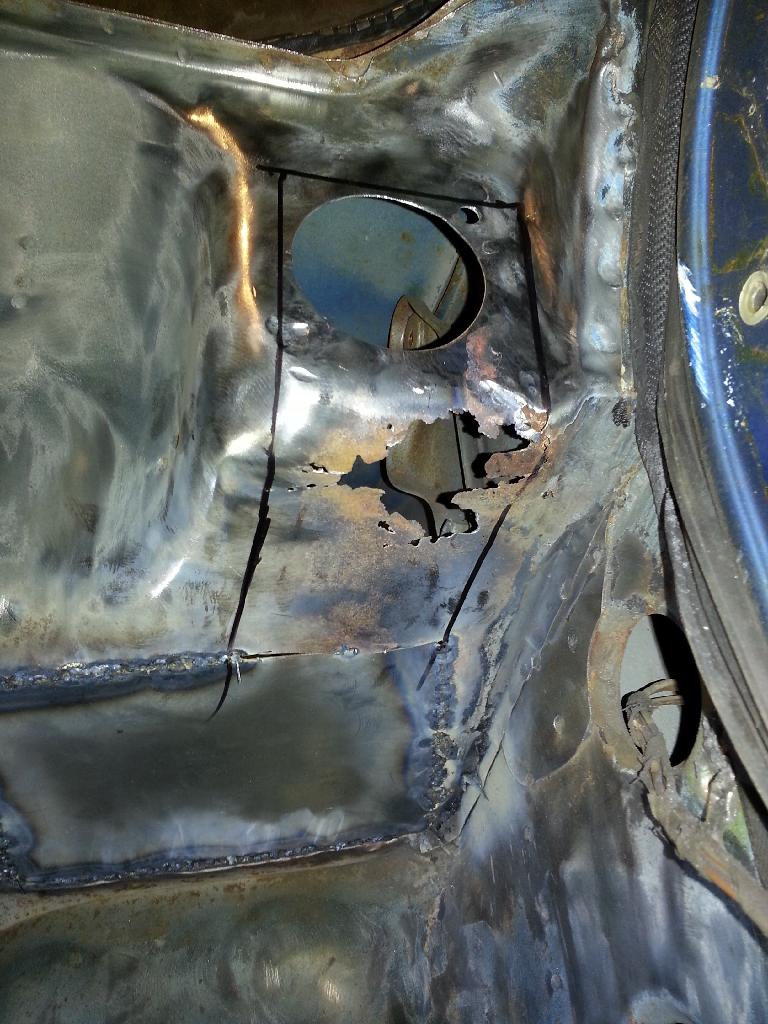
Back at it tonight. I revisited the passenger side inner clam shell. I cut out a 29" x 1.5" strip and welded in fresh metal. It looks like all the interior sheet metal that joined the floor pans, 1" - 2" along the bottom will have to be patched. I suspect that pools of rain water sat in the floor pans of this car for extended periods of time. I just keep cutting and patching...
http://i1336.photobucket.com/albums/o644/t...zps19c74049.jpg
http://i1336.photobucket.com/albums/o644/t...zps57ad45fd.jpg
http://i1336.photobucket.com/albums/o644/t...zps19c74049.jpg
http://i1336.photobucket.com/albums/o644/t...zps57ad45fd.jpg
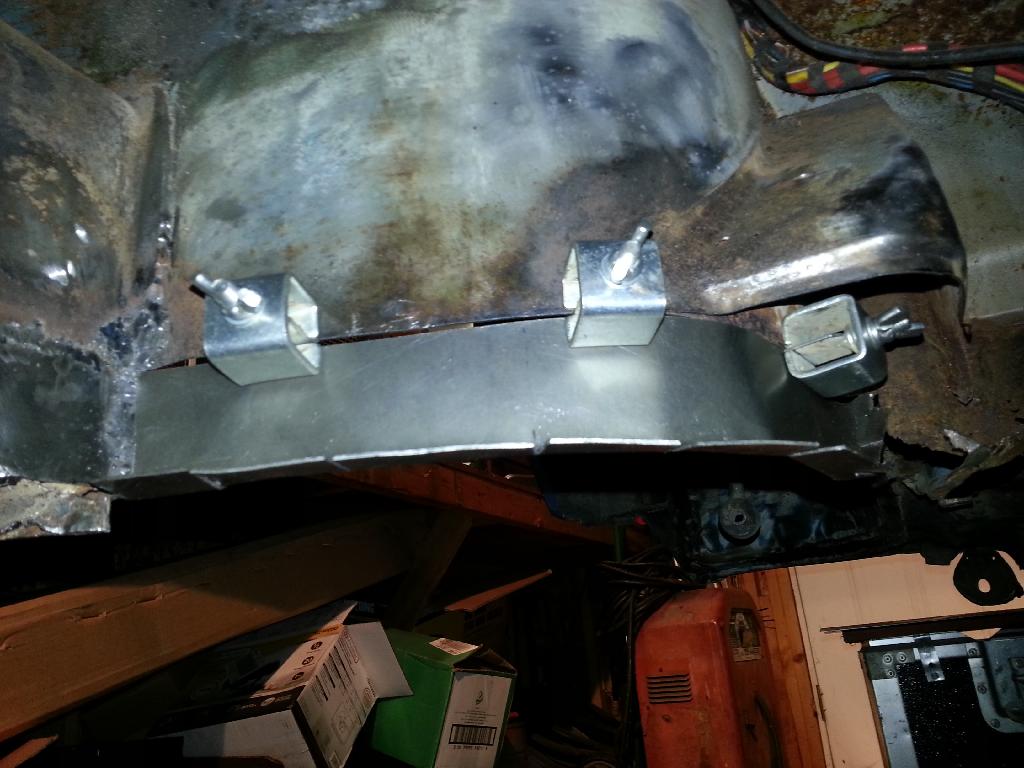
Door beams, bracing?
Although recommended by many, I'm not using bracing. All this work is being done with the car jacked from the bottom, level and with the doors closed. Frankly, if the chassis shifts slightly, perfect door alignment is not a priority. It's a race car
Door beams, bracing?
QUOTE(mepstein @ Nov 22 2013, 10:05 PM)
Door beams, bracing?
More welding shots. Getting better at this
Moving on to the drivers side inner clam shell.
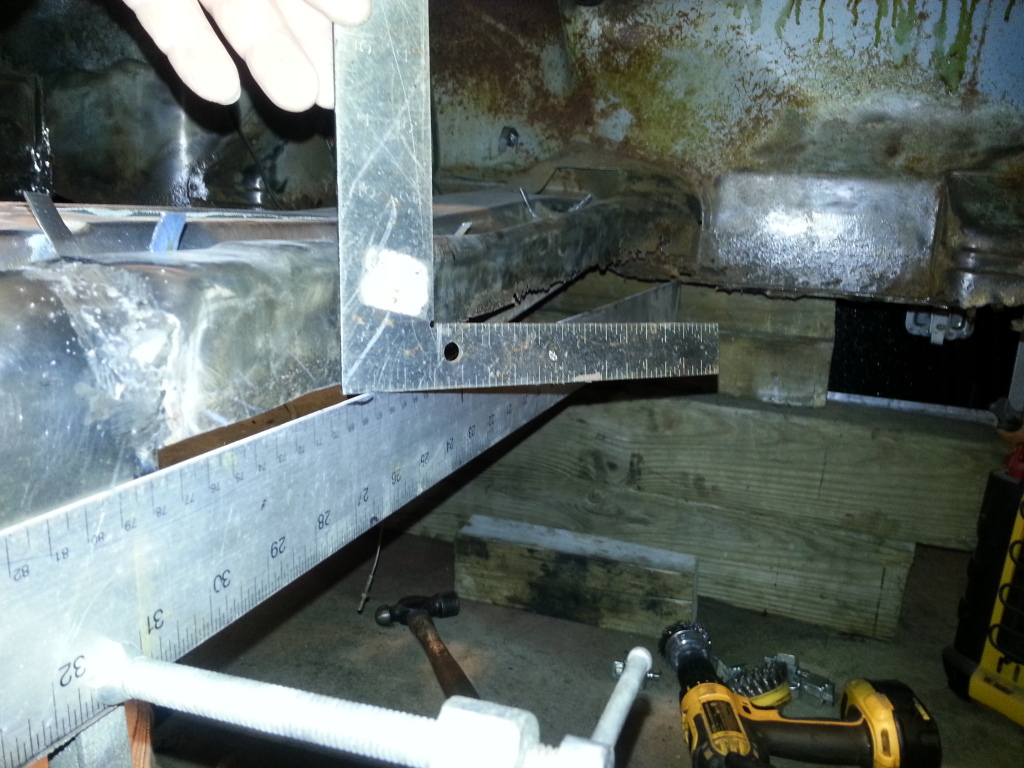
Great progress today. I got the drivers side inner clam shell patched and moved on to the front firewall. This is where it gets a little odd because so much of the bottom is missing - how tall should the patch be? I saw some remains of the bottom of the rear firewall and that gave me a pretty good sense of where the floor pan mates with the front firewall. I cut 1 1/2" strips and bent 1/2" for attaching to the pan. I can modify that attachment if needed. On the drivers side I notched out for the parking brake tubes which are in fairly good shape. There's also a bit of a bend where the firewall joins the inner clam shell. On the passenger side the rust had migrated further up in that bend and I added another 2" of sheet metal to that area. Of course when I was wire brushing some more holes opened up a bit higher Oh well, that's going to be happening a lot with this poor beast and I'm just going to keep patching

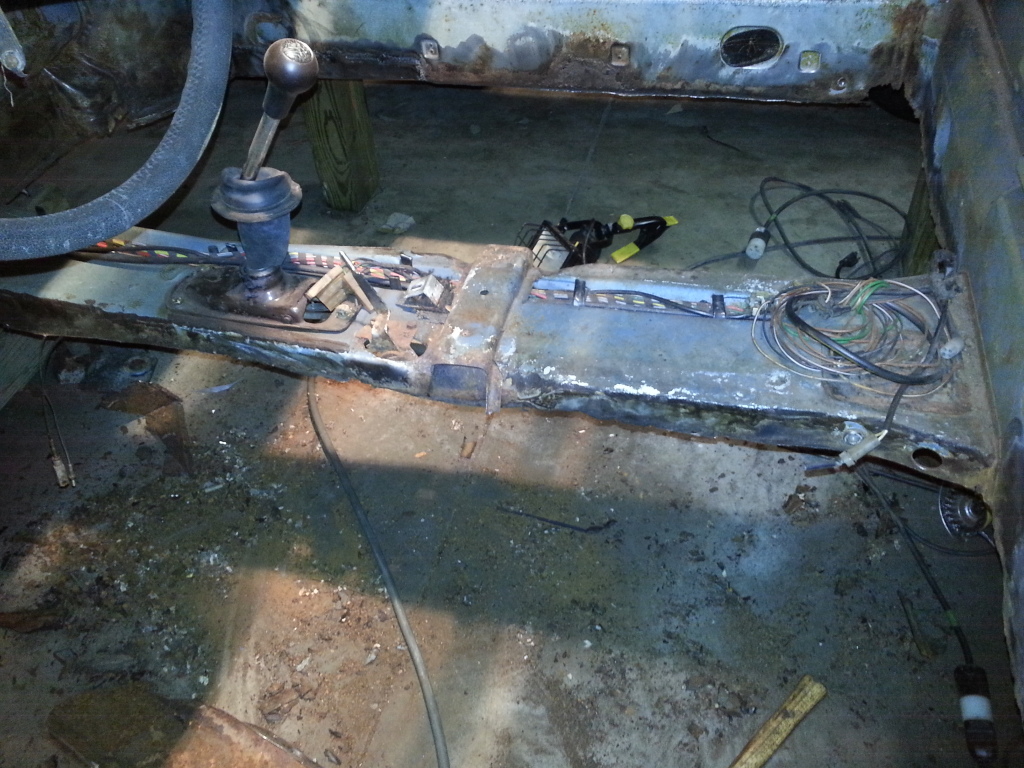
I had a couple hours this evening to move on to the area of the drivers compartment. I decided to tackle the tunnel (or what's left of it).
I just reviewed TRs posts on his rebuild here... I've joined the ranks of the 914 club.
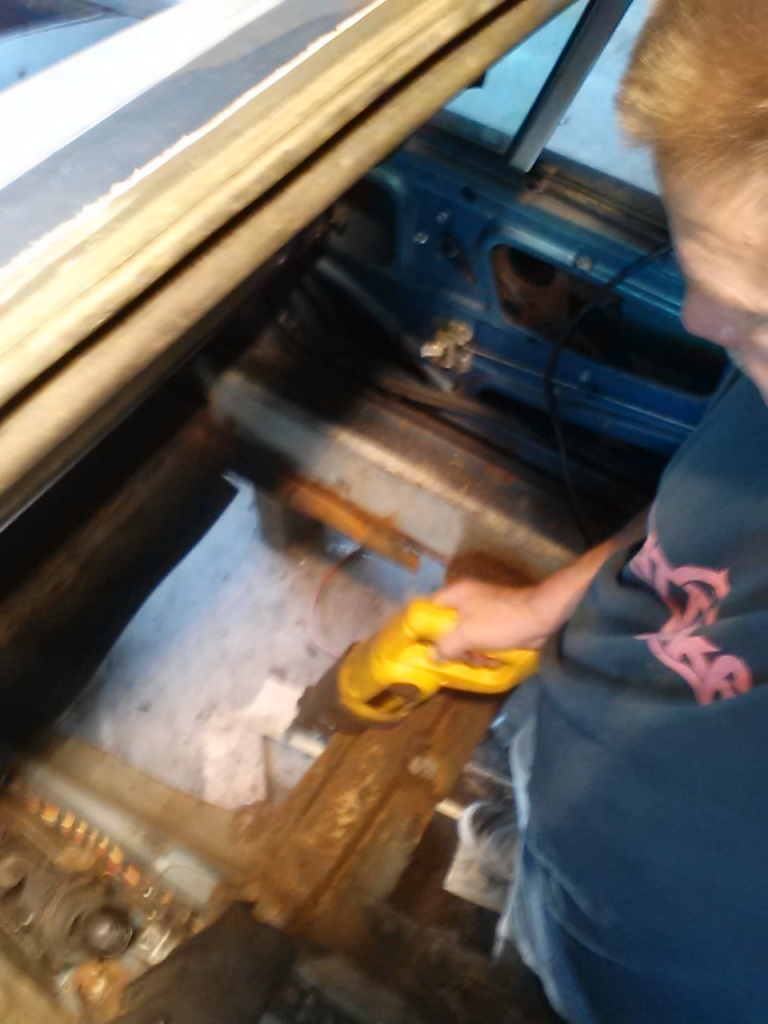
Our Aussie friend did have bit more to work with but the the same principles will apply to my poor beast. Followers will note that earlier I removed about 1" of rusty material the whole length on both sides of the tunnel. First step tonight was to remove the remaining sound deadening material. My AC operated vibrating cutting tool is excellent for this purpose. I'm leaving the wiring harness in place as long as I dare just because I'm not sure how much of it I'll actually use. I removed the shifter and heater switch (discarded the heater cables, no use for them). Also cut out the dangerous nylon fuel lines. I'll definitely be replacing those with steel tubing. After scraping off the bulk of the sound material, I followed up with a wire brush. Final chore of the evening was to remove the remainder of the cross member. I ground off the welds and popped it off with a chisel. There was more rust under the cross member and I'll have to at least add more patching to the passenger side. That's a rather complex bend in the tunnel so I'm thinking of rust kill and then adding a strengthening layer of sheet metal over the top that wraps all the way over the tunnel where the cross member attaches. That could cause dimensional problems when I weld in a replacement cross member later though but I know I can make that 20 gauge sheet metal conform to the tunnel snugly. Undecided at this time what to do there.
I just reviewed TRs posts on his rebuild here... I've joined the ranks of the 914 club.
Our Aussie friend did have bit more to work with but the the same principles will apply to my poor beast. Followers will note that earlier I removed about 1" of rusty material the whole length on both sides of the tunnel. First step tonight was to remove the remaining sound deadening material. My AC operated vibrating cutting tool is excellent for this purpose. I'm leaving the wiring harness in place as long as I dare just because I'm not sure how much of it I'll actually use. I removed the shifter and heater switch (discarded the heater cables, no use for them). Also cut out the dangerous nylon fuel lines. I'll definitely be replacing those with steel tubing. After scraping off the bulk of the sound material, I followed up with a wire brush. Final chore of the evening was to remove the remainder of the cross member. I ground off the welds and popped it off with a chisel. There was more rust under the cross member and I'll have to at least add more patching to the passenger side. That's a rather complex bend in the tunnel so I'm thinking of rust kill and then adding a strengthening layer of sheet metal over the top that wraps all the way over the tunnel where the cross member attaches. That could cause dimensional problems when I weld in a replacement cross member later though but I know I can make that 20 gauge sheet metal conform to the tunnel snugly. Undecided at this time what to do there.
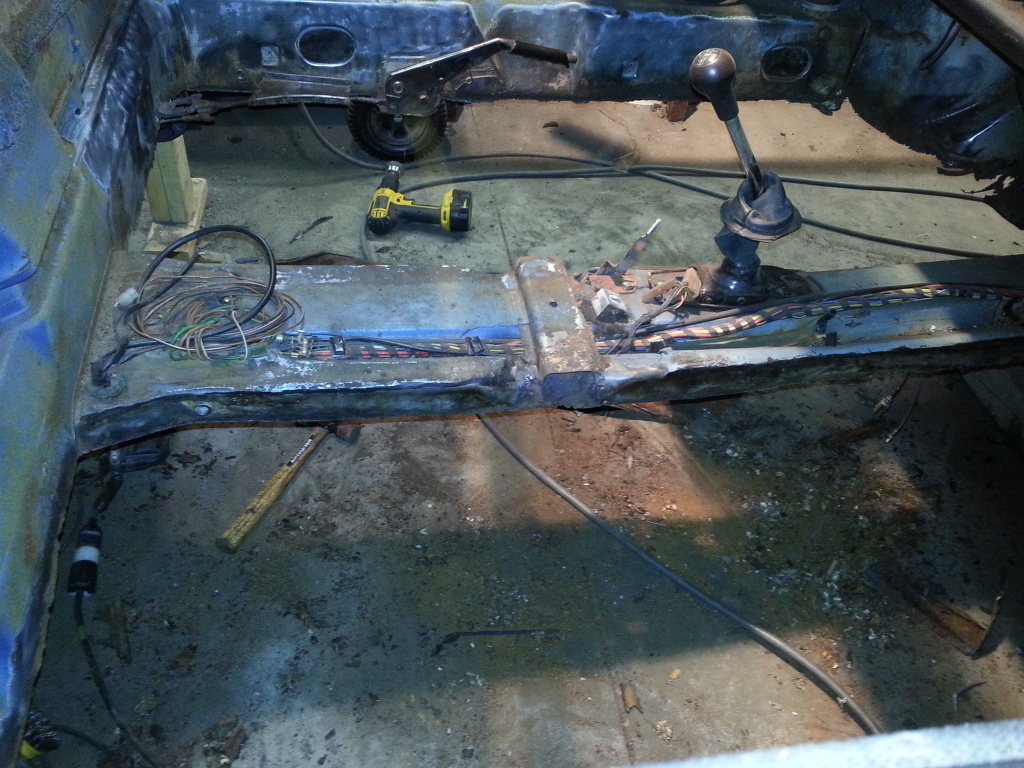
Another few hours of tunnel fun this afternoon. I decided, "What the heck?" and just cut the offending rust area out that was under the cross member. Being careful to not mangle the cut out section - I used that as a template for a patch. Bending the new sheet metal with a vise, nylon hammer and handy piece of angle iron. I got it as close as I could and then started welding it in using magnets under to hold it in place. On small area had a different bend but I was able to hammer the metal close enough to bridge. It's not pretty but everything will get rust kill and sealed with POR 15.
QUOTE(Han Solo @ Sep 30 2013, 11:53 AM)
My hillbilly car lift before dropping the engine and transmission.
Forget everything else. The four post wooden jack is the coolest part of your project .
Love it !
QUOTE(914itis @ Dec 5 2013, 01:31 PM)
QUOTE(Han Solo @ Sep 30 2013, 11:53 AM)
My hillbilly car lift before dropping the engine and transmission.
Forget everything else. The four post wooden jack is the coolest part of your project .
Love it !
Thanks. It has actually worked pretty darn good. And I haven't ripped the roof trusses down yet

QUOTE(Han Solo @ Dec 5 2013, 02:02 PM)
QUOTE(914itis @ Dec 5 2013, 01:31 PM)
QUOTE(Han Solo @ Sep 30 2013, 11:53 AM)
My hillbilly car lift before dropping the engine and transmission.
Forget everything else. The four post wooden jack is the coolest part of your project .
Love it !
Thanks. It has actually worked pretty darn good. And I haven't ripped the roof trusses down yet
Awesome !
Despite the extreme cold in the garage, I'm back at the tunnel today. First step was to try a figure out how much material to add. Taking a straight edge and laying against areas known to have attached to the floor pan - that gave me a reference. This section was from the patch on the passenger side forward to the foot wall. I sub-divided it into three segments which made cutting the new sheet metal, fitting and welding much easier. This is all become rather routine to me now. I have a small segment on the passenger side of the tunnel left and then it's on to drivers side. Oddly, I'm just now using up the first sheet of metal purchased two months ago. It seems like I've hacked through a dozen.
So I'm cutting back towards the firewall from the center tunnel patch and I've found that there's a second layer of metal around the seat belt anchor point. That makes for some slow cutting. It's fairly decent metal so I get my trusty chisel and peel the outer thin layer off and leave the thick metal. I also made notices in the 1/2" flange on the patch. That keeps the strip straight when you bend the flange (something anyone that had shop class would know). With that patch in, the complete passenger side of the tunnel has been replaced. I've got another hour before lunch and what the heck, let's do another . I'm all the way in the passenger footwell and that section joins part of the metal that's curved under the fuel tank. That tank area was chock full of crap when I got the car but surprisingly not completely rusted through. Cutting out the vertical section of the footwell allowed good access for a wire brush and that bottom tank area cleaned up pretty good. It took the welds nicely but it was extremely difficult the grind the welds down. I've got one section left in the passenger side. That's the odd piece attached to the wheel well. I'm not sure what purpose it serves but I'll patch it also. The wheel well (the backside is part of the footwell) is in good condition on this side. In fact, that's the only area on the passenger side that contacted the floor pan that I'm not having to patch!
A bit more progress last night. That little odd shaped area that's behind the wheel house appears to be engineered just to support the fuel tank. Perhaps there's some additional structural benefits but I patched it anyway. I noted that the bottom of the wheel house will need a patch. At least the seam is still there to help in the fabrication. With the passenger side of the interior floor pan connecting metal done - I'm moving back to the drivers side. There's some real challenges there as not much is left of the foot well area and when I looked closely at the underside of the tunnel - there additional structure associated with the pipes that will complicate the patch. I've got a plan and it's much like TR did with his tunnel.
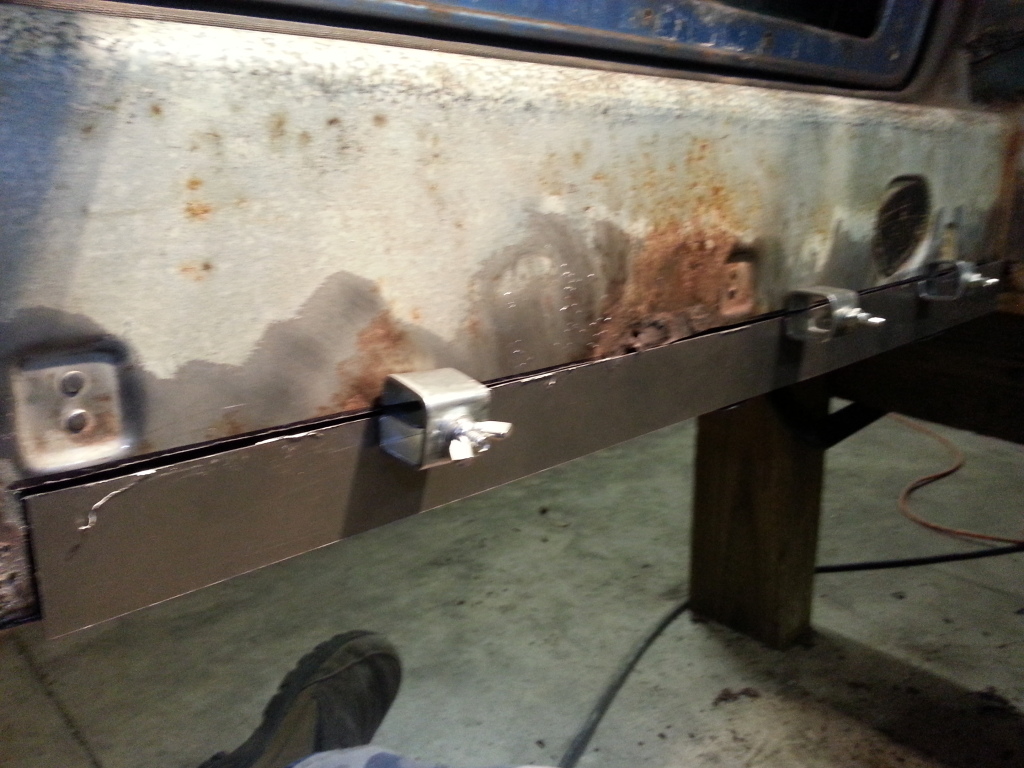
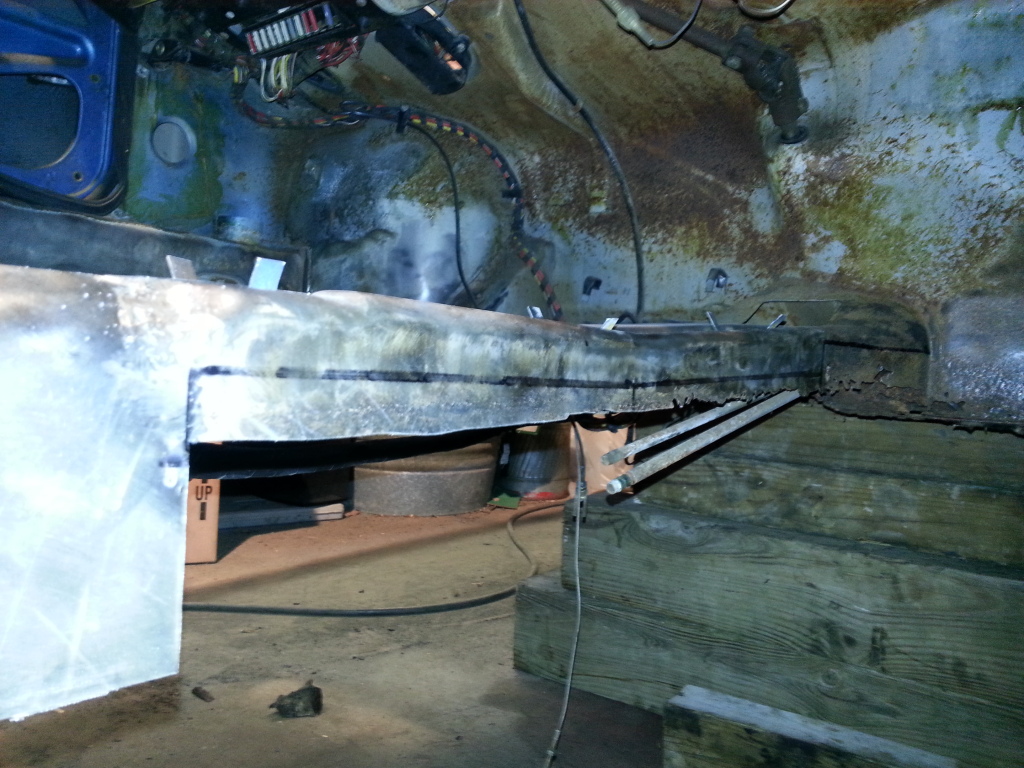
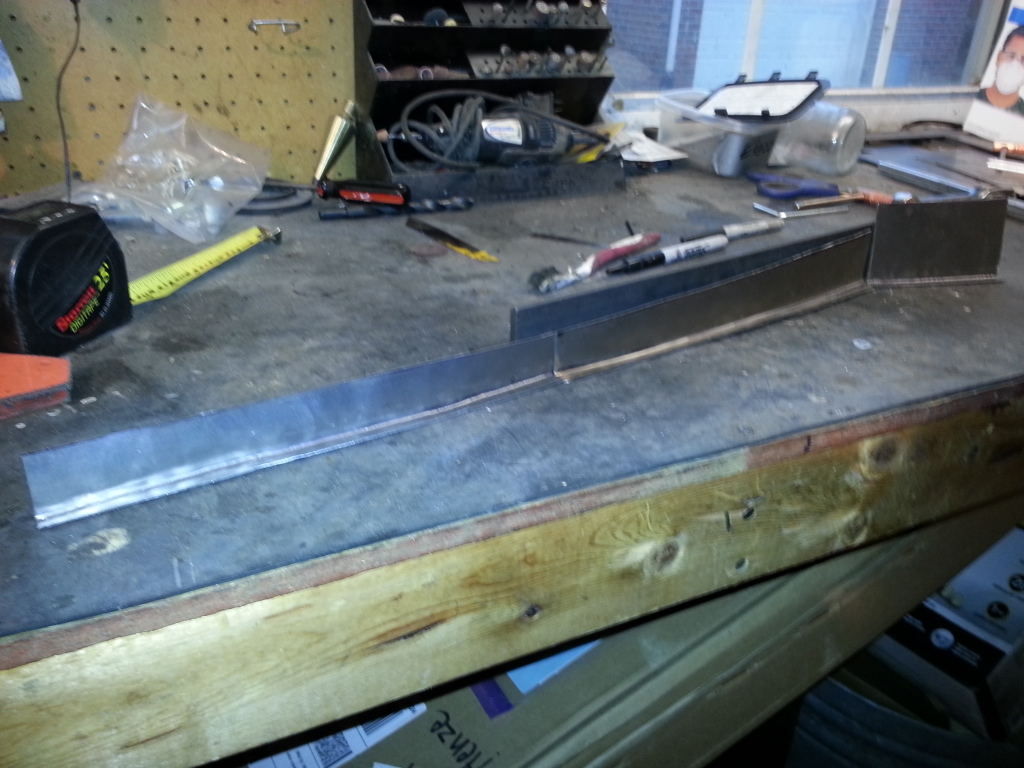
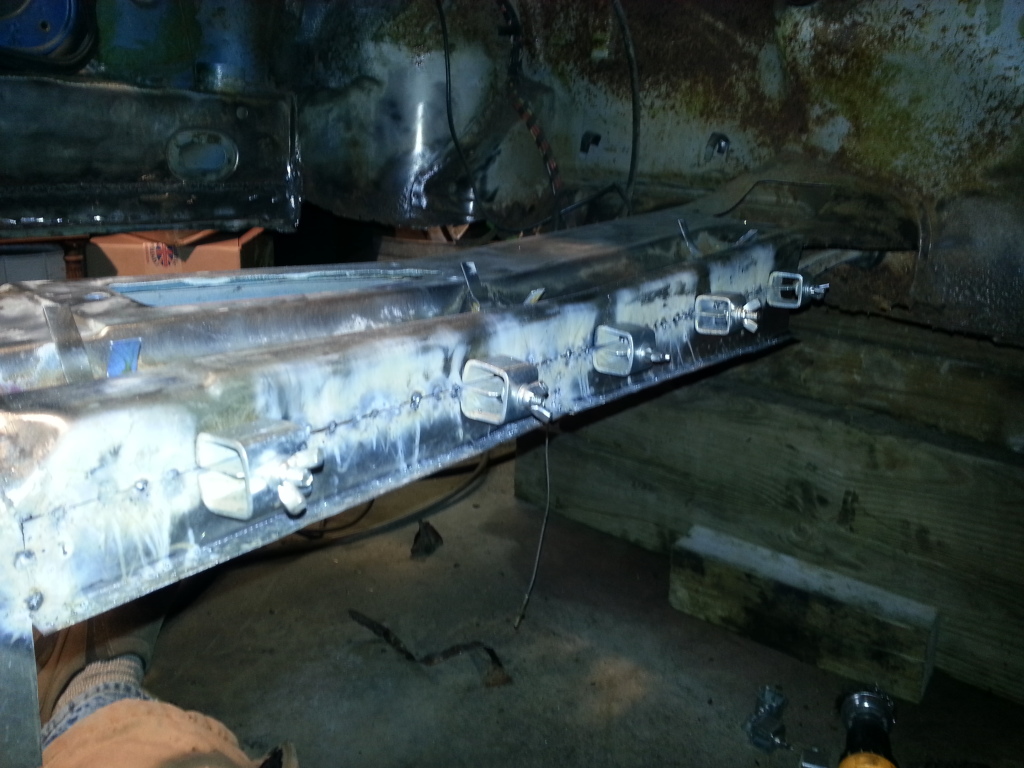
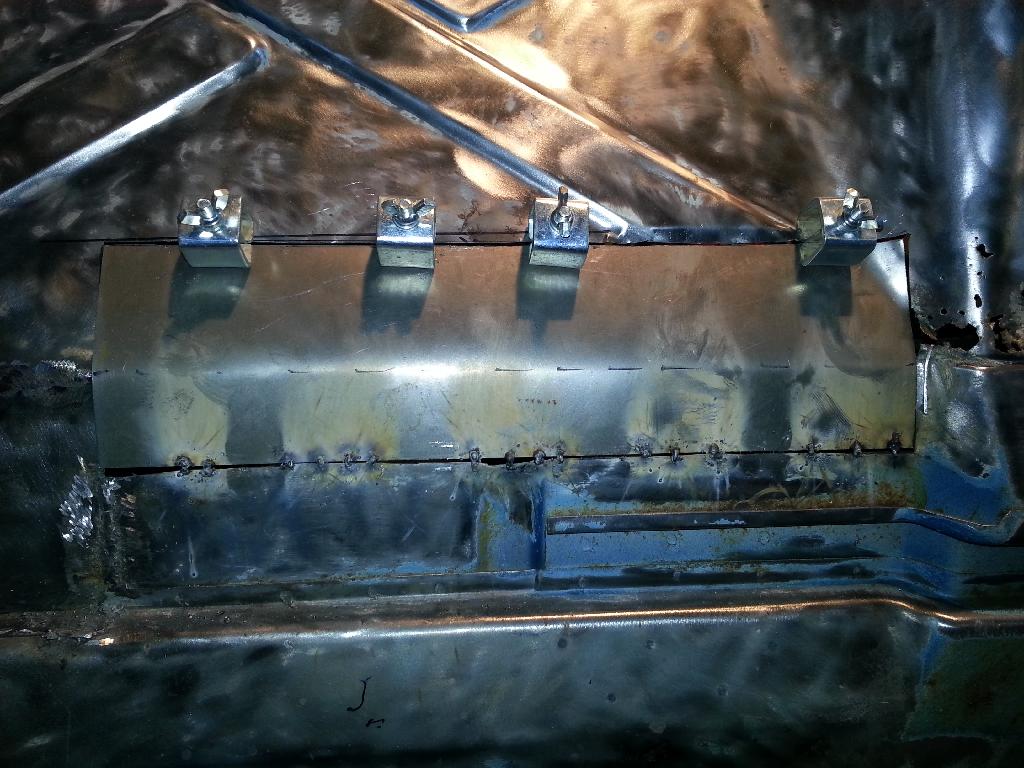
The plan on the drivers side of the tunnel is to lap on long strips of sheet metal rather than butt weld. This will make it much easier to keep the joining edge to the pan the correct elevation and I won't have to cut into the shifter supporting metal. You can see that structure in my shot from under the tunnel. I will have to clean, rust kill and prime with weld through before lapping. That's going to be really messy with the car on blocks and keeping those chemicals off clothing and skin will be important. I was hoping to do all the treatment on the longs, firewall, foot wells and tunnel all at once but I'll need to get the original metal on this side of the tunnel taken care of before I lap fresh metal on top. The last photo shows the first strip I've fabricated for this side.
I started the morning off with marine clean and then rust kill. Having sheet plastic down kept the mess factor low. Then I sprayed the underside and driver side of the tunnel with weld through primer. I'm not priming the whole tunnel because I'll cover it with POR 15. The first long segment was drilled for spot welds every 1 1/2". I clamped that on and started with my first series of rosette welds. That went quite nicely so I followed up with 1" seam welds every 3 or 4 inches. I then fabricated the last segment and had it welded in pronto. Followed up with wire brushing and grinding welds. The grinding process goes SO much quicker with the spot welds. Although the net result doesn't look as original as the butt welded patches I used on the passenger side - I think this side is much stronger.
The last photo shows what I'm dealing with next. There's A LOT of sheet metal missing in the drivers foot well. That area is going to require some complex fabricating and extensive patching. Anyone following this thread that can post a photo showing that area without the peddle assembly in place, just the original sheet metal - that would be most helpful.

The last photo shows what I'm dealing with next. There's A LOT of sheet metal missing in the drivers foot well. That area is going to require some complex fabricating and extensive patching. Anyone following this thread that can post a photo showing that area without the peddle assembly in place, just the original sheet metal - that would be most helpful.
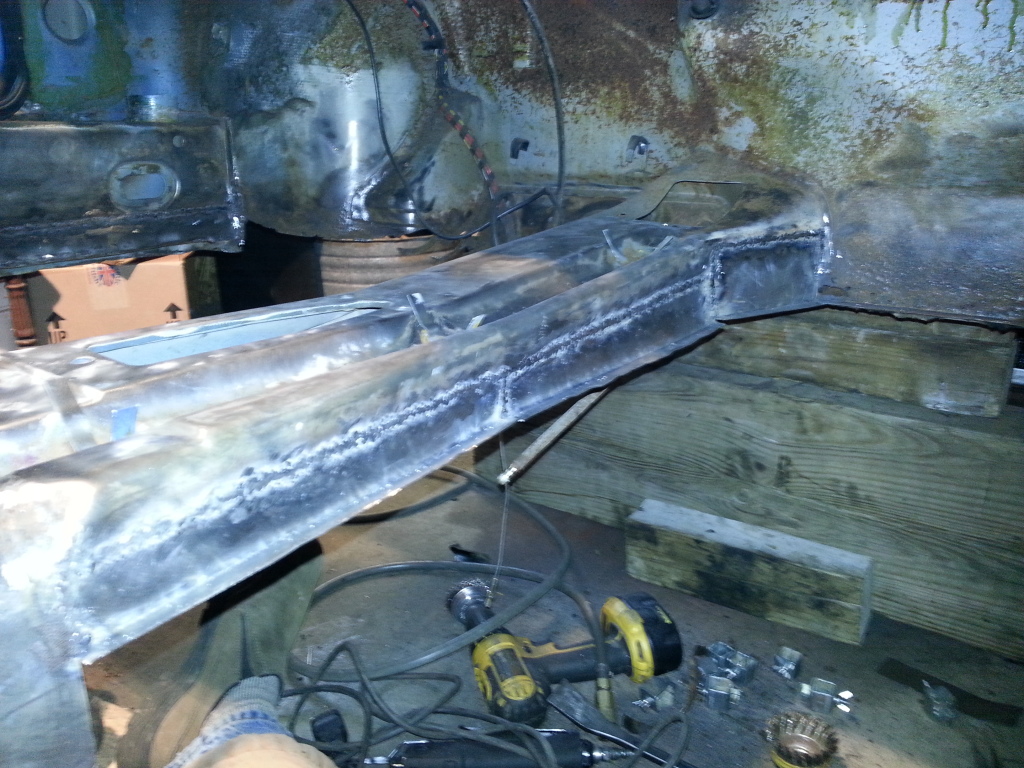
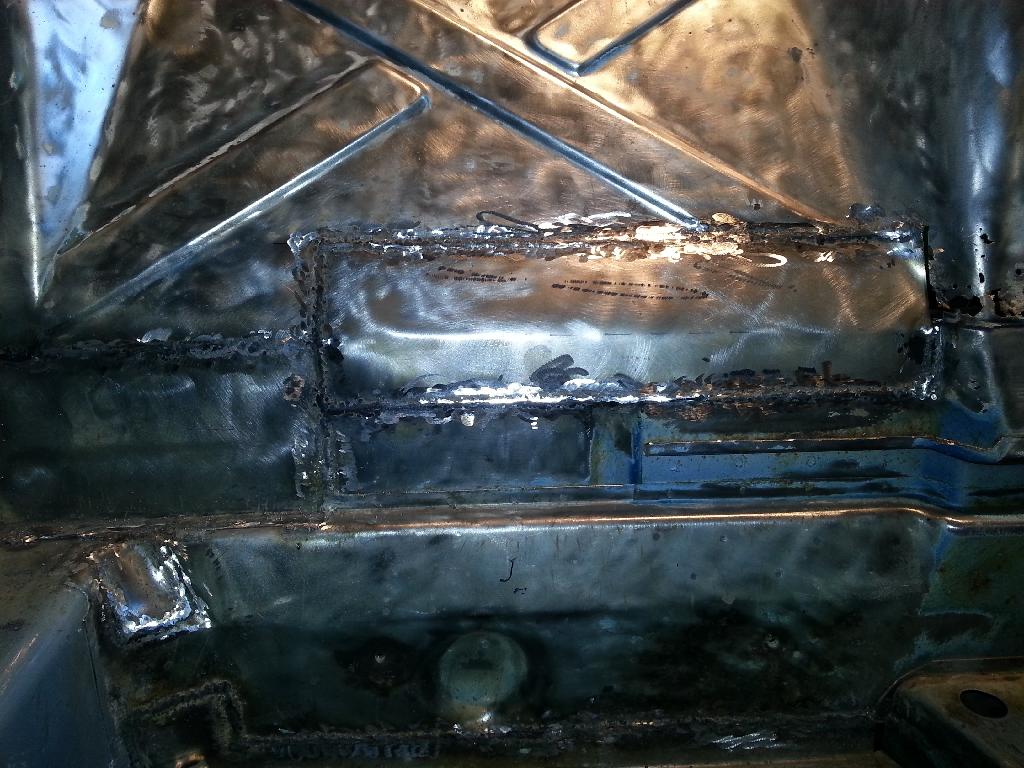
So I'm diving in to this last area of floor pan attaching sheet metal. There's not much left here to help me fabricate replacement. I'm starting with the backside of the wheel house and using the passenger side as a template (they appear to be mirror image). There's a sliver of the folded seam from the factory where the wheel house joined the floor pan. Reproducing that exactly far exceeds my skills at this time so I'm just using right angle flanges. I've left those a bit longer than the usual 1/2" so I've got extra metal to work with when it comes time to put the pans on. The bend in the wheel house is a little complex, almost an S curve but it fabs up pretty well. What is handy is being able to weld both sides. This should add strength in a high stress area. Next I'll tackle the front metal behind the peddles and tunnel. I haven't look really close but I think this can be done with one large strip. I'm also thinking that I'll overlay the new metal on treated old with spot welds. That way I'll have the brake master cylinder mount in the exact position (it's still there but barely) and I'll have a better sense of the gentle curve from "firewall" to floor pan. All this is subject to change of course.

http://i1336.photobucket.com/albums/o644/t...zpso2b5epxk.jpg
http://i1336.photobucket.com/albums/o644/t...zpso2b5epxk.jpg
And indeed I did change my plan for this troublesome area. After looking hard, I determined that trying to lap one long piece was going to be really difficult. I couldn't figure out how to really do that with all the little bends and the fact that the mount for the brake master cylinder is a little half box. I watched this YouTube video by Restoration Design and that really helped me get a good idea of what was missing... https://www.youtube.com/watch?v=3kMOMNhxg-A
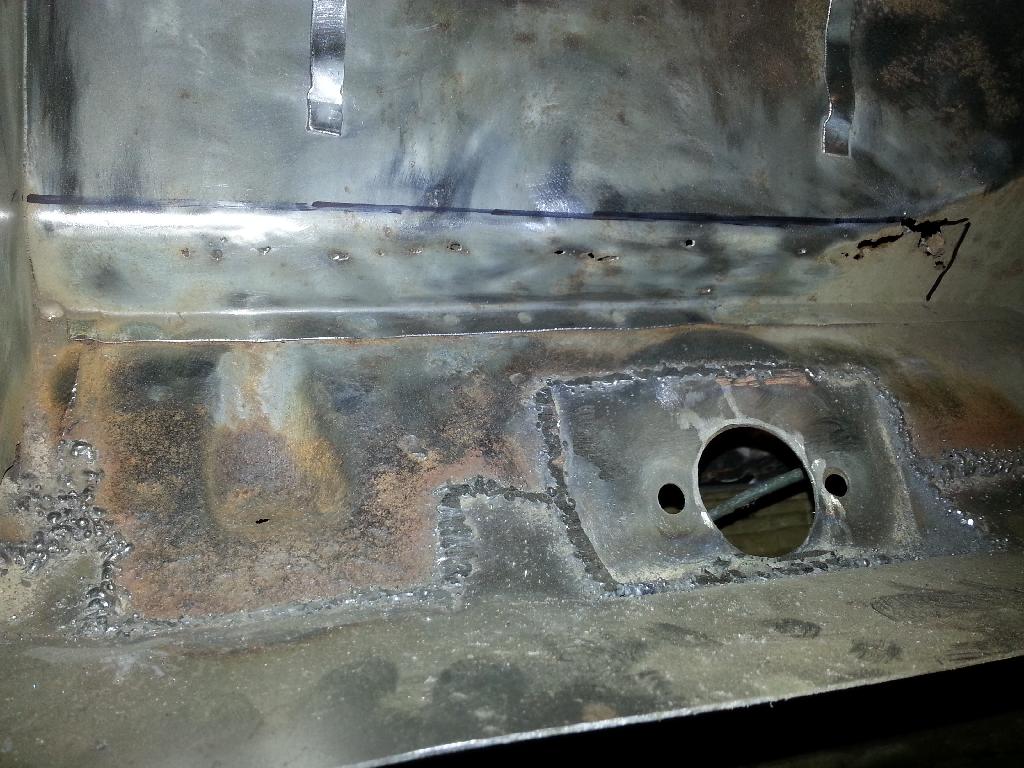
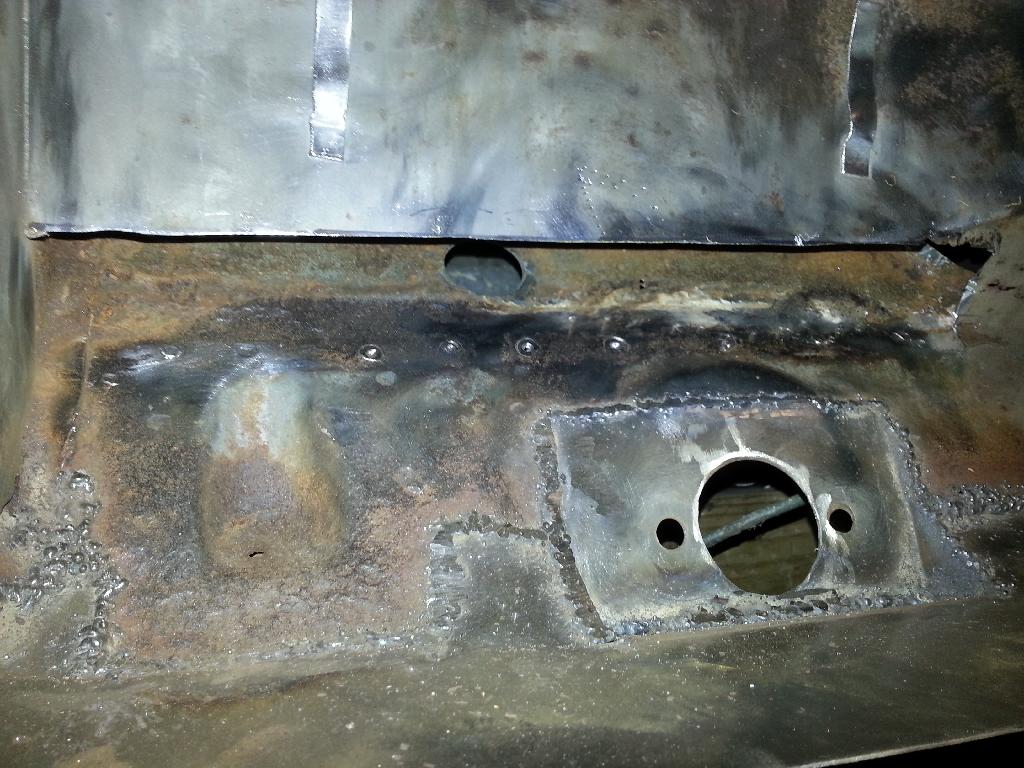
So, I cut a 4" x 22" strip and then trimmed a right angle space where the tunnel joins on the right side in the old metal. The new strip was then cut four times to make flaps. The narrow flap on the left (bent up) passes between the suspension mount and the brake cylinder area (bent down). There's a large notch for the suspension mount and then a remaining flap on the extreme left to join with the wheel house. After welding this large strip in place, I fabricated a half box to lay over the brake cylinder mount. I marked the the two bolt holes, the large hole and cut those out. Then I trimmed off the sides, fixed that into place with a couple nuts and bolts and welded that in. Continuing to work from right to left, I welded around the suspension mount (front and back) and finished by tying in the wheel house and this new piece. That was the most complex with three different planes all joining and a odd curve in the wheel house. I'll do more welding and dressing in that area when I put the floor pan on. Many of the welds were impossible to grind off due to the tight quarters. I was able to weld much of the top joint front and back which should add strength. You'll see the original cylinder mount still in place behind the new metal but I should be able to carefully cut that out once I confirm correct master cylinder positioning. Interesting thing about the area is it is a part of the floor pan. The Porsche diagrams show that from the firewall forward to the front of the front trunk (including the bend over the steering rack) is ALL floor pan.

So, I cut a 4" x 22" strip and then trimmed a right angle space where the tunnel joins on the right side in the old metal. The new strip was then cut four times to make flaps. The narrow flap on the left (bent up) passes between the suspension mount and the brake cylinder area (bent down). There's a large notch for the suspension mount and then a remaining flap on the extreme left to join with the wheel house. After welding this large strip in place, I fabricated a half box to lay over the brake cylinder mount. I marked the the two bolt holes, the large hole and cut those out. Then I trimmed off the sides, fixed that into place with a couple nuts and bolts and welded that in. Continuing to work from right to left, I welded around the suspension mount (front and back) and finished by tying in the wheel house and this new piece. That was the most complex with three different planes all joining and a odd curve in the wheel house. I'll do more welding and dressing in that area when I put the floor pan on. Many of the welds were impossible to grind off due to the tight quarters. I was able to weld much of the top joint front and back which should add strength. You'll see the original cylinder mount still in place behind the new metal but I should be able to carefully cut that out once I confirm correct master cylinder positioning. Interesting thing about the area is it is a part of the floor pan. The Porsche diagrams show that from the firewall forward to the front of the front trunk (including the bend over the steering rack) is ALL floor pan.
Looking good so far! One thing I noticed - the pedal cluster sits in a bit of a 'trough' in front of the MC hole. Currently you have it going straight across. You may have significant difficulty getting the pedal cluster to fit if you don't leave enough room. Might check some other posts here for a good picture. Keep it up, lookin good! 
QUOTE(ThePaintedMan @ Dec 23 2013, 02:06 PM)
Looking good so far! One thing I noticed - the pedal cluster sits in a bit of a 'trough' in front of the MC hole. Currently you have it going straight across. You may have significant difficulty getting the pedal cluster to fit if you don't leave enough room. Might check some other posts here for a good picture. Keep it up, lookin good!
Yeah. I noticed that today looking at Restoration Design videos and a restoration thread on Pelican. There's a peddle cluster support bracket that locates under the pan. I left quite a bit of extra sheet metal and had planned on trimming the excess when I put the pan on. Thanks for the heads up
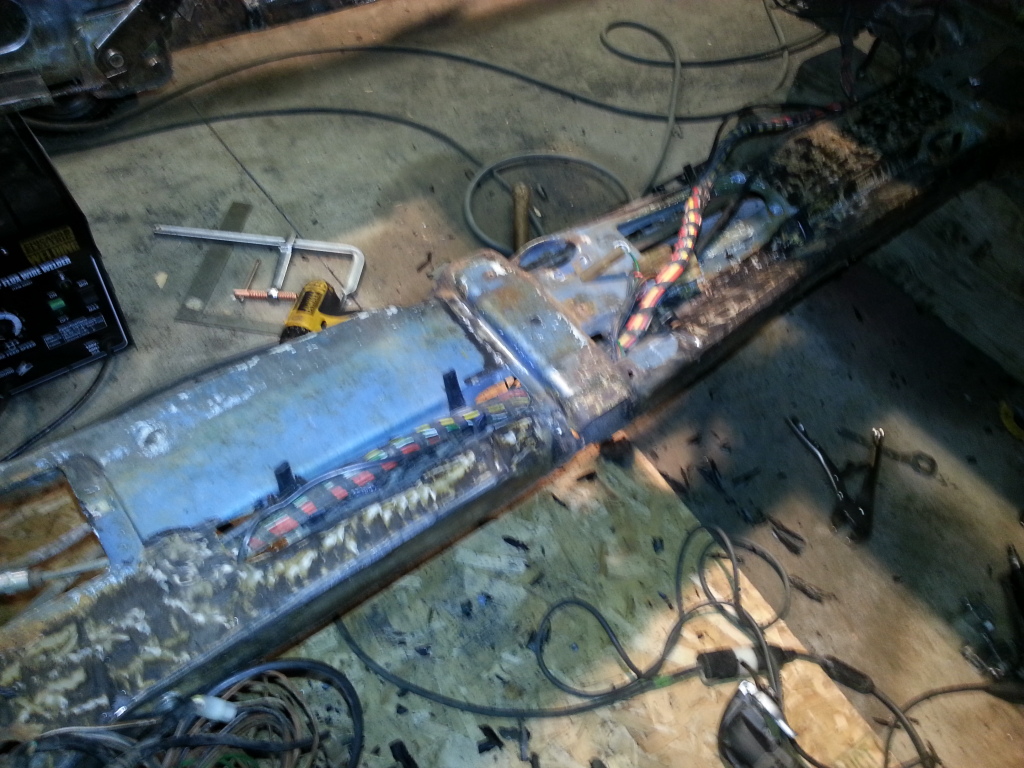
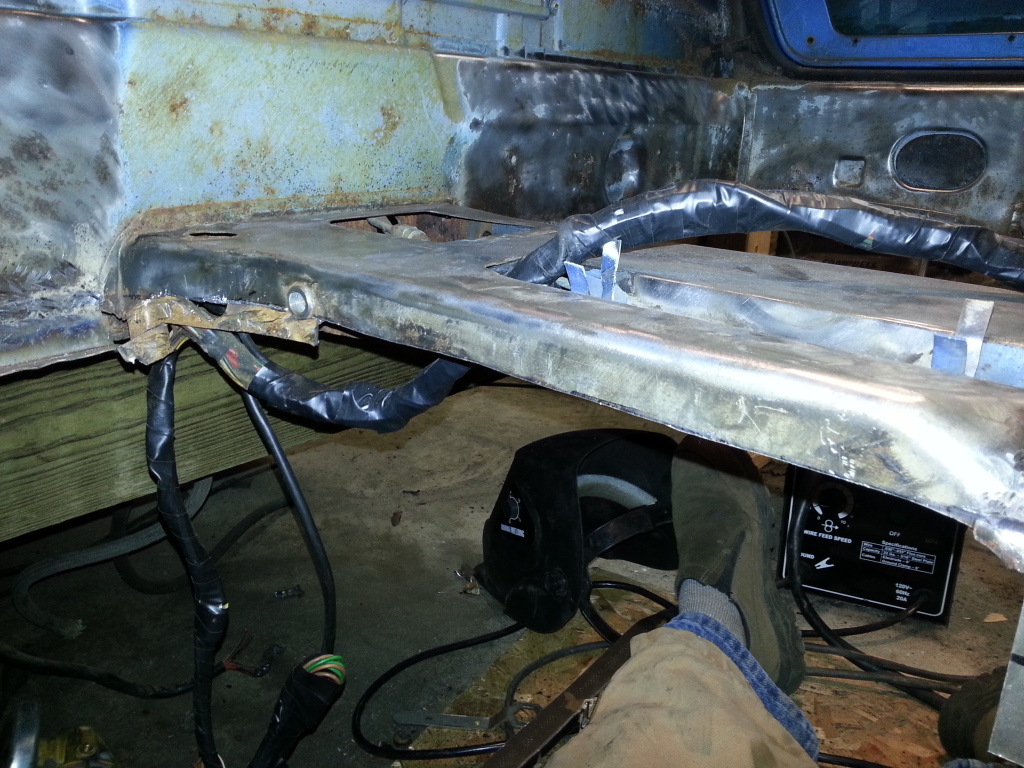
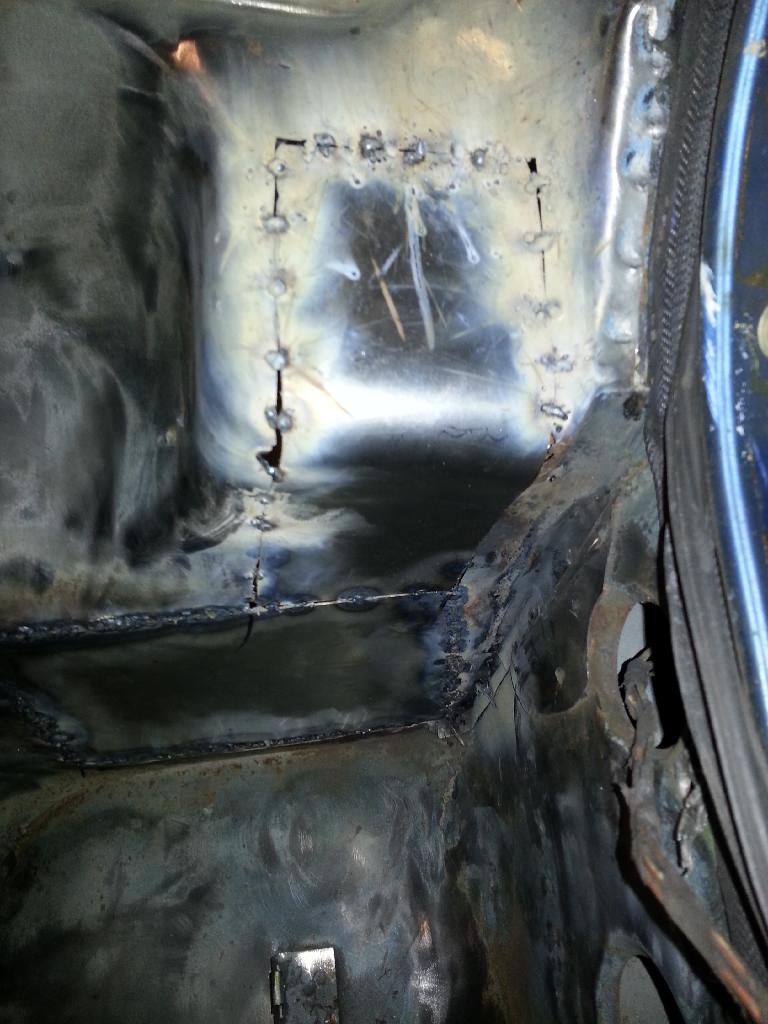
Today I got the upper pad, lower pad, steering wheel, steering column, steering rack and dash assembly out. I'm glad I did! There's some rust invading the steel bulkhead below the right corner of the wind shield. Removing those parts went fairly well with no new wildlife to report. The mice had been nesting in the left vent, building up garbage around the wiring harness. But there's no indication of gnawing on the wires. Tomorrow I'm going to break up the wire bundles and discard every thing going to the front of the car. Nothing from the dash forward will ever need electrical so all that can be cut out. In fact, I don't think I'll even put the dash back in. Probably just fabricate a box for the instrument cluster and use the OEM console gauge cluster. Tomorrow I'm also going to clean all that sheet metal on the front bulkhead to prep for rust treatment.
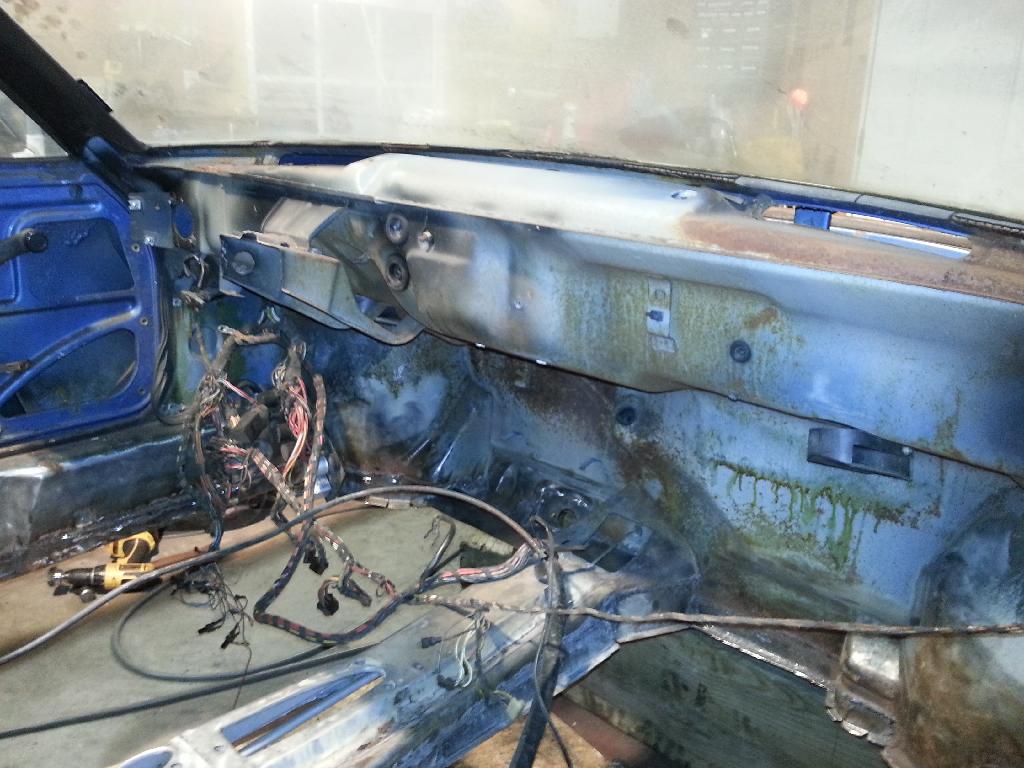
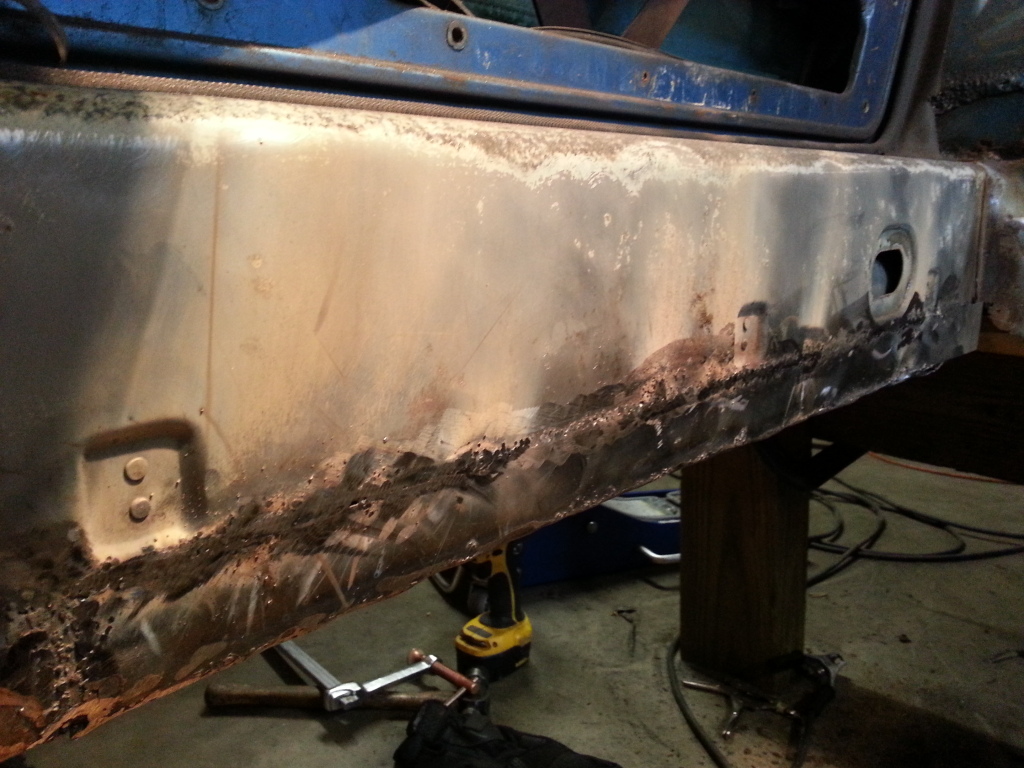
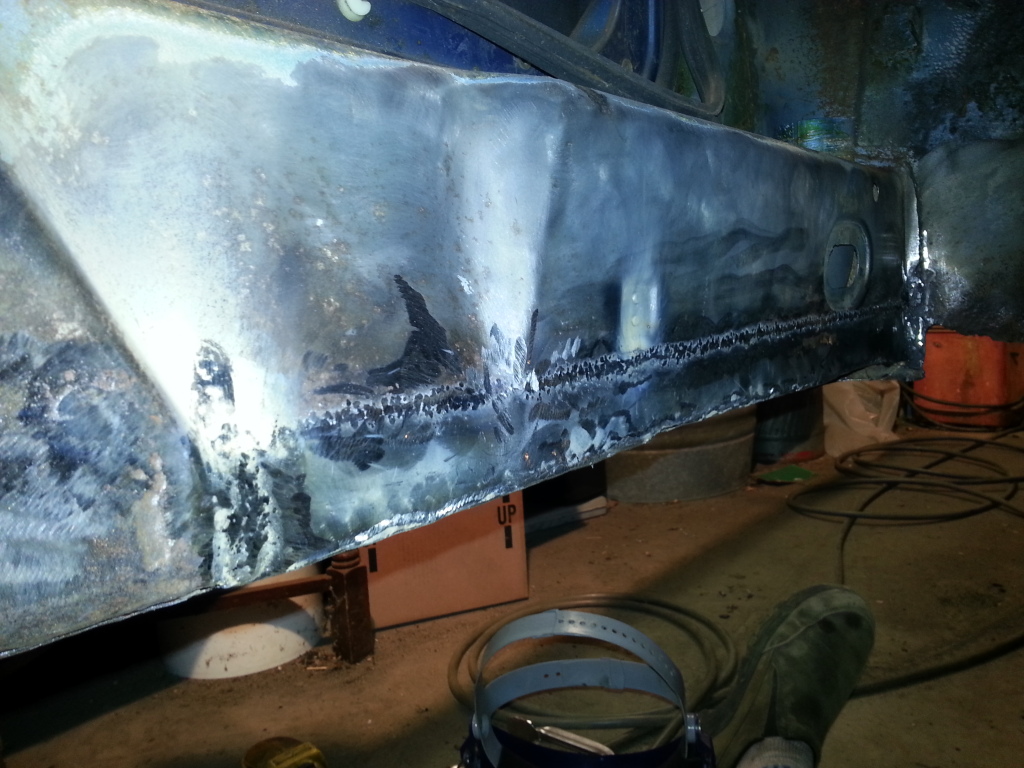
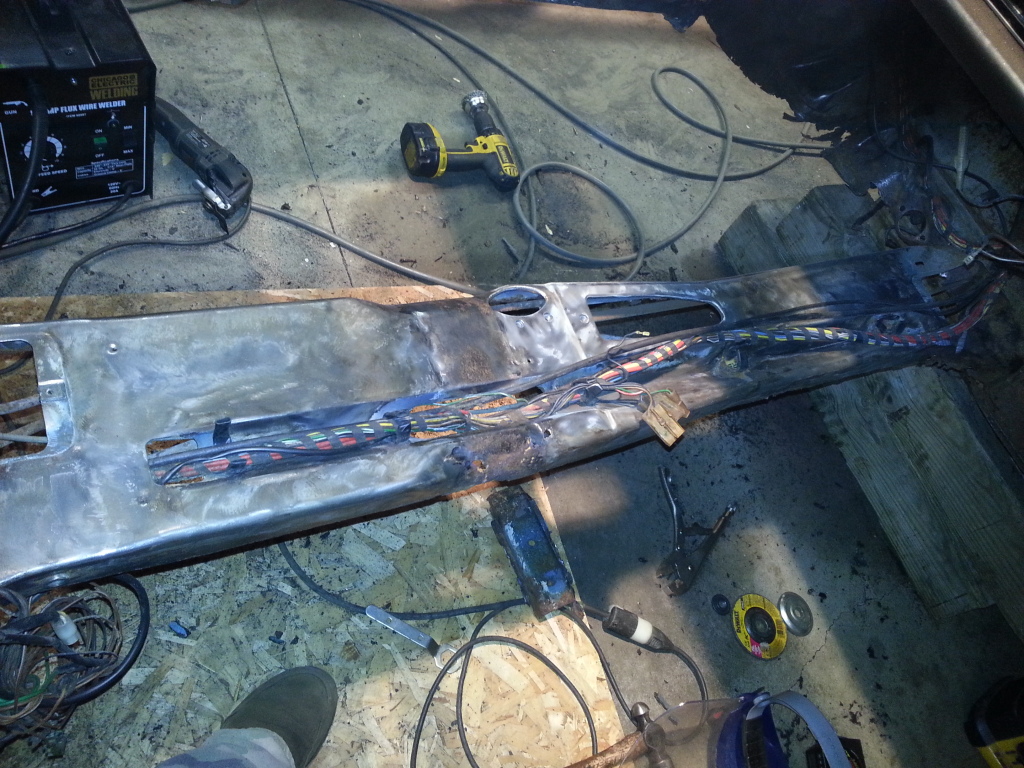
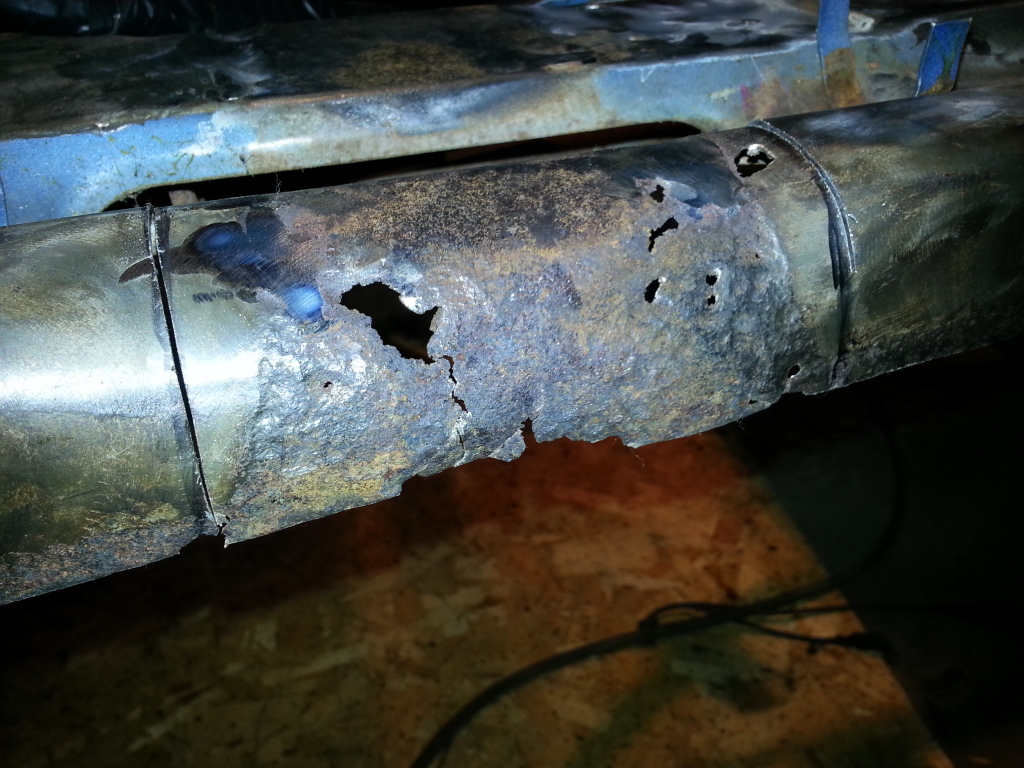
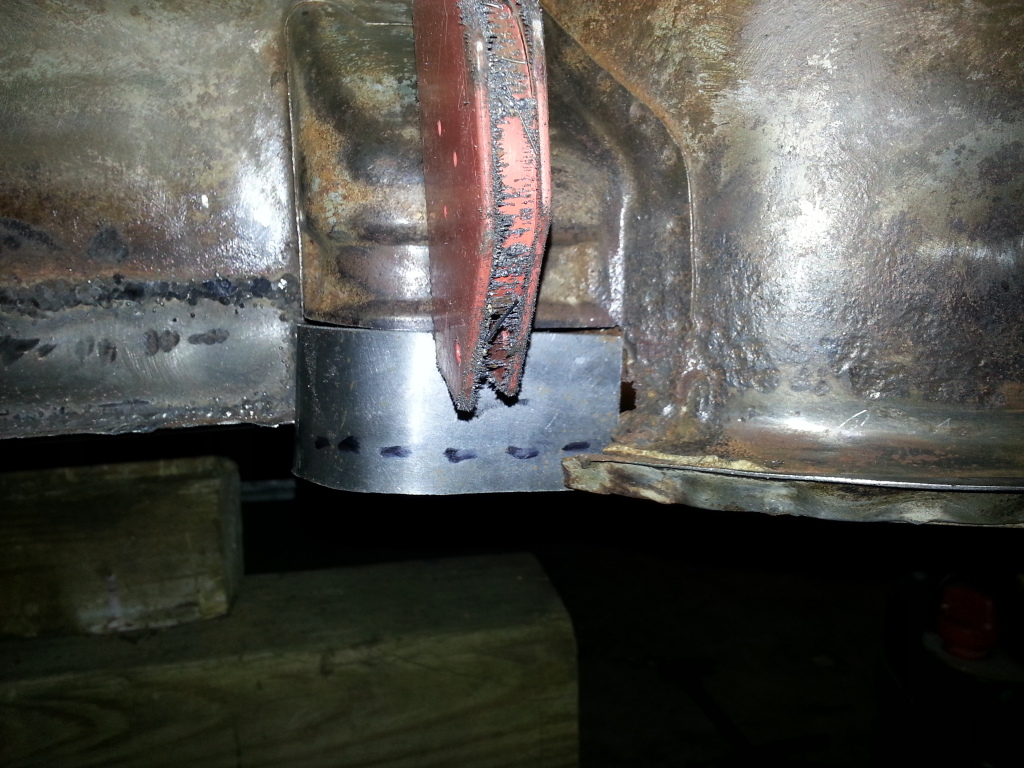
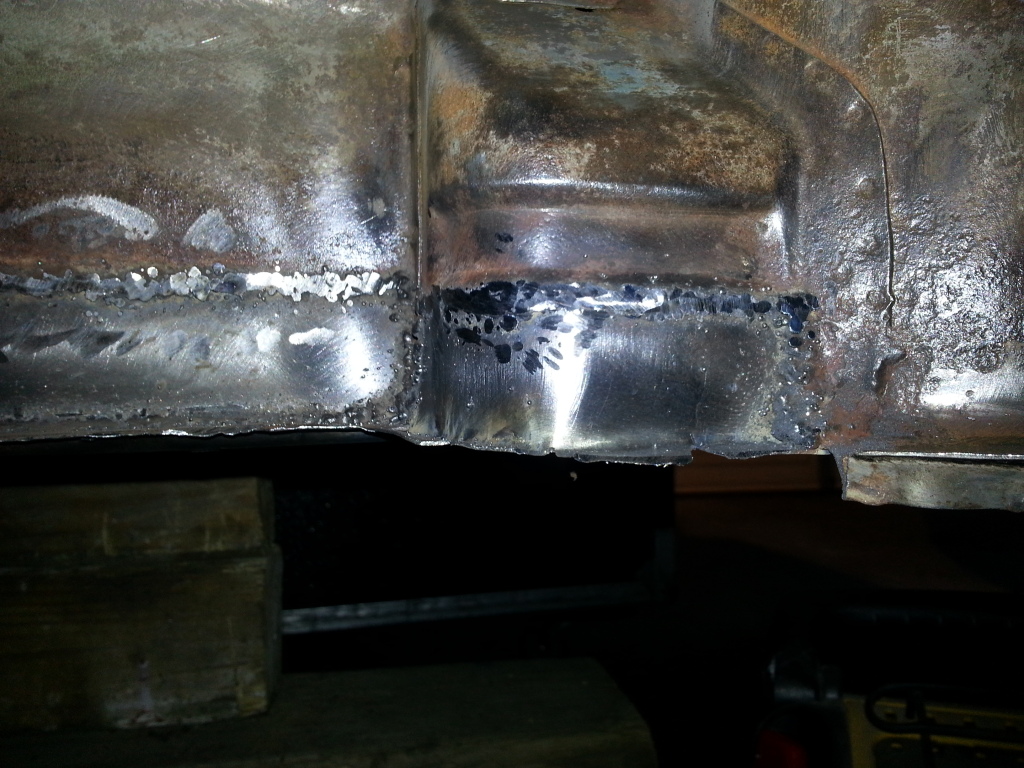
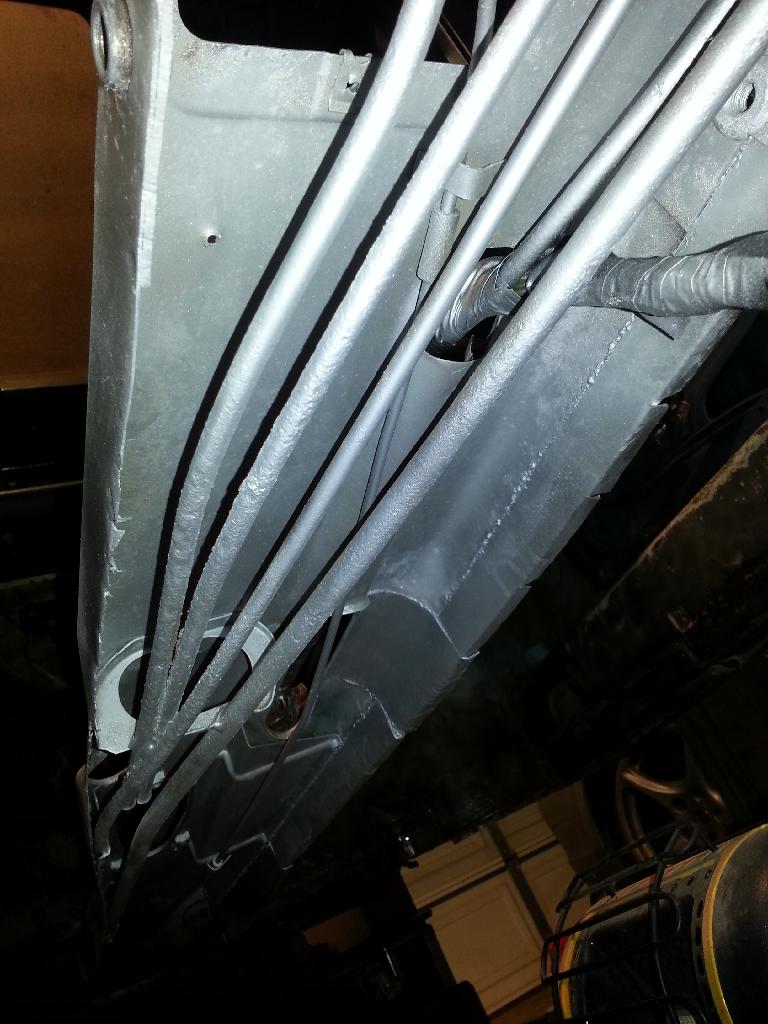
A great day off for Christmas eve and I'm crawling through the rust First thing I got the wire harness apart and culled anything that will probably never be used again. Basically all this car will need are engine functions (starter, oil pressure, temp, etc). With that mess out of the way I'm wire brushing the whole front bulkhead. There's three bad spots. Under either vent and above the peddle area. I decide to go ahead and patch the peddle area. These rust spots were cause by moisture collecting on the edges of the seam sealer in the fuel tank compartment. I drilled out the spot welds and cut out the offending material. There's one more area directly in front of the tunnel that will need to be addressed and that going to be really difficult to get to  Anyway, when I finished the patch, there's one other task I want to do. I've been reading a post in the tech forum about outer long re-enforcement and it discusses treating inside the long with a sprayer (without removing the outer half). That sounds like something I should really do but the stupid heater hose is not going to make that very effective. I'm convinced I can remove the hose (hard pipes front and back, flexible in the middle). The right side is my choice today and there's bottom material missing near the rear jack point so I figure I can pull out the tubing there. The front hard pipe has two spot welds holding it so I grind those off. Going in between the firewalls, I cut the rear hard pipe in half. I ground off the small rivets that hold the three hose supports located on the inside long. I start wiggling the pipes and I'm looking down inside with a work light and an inspection mirror. There's spot welds on the top of the front and rear hose support brackets so I just drilled those out. That freed everything up and I start dragging the "guts" out. That was really difficult and the flex hose pulled to pieces but eventually I got all that mess out. Last photo shows a camera shot inside the long. The bottom is really toasty but 2/3 of the sides and the top are surprisingly rust free. I'll vacuum out the remaining junk and treat with rust kill. Sorry about the lack of photos but it was a real thrash and I was just focused on "getting 'er done"

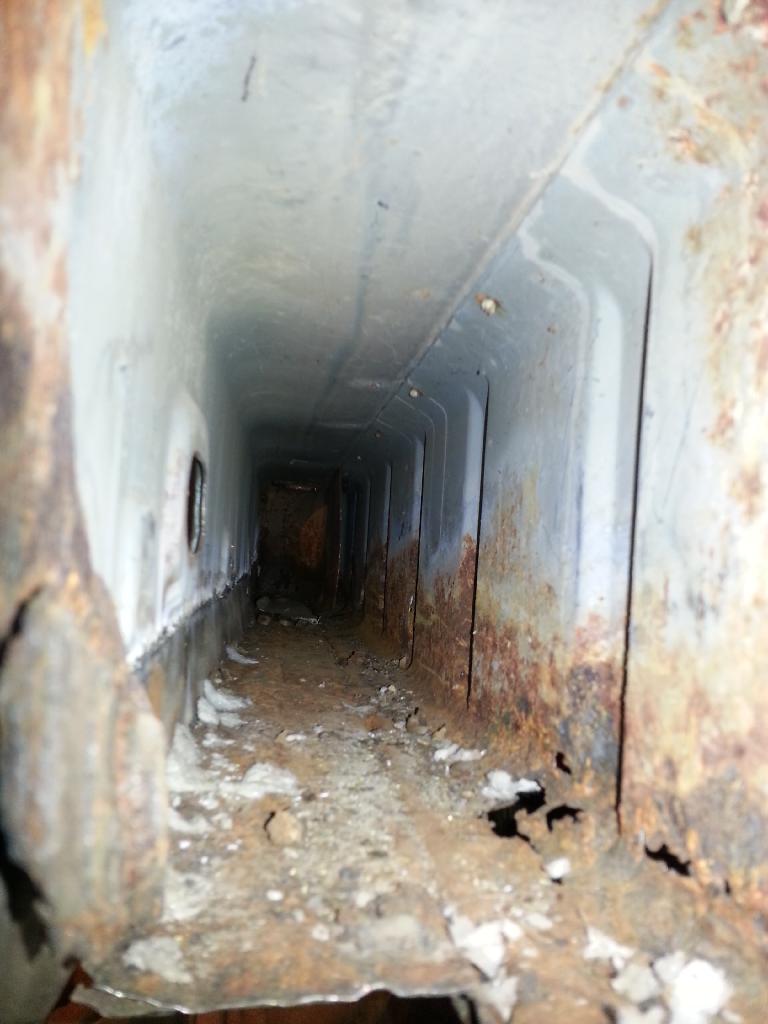
First thing I got the wire harness apart and culled anything that will probably never be used again. Basically all this car will need are engine functions (starter, oil pressure, temp, etc). With that mess out of the way I'm wire brushing the whole front bulkhead. There's three bad spots. Under either vent and above the peddle area. I decide to go ahead and patch the peddle area. These rust spots were cause by moisture collecting on the edges of the seam sealer in the fuel tank compartment. I drilled out the spot welds and cut out the offending material. There's one more area directly in front of the tunnel that will need to be addressed and that going to be really difficult to get to Anyway, when I finished the patch, there's one other task I want to do. I've been reading a post in the tech forum about outer long re-enforcement and it discusses treating inside the long with a sprayer (without removing the outer half). That sounds like something I should really do but the stupid heater hose is not going to make that very effective. I'm convinced I can remove the hose (hard pipes front and back, flexible in the middle). The right side is my choice today and there's bottom material missing near the rear jack point so I figure I can pull out the tubing there. The front hard pipe has two spot welds holding it so I grind those off. Going in between the firewalls, I cut the rear hard pipe in half. I ground off the small rivets that hold the three hose supports located on the inside long. I start wiggling the pipes and I'm looking down inside with a work light and an inspection mirror. There's spot welds on the top of the front and rear hose support brackets so I just drilled those out. That freed everything up and I start dragging the "guts" out. That was really difficult and the flex hose pulled to pieces but eventually I got all that mess out. Last photo shows a camera shot inside the long. The bottom is really toasty but 2/3 of the sides and the top are surprisingly rust free. I'll vacuum out the remaining junk and treat with rust kill. Sorry about the lack of photos but it was a real thrash and I was just focused on "getting 'er done"
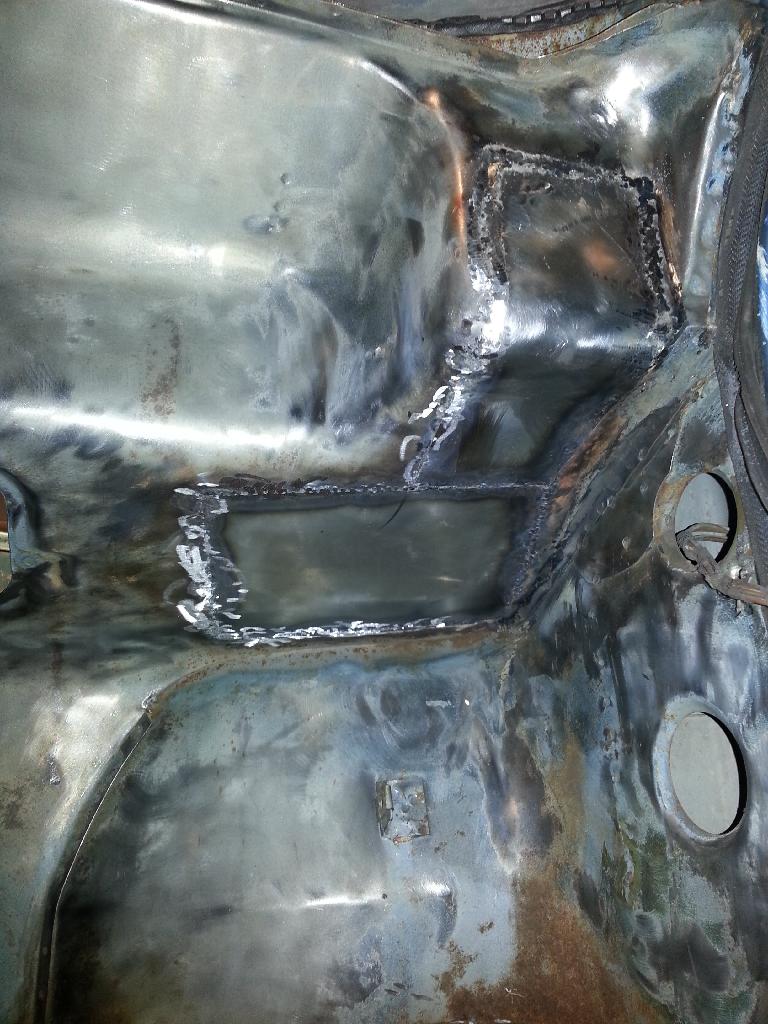
The wife ran me out of the house while Christmas dinner was being prepared so what else do you do after opening gifts? Actually, she's quite wonderful and knows me SO well. I've got a couple hours and I'm on the rust spot under the passenger vent. It's two bad spots and I'm going to combine those. Cutting around the connecting vent hole for metal that's flat (that hole is recessed). I did one patch and will add another for the upper-vent area. In fact, I think I'm going to wrap that patch all the way up and eliminate that vent hole completely. I know I'm going to grind off the dash mount bracket near the door so I might as well make that area one smooth surface. The only purpose I can foresee would be to possibly have the roll cage extend through that vent hole (I've seen some photos of that) but it's unlikely I'll have a roll cage system that complex.

Another evening of patching fun. Finished up the passenger side vent rust. I cut the dash bracket off with a grinder. Then marked a rectangle bending up from the previous patch. Cut the offending material out and made the patch. I actually ended up making the bends by hand and some nylon hammer assistance. The vertical welds were done in the passenger compartment and the horizontal welds from inside the fuel tank compartment. Everything cleaned up well in the passenger compartment but a bit too tight to get the grinder in on the other side.
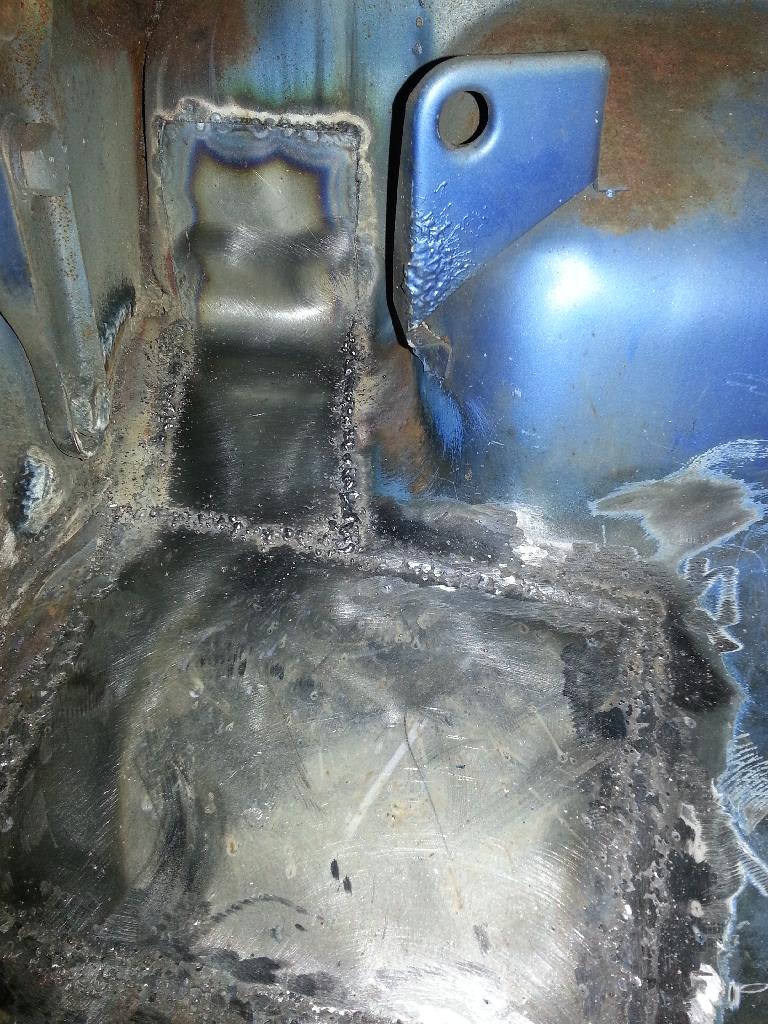
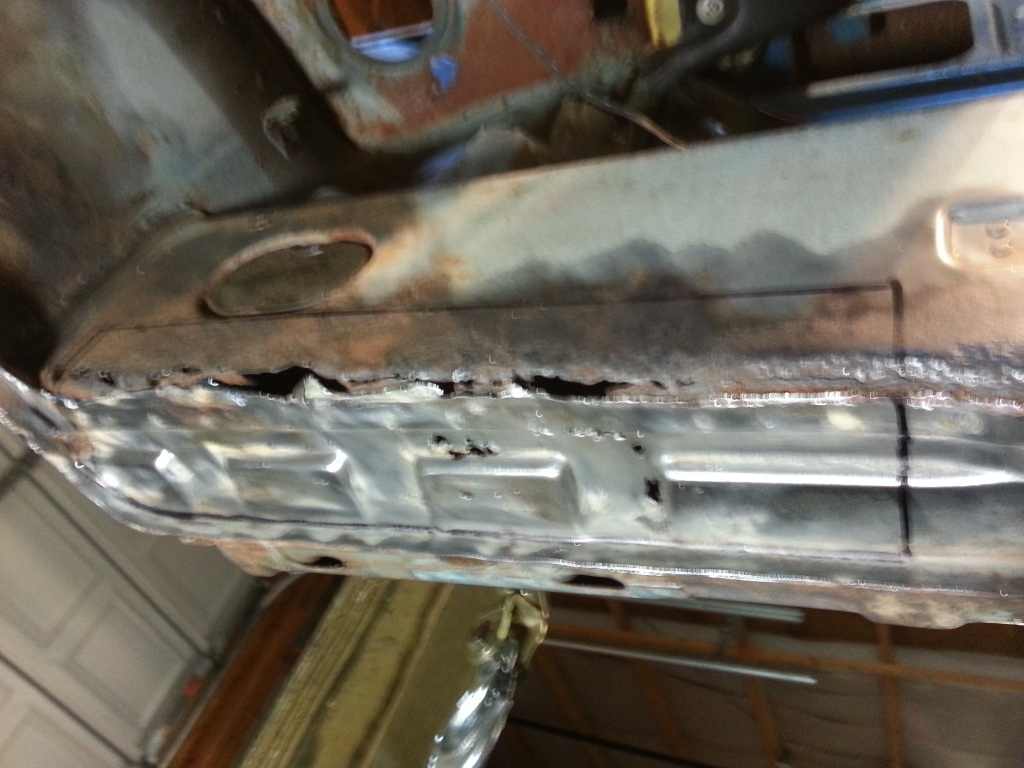
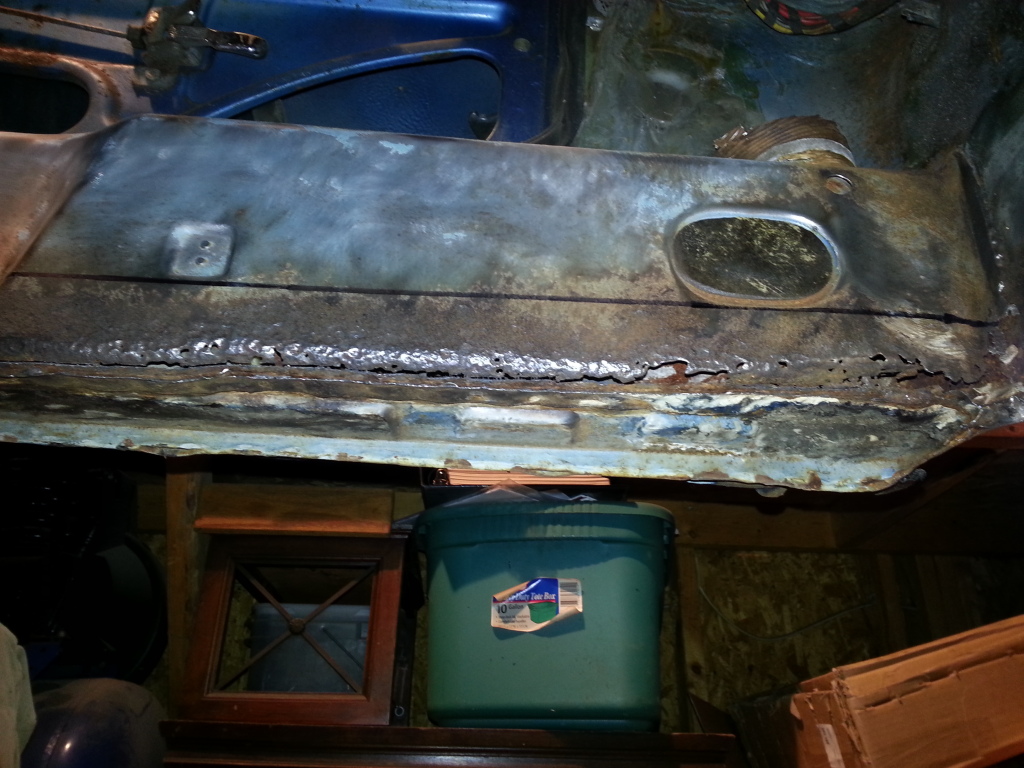
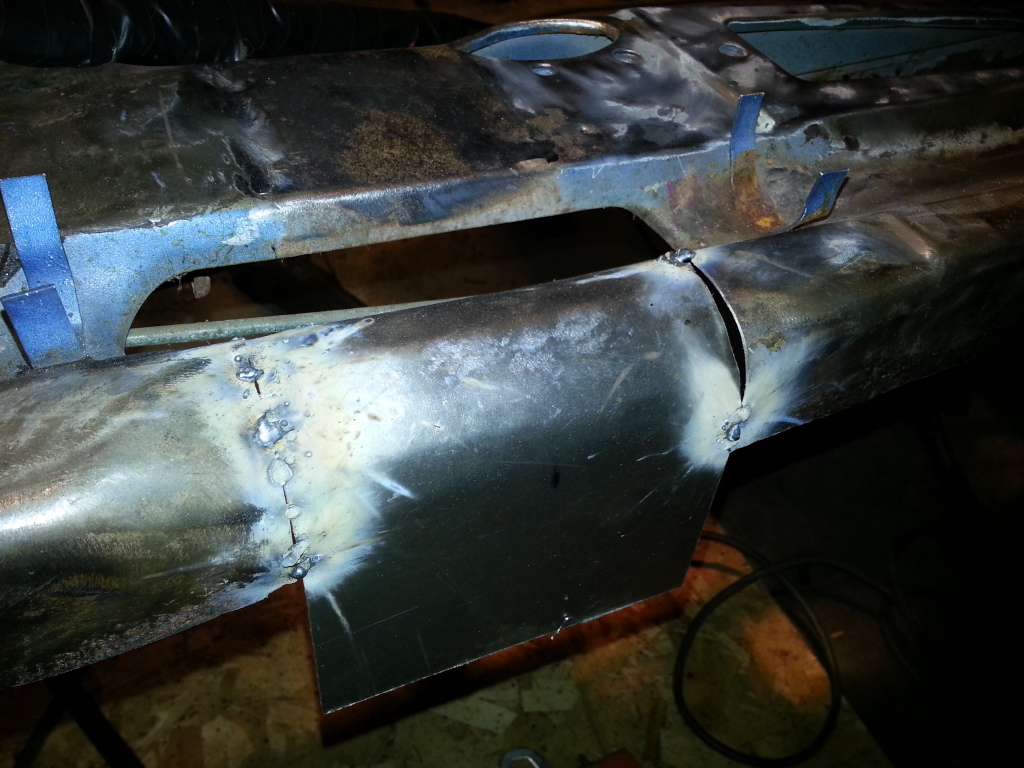
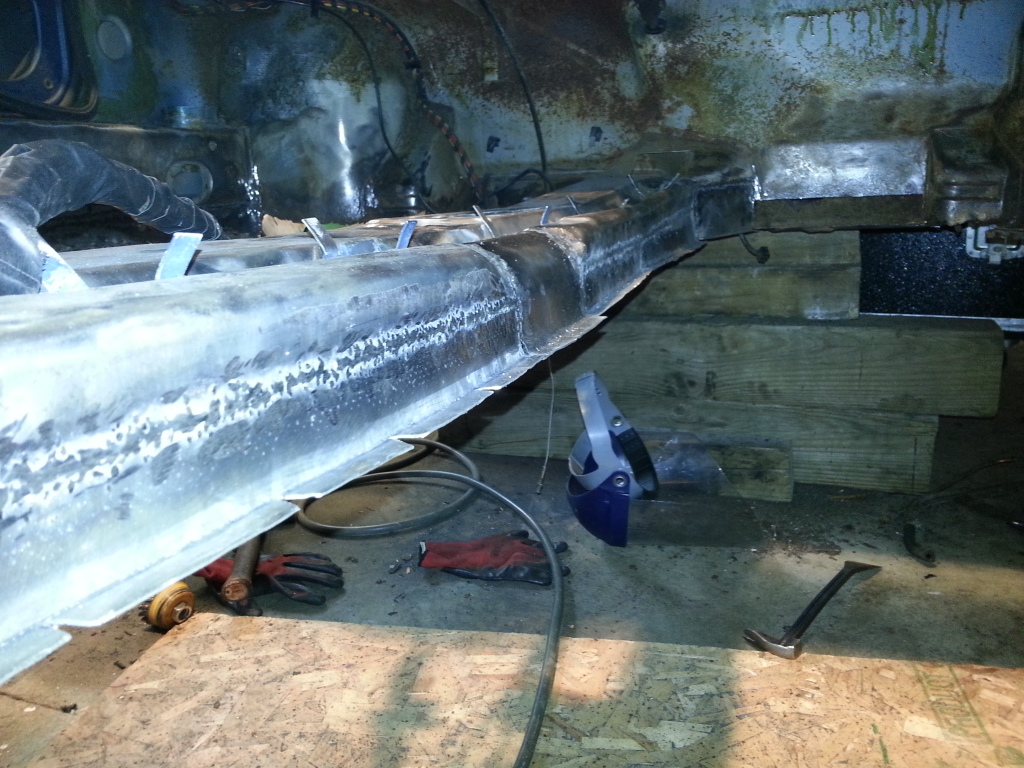
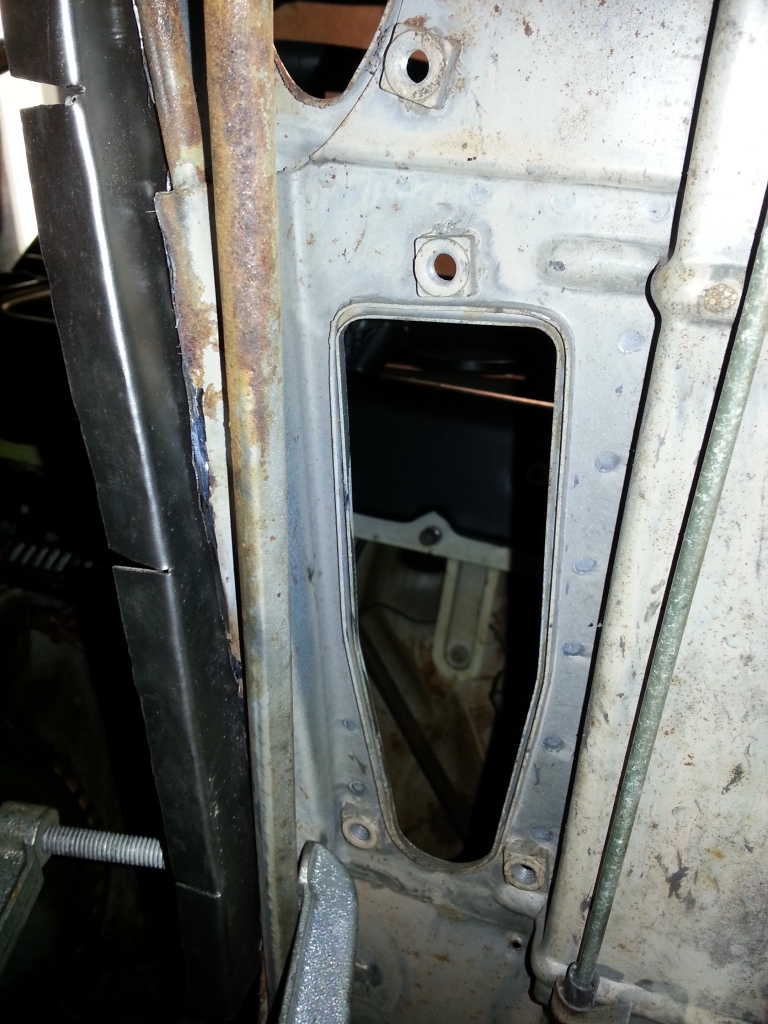
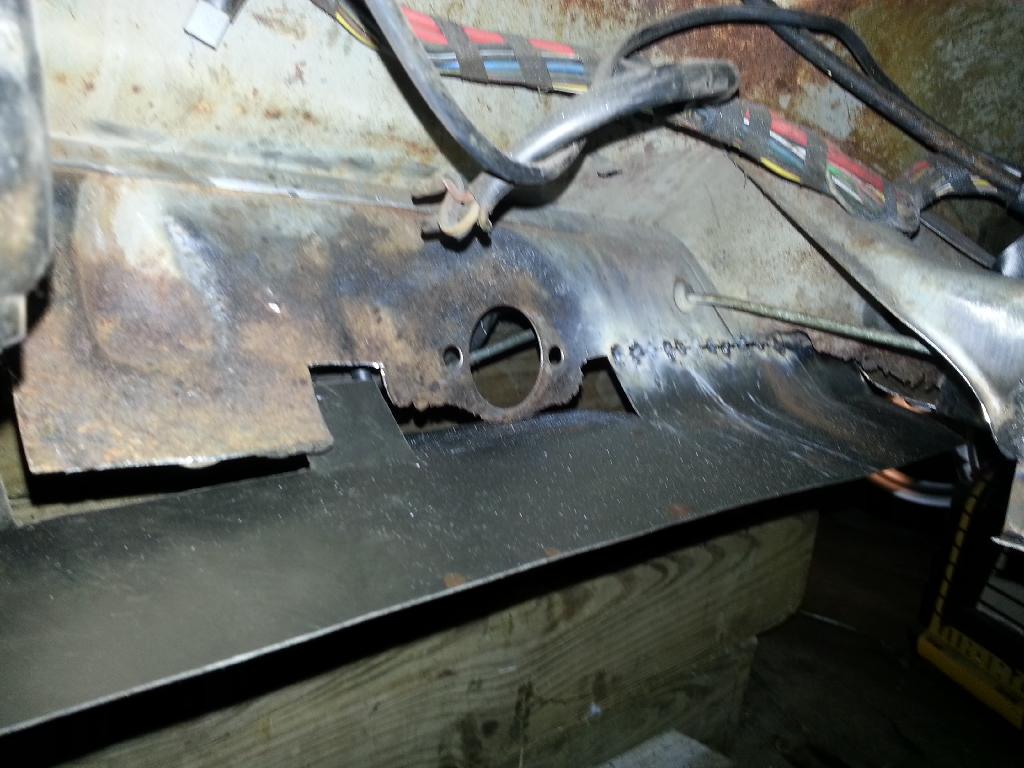
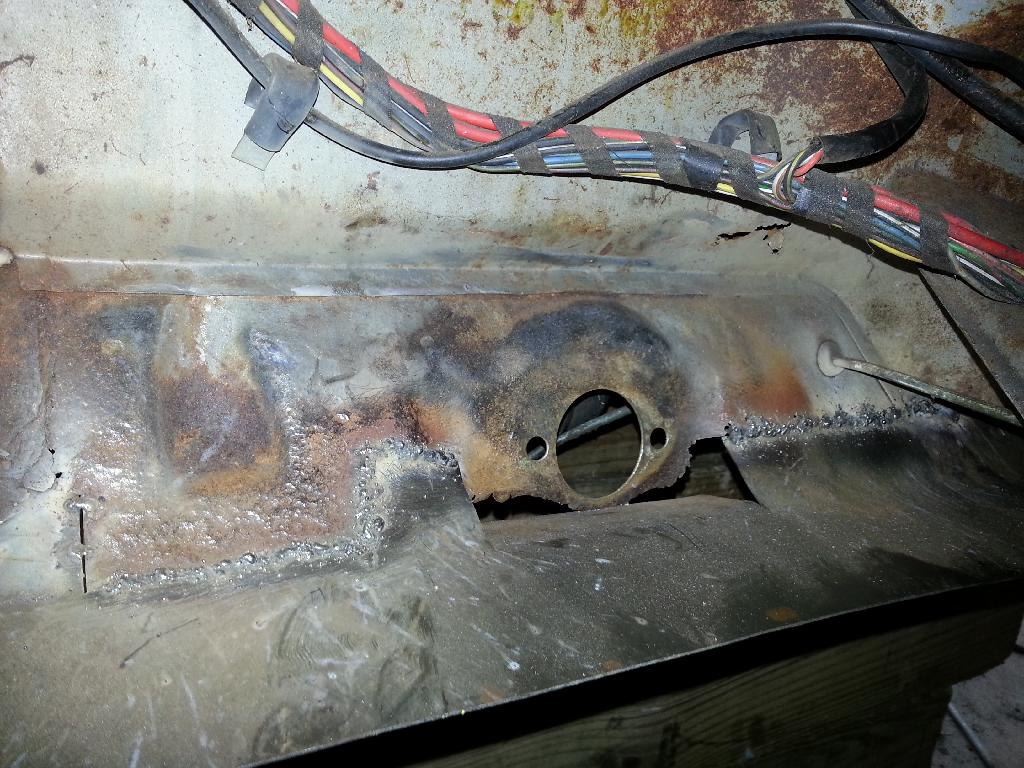
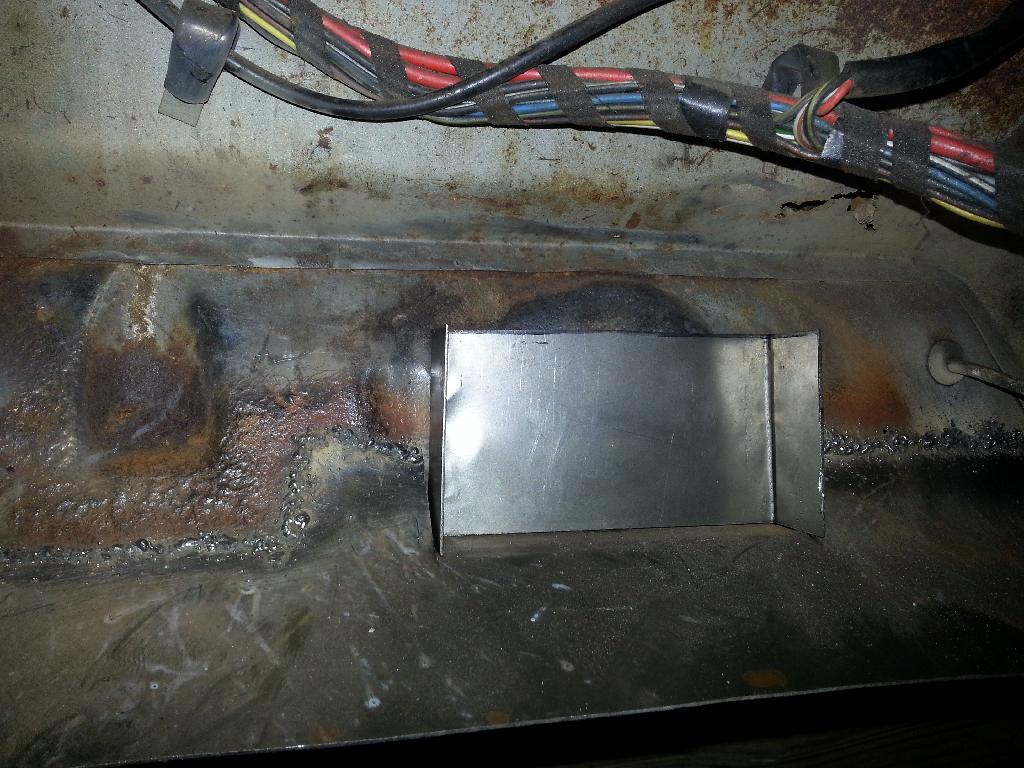
Outstanding progress today! I've got POR 15 on the front firewall. Last night I cut out the rust hole under the front hood release. I stripped the hood release handle, cable, trunk hinge and the trunk seal out of the channel (now I've found a source for all 914 rubber). I started with a couple of rectangular shapes but realized that I didn't need the dash mount bracket so turned that into a polygon. I also did the correct procedure and removed the offending metal all the way to the inside of the wheel house. The original metal had a flange and I was able to remove that with a grinder (so much quicker than drilling out the spot welds). Note that there's thick metal where the trunk hinge plate attaches so no worries of burn through there. The patch was cut to fit, I bent the edge and drilled for rosette welds. A little trimming and that went in like a charm. I was able to make all the butt welds from inside the gas tank compartment so those were easy. Then I welded the rosettes along the side and added a couple of seam welds for good measure. I was able to get the grinder into most and it cleaned up nicely. I did not cut out the drivers vent hole as the metal there was in pretty good shape. I may cover it later along with the two lower vent holes.
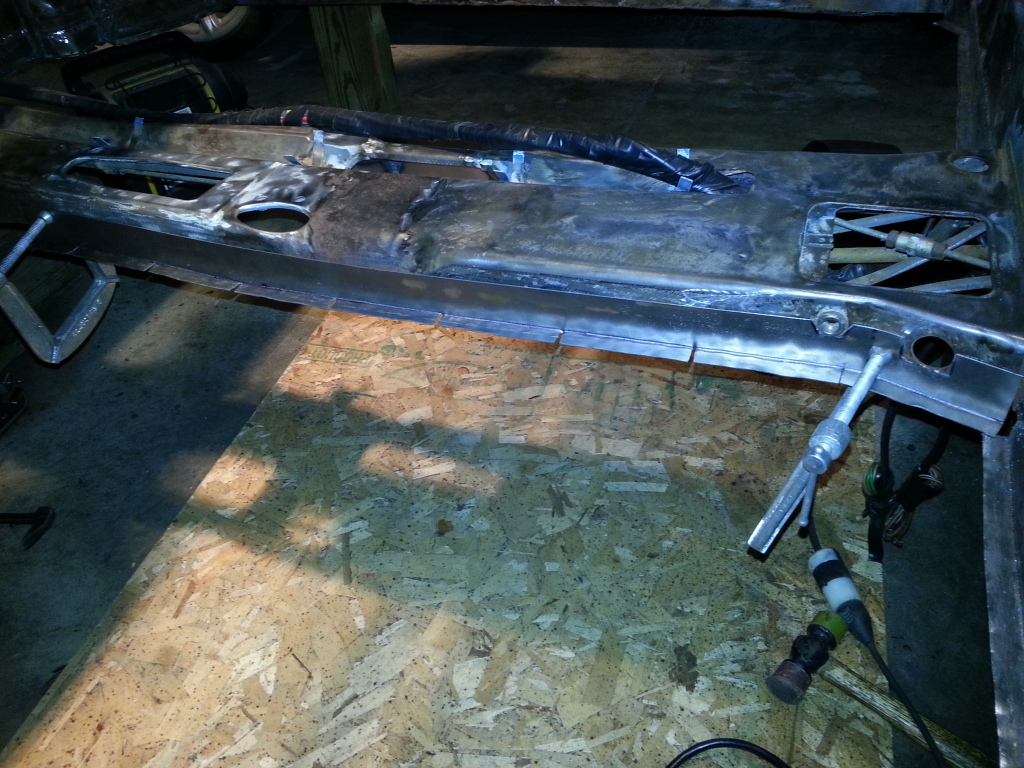
Now I've been wanting to get treatment on this dash bulkhead (firewall) for weeks. After just days all these patch areas have started to surface rust and that was driving me nuts. So with this whole area mostly complete, I say the h*ll with it, and Marine Clean and surface prep everything I can get to. The temp in the garage is as good as it going to get in late Dec. so after making sure everything was completely dry, I'm slathering on the POR 15. Man, does it feel good to have that metal covered up I also covered the tunnel as it's ready. Of course some of the flanges will have to be ground clean for welding when it's time to put the pans on. I think next will be to gut the pipes out of the drivers side long, strip the tops of both longs, and then rust treat the interiors and exteriors of both. That will leave the inner firewall and back panel. I had no idea that getting this car structural would be this intense And I haven't even got into the engine compartment yet!

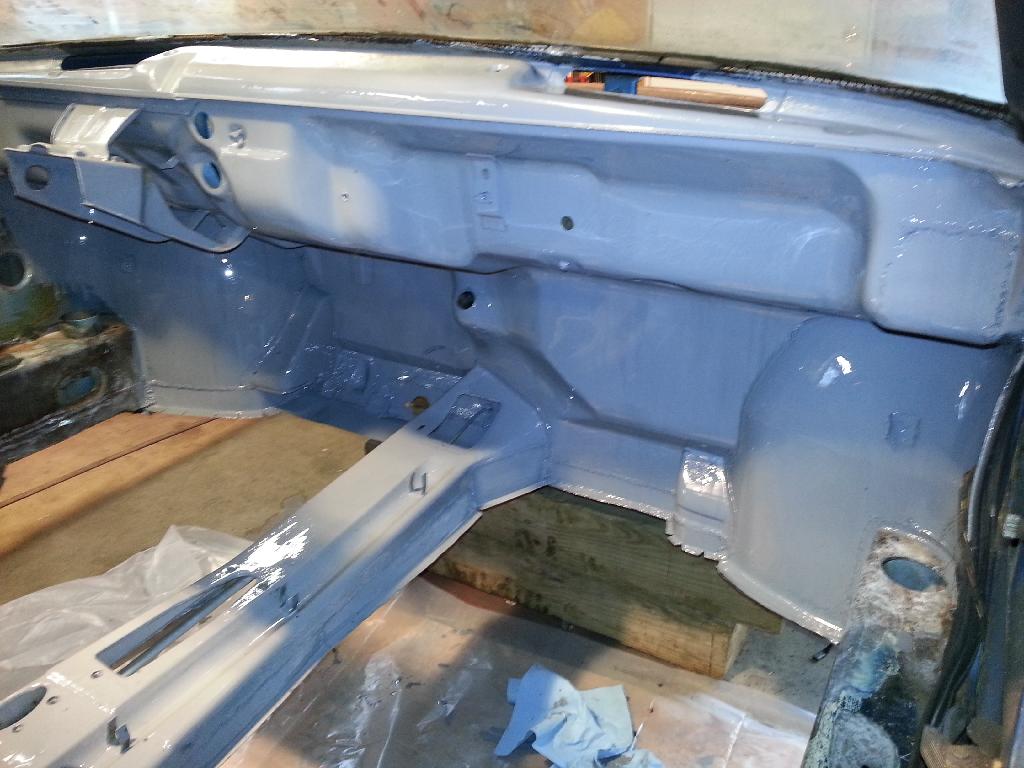
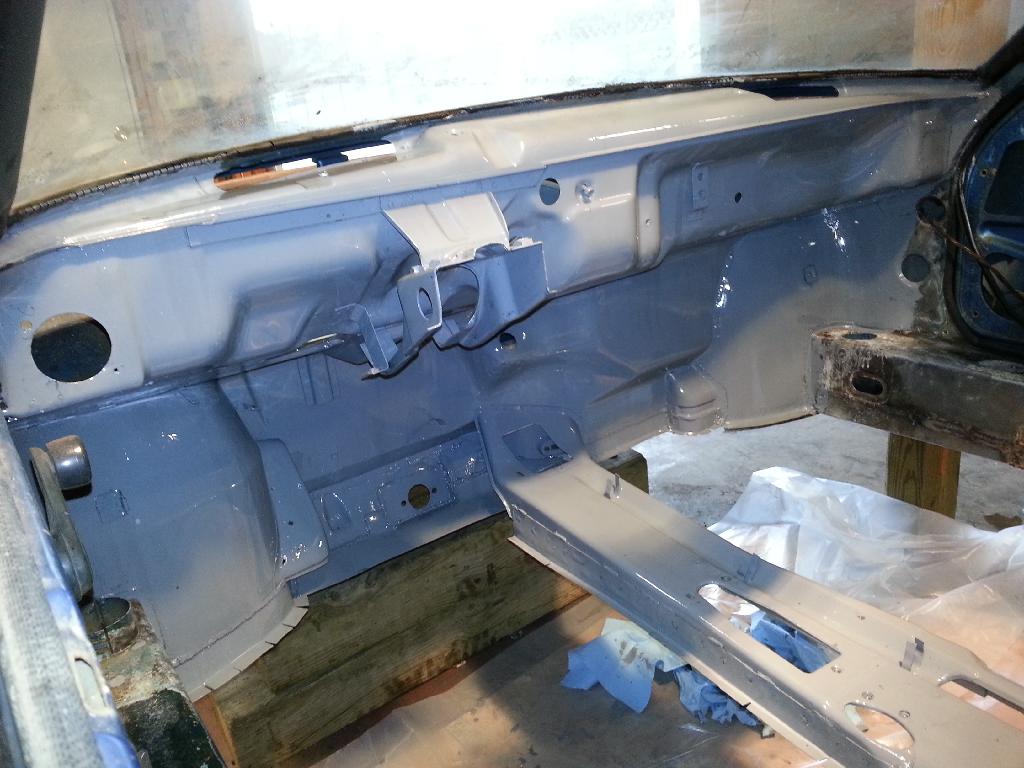
Now I've been wanting to get treatment on this dash bulkhead (firewall) for weeks. After just days all these patch areas have started to surface rust and that was driving me nuts. So with this whole area mostly complete, I say the h*ll with it, and Marine Clean and surface prep everything I can get to. The temp in the garage is as good as it going to get in late Dec. so after making sure everything was completely dry, I'm slathering on the POR 15. Man, does it feel good to have that metal covered up I also covered the tunnel as it's ready. Of course some of the flanges will have to be ground clean for welding when it's time to put the pans on. I think next will be to gut the pipes out of the drivers side long, strip the tops of both longs, and then rust treat the interiors and exteriors of both. That will leave the inner firewall and back panel. I had no idea that getting this car structural would be this intense And I haven't even got into the engine compartment yet!
QUOTE(J P Stein @ Dec 29 2013, 01:54 AM)
Yes, sir. That looks nice and clean. Your cage builder used the vent holes I see. Is that a XP SCCA Solo car?
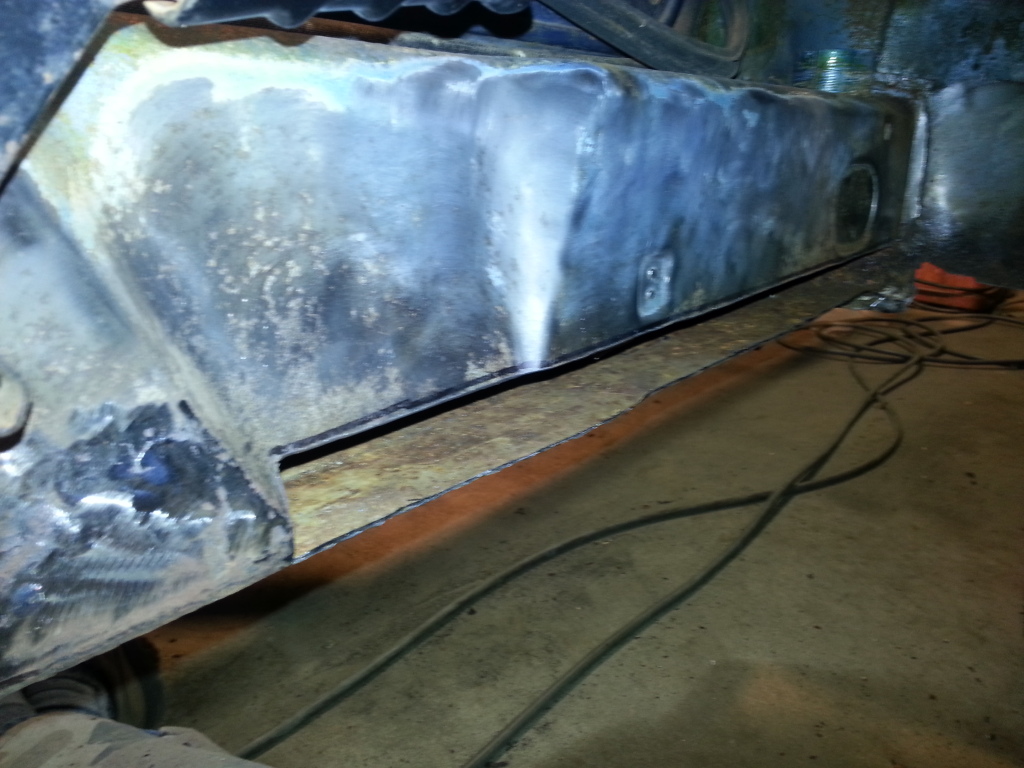
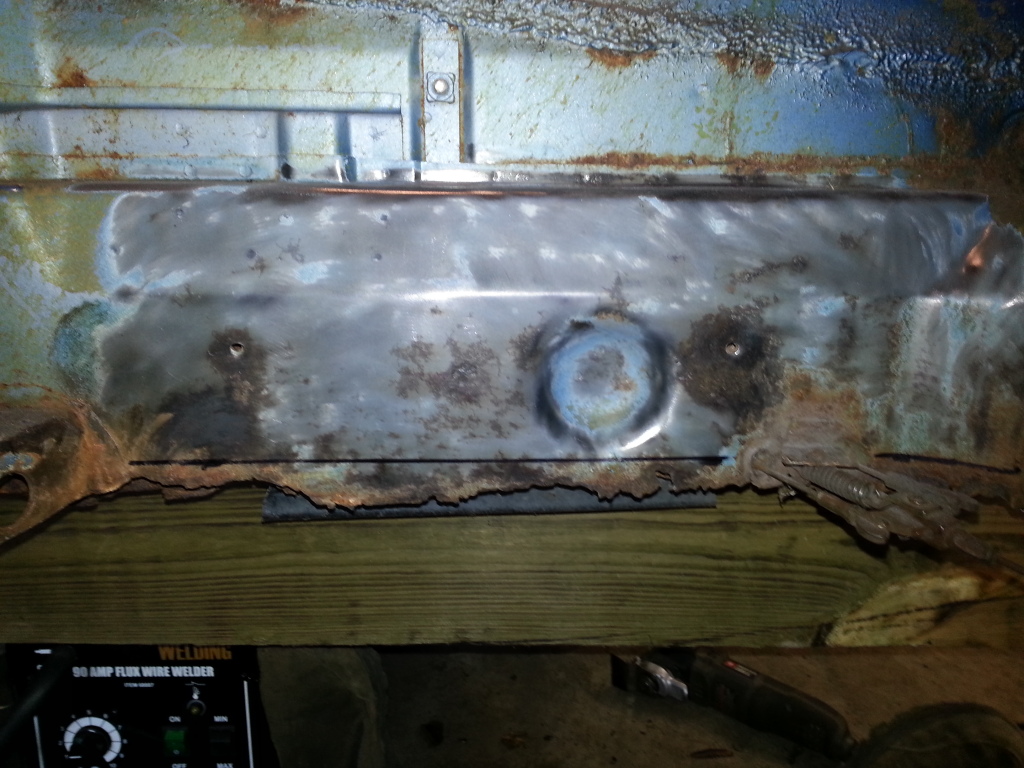
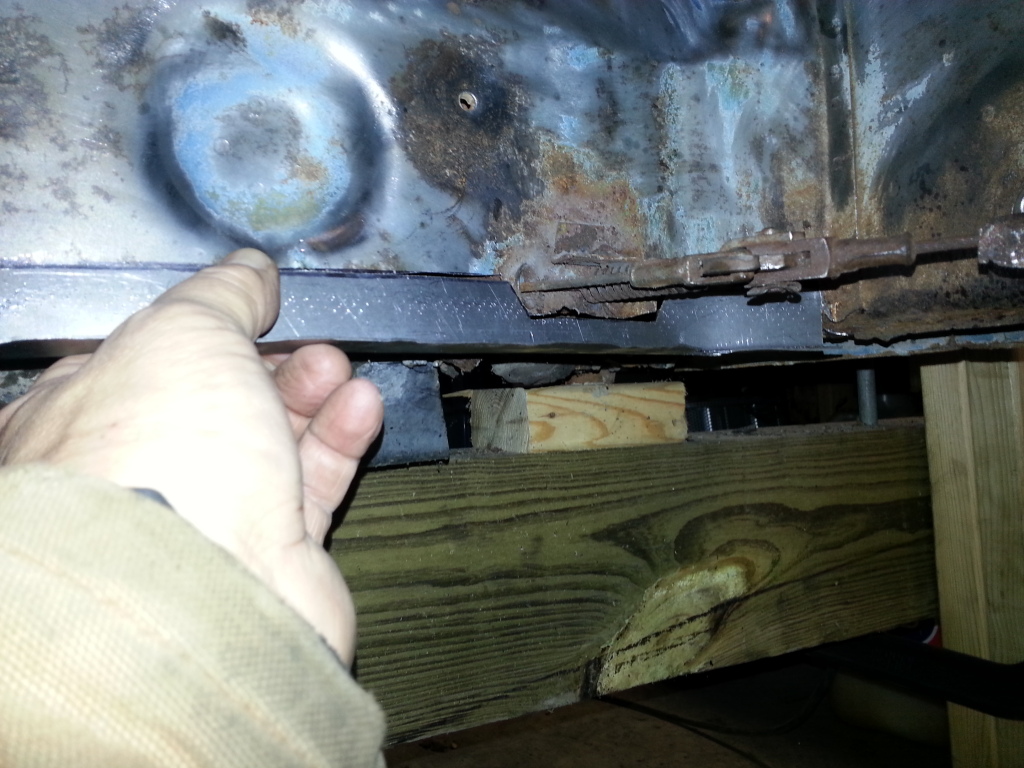
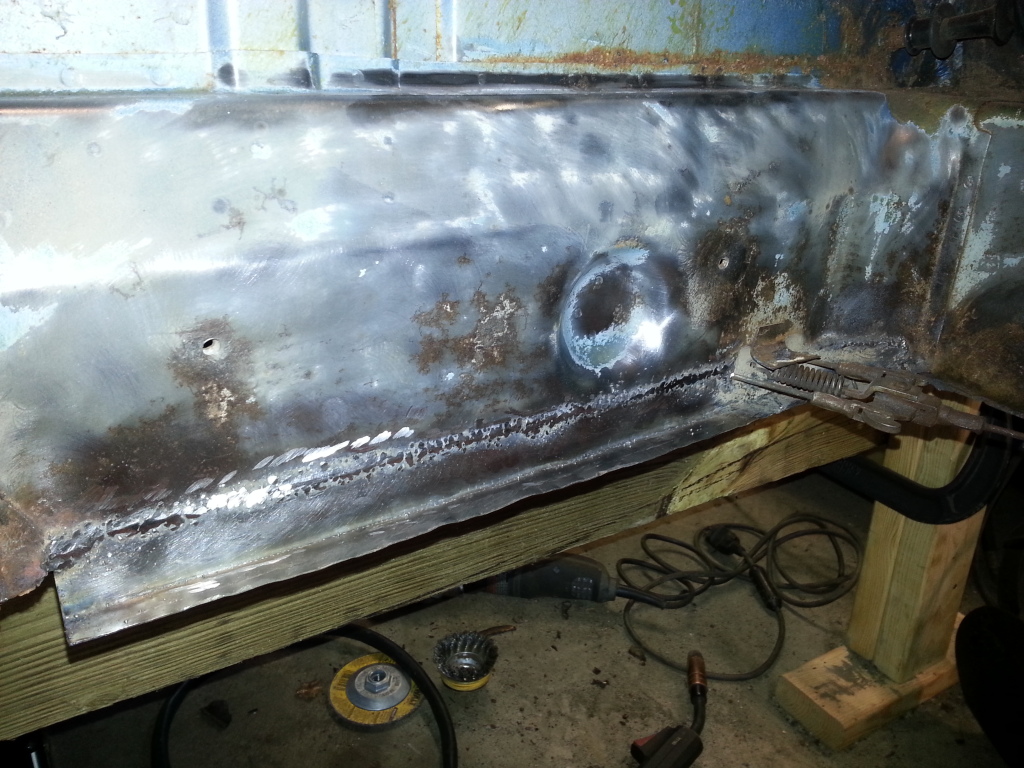
Well I took a good look at the drivers side long and that side rear jack-point is okay. The plate has a rust hole but I've got the car up on the jack-point. So pulling the heater hoses out the back isn't an option right now. I thought briefly about cutting a hole in the wheel house to pull that out, but that's good metal and I really don't want to bugger up a high stress area like that. So I'm leaving that junk in the long for now. I did strip the tops of both longs, cleaned and treated. I used the last of my first small can of POR 15 and covered the tops and interior sides. I also sprayed metal prep into the passenger side long, flushed and dried that really good with a heat gun. I don't know if that will help but it certainly can't hurt either.
Looking good keep uo the hard work.
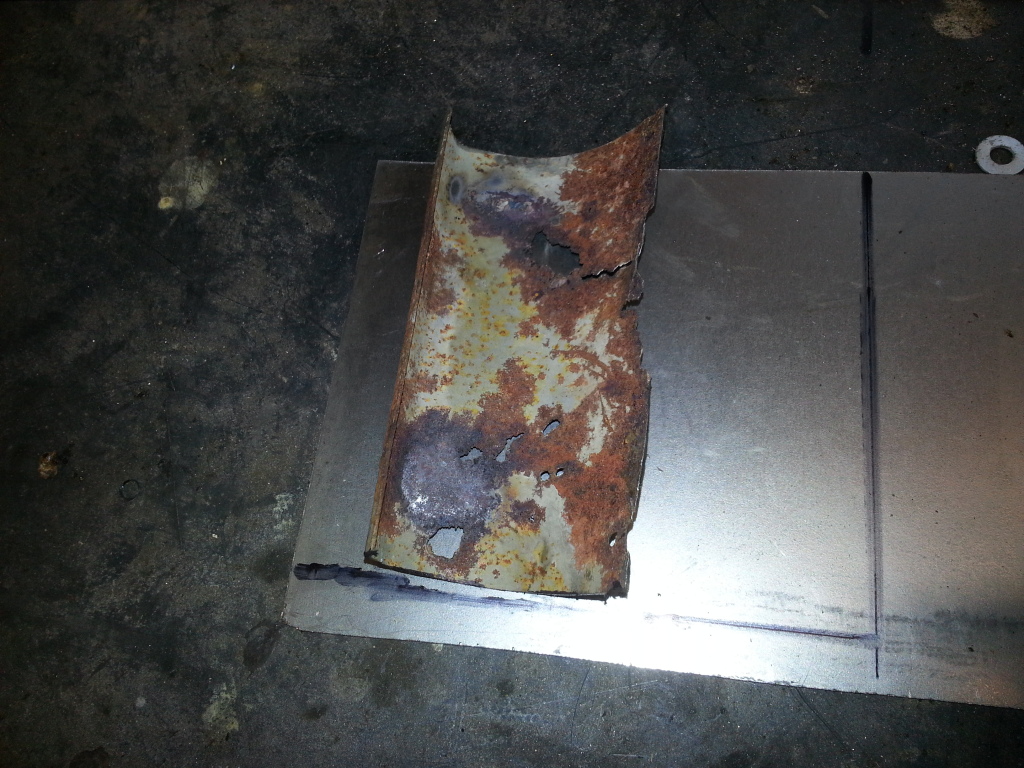
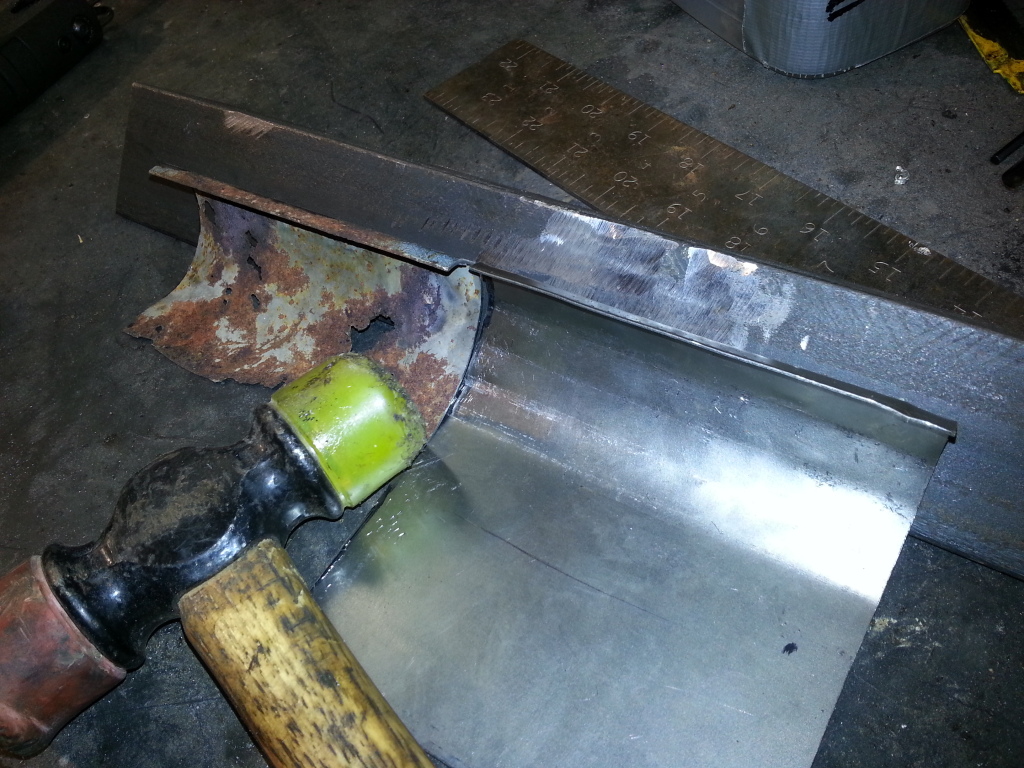
It seems that the firewall in this car progressively got worse as I was fixing all the other rust in the drivers compartment. But maybe I just got a really good look at it while I was working inside for hours and hours. Anyway, standard procedure, strip the paint, evaluate the rust holes, mark out segments, cut holes, cut patches and weld them in. I discovered that the actual inner firewall has a flange on the top that joins the outer firewall and back plate (or upper firewall). On the passenger side the rust was pretty extensive not only in the bottom of the upper firewall but into the inner firewall. After cutting those areas out I found rust holes in the side and suspension console (I knew that would be there). I couldn't proceed without making a patch on the side wall and left the rear of that un-welded as I'll have to deal with that when I start patching in the engine compartment. At first I thought of reproducing all the flanges and segments cut out but then I thought "Why go to all that trouble?". Restorers are going to scream hack job here but you'll see a much simpler method I used to get fresh metal in place. Using larger pieces of sheet metal, being able weld kneeling (as opposed to on my back) and having plenty of light - made these patches really easy. I'm working my way from passenger side to drivers side and hopefully will have this area patched and sealed by the end of this weekend.


This is a "lo-fi" version of our main content. To view the full version with more information, formatting and images, please click here.