I was wondering if any one has pictures of exactly where to measure body dimension X. Targa bar to windshield frame.
This car was a front clip repair back in the beginning of its life.
http://www.914world.com/bbs2/index.php?act...=2&t=187546
If it needs to be tweaked, now is the time.
TIA for the help ........................
Full Version: Pictures of Body Dimension X Measurement Points
Look at the link up top right of the page named 914info.
All the body dimensions are there
All the body dimensions are there
Got that ...............
Kind of vague exactly where to measure.
Targa bar is pretty easy.
The windshield frame there are 2 or 3 points that could qualify.
Kind of vague exactly where to measure.
Targa bar is pretty easy.
The windshield frame there are 2 or 3 points that could qualify.
![popcorn[1].gif](http://www.914world.com/bbs2/style_emoticons/default/popcorn[1].gif)
It's hard to get a good measurement by yourself, but if I put it about there, the other side of the tape measure, I can touch the end of the catch on the corner of the targa bar, so I'd say the tip of the inner. There's no trim on my car or rubber, so just the steel, I'm measuring from. -I think that's how you do that one. That's like the easiest one though. 

Click to view attachment
Click to view attachment
Perfect ................ that's what I thought.
Shame, shame ... the tape is not metric.
QUOTE(SLITS @ Jan 25 2014, 04:30 PM) 
Shame, shame ... the tape is not metric.
Have you tried to find a good metric tape measure lately? I've checked all the local places. Vanished!
QUOTE(rick 918-S @ Jan 25 2014, 02:59 PM)
QUOTE(SLITS @ Jan 25 2014, 04:30 PM)
Shame, shame ... the tape is not metric.
Have you tried to find a good metric tape measure lately? I've checked all the local places. Vanished!
i got a nice starrett from mcmaster carr (i think) might have even been ebay. it wasnt more than 10 or 15 bucks either. its not very big tho.
I built a gadget to measure by yourself.
$8 for the metal strap and a couple nails.
Click to view attachment
Click to view attachment
Looks like I'm off by 1/8".
I think I'll wait till I get it back on its wheels before I tinker with it.
Thoughts?
$8 for the metal strap and a couple nails.
Click to view attachment
Click to view attachment
Looks like I'm off by 1/8".
I think I'll wait till I get it back on its wheels before I tinker with it.
Thoughts?
After your pm I went back and reviewed your build thread. You have quite the project on your hands.
I noticed you sectioned the "A" pillar including the lower hinge mount. At this point I would suggest checking the door fit. 914's are a challenge because of their welded chassis. Unlike American iron that could be shimmed.
I understand you had both longs out at the same time. You should have supported the car by the shock and strut mounts to prevent sag in the cowl or rear clip. Maybe you did.. In any event that's one of the things you will want to consider going forward.
If I were you I would start there. Build some type of support. Wood works or metal. what ever you have.
Level it and make a provision to adjust it. Whether it be a small bottle jack or acme thread. Just something that will allow the weight to come off the base of the "A" pillar and the base of the door latch pillar.
Next I would check your "H" measurement. This may give you a sense of whether your cowl is sagged. Once you have recorded that measurement move onto the "F" measurement.
Here is a set of braces I made for Ben's 6. You need to install some kind of a brace and leave it in place until your done welding.
Click to view attachment
Here is the upper position. I used the targa top cover latch bolt holes as a mounting location.
Click to view attachment
Here is the lower mount. I used drill screws to attach it to a section of the long that is solid. The bolt that holds the pipe also passes through the all thread. The nuts push the pipe and act as an extension to correct sag. I adjusted this chassis 1/8 of an inch before I cut anything out of the car. I have seen guys use turn buckles but they tend to deflect and not hold an accurate measurement.
Click to view attachment
Once you have this set then re-fit the doors and check your hinge mount fit on your "A" pillar.
Check your fit to the fender and then finally the quarter panel gap. Once you have the doors in place check your "X" measurement last. This will be strongly effected by your "F" measurement. "F" first then "X"
Great tip Rick. I agree that the turnbuckle routs seems the best, but they do stretch out and deflect.
Also, Ace Hardware has a tape with SAE/Metric on it. I picked one up yesterday. :-)
Also, Ace Hardware has a tape with SAE/Metric on it. I picked one up yesterday. :-)
QUOTE(CptTripps @ Jan 26 2014, 04:35 PM)
Great tip Rick. I agree that the turnbuckle routs seems the best, but they do stretch out and deflect.
Also, Ace Hardware has a tape with SAE/Metric on it. I picked one up yesterday. :-)
Damn it! I didn't try Ace! I have one a couple blocks away. I can't find the three I own. Kids...
Thanks for the guidance.
I'll get it lowered from the 2 post lift tomorrow.
No suspension, so we'll MacGyver something after we get it leveled on the floor.
I think I'm OK on the sag.
It was always supported on all 4 outside corners. Screw jack under the rotisserie hanger. We'll see.
Click to view attachment
I never had it supported under the "A" pillar. I used that as my adjustment point for installing the longs.
Click to view attachment
On the lift ............... Supported with this frame.
Click to view attachment
On the lift ............
"F" is perfect on the right where I haven't finished the inner rocker install. UNSPRUNG
"F" on the left is 25 1/16. UNSPRUNG. I can push it out to 25 1/8, but springs back.
Not enough threads on the Hiem joint to push it out far enough to adjust.
I'll report back tomorrow night after I get it on the floor, on jackstands.
Here's the other guidance I'm using.
http://www.914world.com/bbs2/index.php?sho...03941&st=50
http://www.914world.com/bbs2/index.php?sho...75069&st=25
I have both a big and little Porta Power so I should be OK.
The screw jacks are nice.
The doors have been braced from the get go.
We just built them so we could leave the door on too.
Heres the before ............
Click to view attachment
This after we put them behind the door so we could continually check the door fit.
Click to view attachment
Click to view attachment
We just built them so we could leave the door on too.
Heres the before ............
Click to view attachment
This after we put them behind the door so we could continually check the door fit.
Click to view attachment
Click to view attachment
Good day ...................
After pushing the left cowl a bit. Got the 1/16th I was looking for.
Both F's are 638mm.
Both H's are 1039mm.
But the X's, that's another issue.
Right window frame to left targa bar is dead on at 1997mm.
Left window frame to right targa bar is 2001.
When they did the front clip they screwed something up.
Front gap on the left door is excessive.
I have seen guys weld a bead on the leading edge of a door or use lead in that spot to reduce the gap, and move the door back to make the door latch fit correctly.
That's what I'm thinking too .........................
Weld or All Metal.
Tested the top. It should be fine.
Not exactly a Willhoit restoration. But I'm starting with an $1100 combination of two cars. LOL.
Weld or All Metal.
Tested the top. It should be fine.
Not exactly a Willhoit restoration. But I'm starting with an $1100 combination of two cars. LOL.
Both latches are perfect .......................
Just the excessive left front door gap.
Just the excessive left front door gap.
I chased my gap back/forth for a week...then measured the DOOR. Passenger side was 5mm longer than the Driver's side. Doh!
QUOTE(cary @ Jan 27 2014, 11:56 PM)
Both latches are perfect .......................
Just the excessive left front door gap.
If you ever get a chance to work on a 356, you may notice a bit of lead on both edges of the door, and both fenders. I am being kind when I say a bit.
From what I have seen in stripped tubs, the gaps are fairly large and un even.
They would use lead to fill in the gaps and some use a paint stick run up and down the door gap to ensure a 4mm gap all the way down.
So, they would fill it in and while it was still workable they would use the paint stick to measure the gap and fill in where needed.
The 356 uses a lot of lead on the door jamb to close that gap, and on the front of the doors leading edge, and the bottom of the door also.
If the gap is too large up front, try raising the door up a bit....odd but true...it closes that gap quite a bit when raised straight up. Weird geometry, but worth a try to raise the door.
Raising the door closes the front gap, but opens the rear gap....so you need to find the subtle medium for your door and car.
Use your hand and a long straight edge on TOP of the fender to raise it up to the right height....then you need to compromise with the gap, the the height....
Eventually you may need to fill in both the fender and some of the door to make it all flat as they meet in different areas.
Use the door gap in the front to see how high you can raise the door.
Use the door and fender recess for the handle in the rear to determine how high you can go....that should be perfect, it's really hard to fix that spot.
Amazing how much you can raise the front of the door while having little effect on the rear....so try it, you might be pleasantly surprised.
Oh, the door hinge area bends...
Using a jack to bend it up, or your body to bend it down....it will bend.
I have fuzted with a 356 door for a weekend till I got it right.
First one takes time to understand all the subtle adjustments that don't seem obvious.
The 356 uses shims behind the hinge plate also, to add to the complexity of getting the door hung right.
914 does not use shims, but oddly does not need them.....
Stand back and take a side shot of your gap. I have a hunch.
Also take a measurement from the upper latch bolt on the latch pillar to the upper corner of the windshield both sides.
Also take a measurement from the upper latch bolt on the latch pillar to the upper corner of the windshield both sides.
QUOTE(rick 918-S @ Jan 28 2014, 08:33 AM)
Stand back and take a side shot of your gap. I have a hunch.
Also take a measurement from the upper latch bolt on the latch pillar to the upper corner of the windshield both sides.
Your only long by 1-2 mm to be in spec. The fender gap may be another issue.
Door is already off .............. 
We're getting ready to install a double door brace in the hinge locations.
Here's the only picture I have. The fender to door gap is so crappy I don't shoot any pictures of it. Kind of Embarrassing. I've always figured it was going to take some creative craftsmanship like r_towle's been discussing.
Click to view attachment
I'll get the other measurement this am before we install the door brace. I assume it doesn't matter which latch screw hole as long as its the same on both sides.
I seems odd only one dimension is off.
But with the hillbilly job that was done on the front clip install anything is possible.
What if the front clip was a different year?
QUOTE(cary @ Jan 28 2014, 09:27 AM)
What if the front clip was a different year?
The front clip wouldn't matter. How the front clip was installed will.
Super In Law is fabricating the new door braces. So I left his brackets in place.
Here's what I measured.
Targa corner to closure pin bracket.
Left : 300 mm
Right : 297 mm
Click to view attachment
Then I measured windshield corner to rear qtr. door handle.
Left : 758 mm
Right : 763 , oops ..........
Click to view attachment
All the while the F still measures 638 mm on both sides.
I suspect the windshield frame is tweaked. That is what I was suspicious of. Let me think about what you can do to get that car right. You are compounding mm's that are adding up to a real issue. I will do some diagraming for myself and see if I can make a suggestion tomorrow.
Thank You .................
That's what I was kind of thinking.
That's what I was kind of thinking.
Ok, I think I got this. Here are some questions:
The right side targa bar to windshield is good right?
How does the door fit on the right?
Door fit on the right is good right?
So this brings us to the left side.
What you want to do is create new measuring points as the windshield on the left seems to be bent causing an issue with the door fit.
So, design an cross measurement from the right side you can replicate on the left without using the windshield frame.
Targa bar top corner to the lowest hinge bolt.
The measure from the door ceil up to the radius at the base of the windshield and make a mark. This will be your point of measure.
Then use the ceil seam just before the radius at the base of the latch pillar.
This will give you a cross measurement of the right door opening.
Check the left side and tweak the opening to match.
Once you have the door openings the same brace both sides well, bend the windshield frame to correct it and achieve the "F" measurement Then see if your "X" measurement checks out.
If the "X" measurement is off check the "Y" measurement to see if the car is twisted.
Gotcha ......
Won't be back out there until Thursday.
Yes, the door fit on the right is perfect.
Won't be back out there until Thursday.
Yes, the door fit on the right is perfect.
QUOTE(SLITS @ Jan 25 2014, 02:30 PM)
Shame, shame ... the tape is not metric.
I've been compelled to get one
- dims on the page are english as well but it might be better to see it in mm, like if they were rounding up, to know that.
The newer luftkins look a bit cheesier than above. The stanley ones are ok-looking. I found one that is german.
 I bought it, but it might take awhile to get here.
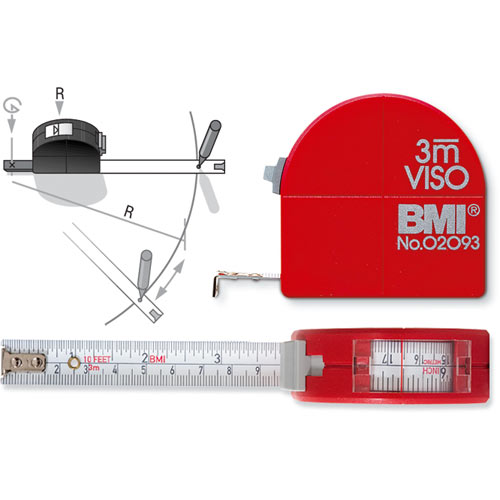
QUOTE(nathansnathan @ Jan 31 2014, 10:41 PM)
QUOTE(SLITS @ Jan 25 2014, 02:30 PM)
Shame, shame ... the tape is not metric.
I've been compelled to get one
- dims on the page are english as well but it might be better to see it in mm, like if they were rounding up, to know that.
The newer luftkins look a bit cheesier than above. The stanley ones are ok-looking. I found one that is german.
I bought it, but it might take awhile to get here. Where are you getting that one from? It's cool.
QUOTE(rick 918-S @ Feb 1 2014, 04:35 AM)
Where are you getting that one from? It's cool.
http://www.german-hand-tools.com/
I bought a Hazet tire inflator thing with a gauge from them before and it does take awhile. - some of the stuff is drop shipped from the company.
This is a "lo-fi" version of our main content. To view the full version with more information, formatting and images, please click here.