So, for those if you who have gone through hell hole repair, what improvements (if any) have you made?
It seems like obvious things to do would be:
1. Get a (better) drain hole in that area is possible?
2. Put in a sealed battery (Optima)
I thought there was actually a drain hole in the hell hole area but that it gets plugged up with dirt and debris. Seems to me like I would want to install/fabricate a larger drain hole with tubing below to get any water or battery acid draining away that area.
Full Version: Hell hole improvements?
QUOTE(boxsterfan @ Feb 18 2014, 10:00 AM) 
So, for those if you who have gone through hell hole repair, what improvements (if any) have you made?
It seems like obvious things to do would be:
1. Get a (better) drain hole in that area is possible?
2. Put in a sealed battery (Optima)
I thought there was actually a drain hole in the hell hole area but that it gets plugged up with dirt and debris. Seems to me like I would want to install/fabricate a larger drain hole with tubing below to get any water or battery acid draining away that area.
Move battery to trunk...
 At least that is what I plan on doing eventually as others have.
You don't want air from underneath coming into the intake or cooling, is why they are small.
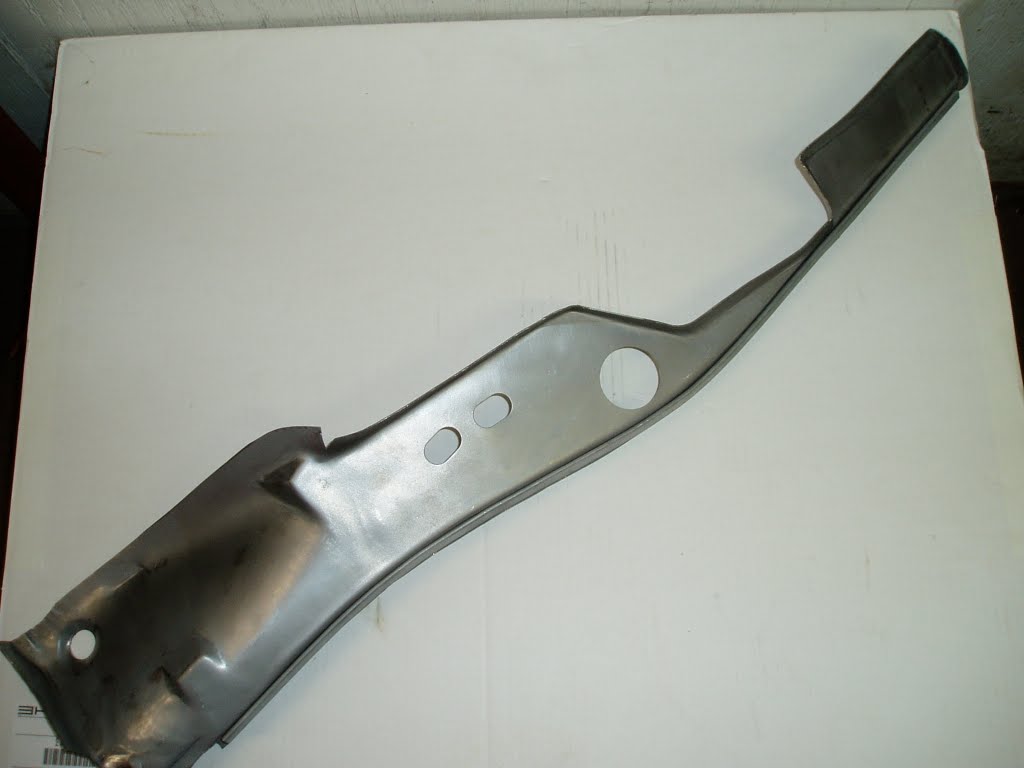
From what I have seen a big problem is with the replacement engine shelf piece not being formed right. It is missing the embossing around the hole, which sets the hole too high up to drain.
Moving the battery - you still have water that needs to drain there.
From what I have seen a big problem is with the replacement engine shelf piece not being formed right. It is missing the embossing around the hole, which sets the hole too high up to drain.
Moving the battery - you still have water that needs to drain there.
QUOTE(nathansnathan @ Feb 18 2014, 10:07 AM)
From what I have seen a big problem is with the replacement engine shelf piece not being formed right. It is missing the embossing around the hole, which sets the hole too high up to drain.
I'm pretty sure the stock drain hole is too high as well, at least from what i can remember.
To drain this area correctly, one would need a drain option that is flush with the bottom level of the hell hole.

Keeping with the typical solutions works really well.
Moving to a dry cell battery is pretty common, and a great solution once HH repairs have been made.
Also, remove the insulation on the engine side of the sidewall. It can trap water and debris.
I'm not a fan of moving the battery to the trunk. You loose trunk space, and shift the weight balance further back in the car. If the battery leaks you will still have rust issues. Moving the battery is more for someone who had pulled out the factory battery stand and does not want to put it back in, or can not put it back in due to an engine swap.
Zach
QUOTE(SirAndy @ Feb 18 2014, 10:12 AM)
QUOTE(nathansnathan @ Feb 18 2014, 10:07 AM)
From what I have seen a big problem is with the replacement engine shelf piece not being formed right. It is missing the embossing around the hole, which sets the hole too high up to drain.
I'm pretty sure the stock drain hole is too high as well, at least from what i can remember.
To drain this area correctly, one would need a drain option that is flush with the bottom level of the hell hole.
The way it is stock, there's only the thickness of the 19 gauge sheet metal to get over, then down the slope of the emboss of the hole - this follows the round corner of the top of the long.
Here's the best pic I could find of a stock situation (can't post the image os a link here)
http://www.914world.com/bbs2/index.php?act...t&id=432775
Here's a badly done part installed
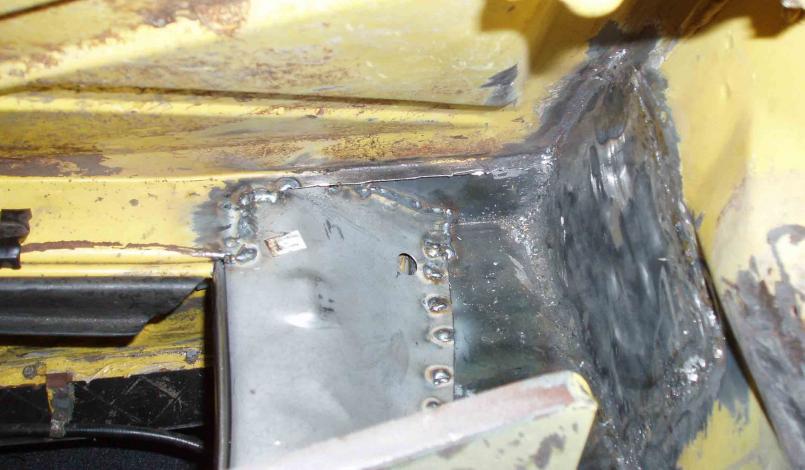
I have seen some replacement pieces that have the right emboss, probably older ones before they stopped caring. Of course embossing it stretches the hole to be unusable - no way the nipple would stay in there.
At the fwd left side of the very bottom of the HH, drill a hole in the top and bottom of the long. Slide in and weld a piece of tubing to act as a drain.
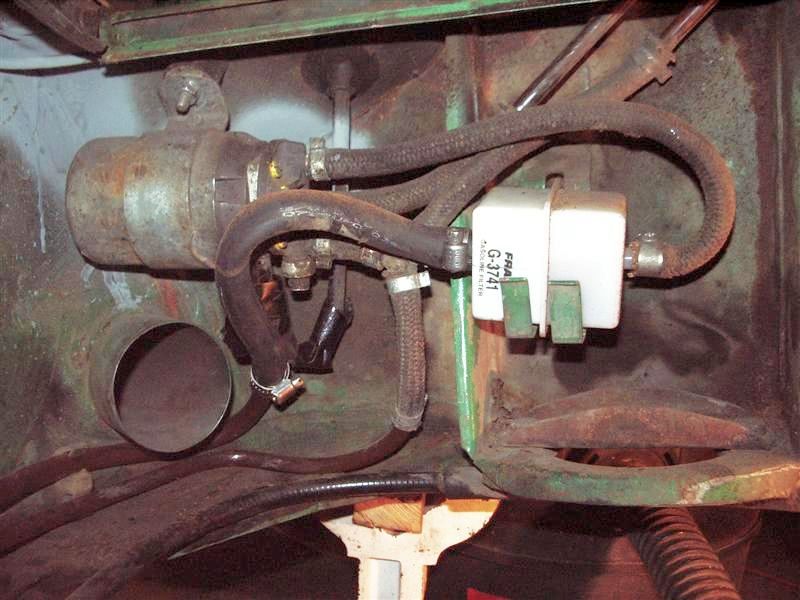
If you're talking about that hole visible near the bottom of the "hell hole" area, it's not a drain hole. It's where the fuel pump harness passes through the sheetmetal, and there's a grommet effectively sealing it up.
The Cap'n
The Cap'n
Nope. The Yellow Zonker had them installed on both longs at the very bottom surface allowing water to drain through. I might do it with my black car since the motor is out and while I'm in there....... 
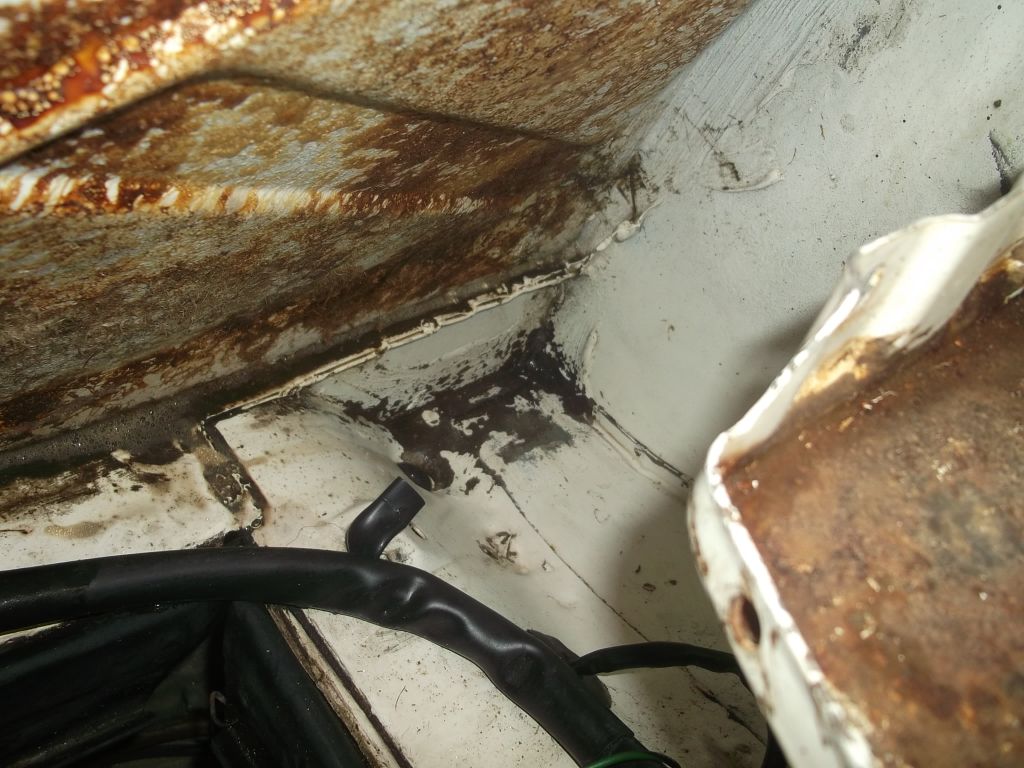
My hell hole 
QUOTE(Mark Henry @ Feb 18 2014, 11:29 AM)
My hell hole
Show off

I plan on not driving it/parking it in the rain. That should help most of all
QUOTE(Elliot Cannon @ Feb 18 2014, 11:05 AM)
At the fwd left side of the very bottom of the HH, drill a hole in the top and bottom of the long. Slide in and weld a piece of tubing to act as a drain.
I like the idea of the tubing. Anything to keep water and/or battery acid from running down the longs.
QUOTE(Cap'n Krusty @ Feb 18 2014, 11:07 AM)
If you're talking about that hole visible near the bottom of the "hell hole" area, it's not a drain hole. It's where the fuel pump harness passes through the sheetmetal, and there's a grommet effectively sealing it up.
The Cap'n
It seems to me the hole for the fuel pump wire is either too small or missing from the replacement pieces - it is supposed to be to the rear of the fuel pump. The hole for the drain hole is to the front of the pump. -talking about early cars here. You can't see the drain hole in either of these as it is forward more.

I think the wire is meant to go through the small hole (which should be bigger); this is a replacement piece

QUOTE(peteyd @ Feb 18 2014, 03:22 PM)
QUOTE(Mark Henry @ Feb 18 2014, 11:29 AM)
My hell hole
Show off
Sorry Pete
QUOTE(stephenaki @ Feb 18 2014, 11:03 AM)
QUOTE(boxsterfan @ Feb 18 2014, 10:00 AM)
So, for those if you who have gone through hell hole repair, what improvements (if any) have you made?
It seems like obvious things to do would be:
1. Get a (better) drain hole in that area is possible?
2. Put in a sealed battery (Optima)
I thought there was actually a drain hole in the hell hole area but that it gets plugged up with dirt and debris. Seems to me like I would want to install/fabricate a larger drain hole with tubing below to get any water or battery acid draining away that area.
Move battery to trunk...
At least that is what I plan on doing eventually as others have. moving weight to the rear of a 914 hurts the handling...
friends don't let friends do things that hurt the handling of a 914
You got a nice hole there Mark…..
QUOTE(Cairo94507 @ Feb 18 2014, 06:11 PM)
You got a nice hole there Mark…..
 Ummmmmm......
  thanks

QUOTE
Move battery to trunk...
At least that is what I plan on doing eventually as others have. No. A sealed battery solves the initial problem. (Optima, Odyssey, etc.)
Only move the battery if there is a specific weight reason for a race car.
Or because you think it's a super cool idea. I've done that before. :wacky:
Just a $.02 opinion.
From my marine perspective, all boat batteries are inclosed in a covered plastic box and strapped down. Mine does not have the OEM battery tray and a PO replaced it with a welded heavy wall angle iron base. I'm going to modify this to fit one of the marine units, so any acid or rain overflow is contained in the impervious battery box.
Think outside the box
Think outside the box
Fix it properly, add a modern battery, check it in the spring and fall. Fix anything that looks like rust starting. Leave the battery where it belongs. Most of you are repairing cars that were neglected for most of their existence. With modern jell cell batteries and knowing what happens to 914's when rust is left to eat you already have a leg up.
However, after seeing how cool my friend's 280SL turned out after e-coating....
http://www.914world.com/bbs2/index.php?sho...=230343&hl=
However, after seeing how cool my friend's 280SL turned out after e-coating....
http://www.914world.com/bbs2/index.php?sho...=230343&hl=
When someone suggested moving the battery to the trunk wouldnt you move it to the front trunk and not the rear trunk? At least that's what I'm doing since my battery tray was beyond repair. Fuel pump and filter will also move forwards.
QUOTE(falcor75 @ Feb 18 2014, 11:22 PM)
When someone suggested moving the battery to the trunk wouldnt you move it to the front trunk and not the rear trunk? At least that's what I'm doing since my battery tray was beyond repair. Fuel pump and filter will also move forwards.
Battery tray and stand from restoration design is an easy repair. Much easier than running electrical cable from the front of the car, fabricating a make shift tray and hoping you don't short something out.
The front trunk is a good move for balancing weight distribution
QUOTE(barefoot @ Feb 18 2014, 05:54 PM)
From my marine perspective, all boat batteries are inclosed in a covered plastic box and strapped down. Mine does not have the OEM battery tray and a PO replaced it with a welded heavy wall angle iron base. I'm going to modify this to fit one of the marine units, so any acid or rain overflow is contained in the impervious battery box.
Think outside the box
Like that idea also. Better than moving the battery IMHO.
Dipping a 914 in an e-coat tank is a great idea (I had it back in the 80's when I worked for BASF). Doesn't turn out as well as you'd expect though. Besides the heater tubes in the longs disintegrating, the 914 body just wasn't designed with a tank dip in mind. Ended up with lots of runs, especially coming out of the windshield/cowl area. Back then it was dipped in a stripper bath (which sounds nice but a different kind of stripper). We had he'll getting the stripper out of the windshield frame before paint.
This is a "lo-fi" version of our main content. To view the full version with more information, formatting and images, please click here.