Safety first, since I tried to artfully get a cutting tool under the sealant, the glass broke and had to purposely fracture and pull foot sized planks of glass with channel locks and needle nose pliers. Safety glasses, heavy leather gloves, and the wet dry vac were constantly at my side. Those fragments and shards of crystal fly all over the place when they are tugged out. I also removed the entire carpets, seats, and all targa rubber seeing how the glass like to fracture and pop bits everywhere. Prior to starting, I documented the position of the rear view mirror mount.
all told, it took me a little less than 30 days to change a windshield, but that was my plan, to be methodical. And this was a one-man installation, designed to be completed by one person, besides, so we can say we did it all solo.
Phase 1. Get some tools, remove the trim and take the glass out. In this thread, most if not all the tools came from Harbor Freight (HF). First I bought that "L" shaped tool, the one that comes with two cylindrical aluminum bars and the "L" shaped blade. I also got and the HF pack of metal trim removal tools to remove the trim. After I removed the trim, I used a 16" channel lock to bend the clipping points back to be nice and square. I artfully tried taking the glass out for resale, but not luck there. So you see I broke a corner to try to get the "L" tool in there. No luck. I learned that the glass was previously installed with urethane and hence it was caulked in very tight. I did not want to spend $20 for the windshield wire cutting kit from HF, so I bought six feet of 1/32" stainless wire from Orchard supply for less than $3. All six feet of that wire was consumed. Add a pair of vise grips and using the pull technique, I was able to cut the urethane and free the glass in one or two foot squares, if you could call it that. That process of glass removal took about three or four sessions lasting about an hour each. After cutting the urethane, I leveraged out the glass to free. The old bed of urethane was not slicing out easily with a utility or Xacto knife, so I got a HF kit of sanding disks and attached those tiny grinding discs and power drill to grind off the urethane to bare metal. All the old plastic clips were replaced. LEARNING POINT: Trim tool unnecessary, CUT the clips off using utility blade.
.
Phase 2. I picked up the new glass from ProSource Glass International for the out the door price of $195. I bought a pair of the orange suction cups from HF and used these to aid me in the dry fitting of the glass. I weighed the glass on a postal scale and it weighs 328 ounces, i.e. 20.5 pounds. The circumference of the glass is 145 inches. (The box of 3M butyl tape is 180 inches) Prior to dry fitting the glass, I made stacked decks of plastic cards as spacers, two on the bottom and a pair of spacers two thirds of the way up on the sides. These were taped in place. There is basically no play, so the glass can not be positioned incorrectly on final fitment as long as the spaces stay firmly in place, not in the way of the butyl. Whenever I carried the glass to the frame, I always carried it by the glass edges, even though the suction cups were locked on. The caveat is that these $4 suction cups are only trustworthy for positioning, NOT CARRYING. Admittedly, I did suspend the glass over the workbench solely to see if they could do the job; they can. So in a pinch, you really could trust them, but I did not want to gamble with the $200 new glass. Also, I learned that when you use the suction cups, you must be certain the two handles are tightly clamped against one another with NO space between the handles in the carry position. By using the four engineered plastic spaces on the periphery of the pinchweld frame, the new glass is forced to fall into place, centered top to bottom and left to right. After being satisfied with fitment using the four spacers, I removed the glass and laid it on the workbench on two chunks of foam.
Phase 3. I taped off the pinchweld with regular masking tape and used a "dauber" to paint on the pinchweld primer. After masking the pinchweld off, it takes about 3 minutes to daub the entire pinchweld with the primer. After the primer dried, I installed the 19 new trim clips. I took a socket and used the female end of a 1/4" extension to bed the clip flush to the pinchweld frame. I then used a plastic drift and drove in the the retaining pin on each of the 19 clips. In the pics, you will see the tape with arrows, and these are redundant since the four plastic spacers already guides the glass into the correct position.
Phase 4. I laid the 3M brand 5/16" butyl bead down. The front dash to window seal is installed prior to the butyl. I snipped off the first inch or so of the butyl to get a consistent round bead of butyl. I got the butyl from Rich Bontempi at HPH and he said to start the bead at top center. I unfurled the bead in a counterclockwise direction. When I made a turn, I cut the paper, then continued on. I tried to lay the slightly flattened surface of the butyl and make turns, but found that it was best just to let to unfurl and follow the pinchweld contour however the rope unfurled, hence, avoiding to have to lift up and repositioning, risking a thinning of the bead. I then used strips of the paper liner to make an modify some wedging tools. After the bead was completely laid, I used some of the butyl paper liner as an insulator for the lower spacer blocks. I introduced the lower blocks using a bit of the paper to prevent the butyl from touching the spacer block surfaces.
Phase 5. Glass mounted. I presented the glass onto the butyl from a standing position inside the compartment. The plastic spacers did their job, but the paper on the bottom spacers kind of almost got inbedded on the mating surface. I got a pair of plastic tweezers and pulled out the slips of liner paper, then I gently pressed all around the edges of the new glass using the my open palm hands initially, then using the suction cups as "press pads" all around. There was a 100 % "contact bead" all around, but in some places the bead seemed to be only about 1/4" wide. In those places, I coated the chisel edges of the HF upholstery/body tools I had and used them as a spudgers. On the outside, I would keep the spudger in place and from the inside I would push on the butyl bead to smush the butyl, pushing on the bead from both sides at once. I was able to make the butyl squish up and make a wider contact patch by this technique.
Phase 6. Aluminum trim installed. No secret here. I marked the locations of the clips on the body with painter tape so I knew where to apply pressure to hear the reassuring clicks. Sorry, I could not post a pic of the completed installation, ran out of image space on this single post. Sorry, I don't understand why the pics re-sequence from my narrative.
Learning point. Had I known that it was urethane and hard to cut out with the "L" bladed too, I should have had the $20 HF kit sold with the cable, handles. and urethane starter hole tool. Take your time and pace yourself. Just doing the job incrementally took the time pressure off and gave me time to devise engineering controls. The other MAJOR error made was the fact that I used urethane primer and you are supposed to use butyl primer by the name of CRL Industries. I'm hoping it wont make that much of a difference. If you don't want to spend money on the HF $20 windshield removal tool kit, and the glass is broken already, then use a Craftsman cotter pin removal tool to make a hole in at the base of the windshield butyl bead, thread 6 inches of 1/32" stainless wire from OSH, and use two two vise grips and proceed to saw out the glass.
comments welcome
Full Version: windshield installation
would you please describe how you used the metal trim removal tool?
tks
randal
tks
randal
I'm glad it worked out for you, but I don't recall it being this difficult 
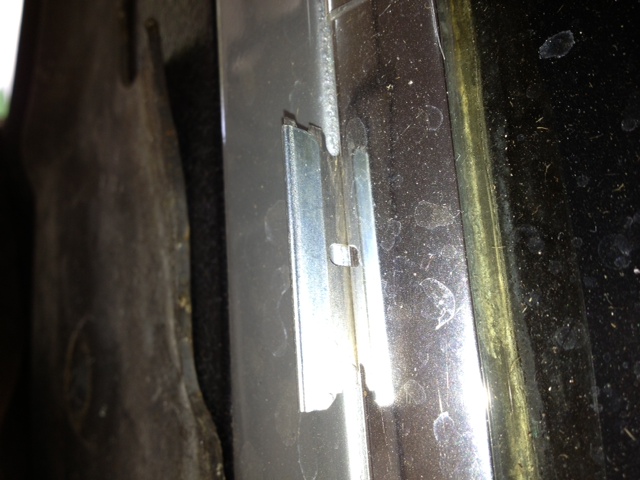
To remove the chrome trim, slip a single sided razor blade under the plastic clip and lightly tap it with a hammer. It will sever the plastic pin and everything simply lifts off. You will need new clips but they are cheap and time to replace the 40 yr old ones. Wire or guitar string works well as stated with vise grips to remove the glass using a sawing motion. Not sure how you ended up breaking yours all up? It must have put up one heck of a battle
To remove the chrome trim, slip a single sided razor blade under the plastic clip and lightly tap it with a hammer. It will sever the plastic pin and everything simply lifts off. You will need new clips but they are cheap and time to replace the 40 yr old ones. Wire or guitar string works well as stated with vise grips to remove the glass using a sawing motion. Not sure how you ended up breaking yours all up? It must have put up one heck of a battle
thank you
QUOTE(bulitt @ May 2 2014, 06:27 AM) 
I'm glad it worked out for you, but I don't recall it being this difficult
To remove the chrome trim slip a single sided razor blade under the plastic clip and lightly smack it with a hammer. It will sever the plastic pin and everything simply lifts off. You will need new clips but they are cheap. Wire or guitar string works well as stated with vise grips to remove the glass. Not sure how you ended up breaking yours all up? It must have put up one heck of a battle

Absolutely the best way to remove the trim! The only way in my opinion
QUOTE(Bartlett 914 @ May 2 2014, 06:44 AM)
QUOTE(bulitt @ May 2 2014, 06:27 AM)
I'm glad it worked out for you, but I don't recall it being this difficult
To remove the chrome trim slip a single sided razor blade under the plastic clip and lightly smack it with a hammer. It will sever the plastic pin and everything simply lifts off. You will need new clips but they are cheap. Wire or guitar string works well as stated with vise grips to remove the glass. Not sure how you ended up breaking yours all up? It must have put up one heck of a battle
Absolutely the best way to remove the trim! The only way in my opinion
yes, I agree, I studied other people's techniques, thinking I could get away with trying to remove the trim and salvage the old clips, leaving them in place. you may also want to download an image of someone else who had done this and use this as map to know where the 19 clips are set. I did use this razor blade method, operating on the premise that the clips could be left in place and I wiould need only a few to replace. Since I had urethane filling a lot of my channel space, I used a utility knife blade (thicker gauge) and a light hammer. NEXT time, if I have to replace the glass again, cutting off the old clips off is the most efficient way to remove the fragile and expensive trim. In my case, I severed five of the upper left quadrant clips and used the trim tools to work off the rest of the trim using the HF pry tools. Fortunately, I did not distort the trim too much and ended up with a pretty good finish. bdstone mentioned the thinness of the glass may cause a little gap after the trim was installed. Based on 3/8" butyl and the pinchweld only lined with primer, the glass actually sits at the perfect depth. After removing those plastic spacers I made, I cut chunks of rubber to fit in the gap AFTER the glass was situated. The rubber is INCLUDED whenever you buy the blue-colored 3M brand butyl bead. I was concerned about gravity sag. The pic of the yellow teener was one of the aids I used to give me road map of the clips.
QUOTE(Bartlett 914 @ May 2 2014, 06:44 AM)
QUOTE(bulitt @ May 2 2014, 06:27 AM)
I'm glad it worked out for you, but I don't recall it being this difficult
To remove the chrome trim slip a single sided razor blade under the plastic clip and lightly smack it with a hammer. It will sever the plastic pin and everything simply lifts off. You will need new clips but they are cheap. Wire or guitar string works well as stated with vise grips to remove the glass. Not sure how you ended up breaking yours all up? It must have put up one heck of a battle
Absolutely the best way to remove the trim! The only way in my opinion
in hindsight, YES, CUT OFF the old clips
Thanks for taking the time to do this write up! The windshield has been on my list of projects for a while, now I have a better idea how to tackle it.
Dan, if you had to break the windshield up to get it out you need to get a leaf blower and blow the fuck out of every crevice, corner, nook, cranny and vent hole. Those little fringing shards of glass will fly around and get in your eyes. Even with glasses on. Ask me how I know. I had blown mine out with compressed air expecting to remove all those pieces. Even months afterwards I would feel a piece fly in my face. I should have worn goggles the first 6 months afterwards. 
QUOTE(76-914 @ May 2 2014, 02:56 PM)
Dan, if you had to break the windshield up to get it out you need to get a leaf blower and blow the fuck out of every crevice, corner, nook, cranny and vent hole. Those little fringing shards of glass will fly around and get in your eyes. Even with glasses on. Ask me how I know. I had blown mine out with compressed air expecting to remove all those pieces. Even months afterwards I would feel a piece fly in my face. I should have worn goggles the first 6 months afterwards.
The last time I cracked one I covered the whole thing with packing tape and was able to avoid the mess!!
Very nice write up. Also to note it's a great time to replace the dash top vinyl if needed, and the dash to windshield seal......while you're there. 
Looks like you had it covered.
Looks like you had it covered.
Here we are exactly one year later and I'm just now reading this important thread. I'm planning to have our '71 painted in the near future and need to deal with this issue as well.

I used the cheapie HF suction cups 7 years ago; here's my thread with pics and detailed installation.
http://www.914world.com/bbs2/index.php?showtopic=235156
http://www.914world.com/bbs2/index.php?showtopic=235156
QUOTE(76-914 @ May 2 2014, 03:56 PM)
Dan, if you had to break the windshield up to get it out you need to get a leaf blower and blow the fuck out of every crevice, corner, nook, cranny and vent hole. Those little fringing shards of glass will fly around and get in your eyes. Even with glasses on. Ask me how I know. I had blown mine out with compressed air expecting to remove all those pieces. Even months afterwards I would feel a piece fly in my face. I should have worn goggles the first 6 months afterwards.
Getting the old one out can be troublesome. Safety first, small pieces of glass can be very dangerous
This is a "lo-fi" version of our main content. To view the full version with more information, formatting and images, please click here.