Help - Search - Members - Calendar
Full Version: First attempt: engine out in two hours!
914World.com > The 914 Forums > 914World Garage
thieuster
Perhaps is can be done faster, but I wanted to do it properly. And with the help of the Pelican website's 'how to', the job went smoothly.

The clutch cable showed worryingly signs of wear, so I will have to replace that as well. Hell hole etc is solid as a rock. I will remove the isolation blanket at a later stage, but things look good at first sight.

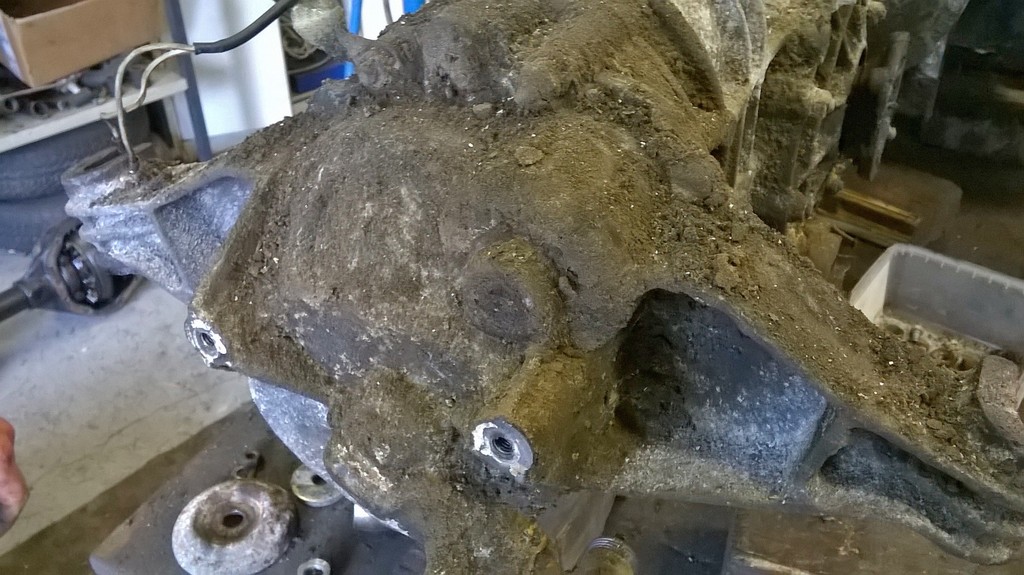
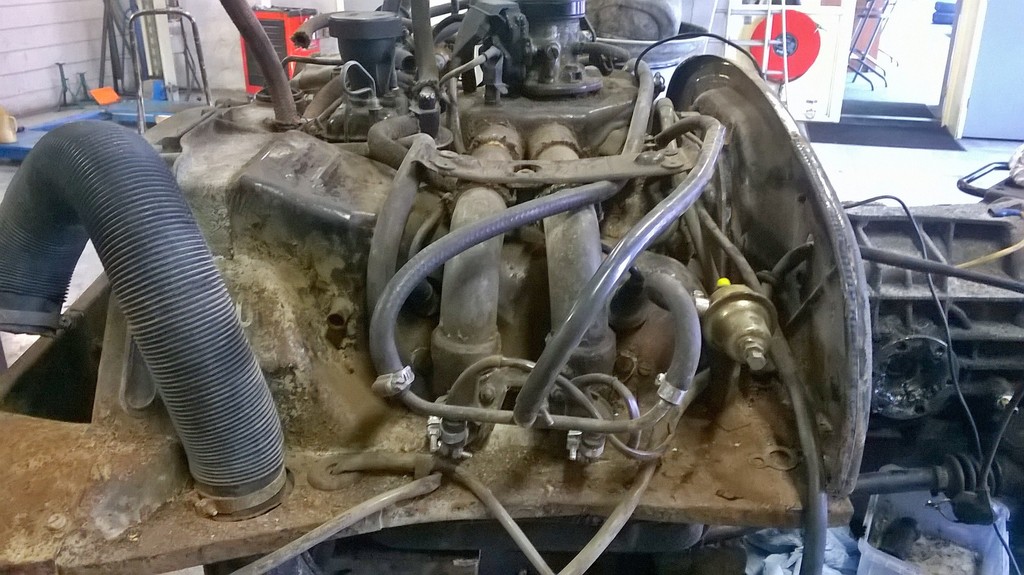
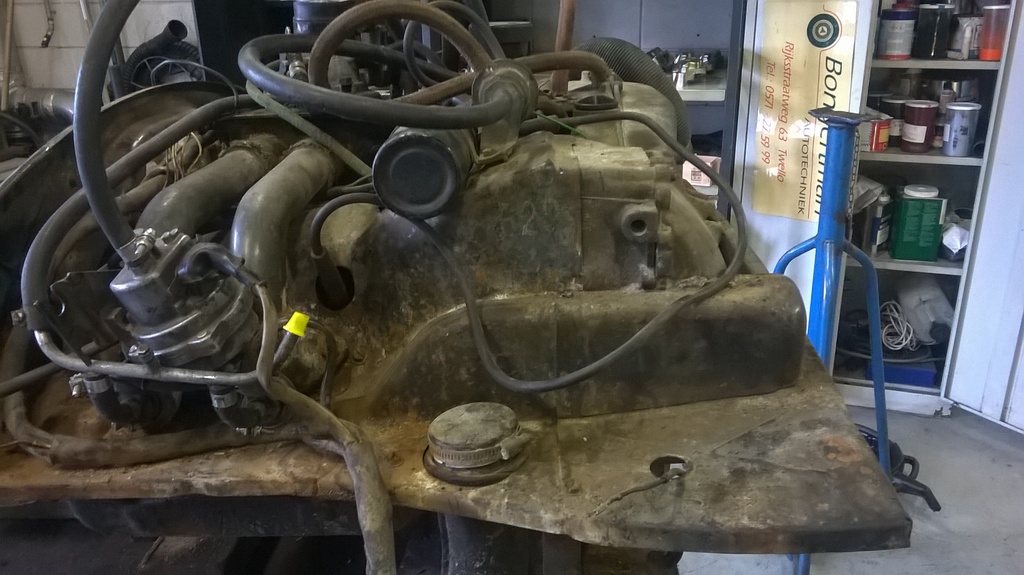
The engine... well... let's say that the tins carried at least 7 lbs of sand! No signs of oil contaminantion. Just sand, sand, sand! The back of the gearbox is covered in sand + oil. I will have to attack that with a steam cleaner and degreaser.

Now the engine is out for cleaning and replacement of the pushrod tubes, it's the perfect moment to look at other parts as well:
- powder coating the tins,
- replace all hoses,
- have a look at the clutch
- have a look at the alternator
- replace the V-belt (see pic...)

A DPO (Dumb Previous Owner) must have noticed that the car had earthing problems. All earth wires were bundeled to a bolt with tape and a single wire ran from the bolt to the - side of the battery... Time to put that straight as well!

The battery of my telephone was very low, so I was able to take one pic... Says it all, I think...

So yeah, taking the engine out took two hours. Cleaning the engine (to start with) will take a lot longer
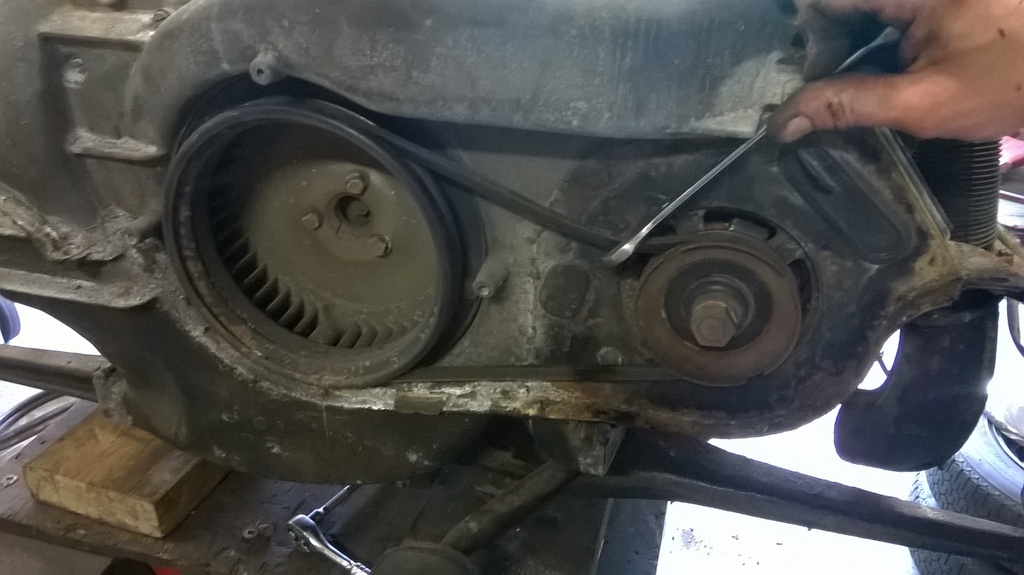
IPB Image
McMark
2 hours is an appropriate amount of time for an engine drop. Any faster than that and you're rushing. And I'm a believer in the phrase, Haste makes waste. wink.gif
toon1
2 hours is good for the first time. My best was 1.5 hrs, that was after removing and replacing the engine twice.

Since your that far in, why not clean the heads, re-ring and hone.
r_towle
Coffee breaks take time too.
mepstein
start spraying the engine tin screws now and let it soak.
thieuster
QUOTE(mepstein @ Apr 30 2015, 02:06 PM) *

start spraying the engine tin screws now and let it soak.


Solid advise. Luckily, I was able to get them off with the torch: apply heat and hey presto, all screws came off unharmed. Needless to say that I will replace them with fresh ones!

Now, this was day two. I have a two week holiday and I want to make good use of it. So I started early. Things done:

- removed all the tins, but first tested both cooling flaps: they work.
- cleaned the s/steel heat exhangers: lots of oil and grime on them
- cleaned and blasted the fan shrouds (what do you guys do with them? Keep them 'aux naturel' or...)
- took all the externals off: fan, dizzy, oil cooler, alternator, inlet tubes etc
- removed the g/box and found the clutch and flywheel in great condition.
- cleaned the engine block with a steam cleaner,
- cleared all fins from debris. And that was a lot of debris!
- sorted the items: powder coating, zinc plating
- took the pushrod tubes out.
- made a list of parts needed:

fan belt, dizzy rotor and cap, complete spark plug wiring set, rear oil seal to the crank (old one leaks!), oil cooler gaskets, valve cover gaskets, new oil temp sender, new tem sender. In short: all items on the outside. New clutch cable as well. I think I left some out...

If you have suggestions at this stage, please share them with me.

Menno
r_towle
powder coat the fan shroud the proper silver.
It will never look right with oil stains over time, so while you are doing the rest, get it done...then you can wipe it off forever and it will look nice.

Leave the fan pulley alone, you wont ever see it, and its not worth the hassle because its balanced. Do download the marking template from Pelican Parts and take the time with a dremel to put in tiny slices to mark the degrees, then fill those with white paint or nail polish....

Rich
rhodyguy
New plenolic spacers where the intakes meet the heads. New cork gasket under the oil fill tower. If the control wire for the cooling flaps was cut tight to the cross rod you'll struggle trying to reconnect. Much easier to put one in while the engine is out. New, muffler to heat exchanger gaskets, copper sealing rings for the he's at the heads, maybe new front engine mounts and trans mounts. Again, much easier to work on while the engine is out. fill the box and only pay shipping once. Shipping costs will nickel and dime you to death.
thieuster
Phenolic spacers: I hadn't thought 'bout these. Good tip. All other suggested were on my list already, but I forgot to mention.

Engine mounts: forgotten on my list. Thanks.

P/coating the shrouds: good idea. The surface of these is pretty rough and it will get dirty over times. Like the 40 years of grime I've blasted off this morning...

Oh, and about the grey-ish air intake tubes: what's the color's name/number? Odd sort of grey. Looks a little military... 'Feldgrau'...

Menno
stugray
If you are going through the trouble of cleaning the engine tins and having them painted. Pay a powder coater to do it.

I painted mine with "High Temp Engine paint" and then let them cure for months before even touching them.
They looked GREAT.

Paint wipes right off with dripped gasoline - DOH!

However I learned that you can strip the paint right off of the engine tins down to bare metal with the Purple parts washer liquid from Home Depot. You just need a bin big enough to submerge them overnight.
thieuster
I have an industrial size parts washer + equally sized blasting cabinet available biggrin.gif biggrin.gif So that's not a problem. I have quite some experience with p/coating classic car parts; back in 07, 08, I was busy restoring my TR and all, including the whole chassis - the single part I couldn't blast myself...- was p/coated by a local guy. I don't turn to him this time. It's very difficult to make an arrangement with the guy nowadays, due to circumstance I will not mention here. Luckily, a former student of mine has started his own p/coating business a few years back and I've heared and seen great things from him.

Bringing it over to him tomorrow.

Having said that: stugray's words keep sounding in my ears! What about the grey-ish airintake tubes I mentioned in a posting above? How did you do that? Painting?

Menno
stugray
QUOTE(thieuster @ Apr 30 2015, 12:05 PM) *

I have quite some experience with p/coating classic car parts; back in 07, 08, I was busy restoring my TR and all, including the whole chassis - the single part I couldn't blast myself...- was p/coated by a local guy.


TR huh. Nice!

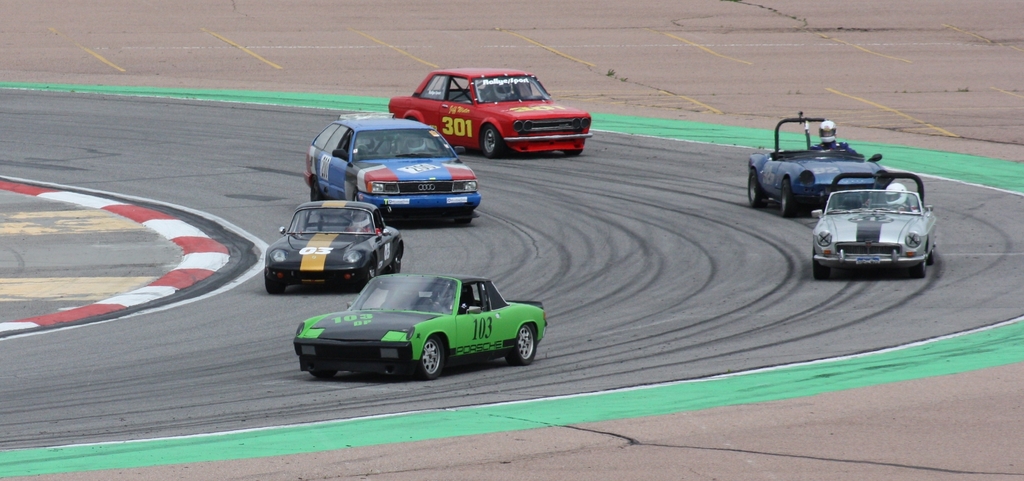
I helped build this one:
http://www.triumphexp.com/registry/RMVR102

It was my father's. Now my brother drives it in Vintage racing.
I am now RMVR103 (but NOT a triumph). driving.gif
IPB Image

Oh, and when I was going to have my tins p-coated, I found someone that could do them in "Black Chrome".
I think the engine bay would look awesome with the tins in BC.
thieuster
I hadn't heared of BC! I've googled it and it looks very interesting! Thanks! I will ask the p/coater if he has an example.

Menno
thieuster
Some additional pics...

IPB Image

IPB Image

IPB Image
This is a "lo-fi" version of our main content. To view the full version with more information, formatting and images, please click here.
Invision Power Board © 2001-2024 Invision Power Services, Inc.