Help - Search - Members - Calendar
Full Version: Patch floor or order replacement pan?
914World.com > The 914 Forums > 914World Garage
dangerranger01
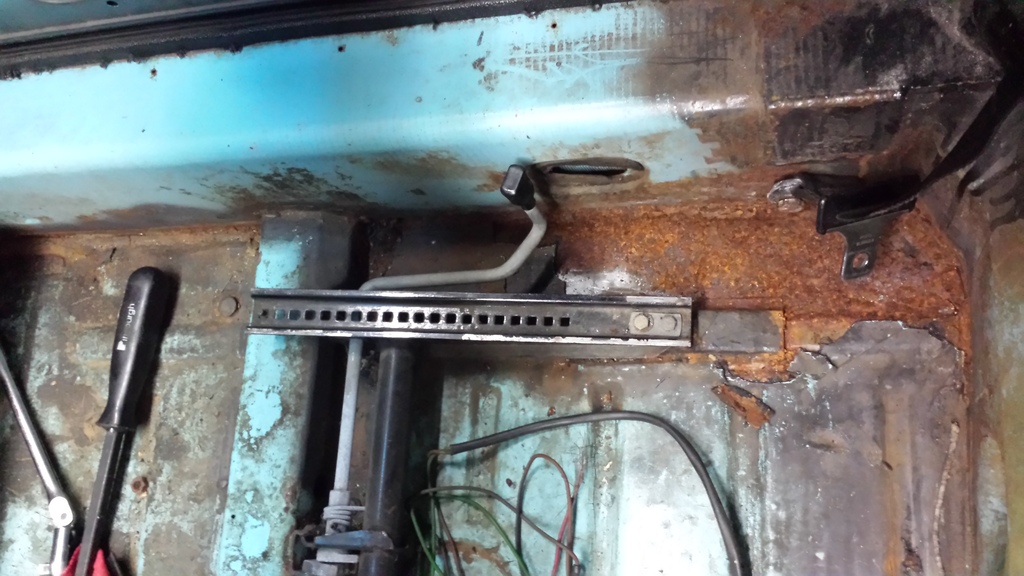
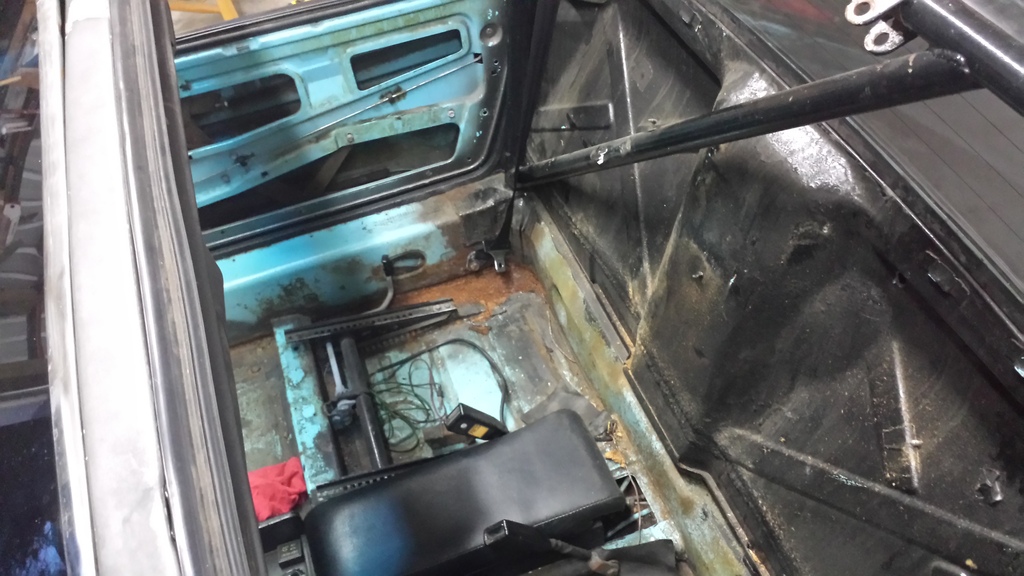
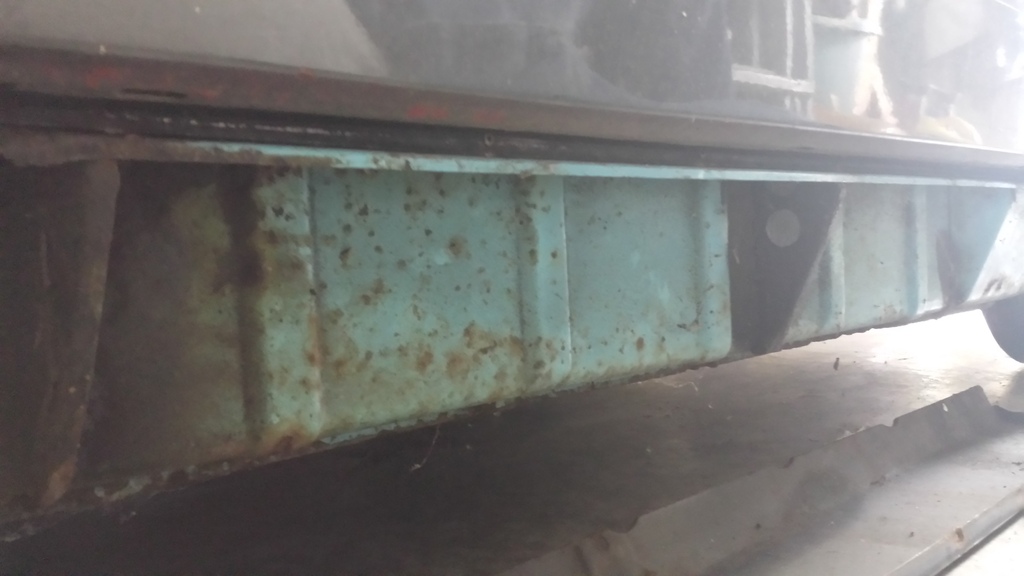
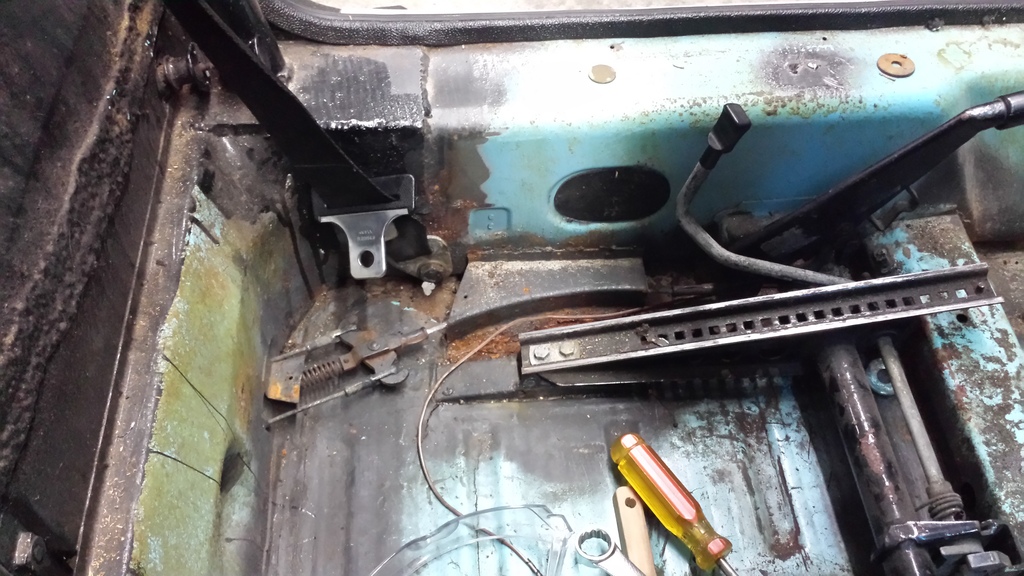
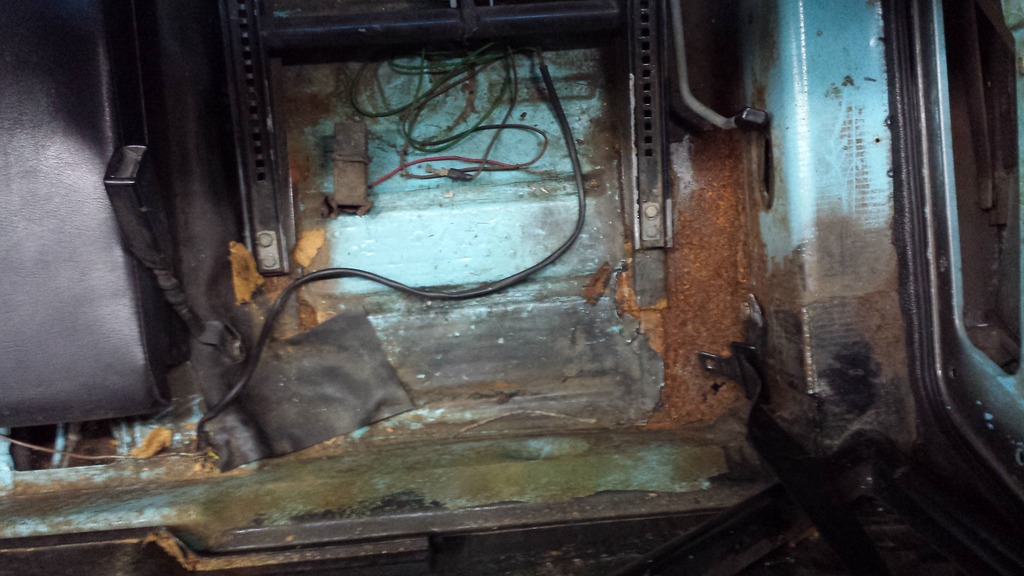
Started digging a little into my floors and I've got a hole on the passenger rear (see pic below...next to seat belt). I stabbed the hell out of it with a screwdriver and feels pretty solid. There was a couple small holes where the pan meets the long. Driver side has a dime size hole too. Where the seam sealer flakes off it is rusty, but feels solid. Where I have to pry the seam sealer off it looks like clean metal (look next to the tilt adjuster handle).

What are your guys thoughts on either patching it or just ordering a panel from RD? I also plan to install the popular inner long stiffening kit (or maybe the outer...stilling deciding).
Looking for some guidance. Thanks!

IPB Image

IPB Image

IPB Image

IPB Image


mepstein
Remove all the tar with a multi tool to see where you stand and then decide what to do next.
stevegm
agree.gif

There is likely more rust under the rest of the tar.
GaroldShaffer
QUOTE(stevegm @ Dec 30 2015, 06:43 PM) *

agree.gif

There is likely more rust under the rest of the tar.


agree.gif agree.gif agree.gif agree.gif agree.gif agree.gif agree.gif
stevegm
Here is an article I wrote when I did my floors. Scotty b's suggested treatment worked well.

http://fourteenermotoring.com/2015/12/07/1...ans-and-trunks/
Cairo94507
I agree with the collective wisdom above. Additionally, unless you are building a 300HP race car with some very sticky tires, I believe the inner chassis stiffening kit is plenty for a street car. It is a significant kit.
JoeDees
Eventually, I think you would want to replace. If you have a bunch of other repair to do, I would replace for sure. The other option is what I did to my VW bus's floor that was solid but with a few pin holes and significant surface rust: kick the can down the road. I PORed mine so they'd last 4 years of driving until the bus's turn for refurbishment comes. To me, this is what POR is for.
mgp4591
If you're gonna buy floor pans from RD, do it fast- their sale ends 12/31! welder.gif
dangerranger01
QUOTE(mepstein @ Dec 30 2015, 04:39 PM) *

Remove all the tar with a multi tool to see where you stand and then decide what to do next.


You have a link? I remember seeing a few tools used to remove the tar but I can't seem to find the threads tonight.....

QUOTE(stevegm @ Dec 30 2015, 04:43 PM) *

agree.gif

There is likely more rust under the rest of the tar.


I was afraid of that. I guess i needed a kick in the butt from some experienced dudes...


QUOTE(mgp4591 @ Dec 30 2015, 08:55 PM) *

If you're gonna buy floor pans from RD, do it fast- their sale ends 12/31! welder.gif


I know!! Ordering some parts tomorrow....might not need them all but for the discount you can't beat it really.
mepstein
Harbor freight sells a multi tool cheap. You need to buy a couple scraper blades for it. Takes the tar off fast.
GaroldShaffer
I used a heat gun a putty knife to remove the floor tar. Work in small sections, it actually went pretty quickly.
BeatNavy
QUOTE(Garold Shaffer @ Dec 31 2015, 11:02 AM) *

I used a heat gun a putty knife to remove the floor tar. Work in small sections, it actually went pretty quickly.

agree.gif Heat gun works well. I've done it twice now, and it is not fun but can be done. You'll find large sections come off fairly easily with a putty knife when heated properly. There will then be small sections, mostly around the seam sealer, that are a real PITA.
JoeDees
My concern would be that if the floors are bad, how about the longs...?
dangerranger01
Alright thanks guys, i think i know what tool youre talking about

http://www.harborfreight.com/6-piece-pneum...-kit-95826.html

and i've got a nice heat gun to use. Looks like i'll get busy when it warms up some!


QUOTE(DirtyCossack @ Dec 31 2015, 09:06 AM) *

My concern would be that if the floors are bad, how about the longs...?


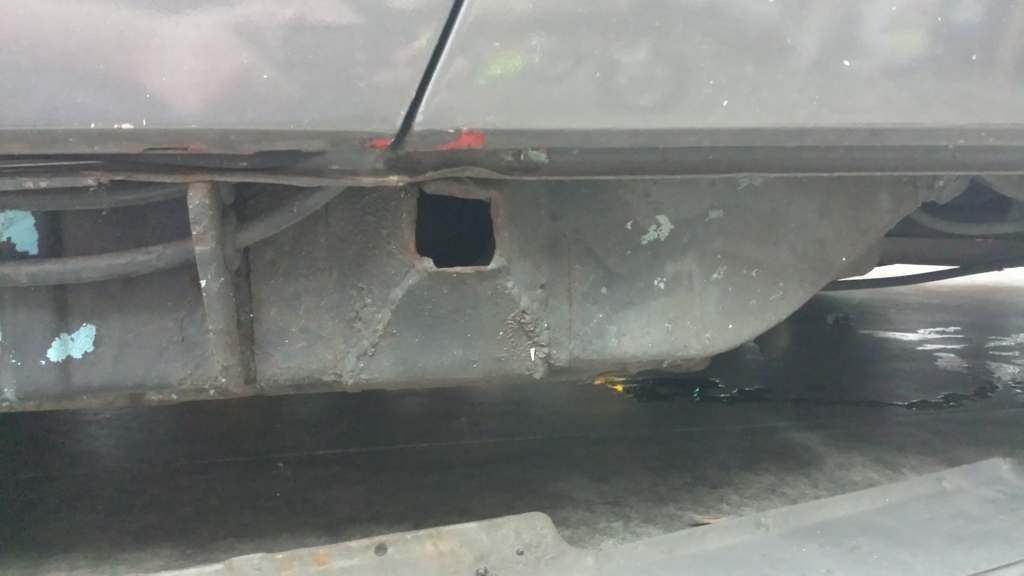
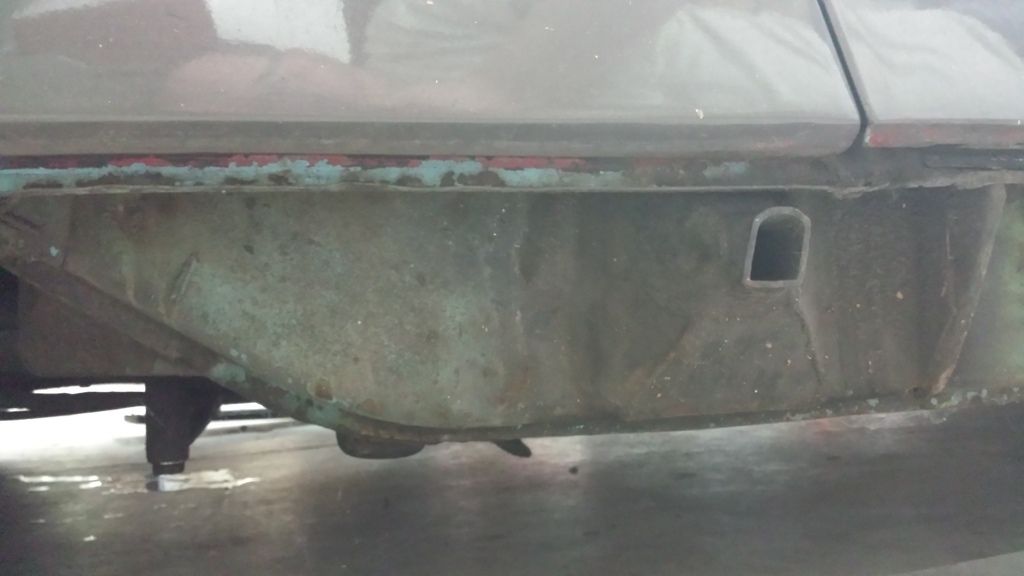
Longs actually aren't too bad. Some spotty surface rust, but i poked with screwdriver and sounded/felt fine. Although, the jack posts did get replaced very haggardly...

IPB Image

IPB Image

IPB Image

EdwardBlume
Looks like she was put away wet....

Take up the tar on the inside. The pass side rear was where water collected so expect that to be real thin....

There was a lower firewall patch just above it while I was fixing up the hell hole.

The quality is the same as the jack posts. The jack posts were never meant to be used again. Sorry, but if I knew my former race car was going to such a good home I would have spent more money on it....

You're going to have more bad news on the front cowl / lower windshield panel, and the front end was tapped and repaired before I had it. Just in case you're wanting to buy up all at once.

The lower rear trunk is likely thin too....

Better check the dog ears while you are looking....

Great to see the car! Even better to see you working on it!


Chris Pincetich
If you get the replacement pan, it does not go vertical up the firewall, and that area will need a patch. My car got both: a full pan on one side with vertical patches around the e-brake area, then patches on the other side. When welding, you can't weld onto rust, so you need to grind at all surfaces down to shiny metal to determine how big the patch really needs to be.

Good luck beerchug.gif
Chris Pincetich
ALSO, if you order the floor pan from Restoration Design, I recall the seat hinge mounts were not included, and are a separate item to order (if new metal is needed there). If you get the pieces at discount now, I bet you could sell them later if they weren't needed! biggrin.gif
dangerranger01
Just ordered a bunch of stuff including the inner firewall...it was pretty crusty. I'm figuring the replacement panel cost is lower than the time spent to fit a homemade patch. At least the replacement panel will be pretty close. Looks like I need to spend some time digging out all the tar. Its amazing how the cold can prevent work from getting done....


QUOTE(RobW @ Dec 31 2015, 10:52 AM) *

Looks like she was put away wet....

Take up the tar on the inside. The pass side rear was where water collected so expect that to be real thin....

There was a lower firewall patch just above it while I was fixing up the hell hole.

The quality is the same as the jack posts. The jack posts were never meant to be used again. Sorry, but if I knew my former race car was going to such a good home I would have spent more money on it....

You're going to have more bad news on the front cowl / lower windshield panel, and the front end was tapped and repaired before I had it. Just in case you're wanting to buy up all at once.

The lower rear trunk is likely thin too....

Better check the dog ears while you are looking....

Great to see the car! Even better to see you working on it!


Thanks Rob! I don't see anything for the cowl from RD...might have to source from parts car, or see how bad it really is and patch it, we will see. Already got a trunk panel during the summer. I checked the dog ears, but didn't really dig into them...looked okay but I plan to reinforce with that tangerine kit he carries.
bandjoey
And don't forget to reseal the back window from wince rusty floors come from.
This is a "lo-fi" version of our main content. To view the full version with more information, formatting and images, please click here.
Invision Power Board © 2001-2024 Invision Power Services, Inc.