I'm looking at replacing my stock length wheel studs with longer units. What is the process and do you have to remove the hubs to replace these (like with a press)? Thanks in advance...
Happy new year!
Tony
Full Version: Extended Wheel Studs
Thanks Scotty! So do you just "double nut" the stud and then unscrew it from the hub?
Tony
Tony
Tony a screw in stud is the last thing you need.
You just need to get longer studs and press them in.
You just need to get longer studs and press them in.
You can do it on your bench,  , before I had a press I used a blacksmith vice. To install I used a open steel lug nut, a washer, and lots of grease on the threads and washer. A impact wrench would do the job also.
, before I had a press I used a blacksmith vice. To install I used a open steel lug nut, a washer, and lots of grease on the threads and washer. A impact wrench would do the job also.
Guys. How are the stock studs retained? I'm assuming they are pressed in...correct? If they are, does anyone manufacture press-in long studs? 
I pounded mine out with a BMFH. Seated them with the lug nuts and impact wrench. I really like my impact wrench. 
Seated them with the lug nuts and impact wrench. I really like my impact wrench.
Yes I got my from CB Performance
QUOTE(Cracker @ Dec 31 2015, 10:35 PM) 
Guys. How are the stock studs retained? I'm assuming they are pressed in...correct? If they are, does anyone manufacture press-in long studs?
Yes, there are studs in various lengths from 45 to 100 mm. For the rear, it is not
necessary to remove the hub. There is enough room to get them out. I did this,
but can't recall, I think there is only one good place to use a bearing press or
C-clamp with appropriate size socket behind. Get the new ones seated by using
the lug nut with spacer behind it or use a bad nut you were going to toss.
For anyone else interested...I found these through a search on the bird.
http://www.msiracingproducts.com/products.html
http://www.msiracingproducts.com/products.html
Tony, I've done literally hundreds of sets and there's a couple of ways to do it without killing yerself. First, safety glasses for your eyesight, gloves for no metal slivers in yer fingers, channel locks so your hands don't get in the way of your BFH, a BFH, a thick brass drift and a for setting them I like to use an old piece of round stock about 1/2 to 3/4 of an inch. If you use the impact gun method, you risk the chance of bunging up the threads. I've done that successfully many times also but it's also messed up its share of studs.
Brass drift in channel locks, line up your stud base in an appropriate space by adjusting your vise, make sure everything is steady, drift sitting on the top of the stud and hit with BFH. Usually once or twice will do, proceed with the rest until done. Flip over hub and drop in the longer stud, set the round stock (clamped with the channel locks) on the base of the stud and apply BFH. Continue until all are seated properly and hit 'em one for time to make sure.
This is longer than most explanations but when I did them without a press, sometimes
several sets a day, I never hurt myself, my equipment or the customers vehicles. Some will guffaw at all this preparation and method but it's your money. You earned it, don't waste it. Happy New Year! And no, I haven't been drinking...
Cheap press from HF works well.
Don't believe BFH is good for the bearing.
Automotion sells the press in studs in 66,72,100mm lengths.
They once sold a pack of ten 100mm for 40$ but no longer.
Paragon sells pack of 10 -100mm press in for 65$
http://www.paragon-products.com/Porsche-Wh...ws-100mmp10.htm
100mm-with 30mm spacer slid over studs
Click to view attachment
Click to view attachment
Tony- check this thread out for a homemade stud remover-
http://www.914world.com/bbs2/index.php?sho...=135943&hl=
I use various lengths of these:
http://www.track-studs.com/ (website currently down).
And one of the other racers said that some American car man. makes longer screw-in studs that fit our cars perfectly for about $3 ea. ( IIRC Ford or Dodge ??).
One issue with the track-studs: they have a shoulder intended to bottom out on the hubs. On the front rotors these shoulder stick out enough to make it difficult for some of the wheels to pull down flush with the rotor.
Not a problem if you use spacers, but certain wheels dont fit quite right without hogging out the first 1/4" of the holes on the wheels.
Does HF make a cheap on car stud press? If it's off the car anyway, don't hit the bearing and you're okay... 
![popcorn[1].gif](http://www.914world.com/bbs2/style_emoticons/default/popcorn[1].gif)
Good luck!
I do agree thought that if the hubs are only supported by the bearing alone you don't want to use the BFH method...
Good luck!
I do agree thought that if the hubs are only supported by the bearing alone you don't want to use the BFH method...
Just to be clear. When I used the BFH on my wheel studs, the hub was off the car, sitting on my garage floor and the bearing was never in danger of being damaged.
I have the 100mm studs on all 4 corners. Simple press fit, no need to get crazy with a BFH.

http://www.harborfreight.com/3-4-quarter-i...ator-99849.html
I used the above ball joint separator to remove and install stripped studs on my 1997 Camry; If I had to install studs on the teener (which I have already) I would use this tool. I have used this tool when I had to install my turbo tie rods, without tearing any rubber ball joint seals. I have used the impact wrench plus socket technique to install studs, but this ball joint separator works in a more steady, controlled manner. Also use safety glasses, in case the tools "bursts" from excessive pressure or slips.
I used the above ball joint separator to remove and install stripped studs on my 1997 Camry; If I had to install studs on the teener (which I have already) I would use this tool. I have used this tool when I had to install my turbo tie rods, without tearing any rubber ball joint seals. I have used the impact wrench plus socket technique to install studs, but this ball joint separator works in a more steady, controlled manner. Also use safety glasses, in case the tools "bursts" from excessive pressure or slips.
Interesting. I'd "guess" you put a nut on the stud after feeding it through the hub and then pull on that nut, therefore (eventually), seating the stud. Correct or wrong?
Tony
http://www.harborfreight.com/3-4-quarter-i...ator-99849.html
I used the above ball joint separator to remove and install stripped studs on my 1997 Camry; If I had to install studs on the teener (which I have already) I would use this tool. I have used this tool when I had to install my turbo tie rods, without tearing any rubber ball joint seals. I have used the impact wrench plus socket technique to install studs, but this ball joint separator works in a more steady, controlled manner. Also use safety glasses, in case the tools "bursts" from excessive pressure or slips.
How do you use this to press in studs
Tony
QUOTE(scotty boy @ Jan 1 2016, 10:18 PM)
QUOTE(dangrouche @ Jan 1 2016, 08:29 PM)
http://www.harborfreight.com/3-4-quarter-i...ator-99849.html
I used the above ball joint separator to remove and install stripped studs on my 1997 Camry; If I had to install studs on the teener (which I have already) I would use this tool. I have used this tool when I had to install my turbo tie rods, without tearing any rubber ball joint seals. I have used the impact wrench plus socket technique to install studs, but this ball joint separator works in a more steady, controlled manner. Also use safety glasses, in case the tools "bursts" from excessive pressure or slips.
How do you use this to press in studs
Andy,
Whats the thickness of the spacer you run on the rear & can you post pictures of your wheels mounted please? Thanks in advance...
Tony
I have the 100mm studs on all 4 corners. Simple press fit, no need to get crazy with a BFH.
Whats the thickness of the spacer you run on the rear & can you post pictures of your wheels mounted please? Thanks in advance...
Tony
QUOTE(SirAndy @ Jan 1 2016, 03:21 PM)
I have the 100mm studs on all 4 corners. Simple press fit, no need to get crazy with a BFH.
QUOTE(Cracker @ Jan 1 2016, 07:31 PM)
Whats the thickness of the spacer you run on the rear & can you post pictures of your wheels mounted please? Thanks in advance...
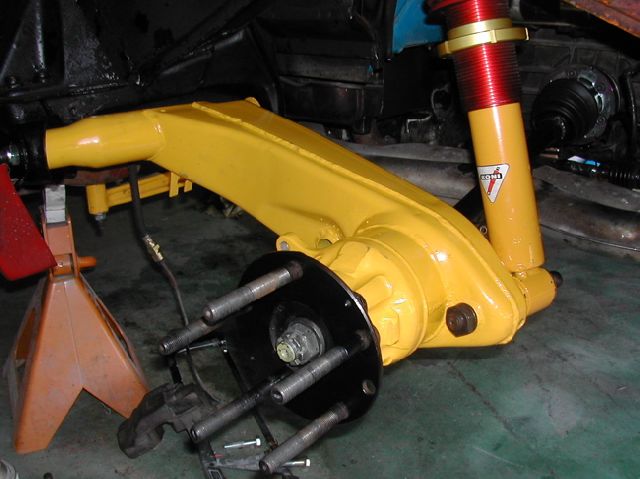
I run 7" cookie cutters for both the street and the track.
On the street, i have 225x50 tires and 1 1/2" spacers.
Click to view attachment
On the track, i run 10" GoodYear R250 slicks and 3/4" spacers.
Click to view attachment
for the pull through technique, you a. thread the stud from the rear b. place a stack of washers on the threaded side. the washers act as a seat for a steel acorn lugnut that you thread onto the stud. put a bit of lube on the threads, then you start tightening the lugnut to see that it is going onto the flange straight. then you apply the impact wrench with a deep 19mm impact socket. hopefully you pull that stud out with a few blasts of the impact gun.
QUOTE(Cracker @ Jan 1 2016, 08:30 PM)
Interesting. I'd "guess" you put a nut on the stud after feeding it through the hub and then pull on that nut, therefore (eventually), seating the stud. Correct or wrong?
Tony
QUOTE(scotty boy @ Jan 1 2016, 10:18 PM)
QUOTE(dangrouche @ Jan 1 2016, 08:29 PM)
http://www.harborfreight.com/3-4-quarter-i...ator-99849.html
I used the above ball joint separator to remove and install stripped studs on my 1997 Camry; If I had to install studs on the teener (which I have already) I would use this tool. I have used this tool when I had to install my turbo tie rods, without tearing any rubber ball joint seals. I have used the impact wrench plus socket technique to install studs, but this ball joint separator works in a more steady, controlled manner. Also use safety glasses, in case the tools "bursts" from excessive pressure or slips.
How do you use this to press in studs
here is the pic of the tool removing the stud. if you reverse it so the solid end (non-forked side) is on the surface of the flange, the tool then becomes an "installer", rather than a stud remover. besides its a pretty good for its intended purpose. sorry I got this from photo the web from some other forum and only have the printout.
This is a "lo-fi" version of our main content. To view the full version with more information, formatting and images, please click here.