Left work early on Friday and continued on with paint prep. Was able to get the bumpers, rockers, rear valance and other misc bits sprayed.
Used Eastwood's epoxy primer and their single stage urethane topcoat in satin black. My dad's garage is a dirty, dusty mess, but I'm happy with how everything turned out. Not show quality, but it's a huge bump up from where the parts were at. My rockers were pretty bent, so when I paint the car I may opt to get a new set from RD.
Click to view attachment
Click to view attachment
Click to view attachment
Click to view attachment
Full Version: My slow-paced, mundane progress thread
I really don't see myself having the patience to do the bodywork on my whole car. Just doesn't seem like something I'd enjoy. Prefer working with the mechanical bits.
Spent the entire day Sunday wrenching on the car in hopes of firing her up in the afternoon. My trusty friend Jon came back and helped me knock down my checklist.
However when it came time to fire her up I ended up fighting with my ignition switch. Only getting intermittent signal to the starter solenoid and it appears the switch has gone bad again. Replaced it about ten years ago after Glenn Stazak (GMS) and I had it fail on us while bopping around Mendocino.
New switch ordered along with a new Pertronix III as I let the smoke out of mine in a big way. My old ignition harness from Bowlsby unfortunately has had the stripes wear off enough to where I mixed them up and appear to have nuked my old sensor.
Sigh.
Also noticed that my p-side 40 IDF didn't seem to be spitting nearly as much fuel down the barrels as my d-side carb. Need to investigate that as well.
Waiting on an ignition switch and a few other bits before I can get back to the meaty stuff. So last night I had a few glasses of wine and reassembled the targa top, sans the perlon which should be here from 914rubber soon. Might have to give them a call today.
Glad I found an old forum post detailing how to install the top window seals. Tried sliding them into the rails for a while and that was a big no-go. Have to slide the other channel into the groove and then work the inner part in carefully with a screw driver. The rear seal was a total breeze. Once the seals were fitting, I roughly trimmed off the excess material from the top side windows seals and then trimmed to fit with the top nearly in place.
You can really see how screwed up the side sail panel vinyl looks now. Think I might paint/dye it to hold it over until I paint the car. I plan on deleting the sail panel vinyl at that time, so really don't want to go through the hassle
Click to view attachment
Click to view attachment
New Meistersatz ignition switch came in this afternoon, so I tore into my steering column to find out if the old switch was cracked. Sure acted like it when we tried to start the car on Sunday.
Click to view attachment
Click to view attachment
Wow, taking off the knee pad first, per PP's guides, was worlds better than trying to get to the harness connectors with the pad in place. I didn't realize how easy it came out and feel like a dufus for struggling so badly the last time.
Click to view attachment
Ah ha, it's cracked (by my thumb in the photo) ... again! I had one fail only a year or so before I stopped driving the car and I don't remember the new switch giving me problems when I parked it in 2012'sh. Thinking it was the lousy brand and it just got brittle with age.
Click to view attachment
Click to view attachment
Ah ha, it's cracked (by my thumb in the photo) ... again! I had one fail only a year or so before I stopped driving the car and I don't remember the new switch giving me problems when I parked it in 2012'sh. Thinking it was the lousy brand and it just got brittle with age.
Click to view attachment
The dash went back together quickly so I decided to fix a nasty wire before my fingers froze. It's getting down into the 30s and my garage is in the 50s at night, maybe lower.
Click to view attachment
Ah yeah, so what da fuch is this? The wire is super short and hacked together. Hmm, wonder if I did that when I was in my late 20s. I sure hope not.
Click to view attachment
So I pulled off the wheel again and removed the copper contact ring by bending tabs on that attached it to the horn ring. The stress relief crimp section was cracked so I decide to solder the new wire into the contact ring to keep it from pulling out easily.
Click to view attachment
Much better!
Click to view attachment
Click to view attachment
Click to view attachment
Ah yeah, so what da fuch is this? The wire is super short and hacked together. Hmm, wonder if I did that when I was in my late 20s. I sure hope not.
Click to view attachment
So I pulled off the wheel again and removed the copper contact ring by bending tabs on that attached it to the horn ring. The stress relief crimp section was cracked so I decide to solder the new wire into the contact ring to keep it from pulling out easily.
Click to view attachment
Much better!
Click to view attachment
Click to view attachment
What paint did you use for the valance, rockers, etc.? It looks great.
Konrad
Konrad
QUOTE(krazykonrad @ Dec 7 2017, 09:19 AM) 
What paint did you use for the valance, rockers, etc.? It looks great.
Konrad
Thanks! They'd look even better if I'd spent another day prepping, but I don't really have that type of patience at my skill level. Also found out after I bought the product that you have to wait days before you can sand epoxy primers.
Here's the paint:
http://www.eastwood.com/eastwood-rat-rod-s...lack-paint.html
Primer:
http://www.eastwood.com/eastwood-black-epoxy-primers.html
nice work.
funny, I have the exact same paint in my garage, just waiting for me to finally prep the same parts and paint them.
funny, I have the exact same paint in my garage, just waiting for me to finally prep the same parts and paint them.
QUOTE(jmitro @ Dec 7 2017, 04:23 PM)
nice work.
funny, I have the exact same paint in my garage, just waiting for me to finally prep the same parts and paint them.
I thought it was a good product to work with, but I'd be curious to see what you think after you've used it.
I sprayed the primer in cold weather too. Somewhere in the low 40s, and didn't have any issues. It _might_ have been in the 50s when I sprayed the urethane. Again, no issues whatsoever.
Good luck!
Been a week or so since I last posted an update.
Tried starting the car last weekend. However my new battery acted like it was dead, though it tested fine. Almost my new ign. switch stopped working after a few tries. WTF? Turns out I hadn't tightened the ground strap to the gearbox. From what I can tell I only fried the start position on the ign switch and cooked my CHT gauge. Thankfully I have another NIB gauge and my replacement switch just arrived today.
Used a momentary switch to make a starter-switch in the engine bay just for getting her going. Once the grounding issues was resolved I found that I was only getting back fires when trying to start it up. Checked and double-checked that the rotor was pointing where it needed to be at TDC, wire order, etc. Eventually had to call it quits until Tuesday. Had my friend and the person who built the motor come by to check my work and found that he had installed the distributor drive gear 180 deg out.
Once that was sorted she fired right up, but I had some terrible exhaust leaks so we shut her down.
Pro Tip - Always fit the exhaust on the stand. I didn't because I didn't see an easy way to get the motor off the stand with it upside down or sideways.
I paid the price for that. While tightening the exhaust I pulled a stud and broke another. I take full responsibility for the snapped stud, but the once that pulled never got close to being torqued.
Long story short, I was able to to get the stud out using a Snap On CJ700-1 stud extractor. Really dodged a bullet there. Just barely had enough thread left and clearance to make that work.
Fixing the pulled stud with a helicoil this week and hopefully we'll be in better shape to actually drive the car by next weekend.
Click to view attachment
New Ignighter III
Click to view attachment
Click to view attachment
Click to view attachment
Click to view attachment
Click to view attachment
QUOTE(RoadGlue @ Dec 7 2017, 01:16 AM)
It's getting down into the 30s and my garage is in the 50s at night, maybe lower.
Well, isn't that cute? 

Looks like you're making great progress. It's the ol' 90/10 rule. But keep after it. You're almost there.
BTW, I really don't think that was a Triad. At the very least the actual tailpipes are huge, and I don't remember a Triad being like that.
QUOTE(McMark @ Dec 18 2017, 08:22 PM)
QUOTE(RoadGlue @ Dec 7 2017, 01:16 AM)
It's getting down into the 30s and my garage is in the 50s at night, maybe lower.
Well, isn't that cute? Looks like you're making great progress. It's the ol' 90/10 rule. But keep after it. You're almost there.
BTW, I really don't think that was a Triad. At the very least the actual tailpipes are huge, and I don't remember a Triad being like that.
Hey, I'm a proud Californian wuss. :-)
You know how large my garage is. It's pretty well insulated too. Any ideas for a relatively economical way to heat it up?
I'm inclined to agree that it's a a Triad copy.
QUOTE(RoadGlue @ Dec 19 2017, 08:58 AM)
It's pretty well insulated too. Any ideas for a relatively economical way to heat it up?
If it's well insulated you can get one of them electric oil-filled radiators and set it to 65ish. Once it gets there it won't take much energy to keep it at that level.

QUOTE(SirAndy @ Dec 19 2017, 09:27 AM)
QUOTE(RoadGlue @ Dec 19 2017, 08:58 AM)
It's pretty well insulated too. Any ideas for a relatively economical way to heat it up?
If it's well insulated you can get one of them electric oil-filled radiators and set it to 65ish. Once it gets there it won't take much energy to keep it at that level.
I can try! I actually have one already, but didn't feel it would have enough oomph to do the job.
I'm usually only out there in spurts and often right after work. I wouldn't want to leave it on while I'm away, so having something that could be more "on demand" would be helpful.
Good idea though and it could turn out to be useful during the upcoming holiday break.
Thanks!
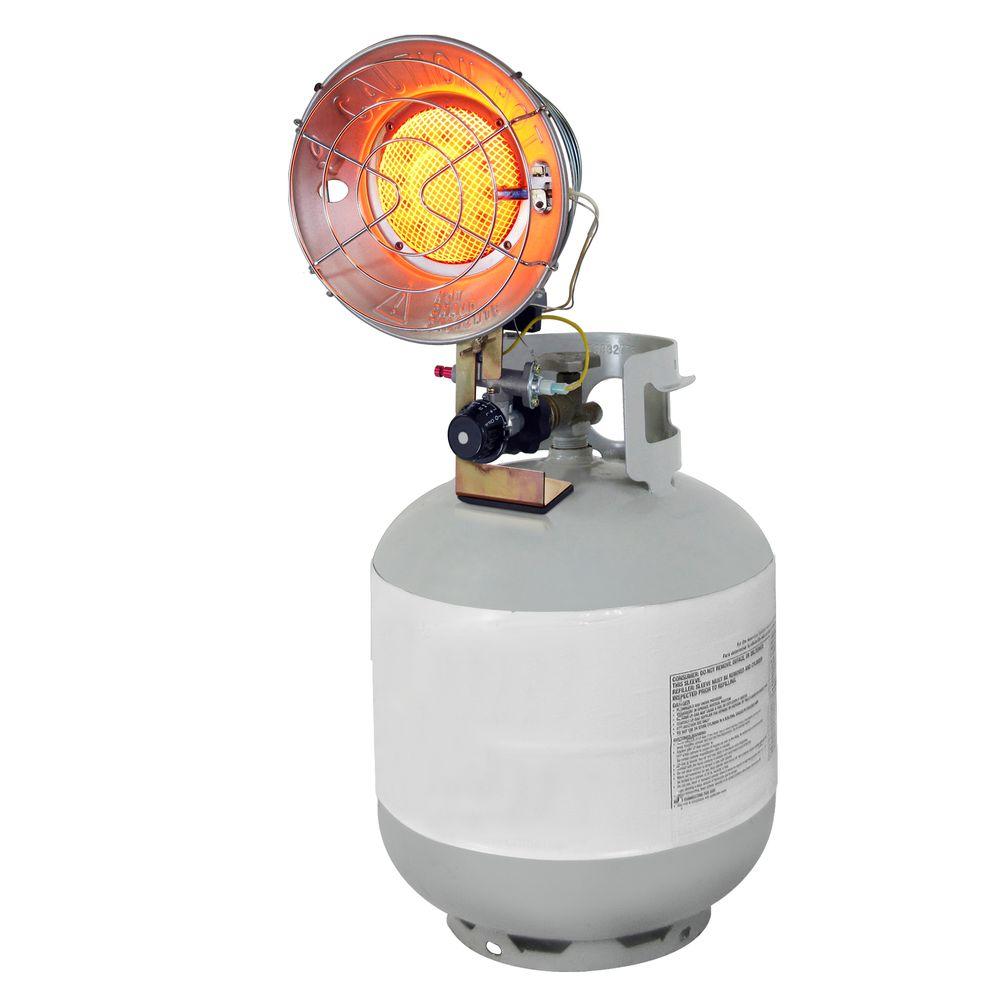
Propane heaters work well. I had one at my dads place and it was nice. I'm looking into the small Reznor hanging shop heaters for my garage at home. They're available used all the time for ~$100.
That oil-filled radiator style heater worked great in the garage. Took the edge off and if I was close to it I'd find myself pushing it out of the way.
Fixed both exhaust studs on Thurs evening and then drove around the neighborhood for the first time in seven or so years Saturday. Happy Christmas to me!
Still have an exhaust leak I haven't been able to totally adjust out. This set of HE's I have might not me totally true/straight. IDK... Think I'll heat cycle it a few more times and carefully try to add a bit more torque. If that doesn't work I'll pull them and put a straight edge on it and see how it looks. Might need a new set though. These are pretty ratty anyways.
Also installed another ign switch. Think I can swap it out and put it all back together in about 25 min now, while sleeping. Anyways, didn't fix the START position problem. Pulled the fuse block, fixed a few little issues, cleaned up the main ground lug. Still no dice.
Pulled the passenger seat. Put the switch into START and wiggled the sea tbelt interlock wires and BOOM, it wanted to turn over. Didn't have chance to investigate further, but at least I know where the issue is.
Tonight I'm having my neighbor come over to TIG weld the engine lid hinge mounts. I installed Sergio's GT lid and the springs appear to have a lot more tension. Both hinge mounts ripped on the first close. DOH.
Also mounted the front LE Dam and bumper, rear valance and bumper and the two rocker panels.
Click to view attachment
Click to view attachment
Click to view attachment
Click to view attachment
Click to view attachment
Click to view attachment
In other news, my buddy Dug snagged a set of 15 x 7 ATS 4-lug wheels that were listed on the classifieds here for me this past week - Probably won't have them here in Santa Rosa for at least a few weeks, but I'm so stocked. Always loved the ATS wheels.


Click to view attachment
Click to view attachment
Question -
My car was originally a '74 1.8 and I wonder if the relay board cover was different for L-Jet cars as I can't for the life of me get my relay board cover to fit.
Anyone care to chime in?
My car was originally a '74 1.8 and I wonder if the relay board cover was different for L-Jet cars as I can't for the life of me get my relay board cover to fit.
Anyone care to chime in?
Looking good Randy! I am so glad you got those wheels!
QUOTE(Krieger @ Dec 26 2017, 12:32 PM)
Looking good Randy! I am so glad you got those wheels!
Thanks buddy!
So last weekend she officially roared to life, sans exhaust leaks. The HE I picked up from a fellow member years ago, for whatever reason, wouldn't quiet down. Pulled it again, put a straight edge across both surfaces and couldn't see any problems. I had one spare in my stash, but it's a SS and has a slightly larger ID. I either need to pick a new HE that matches one or the other.
Click to view attachment
Click to view attachment
Really wasn't happy with Mark's throttle cable support being on the passenger side of the case (sorry Mark!) as it meant that the linkage rods weren't parallel to one another. After some heavy tweaking in the vise I got it to fit on the other side of the case -
Click to view attachment
Click to view attachment
Nice work!

Still fiddling with gauges. Fuel gauge isn't working, though the reserve light does operate. Hmmm.
Really digging the A/F ratio gauge. More on that later though.
Installing and oil pressure gauge this weekend.
Click to view attachment
Really digging the A/F ratio gauge. More on that later though.
Installing and oil pressure gauge this weekend.
Click to view attachment
QUOTE(gms @ Jan 5 2018, 12:52 PM)
Nice work!
Thanks Glenn! Think I beat my Sept '18 deadline. Just gotta be sure not to break it before then.

Awesome neighbor came by and TIG welded both of the cracking/separating engine lid hinges -
Click to view attachment
Click to view attachment
Sergio's GT lid is a thing of beauty. Did require some bending to get it to sit straight.
Click to view attachment
Click to view attachment
I had planned on using the AP carb rain hats, but they interfere with the deck lid springs. Wish I had known before purchasing them.
No mention of them having interference issues on 914rubber site -
http://shop.914rubber.com/Rain-Hats-for-carbs-914RH.htm
I'll send Mark a message about that.
No mention of them having interference issues on 914rubber site -
http://shop.914rubber.com/Rain-Hats-for-carbs-914RH.htm
I'll send Mark a message about that.
This is a "lo-fi" version of our main content. To view the full version with more information, formatting and images, please click here.