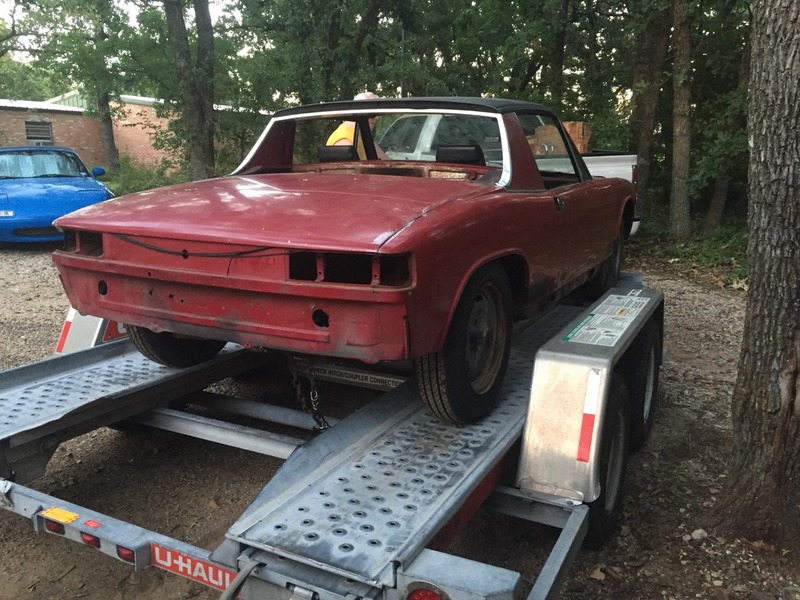
Ok, as promised here are some much better pictures from pick-up and drop-off at my storage unit (temporary). I met the seller last night and went over as much as we could before it got dark. He seems like he will be a good resource for any future questions / contacts in the local 914 arena.
Some photos from pick-up / loading up:
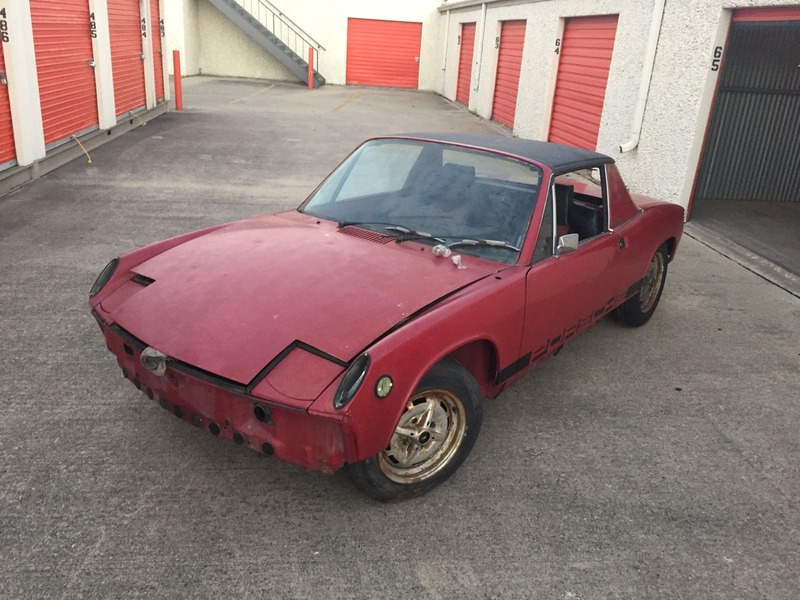
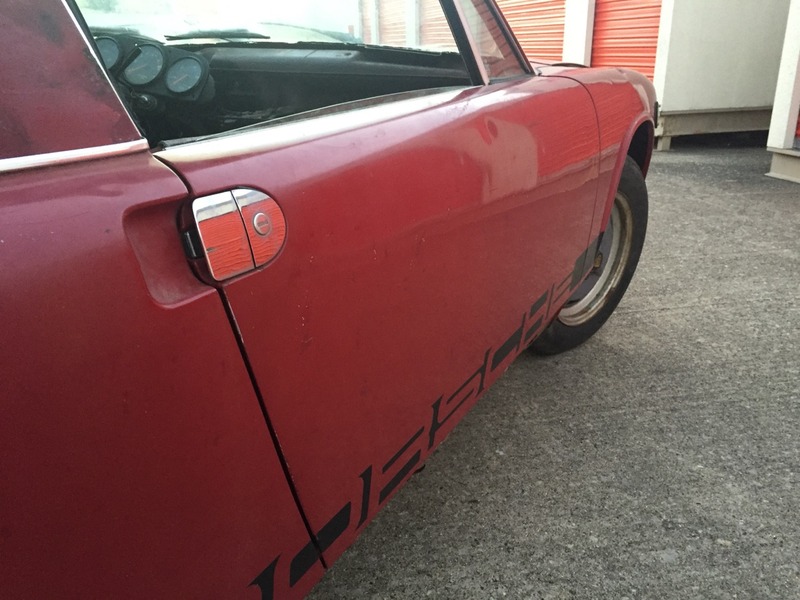
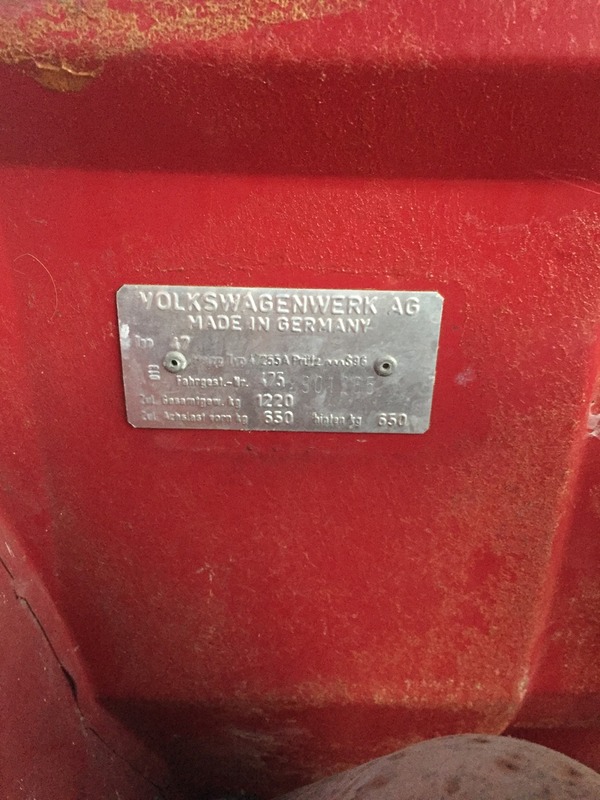
L30C (Malaga Red, 75/76 only I believe)
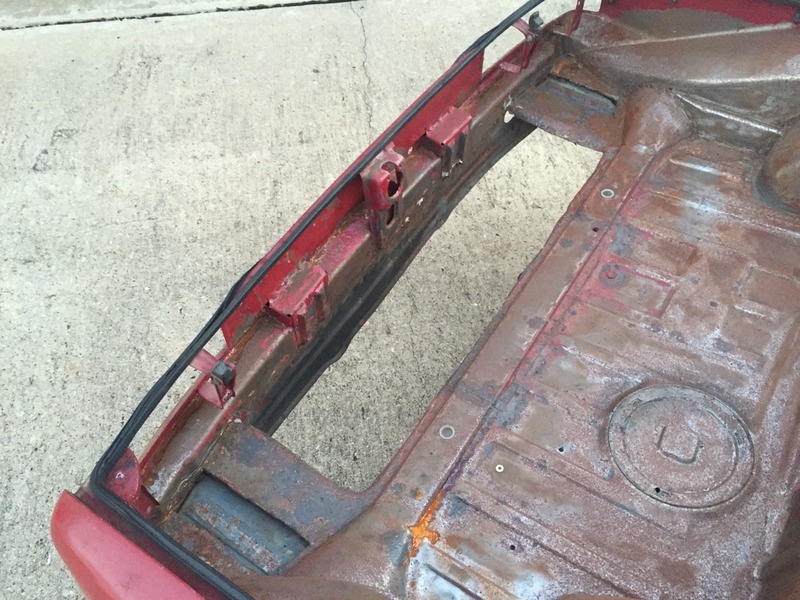
Once upon a time it wore its badges with honor…
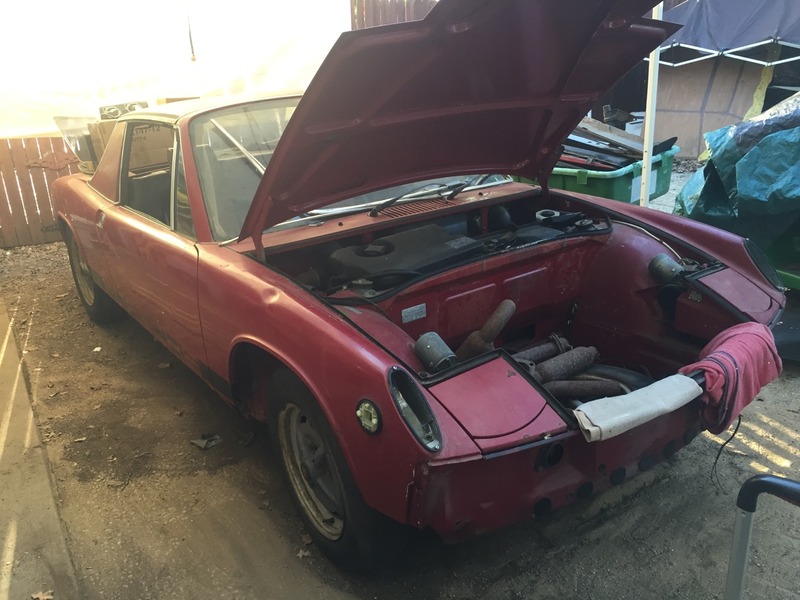
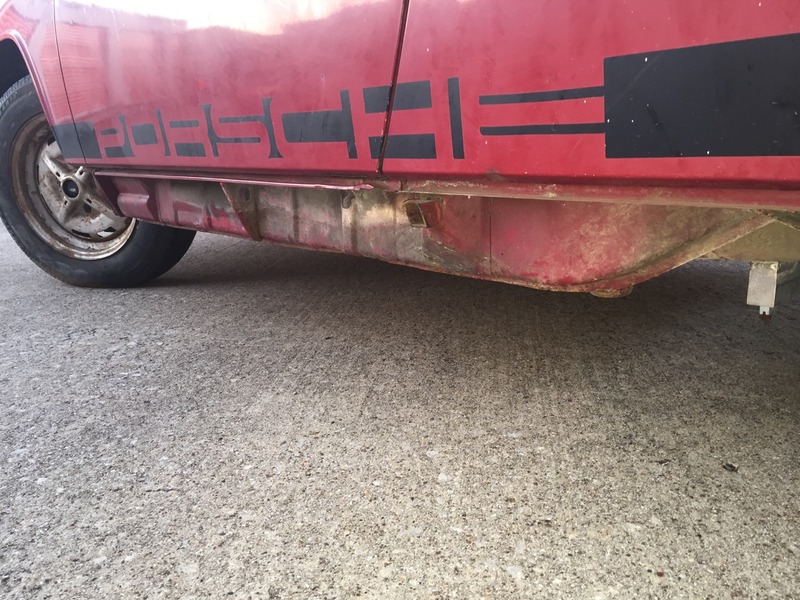
As it always seems to go, my initial estimate of required work was a tad low. A closer inspection revealed that the "rust free" 914 (just doesn’t exist, lol) has a few small spots that will require attention. But, the important bits seem to be clean and structurally sound. There is no apparent rust on any of the longs and they door gaps and even with no sag. Here are my initial areas noted for repair:
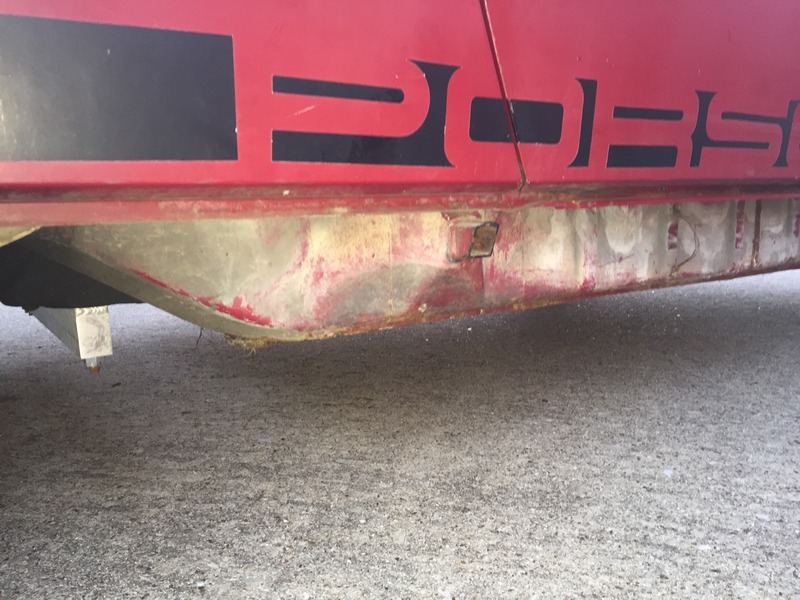
- A few patches will be needed below rear trunk release button, on the flat sheet metal that is usually covered by the bumper. These will be easy as it will just be flat rectangle patches that will get stitch-welded in.
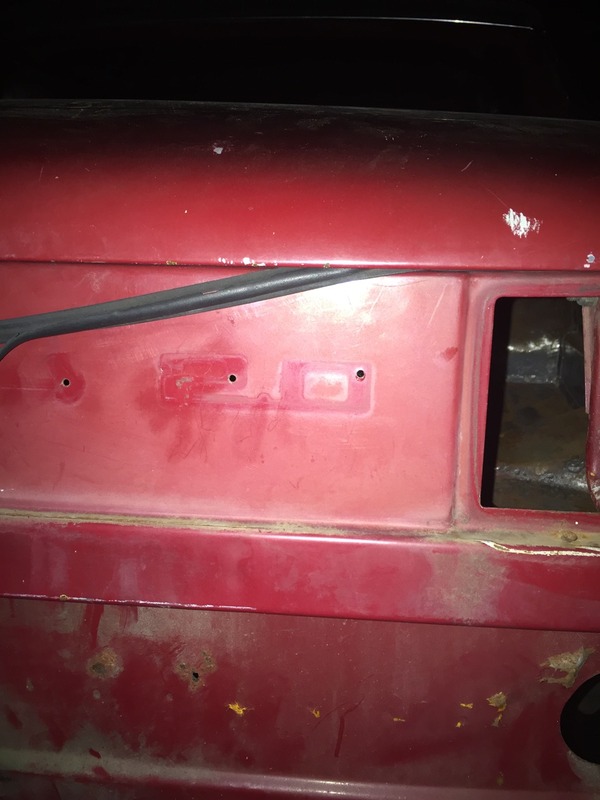
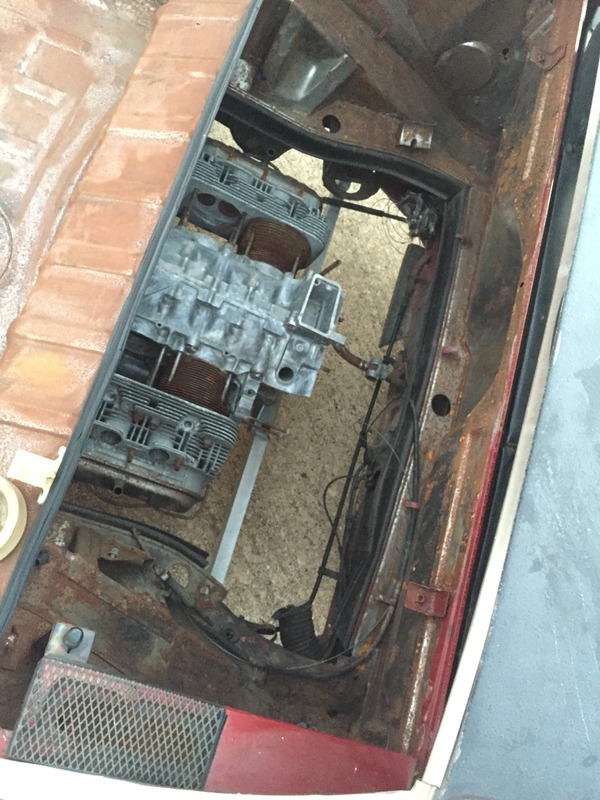
- There are a couple of small (penny sized or smaller) holes in the engine compartment sidewalls. Not sure if these were once factory holes or maybe someone got crazy with a sheet metal screw at one point in the car's history and the rot just manifested from that.
- There is some rust around the antenna hole, but I am planning on filling this in anyways.
- There is some bubbling on a corner of the passenger side sail / b-pillar. Might be able to mitigate with a clean & rust treatment but won't know until I dig further.
- I knew the rear trunk floor pan was cut out when I agreed to purchase, so will be purchasing that patch panel.
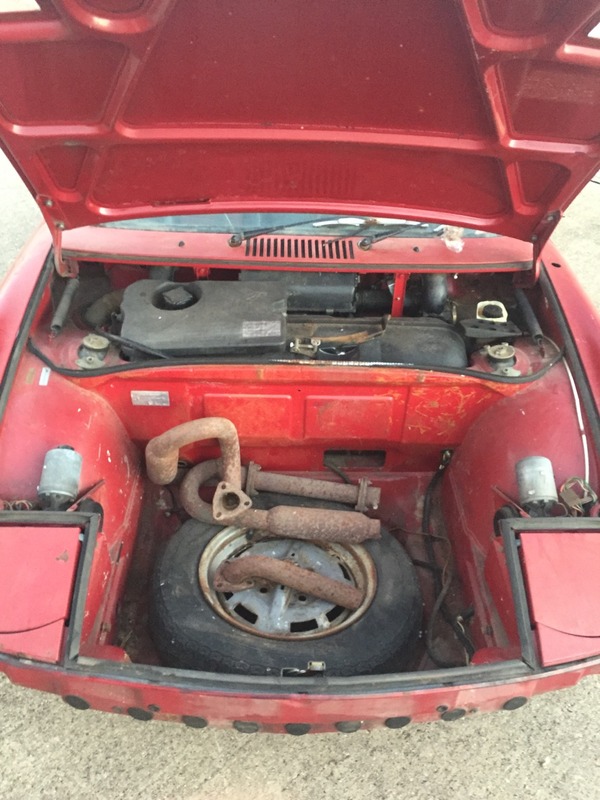
- I found out that someone installed aftermarket A/C at some point, so there are holes cut in the front trunk floor pan. Will have to get that patch panel.
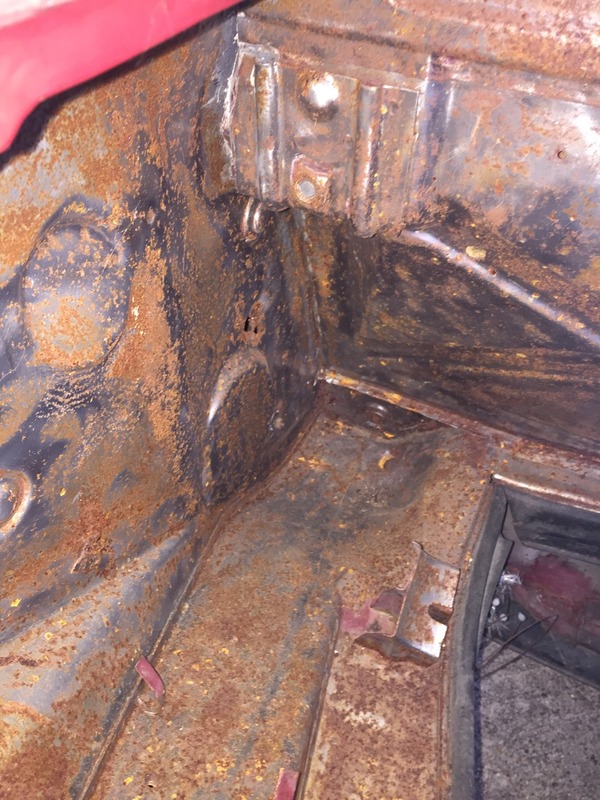
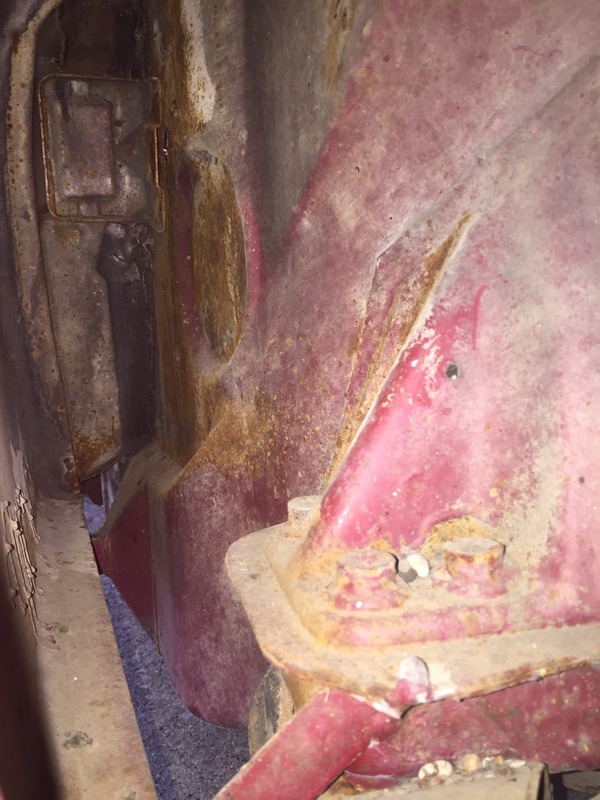
- A little further investigating into the engine compartment / hell hole led to the discovery of some rust on the lower firewall, where it meets with the engine shelf. It appears on the passenger side and to a lesser degree on the driver side. I studied this carefully yesterday and poked around to ensure it did not lead to any decay on the longs. It appears to be isolated to that one vertical, flat piece on both sides. I'm not sure which piece of a patch panel this is so will have to do some research.
- Lastly, I will have to add back in the battery support, tray, etc. as they have been removed.
So definitely not a "rust free" car, but really not too bad considering age / it was at one point a barn find (previous seller). I can at least say it is much better off than some of the other teeners I looked at. Some other areas that will need love:
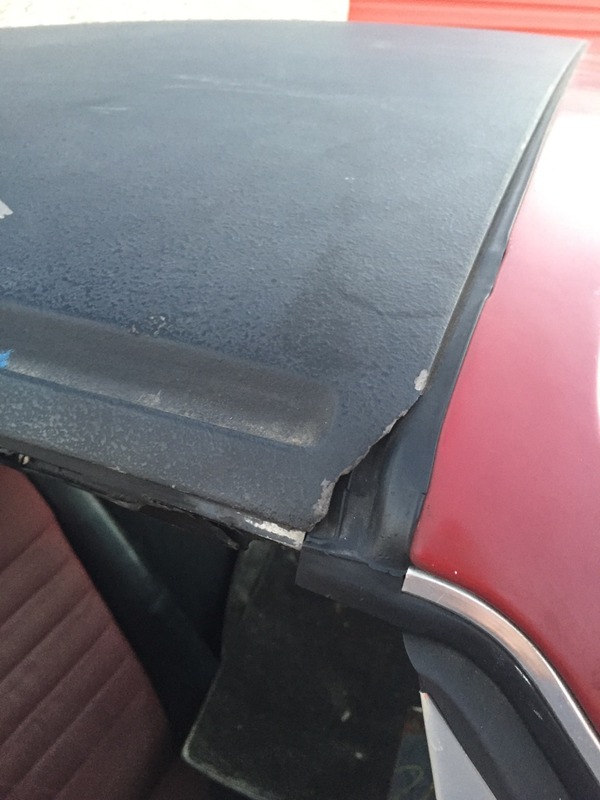
- A corner of the targa top is chipped off, and will have to be re-glassed. I'm not sure what that will mean for texture-match. Also, the front locking mechanisms appear to be missing handles and not properly functioning. Will have to post pics and figure out how to get this top off.
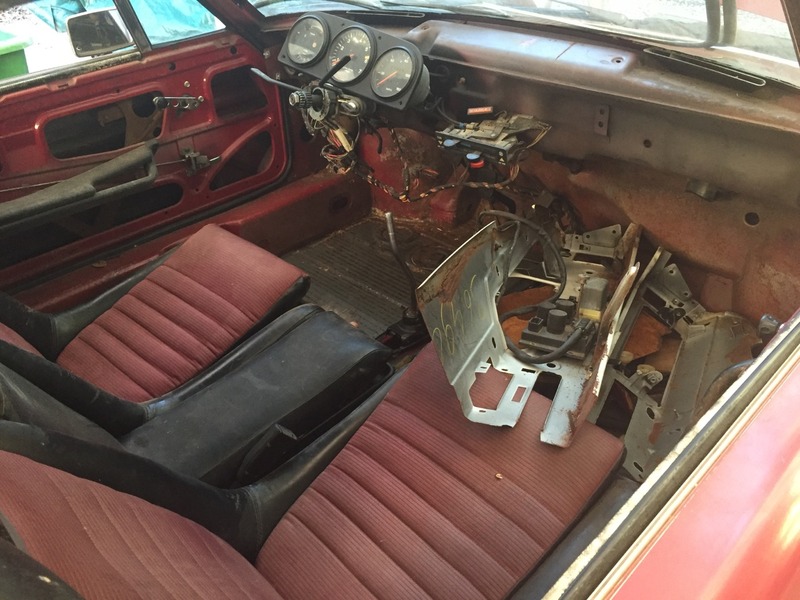
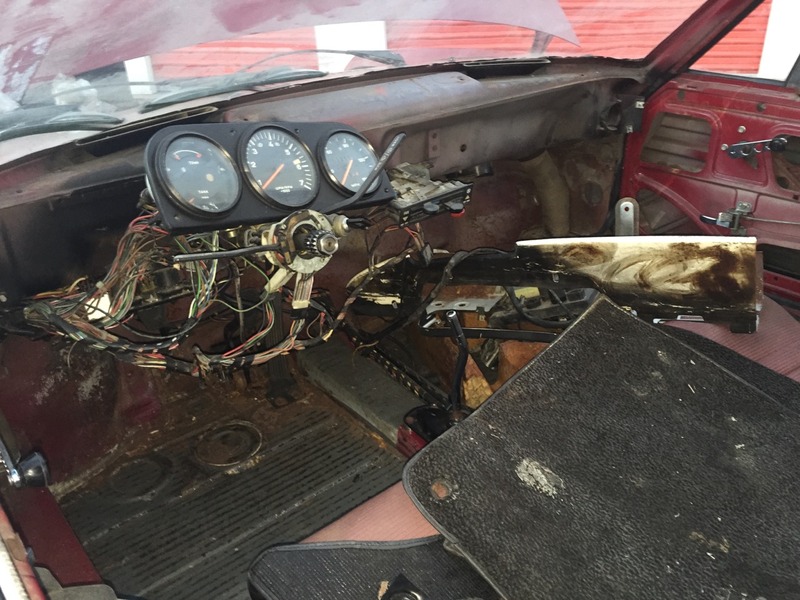
- The main wiring harness is cut aft of the passenger cabin and some of the dashboard wiring sheathing has been compromised. I was told going in that the harness was completely missing, so actually pleasantly surprised to see that it was still mostly in the car. I'm thinking I will use the existing harness and schematics as a template to recreate a new one. Am I crazy?
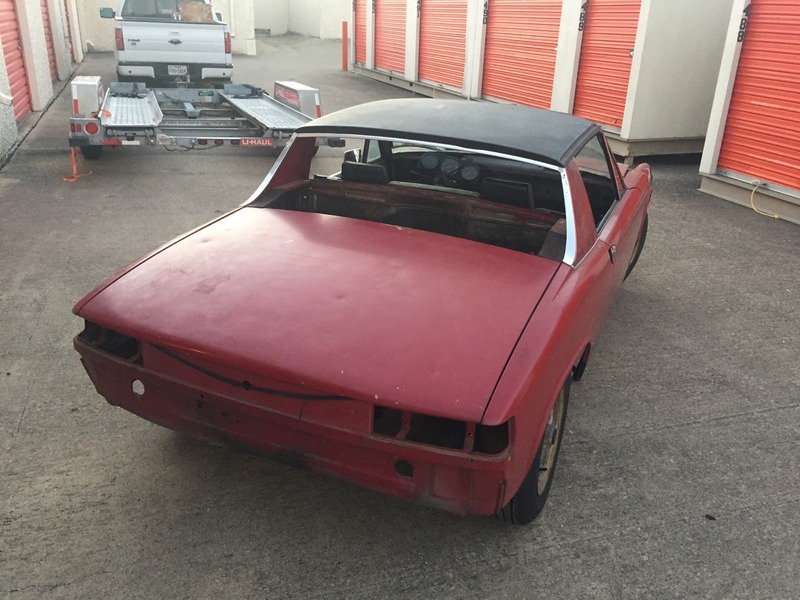
- The dash "skeleton" or frame is cut in half, but looks to be a clean cut so hoping it will be an easy tack weld back together. The original dashboard pieces are pretty badly cracked and torn up, so will have to do research on replacement options.
The car also came with literally a truck bed load of parts in boxes. I will be going back tonight with Tupperware, tape and sharpies to attempt to identify and organize what's there. I'm going to have to gather my thoughts and do some research, but my plan now is to go for a mostly-stock restoration with some tasteful customizations. This car, despite missing some things and being disassembled, is remarkably original. With that in mind, I think I'm not going to venture too deep into the world of custom modifications. Here are some things I do plan to change:
- Shave the side markers
- Shave the antenna hole
- Add "duck tail" rear spoiler
- Replace "steelie" wheels with fuchs or other
- Replace bumpers with either fiberglass or chrome (if I can find without having to sacrifice a limb or two in order to afford them)
- Thinking of leaving the sail panels / b pillars painted instead of covering w/ vinyl
- Possibly others? Who knows?
The game plan for now is to get the transmission and engine out, get the car up on a wooden rolling cart, remove front and rear suspension and remove any remaining interior / trim / electrical / etc. so that I can trailer it to have it blasted and epoxy-primed. While it's away, I'll focus on organizing parts and dropping the engine off for inspection and likely a build. I'll likely take parts to the powder-coaters / cad-coaters in batches. When it comes back, I'll tackle the metal repairs at my own pace. After that, I will send off for body & paint. I'm trying to stay more "hand off" with this project as I'm without my garage full of tools for the moment. (All subject to change, as with any project)
I'll be tracking every dime I spend, so will post that information for anyone interested in how much the restoration of my 914-4 comes out to. Anyways, here are some pictures:
A few dimples here & there:
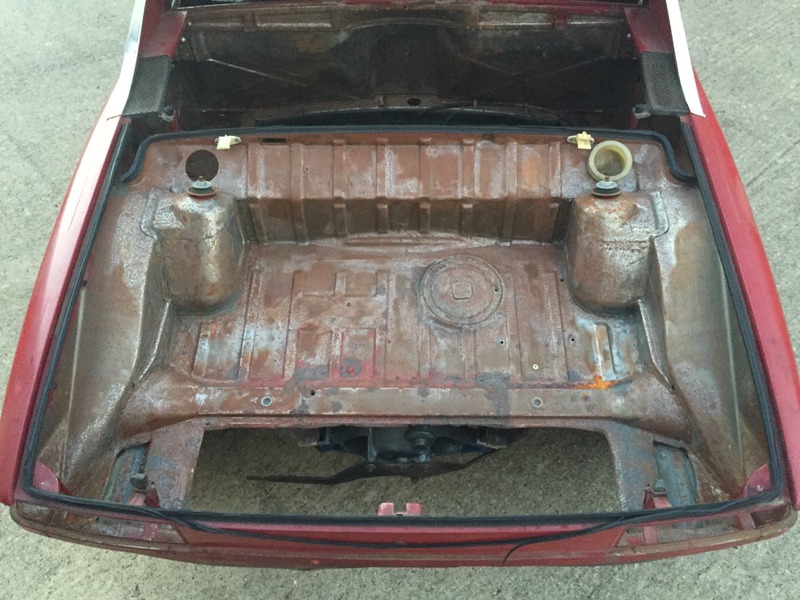
Trunk with missing section(s) of the floor pan:
Here is the rot on the firewall / engine shelf. As mentioned, I poked and prodded and the long itself seems solid:
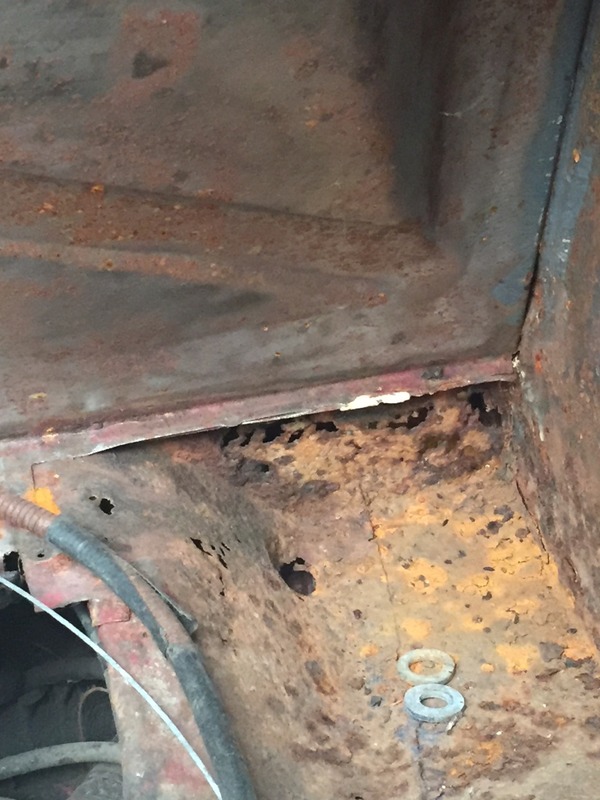
Passenger side:
Driver side:
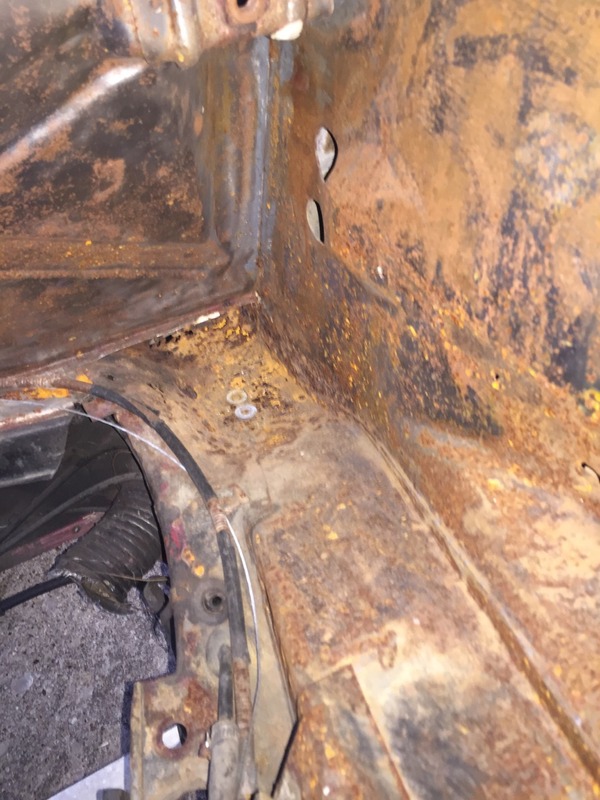
Here are some shots of the longitudinal(s) and inner fenderwell(s):
Passenger:
Passenger, holes are from where original battery support / tray were spotted in (I think?)
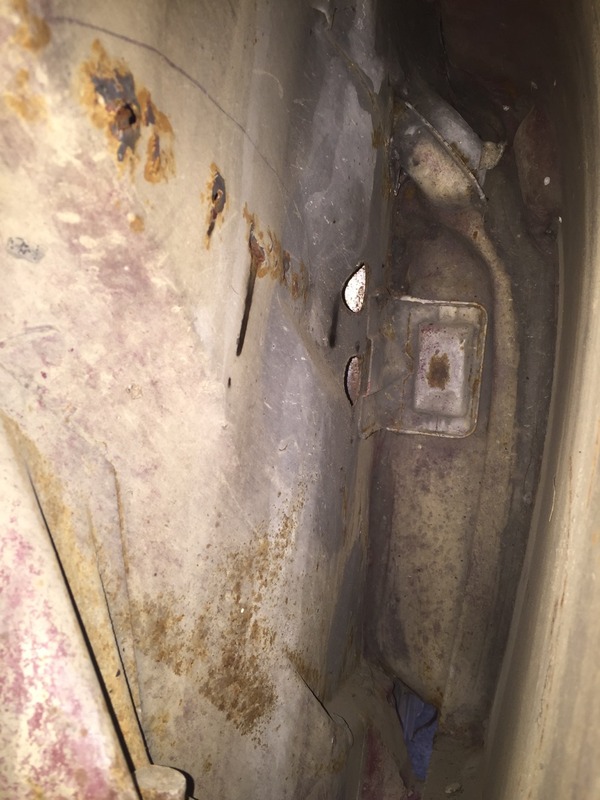
Passenger:
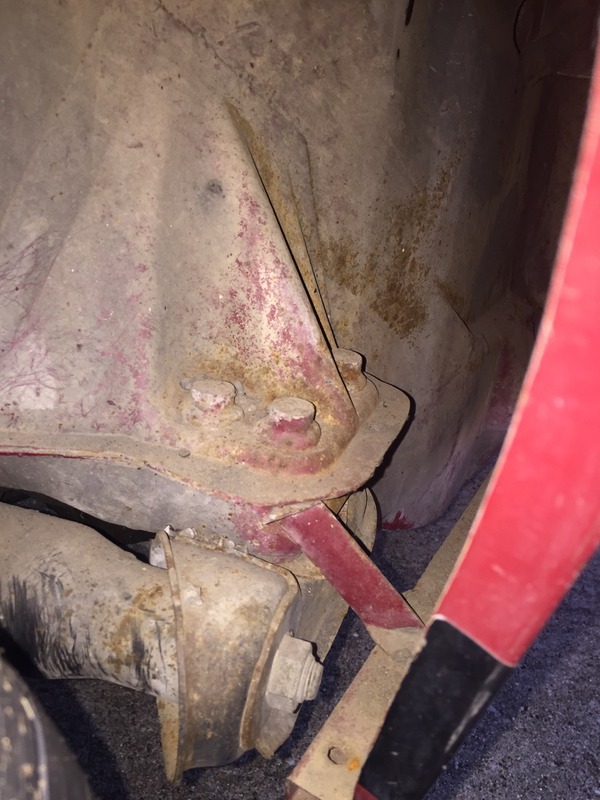
Driver:
Driver:
Here is the chipped corner on the targa:
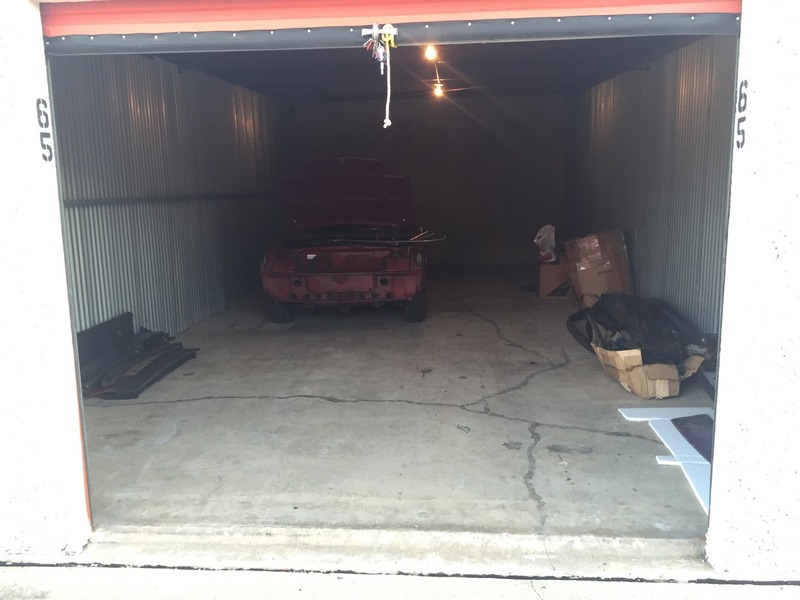
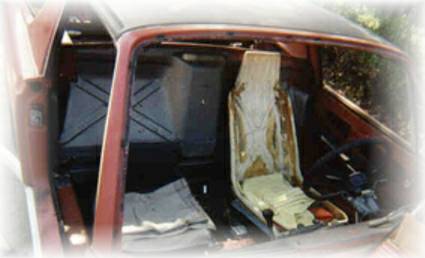
All tucked away for now:
Fair warning: Once I get everything sorted and labeled, I'm sure I'll be posting pictures & questions about numerous parts & pieces. More to come!


 If'n ya see Linda Lovelace tell her I said
  .
. 


 [/url]


 . Why don't we start a contest where we can all take a guess at the final number...


