
Full Version: BUILD-OFF CHALLENGE: Tygaboy's '75 LS3
Pages: 1, 2, 3, 4, 5, 6, 7, 8, 9, 10, 11, 12, 13, 14, 15, 16, 17, 18, 19, 20, 21, 22, 23, 24, 25, 26, 27, 28, 29, 30, 31, 32, 33, 34, 35, 36, 37, 38, 39, 40, 41, 42, 43, 44, 45, 46, 47, 48, 49, 50, 51, 52, 53, 54, 55, 56, 57, 58, 59, 60, 61, 62, 63, 64, 65, 66, 67, 68, 69, 70, 71, 72, 73, 74, 75, 76, 77, 78, 79, 80, 81, 82, 83, 84, 85, 86, 87, 88, 89, 90, 91, 92, 93
So I removed EVERYTHING I'd previously done. It really is back to "Square 1"... or in my case, "Square Zero"? Are there negative squares?
Then I redesigned and fabbed a new base panel. This now sits flush against the rear of the arched support. Plus, overall, it's lower. This will give me more room behind the seats.
Rough mock-up of the driver side main panel. Compared with the previous design, this also sits further back. It reduces the number of parts (and weight), is easier to install and again, creates more room in the cockpit.
Yes, I'll add something to prevent oil-canning.
Yes, I'll add something to prevent oil-canning.
Playing around with designs to close off around the door bars.
I'm not (yet?) skilled enough that a paper template transfers to directly to metal so after approximately 8,347 trips back and forth from test fitting to the angle grinder I have a nice fit!
And a special "Thanks!" to @Cary , @bbrock and others who turned me on to the 3M abrasive products. SOOO much nicer to work with. Faster, cleaner cutting and they last what seems to be 10x over the "bargain" brands. Highly recommended!
And a special "Thanks!" to @Cary , @bbrock and others who turned me on to the 3M abrasive products. SOOO much nicer to work with. Faster, cleaner cutting and they last what seems to be 10x over the "bargain" brands. Highly recommended!
Sorta like this. Still a ways to go but I like this design a lot more.
Now onto fabbing that same panel for the other side and adding a section across the top.
Now onto fabbing that same panel for the other side and adding a section across the top.
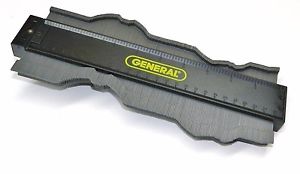
Do you have on of these in your toy barn?
Might cut down your trips from test fit to angle grinder to approximately 4218.5. I do like that design but will need to see it with the seat in position. Assuming you will do some fancy bead work on that back panel?
Yes, those 3M abrasives wind up quite a bit cheaper than the bargain brands, although I posted on Cary's channel repair thread about my dissatisfaction with the 36g Cubitron belts. Will be interesting to hear his experience with those. I still wonder if I just got a bad batch because it is hard to imagine they would have made it past QC.
Keep on fabbing man!!!
Since you have a plasma table, just cut out the pattern you want to put in the panel, tack it up, and smash it with that nice press.
 I am thinking you could match the factory panel.
Nah what's the fun in that
I am thinking you could match the factory panel. Nah what's the fun in that
![popcorn[1].gif](http://www.914world.com/bbs2/style_emoticons/default/popcorn[1].gif)


Watching & learning. Amazing the arsenal of tools
Chris has.
QUOTE(tygaboy @ Nov 4 2018, 03:41 PM) 
I'm not (yet?) skilled enough that a paper template transfers to directly to metal so after approximately 8,347 trips back and forth from test fitting to the angle grinder I have a nice fit!
And a special "Thanks!" to @Cary , @bbrock and others who turned me on to the 3M abrasive products. SOOO much nicer to work with. Faster, cleaner cutting and they last what seems to be 10x over the "bargain" brands. Highly recommended!
Very big fan of the good abrasives.. I've always got more than their cost increase out of them compared to cheaper brands.
Big fan of the good flap wheels for smooth grinding for those without an incredibly smooth "pull" required for a disk.
My shop has been using Klingspor Abrasives (mfg. in Germany) forever...tried the less expensive and NO bueno
QUOTE(bbrock @ Nov 5 2018, 01:58 AM)
Do you have on of these in your toy barn?
I don't - but I will have very soon now I know that they exist. Thanks Brent - awesome tip.
QUOTE(tygaboy @ Nov 2 2018, 04:38 PM)
Playing around with designs to close off around the door bars.
Chris love your work! It seems that you are really enjoying this project. I have a question, Ok now, how did you get that flange around the bar without cutting the bar or the flanget? Did you cut the flange in half, place , weld and grind? How did you do that? Inquiring minds want to know, since I have the same issue.
QUOTE(tygaboy @ Nov 4 2018, 03:42 PM)
Sorta like this. Still a ways to go but I like this design a lot more.
Now onto fabbing that same panel for the other side and adding a section across the top.
I know that you are going to bead roll the panel for stiffness. However, you might want to use this flat unmolested panel as your template instead of bead rolling it. I would cut the panel that you are going to bead roll bigger than the template. Once you bead roll you will shrink and expand the steel, then use the template to place on your bead rolled panel to outline the shape and then cut the bead rolled panel. This may be what you were going to do, and if so, then disregard.
For those who may enjoy a bit more detail, here are a couple vids of the fab process for the Infinity Box brain tray.
1. plasma cut the panel
2. add 90 degree bend to the edges
3. use the knock out punch to cut the hole for the dimple die
4. press the dimple
https://www.youtube.com/watch?v=aE49K950CLo
https://www.youtube.com/watch?v=j8Wfd5SDCnY
1. plasma cut the panel
2. add 90 degree bend to the edges
3. use the knock out punch to cut the hole for the dimple die
4. press the dimple
https://www.youtube.com/watch?v=aE49K950CLo
https://www.youtube.com/watch?v=j8Wfd5SDCnY
QUOTE(andrewb @ Nov 4 2018, 11:04 PM)
QUOTE(bbrock @ Nov 5 2018, 01:58 AM)
Do you have on of these in your toy barn?
I don't - but I will have very soon now I know that they exist. Thanks Brent - awesome tip.
@bbrock Brent- I used to have one of those but couldn't find it. Lost, loaned? Can't recall. I ordered a replacement today so thanks for the reminder!
QUOTE(Curbandgutter @ Nov 5 2018, 11:12 AM)
QUOTE(tygaboy @ Nov 2 2018, 04:38 PM)
Playing around with designs to close off around the door bars.
Chris love your work! It seems that you are really enjoying this project. I have a question, Ok now, how did you get that flange around the bar without cutting the bar or the flanget? Did you cut the flange in half, place , weld and grind? How did you do that? Inquiring minds want to know, since I have the same issue.
@Curbandgutter Rudy - Thanks. I snipped through the flange and just hid the slice under the bar. This is just a test piece to see what something like this might look like...
https://www.youtube.com/watch?v=SghyoTa3Zf4
First attempt at the one-piece top section. I find it difficult to determine all the measurements ahead of trial fitting, what with all the different angles and stuff that gets in the way.
So I approach things like this with a "get as close as possible and if it ends up a practice piece, oh well..."
This first effort fit well in most areas - but not all - so: practice piece it is!
I chalk these sorts of things up to simply being a cost associated with learning.
So I approach things like this with a "get as close as possible and if it ends up a practice piece, oh well..."
This first effort fit well in most areas - but not all - so: practice piece it is!
I chalk these sorts of things up to simply being a cost associated with learning.
I updated the upper panel design with the lessons learned from Version 1. There are still a couple imperfections but I think I can live with them.
With that done, I moved on to fine tuning the fit of the driver's side panels.
Then I started playing with the "rivet strip". I think I'm going to have these run only on the vertical edges of the panels behing the seats. Again, we'll see as all the pieces get fabbed and fit.
So far, so good with this design.
Mock up of the current plan for the top of the doghouse.
914s really are about the corners!
914s really are about the corners!
The shop just got a bit more crowded.
And so much for retirement. I'm now a member of the fab team at Orbis. Only part time. Check out the 4-wheel drive Civic Type R hybrid. This really is pretty cool stuff. We just got back from a successful week at SEMA, showing off the Civic.
https://orbisdriven.com/
so - this Lotus 7 replica is going to be converted to a 200 hp, 4-wheel drive electric vehicle via installation of Orbis wheels at each corner.
This will be a great learning experience.
Will 2 of these wheel show up on the front of my 914? 430 hp to the rear wheels and 100 to the fronts? What could possibly go wrong?
And so much for retirement. I'm now a member of the fab team at Orbis. Only part time. Check out the 4-wheel drive Civic Type R hybrid. This really is pretty cool stuff. We just got back from a successful week at SEMA, showing off the Civic.
https://orbisdriven.com/
so - this Lotus 7 replica is going to be converted to a 200 hp, 4-wheel drive electric vehicle via installation of Orbis wheels at each corner.
This will be a great learning experience.
Will 2 of these wheel show up on the front of my 914? 430 hp to the rear wheels and 100 to the fronts?
What could possibly go wrong?
Are you freakin' kidding me? The master fabricator has gone pro.
QUOTE(bbrock @ Nov 11 2018, 04:46 PM)
Are you freakin' kidding me? The master fabricator has gone pro.
I know, right? Never thought anyone would pay me to fab (my yard art stuff aside).
It was a major milestone. I did my first "paid for welding" to help prep the trailer to take the Civic to SEMA.
No Olympic Welding Team for me...!
Congrats Chris, that is awesome!  We’ll be seeing you in F1 next!
Yes I see some of that tech in your build.
We’ll be seeing you in F1 next!Yes I see some of that tech in your build.
https://orbisdriven.com/
take one perfectly good wheel and completely reinvent it.
It sounds right down your road, Chris.
Enjoy the ride. However, us hangers-ons will be be needing regular 914 LS fixes... Just sos you know...


Awesome!!!!! Congrats on the fun gig!
I've been thinking of ways to power the front wheels via an electric motor for a while now. 100hp is just about right to make things interesting!
I've been thinking of ways to power the front wheels via an electric motor for a while now. 100hp is just about right to make things interesting!
So the teener will be delayed a bit more (too funny). As stated you are the "right man for the job!". I am glad this came to fruition for you Chris. Regarding the wheel: Do you think they will be able to get that "hum" out of the system? The demo alone is enough to drive me off/crazy.
T
T
Congrats on the new gig.
https://www.uh.edu/engines/epi2714.htm
Neat idea, been tried a few times, this might be the right time with materials and tech being much better now.
https://www.uh.edu/engines/epi2714.htm
Neat idea, been tried a few times, this might be the right time with materials and tech being much better now.
Cool deal! Sounds like fun! 
The exposed bearing wheels and gear kinda sketch me out for a production application, but still neat. Most modern attempts at the fixed center automotive wheel I've seen use something like a Franke wire race bearing. Not really sure what it buys you over a hub motor with planetery gearbox and rim mounted brake rotor (for clearance) though.
https://www.franke-gmbh.com/bearings/basic-information/
https://www.youtube.com/watch?v=oM-sbDfJgPg
https://www.youtube.com/watch?v=iQ4lTPVR3qc
10k?
Thats right where I was thinking it should be! Very impressive.
10k?
Thats right where I was thinking it should be! Very impressive.
Yes congratulation Chris, well earned.
Enjoy the venture capital ride. So while your in this game I will give you the advice I found out early in my career, you have two bags. One is for money they will pay you for your talents, and ideas. The other is for all that comes with the work. When ever either bag gets full it is time to leave the game.
Enjoy the venture capital ride. So while your in this game I will give you the advice I found out early in my career, you have two bags. One is for money they will pay you for your talents, and ideas. The other is for all
that comes with the work. When ever either bag gets full it is time to leave the game.
It was only a matter of time that word got out about your mad skills. Congrats Chris!
I saw the exhibit at SEMA but didn't know that you were involved - as a former Honda tech, it was interesting to see how technology can improve even a new platform. It would've been good to meet you there....congratulations on moving to the next phase of fabrication engineering!
Back to the fire wall. The never ending fire wall.
And it's got me to thinking: Are they called "mad skills" because developing them is infuriating?
Note that I'm in no way claiming I have them, and let me just prove that right now.
And it's got me to thinking: Are they called "mad skills" because developing them is infuriating?
Note that I'm in no way claiming I have them, and let me just prove that right now.
The latest effort is to fab the upper "cap" of the fire wall dog house. Again, if only I'd paid more attention in Geometry class.
It went something like this:
- Figure out how much clearance is needed inside the dog house and be sure it doesn't interfere with the seats on the outside surfaces. This determines the plane that makes up the sides of the dog house.
- Calculate all the angles needed to connect everything. Everything being the sides, the angles they join the main fire wall panels behind the seats, the angle those main panels intersect with the remaining upper section of the stock fire wall.
Work out the angles for this upper "cap", which has to serve as the part that connects and locates most of these pieces.
- Oh, and then be sure there's a nice step around the opening for the removeable panel.
How hard can this be?
Protractors and levels and a laser that projects a line and lots, lots of measuring.
I wanted do more bending than welding so I tried to work out how I could fold things and ended up with this pattern design.
I wanted do more bending than welding so I tried to work out how I could fold things and ended up with this pattern design.
Bender! Such fun trying to work out the bend order so things don't end up interfering with secondary operations...
Can you believe I got it wrong the first time?
Fail #1
And don't bother counting, I'll total it up for you at the end...!
Can you believe I got it wrong the first time?
Fail #1
And don't bother counting, I'll total it up for you at the end...!
Wait, this looks out of order. There are no bends in this piece!
I determined I had to add the step BEFORE any bending.
Add a couple fails ahead of this BFO.
Sorry. BFO = Blinding Flash of the Obvious.
I determined I had to add the step BEFORE any bending.
Add a couple fails ahead of this BFO.
Sorry. BFO = Blinding Flash of the Obvious.
So, add the beads, then do the folding. Actually, it worked out that I had to add one bead, then fold up the sides, then add the bead to the side sections. Failed there the first time I got to that point.
Oh, you didn't know that when you fold at other than a 90 degree angle, the bead on the adjoining surface needs to be set at a different dimension?
You do now!
And I think I did to, as I posted about this earlier. But, I forgot.
A couple fails here as I remembered then worked this out...
Oh, you didn't know that when you fold at other than a 90 degree angle, the bead on the adjoining surface needs to be set at a different dimension?
You do now!
And I think I did to, as I posted about this earlier. But, I forgot.
A couple fails here as I remembered then worked this out...
And finally. All nice and lined up on both corners!
Now to mess it up welding those open corners.
Now to mess it up welding those open corners.
In conclusion, here's my Fail Display. Only SEVEN (7) tries (from right to left) as I evolved the design then perfected (ahem...) the process to fab the part.
Good news on all fronts:
1. The part is where I wanted it to be
2. My swear jar is full!
"Mad Skills", indeed.
Happy Thanksgiving to you and yours!

Good news on all fronts:
1. The part is where I wanted it to be
2. My swear jar is full!
"Mad Skills", indeed.
Happy Thanksgiving to you and yours!
I am amazed with your fab work and neat-o collection of tools!
Boy that's good stuff! Glad you refilled that jar too. I had to upgrade mine to the jumbo size.
Fitting up the sides of the upper panel. Lots of "sand, fit, sand, fit..." to sneak up on the final shape.
Things came together nicely on both.
Things came together nicely on both.
I changed the design - imagine that! The entire lower doghouse will be removable. It gives me tons more access than having just a removable front panel.
Here, I'm just playing with fit and how I like the overall look.
Here, I'm just playing with fit and how I like the overall look.
A work of art, just like that driver seat! By the way will that seat bolt in or will you have to fab something for it to fit?
To quote AC/DC:
"Back in Black"
Some stock parts, some of the items I fabbed. After nothing but raw surfaces, it's so nice to see things in a final finish.
"Back in Black"
Some stock parts, some of the items I fabbed. After nothing but raw surfaces, it's so nice to see things in a final finish.
And since retirement, my yard art business is picking up. So I decided to upgrade my plasma table. I ordered an Arclight Dynamics 5'x5' table with adds on that support engraving (think marking for holes, bend lines, script, part #s, etc.) a tube cutter that handles up to 8" tube, and a router attachment that can do 3d carving in wood and plastic.
If you're interested in details: https://arclightcnc.com/
This is going to be very cool!
If you're interested in details: https://arclightcnc.com/
This is going to be very cool!
QUOTE(tygaboy @ Nov 30 2018, 05:40 PM)
To quote AC/DC:
"Back in Black"
Some stock parts, some of the items I fabbed. After nothing but raw surfaces, it's so nice to see things in a final finish.
Nice & fresh!
Keeping ya busy out there.
Carry on.....waiting for more
 New tools to play with!
QUOTE(tygaboy @ Nov 30 2018, 05:48 PM)
And since retirement, my yard art business is picking up. So I decided to upgrade my plasma table. I ordered an Arclight Dynamics 5'x5' table with adds on that support engraving (think marking for holes, bend lines, script, part #s, etc.) a tube cutter that handles up to 8" tube, and a router attachment that can do 3d carving in wood and plastic.
If you're interested in details: https://arclightcnc.com/
This is going to be very cool!

SO AWESOME!
This is a "lo-fi" version of our main content. To view the full version with more information, formatting and images, please click here.