tygaboy
Nov 10 2020, 06:40 PM
Aaaaaaaaand, there's the horribly rough cut hole. Let me remind you that this hood was tweaked and had a ton of bondo on it already.
DISCLAIMER: No nice hood was harmed in the making of this proof of concept.

Back to the serious stuff: It looks like the resulting airway may actually work.
tygaboy
Nov 10 2020, 06:45 PM
Next, I cut the hole on the other side. New in this pic is that after reviewing Tony's design, I noticed I'd not accounted for the .375-ish reveal at the back of the headlight and up the edge of the hood. Here's the comparison.
I'm with Tony and will be adding the reveal, as pictured on the passenger side.
This is also a benefit in that it moves that side of the opening in .375 and gives me a bit more flexibility in terms of what I can do to remove parts of the support structure to gain more vent opening area.
Then it was "tape up the center vent" in preparation for road testing to see if this design flows adequately.
I need to point out that up to this point, my cooling system has over performed. The car struggles to get to temp. So much so that my next step is to remove the thermostat and run the electric water pump with the ECU. I'll spin it not at all (or very slowly) at start up, and ramp it up as the temp climbs. The ECU does this via PWM (pulse width modulation) signal and can run the radiator fans the same way. I can program the pump and the fans to do exactly what's needed. It's just a matter of understanding what that is...

ri914
Nov 10 2020, 06:51 PM
Very Nice, I am going to be cutting my hood soon for an exhaust for the fans. I like seeing new ideas. Not sure what I am going to do. I did learn that when cutting a hood you quickly see what existing bracing was working and what is not. Took me an entire day to fix a 10 minute sawzall blast.
I was thinking about making 1 vent at the top near the windshield but I like the 2 side vent idea you created. I dont have much landscape with my new fenders though.
My radiator has a temp guage in it which kicks on my fans and the engine temp decides how fast to fun the electric pump. If you have any questions I can ask my friend that programmed it for me, he is very good with the GM engines and ecu stuff. how close is your water pump plate to your firewall?
tygaboy
Nov 10 2020, 06:53 PM
Here's Tony's original design sketch, just so you don't have to go looking.
dan10101
Nov 10 2020, 06:55 PM
QUOTE(tygaboy @ Nov 10 2020, 04:27 PM)

@markhoward has agreed to take my car for a test drive (hopefully tomorrow!) and report back if the pedal feel meets his high standards.

Thanks Mark!
Why didn't you say something. i would be glad to help out! Oh wait, you wanted high standards... nevermind.
tygaboy
Nov 10 2020, 06:57 PM
QUOTE(dan10101 @ Nov 10 2020, 04:55 PM)
QUOTE(tygaboy @ Nov 10 2020, 04:27 PM)
@markhoward has agreed to take my car for a test drive (hopefully tomorrow!) and report back if the pedal feel meets his high standards.
Thanks Mark!
Why didn't you say something. i would be glad to help out! Oh wait, you wanted high standards... nevermind.
- If only it had been ready for that when you were here... Your experience with LS power would have been great to have. You could always come back down!
ri914
Nov 10 2020, 07:00 PM
QUOTE(tygaboy @ Nov 10 2020, 07:53 PM)
Here's Tony's original design sketch, just so you don't have to go looking.
What is the rectangular mark on the passenger fender? matching air ducts for brakes?
very nice...
Click to view attachment
tygaboy
Nov 10 2020, 07:01 PM
And as always, I'll do the full transparency thing. Here's my initial effort at a vent design.
I'm trying to reuse my center vent "bendy vent panel" design and adapt it to this new shape. Obviously quite a way to go and there are a couple challenging areas so final outcome is TBD, but you get an idea of how my pointed little head approaches this sort of part. At least so far.
djway
Nov 10 2020, 08:45 PM
BigKat once told me that the air inlet to his radiator was the size of the 6 cylinder oil cooler opening. LS motors just seem to run cooler. Hot air is approximately 1.7 times the cool volume so math at your most restrictive point.
Looking at the rest of the car I have no doubt it will look cool.
Love it.
Cairo94507
Nov 11 2020, 07:16 AM
Chris- I really like the new design. I just could not warm up to the center vent.

Andyrew
Nov 11 2020, 10:01 AM
I like it!
I think if you ran JUST this it would be fine. If you ran both this and the fender vents it would be double fine

tygaboy
Nov 11 2020, 01:20 PM
I worked up version 1 of the vent design. As usual, I'll need to see these on the car and adjust from there, as needed.
Yes, I know I can't tip all the vents into position, given the current opening but this will give me the physical model I need to noodle through exactly what I need to do to make this work.
I'll cut one side, tweak until I'm happy, then apply the final (ha!) changes to the other side.
Ultimately, I'll use a fiberglass or carbon hood where it's far easier to cut/change the support structure to resolve any clearance challenges.
Another BIG thanks again to Tony
@RetroRacer for suggesting this design.
Pics of one of these in metal this afternoon, if all goes to plan.
tygaboy
Nov 11 2020, 01:23 PM
QUOTE(Cairo94507 @ Nov 11 2020, 05:16 AM)
Chris- I really like the new design. I just could not warm up to the center vent.
Michael - Yep, me neither. But building all those center vents was a great experience and skill builder for me. Chalk it up to "more learning". Fingers crossed that the "TonyVents" are to my liking. So far, the design feels like a winner.
tygaboy
Nov 11 2020, 01:44 PM
QUOTE(ri914 @ Nov 10 2020, 05:00 PM)
What is the rectangular mark on the passenger fender? matching air ducts for brakes?
very nice...
Click to view attachmentThat was me trying to thinking about trying to channel
@OptimusGlen and copy his wonderful fender vent design, pic attached. If I end up with the TonyVents (tm!) on the hood, I'm not sure Glen's design are complimentary, uber cool though they may be.
Lots still up in the air, pending if I can pull off any of this.
tygaboy
Nov 11 2020, 10:41 PM
Version 1 of the vent panels. As usual, seeing it "in the metal" and on the car lets me start to understand what I like, what I don't, what may change, etc., etc...
tygaboy
Nov 11 2020, 10:47 PM
And here's the actual first one I cut. I measured one angle incorrectly and realized another needed to be changed. But that didn't prevent me from bending the vents into position to get a bit better feel for the look.
My first reaction was that it looks maybe a little "heavy" and that perhaps resizing the height of the vents (using more of them in the same space) would be worth a go.

As always, it's a work in progress that will likely see a few more versions, up to and including a completely different approach. Yep, same ol', same ol' from me.
Andyrew
Nov 12 2020, 09:07 AM
QUOTE(tygaboy @ Nov 11 2020, 08:47 PM)
And here's the actual first one I cut. I measured one angle incorrectly and realized another needed to be changed. But that didn't prevent me from bending the vents into position to get a bit better feel for the look.
My first reaction was that it looks maybe a little "heavy" and that perhaps resizing the height of the vents (using more of them in the same space) would be worth a go.
As always, it's a work in progress that will likely see a few more versions, up to and including a completely different approach. Yep, same ol', same ol' from me.
They do look a bit thick. Maybe another 30% thinner?
Cairo94507
Nov 12 2020, 10:35 AM
I agree with Andrew on that. The vents need to be scaled down in size and maybe add a couple more to make them fit the space? But I like where this is headed for sure.
AZBanks
Nov 12 2020, 11:01 AM

A little thinner on the individual vents but other than that, you nailed it.
tygaboy
Nov 12 2020, 11:21 AM
@Andyrew @AZBanks @Cairo94507 Yep, I've got a newer, slimmer, improved version partly done. And I'm thinking maybe narrow up the frame. It's 1" as is, maybe take it down to .75?
Make everything a bit less "tough" looking?
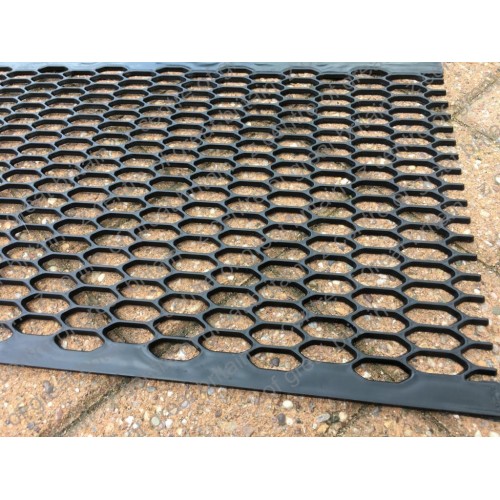
The other thing I messed with that I like is the scree/mesh look. Clearly, the shape of the opening would need to be other than what's shown here, more like the sharpied size but with the same corner detail as the vents?
I will say that to me, this look is more elegant, more sophisticated than the vents. I could use the same material on the hood, front bumper opening and GT lid to drive some continuity.
The cool thing is "it's just a hood". I could make a couple different ones, just like the fire wall access panel, and swap looks as I wanted to.
Just more to consider. Ain't custom fab stuff a gas?


Andyrew
Nov 12 2020, 11:28 AM
Get some honeycomb mesh, Larger openings. I think the thin mesh looks off.
tygaboy
Nov 12 2020, 12:17 PM
QUOTE(Andyrew @ Nov 12 2020, 09:28 AM)
Get some honeycomb mesh, Larger openings. I think the thin mesh looks off.
@Andyrew - Hey, it's all I had laying around! Geez, tough crowd...


AZBanks
Nov 12 2020, 12:19 PM
It looks like too big of an opening for the mesh to me visually. What about making it similar to the vents with several smaller mesh openings. Excuse my poor/hasty editing skills.
914forme
Nov 12 2020, 01:25 PM
I want to know if you are going to stamp the mesh to add another profile to the finished products.
Andyrew
Nov 12 2020, 01:47 PM
QUOTE(AZBanks @ Nov 12 2020, 10:19 AM)
It looks like too big of an opening for the mesh to me visually. What about making it similar to the vents with several smaller mesh openings. Excuse my poor/hasty editing skills.
What about.....
This same layout, But with the honeycomb pattern CNC cut out vs a straight hole? Chris could cut and weld in a blade if he wanted as well.
KELTY360
Nov 12 2020, 01:53 PM
QUOTE(Andyrew @ Nov 12 2020, 12:47 PM)
QUOTE(AZBanks @ Nov 12 2020, 10:19 AM)
It looks like too big of an opening for the mesh to me visually. What about making it similar to the vents with several smaller mesh openings. Excuse my poor/hasty editing skills.
What about.....
This same layout, But with the honeycomb pattern CNC cut out vs a straight hole? Chris could cut and weld in a blade if he wanted as well.
![popcorn[1].gif](http://www.914world.com/bbs2/style_emoticons/default/popcorn[1].gif)
This is fun.
tygaboy
Nov 12 2020, 02:53 PM
I texted Tony
@RetroRacer this morning and attached this pic. My message was "OK, Tony, here you go. Proof that your design is possible."
A bit of slicing and dicing and the prototype panel can drop into place. I will say, it takes on a different look once it's down in the hood. I'm liking it! Especially that rear view.
In place, a couple things stand out as needing mods, IMO:
- the vents stick up a bit too much. Looking back at Tony's design, his pivot even with the upper edge.
- the upper edge of the frame seem in a bit of conflict with the trailing edge of the hood. Instead of what's there now (90 degrees to the center line of the hood), maybe add a bit of forward/inward sloping angle? Not a lot, just something that hints it's not 90.
And yes, I had to open things up past the fuel tank bulk head. But I'm confident I can work up a solution for that.
Onward to updating the design.
tygaboy
Nov 12 2020, 03:05 PM
QUOTE(914forme @ Nov 12 2020, 11:25 AM)
I want to know if you are going to stamp the mesh to add another profile to the finished products.
@914forme - Stephen, if I end up with mesh, yes, I'll make up a stamping die set and add that little "peek-a-boo" look that brings the mesh even with the surface of the hood.
mikey63
Nov 12 2020, 03:14 PM
QUOTE(tygaboy @ Nov 12 2020, 01:05 PM)
QUOTE(914forme @ Nov 12 2020, 11:25 AM)
I want to know if you are going to stamp the mesh to add another profile to the finished products.
@914forme - Stephen, if I end up with mesh, yes, I'll make up a stamping die set and add that little "peek-a-boo" look that brings the mesh even with the surface of the hood.
Looks good Chris!!
Andyrew
Nov 12 2020, 03:16 PM
How does it interfere with the headlight mechanism? I can see it on the left in the second pic. Have you run the motor to check for interference?
I like what you have. I take back my honeycomb concept.
tygaboy
Nov 12 2020, 03:29 PM
QUOTE(Andyrew @ Nov 12 2020, 01:16 PM)
How does it interfere with the headlight mechanism? I can see it on the left in the second pic. Have you run the motor to check for interference?
I like what you have. I take back my honeycomb concept.
@Andyrew - No motors - GT headlights!
Cairo94507
Nov 12 2020, 03:38 PM
This is looking a lot better. I agree with the back edge of the vent not flowing with the back end of the hood. I also wonder how the vents would look if they finished out flush with the hood surface- so the vents are not proud of the hood. Or is it just the picture that makes them look like they rise above the hood? But, all said, I am really liking the look.
Andyrew
Nov 12 2020, 04:22 PM
QUOTE(tygaboy @ Nov 12 2020, 01:29 PM)
QUOTE(Andyrew @ Nov 12 2020, 01:16 PM)
How does it interfere with the headlight mechanism? I can see it on the left in the second pic. Have you run the motor to check for interference?
I like what you have. I take back my honeycomb concept.
@Andyrew - No motors - GT headlights!
Thats right, I forgot your doing that!
djway
Nov 12 2020, 05:17 PM
Have you considered a louvered panel ot louvers in the hood itself?
Narrow , not too tall.
dakotaewing
Nov 12 2020, 06:02 PM
Here's an idea just to make things more difficult to execute.
Cut the wire pattern to fit inside the opening between each angled metal slat, keeping the wire pattern even with the top of the hood. This process uses both components.
Retroracer
Nov 12 2020, 06:49 PM
Chris - as discussed, the original intent was the edge of the cut out needs to follow the line of the headlight cutout as shown below in the two pics - with some really bad visual editing on the "fixed" pic:
Click to view attachment
Retroracer
Nov 12 2020, 06:50 PM
Click to view attachment ...and I realize you may not be able to do this easily on the steel mock up.
Either way - looks completely awesome!
- Tony
tygaboy
Nov 13 2020, 11:29 AM
A new day, a new design. V1 wasn't doing it for me - the "tab bend" approach requires some amount of gap in certain areas and the more I looked at it, the more it looked a bit too raw or crude. I think I can do better and come up with something that looks more "finished".
So this morning was an update to a simple cut line to define each vent. Note that the red line isn't a cut - it represents the bend line for each vent.
This approach results in a .375" flat at the front of each vent. The goal is something like the 2nd pic.
Today's effort will be to cut one of these and see how it works out.
tygaboy
Nov 13 2020, 11:30 AM
Here's the look I'm after for this version...
tygaboy
Nov 13 2020, 11:34 AM
Then maybe something like this to finish it off, but using a more open mesh.
AZBanks
Nov 13 2020, 11:45 AM
I think you are on the right track. I can't wait to see the results.
dan10101
Nov 13 2020, 12:28 PM
QUOTE(tygaboy @ Nov 13 2020, 09:34 AM)
Then maybe something like this to finish it off, but using a more open mesh.
I really like this. I know you can do it even better.
tygaboy
Nov 13 2020, 03:07 PM
After messing about with the design, I cut one (

geez, how old am I?) and went after bending the vents. It immediately apparent it doesn't need those little arcs in the corners at the bend. I thought they'd add some style points but they actually detract.
Anyway, here's how I ended up bending the vents. I didn't have this clamping model totally worked out on that first little vent so its bend radius isn't as crisp as it should be. Won't happen again, I promise!
mgp4591
Nov 13 2020, 03:14 PM
QUOTE(tygaboy @ Nov 13 2020, 11:30 AM)
Here's the look I'm after for this version...
I think a rounded edge similar to these can really add some much needed sex appeal to these boxy little cars just like the softer curves of the steel flares add it to the whole car. Some interesting ideas floating around your garage!
tygaboy
Nov 13 2020, 03:22 PM
You can see I also updated the notch area. I couldn't resolve that top angle to my liking so decided to try this look.
Note that I just snipped the lower edge of any vents that interfered with the panel sitting down in the hood. I'll work all that out and see if I can account for it in the design.
Overall, I do like it better than V1. That said, there are a couple angles where it reminds me of a home heater floor vent! Maybe with the vent sides and mesh added, I'll un-see that...
One potential update I think I will do is to narrow the frame dimension. Keep the same outer dimension and widen the vents. In the full frontal shot, the frame seems a bit too much.
In any case, I need to look at it on the car for a couple days and see what I think.
In the meantime, I welcome your constructive criticism.
tygaboy
Nov 13 2020, 03:28 PM
Speaking of that full frontal shot, with the fog light delete grills I plan to run, the vents are practically begging to run directly side to side. I think I'll make one with horizontal vents and see with that looks like.
djway
Nov 13 2020, 04:06 PM
Another possible idea is have them drop down less, shorten up the slat part, say to an inch. You could then consider more slats. This would also get rid of the interference problem with the wheel well.
I dig watching all this.
sixnotfour
Nov 13 2020, 04:50 PM
Try bending over a bigger radius....air rollout
Andyrew
Nov 13 2020, 04:52 PM
I like it,
I just wonder about making it line up with the headlight bucket as was previously mentioned.
tygaboy
Nov 13 2020, 05:40 PM
Here's tomorrow's "horizontal" test version. Plain as this may be, I think it's going to look pretty cohesive. Maybe not as dramatic, but still pretty cool. We'll soon see.
This is a "lo-fi" version of our main content. To view the full version with more information, formatting and images, please
click here.