tygaboy
Mar 24 2018, 06:25 PM
Back to the compound curve I needed to put into the upper piece. It didn't take much but I was able to get a really nice fit.
Arch at the back, flat across the front.

tygaboy
Mar 24 2018, 06:29 PM
Then it was working up an understanding of how things need to come together to frame the removable inspection panel.
My main take-away from this was:
I wish I paid closer attention during Geometry class... 
But it's coming together and I'm starting to think I can achieve what I'm after.
Jeff Hail
Mar 25 2018, 12:40 PM
[quote name='tygaboy' date='Mar 18 2018, 09:18 PM' post='2590237']
Did I say "tedious"?
"Forgive the horrific-ness of this little part. I an no where near skilled / experienced enough to be able to apply the "measure twice, cut once" approach to this part of the project."
Hey Chris,
Think of those as "prototypes". Some folks have scrap bins. We have containers for research and development aka the metallurgical origami department.
Keep up the good work.
Jeff
Mueller
Mar 25 2018, 12:55 PM
How much of this stuff do you dream up while sleeping? Great work.
Dion
Mar 26 2018, 09:38 AM
QUOTE(Mueller @ Mar 25 2018, 10:55 AM)

How much of this stuff do you dream up while sleeping? Great work.
Agree 100%! I get lost trying to keep up with Chris project.
Talk about architecture. totally cool.
Cheers,Dion
bbrock
Mar 26 2018, 09:48 AM
QUOTE(Dion @ Mar 26 2018, 09:38 AM)
QUOTE(Mueller @ Mar 25 2018, 10:55 AM)
How much of this stuff do you dream up while sleeping? Great work.
Agree 100%! I get lost trying to keep up with Chris project.
Talk about architecture. totally cool.
Cheers,Dion

We need a blueprint to follow... but we know that doesn't exist.

I've never seen a car get constructed around an engine before. Fascinating to watch.
914350
Mar 26 2018, 03:38 PM
Great fab work, beautiful build. Going to be an awsome car for sure.

Rand
Mar 26 2018, 03:55 PM
QUOTE
We need a blueprint to follow
No, the beauty of a build like this is it's own life not following a blueprint.
Matty900
Mar 27 2018, 12:54 AM
Love seeing the detail of your Art. This is going to be a real masterpiece
tygaboy
Mar 31 2018, 06:11 PM
Thanks for all your kind and encouraging words. I really need them...
This firewall is giving me fits!

Every time I think I've solved a problem, I seem to create three others. Today's was REALLY understanding what happens when you tip a plane out of level but want other level planes to intersect with it.
It's hard to explain but let me just say "things weren't lining up". Well, they were, but but not in a way that would let me complete the more complex corners without multiple, tedious cuts and welds and grinds and LOTS of cursing.

(My wife was gardening and poked her head into the shop at one point and said "No more "Goddamnits", please?")
It was one of those days where I thought, "Well, I could always chuck this chassis and start over with a different one...."
But after a bit of noodling, I realized I could simplify things greatly by keeping the planes in line. Great.
But that changes all of the dimensions I've worked out so far.
So I cut out all of last week's work and started over by remaking the piece that lives under the cross bar.
Instead of the cool English wheeled, zippidy do-dah, angled approach, it turns out I want it 90 degrees to the vertical part of the fire wall. So, back to tipping flanges on inside curves and stretching to get things flat again. Thankfully, the mag brake lends itself to "interesting" shapes.
Note this new version (#4, btw) has no sides or front. Another simplification is that I'll add the sides and front as separate pieces. This should make it easier to get the beading detail to align across all the various pieces. It'll be easier to explain once I get to that point and have some pics.
And apologies, I'm sure you're as bored with this part of the build as I am...
tygaboy
Mar 31 2018, 06:12 PM
Exciting, I know...
tygaboy
Mar 31 2018, 06:13 PM
I am getting pretty good at making inside curve flanges and ending up with a nice fit.
I do, however, plan to keep my day job.
tygaboy
Mar 31 2018, 06:18 PM
Perhaps most exciting is that next week, I head to the East coast for the 4-day coach building class with Wray Schelin of Proshapers!

Very excited...
Dion
Mar 31 2018, 06:22 PM
Hahaha this build is far from boring.
Your Mrs. and mine think alike.
I get told about my attitude in the garage sometimes as well.
One day I will understand this creation. I wish you would provide all of us tuning in
with blueprints and roadmaps. Heheh Carry on Chris!
914forme
Mar 31 2018, 06:49 PM
Chris, Enjoy the class, I am sure you will pickup some new skills. I have a couple on them on my list, to do when I get a chance.
bbrock
Mar 31 2018, 10:55 PM
QUOTE(tygaboy @ Mar 31 2018, 06:11 PM)
(My wife was gardening and poked her head into the shop at one point and said "No more "Goddamnits", please?")
One evening my wife asked how the car project was going and I said it was going much better than I had expected. She said, "Really!? Then what's all the cussing?" I just grinned and said, "That's just part of the charm." I've instructed her that if the cursing stops, she should dial 911 because it surely means I've knocked myself unconscious.
tygaboy
Apr 1 2018, 12:15 PM
Well, even yesterday's re-do #4 turns out to be another practice part. I want a taller flange so I can spot weld vs butt weld when I install the top piece. So... back to it. Again.
Here's a bit more detail of the how I made the piece.
Cut the blank, mark the bend line and use the bead roller to start tipping the flange.
The flange on this one is ~ 2x larger that the previous version so it took bit more effort to tip the flange. That's a fair bit of metal to move around.
Here's the first pass through the bead roller. You can see how tipping on an inside curve starts to curve the flat area of the material.
tygaboy
Apr 1 2018, 12:16 PM
Pass # 2, more angle and more curving going on.
tygaboy
Apr 1 2018, 12:19 PM
Third pass, almost there. Pretty curvy!I stopped here as I wanted to do some stretching to get it flatter ahead of the next bead rolling operation.
Note that the initial tipping was done with the thin top die and the large, flat lower.
tygaboy
Apr 1 2018, 12:20 PM
A bit of stretching to get things to lay down a bit.
tygaboy
Apr 1 2018, 12:22 PM
Stretch, check, stretch check, etc, etc...
Done!
What I didn't show was the final couple passes through the bead roller were using a wide, flat top die against the same flat lower to smooth the flange and crisp up the corner.
tygaboy
Apr 1 2018, 12:24 PM
For the tool whores. A teeny little roll bender, just perfect for 1/8" rod.
Why would I want that?

tygaboy
Apr 1 2018, 12:33 PM
Yes, it's April 1. No, this isn't an April Fool's joke. Tho I may end up thinking this was foolish.
I'm headed to the coach building class next week and I'm contemplating, just contemplating, mind you, giving a go to making an all steel wide body.
So as a complete waste of time, I started messing about, trying my hand at working up the beginnings of a wire frame...
tygaboy
Apr 1 2018, 12:37 PM
The design would have to enable me to:
- run a radiator in each rear side scoop, ala the DP2 design pictured below.
(He's running an LS3 and having no cooling issues - and he has a muffler right behind each rad...)
- retain a fully functional front trunk. That'd actually be pretty neat and is a main driver for this silly idea
Yes, LOTS of things to think about and it may all be abandoned. But this build is, well, about the build.
Will it ever run? Who knows... Do I care? Not right now, too much fun in playing around and learning.
914Timo
Apr 1 2018, 12:52 PM
QUOTE(tygaboy @ Apr 1 2018, 08:37 PM)
Will it ever run? Who knows... Do I care? Not right now, too much fun in playing around and learning.
I like your attitude !! Keep up good work and sending pics

tygaboy
Apr 1 2018, 03:26 PM
Top piece Version 5 centered, leveled and tacked in.
tygaboy
Apr 1 2018, 03:28 PM
Trying not to let "perfect" get in the way of "0.1 is really, really close"...!

I can tweak it a bit but for now, I'll take it.
tygaboy
Apr 1 2018, 03:33 PM
And with that top piece mocked in, I can start on the practice parts to work a design for how all the corners will come together. I'm determined to have that bead transition around all the flat panels but these corners are certainly going to be tricky.
I may have to enlist my bicycle building friend to help me learn how to braze and file so I can get the transitions to look good.
mb911
Apr 1 2018, 04:26 PM
I like the wire fixtures.. It will look really cool.
tygaboy
Apr 1 2018, 04:32 PM
And with that top piece in, I could start "connecting the dots" and get a feel for what this thing will look like and how it'll work. Still not sure if the access panel will be one piece or a few.
And while it's not quite a blueprint, hopefully this will give a better idea of what I'm trying to do.
tygaboy
Apr 1 2018, 04:34 PM
'nother...
tygaboy
Apr 1 2018, 04:38 PM
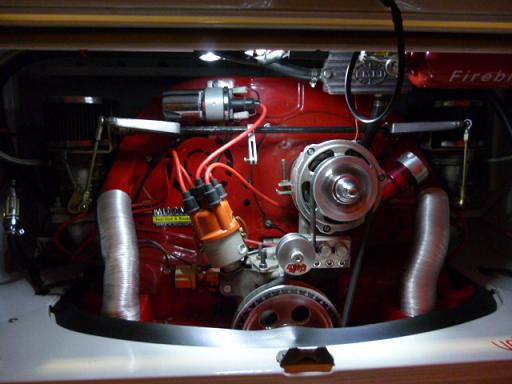
And to celebrate (?) getting to page 50, here's a gratuitous artsy-fartsy shot and a pic of (what I think is) one of the coolest looking engines.
I never get tired of looking at this. But hey, it is my car...
That's all for this weekend.
Happy Easter, everyone!

Cracker
Apr 1 2018, 07:30 PM
...and it is track certified!

Looking great Chris!!
T
QUOTE(tygaboy @ Apr 1 2018, 06:38 PM)
And to celebrate (?) getting to page 50, here's a gratuitous artsy-fartsy shot and a pic of (what I think is) one of the coolest looking engines.
I never get tired of looking at this. But hey, it is my car...
That's all for this weekend.
Happy Easter, everyone!
Dion
Apr 1 2018, 07:37 PM
QUOTE(tygaboy @ Apr 1 2018, 02:38 PM)
And to celebrate (?) getting to page 50, here's a gratuitous artsy-fartsy shot and a pic of (what I think is) one of the coolest looking engines.
I never get tired of looking at this. But hey, it is my car...
That's all for this weekend.
Happy Easter, everyone!
That looks awesome Chris. Nice one.
tygaboy
Apr 4 2018, 08:18 AM
Some fun stuff to help maintain perspective:

Martin is from the UK so...
Andyrew
Apr 4 2018, 09:07 AM
Man that manifold looks killer!!!! You'll need to make a full GT engine lid or or something that will show off that engine!
tygaboy
Apr 4 2018, 10:02 AM
QUOTE(Andyrew @ Apr 4 2018, 08:07 AM)
Man that manifold looks killer!!!! You'll need to make a full GT engine lid or or something that will show off that engine!
Maybe something like this?
I didn't make this one. Robert (BuddyV) was kind enough to drop it by...
Andyrew
Apr 4 2018, 12:29 PM
That'll do just nicely. You'll need some LED's in the engine bay for when you park at shows at night.
Cracker
Apr 4 2018, 01:08 PM
I must be old and afflicted with impeccable taste. LED"s...just make sure the lights match Lori's shoes.

T
QUOTE(Andyrew @ Apr 4 2018, 02:29 PM)
That'll do just nicely. You'll need some LED's in the engine bay for when you park at shows at night.
Andyrew
Apr 4 2018, 01:53 PM
QUOTE(Cracker @ Apr 4 2018, 12:08 PM)
I must be old and afflicted with impeccable taste. LED"s...just make sure the lights match Lori's shoes.
T
QUOTE(Andyrew @ Apr 4 2018, 02:29 PM)
That'll do just nicely. You'll need some LED's in the engine bay for when you park at shows at night.
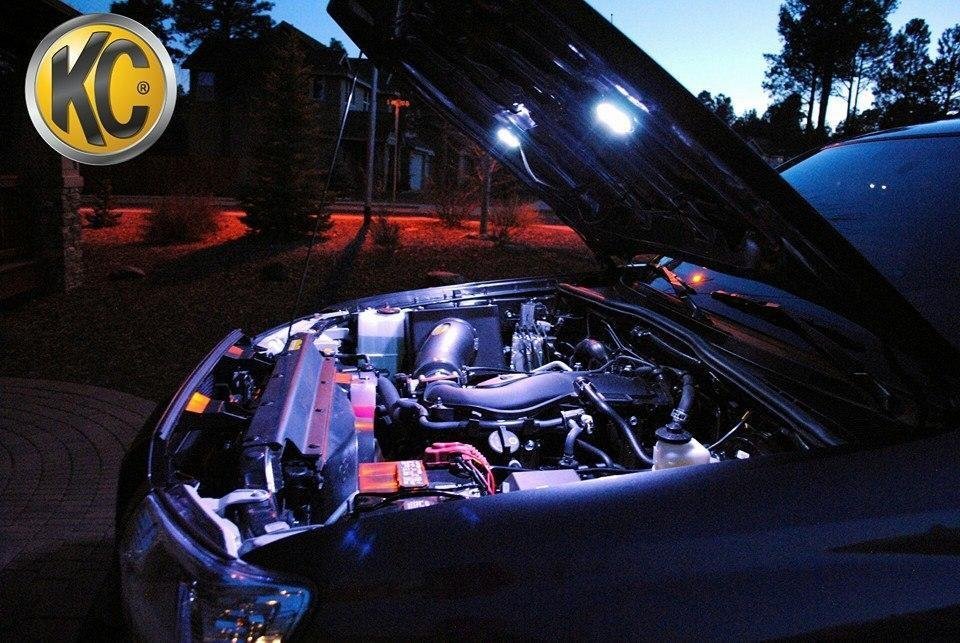
Whenever I went to night shows I would constantly get people turning on their flashlight and looking over the engine bay... Saw a couple cars that had an LED or two making it easy to see in and it just made sense. *Shrugs*
tygaboy
Apr 14 2018, 04:51 PM
Home from the coach building class and time to get back to work. I think I've finally resolved all the details and landed on a design that I'll implement.
The beading fully surrounds and helps locate each sides main fire wall panel. I still have final trimming and fabrication of a couple more bits but I'm happy with how this is going.
tygaboy
Apr 14 2018, 04:57 PM
In the event I actually give a go to making my own flares, I wanted to start practicing the toughest part I'll have to deal with: the reverse curve.
I wasn't working to a pattern, just getting a feel for how to form these. IMO, it's the sexiest shape there is...
tygaboy
Apr 22 2018, 03:47 PM
The fire wall is taking a LONG time... Very fiddly, lots of "just so" cuts and joints.
Today I fabricated the pieces and started framing in the driver side fire wall.
Fun, fun, fun because now all the parts have to be mirror image of the passenger side. Some careful measuring and everything matches nicely!
I'll even up all the corners so everything is matchy-matchy so clearly, some final trimming to do on most every piece.
I also built a quick "template frame" to ensure the entire perimeter of the main panel framing gets built in a nice, flat plane. Interesting how when I clamped everything in place, I turns out the lower pieces actually need to come forward a bit as they move toward the center of the car.
You can see the template frame in one of the pics.
Cracker
Apr 22 2018, 04:36 PM
Chris: You are taking v8 Teener conversions to all new levels!!!
The only issue I see so far...no notched floor!
#DoingV8conversionsproud!
Tony
tygaboy
Apr 27 2018, 01:49 PM
I took today off work today and got back on the fire wall. More of the fiddly fitment/multiple angle joints. It's REALLY slow going as each piece requires rough fitting then what seems like a couple dozen trips to the band saw and sander to tune each edge...
And I didn't like how the side supports for the removable panel were working out so I remade them. In the redo, I moved the bead to the center of the bend which will make for a symmetrical look where the main fire wall panels meet up to the removable panel.
Slow going, but I'm happy with how it's coming along.
Cracker
Apr 27 2018, 03:26 PM
tygaboy
Apr 27 2018, 04:45 PM
Top pieces completed and ready for welding!
914forme
Apr 27 2018, 06:05 PM
QUOTE(Cracker @ Apr 4 2018, 03:08 PM)
I must be old and afflicted with impeccable taste. LED"s...just make sure the lights match Lori's shoes.
T
QUOTE(Andyrew @ Apr 4 2018, 02:29 PM)
That'll do just nicely. You'll need some LED's in the engine bay for when you park at shows at night.
RGB LEDs and they can match any shoe in her's or your own closet.
Krieger
Apr 27 2018, 06:16 PM
Looking good! I'm thinking you should put Lexan panels in there so you can see everything! For safety, a fire suppression system.
tygaboy
Apr 28 2018, 04:16 PM
QUOTE(Krieger @ Apr 27 2018, 05:16 PM)
Looking good! I'm thinking you should put Lexan panels in there so you can see everything! For safety, a fire suppression system.
Interesting...
(I was hoping to get some transparent aluminum but may have to settle for Lexan!)
This is a "lo-fi" version of our main content. To view the full version with more information, formatting and images, please
click here.