Help - Search - Members - Calendar
Full Version: Intro from Montana: '73 2.0L rustoration thread
914World.com > The 914 Forums > 914World Garage
Pages: 1, 2, 3, 4, 5, 6, 7, 8, 9, 10, 11, 12, 13, 14, 15, 16, 17, 18, 19, 20, 21, 22, 23, 24, 25, 26, 27, 28, 29, 30, 31, 32, 33, 34, 35, 36, 37, 38, 39, 40, 41, 42, 43, 44, 45
bbrock
Thanks guys. Sorry for the silence. I've been busy cleaning a nasty little virus off my computer. Word to the wise, don't download ancient device drivers from a sketchy site. I knew that would be trouble but did it anyway. screwy.gif

The psychology of getting this thing on the ground is very interesting. After two years of looking at the car with the door sills tits high, it was hard to get re accustom to just how low it sits. In fact, I thought there might be something wrong with the front suspension but after measuring the axle height, I found it actually a tad high biggrin.gif The other thing is that looking down on the car instead of up, makes the whole project seem much smaller. There is a glimmer of hope for getting color on the car yet this fall. beerchug.gif
mepstein
When I drove my car after 26 years of not driving a 914. I couldn't believe how small and low it was.
Of course there weren't so many pick-ups and SUV's on the road back in the day.
FlacaProductions
Agreed. I was "between 914's" for 23 years until this past March and I'm amazed at how small and low they actually are. Especially in a "modern" parking lot....
bbrock
Plugging along. Yesterday I finished skim coating filler on the chassis and blocking it out. I've block sanded to 120. Wondering if I should go to 220. Plan is to spray with epoxy primer, then high build. Thoughts?

Click to view attachment

Click to view attachment

Click to view attachment

Filled the dents someone left with their fat ass when they sat on the roll bar.

Click to view attachment

Click to view attachment

Click to view attachment

Click to view attachment
bbrock
Today I started on a task I've been dreading - stripping the deck lids. I've had inconsistent luck with paint stripper. I did okay stripping the paint from the underside of the frunk lid but did nothing on the poly coating underneath. I'll have to media blast that off.

Click to view attachment

A little damage that will need repair. Looks like someone closed the frunk lid within something in the way.

Click to view attachment

And a small rust hole to plug.

Click to view attachment

Paint stripper was worthless on the top of the lid. It had multiple layers of primer and high build or filler that the stripper barely phased. I know from stripping the chassis that this stuff is pretty hard to blast too. I used a stripping disc on a grinder, just stripping a small patch in a spot at a time to avoid heating the panel. It took forever but I got it done.

Click to view attachment

That took most of the day but I had enough time to start on the trunk lid. Better luck with the stripper here. Only two layers of paint to remove.

Click to view attachment
Superhawk996
QUOTE(bbrock @ Aug 25 2019, 11:26 PM) *


Filled the dents someone left with their fat ass when they sat on the roll bar.


Prom Queen?
76-914
Great news. So now that Old Man Winter is peaking around the corner what are your plans for "rodent proofing" since it's on the ground loaded with fresh wiring, etc? shades.gif Or is there a standard regime that mountain dwellers follow regardless of a car's condition?
Jamie
QUOTE(FlacaProductions @ Aug 21 2019, 08:51 AM) *

Agreed. I was "between 914's" for 23 years until this past March and I'm amazed at how small and low they actually are. Especially in a "modern" parking lot....


I really felt small recently when passing a line of semis on the Interstate. In one 3 lane section I was sandwiched between 2 trucks, feeling really small at about 75MPH. My Mom always resisted riding in the 914 when Dad owned it, said that when she looked out the side window all she could see was lug nuts going by! w00t.gif
sixnotfour
will these spot welds cause a problem with the trim strip ???
defianty
QUOTE(sixnotfour @ Aug 26 2019, 04:48 PM) *

will these spot welds cause a problem with the trim strip ???


I was just about to say the same. Worth grinding them down just in case.
bbrock
QUOTE(76-914 @ Aug 26 2019, 08:44 AM) *

Great news. So now that Old Man Winter is peaking around the corner what are your plans for "rodent proofing" since it's on the ground loaded with fresh wiring, etc? shades.gif Or is there a standard regime that mountain dwellers follow regardless of a car's condition?


confused24.gif I'm not sure I've ever seen a mouse around here. Oh wait - that's a damn lie. lol-2.gif They aren't much of a problem in the garage though. We keep a wind-up box trap set all the time and usually they are trapped within an hour of two after getting in the house (always hitchhiking in the DD after it has been parked outside too long). I rarely see droppings in the garage and have never found anything chewed up out there. That said, once I have upholstery in the 914, I'll keep fresh packets of Fresh Cab in it to keep them out.

QUOTE(defianty @ Aug 26 2019, 10:46 AM) *

QUOTE(sixnotfour @ Aug 26 2019, 04:48 PM) *

will these spot welds cause a problem with the trim strip ???


I was just about to say the same. Worth grinding them down just in case.


Now that's the kind of scrutiny I can respect! beer.gif I was looking at those too. They are flatter than the look in the pic and the trim strip fits fine over them, but I'm going to clean them up anyway. The other side needs a little trim on the flange. I'll be going over the whole chassis at least once more before respraying epoxy to clean up those little things.

I'm glad you guys brought this up. I just laid the trim on to double-check the fit and discovered the sail panels aren't drilled on the cabin side for the screws for that trim. Wouldn't have been a huge deal but happy to catch it now before the paint goes on beerchug.gif
bbrock
I had a small, unexpected project last week that turned out well. I pulled out my sun visors with the intention of stripping out the cores to send to Mark for the rebuild GB. After looking at my visors, I decided I couldn't destroy them without giving them another chance to live. Sorry I didn't get before pics, but the vinyl was in good shape although a little stretched and floppy and the foam was crunchy - well the foam that hadn't already disintegrated into fine powder anyway.

I picked up $10 worth of 1/4" thick foam at Wally World and went to work. First step was carefully slicing along the heat seam on the top. I started on the skinny end and sliced a little over half way along the top. This is just enough to be able to coax the wire core out. This pic was taken after the new foam is in but shows the patient sliced open.


Click to view attachment

Next was cutting the foam and taping it with double stick tape to the wire frame. This pic shows the wrong way to mark the foam. The right way is to draw an outline around the full vinyl cover because the foam should extend beyond the wire at the bottom a fair amount. I learned the hard way but luckily had enough extra foam to cover my oops.

Click to view attachment

The passenger side gets a cutout on the mirror side of the foam. I had enough of the original foam intact to serve as a template, but it wouldn't be hard to figure it out. The double stick tape works great to hold everything together and appears to be what the factory used.

Click to view attachment

Then it is a matter of stuffing the frame back in the vinyl pouch and gluing it shut. I used Permatex Vinyl Repair Adhesive. I glued the inside of the vinyl to the top of the foam on one side and then tried as best I could to just glue the cut edges together. If I got a little sloppy, I could just rub the overage off. Rubbing the glue or trying to work it after the solvent has flashed (which is quick) leaves little white 'tag's in the adhesive. That's really the only evidence that was left behind and is hidden from view by the windshield frame when the visor is mounted. If I ever buy black vinyl dye for any reason, I will mask the visors and shoot only the seams. That should make the repair completely invisible but is frankly not worth a special expense.

Click to view attachment

After the adhesive set, I put a damp towel over the visors and hit them several times with a steam iron. I'm kicking myself for not taking before shots because that really tightened up the floppy, baggy visors. Most dramatic was the map pocket that was gaping open before the steam. The last step was a good treatment with 303 Protectant. These bad boys look and feel like new! cheer.gif

Click to view attachment

Click to view attachment

As much as I love Mark's rebuilt visors, I have this originality fetish so I'm quite happy. Plus, it saved me a C-note.
914_7T3
QUOTE(bbrock @ Aug 26 2019, 07:08 PM) *

I had a small, unexpected project last week that turned out well. I pulled out my sun visors with the intention of stripping out the cores to send to Mark for the rebuild GB. After looking at my visors, I decided I couldn't destroy them without giving them another chance to live. Sorry I didn't get before pics, but the vinyl was in good shape although a little stretched and floppy and the foam was crunchy - well the foam that hadn't already disintegrated into fine powder anyway.

I picked up $10 worth of 1/4" thick foam at Wally World and went to work. First step was carefully slicing along the heat seam on the top. I started on the skinny end and sliced a little over half way along the top. This is just enough to be able to coax the wire core out. This pic was taken after the new foam is in but shows the patient sliced open.


Click to view attachment

Next was cutting the foam and taping it with double stick tape to the wire frame. This pic shows the wrong way to mark the foam. The right way is to draw an outline around the full vinyl cover because the foam should extend beyond the wire at the bottom a fair amount. I learned the hard way but luckily had enough extra foam to cover my oops.

Click to view attachment

The passenger side gets a cutout on the mirror side of the foam. I had enough of the original foam intact to serve as a template, but it wouldn't be hard to figure it out. The double stick tape works great to hold everything together and appears to be what the factory used.

Click to view attachment

Then it is a matter of stuffing the frame back in the vinyl pouch and gluing it shut. I used Permatex Vinyl Repair Adhesive. I glued the inside of the vinyl to the top of the foam on one side and then tried as best I could to just glue the cut edges together. If I got a little sloppy, I could just rub the overage off. Rubbing the glue or trying to work it after the solvent has flashed (which is quick) leaves little white 'tag's in the adhesive. That's really the only evidence that was left behind and is hidden from view by the windshield frame when the visor is mounted. If I ever buy black vinyl dye for any reason, I will mask the visors and shoot only the seams. That should make the repair completely invisible but is frankly not work a special expense.

Click to view attachment

After the adhesive set, I put a damp towel over the visors and hit them several times with a steam iron. I'm kicking myself for not taking before shots because that really tightened up the floppy, baggy visors. Most dramatic was the map pocket that was gaping open before the steam. The last step was a good treatment with 303 Protectant. These bad boys look and feel like new! cheer.gif

Click to view attachment

Click to view attachment

As much as I love Mark's rebuilt visors, I have this originality fetish so I'm quite happy. Plus, it saved me a C-note.


blink.gif

drooley.gif

Way to go Brent!

Glad I didn't filet my second set that is still in half decent condition! They will go in a box for a later date. (it's my spirit line wink.gif
raynekat
Mad scientist Brent up to it again.
Wow! Nice job on those visors....
Superhawk996
Nice job Brent. Looks good. happy11.gif

I have so many other things do that I figured outsourcing is the way to go. Plus I wanted Corinthian Leather and I can't really sew! laugh.gif
preach
Still loving the attention to (most w00t.gif ) detail in this build. keep it up brother!
bbrock
This one pic represents a lot of hard work. Spent most of the weekend stripping down the remaining body panels - doors, deck lids, and engine lid. There's no way around it, stripping paint is miserable work. I used a combination of chemical stripper, stripping wheel on a grinder, sand paper, and glass media blasting. Mostly glass media blasting because as nasty as that job is, I find it less nasty than chemical stripper and does a way better job than the other methods. I finished the last of the blasting about 9am this morning and about killed my compressor in the process. Don't ever buy an oil-free air compressor. They suck. Oh well, feels good to be able to put the pressure blaster into deep storage. I still have about a dozen pieces to blast in the blasting cabinet, but I don't mind that at all. monkeydance.gif

Click to view attachment

Despite having to rebuild the cylinders on the POS compressor AGAIN, I managed enough time to get a start on repairing the driver's door. To refresh, it had some nasty drill and slide hammer treatment.

IPB Image

There wasn't too much I could do to straighten it because the crash bar blocks access to the other side. It would take tools I don't have to metal work that back to health. The best I could do was run the shrinking disc over it a few times to tighten up the metal and even out the wrinkles a bit, then weld the holes shut and fill with the fancy zinc enriched, kevlar reinforced filler. I neglected to take any progress shots but here's how far I got.

Click to view attachment

I'm beat, but I won't get any sleep tonight. I'm going to be out all night hiking through marshes in grizzly country under a new moon helping Fish Wildlife and Parks catch cranes. The crazy shit I do... screwy.gif
johnlush
You, sir, are my spirit animal. pray.gif

Keep up the fine work.
bbrock
QUOTE(johnlush @ Sep 2 2019, 10:29 PM) *

You, sir, are my spirit animal. pray.gif

Keep up the fine work.


Ha! Thanks. I think that would have to be evil spirit animal though. happy11.gif

Got home at 7am. We got close to capturing a crane at our first site but she managed to get airborne just before we could get a net on her. We got skunked the rest of the night but it was fun coming across a couple of huge piles of bear scat while crawling through willow thickets as quietly as possible in the backwater sloughs of the Yellowstone River with headlamps off. Watched hundreds of bats foraging over the water and waded within a few yards of a pair of trumpeter swans. Cranes or no, it was a good night. biggrin.gif

This guy has been soaking in the pond next to our house most of the afternoon. This is cooling off on a hot day Montana style.

Click to view attachment

Click to view attachment
BPic
You sir, have the life I always wanted. I took a different route and went more corporate. Many times I wish they hadn’t. Love the photos and the stories please don’t stop posting these. Maybe some day I’ll move to the wilderness and be done with Miami. I envy you.


QUOTE(bbrock @ Sep 3 2019, 07:49 PM) *

QUOTE(johnlush @ Sep 2 2019, 10:29 PM) *

You, sir, are my spirit animal. pray.gif

Keep up the fine work.


Ha! Thanks. I think that would have to be evil spirit animal though. happy11.gif

Got home at 7am. We got close to capturing a crane at our first site but she managed to get airborne just before we could get a net on her. We got skunked the rest of the night but it was fun coming across a couple of huge piles of bear scat while crawling through willow thickets as quietly as possible in the backwater sloughs of the Yellowstone River with headlamps off. Watched hundreds of bats foraging over the water and waded within a few yards of a pair of trumpeter swans. Cranes or no, it was a good night. biggrin.gif

This guy has been soaking in the pond next to our house most of the afternoon. This is cooling off on a hot day Montana style.

Click to view attachment

Click to view attachment

johnlush
That bull moose looks like someone needs to feed him a cheeseburger - or whatever the moose equivalent of that would be. Looks kinda skinny, no?

So what's the crane project about?

Sorry for the off-topic questions...
worn
Well, if you are gonna offer food, your moose has every reason to stick around. Marmots and ground hogs on the other hand seem to love to chew on plastic. Say my friends ensolite sleeping pad, or perhaps all of the spark plug wires. In the complete privacy of a tent or engine compartment of course.
bbrock
QUOTE(johnlush @ Sep 3 2019, 08:00 PM) *

That bull moose looks like someone needs to feed him a cheeseburger - or whatever the moose equivalent of that would be. Looks kinda skinny, no?

So what's the crane project about?

Sorry for the off-topic questions...


He's actually in pretty average condition. The ribs showing are more a combination of him being in thin summer coat, stretching up for the willows, and still being fairly young so hasn't bulk up the muscle mass of older bulls. It's also been pretty hot (for here) for the last week which is pretty hard on moose. I wouldn't call him fat, but his hips aren't bony and looks okay to me. We've had the best serviceberry crop this year I have ever seen and he's been stripping them every night for a week so should be getting lots of carbs.

The crane project is a US Fish and Wildlife project to put GPS transceivers on cranes in MT, ID, and WY to get better data on migration routes, nesting and staging habitat, etc. I was just doing it for fun. I'm friends with the regional nongame biologist and she called to ask if I wanted to help. Heck yeah, how often do you get a chance to mug a wild crane? Next year we are going to try for the cranes that nest in our valley. They lost their colts this year so left a few weeks earlier than normal.

I don't mind the diversions at all. There's more to life than Porsches biggrin.gif

@worn Ha! I have a few old sleeping pads that have been chewed on by various critters over the years. lol-2.gif You can add woodrats to that list. Amazing what they will destroy. I lost two sets of spark plug wires in a week to one of them. Deer are pretty fun too. Seems they chew up anything that piques their curiosity. I've lost a lot of research plot markers to those little #$%^ers pulling them out and chewing them up.
Superhawk996
I gotsta get me one of those bogs for the Idaho Moosie's. Not only do you have that amazing Gurgler by the garage to make cool stream noises, you have a Moose bath tub.

I'm continually amazed and oh so jealous! beerchug.gif
Gudhjem
Just finished reading this thread start to finish over the course of a week. Thanks for the effort in posting all of this detail Brent. I've learned a lot. Car looks fantastic.
bbrock
QUOTE(Gudhjem @ Sep 6 2019, 03:17 PM) *

Just finished reading this thread start to finish over the course of a week. Thanks for the effort in posting all of this detail Brent. I've learned a lot. Car looks fantastic.


Thanks! Looks like you've lived this movie yourself! beerchug.gif
FourBlades

This is such a great thread and build!

You are making really good progress, it gets easier from here in my opinion.

Getting the major rust repair and welding done is the trickiest part.

Once your prime the whole car you will be super stoked.

John
bbrock
Continued refurbishing the doors today. First up was filling the Swiss cheese left from previous dent repair on the passenger door. It wasn't as bad as the driver's side was.

Click to view attachment

Someone had also drilled the door for an after market mirror so a couple more holes to fill.

Click to view attachment

Happy to post intermediate progress shots if someone is dying to see them, but I think the pics of filling holes gets repetitive. Skipping to the finished shots.

Click to view attachment

Click to view attachment

These doors also apparently had speakers in them at some point. Luckily, they didn't cut the doors - just drilled a bunch of screw holes and mangle the flanges a bit.

Click to view attachment

Click to view attachment

I straightened out the flanges with hammer and dolly and welded the holes shut. Again, straight to the finale.

Click to view attachment

Click to view attachment

The driver's door had this nasty corrosion and split in the channel that needed to be fixed.

Click to view attachment

I decided to try just welding it shut. It is a PITA location that is tight and hard to position the welding nozzle, and I'm still a crappy welder, but I think I did a fair job of it.

Click to view attachment

And finished with a little bit of reinforced filler.

Click to view attachment
bbrock
Here was the most interesting part of the doors. Both my original and replacement donor doors are late style. Trust me, I have the hernia from lifting them to prove it. My original doors had these brackets with metal tabs bolted to them that were missing from replacements.

Click to view attachment

IIRC, these help hold the wing seal in place. They also look like they provide some adjustment. Regardless, transferring them to the new doors was in order. Here are the brackets liberated from the old doors.

Click to view attachment

And welded into the new. I feel like the tabs want to be yellow chromate so they are in the plating bucket for the next batch.

Click to view attachment

That's it for today. One more patch to weld on one of the doors tomorrow and they'll be ready for ospho and primer.
tygaboy
One of the best parts (for me) is seeing repairs like the one you did to correct the PO speaker install.

You're setting a great example by investing time and doing a wonderful job on a part of the car that will likely never be seen again.

It's like the furniture maker who finishes the underside of the top of the dresser, all the while knowing no one will ever see it... But he knows it has received the same love and care as the rest of the piece.

I love that about your work.
Dion
QUOTE(tygaboy @ Sep 8 2019, 03:43 AM) *

One of the best parts (for me) is seeing repairs like the one you did to correct the PO speaker install.

You're setting a great example by investing time and doing a wonderful job on a part of the car that will likely never be seen again.

It's like the furniture maker who finishes the underside of the top of the dresser, all the while knowing no one will ever see it... But he knows it has received the same love and care as the rest of the piece.

I love that about your work.


agree.gif Chris you described exactly as I see all of Brent’s adventure here.
You worded it perfectly.
beerchug.gif
bbrock
QUOTE(tygaboy @ Sep 8 2019, 05:43 AM) *

One of the best parts (for me) is seeing repairs like the one you did to correct the PO speaker install.

You're setting a great example by investing time and doing a wonderful job on a part of the car that will likely never be seen again.

It's like the furniture maker who finishes the underside of the top of the dresser, all the while knowing no one will ever see it... But he knows it has received the same love and care as the rest of the piece.

I love that about your work.


I never thought of it like that, but now that you mention it, it's kind of funny. I've made quite a bit of furniture before fiddling with this car and all I can say is... Yep. biggrin.gif
bbrock
Well I guess this is project update day and I'm a little behind. Spent a lot of time getting deck lids and doors ready for primer. I think I started a mild controversy saying I was going to glue the frame to the hood skin on another thread. In reality, I was just trying to replicate what the factory did. They just glued down the central cross member what looked to be butyl caulk. 3M Weatherstrip Adhesive has very similar, if not identical properties. Plenty of stretch to allow the panel to move as needed.

Click to view attachment

Then I coated all the internals with Eastwood Internal Frame Coating.

Click to view attachment

Here's a tip when using this stuff, wipe up runs and drips right away. It does not sand easily. It's like sanding gummy bears.

Click to view attachment

I spent all day Saturday re-configuring for paint. I hosed down the inside of the tent and gave the shop a thorough cleaning and reorganization. Plating buckets were temporarily stored out of sight, and painting materials took their place.

Click to view attachment

Click to view attachment

By the end of the day, I was able to stow panels in the tent ready for final cleaning.

Click to view attachment

Got the panels cleaned and hung on Sunday with the hope of spraying primer after work on Monday, but the weather turned to shit and I didn't want to spray while it was raining. Today was cloudy and cool but around noon, temps crept into the 60s, so I knocked off work early and shot the panels. With the cool temps, I doubled induction and flash times.

Click to view attachment

Click to view attachment

Tomorrow is supposed to be sunny and warmer so the paint should cure nicely before skim coating with filler to block them straight.
bbrock
Holy smokes! I feel like I've been running consecutive marathons since last Tuesday. Trying to make the most of a few good weather days. Sadly, I neglected to take a lot of pics I should have but I'll get sort of caught up here.

After getting the doors in primer, I applied some Noico sound deadener to the insides where the factory had sprayed tar stuff. I added some to the top too because, you know, those doors aren't heavy enough huh.gif It makes a huge difference in silencing those doors though.

Click to view attachment

Then I skim coated the outer skins with filler and block sanded them flat. Here they are ready for final epoxy primer.

Click to view attachment

Click to view attachment

Click to view attachment

Click to view attachment

Then it was short work to shoot primer. No shiny tin foil inside these doors.

Click to view attachment

Click to view attachment

I found a spot with a few 80 grit scratches I missed. I guess I'll fill those with a spot of glazin putty before shooting surfacer.

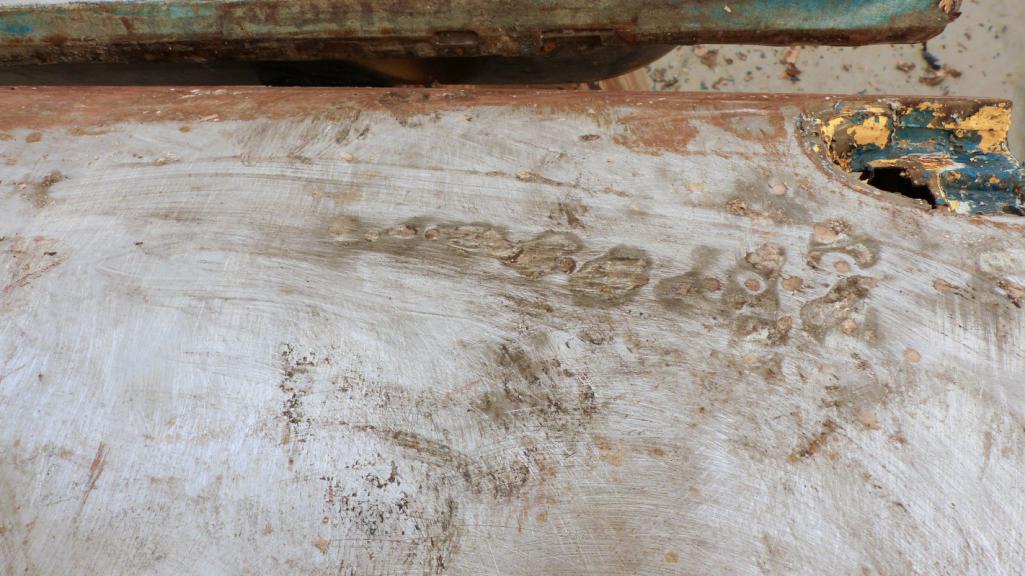
Click to view attachment

Next, the chassis got a very careful inspection to tidy up any pinholes, scratches, imperfections, and those plug welds you all complained about. This took a LOT of time but paid off. After primer, I've found just a couple of spots that will need glaze but that will wait for another post. Here she is yesterday, several hours after primer. I'll take a better shot later. In case you are wondering about that gravel floor, that will be covered and sealed before spraying color.

Click to view attachment

I got the shit scared out of me when I walked by the zipped shut tent and this popped out.

Click to view attachment

That's where I stopped clicking pics. I got both deck lids skim coated and blocked down to 320 grit last night and around mid-morning today, I reshot them with primer. Spent tonight adding additional masking in prep for surfacer. The weather forecast is giving me two more partly sunny days in the upper 60s. I'm hoping to get surfacer applied by the end of Thursday. Our first winter storm is predicted to start on Sunday. If I can get the surfacer on this week, I can use the bad weather time to prep the tent for the grand finale while the surfacer rests, then block the whole car down to a perfect surface, and hope I get another window of good weather to finish this job. unsure.gif
dr.tim
GOOOOOOOOO BRENT! cheer.gif
bbrock
GAME OVER!!!!

First thing this morning, I was setting up to spray surfacer on body panels. Air compressor kicked in and has been taking a ridiculous amount of time to recover pressure. I figured yet another set of teflon rings in this crappy oiless compressor were worn again but this time, just at the end of the cycle, there was a loud clunk followed by a clatter. I shut the damn thing off and tore it open to find this.

Click to view attachment

Click to view attachment

Piston rod is trashed and head needs rebuilt. It looks like the undersized screw that holds this piston cap on sheered off to start the catastrophic failure.

Click to view attachment

It gets better. It looks like that connecting rod was a standard replacement item which says a lot about the quality of this piece of crap, but that part is NLA. I managed to find one on ebay but to replace everything needed for a complete repair will cost somewhere around $250 in parts alone and even after that, it will still be a piece of shit.

I can't over state how much of a piece of shit this compressor is. Had I known when I bought it that Devilbiss compressors are just rebranded Porter-Cable, I would have never bought it because every Porter-Cable tool I've owned has been complete shit that broke prematurely.

So... I think I'll see if I can find a decent compressor unit to mate to this motor and mount on this tank. That is going to take time though so I guess I'm going shopping for compressors today. Fuch! Looks like I'm going to miss this weather window and chances for getting the car painted before winter are looking slim. I wish there was a place I could rent time in a spray booth but I sure don't know of any options around here.

Oh well, that's life... wacko.gif
mepstein
If you can't rent a booth, can you rent a compressor. The commercial ones are so much better.
mepstein
DP
bbrock
QUOTE(mepstein @ Sep 25 2019, 09:58 AM) *

If you can't rent a booth, can you rent a compressor. The commercial ones are so much better.


That's a thought. I'll look into it. Biggest problem is working around Mother Nature's schedule this time of year. There's a nice 2-stage compressor on Craigslist I have left a message on. Alternative would be to pick up a $500 compressor at Home Depot that is comparable to the old Cambpell-Hausfeld I had for many years and sold with our last house. It wasn't a commercial compressor but did everything I asked of it and never gave me a problem.
JOEPROPER
After all this work... Go buy a compressor before it gets too cold out there. I know this sucks, but keep it moving forward. Good Luck! flag.gif
bbrock
Craigslist compressor already sold. The dog has a vet appt. today so I'll be in town and can go shopping. Will probably come home with a compressor.
preach
That sucks Brent. Hope you can recover in time.
bbrock
Here's where I sit at the moment. Waiting for my neighbor to come home to help me lower it down.

Click to view attachment

It's a two-stage so that should be nice. It barely shoehorned in the SUV. I have a pickup I can't drive because it has 4 bad tires and a trailer that is full of scrap metal (I'll give you one guess where it came from). Everything is on deferred maintenance until the project car is painted and I've been skating along with no backups, hoping for the best. Today, the house of cards fell.

I'll probably need to head back to town for some plumbing fittings to hook this thing up. Hoping to have it operational tonight so I can get some paint laid down tomorrow. If not, I will have to wait until after this winter storm passes which means I'll have to scuff sand all this fresh primer because I will lose my recoat window. One loud clunk in the morning and my whole plan went to shit.
FlacaProductions
For all the things that could have gone SO wrong up to this point, this is minor.
Keep moving and keep your eyes on the prize - if this is the worst thing that happens, you're in great shape!
johnlush
Damn crappy compressors. Was the one that failed a single stage direct drive? Minor detour for you. Let the weather pass and jump back in. Better now than in the middle of laying down color...
bbrock
QUOTE(johnlush @ Sep 25 2019, 08:30 PM) *

Damn crappy compressors. Was the one that failed a single stage direct drive? Minor detour for you. Let the weather pass and jump back in.


Yes, the crappy one was single stage direct drive AND oiless. It was just not a well thought out purchase. I'll never buy an oiless compressor again. Unbelievably cheaply made and maintenance is quite expensive since the teflon piston rings/cups wear out quickly.

The new compressor is hooked up and on its break-in run. Already like it better. SO much quieter than that old POS. Of course, I don't have the plumbing fittings I need to hook it to my lines and my neighbor who helped me unload stuck around to chit chat so it was too late to run back to town for fittings. Will make and early run tomorrow.

QUOTE
Better now than in the middle of laying down color...


EXACTLY. If the break down would have happened one hour later, I would have had a pot full of rather expensive urethane surfacer in the gun that would have gone to waste. Breaking down while laying color would have been way worse.

Onward ho!
bbrock
QUOTE(FlacaProductions @ Sep 25 2019, 08:06 PM) *

For all the things that could have gone SO wrong up to this point, this is minor.
Keep moving and keep your eyes on the prize - if this is the worst thing that happens, you're in great shape!


agree.gif Worse thing so far has probably been having to have metal flakes drilled out of my eye. lol-2.gif
raynekat
You get 'em Brent. The winter is a coming.
Dion
A minor hiccup for you! You got this man. Yes, very happy it didn’t crap out during colour phase. Hope the weather window improves quickly for ya.
Good karma and all that , etc! beerchug.gif
JOEPROPER
, very happy it didn’t crap out during colour phase

Could be a blessing in disguise. Move forward!
This is a "lo-fi" version of our main content. To view the full version with more information, formatting and images, please click here.
Invision Power Board © 2001-2024 Invision Power Services, Inc.