Help - Search - Members - Calendar
Full Version: Intro from Montana: '73 2.0L rustoration thread
914World.com > The 914 Forums > 914World Garage
Pages: 1, 2, 3, 4, 5, 6, 7, 8, 9, 10, 11, 12, 13, 14, 15, 16, 17, 18, 19, 20, 21, 22, 23, 24, 25, 26, 27, 28, 29, 30, 31, 32, 33, 34, 35, 36, 37, 38, 39, 40, 41, 42, 43, 44, 45
bbrock
@tygaboy

Thanks Chris! This is awesome! I'll send you a PM but #2 is a match for what I have. Either would work though. My understanding is that later switches (74-on?) had the extra wire channels and maybe the wires for an electric washer pump. The harness plug would still fit on there and the pinless slots would just overhand the harness plug. No biggie.

With that said, my preference would be for whichever one has the best icon figures. It's hard to tell what will clean up vs. scuffed. I'll wind up repainting either lever but what worked well on my original was to tape off the icon printing with rolled edge tape to make a soft mask and spray. The less touch-up needed on the icons, the better. I could see myself screwing that up. I'm leaning toward switch #2 but curious of your thoughts on which one would clean up nicer on the white printing.

I can't believe I got through all this talking about #1 and #2 without any juvenile jokes. Whoops! blink.gif
altitude411
popcorn[1].gif
sixnotfour
Im guessing someone needs /wanted to park inside for a few months,,,Soo..
yellowsleep[1].gif yellowsleep[1].gif ...its the same at a number of peoples places with real seasons.. beerchug.gif
bbrock
QUOTE(altitude411 @ Dec 13 2019, 09:00 PM) *

popcorn[1].gif
QUOTE(sixnotfour @ Dec 15 2019, 04:00 PM) *

Im guessing someone needs /wanted to park inside for a few months,,,Soo..
yellowsleep[1].gif yellowsleep[1].gif ...its the same at a number of peoples places with real seasons.. beerchug.gif


https://www.youtube.com/watch?v=MWtUVDG5M1w

av-943.gif

Okay, I can take a hint. I've gone silent due to a combination of being distracted by other priorities, very busy with work, and doing work on the car that wasn't very exciting to share. Things are on the move again so I'll throw up a couple posts to catch up. This one is mostly off topic but what the hell...

First, the distraction. In a 48 hour period from the night before Thanksgiving through Black Friday, we got over 38 inches of snow. This is a pic of only about half what we got. It was taken the second day after I had already cleared the now from the first day.

Click to view attachment

So I go out early Thanksgiving morning and the plow won't work. A working snow plow is not a luxury here, it is a necessity. When the plow isn't working, everything else goes on the back burner. So I spent most of Thanksgiving outside in sub zero blizzard conditions wrenching on the plow controller. Somehow, I managed to get it working just in time to plow the driveway before our neighbors arrived for Thanksgiving dinner.

Here is the next morning. Somewhere under here is the plow which, of course, isn't't working again.

Click to view attachment

I spent all day working on the controller and got it fixed. The plow worked perfectly again. This made me very happy because those things are ridiculously expensive. I celebrated by spending the money saved not buying a new controller in the 914Rubber Black Friday sale. Of course, I hooked up the plow last weekend and it was dead again. That's it. Can't afford to have a jinky plow around here. $530 later, I have a new controller for the plow. Pisses me off because there can't be more than $50 of parts in these goddam things. Oh well... wacko.gif

This has nothing to do with anything but I thought it was cool. Last Monday as I headed to the Pathfinder to go to town to buy the plow controller, there was a long-tailed weasel running all around it it and trying to get inside. I grabbed the camera but it took off too fast. I did get a shot of the tracks it laid over the top of the rig.

Click to view attachment

Then I popped the hood to check the oil and found this:

Click to view attachment

That rabbit's foot wasn't so lucky. Now I know what the weasel was up to. Now every time I go to start that car, I bang on the hood to make sure there isn't a weasel under there. I like those guys. Don't want to chop one up.

Getting back to the Porsche - I got a package from Santa. A World member so generous, he has a holiday named after him laugh.gif

Click to view attachment

Yes, of course @tygaboy is Santa. Who else would it be? He actually sent two switches. The other is already installed.

Click to view attachment

I'll have to pull it out again to do a little cosmetic rehab, but I wanted to test to be positive my wipers were in perfect working order before installing the dreaded air box. Wipers worked like a champ with the new/old switch. Two speeds and intermittent. cheer.gif Thank you Father Chrismas!!!
bbrock
So what's been happening with the car? Sanding, sanding, and more sanding. I've been working long hours for my job but have spent all my free time for over a week cutting the paint. It was more work than it should have been thanks to me not knowing what I was doing. The only PPG clear I could buy at my paint shop is intended for collision repair. PPG recommends it for 1-3 panel repairs and from what I saw, that was about spot on. It flashed so fast that I had a hard time getting around the whole car without having overspray pile on the flashed surface. It wouldn't be a problem for a good painter, but I didn't have one of those available. Then there was the big spill fiasco which complicated things. The upshot is that I had a lot more sanding to do than I should have. It was amazing how much easier the panels I had really sprayed well were to work flat. Probably only 1/4 of the time as required for shitty panels.

Anyway, after many, many hours of work, I finally had everything sanded to 3000 grit by mid-morning yesterday. And yes, I did wind up resanding the hood to get those scratches out. Here it is after sanding and with just the corner after the first cut of compound.

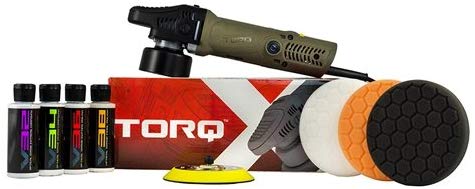
Click to view attachment

I got the first cut done and half way through the second cut yesterday before having to quit early. I'm really happy with this Chemical Guys polishing kit. Everything needed to polish a whole car for $150 can't be beat. If I were going to be doing a lot of polishing, I'd want a better machine, but it is high quality and perfect for occasional use on the cheap.

IPB Image

Today I finished polishing (4 grits). I'm pretty happy with the results. I'm going to rate this paint job a "two footer." It looks pretty darn good up to two feet away. Closer and it isn't hard to pick out flecks of shit here and there. You have to look for them though. Put another way, the average Joe drooling over the car at the gas pump will think it is amazing. Anyone who actually knows what a good paint job looks like will quickly say, "Good for you trying to paint your own car little buddy." rolleyes.gif So here are some typically bad picks. If I get a chance on a sunny day, I'll roll it outside for better picks.

Click to view attachment

Click to view attachment

Click to view attachment

And the other side:

Click to view attachment

Whoa! That looks like shit. What's the deal? unsure.gif If you've been following along with this project, you know I can't go long without f'ing something up, but give me credit for being consistent. Yes, of course I sanded right through the clear and into the primer. In two places actually. Quite easily too.

Click to view attachment

I obviously got the clear way too thin in this area. That area was a bitch to see and reach when I was painting and it also happens to be just downstream of my painting progression from where the spill happened. I probably was so frazzled at that point that I failed to get the final coat on at all. As unhappy as this makes me, I would much rather discover it now than in a year when the paint started to fail. Of course that's not all. This next one is truly a dumbass move. I was working on the roll bar when the wife walked in to chat. So we are talking and I keep sanding but not paying attention like I should. Bad move. Next thing I know, I have a little spot of primer peeking out in the corner.

Click to view attachment

What a dipshit! headbang.gif

So here's the plan. The sand-thru on the front fender is low and inconspicuous enough that I'm going to try to just airbrush a little base in to blend the goof and then reclear the whole panel. Even if they blend isn't 100% perfect, it will be hard to notice. I would try the same on the door but there is some trash right above the door handle which is a particularly annoying place to have a blemish. I'll probably just respray the door with base and reclear. On the roll bar, I'm going to try the same as on the fender. I experimented a bit dabbing base into the sand-thru with a touch up brush. The results were promising enough that I think I can air brush in base to make the blemish disappear. Of course the whole top of the roll bar will be shot with clear. If I can't make and invisible patch, I'll reshoot that with base too. I'm hoping to do that next weekend so we'll see how it goes.

I had enough time today to do a few fun things after the polishing was done. I know the factory just sloppy brushed flat black in this area but I could quite bring myself to do it. Just a single coat of trim black here though.

Click to view attachment

Trying my best to keep up with @mb911 but it isn't easy. Ending this with a symbolic step... or in this case, maybe it is emblematic? rolleyes.gif

Click to view attachment
mb911
Lol.. I am moving fast now but things are about to come to a screaming halt.. We may have to move by the 3rd week in January.. Got a cash offer on the house.. So car things may have to wait.

On another note also know you can spot clear in spots then wet sand and buff.. You don't have to clear the whole panel.
bbrock
QUOTE(mb911 @ Dec 16 2019, 04:27 AM) *

Lol.. I am moving fast now but things are about to come to a screaming halt.. We may have to move by the 3rd week in January.. Got a cash offer on the house.. So car things may have to wait.

On another note also know you can spot clear in spots then wet sand and buff.. You don't have to clear the whole panel.


I thought about trying to spot clear and blend, but since I'm not sure where the thin clear begins low on that front right corner, I decided on something of a hybrid approach. My plan is to spray a coat of clear just along the bottom of that front fender, then a second coat feathered half way up the panel. At that point, I figured I might as well do a final full coat. That way I'll know I have plenty of depth over the whole panel. I do have a couple of very tiny spots on the other side I need to touch and will only spot clear those. They are so small I will probably just dab clear in with a touch up brush and then sand them flat.

I saw that you had the house up for sale. Congrats on the offer and good luck with the move!
914_7T3
QUOTE(bbrock @ Dec 15 2019, 09:55 PM) *


I had enough time today to do a few fun things after the polishing was done. I know the factory just sloppy brushed flat black in this area but I could quite bring myself to do it. Just a single coat of trim black here though.

Click to view attachment


Now you tell me! unsure.gif

Click to view attachment

Not going a 2nd round with those plastic speed nuts.......Spirit Lines laugh.gif
bbrock
QUOTE(914_7T3 @ Dec 16 2019, 02:29 PM) *

QUOTE(bbrock @ Dec 15 2019, 09:55 PM) *


I had enough time today to do a few fun things after the polishing was done. I know the factory just sloppy brushed flat black in this area but I could quite bring myself to do it. Just a single coat of trim black here though.


Now you tell me! unsure.gif


Not going a 2nd round with those plastic speed nuts.......Spirit Lines laugh.gif


I saw that and thought, well that was bad timing. blink.gif After fighting just 4 of those speed nuts last night and not completing the task, I don't blame you a bit. Have you learned any tricks with those nasty gadgets to pass along?
914_7T3
QUOTE(bbrock @ Dec 16 2019, 02:06 PM) *

QUOTE(914_7T3 @ Dec 16 2019, 02:29 PM) *

QUOTE(bbrock @ Dec 15 2019, 09:55 PM) *


I had enough time today to do a few fun things after the polishing was done. I know the factory just sloppy brushed flat black in this area but I could quite bring myself to do it. Just a single coat of trim black here though.


Now you tell me! unsure.gif


Not going a 2nd round with those plastic speed nuts.......Spirit Lines laugh.gif


I saw that and thought, well that was bad timing. blink.gif After fighting just 4 of those speed nuts last night and not completing the task, I don't blame you a bit. Have you learned any tricks with those nasty gadgets to pass along?


Used a small set of pliers over a microfiber towel closer to the center of the pin and pushed straight down on those 'lil f-ckers. The seven pins that go straight into the "black" painted section went pretty easily. The others did not go willingly as you can't get it from the right angle with all tension rods etc. that are in the way. Mostly gripped the speed nuts from the side and twisted them down onto the pins. They barely resemble speed nuts now laugh.gif
bbrock
Put the upper and lower front targa seals in today. That sure is a treat of a job!!! Instructions would be nice. Even scouring old threads for nuggets of info left a lot of question. I had to slice slots into the upper corners to slide the aluminum tabs on the windshield frame tracks into. A little guidance on that would have been helpful, or just something saying it needed to be done. There was no other way though. Same goes for trimming the bottoms. For now, I just cut off enough for the door to clear. It looks like they need to be trimmed to mate with the triangle window seal when installed. Anyway, the car is starting to have a finished appearance with raw metal edge wrapped in new rubber. Never drove one without a torn up targa seal I don't think.

Click to view attachment

Click to view attachment

Did the passenger side first and managed to get it in without screwing anything up. Decided to play it safe on the driver's side and protect the frame paint and track with blue painter's tape. Wouldn't you know it, the tape lifted off some of my new trim paint. sad.gif Now I get to mask that all off to touch it up. No way am I pulling that seal out again!

Click to view attachment

I used a bit of weatherstrip adhesive on the corners to make sure I get a good seal with no leaks. The driver's side is wanting to roll just a little even after screwing the corner block in place. Hopefully a little clamp pressure overnight will let the adhesive set to hold it in place. Thought about putting the roof on to use as a clamp but this seemed easier.

Click to view attachment

Got a little OCD trimming the union of the lower seal to the upper.

Click to view attachment
bbrock
I have to get this out of the way. This post is off topic and not fun so feel free to skip it.

To say last few weeks have been hard for me is an understatement. The Friday before Christmas was my wife's birthday, but rather than a day of celebration, it was the day we suddenly and unexpectedly lost our dog and my best friend.

Niaquq was the third Alaskan malamute we've had in addition to a wolf who made his appearance earlier in this thread. Malamutes have big personalities and all of ours have been wonderful dogs, but Niaquq was that next level companion we are lucky to have once in a lifetime. There have been few hours over the last 8+ years we were apart as he accompanied me almost everywhere I went, be it for work or play. He made many friends and became something of a minor celebrity around town. He was a favorite among tourists and wound up in the family vacation photos of strangers from around the globe. Once in Bryce Canyon, tourists actually formed a line to have their pictures taken with our big ham. Malamutes always tend to attract attention, but none of our previous dogs were as magnetic as Niaquq. He just had an indescribable essence that made people want to be his friend.

The morning of Friday the 20th was not particularly unusual. Niaquq had been feeling a little "off" and had skipped a meal here and there over the previous few days. We attributed to the deer carcass he had been feasting on for over a week - probably stolen from a mountain lion which was his typical M.O. He wasn't getting better so I took him to our vet just to be safe. I have no interest in reliving that horrible day, but by early evening, he was in surgery to attempt to remove a large tumor from his abdomen. It turned out to be inoperable and the prognosis was the worst possible. We made the crushing decision not to wake him from anesthesia to save him the suffering of spending his last few days of life recovering from surgery only to succumb to cancer.

I had been feeling increasingly guilty about the amount of time I've been spending on the car instead of taking my friend hiking, camping, and canoeing. I knew he was approaching the age where he would begin to age. I justified it by thinking of all the epic voyages we would have in the car. Our first malamute LOVED this 914 and I wanted Niaquq to experience that same joy of open top touring. It drove me to work harder on the car to finish it sooner. That was a bad gamble and now I regret my obsession. Ironically, working on the car is the only thing that keeps my mind occupied as I work through my grief. A lot of progress has been made and updates will follow.

There will be a fourth mal but there will never be another Niaquq. Goodbye to the best goddam friend a guy could ever have.

Click to view attachment

Click to view attachment

Click to view attachment

Click to view attachment

Click to view attachment

Click to view attachment

Click to view attachment

Click to view attachment

Safe travels buddy...

Click to view attachment
AKFish
We lost our best friend recently as well. Deepest condolences.
mepstein
I've been there. I feel for you. sad.gif
mb911
I am so sorry for your loss.. Our animal's are such a huge part of our family and lives..

doug_b_928
Condolences on the loss of your friend, Brent. He was beautiful.
bigkensteele
So sorry to hear this. I don't believe you have lived until you have had a really great dog. My thoughts are with you and your wife.
Dion
Brent so sorry to read of the loss of Niaquq. Always enjoyed the stories
you shared of him.
Condolences buddy. Hope the great memories you have of him help
ease the pain a little.
They are certainly family.
fiacra
I'm so sorry to hear this. It is sometimes hard for people to understand that our dogs are our family, and we grieve for them as though we have lost a family member. Words of condolence don't do justice to the grief we feel. Just as you gave him a good life, you gave him a good death and spared him from the suffering that was sure to come. It is fortunate we have that privilege with our canine family members. Celebrate his life, don't regret any opportunities you missed to spend more time with him. You can't go back and nobody who loves us would want their passing to cause us grief or unnecessary regret. Thank you for posting your tribute to him.
Aerostatwv
So sorry for your loss. I lost my fuzzy buddy last year....He obviously had a great set of parents that cared greatly for him.
altitude411
So so sorry Brent sad2.gif
KELTY360
So sorry to hear this Brent. I can attest to what a great pooch he was. When I met him he kind of demanded we be friends....which was great with me. He obviously ruled his domain and kept you around so you could serve him. biggrin.gif
Good luck working through your loss. RIP
bbrock
Thanks everyone. This one will take more time to get over than usual, but let's move on with the project.

Click to view attachment

Click to view attachment

The dreaded fresh air box actually turned out to be quite easy thanks to Ian's video of @914_7T3 's install. Don't hate me, but it only took about 30 minutes doing ot solo. Then I took it out and did it again. Piece of cake shades.gif

Click to view attachment

Next up was fixing the sand-thrus on the paint. The air brush was a mixed bag but got the job done. Here's the sand-thru on the roll bar.

Click to view attachment

I barely got the base sprayed on this spot before the air brush clogged up. I think it was the metallics. Still, it got the job done. You can still see it if you look hard in the right light, but not bad.

Click to view attachment

I decided to do a full reshoot on the door and fender. I had the paint and it gave me another chance to get it right... which I did.

Click to view attachment

I also sprayed the last of the hardware. I also resprayed both headlight blinders.

Click to view attachment

Of course I couldn't get through a day of painting without a fuch up. When I pulled the masking plastic off, I found the clear coat had dissolved the plastic and glued plastic, clearcoat, and base coat to the hood. headbang.gif

Click to view attachment

Luckily it sanded out but was nerve wracking because I had to sand through the base coat that got stuck on top - hoping that's what it was and not the final base coat under the clear. After polishing, you can't tell it happened.

Click to view attachment

Now I have a paint job I can almost be proud of. The rear deck lid still has a bit more crap in it than I would like, but not bad.

Click to view attachment

Click to view attachment
KELTY360
piratenanner.gif You can definitely be proud of that paint job...with no apologies! Incredible work. The front fender looks so good without the wart. Do you have a target for first drive yet? shades.gif
bbrock
I've been told you can't install trunk lids by yourself but I've done it over a dozen times now without a scratch. The trick is to carefully place the lid in the gasketed opening, then fold up some soft towels and place them slightly under the rear corners of the lid to pad the paint. Then you can lift the lid so the corners rest on the padding and use your head and shoulder to prop up the lid while you line up the lower bolt hole with your hands. Once you have a bolt loosely threaded into the first lower hole, move to the other corner and insert the lower bolt finger tight. Then the upper bolt and finally move back to the other side and finish. I'm not saying it is easy, but like I said, I've had these lids on and off at least a dozen times without a scratch.

Click to view attachment

Click to view attachment

Final install of the rear lid is a bit trickier because it has to be done with torsion springs installed so the hinges are point up. Same drill though except you have to muscle the lid over the hinges and then down behind to rest on the towel padding. Installing the springs was much easier using McMark's Original Customs torsion bar tool. No broken thumbs!

Click to view attachment

Now my trunk lid stays open of it's own will.

Click to view attachment

Now here's something that takes either huge balls or small brains. I test fit the targa top and found a problem. It's a little hard to see, but the overhang is greater on one side and a tad too shallow on the other.

Click to view attachment

Click to view attachment

After puzzling over it a bit, I deduced this was caused by many years of pulling on the windshield frame getting in and out of the car which tweaked the frame slightly. Indeed, just tugging on the frame a little corrected the targa overhang. Of course it sprang right back when released so drastic measures were in order.

Enter the big ass ratchet strap and timber frame post.

Click to view attachment

Click to view attachment

Just a little at a time, then remove strap and test. It only took a couple pulls and all was straight.
bbrock
Next up was assembling the engine lid. I found this task pretty fun as it's a pretty complicated piece. The rain tray was in great shape except some overspray from the old paint job and on crack at a rear mount point.

Click to view attachment

I originally planned to buy a plastic welder but the CSOB in me kicked in and decided that was an unnecessary expense. Instead, I used the hot knife I already have and a black zip tie to weld the crack shut.

Click to view attachment

Click to view attachment

After sanding down to 2000 grit, the repair blends pretty well. I could have spent more time and gotten a perfectly invisible repair but frankly, it wasn't worth it.

Click to view attachment

This little rubber sleeve is still available from Porsche.

Click to view attachment

Thanks @914_7T3 for sharing your experience assembling the lid. Learning from you, I decided to install the letter on the grill BEFORE installing the grill in the frame. That gave me clear access to the letter posts. It also helped that the speed nuts have been superceded by a new part# and the new parts are easier to install. The are filled with a putty caulk and have a hex head that can be twisted on with a socket. Easy does it though. I just tightened until the caulk smooched out and the letter was held firm.

Click to view attachment

Despite being careful, the nut twisted the tip off one of the "P" posts. It was already weakened by removal of the old nuts. There was still enough post to bite into and I added a drop of JB Weld just to make sure it stays in place. The poor bastard who has remove this will be cussing me, but I'll probably be in the grave by then.

Click to view attachment
bbrock
The new all plastic nuts for the grill are also easier to work with than the originals. I found this tool or a 7mm deep well socket ideal for pushing them on.

Click to view attachment

Click to view attachment

I had to get a little creative to push on the nuts that were hard to access because of the bracing.

Click to view attachment

Click to view attachment

Here's the assembled lid from the bottom sans rain tray.

Click to view attachment

This little bushing is the reason my rain tray was cracked. It was missing and is a spacer that prevents over tightening and stressing the tray. The part is NLA but I picked up a 5mm deep with 6mm hole black nylon bushing at the local Ace Hardware that fits perfectly.

Click to view attachment

And the rain tray installed. Anyone know the point of the L-shaped bumper on the rear? I figured it could be adjust to catch on the front edge of the trunk lid when the lid was release to prevent it slamming up and stressing the hinges. But there is no way to adjust it out far enough to do that.

Click to view attachment

Lid installed. That doesn't look too bad. Only thing I don't like is that the 914Rubber edge welting is deeper than the original so the top edges show when the lid is closed. I might see how well my originals clean up and switch back if they pass inspection.

Click to view attachment
bbrock
Last post for now. This will be mostly pictures.

Click to view attachment

Click to view attachment

Click to view attachment

Click to view attachment

Click to view attachment

Click to view attachment

Starting to look like a car. Obviously that center console cushion has to be replaced. Anyone know where to get the best cover? The only recover kit I found is through AA. Not my first choice of vendor. Anyone know if it is any good?

Click to view attachment
bbrock
QUOTE(KELTY360 @ Jan 7 2020, 09:23 PM) *

piratenanner.gif You can definitely be proud of that paint job...with no apologies! Incredible work. The front fender looks so good without the wart. Do you have a target for first drive yet? shades.gif


No definite target, but we are planning to drive out to Iowa for my niece's graduation in May. If we don't have a dog by then, I'm entertaining the idea of driving the Porsche. Taht would mean first drive would need to be early to mid April to allow for shakedown. Not sure that is realistic but we'll see.
euro911
Sorry to hear you guys lost your pup, Brent sad.gif

We lost one of ours the day before New Years Eve, so we know the hurt. Remember and cherish all the good times you shared.
falcor75
Sorry for your loss. sad.gif
914_7T3
Brent, so sorry to hear of your loss. Its never easy losing a loyal friend like Niaquq.
tygaboy
Brent - Most importantly, I'll raise one this evening in honor of Niaquq.
So sorry to hear.


2nd, I believe that L-shaped rubber piece is there so if you have the engine cover and trunk open at the same time, and mistakenly go to close the engine cover, the rubber hits the trunk lid, preventing damage.

Give that a go and see if you think that's it.

burton73
Brent,

I am so sorry of your loss of your buddie. We love our dogs so much. They are better than most people. The true unconditional love they give us like a mother to a child.

As you know it takes time to work through the grief. I hope that part passes quickly for you, and that you are left with a warm feeling whenever you think of Niaquq.


Bob B
theer
QUOTE(bbrock @ Jan 8 2020, 12:13 AM) *

The new all plastic nuts for the grill are also easier to work with than the originals. I found this tool or a 7mm deep well socket ideal for pushing them on.


@bbrock where did you find those all plastic grill nuts? I'm in need of a complete set for Grey Matter.

Thanks,
Tom
FlacaProductions
QUOTE(tygaboy @ Jan 8 2020, 12:41 PM) *

I believe that L-shaped rubber piece is there so if you have the engine cover and trunk open at the same time, and mistakenly go to close the engine cover, the rubber hits the trunk lid, preventing damage.

Give that a go and see if you think that's it.


That's always been my belief as well but I'm curious as I don't believe every year has/had them....my 73 did - my 74 doesn't.
bbrock
QUOTE(theer @ Jan 8 2020, 04:54 PM) *

QUOTE(bbrock @ Jan 8 2020, 12:13 AM) *

The new all plastic nuts for the grill are also easier to work with than the originals. I found this tool or a 7mm deep well socket ideal for pushing them on.


@bbrock where did you find those all plastic grill nuts? I'm in need of a complete set for Grey Matter.

Thanks,
Tom


@theer they are a dealer item. Kind of pricey of course. I got mine through Sunset Porsche: https://www.sunsetporscheparts.com/oem-part...nut-99950722040
bbrock
QUOTE(FlacaProductions @ Jan 8 2020, 05:20 PM) *

QUOTE(tygaboy @ Jan 8 2020, 12:41 PM) *

I believe that L-shaped rubber piece is there so if you have the engine cover and trunk open at the same time, and mistakenly go to close the engine cover, the rubber hits the trunk lid, preventing damage.

Give that a go and see if you think that's it.


That's always been my belief as well but I'm curious as I don't believe every year has/had them....my 73 did - my 74 doesn't.


@tygaboy @FlacaProductions

By golly I think you are right. That was driving me nuts trying to figure out how to adjust that thing and the idea that Porsche might have included a completely useless and unnecessary part was challenging my world view! You guys are so smart. pray.gif

Click to view attachment
bbrock
My lunchtime project today. @tygaboy should recognize the window since he donated it. beerchug.gif

Click to view attachment

Click to view attachment

Why is the interior light missing? Because the contact snapped off the cheap POS repop when I tried to plug the wires in. JB Weld to the rescue. Should have it installed after the epoxy sets overnight.

Click to view attachment
tygaboy
I've been waiting to see that window go in! Now I say officially that you couldn't have done your build without me! av-943.gif

And seriously Brent, your car is looking SOOOO good. It's helping keep me motivated to get mine moved along.
FlacaProductions
More on the L-shaped piece - I knew I had read about it not being on all years...from 914Rubber's site:

New reproduction of the NLA engine deck lid bumper used on early model year cars. This rubber bumper prevents the rear trunk lid from hitting the engine deck lid and rain tray.

Used for the 1970-73 914 model years, 1 required per car.

914.512.195.10, 914 512 195 10, 914-512-195-10, 91451219510

https://900designs-container.zoeysite.com/1...for-porsche-914
raynekat
Looking good there Brent on all the paintwork and assembly riddles.

And so sorry to hear about your bud.
Sounds like you really had a special bonding.
May he be in the real dog heaven now.
All the best my friend.
bbrock
Made a big purchase yesterday. Trying to keep up with @914_7T3 . You aren't the only one with NOS hold down dude. Of course, when I bought mine, it was just N but I guess since it stayed in the package in the 30 years I've owned it, it has earned the OS. I'm not digging the finish on the mounting bolt. I think it was just black oxide and has started to rust. I'll replate that with a black chromate finish.

Click to view attachment

Also bought one of these to keep it topped up.

Click to view attachment

With an actual battery in, I finally got to hear what the Hella Sharptone horns sound like. LOUD!

I do have an electrical mystery though. I don't have three speeds on my fresh air blower. Low works fine but medium and low both run at the same speed. I was hoping it was just because my little power supply couldn't pump enough amperage to run high speed but no. I think it might actually be running at high speed on both medium and low settings. I double check connections to the controller to make sure it is wired according to the schematic but the connector on the blower is still a mystery. Those wires got mixed up when I was working on the harness and I haven't found a diagram that shows how they should go. I'll have to do a little more trouble shooting to figure that out.
Superhawk996
The power supply probably can't source enough current. Motors are current hogs to get them up to speed. Even if steady state is 3A, you'll need more current to cover inrush current and to get the mass and inertia up to speed which might be making high seem a lot like medium.

IIRC the low and medium speeds are current limited by a wire wound resistive element. High should be straight through to the motor windings.

If low and medium work OK with no smoke escapage, check the schematic and your wiring and you'd be safe to run the motor directly off the battery via jumpers if you don't want to energize the rest of the harness. if you do this, isolate the motor so you don't backfeed the harness.

Great progress!
bbrock
QUOTE(Superhawk996 @ Jan 15 2020, 05:12 AM) *

The power supply probably can't source enough current. Motors are current hogs to get them up to speed. Even if steady state is 3A, you'll need more current to cover inrush current and to get the mass and inertia up to speed which might be making high seem a lot like medium.

IIRC the low and medium speeds are current limited by a wire wound resistive element. High should be straight through to the motor windings.

If low and medium work OK with no smoke escapage, check the schematic and your wiring and you'd be safe to run the motor directly off the battery via jumpers if you don't want to energize the rest of the harness. if you do this, isolate the motor so you don't backfeed the harness.

Great progress!


Correct on almost all fronts. Yes, it was my assumption that the power supply was only providing enough oomph for low and medium and that when I hooked up the battery, I would get my high speed back - but no.

When I rebuilt the blower, I opened up the guts to clean cobwebs off the resistor coils and test for continuity etc. I bench tested the blower using a 4 amp battery charger (didn't have the power supply at the time). IIRC, I was able to get all speeds but can't be sure.

Now here's where the mystery and I think the problem is. When I removed the harness for refurb, I labeled all the wires on the control "front, middle, and rear." Then I made the dumb move of pulling wires from the connector on the blower without documenting positions. I assumed the factory schematic would provide that detail. They do NOT. I posted a thread on The World and got a pic of the wire connections from another member. Then on reassembly, I found that neither the original connections to the controller or the wiring pic for the blower connector were correct. I rewired the controller according to the schematic and found @BeatNavy 's excellent post on wiring. I believe that wiring is correct.

One thing I know is that I have positive power connected correctly and that the control wires just alter ground paths so I'm safe from sending power backward through the harness. According to Rob, low speed runs through both resistors to ground, med speed runs only through one resistor, and high is direct to ground. My next step will be manually ground each of the control wires to see if I can get low, med, and high. If I can, then the problem would be in the finger contacts. If I can't, I it will mean either wiring at the blower connection, or an open wire in the blower itself. One problem is that I'm not sure if I'm getting low and med, or low and high. The med speed seems kind of high to me but I don't know. Also, the blower runs in all three positions, I just don't hear a change in fan speed between med and high. One way or the other, I'll get it figured out. Electrical troubleshooting is one of the few things I can do well. thumb3d.gif

bbrock
This one is for @raynekat - the dreaded 914rubber door stay kits. Here's how I tamed the click.

First step was to clean and replate all the brackets so they were nice and shiny. Then rebuild with the 914Rubber kit. Easy enough and looks pretty nice.

Click to view attachment

That's when the fun begins. In an effort to fix the notorious "click" problem, 914Rubber decided to overbore the pivot hole on the arm and supply an oversized pin to match. Their theory is that the click was caused by the bracket holes on the chassis being wallowed out by wear and allowing play. Problem is that is not always the case. Many of our car's bracket holes are just fine and they are a PITA to drill or ream out. I had no interest in molesting my original brackets - especially with fresh paint on.

I cut my challenge in half by simply re-using the one original stay arm that was still in good condition. That has the correct 6mm bore to match the bracket. Only challenge there was sourcing the correct pin. OEM pin is 6x16mm and the 914Rubber pin is 1/4inch or about 6.3mm. I couldn't find a 6mm pin locally (they can be found on ebay) but I did find 6mm tension pins. Look at the door stays of most modern cars and you will probably find a tension pin instead of a clevis - I think for good reason. I chose a 6x20 mm pin to provide a little more length since there is no head to rest on at the top. The diameter of the untensioned pins were 6.5mm which was way too big to drive into the brackets and arms easily so I compressed them in a vice before installing. The only thing I did on the OEM arm was to very lightly file the bore with a round chain saw file. Just enough to see fresh metal. The idea here was that the tension pins will remain stationary in the brackets (which should prevent future wallowing of the brackets) with the arm pivoting snuggly but smoothly around the pin. It worked! Door opens and closes as it should with NO CLICKS.

Now to mod the 914Rubber arm to get the same result. I bought a 1/4" OD aluminum spacer bushing that fit snuggly inside the bore.

Click to view attachment

I JB Welded the bushing in because almost all of the bushing gets drilled back out. Drilled perfectly, there will only be 0.15mm of material left after drilling. A better way would probably be to drill the arm hole out to 3/8" and source a matching O.D. bushing to leave more wall behind. I may wind up doing that but will see how long this lasts. After drilling (to 6mm or 15/64") and filing the bushing flush with the arm, here's what it looks like.

Click to view attachment

After installing the tension pin on this side, all was in place and again, NO CLICKS! shades.gif (Doug, you might recognize that door switch laugh.gif )

Click to view attachment

And a parting shot of the mechanism in its home.

Click to view attachment
cary
Well done ............
defianty
Just caught up with your last few posts Brent.

Firstly, so sorry about your loss.

The car is looking just great, super progress!
BeatNavy
QUOTE(defianty @ Jan 15 2020, 11:27 AM) *

Just caught up with your last few posts Brent.

Firstly, so sorry about your loss.

The car is looking just great, super progress!

I'm also sorry about your friend, Brent. Such a beautiful dog and happy dog in those pictures sad.gif

Rock on - your car is looking fantastic. Your attention to detail is amazing, and you're getting closer to hitting the road beerchug.gif
johnlush
Just catching up on this thread.

Brent, the car looks great and the progress is inspiring.

Sorry about your pooch. Sounds similar to how my last Shepherd went. Here today and gone tomorrow. I felt like a gutted fish for a long time.
This is a "lo-fi" version of our main content. To view the full version with more information, formatting and images, please click here.
Invision Power Board © 2001-2024 Invision Power Services, Inc.