Full Version: Intro from Montana: '73 2.0L rustoration thread
Pages: 1, 2, 3, 4, 5, 6, 7, 8, 9, 10, 11, 12, 13, 14, 15, 16, 17, 18, 19, 20, 21, 22, 23, 24, 25, 26, 27, 28, 29, 30, 31, 32, 33, 34, 35, 36, 37, 38, 39, 40, 41, 42, 43, 44, 45
Thanks all. On the grinding sparks, I think it depends. Luckily on mine the metal slag didn't go too deep so I was able to pop all of the metal bits out by running a razor blade over them at the start. Still, there are still quite a few of the deepest pits in this glass that I didn't get out. I think you COULD do it, but the question becomes how thin do you want to grind the glass? The worst part of mine is that they are filled with red cerium oxide now and easy to see. I'll try to get a pick later. Once I get that cleaned out, I don't think they will be very noticeable. I've been looking at pit filler as maybe a way to keep them from filling with crap again. It's kind of expensive though.
Excellent work on the glass. TO be honest I didn't know you could polish glass. I want to do mine now!
Nice spring-like weather today so, inspired by @defianty 's shot of his gorgeous car, I wheeled her out into the fresh air for a quickie photo session. Not glamor shots but this is the first time I've really gotten to see her in natural light since the paint went on. Of course, the clouds moved across the sun the second I picked up my camera but still a nice taste of her potential.
Click to view attachment
Click to view attachment
Click to view attachment
Click to view attachment
Click to view attachment
Click to view attachment
Click to view attachment
Click to view attachment
QUOTE(bbrock @ Mar 6 2020, 07:09 PM) 
Nice spring-like weather today so, inspired by @defiantly 's shot of his gorgeous car, I wheeled here out into the fresh air for a quickie photo session. Not glamor shots but this is the first time I've really gotten to see her in natural light since the paint went on. Of course, the clouds moved across the sun the second I picked up my camera but still a nice taste of her potential.
Click to view attachment
Click to view attachment
Click to view attachment
Click to view attachment
She’s gorgeous Brent!! Nice work!!

Stunning! That soft light really sets off the lines of the car. Nice gaps on that frunk pic too.

You got to be proud, lots of hard work coming together. 
Beautiful result Brent!
Wowza, that's looking mighty fine!
oh, yes. love the gaps....so good!
Thanks guys. The pics make the gaps look better than they actually are. I haven't adjusted the headlight covers yet. I don't even have the correct brackets on the left headlight yet, but there should be no problem getting the gaps where they need to be.
Looks a beauty Brent!
Brent - Remember, you see your car everyday and because of that, it's wonderfulness can be come "common" to you. If you're like me, it can be easy to lose sight of just how much you've done and, in your case, how great it's turned out.
Plus, you also seem to suffer from the dreaded "Hmmm, I coulda done that better"-itis. And likely zero in on (mostly) those areas that bother you.
Me? I'm going to focus on the 99.99% of awsomeness you've created and say:
Holy Jeebus! That there is one beautiful 914! 
Now go finish it and drive it to 2020 WCR in Petaluma. I want a ride!
Plus, you also seem to suffer from the dreaded "Hmmm, I coulda done that better"-itis. And likely zero in on (mostly) those areas that bother you.
Me? I'm going to focus on the 99.99% of awsomeness you've created and say:
Holy Jeebus! That there is one beautiful 914!
Now go finish it and drive it to 2020 WCR in Petaluma. I want a ride!
QUOTE(tygaboy @ Mar 7 2020, 07:12 AM)
Brent - Remember, you see your car everyday and because of that, it's wonderfulness can be come "common" to you. If you're like me, it can be easy to lose sight of just how much you've done and, in your case, how great it's turned out.
Plus, you also seem to suffer from the dreaded "Hmmm, I coulda done that better"-itis. And likely zero in on (mostly) those areas that bother you.
Me? I'm going to focus on the 99.99% of awsomeness you've created and say:
Holy Jeebus! That there is one beautiful 914!
Now go finish it and drive it to 2020 WCR in Petaluma. I want a ride!
Thanks again guys. Believe it or not, I really am VERY pleased with how this car turned out. Sometimes I look at it and thing, Jeez, did I do that?! But trust me, you'd see the camera is being kind to those headlight gaps. They aren't horrible, but the left headlight is literally hanging loose. The assembly missing a mounting plate on the fender side and the threaded holes on the inner bracket got roached by the plater and need to have helicoils inserted so I can tighten them up. In one of the shots I just posted, you can kind of see the left cover lying at a lower plane than the hood. The other side needs a little adjustment too, but it is mounted solid and the gaps are pretty close to where they will finally land.
There is one flaw that was really disappointing. I mentioned earlier there is a little scuff in the base coat at the right rear corner where something (probably the air hose) brushed against the paint when it was wet. It is so subtle that I didn't notice it until days after painting. I had even kind of forgotten about it until I rolled the car into the bright sun yesterday and it caught the light in the most horrific way. It doesn't show in the pics because the cloud cover softened the light and made it disappear. It sucks but I'll live with it... for now.
Only one solution . . . . strip it back to metal and start over. 
Brent it looks great and I fully agree that pictures never tell the story the same way as seeing in person. However, you've done miraculous things with this car that simply serve to inspire the rest of us. Great job! Forge ahead proudly.
I want to see this thing running by June when I make my trek to Idaho this summer. Now get to work!
Thanks for the ongoing updates
Brent buddie,
You have developed a great skill set working on your car and it looks fantastic.
The only problem is your eye will always go to that one flaw spot. I know all of them on my cars. It is a problem with people of a certain personality. I am just like you.
No one may notice it. The car looks super in the photos. This was an incredible save of a very rusty car at one point. Now it is well, a super restoration of a 914 that is well documented
Bob B
Brent, your car looks gorgeous! And even the nicest 914s have their flaws (that only the owner tends to know/see).
I'm really thankful for you taking the time to document how to polish out the side glass. I've had a pair of extras for a long time, and they're imperfect for sure but the best I could find after working through what must have been 200 door windows. Now I know how to make them "good enough" and then some.
Your glass polish posts would make a great "Classic" thread. Thank you, again!
Brent,
That looks so good!! I love silver! Hope to connect some day...
That looks so good!! I love silver! Hope to connect some day...
Got the passenger window in today. Fought the little F'er quarter window all day yesterday with no progress. Used up all my best curse words too. Started fresh this morning and figured out my mistake, I was following the installation instructions in the factory shop manual. Don't do that. What you want to do is install the quarter glaas into the gasket and press into the support BEFORE putting it in the door. Make sure you have that top cap installed. If you don't the assembly will spit the glass out when you set the gasket.
Click to view attachment
Then you slide the whole assembly in. Set the gasket into the door with a hammer and wooden wedge, then install the adjuster bolt before bolting the support in. After a lot of adjusting and tweaking, it's a good fit.
Click to view attachment
There is a problem though. The 914Rubber early outer window scraper was binding badly when the window was rolled down. So bad I'm sure it would have broken the window regulator or torn the aluminum weatherstrip track off after just a few cycles. After waxing the window, it is better, but still not great. The scraper still rolls down into the window track when the window is rolled down. I'm afraid it will start binding again if the wax wears off, or scratch the glass if it is rolled down after mud splashes on the scraper. The rubber seems like it is too soft and sticky for this application. Anyone know if there is a fix for this, or if there is a better outer scraper option? I know they just "upgraded" the late style scrapers with a fuzzy strip to make the glide better, but I'll be honest, I think having a fuzzy strip that will absorb and hold water on the outside of the glass is a bad idea.
Click to view attachment
Click to view attachment
Then you slide the whole assembly in. Set the gasket into the door with a hammer and wooden wedge, then install the adjuster bolt before bolting the support in. After a lot of adjusting and tweaking, it's a good fit.
Click to view attachment
There is a problem though. The 914Rubber early outer window scraper was binding badly when the window was rolled down. So bad I'm sure it would have broken the window regulator or torn the aluminum weatherstrip track off after just a few cycles. After waxing the window, it is better, but still not great. The scraper still rolls down into the window track when the window is rolled down. I'm afraid it will start binding again if the wax wears off, or scratch the glass if it is rolled down after mud splashes on the scraper. The rubber seems like it is too soft and sticky for this application. Anyone know if there is a fix for this, or if there is a better outer scraper option? I know they just "upgraded" the late style scrapers with a fuzzy strip to make the glide better, but I'll be honest, I think having a fuzzy strip that will absorb and hold water on the outside of the glass is a bad idea.
Click to view attachment
QUOTE(bbrock @ Mar 8 2020, 08:58 PM)
Got the passenger window today. Fought the little F'er quarter window all day yesterday with no progress. Used up all my best curse words too. Started fresh this morning and figured out my mistake, I was following the installation instructions in the factory shop manual. Don't do that. What you want to do is install the quarter glas into the gasket and press into the support BEFORE putting it in the door. Make sure you have that top cap installed. If you don't the assembly will spit the glass out when you set the gasket.
Click to view attachment
You forgot the part about the sharp edge slicing a 1" gash across your wrist if you don't have the top cap installed. Oh wait , that was me

@bbrock l had the same issue with the window seal and the thought about the fuzzy seal. I ordered the new fuzzy seat from 914 Rubber and was actually surprised. It’s not a lot of fuzzy and I don’t think it will be an issue. I kept the old style just in case. But with the slight fuzzy edge, problem solved.
QUOTE(BPic @ Mar 9 2020, 03:35 AM)
@bbrock l had the same issue with the window seal and the thought about the fuzzy seal. I ordered the new fuzzy seat from 914 Rubber and was actually surprised. It’s not a lot of fuzzy and I don’t think it will be an issue. I kept the old style just in case. But with the slight fuzzy edge, problem solved.
@BPic
Thanks Brad. My car came original with the early stye scrapers and I'd prefer to stick with them if possible. It will be interesting to see how those new seals perform after people use them in the rain. I'm not willing to be the guinea pig with them. I'm just afraid they are going to give water a path to run down that outside of the glass and inside the door cavity. That defeats the purpose of the seal. Bottom line is the factory seals worked without needing any fuzzy strip so the modification is, at best, a kludge to compensate for something else - probably the rubber compound. IIRC, the factory used natural rubber and most of the 914Rubber seals are silicone. Silicone is probably an improvement for most of the seals but maybe not so much for something that needs to act as a squeegee?

In the mean time, the windows roll up and down pretty smoothly with a fresh coat of wax on them. I'll probably just see how they work over time. I'm hoping after a little time in the sun, they stiffen up enough that they don't grab and roll. I'm also thinking about trying to rub a little graphite on them to see if I can get it impregnated in the rubber to act more like a wiper blade.
Mine wanted to curl too when they were new and freshly installed, just lubricated them with water and rolled the window up and down a few times over a period of time and they kinda "wore in" No issues after that.
QUOTE(falcor75 @ Mar 9 2020, 07:00 AM)
Mine wanted to curl too when they were new and freshly installed, just lubricated them with water and rolled the window up and down a few times over a period of time and they kinda "wore in" No issues after that.
Cool! Exactly what I was hoping to hear! Thanks!
Several tasks in the works lately.
One nice thing about having black targa trim is that it opens more options for restoring. One of these had the ubiquitous hole drilled in the base to replace the special mounting plate with a screw. I had just enough of the fiber reinforced filler to patch these up and a little glazing compound to smooth things over.
Click to view attachment
Mounting these things is no treat. That little 5mm stud for the base bracket is WAY up there in the fender.
Click to view attachment
While I was in there, I had to admire the jewel-like look of the door striker mounting plate from inside the fender. A shame nobody will see it and it will never look like this again.
Click to view attachment
While the wheel was off, I installed the cotters in the axle castle nuts.
Click to view attachment
After a LOT of cussing, I figure out the best way to go at it is to put the bracket on without the trim and just get that little bastard of a nut started so the bracket is loose. Then slide the trim carefully onto the bracket. It isn't without risk though. For some reason the edge of the driver's side trim where the bracket slides in was thin as foil and tore open.
Click to view attachment
That required a bit of in situ repair. Again, I couldn't get away with this with bright work.
Click to view attachment
Click to view attachment
And an overview of this masterpiece.
Click to view attachment
Your black trim looks very nice. And I usually don't like it blacked out but yours really sets off nicely against that wonderful silver paint.

Next item, the driver's window. This one was in a lot better shape than the passenger window, but still needed some help. There were a lot of deep scratches along the top of the glass. There were also several long scratches in the middle of the view field from rolling the window with gritty shit on the scrapers. Couldn't get the long scratches to show in photos but they were pretty nasty. Here are the scratches along the top.
Click to view attachment
I went through the same drill as before but less of it. Luckily, the inside of the glass was pretty clean so it just got polished and not ground. I also discovered that after grinding with the fine discs, I could go straight to polishing with cerillic oxide and skip the two grades of Chemical Guys polish. Here's a shot showing the difference between medium and fine grind.
Click to view attachment
Cussed the hell out of installing the quarter glass and window again. I'm glad that PITA job is done! Look closely. You are looking through the freshly ground and polished window
Click to view attachment
Proof there is a window there.
Click to view attachment
Click to view attachment
BTW, it took about eight hours for each side to adjust those windows, but they mate with the seals PERFECT. Couldn't be happier about that because I hate leaks and wind whistle.
Here's another little item. I mentioned earlier that I'd say more about the fresh air outlet vents in the doors. Lesson learned the HARD way. When you install the RD door jambs, you REALLY need to fit those vent covers BEFORE painting the car. I discovered the lips needed to be hammered back to adjust the opening so the plastic vents would fit. There was not way to do that without damaging the paint. Here's the worst of them. At this point I have coated most of the damage with epoxy primer but remembered to grab the camera to show the chip flaked off that extends beyond the vent cover.
Click to view attachment
I used a touch-up brush to dab on some base coat over the primer, followed by clear.
Click to view attachment
Then the cover pops on. Sure, you can still see it if you look for it, but it won't be noticeable, and if anybody does, I'm going to call them a dick.
Click to view attachment
Click to view attachment
I went through the same drill as before but less of it. Luckily, the inside of the glass was pretty clean so it just got polished and not ground. I also discovered that after grinding with the fine discs, I could go straight to polishing with cerillic oxide and skip the two grades of Chemical Guys polish. Here's a shot showing the difference between medium and fine grind.
Click to view attachment
Cussed the hell out of installing the quarter glass and window again. I'm glad that PITA job is done! Look closely. You are looking through the freshly ground and polished window
Click to view attachment
Proof there is a window there.
Click to view attachment
Click to view attachment
BTW, it took about eight hours for each side to adjust those windows, but they mate with the seals PERFECT. Couldn't be happier about that because I hate leaks and wind whistle.
Here's another little item. I mentioned earlier that I'd say more about the fresh air outlet vents in the doors. Lesson learned the HARD way. When you install the RD door jambs, you REALLY need to fit those vent covers BEFORE painting the car. I discovered the lips needed to be hammered back to adjust the opening so the plastic vents would fit. There was not way to do that without damaging the paint. Here's the worst of them. At this point I have coated most of the damage with epoxy primer but remembered to grab the camera to show the chip flaked off that extends beyond the vent cover.
Click to view attachment
I used a touch-up brush to dab on some base coat over the primer, followed by clear.
Click to view attachment
Then the cover pops on. Sure, you can still see it if you look for it, but it won't be noticeable, and if anybody does, I'm going to call them a dick.
Click to view attachment
Your black trim looks very good indeed. But it reminds me that I will be undoing blackened trim on mine in a few months.
Last one for this update. Needed to do something about this cushion.
The only cushion recover kit I could find was through AA. I had reservations but ordered it anyway. It's not like me to be nit picky but this thing was a bit of a disappointment. It's actually good quality and well made, but the vinyl doesn't match OEM. The vinyl that 914Rubber uses is a dead on replica of OEM and it is hard to tell the difference with them side by side. This cushion fabric has a noticeably flatter finish that stands out against the glossier original material. Hard to see in the photo, but it is quite noticeable.
Click to view attachment
That really wasn't going to do so it was time to improvise. Seems like I've been polishing everything lately so why not try polishing vinyl? I sprayed the fabric down with 303 Protectant and then ran my DA polisher over it with Chemical Guys finest #38 polish and a fine polish pad. That helped quite a bit but still doesn't quite have the sheen of the OEM material. I not a fan of "good enough" products. The 303 hadn't completely dried in this shot so it looks better here than after it dried.
Click to view attachment
I was hoping the sheen might improve after stretching the vinyl on and a good steaming. First, I needed to replacy that split foam.
Click to view attachment
I found a treasure in the map pocket. A photo of Elizabeth's grandmother taken not long before she died. We must have driven the Porsche the last time we visited her and slipped the photo in the pocket and forgot about it.
Click to view attachment
Click to view attachment
I'm happy to report that stretching the vinyl on followed but shrinking with the steam iron did improve the sheen. It still isn't a perfect match like the 914Rubber fabric but you have to look really close to tell it. The interior is beginning to look respectable.
Click to view attachment
Click to view attachment
The only cushion recover kit I could find was through AA. I had reservations but ordered it anyway. It's not like me to be nit picky
but this thing was a bit of a disappointment. It's actually good quality and well made, but the vinyl doesn't match OEM. The vinyl that 914Rubber uses is a dead on replica of OEM and it is hard to tell the difference with them side by side. This cushion fabric has a noticeably flatter finish that stands out against the glossier original material. Hard to see in the photo, but it is quite noticeable.Click to view attachment
That really wasn't going to do so it was time to improvise. Seems like I've been polishing everything lately so why not try polishing vinyl?
I sprayed the fabric down with 303 Protectant and then ran my DA polisher over it with Chemical Guys finest #38 polish and a fine polish pad. That helped quite a bit but still doesn't quite have the sheen of the OEM material. I not a fan of "good enough" products. The 303 hadn't completely dried in this shot so it looks better here than after it dried.Click to view attachment
I was hoping the sheen might improve after stretching the vinyl on and a good steaming. First, I needed to replacy that split foam.
Click to view attachment
I found a treasure in the map pocket. A photo of Elizabeth's grandmother taken not long before she died. We must have driven the Porsche the last time we visited her and slipped the photo in the pocket and forgot about it.
Click to view attachment
Click to view attachment
I'm happy to report that stretching the vinyl on followed but shrinking with the steam iron did improve the sheen. It still isn't a perfect match like the 914Rubber fabric but you have to look really close to tell it. The interior is beginning to look respectable.
Click to view attachment
Click to view attachment
QUOTE(tygaboy @ Mar 17 2020, 07:47 PM)
Your black trim looks very nice. And I usually don't like it blacked out but yours really sets off nicely against that wonderful silver paint.
QUOTE(bkrantz @ Mar 17 2020, 07:53 PM)
Your black trim looks very good indeed. But it reminds me that I will be undoing blackened trim on mine in a few months.
Thanks guys. I do like the black against the silver. It's funny how the bright work looks better on most 914 colors but there are those few where the black looks really nice. I think Olympic blue is a color that shows either trim finish well.
Nice job on that center cushion Brent.
You've reclaimed your title of chief mad scientist. Ha
You've reclaimed your title of chief mad scientist. Ha
Still fantastic work. Amazing - and it reads like a great novel...ups, downs, triumphs, tragedies and comedies ("Sure, you can still see it if you look for it, but it won't be noticeable, and if anybody does, I'm going to call them a dick.") - I literally laughed out loud.
ANYone interested in turning a wrench on a 914 needs to read this thread - SO many tips.
ANYone interested in turning a wrench on a 914 needs to read this thread - SO many tips.
Ha! Thanks again guys. Very high praise indeed. I still have battery envy and reading that sentence that Brian quoted hurts to see all the comma splices... but yeah, I'll do it
Also, I'm happy to report that @falcor75 was spot on about the window scraper. I didn't do much else with it but has now stiffened up just enough for smooth window operation. The driver's side was never as much of a problem for some reason. Makes me wonder if there is something left behind from the molding process that evaporates out to make them a little less sticky. Anyway, I'm very happy.
Also, I'm happy to report that @falcor75 was spot on about the window scraper. I didn't do much else with it but has now stiffened up just enough for smooth window operation. The driver's side was never as much of a problem for some reason. Makes me wonder if there is something left behind from the molding process that evaporates out to make them a little less sticky. Anyway, I'm very happy.
I was right? I mean, of course I was right !
(can I have that in writing to show my Wife when needed?)

(can I have that in writing to show my Wife when needed?)
I've got a lot of irons in the fire. I got quite a bit done over the weekend despite having a rather large obstacle to work around.
Click to view attachment
I cut some plastic for the door vapor barriers. After quite a bit of searching, I found the right stuff to stick them to the doors at the local crafts store. Krylon Easy-Tack is supposed to stay permanently tacky and allows repositioning. It matches the adhesive that was used on all the new cars I've had.
Click to view attachment
I never knew what the flaps on door vapor barriers were for, but someone on the Pelican forum said they are to guide condensation into the door to drain to the outside rather than drip inside the door and ruin the cards.
Click to view attachment
Click to view attachment
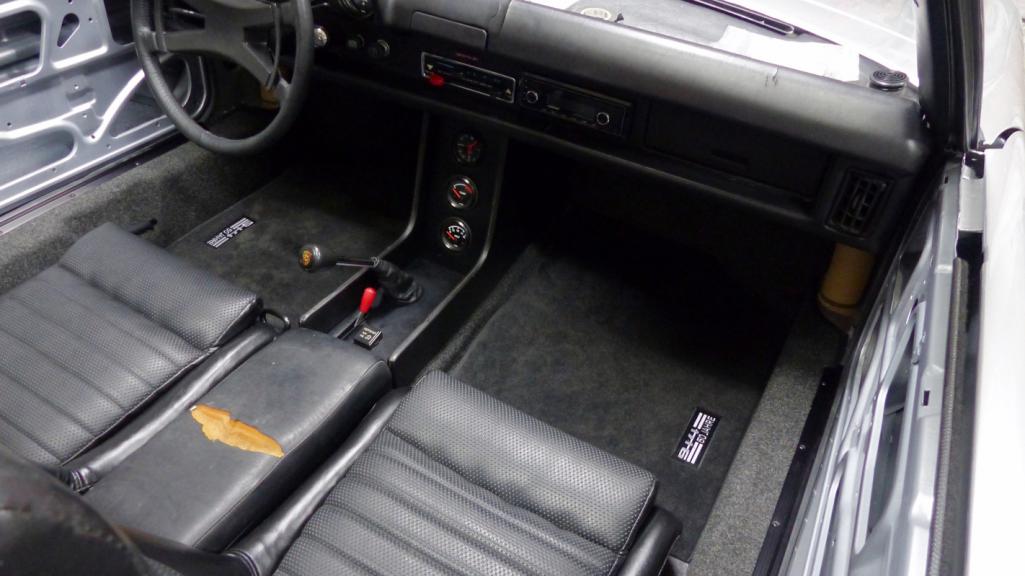
I've got a few other projects in the works I'll report on when they are done. Here's a peek inside the center console. It continues to amaze me just how far ahead of their time these cars were. How the hell did they know to include a USB charger decades before they were invented? Amazing. 
Click to view attachment
Click to view attachment
Click to view attachment
I cut some plastic for the door vapor barriers. After quite a bit of searching, I found the right stuff to stick them to the doors at the local crafts store. Krylon Easy-Tack is supposed to stay permanently tacky and allows repositioning. It matches the adhesive that was used on all the new cars I've had.
Click to view attachment
I never knew what the flaps on door vapor barriers were for, but someone on the Pelican forum said they are to guide condensation into the door to drain to the outside rather than drip inside the door and ruin the cards.
Click to view attachment
Click to view attachment
I've got a few other projects in the works I'll report on when they are done. Here's a peek inside the center console. It continues to amaze me just how far ahead of their time these cars were. How the hell did they know to include a USB charger decades before they were invented?
Amazing. Click to view attachment
Click to view attachment
I've been using this little engineering masterpiece to prop open the frunk. Can you believe I made that myself?
Click to view attachment
I finally got around to refurbishing the springs. I rigged up this crude spring stretcher to open them just enough to be able to clean and paint. I would have made it prettier if it wasn't just going to be a one time use device.
Click to view attachment
After media blasting...
Click to view attachment
SEM trim paint is supposed to be flexible so should work well for the springs. Gloss matches the original finish.
Click to view attachment
And installed.
Click to view attachment
Click to view attachment
Click to view attachment
I finally got around to refurbishing the springs. I rigged up this crude spring stretcher to open them just enough to be able to clean and paint. I would have made it prettier if it wasn't just going to be a one time use device.
Click to view attachment
After media blasting...
Click to view attachment
SEM trim paint is supposed to be flexible so should work well for the springs. Gloss matches the original finish.
Click to view attachment
And installed.
Click to view attachment
Click to view attachment
Hi Brent, nice work... How did you take of the frunk springs...?
Just installed mine using a pair of visegrip pliers, grabbing just behind the hook where is it straight, and pull.
Hi Brent, nice work... How did you take of the frunk springs...?
QUOTE(kroelofsen @ Mar 24 2020, 05:03 AM)
Hi Brent, nice work... How did you take of the frunk springs...?
3 things.
-Love the dog, he is obviously enjoying the car.
-Nice add with the USB - modern problems require modern solutions.
-smart idea to spread and paint the frunk springs.
-Love the dog, he is obviously enjoying the car.
-Nice add with the USB - modern problems require modern solutions.
-smart idea to spread and paint the frunk springs.
@bbrock I can't believe how far ahead of me you are now.. Looks very nice..
QUOTE(bbrock @ Mar 24 2020, 12:24 AM)
I rigged up this crude spring stretcher to open them just enough to be able to clean and paint.
Brent, I know that you can appreciate the fact that Chimps & Apes use tools in the wild.
However, the ability to make complex tools and solve complex problems is part of what really seperates humans from chimps. Likewise, humans have the more refined ability to pass along the learned knowledge much more quickly than ape's and chimps. After all isn't that why Al invented the Interwebz, or was that just for sending cute kitten pictures? I digress.
Love the spring puller.
Thanks for helping to move me up the evolutionary ladder, just a bit farther from your average ape smashing a nut with a rock!Click to view attachment
QUOTE(Specracer @ Mar 24 2020, 03:46 AM)
Just installed mine using a pair of visegrip pliers, grabbing just behind the hook where is it straight, and pull.
QUOTE(kroelofsen @ Mar 24 2020, 05:03 AM)
Hi Brent, nice work... How did you take of the frunk springs...?
Yep, I used a shepard's hook shaped pick to pull the springs with brute force to get them on and off. Of course, you have to set the e-brake and/or block the wheels or you'll just be dragging the car around by the spring.
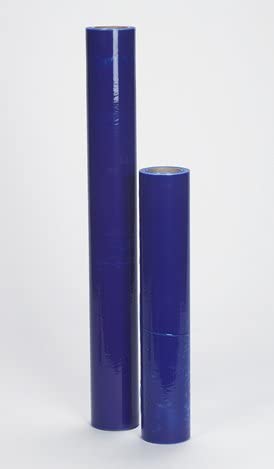
You have some vinyl sheet on the side of the car, can you tell me where you got it?
I've got a lot of irons in the fire. I got quite a bit done over the weekend despite having a rather large obstacle to work around.
Click to view attachment
I cut some plastic for the door vapor barriers. After quite a bit of searching, I found the right stuff to stick them to the doors at the local crafts store. Krylon Easy-Tack is supposed to stay permanently tacky and allows repositioning. It matches the adhesive that was used on all the new cars I've had.
Click to view attachment
I never knew what the flaps on door vapor barriers were for, but someone on the Pelican forum said they are to guide condensation into the door to drain to the outside rather than drip inside the door and ruin the cards.
Click to view attachment
Click to view attachment
I've got a few other projects in the works I'll report on when they are done. Here's a peek inside the center console. It continues to amaze me just how far ahead of their time these cars were. How the hell did they know to include a USB charger decades before they were invented? Amazing.
Click to view attachment
Click to view attachment
QUOTE(bbrock @ Mar 23 2020, 09:39 PM)
I've got a lot of irons in the fire. I got quite a bit done over the weekend despite having a rather large obstacle to work around.
Click to view attachment
I cut some plastic for the door vapor barriers. After quite a bit of searching, I found the right stuff to stick them to the doors at the local crafts store. Krylon Easy-Tack is supposed to stay permanently tacky and allows repositioning. It matches the adhesive that was used on all the new cars I've had.
Click to view attachment
I never knew what the flaps on door vapor barriers were for, but someone on the Pelican forum said they are to guide condensation into the door to drain to the outside rather than drip inside the door and ruin the cards.
Click to view attachment
Click to view attachment
I've got a few other projects in the works I'll report on when they are done. Here's a peek inside the center console. It continues to amaze me just how far ahead of their time these cars were. How the hell did they know to include a USB charger decades before they were invented?
Amazing. Click to view attachment
Click to view attachment
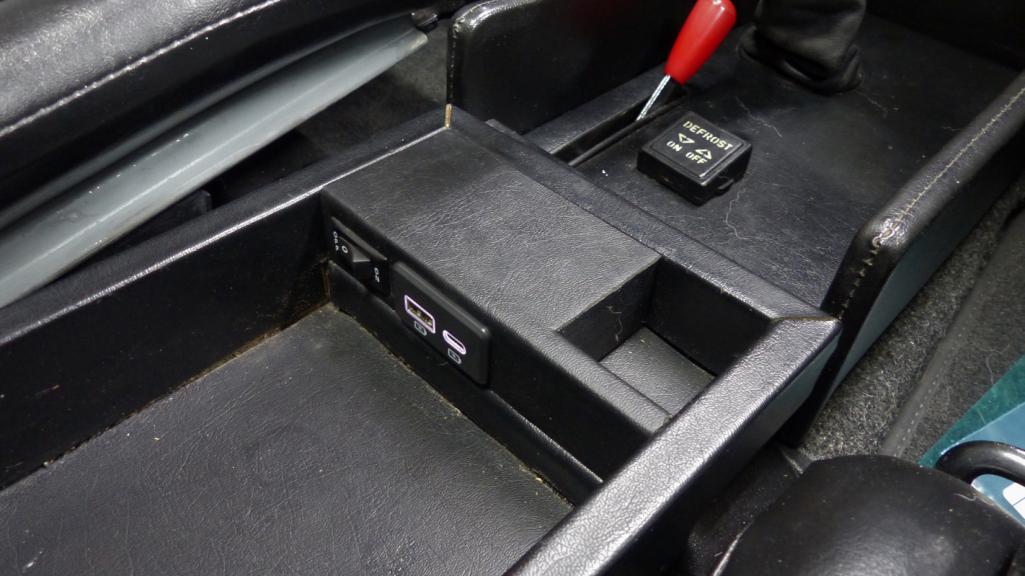
Here's a few more pics of the USB charger in case anyone is interested in doing this. I chose a Molex charger ordered from Digikey. This one has a USB-A and USB-C port and is capable of fast charging. There are a few different options for ports.

I made the box by gluing up 1/4" birch plywood and 1/8" hard board. The unit just press fits into the console so it can be easily reversed.
Click to view attachment
I harvested fabric from the bottom of the original console cushion for a perfect match - unlike the new AA cushion cover that continues to piss me off.
Click to view attachment
The only mod to the console is a 1/4" hole drilled through the corner for wires to pass. Even there, I pulled back the vinyl so it was unharmed and the hole could be filled with a mixture of sawdust and wood glue if somebody ever wanted to restore the sacred pristine original. Power is supplied by a 22g cable. Molex pins were crimped on the charger end, then fished into the console, then a molex plug clipped on.
Click to view attachment
The other end got 1/4" AMP dual gender connectors to plug into the volt meter for power take-off.
Click to view attachment
I included a cubby to store USB adapters and short cables. The rocker switch on the side will be wired as a manual antenna override. My head unit raises the antenna whenever power is switched on to the unit regardless of the music source. That is good from the standpoint of powering up an amp when the unit is on, but means the antenna will be up even when streaming music via Bluetooth. This rocker will let me lower the antenna when it isn't needed.
QUOTE(ctc911ctc @ Mar 24 2020, 06:53 AM)
You have some vinyl sheet on the side of the car, can you tell me where you got it?
Oh yeah, I keep forgetting to mention this. I bought this stuff based on a tip from another thread and love it. Fantastic stuff! https://www.amazon.com/gp/product/B01MZ102D...=UTF8&psc=1

QUOTE(Superhawk996 @ Mar 24 2020, 06:12 AM)
However, the ability to make complex tools and solve complex problems is part of what really seperates humans from chimps.
Ok.. I was VERY close to making this statement.
Brent, friend: If I wasn't aware of your cabin-bound-until-June condition, or the desire to drive it off the lot and not futz with it anymore, I would think you were making projects to prevent completion.
It's going to be a fun summer.
QUOTE(dr.tim @ Mar 24 2020, 07:37 AM)
QUOTE(Superhawk996 @ Mar 24 2020, 06:12 AM)
However, the ability to make complex tools and solve complex problems is part of what really seperates humans from chimps.
Ok.. I was VERY close to making this statement.
Can't help but philosophizing as a biologist a bit here. During my career, I've seen the line dividing humans from everything else moved several times:
- humans are the only species that uses tools - NOPE. Lots of species do.
- humans are the only species with language - CRAZY. It's common in nature.
- humans are the only species that transfers knowledge and culture from one generation to the next. WRONG.
- humans are the only species that make tools. NEIN
Okay, humans are technologically advanced well beyond any other species on earth, but at this point, the only thing I'm willing to say about the difference between me and bonobos is about 1.3% of my DNA - oh, and I swore off picking bits of food out of my poop a couple years ago.

[Edit: and I'll add that the bar on other species making "complex" tools to solve "complex" problems keeps changing. The problem solving ability of species from crows to weasels is mind-boggling.]
QUOTE
Brent, friend: If I wasn't aware of your cabin-bound-until-June condition, or the desire to drive it off the lot and not futz with it anymore, I would think you were making projects to prevent completion.
It's going to be a fun summer.
And there are a few more of these projects in the hopper. You got the secret sneak preview of one of them. I can only say, she'll be done when she is done. The punch list is getting shorter though.

QUOTE(bbrock @ Mar 24 2020, 11:01 AM)
Okay, humans are technologically advanced well beyond any other species on earth, but at this point, the only thing I'm willing to say about the difference between me and bonobos is about 1.3% of my DNA - oh, and I swore off picking bits of food out of my poop a couple years ago.
[Edit: and I'll add that the bar on other species making "complex" tools to solve "complex" problems keeps changing. The problem solving ability of species from crows to weasels is mind-boggling.]
I know virtually nothing about what DNA consists of biologically or how it is put together in all the various DNA sequencnes but that 1.3% sure must be important.
I ain't never seen me no Bonobo use a welder to weld up a spring puller.

I do agree with you though, the animal kingdom continues to amaze me. I wish I could spend more time in it though we have our own kind of animal kindom here in Detroit. Mostly consits of folks like me . . . Rats stuck running on the corporate Hamster Wheel!
QUOTE(Superhawk996 @ Mar 24 2020, 09:59 AM)
I ain't never seen me no Bonobo use a welder to weld up a spring puller.

This is a "lo-fi" version of our main content. To view the full version with more information, formatting and images, please click here.