Back Into Hell I had high hopes of finishing up welding in bits on the floor pan and reinstalling all the parts in the hell hole over the weekend. Things took a lot longer than expected, so I didn't get that far. But still made some good progress.
First up was welding on the pedal support. That was pretty straightforward. The most time consuming part was mixing and applying epoxy primer to the internals of the pedal support, seat hinge brackets, and e-cable guide.
Click to view attachmentIt's been a LONG time since this area of the floor wasn't Fred Flintstone.
Click to view attachmentNext up was welding in the seat hinge brackets. That turned out to be a bigger PITA than expected, and chewed up a lot of time. It didn't go well either. Look close and you might be able to see the inner bracket on the passenger side got cocked when I screwed it in.
Click to view attachmentI'm blaming my cramped f'ing garage because to get the car level, I had to work with my ass smashed against a workbench against the wall. There just isn't room in there. I should have climbed inside the tub to get a better viewing angle as I welded it in. Anyway, the seat base bolts in but doesn't allow for any adjustment on the hinge bolts. So I'm going to have to tear that one out and try again. I hope I can salvage the bracket and hinge because those things are expensive. $50 to replace the bracket and hinge.
The final floor task was zapping in the e-brake cable guide. I did have to trim it down a little to be the exact size as the original, but installation was uneventful.
Next I moved to perhaps the most stressful item on the whole project - welding in the suspension console. With the new floor pan, I now had the landmark needed to measure for placement of the outer console. Factory spec is to insert a long bolt in the rear outer console hole that protrudes 182mm from the boss.
Click to view attachmentThen measure from the center of the bolt to the center of the front edge of the rear most form bead on the floor. The RD form bead edges aren't crisp like on the original floor, and I had replaced the floor, so I didn't go exactly by the factory spec. Instead, X marked the spot at the center of the bead.
Click to view attachmentThen I measured from the drivers side console to get my reference measurement and positioned the passenger console to match that distance. Factory spec is 846mm and my reference measurement came in at 848mm. That seems astonishingly good considering the whole floor was replaced and the bead reference location is fuzzy at best.
Click to view attachmentAs extra precaution, I also measured from the outer edge of the console bolt boss to the edge of the rear sway bar mount bolt hole and made sure the measurements were the same for both consoles.
Click to view attachmentThen I just tacked the console in. I didn't take any progress pics because I was too stressed trying to get it right.
Next was the outer console. I used Jeff Hail's measurements to make sure the distance between consoles was right. Jeff said to triangulate from the pivot pin holes to the center hole on the firewall. I couldn't figure out what center hole he was referencing, so I measured from the driver's side to the center of the rear edge of the floor pan and matched that on the other side. After that was tacked in, I mounted the crusty trailing arm to make sure everything fit and I had adjustment for alignment. It looked good, but I won't know how badly I screwed this up until alignment time I guess.
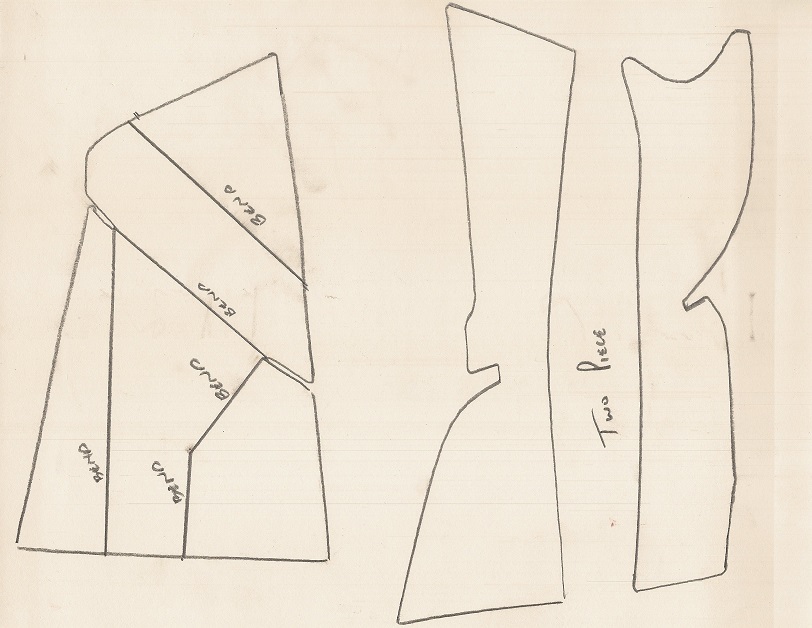
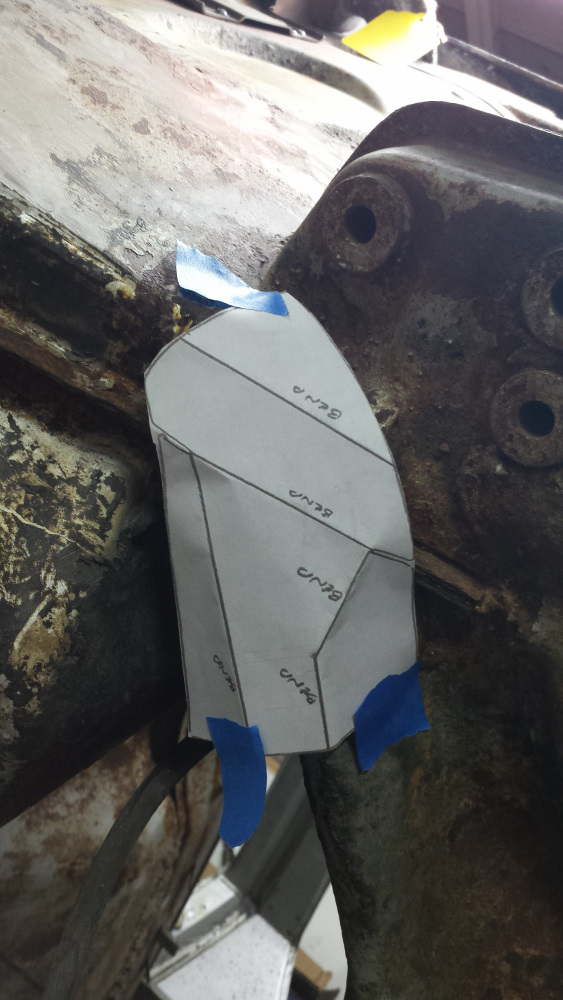
Click to view attachmentLast was to weld on the MiddleMotors/914Rubber console gussets.
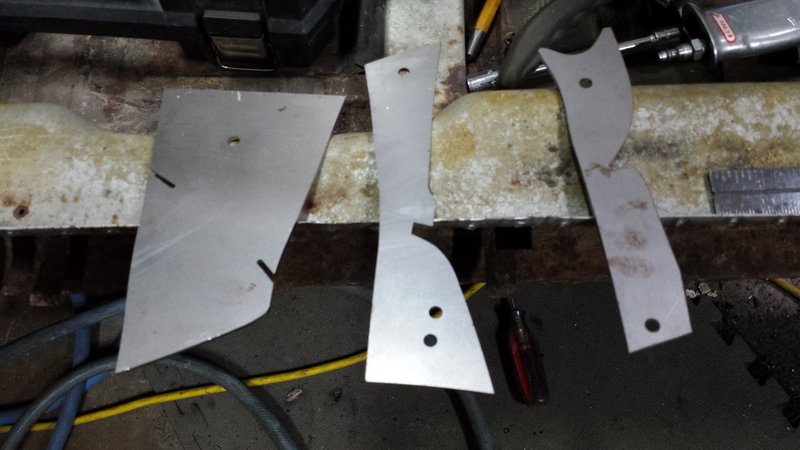
It took a bit to figure out since there are three pieces in the gusset kit, but only two gussets. But I figured out Cary designed one of the gussets as two pieces to ease installation. I had to grind away a little where the gusset crosses the long flange to keep it from crowding the outer console mount boss. But after welding and grinding, it looks pretty close to what the factory did.
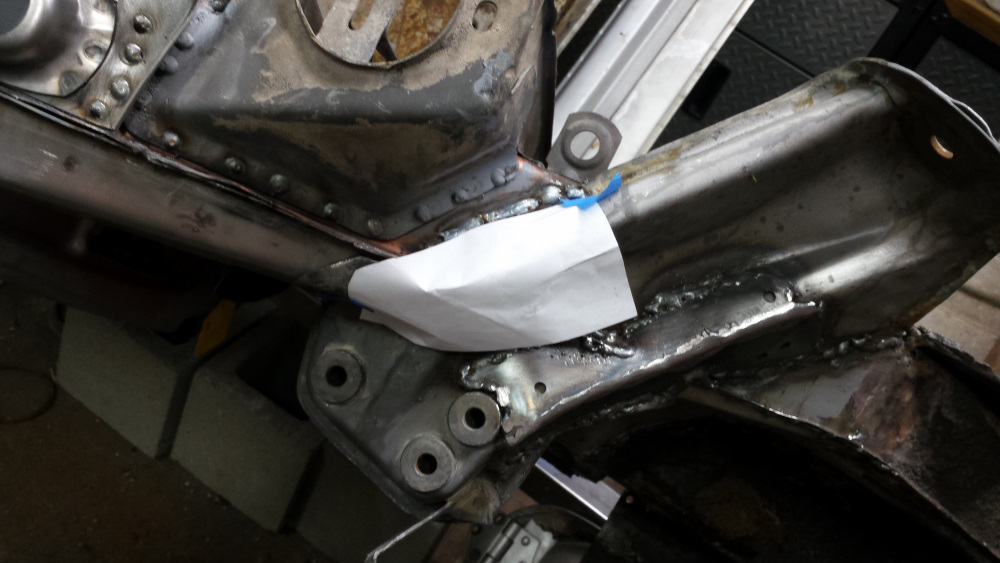
Click to view attachmentClick to view attachmentI just finished this tonight. When I installed these, I thought the holes were weep holes. But now I'm thinking they were intended to plug weld to position the pieces before hammering and bending. Maybe Cary will chime in, but I think I need to weld those in and drill a weep hole in the location the factory piece had.
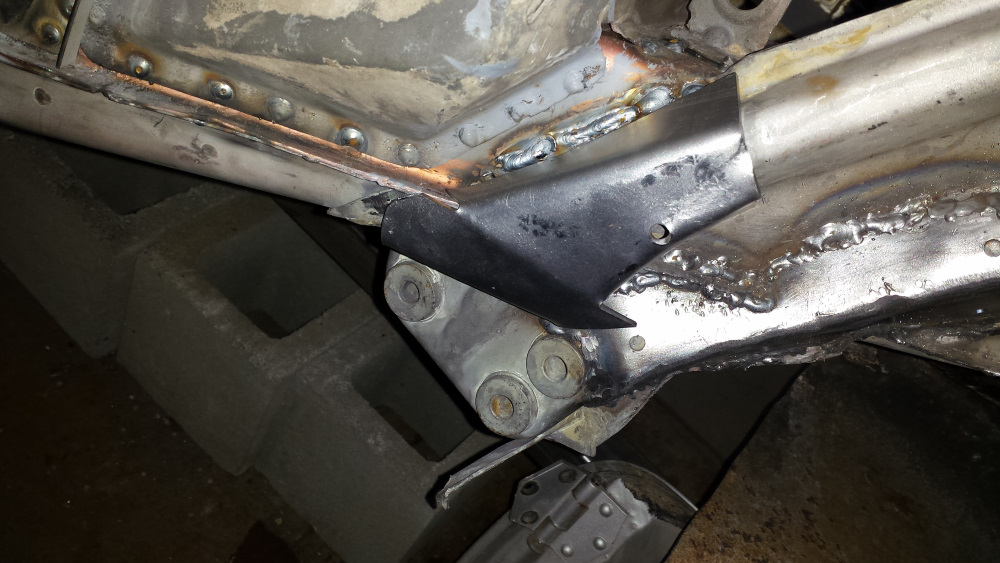
Finally, the other side. This was a real head scratcher. After fiddling with it and comparing to the other side, I'm fairly certain the slots for the long flange are cut wrong on this piece. I'm pretty sure this is the correct orientation of this piece.
Click to view attachmentIt won't be a big deal to close those slots and cut new ones, but I want to get confirmation from the designer before moving forward. So that's where I left it tonight.
Here's a golden eagle that was hanging out on a deer carcass just a couple hundred yards from our driveway last Friday.
Click to view attachment


 "eye" and "drill" are not two words that should be in the same sentence! Luckily, no such procedure for me. Just numbed it up and used a micro-spatula to scoop it off.
 .
. Doc says I should be at 90% by Friday. If they'd just send me home with a bottle of that Lidocaine for numbing, I'd be at 100% right now. Still have to laugh at the absurdity of the whole thing.

 Luckily, a quick rinse with saline got it out without doing more damage to my already traumatized cornea.