QUOTE(Dion @ Apr 23 2018, 09:20 AM)

I wish my compressor could handle the air tools.
That angle grinder is so much more compact than the electric stuff.
Okay, I've toyed with going into tools more but decided not to. But now you have forced my hand

So here's a little of what I've learned about tools that suck, and tools that don't.
Tools that Don't SuckMini angle grinder - Hands down that grinder you mentioned tops the list. I can't imagine doing this project without this bad boy. It is a cheap, $15 HF jobbie. Being HF, quality control isn't good and the first one I bought didn't work for crap. I exchanged it for another (same model) and it has run like a champ ever since. Love this tool!
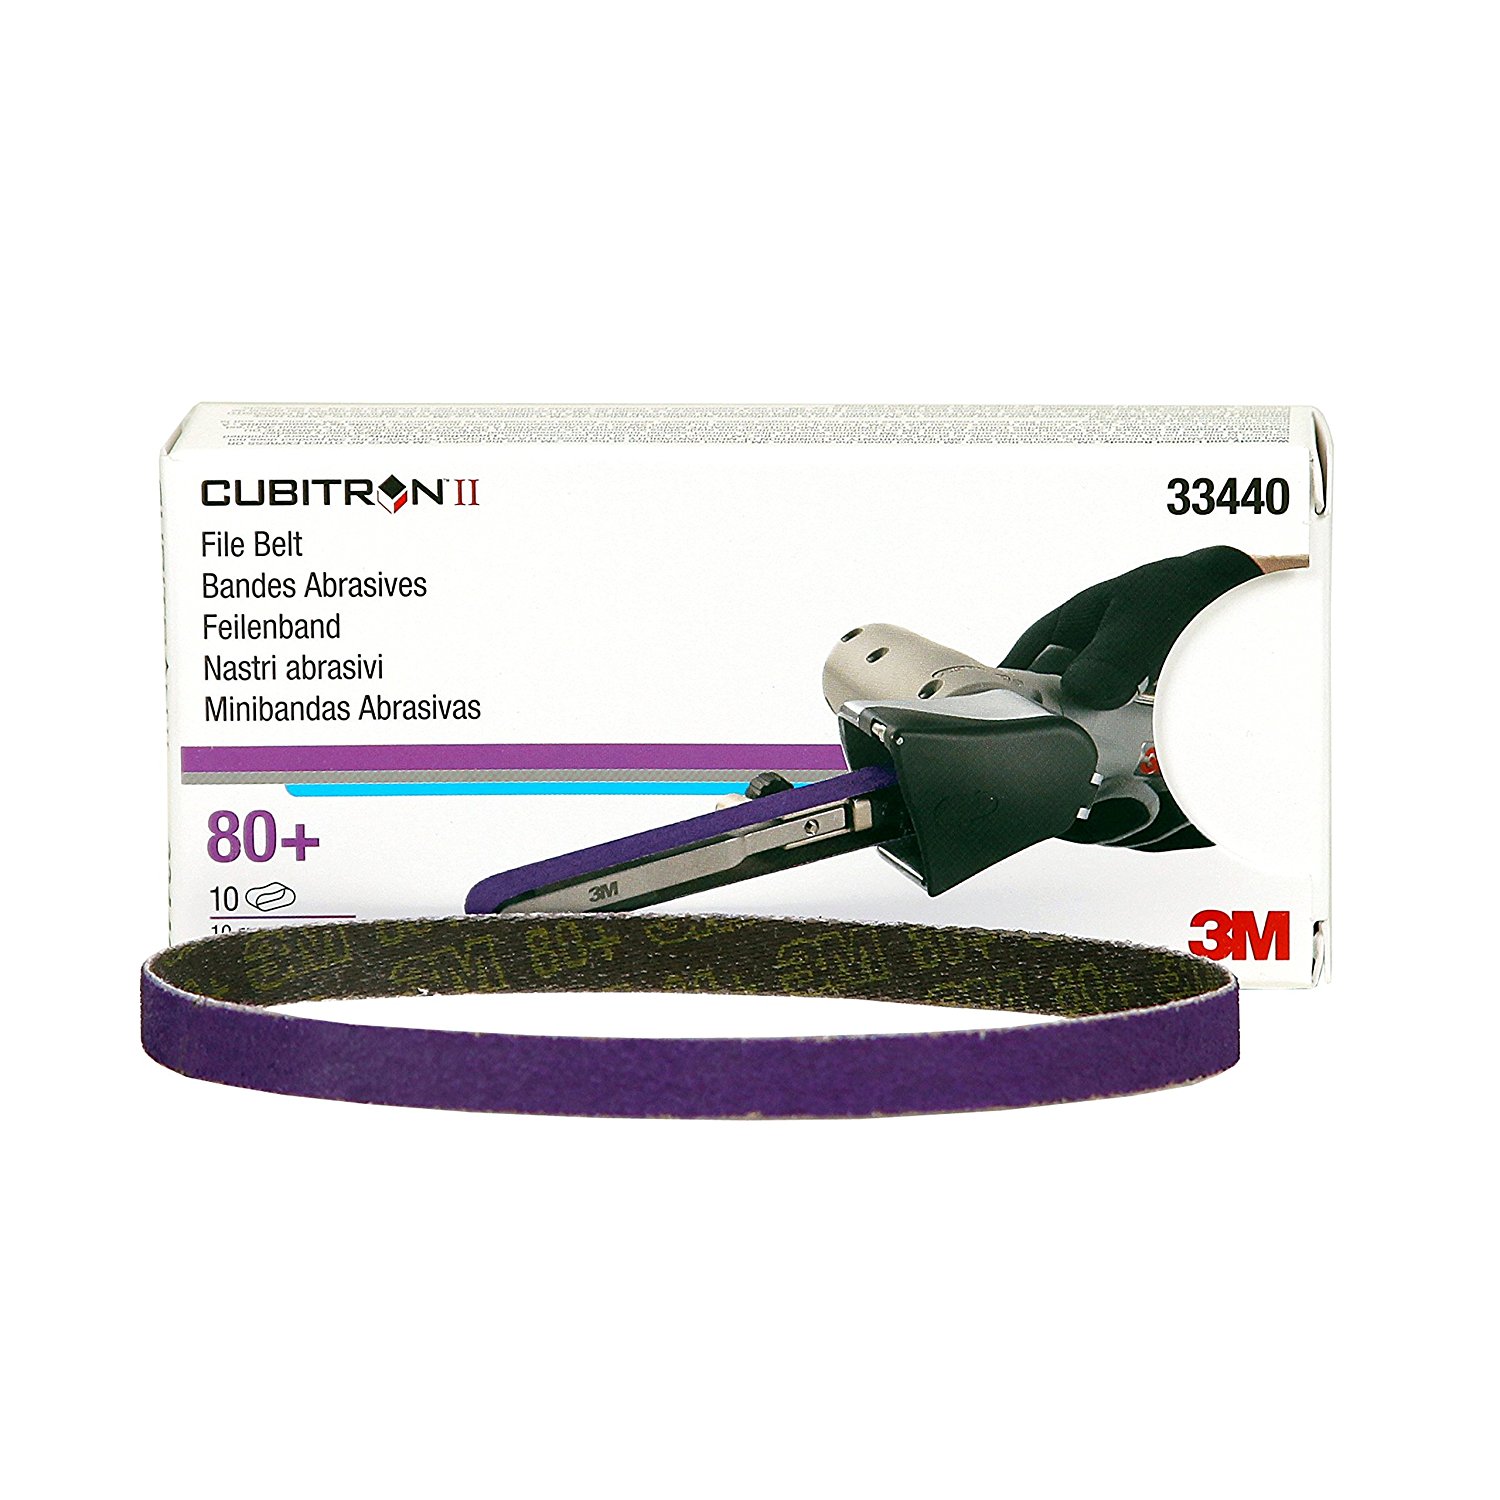
3/8" belt sander (air file) - I came to this one late and wish I'd bought it much earlier in the project. Boy what a fantastic tool for reaching in where nothing else goes. Again, cheap HF and I had low expectations because found several bad reviews on youtube. But they were a few years old and I've noticed on other tools that HF has addressed issues complained about on youtube. Maybe coincidence, but my file works great so far as long as you put a good quality belt on it.
Makita grinder - I have abused (and I mean ABUSED) this little 4" grinder for over 30 years now and it just keeps going. The real standout is that you can still get parts. I think it is criminal how tool companies have been bought up and chopped into pieces, leaving owners of otherwise good tools with no access to replacement parts. Even sacred Delta has been fed to the dogs. Makita seems one of the rare survivors that still offers parts for old tools. Again, can't imagine this project without the grinder. My only complaint being that it is a 4" which I prefer, but is a size that has fallen out of favor over the years which leaves you having to cobble adapters to use 4-1/2" parts on it. I've several times decided to just add a 4-1/2" to the arsenal to save time changing attachments, but then the CSOB within kicks in.
Tools That SuckDeVilbiss air compressor - I bought my 60 gal./5 HP unit barely used on Craigslist and thought with the DeVilbiss name, it would be good. Turns out it is just a rebranded Porter-Cable and I've had such horrible luck with that brand's woodworking tools that I've sworn off of it. This is an oil-less compressor and the basic design is fine, but all the ancillary pieces are cheap crap. I immediately had to replace several fittings that failed. The biggest PITA is that the cheap pressure switch has no adjustment for cut on and cut off. The cut off is set too high which leaves the compressor running on and on as it fights to get that last 1 lb. of pressure. I need to modify it so I can set it one pound lower which would cut the time it runs by 2/3rds.
Air chucks - I can't stand air chucks that leak, but where do you find good ones? I've tried several from local sources, they all wind up hissing after a few weeks of use.
Kobalt air tools - I've been very impressed with Lowe's Kobalt brand hand tools, so when my ancient Campbell-Hausfield die grinder finally crapped out, I though the Kobalt would be a step up from HF for a tool a put a lot of wear and tear on. I hate this tool. A major peeve of my are safety triggers that don't work and ultimately make the tools dangerous. This die grinder fits that category. The stupid trigger binds and makes pulling the trigger a two-handed operation. Dangerous. It also makes it impossible to smoothly modulate the tool speed with the trigger. I need to rip that safety trigger off. Also, the tool's design makes it difficult to use without blocking the exhaust air with your hand. There goes the power. It gets the job done, but I hate it.
HF air tool oil fogger - It works about as well as you'd expect for the price, like a wet dog turd. It is impossible to adjust to get a "fog." It either doesn't feed oil at all, or it just dumps the oil into the hose to be spewed all over your face, cloths and work. Worthless.
I also splurged today and bought a compact 7000 lumen LED work light tree. I really like the design and am pretty sure it will wind up in the tools that don't suck category. It replaces my old halogen tree that most definitely was a tool that sucked. Whew! Feels good to get that off my chest.
And just as I typed that, the sun popped out and it stopped snowing. It only dumped a foot of wet concrete today. Must be spring!

 I'm living vicariously.
 Different hurdles we faced for sure but in the end you will have the pride of doing it yourself. Congrats on your progress and having the presence of mind to post the picture of fornicating frogs on your thread. Keep up the good work and I shall follow you more closely from now on.


 but then again it is April 1st so we can't trust anything you post.
  That vin was last known to be in MO in 2009. Heres a photo from Glenn Stazak's 914-6 registry site

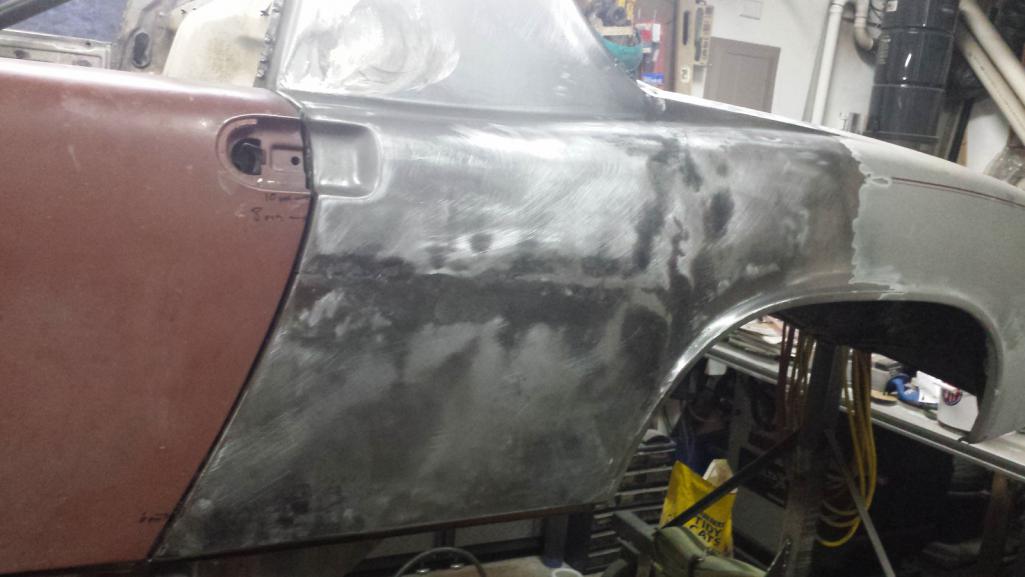
 . But it worked, and with a teeny bit of filler, we'll never know we were there.

 And yes, the expletives did fly.
 I feel a little guilty about them. I actually ordered a set of OM steel budget lines back in November thinking I might install the long line in the tunnel while it was open. My plan was to paint the cheap lines to fake the OEM look. But the lines were put on backorder. Just after Christmas, they emailed to let me know that first half of the shipment from the vendor had just arrived, and mine would be in the second half arriving soon. But it didn't. I contacted them last week just to check status - I'm in no hurry. I learned the vendor had sent SS instead of the kits that were supposed to be OM steel and I was offered my choice of green lines or SS with no upcharge. Amazing - and above what was expected and I told them so, but that a set of green lines would save me having to paint. It is really over the top generous and a good example of why they are such respected vendors.
  It's actually more weird. I spent many days since childhood flipping over huge rocks looking for critters. Yeah, this is the sign of a true nerd.