As the late Jim Morrison might say,
"Come On Baby Hush my Firewall..."The plan was to haul that heavy and bulky firewall pad out of the shed and put it in the car, but it didn't pass inspection. The lead-weighted rubber looked fine and only needed a cleaning, but larger areas of fiber (does this stuff contain asbestos?) were missing.
Click to view attachmentClick to view attachmentLooking at alternatives, I strongly considered the 914Rubber option for replacement pad but quiet is very important to me and I thought this would be an opportunity to upgrade to more modern materials. Searching the many options and weighing them against my tight-ass CSOB criteria, I took the hint from
@76-914 and ordered some of this on ebay for $34 shipped:
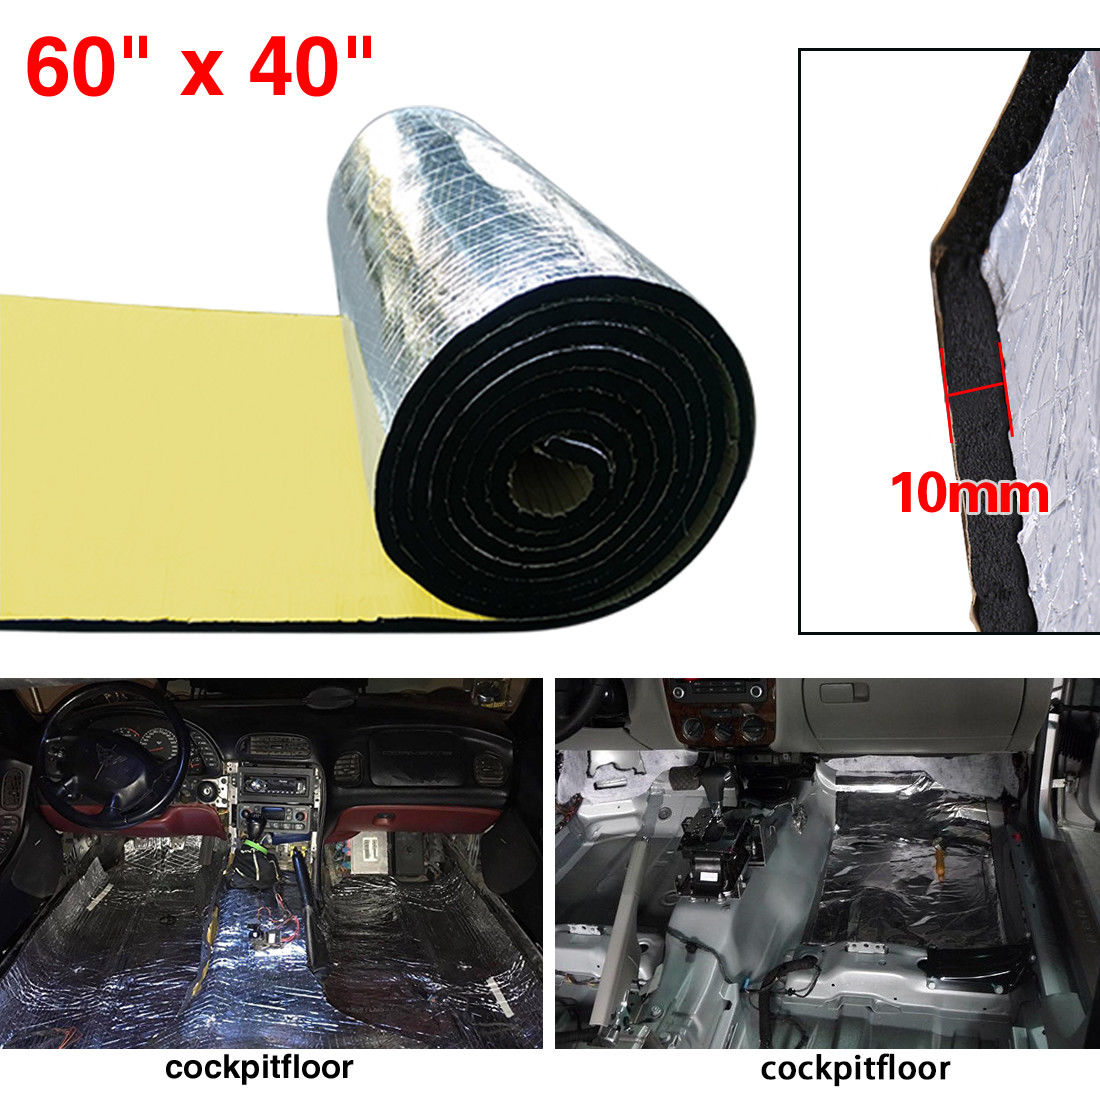
It is very similar to the sample of H-Liner from B-Quiet that I have. The foam on this stuff is more dense, which seems like might be a good thing, but the foil face on the B-Quiet product is more durable as this stuff seems a little on the fragile side. The other difference is that the stuff I bought is 1/3 the price of B-Quiet and got really good reviews on Amazon. Since I wasn't going bone stock, I decided to up the ante and put some of my unused Noico sound deadener to use as a base layer for extra sound absorption. Using the original pad as a template, I cut the materials to match.
Click to view attachment Next step was to install the Noico.
Click to view attachment I've already stated my policy on the Mercury spaceman look. There were seven childhood heros who could rock that look but that's about it. I don't want my engine bay looking like a pot grow room so the open cell liner needed an extra treatment.
Click to view attachment Okay, here's where I screwed up. Despite the cheesy commercials, I've used Flex-Seal to waterproof planters to grow carnivorous plants (have we established that I'm weird?) and knew that it creates a finish texture that is a good match to the original sound pad. But don't use Flex-Seal! Actually, it worked well but it wasn't until it was too late that I realized that rubberized undercoat or body schutz would work just as well and be more cost effective. To match the texture of the original pad, you really need to build up 3-5 coats. Flex-Seal is $13/can and it took a full can just to spray one coat. The CSOB in me decided the one coat was enough even though you can still see the wrinkles of the foil face but looks original-ish.
George (dr914) was nice enough to post the NAPA part # for the correct panel fasteners for installing the pad. The adhesive backing on the pad worked pretty well but I did have to supplement with just a littler contact adhesive in a couple spots where the pad makes sharp bends.
Click to view attachmentIf I'd had my epiphany BEFORE sticking the pad in place, I would have spent more time building up layers to create a thicker coating and match the original more closely. I still think it looks good. Time will tell how durable it is.
Click to view attachment A major complaint of the original pad is the weight. I've read it is 11 lbs. but honestly, it feels heavier. All I know is that it bottomed out the 7 lb. max on the postal scale I had available to measure, but I'll bet it is closer to 15 lbs. So anyway, how does my new version compare? Well, the Noico weighed in at 4.6 lbs. and the open cell pad added a whopping 0.9 lbs for a grand total of about 5.5 lbs. That's a decent weight savings. Of course I don't know yet how it will perform but I can tell you that standing inside the engine bay, the difference was immediately noticeable. The space instantly took on that hushed atmosphere of an insulated space. I'm pretty sure the cabin will be as quiet as a Lexus


 Even better, I reached out to Doug with a couple questions about supplies to buy and he just boxed up his kit and mailed it for me to use what I needed and return the rest. So, it was time to revisit the glove box.

 That turned into a 3 hour puzzle that first required tearing the adjuster from the other piston apart just so I could figure out how the damn thing was put together.
 Yesterday I noticed that the rubber bellows on my NOS brake cable wasn't folding neatly along the pleats. For some reason that bugged the shit out of me so I forced it to fold right and clamped it in place hoping it will develop correct memory. I hope so because I'd hate to have to abandon the project after getting this far.


 I installed the front trunk cable. I have to be honest, I'm not wowed by this piece. The sheath is spot on but the wire cable is soft mild steel compared to the original which is smaller gauge but a very stiff spring steel. To make it work, you have to flood the tube with lubricant. Seems like a stiffer wire would be a better option here. Based on this, I'm not going to use the engine release cable that came in my kit as the original is still in good shape. Important thing is that this cable looks like it will work and it is in sans latch.
 That chip was actually corrosion. I think it will be okay but curious what you smart people think.
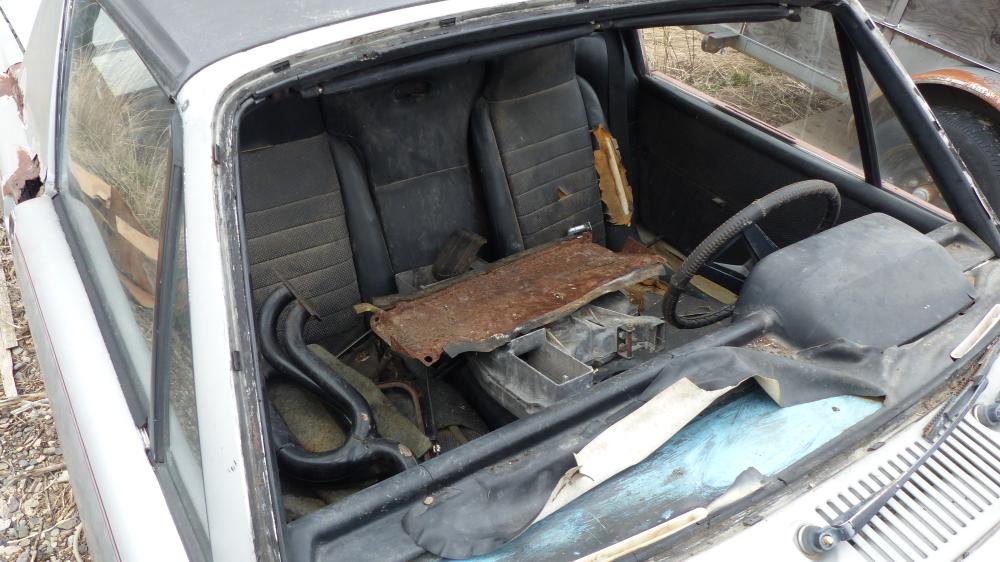


 There is a smear of grease on the inner race side of the cage but the outer race side is bone dry. I mean DRY! How the fuch are they getting away with this?
 The reason it was bugging me is because I put so much grease in that first bearing that grease oozed around the seals and between the inner races when I put it back together. I knew at the time that couldn't be good but just wiped off the grease that oozed out. I just opened that one bearing up enough to wipe some excess out with my finger. I'm happy now.
![popcorn[1].gif](http://www.914world.com/bbs2/style_emoticons/default/popcorn[1].gif)

