QUOTE(KELTY360 @ Jan 31 2019, 07:04 PM) 
Really beautiful work Brent. I can’t believe you actually plan on farting on them.

That blows.

Not planning to, but you know, shit happens.


 I guess I'll jump on the GB for stock springs that 914Rubber has promised.
 I'm actually itching to put that sucker in, but I'd just have to pull it out again when I get back to prepping for paint on the exterior. Right now, the whole dash can be lifted out in a couple of seconds. It seems to be getting heavier though for some reason.
  I guess I'll jump on the GB for stock springs that 914Rubber has promised.
 Sadly, having a dog get skunked has been about a biennial event for us for at least 30 years. It's a tradition that spans 4 dogs, 3 houses, and 2 states. The most epic episode was when our first malamute got skunked in the backyard at 2am Thanksgiving morning just hours before the family was due to arrive for the feast. Now we keep a quart of hydrogen peroxide on hand at all times for the inevitable de-skunking. The funny thing is that we've had a couple other skunks take up temporary residence under the porch and as long as I can keep a dog from attacking them, we get along just fine. I wish I'd have done it that way. I did use Weldwood contact adhesive on that instead of 3M because I knew it needed to be a strong bond to compensate for not being sewn.
I wish I'd have done it that way. I did use Weldwood contact adhesive on that instead of 3M because I knew it needed to be a strong bond to compensate for not being sewn.
Sadly, having a dog get skunked has been about a biennial event for us for at least 30 years. It's a tradition that spans 4 dogs, 3 houses, and 2 states. The most epic episode was when our first malamute got skunked in the backyard at 2am Thanksgiving morning just hours before the family was due to arrive for the feast. Now we keep a quart of hydrogen peroxide on hand at all times for the inevitable de-skunking. The funny thing is that we've had a couple other skunks take up temporary residence under the porch and as long as I can keep a dog from attacking them, we get along just fine. I wish I'd have done it that way. I did use Weldwood contact adhesive on that instead of 3M because I knew it needed to be a strong bond to compensate for not being sewn.
I wish I'd have done it that way. I did use Weldwood contact adhesive on that instead of 3M because I knew it needed to be a strong bond to compensate for not being sewn.

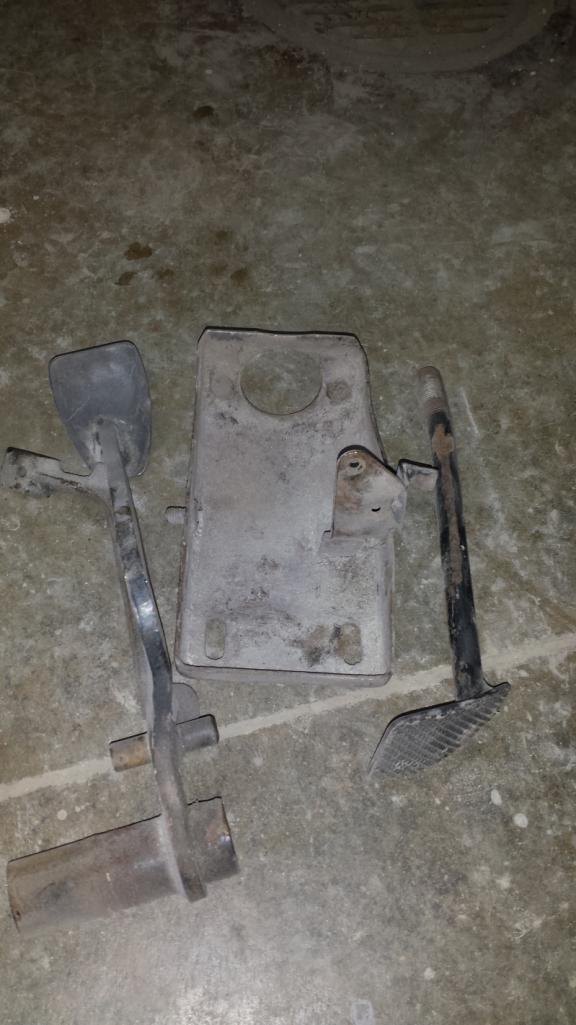
 what the hell is going on with your crooked e-brake bellows Mister??...
  ...other than that your doing one hellava great job Mr Brent what the hell is going on with your crooked e-brake bellows Mister??... ...other than that your doing one hellava great job Mr Brent
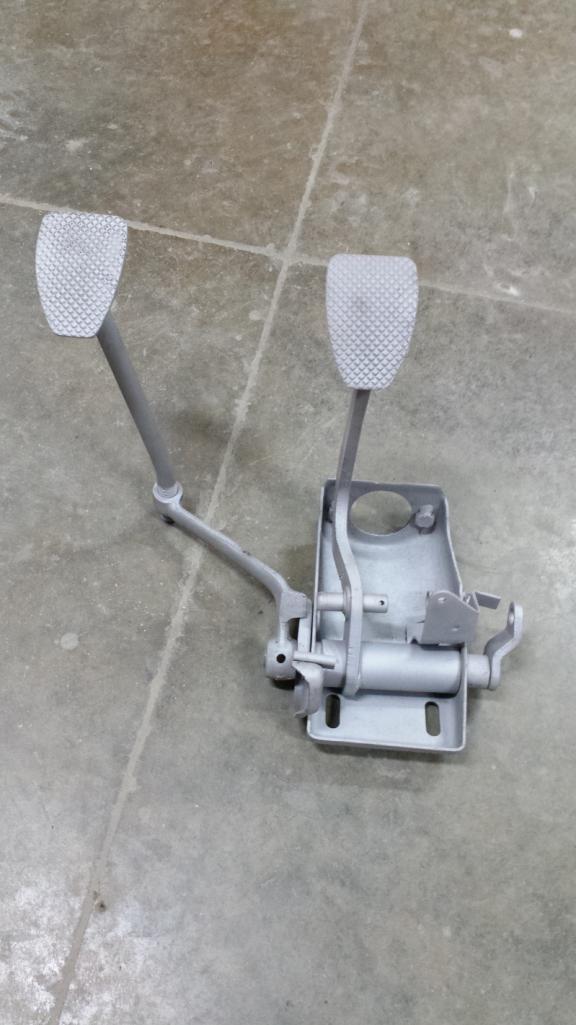
 It's ruined!! Call Garold I'm sure he can cut it up and salvage some parts.

 ... should line up OK when you install the cross bar though? It's ruined!! Call Garold I'm sure he can cut it up and salvage some parts. ... should line up OK when you install the cross bar though?
 what the hell is going on with your crooked e-brake bellows Mister??... ...other than that your doing one hellava great job Mr Brent
 ![popcorn[1].gif](http://www.914world.com/bbs2/style_emoticons/default/popcorn[1].gif) Maybe turn the lights on?
Maybe turn the lights on?
 ), outstanding work.
what the hell is going on with your crooked e-brake bellows Mister??... ...other than that your doing one hellava great job Mr Brent
what the hell is going on with your crooked e-brake bellows Mister??... ...other than that your doing one hellava great job Mr Brent
), outstanding work.
what the hell is going on with your crooked e-brake bellows Mister??... ...other than that your doing one hellava great job Mr Brent
what the hell is going on with your crooked e-brake bellows Mister??... ...other than that your doing one hellava great job Mr Brent  , I would cut off the nubs and plate these cap screws with black chromate to hide my fastener indiscretion.