How are the washer nozzles in front of the windshield removed (the ones on top of the cowl, not the hoses and fittings below the cowl)? There doesn't appear to be any screw or clamp or anything. I've gently pushed and pulled and twisted, but no go.
PET just shows a nozzle, no attachment hardware.
I found one thread, but it wasn't specific:
http://www.914world.com/bbs2/lofiversion/i...hp?t178275.html
Pelican has the nozzle and what appears to be rubber hose connection as one piece for sale.
Is this one of those "install once" parts that gets trashed when it needs to be removed?
I'd like to clean out the holes. The actually squirt, but I figure it can't hurt to clean them out.
Full Version: how to remove the washer nozzles
Work them out from underneath the cowl with a plastic stick
Having mine removed and the holes filled in......... 
Filled mine in on the '73 when I repainted it. They don't work worth a crap anyway, and I never drive it in the rain, which doesn't happen much in AZ anyway! And that's what RainX is for...
Good to hear I'm not the only one to remove them when I had paintwork. Sidemarkers,antenna and washer nozzles really aren't needed on our cars and just clutter up the lines.
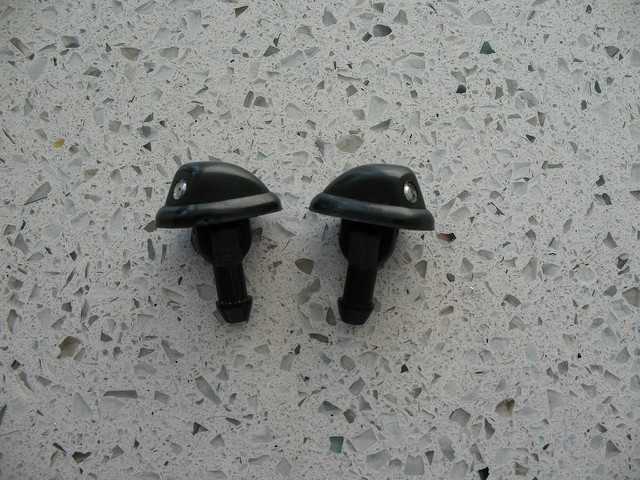
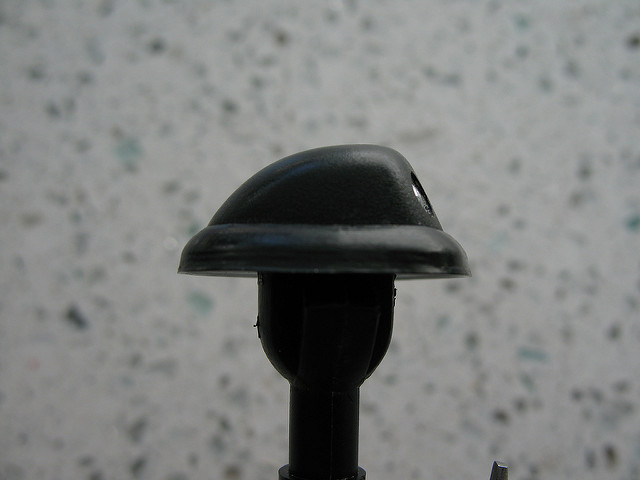
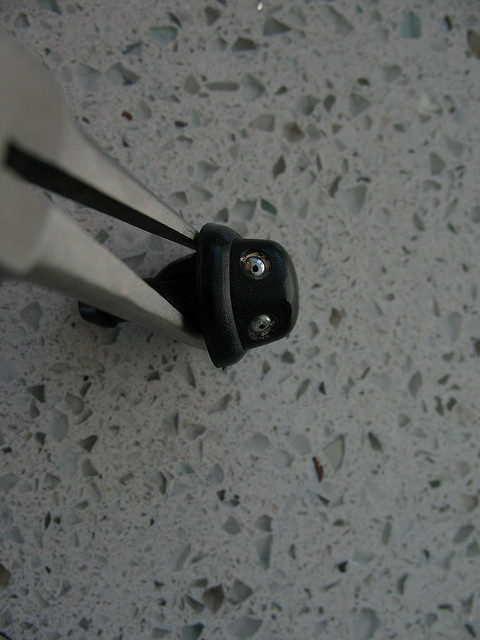
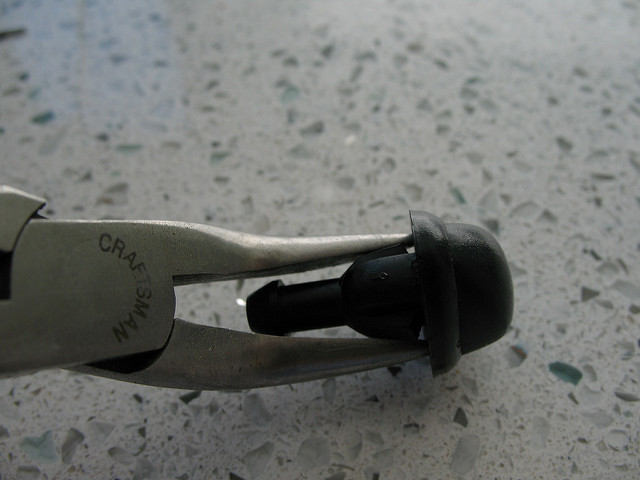
When viewing from the front or the back, you will see two prongs that hold the nozzle in place when it's pushed in from above. The problem is getting it back out once inserted!
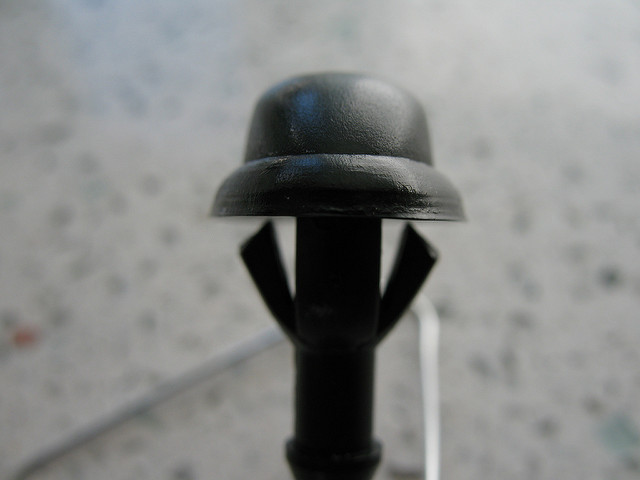
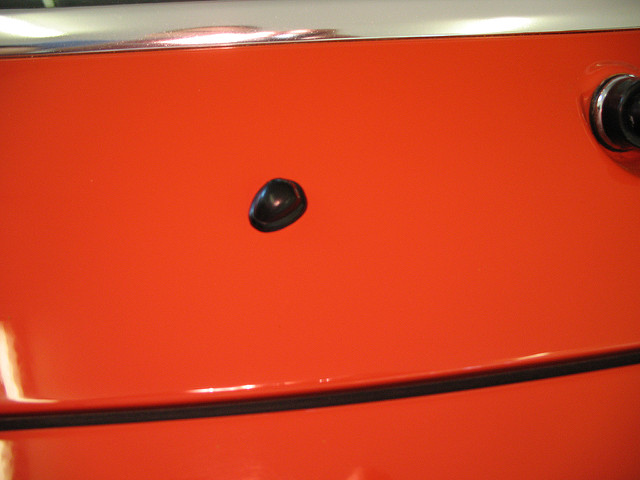
From the side:
The trick is to compress the prongs when you are under the cowl. Use a fine-nosed pliers.
Once compressed, you can push it up through the cowl nozzle hole.
Here it is all happy hovering above the cowl:
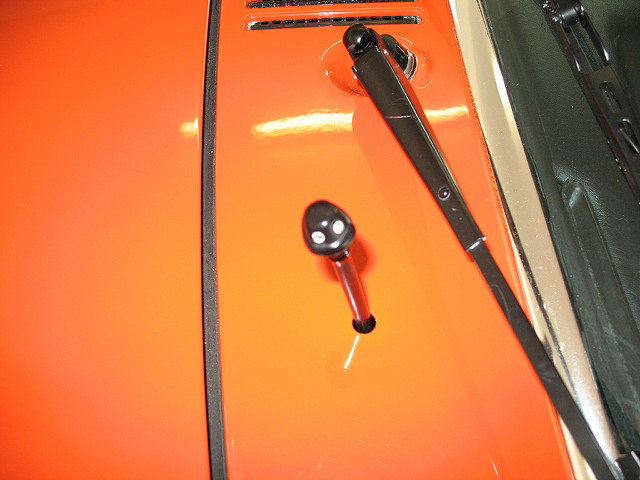
Once you pop it back down, you'll have to rotate it to point in the right direction.
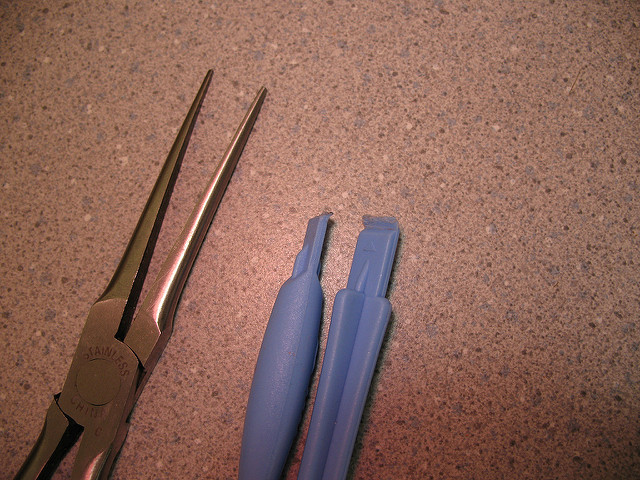
Tools of the trade: the blue things are "spudges" that came with a kit to replace the battery on an old iPod. If you lack strong fingernails, it can help pop the nozzle up without marring the paint.
One of the most annoying things is that by the time you're low enough to see the bottom of the nozzle, the front trunk lip blocks your view so a lot of this is done blind. Knowing where to compress the prongs will help you the most.
Good luck!
Paul
One of the most annoying things is that by the time you're low enough to see the bottom of the nozzle, the front trunk lip blocks your view so a lot of this is done blind. Knowing where to compress the prongs will help you the most.
Good luck!
Paul
Or, like some of the others posted, you could just fill in the holes and repaint the whole car! LOL.
I think there are three styles of nozzle: early ones have metal squirters in a metal holder. The ones I pictured are middle year metal squirters in plastic holder. Later I believe they have plastic squirters in a plastic holder. Of course you use a pin to change the direction of the nozzle and clean it out.
Paul
QUOTE(orthobiz @ Apr 30 2017, 07:31 PM) 
From the side:
Knew I saw that somewhere..........

Click to view attachment
That's great! Only this time you do NOT want to "Use The Force!"
Paul
Paul
Orthobiz: Thank you very much!  This is what I was looking for. I'm not sure mine even have the tabs, but I'll look again.
This is what I was looking for. I'm not sure mine even have the tabs, but I'll look again.
Remove them carefully I saw they were 28.00 new
This is a "lo-fi" version of our main content. To view the full version with more information, formatting and images, please click here.