I've been working with Mark and Matt at 914 Rubber over the past few weeks to refine the installation process and shoot a video for their a-arm bushing kit. Happy to report that it's finally ready for primetime! Shout outs to Bruce and Cary for all their contributions as well.
Coming soon... – 914 Rubber master cylinder install – "Bench" bleeding in the car – 914 Rubber Rebuilt steering rack with turbo tie rods – Front wheel bearing replacement
Hope you enjoy my videos. Just trying to give back to this amazing community. Apologies in advance for worsening the addiction.
Have fun with all the innuendo. Can't wait to read the comments
Ian
Mikey914
Mar 13 2018, 09:57 AM
These are a more difficult install. We could have made them smaller and easier to install, but they would have the issues Elephant mentioned. These need to have a very tight tolerance, this is how to do it.
1adam12
Mar 13 2018, 09:58 AM
Superb video as always!
sithot
Mar 13 2018, 10:20 AM
QUOTE(1adam12 @ Mar 13 2018, 10:58 AM)
Superb video as always!
Nicely done. Thanks!
Mueller
Mar 13 2018, 10:27 AM
Great video, looking forward to watching them all.
Maybe an electric drill to drive those nuts?
914_teener
Mar 13 2018, 10:36 AM
Great video on the bushing install.
Maybe a part two showing how to set up the bar to the drop links without preloading the bar?
mepstein
Mar 13 2018, 10:48 AM
Great video. Unfortunately, my 911 A arms are capped at one end. Gotta get a long pipe clamp.
A pair of leather work glows make things easier to handle than the oven mitt.
iankarr
Mar 13 2018, 11:40 AM
QUOTE(mepstein @ Mar 13 2018, 12:48 PM)
Great video. Unfortunately, my 911 A arms are capped at one end. Gotta get a long pipe clamp.
A pair of leather work glows make things easier to handle than the oven mitt.
My 914 arms were capped too. But it's just a metal disc thats pressure-fit in. I just hammered it back once I was done. I wonder if it's the same on the 911 arms.
mepstein
Mar 13 2018, 11:44 AM
QUOTE(cuddy_k @ Mar 13 2018, 01:40 PM)
QUOTE(mepstein @ Mar 13 2018, 12:48 PM)
Great video. Unfortunately, my 911 A arms are capped at one end. Gotta get a long pipe clamp.
A pair of leather work glows make things easier to handle than the oven mitt.
My 914 arms were capped too. But it's just a metal disc thats pressure-fit in. I just hammered it back once I was done. I wonder if it's the same on the 911 arms.
Probably. Thanks for the tip.
Montreal914
Mar 13 2018, 01:51 PM
Great video and excellent marketing tool!
Now, how do I remove the new Uro bushings that are mounted on the refurbished arms that I got from Bruce???
johnhora
Mar 13 2018, 01:52 PM
Ian...
Very nice job on the video! Easy to follow and perfect for the DIY...
mepstein
Mar 13 2018, 02:06 PM
QUOTE(Montreal914 @ Mar 13 2018, 03:51 PM)
Great video and excellent marketing tool!
Now, how do I remove the new Uro bushings that are mounted on the refurbished arms that I got from Bruce???
Heat works great but since you said refurbished, that complicates things. I would probably remove the end brackets with a press. If the bushing stays in the bracket, use the press to remove. If the bushing is on the arm, mounting the bushing in a vise and twisting the arm will probably work.
Tdskip
Mar 13 2018, 02:41 PM
Thanks for sharing this
Mikey914
Mar 13 2018, 04:52 PM
QUOTE(Montreal914 @ Mar 13 2018, 12:51 PM)
Great video and excellent marketing tool!
Now, how do I remove the new Uro bushings that are mounted on the refurbished arms that I got from Bruce???
Heat gun
Montreal914
Mar 13 2018, 06:46 PM
Press is an option I guess.
Heat gun; Freshly powder coated arms, never re-installed... Glass temperature for power paint is ~80C (Wiki)...
An other option would be to install them as is and replace them when they wear out in 1-2 years... . Probably the same situation though...
iankarr
Mar 13 2018, 07:40 PM
The companion video to this video...A-arm and bushing removal...is uploading to youtube now. Standby! Personally, I prefer the press. Way faster and less cancer.
I bought a 20 ton press from HF because I couldn't find a shop willing to press the bearings onto the axle of my 65 mustang. In a mustang the main thing keeping the axle on the car is the bearing itself, so I guess no one wanted the liability. Anyway, I thought the press would just become a coat rack, but I'm surprised at how often I use it.
mepstein
Mar 13 2018, 07:48 PM
It’s a 2 minute job with a torch but only if you are repainting the a arms. Heat the bracket until you see a little smoke and then twist off with a screw driver.
iankarr
Mar 13 2018, 07:56 PM
mepstein is right...it's only 2 minutes with the heat, but it feels much longer .
ok, removal video is up...link in the first post.
Mikey914
Mar 13 2018, 11:41 PM
Powder cures at about 240-280 range (also depends on the powder). You should be able to heat to about 220, but you will have to be careful. This is one of the reasons I like paint. Sand it and re-shoot it.
TargaToy
Mar 14 2018, 07:14 AM
Ian,
Did you paint your arms or have them powder coated between the removal and installation videos?
They look great!
iankarr
Mar 14 2018, 08:57 AM
Thanks! I blasted and painted the arms. Mark makes a good point that it's way easier to touch up paint than powder coat. And it's likely that stones, etc. will chip whatever is on there. If you do powder coat, make sure you don't use it on the bushing area, as it's tight enough as it is. Powder coat is generally much thicker than paint.
Full disclosure...I used two sets of arms in these videos. If you look closely, you'll see that the ones I took off my car didn't have sway bar brackets. Another member here graciously gave me a set that did, and those are the ones I painted and used for the install video.
mepstein
Mar 14 2018, 09:15 AM
Powder coat works well for me because we have the setup in the shop and when I bring freshly done parts home, they don’t smell (a big concern with my wife). A good epoxy paint also works well if you prep it right.
BeatNavy
Mar 14 2018, 09:33 AM
Great video - I could have used this last week when I finished up a total refresh of my A-arms / front suspension . I did those with Elephant Racing bushings following the video on their website (with video quality that looks circa 1972 for some reason). Luckily I have another complete front suspension to refresh, and on that one I'll get to try out my 914Rubber bushings.
I had mine powder coated, and they do look awesome. You do have to be careful with masking the seating / bushing surfaces. I was not on the first set, and I had a project on my hands carefully sanding those back to metal once they came back from the shop. I then rattle-canned those surfaces for at least some protection. Whatever you do, also take a look down the inside of the A-Arm. There is likely to be rust inside that needs to be treated.
I ended up using a pipe clamp (like in the Elephant Racing video) that worked well on the front bushing / collar combination. On the rear it would not work. It wouldn't get the bushing on the A-Arm far enough to keep it from slipping right back off. Luckily I have a press, and that made quick work of it.
I was somewhat dreading this after the trailing arm bushing install I did about a year ago, but this process went much smoother.
worn
Mar 14 2018, 09:40 AM
I have a few suggested twists for this superb filmh
First, if you have a smooth floor, put something down to catch the soap. I am too old to slip and fall indoors. Ice outside happens no matter what.
Second is to use an impact gun on the tool side. It gives a faster, more even pressing, again saving time. You want to wrench at the tool end so you can watch the progress. An alternative that is a bit quicker yet is to make the double nut ahead of time and put that in the vise grips. This only works with the power tool if you have a long enough socket. I started using an impact gun with a gear puller when rebuilding the transmissions for my cars.
Thanks
UROpartsman
Mar 14 2018, 05:26 PM
QUOTE(Montreal914 @ Mar 13 2018, 12:51 PM)
Now, how do I remove the new Uro bushings that are mounted on the refurbished arms that I got from Bruce???
Hi Montreal914, sent you a PM.
Mikey914
Mar 14 2018, 05:31 PM
Might want to check out the elephant racing video as to why they suck
Yes they actually tested them, who would have thought ?
"slipping causes rapid wear"
UROpartsman
Mar 14 2018, 05:56 PM
QUOTE(Mikey914 @ Mar 14 2018, 04:31 PM)
Might want to check out the elephant racing video as to why they suck
"slipping causes rapid wear"
Actually we've sold about 10,000 of our control arm bushing kits over the last eleven years with no complaints that anyone can remember. A single marketing video from a direct competitor that is priced almost 6X higher isn't exactly proof of a real-world problem. It would be interesting to see if there's any slippage in actual use, as "rapid wear" hasn't been reported by our shop contacts.
If anyone has a problem with our standard durometer control arm bushings, we'll happily replace them under warranty, or even upgrade them to our performance "Heavy Duty" control arm bushings for folks willing to trade some ride comfort for more responsive handling. The rubber used for our HD control arm bushing kit is 27% more firm than OE to minimize deflection, and being natural rubber these bushings are highly resistant to cold flow deformation.
Mikey914
Mar 14 2018, 08:05 PM
In honor of our new install video we are running a special at $29 a set and everyday price of $34.94 now!
That and we will beat any competitors price by10%. Better product better price what more can you ask for!
By the way the OE durometer is 92. You can't be 30% more!
UROpartsman
Mar 15 2018, 10:20 AM
QUOTE(Mikey914 @ Mar 14 2018, 07:05 PM)
By the way the OE durometer is 92. You can't be 30% more!
Sorry but 92 (assuming the shore A scale) is wildly incorrect, and is the equivalent of skateboard or shopping cart wheel rubber. To get an accurate OE durometer figure, you should buy both a NOS genuine control arm and a new genuine control arm (made to the original specs) and remove the bushings to take measurements, as URO did. These control arms are expensive, but it's the only way to get it right.
Just did the math, our HD performance bushings are indeed 27% more resistant to deformation than OE. Facts are facts.
worn
Mar 15 2018, 11:13 AM
Uhhmm I think this instructional video was a benefit to us all, as it would apply to any situation in which an original or reproduction bushing is needed.
Mikey914
Mar 15 2018, 11:17 AM
That was the intent.
bbrock
Feb 25 2019, 01:51 PM
I just did this install over the weekend and want to thank Ian for the great video! Super helpful. I thought I'd add a couple tips I learned that help with beating the clock before the bushings cool down.
1. set up the double nut on the long tail of your threaded rod and insert through the control arm so the double nut is on the opposite end from the bearing you will pull on. Set the length sticking out of the business end so there is about a nut's width of thread protruding after you bearing assembly, installation tools, and washers are on. That way, you only need to spin the nut a few turns after slipping the hot bearing and other parts onto the rod.
2. use an impact driver with deep socket to drive the nut on. This makes the process very easy and much faster. My socket wasn't long enough to drive the bearing on all the way, but it was very easy to finish up with a few turns with a hand wrench. I actually think you could install the bushing without boiling with this method, but I was too chicken to try.
iankarr
Feb 25 2019, 03:07 PM
Glad the video was helpful Brent! These are great suggestions. And...just so you have no regrets or second-guesses...if you used the impact driver to pull the bushing on without heat, it probably would rip. Ask me how I know .
Congrats on getting this done. Please post a pic of your winnings!
bbrock
Feb 25 2019, 05:00 PM
QUOTE(cuddy_k @ Feb 25 2019, 02:07 PM)
Glad the video was helpful Brent! These are great suggestions. And...just so you have no regrets or second-guesses...if you used the impact driver to pull the bushing on without heat, it probably would rip. Ask me how I know .
Congrats on getting this done. Please post a pic of your winnings!
Good to know! FWIW, I toyed with installing per the Elephant Racing video using a clamp and pressing on cold. I figured if both bushing types are OEM type materials and durometer, it should work. The problem I ran into is that the heaviest pipe clamp I have and can get for a reasonable price doesn't have long enough jaws to drive the bushing in straight. A clamp like they show in the vid is quite expensive and would blow any DIY cost savings.
I took zero pics of the install process as my hands were quite full just trying not to screw it up. My hat is off to you being able to accomplish this while video recording!
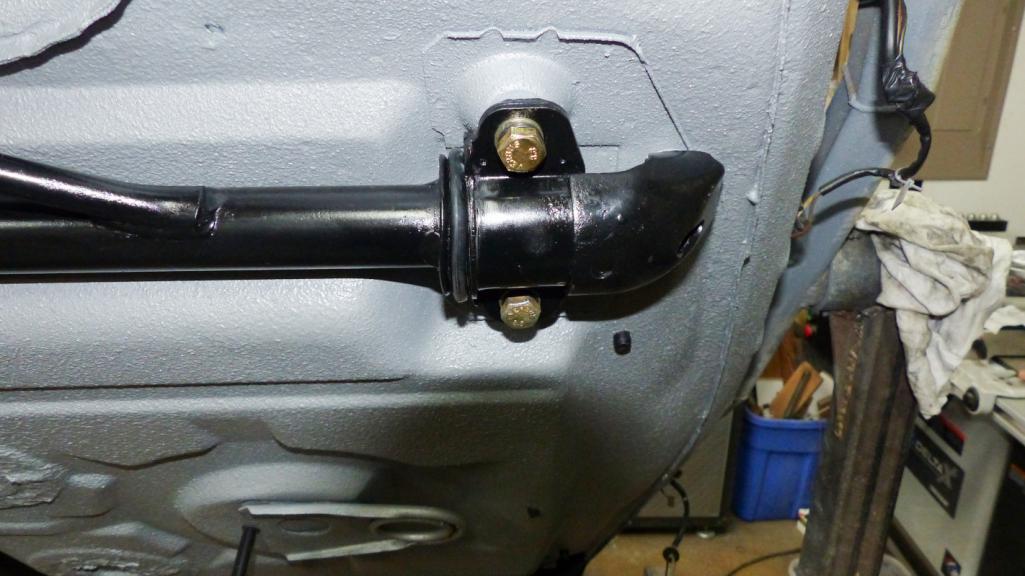
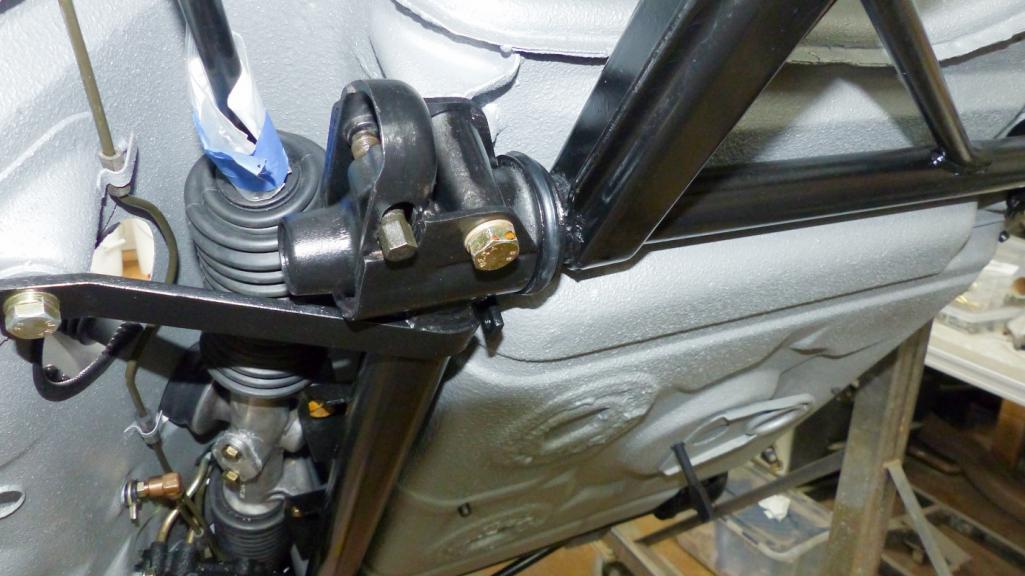
Here are a couple of pics of the result that I posted on my build thread this morning:
Nice job. The OEM size and material is a difficult install, but they do preload the arm, and I’m sure you will notice the difference when you get it back on the road.
Mikey914
Feb 27 2019, 12:50 PM
Gotta ask, what’s up with the steering rack ends? Turbo tie rod upgrade?
bbrock
Feb 27 2019, 01:05 PM
QUOTE(Mikey914 @ Feb 27 2019, 11:50 AM)
Gotta ask, what’s up with the steering rack ends? Turbo tie rod upgrade?
Yes. My boots and tie rod ends were shot, so the turbo upgrade was a no-brainer. It also made rebuilding the rack much easier since I didn't have to worry about the angles. The plastic is the bags with cotter pins taped on so I don't lose them.
Looking forward to seeing how this handles. Never driven a 914 that didn't have worn out suspensions and crappy tires.
ottox914
May 22 2019, 06:15 AM
Did mine last night and here is what worked for me: Used a gear puller to remove the old bushings. Quick, easy, no smell. Also, before removing the bushings and caps, we took a fine scribe and made witness marks to note the orientation of the parts before taking things apart. Match the marks and it all goes back together exactly as it was before. Should make re-install easier. Lots of lube and a press, and it all went back together with out melting your hands in boiling water.
This is a "lo-fi" version of our main content. To view the full version with more information, formatting and images, please click here.


 . Probably the same situation though...
 . I did those with Elephant Racing bushings following the video on their website (with video quality that looks circa 1972 for some reason). Luckily I have another complete front suspension to refresh, and on that one I'll get to try out my 914Rubber bushings.
![popcorn[1].gif](http://www.914world.com/bbs2/style_emoticons/default/popcorn[1].gif)


 Sorry but 92 (assuming the shore A scale) is wildly incorrect, and is the equivalent of skateboard or shopping cart wheel rubber. To get an accurate OE durometer figure, you should buy both a NOS genuine control arm and a new genuine control arm (made to the original specs) and remove the bushings to take measurements, as URO did. These control arms are expensive, but it's the only way to get it right.