Doing a bit of rehab on my front trunk lid in preparation for paint. One side of the A-frame member is stuck tight to the skin but the other side has lifted off about 3/32". I want to glue the lifted side down but don't know what adhesive would work best. 3M Panel Bonding Adhesive looks like it would be the ultimate but kind of expensive and probably overkill for this application. Any suggestions?
Click to view attachment
Full Version: Gluing trunk/frunk skins to frame
I would think any kind of "2 part" epoxy glue should work fine.
I never knew they were bonded there. Thanks. Makes it easier to paint prep if you can seal off that region.
QUOTE(worn @ Sep 8 2019, 08:42 PM) 
I never knew they were bonded there. Thanks. Makes it easier to paint prep if you can seal off that region.
I'm actually not sure they are bonded. I just noticed a little gap under one of the frame members where it is tight to the skin on the other. Figured it would be a good idea to stick the one side down to close the gap so everything is symmetrical and sound.
I think I'm going to pick up a tube of this 3M 550 Multipurpose Adhesive at my local Napa for $13.
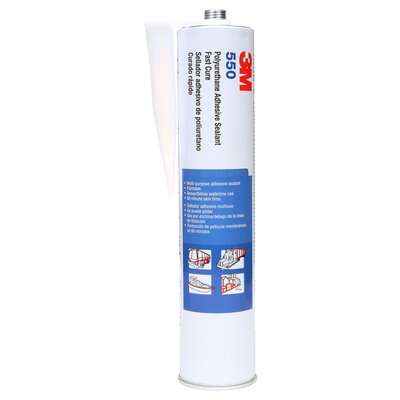
My concern with most 2-part epoxies is that they tend to set up hard and I'm worried they would crack over time with the constant flexing and vibration of the hood. I looked at a variety of 2-part body panel adhesives and single part urethane windshield adhesives. I think they would be great in this application but are all pretty expensive when all I need is an 8 inch bead. They above is a polyurethane elastomeric and looks like it should check all the boxes.
My concern with most 2-part epoxies is that they tend to set up hard and I'm worried they would crack over time with the constant flexing and vibration of the hood. I looked at a variety of 2-part body panel adhesives and single part urethane windshield adhesives. I think they would be great in this application but are all pretty expensive when all I need is an 8 inch bead. They above is a polyurethane elastomeric and looks like it should check all the boxes.
Try this stuff it loves 914
QUOTE(Garland @ Sep 10 2019, 09:05 AM)
Try this stuff it loves 914
I need to actually bond the skin to the frame in a section where it has lifted away. I not sure if seam sealer will have the proper "stick" needed.
Brent buddy,
You need to think this out. The heat of a day could make a big panel expand and if glued it may get a waive in the metal. I remember the space in there. I have done a few hoods in my time.
Ck with more guys before you jump. You may be right but you may be wrong. See what George says or Eric
Best, Bob B
QUOTE(burton73 @ Sep 10 2019, 09:59 AM)
Brent buddy,
You need to think this out. The heat of a day could make a big panel expand and if glued it may get a waive in the metal. I remember the space in there. I have done a few hoods in my time.
Ck with more guys before you jump. You may be right but you may be wrong. See what George says or Eric
Best, Bob B
I agree with Bob, after reading his post, I would leave it alone. I did a close inspection of mine, looks like 45 years of temperature change, gravity, and stresses. Kind of like me!
Here are a few shots, of mine, just reference.
Click to view attachment
Click to view attachment
Click to view attachment
Click to view attachment

Before committing to glue, I would make sure the hood fits and aligns properly. I had a hood painted and found that it had been hit and the hood did not fit properly. i was able to spring it back enough to lay flat. Once you glue it, that may be difficult. There may be a reason the gap is there (as in the case of a bent hood)
I used the 3M Panel bonding adhesive for this, its really good strong stuff. It worked very well. I had the rear frame of my rear trunk not sitting down all the way when closed due to a rusted area causing the skin and the frame to separate.The PO attempted to fix with fiberglass and it did not work.
I bought it on Amazon
https://www.amazon.com/gp/product/B00KSF9TC...=UTF8&psc=1
-Andrew
I bought it on Amazon
https://www.amazon.com/gp/product/B00KSF9TC...=UTF8&psc=1
-Andrew
All, Thanks for the suggestions. Let me explain a bit more about what is going on here and what I plan to do.
First, the lid fits great. I've checked it several times to be sure. The gap between the frame and skin I want to bond is very small. It is only 1/16" to 3/32". The frame can easily be pressed tight to the skin with light thumb pressure
Below is a pic of the frame. I've done a lot of careful probing to verify how this thing is bonded. The blue line is the area where the frame is firmly bonded to the skin. I can neither flex (gently of course) the frame away from the skin there, nor can I slide a thin putty knife blade under that area. It is tight to the skin. My plan is to bond the matching area of the frame next to the yellow line. I'm unsure whether the orange area was originally bonded. This is the only area the frame is attached to the skin other than the perimeter that is crimped over the frame edge. This is clearly intended to allow the panel to float to allow for expansion and contraction. But this is precisely why I think an elastic adhesive is called for here.
Click to view attachment
So why did the frame lift off? Maybe the glue just broke down with age but I'm pretty sure it had some help. At the front end of the yellow line, you can see a small patch I welded in. The hood had been shut with a wrench or something laying near the shock mount that punch a little crinkle in the frame. It did not affect the skin and the distortion of the frame was slight but I'll bet when it happened, the force was enough to pop the frame loose along the yellow line. I've patched and straightened the damage to the frame and now just need to restore the rigidity to match the other side.
And yes, I'll be checking the fit again before committing the lid to paint. BTW, I'm not the only one to re-glue a frunk lid http://www.914world.com/bbs2/index.php?s=&...t&p=2590450 Now that I've looked at that again, I'm thinking I'll just do the same here.
If you are going to use anything use anti-flutter foam which is designed for that exact purpose. It has adhesive properties and is closed cell (wont absorb moisture) with little expansion. 914 hoods as they close tend to bow as you close the latch and compress the surround weatherstrip. If you bond it will make the reinforcement to skin rigid and could possibly raise a dent from the underside out. The outer skin will still float where it needs to as movement is negligible.
Thanks Jeff and Andrew. I had never heard of anit-flutter foam and that looks pretty ideal, but also cost prohibitive for a one-off application like this.
After refreshing my memory on what Kent did in the link I posted above on Cairo's Six, I decided to follow his lead and clean out the old factory adhesive. Doing that was great because I was able to see exactly where the factory applied adhesive and what they used. The stuff I pulled out is clearly a butyl caulk, still tacky and stretchy in the parts where the frame hadn't separated. I ran a test with scrap metal and verified that cured 3M weatherstrip adhesive is pretty much identical in look, tackiness, and stretch. The foam would probably be the superior product to use, but the weatherstrip adhesive will be more economical and will very closely replicate the original factory treatment.
Below is an updated image showing where the original adhesive was applied. Same as what Kent did but figured I'd post here in case someone stumbles on this in the future. The caulk was applied to the inner flange of the frame member only.
Click to view attachment
This is a "lo-fi" version of our main content. To view the full version with more information, formatting and images, please click here.