Full Version: Rebuiding Inside-out
Pages: 1, 2, 3, 4, 5, 6, 7, 8, 9, 10, 11, 12, 13, 14, 15, 16, 17, 18, 19, 20, 21, 22, 23, 24, 25, 26, 27, 28, 29, 30, 31, 32, 33, 34, 35, 36, 37, 38, 39, 40, 41, 42, 43, 44, 45, 46, 47, 48, 49, 50, 51, 52, 53, 54, 55, 56, 57, 58, 59, 60, 61, 62, 63, 64, 65, 66, 67, 68, 69, 70, 71, 72, 73, 74, 75, 76, 77, 78, 79, 80, 81, 82, 83, 84, 85, 86, 87, 88, 89, 90, 91, 92, 93, 94, 95, 96, 97, 98, 99, 100, 101, 102, 103, 104, 105, 106, 107, 108, 109, 110, 111, 112, 113, 114, 115, 116, 117, 118, 119, 120, 121, 122, 123, 124, 125, 126, 127, 128, 129, 130, 131, 132, 133, 134, 135, 136
New cables inserted from the engine side. These will get adjusted later.
Cable ends on the equalizer.
The screw for the cover was interfering with the spring, so I cut it short.
Handle done.
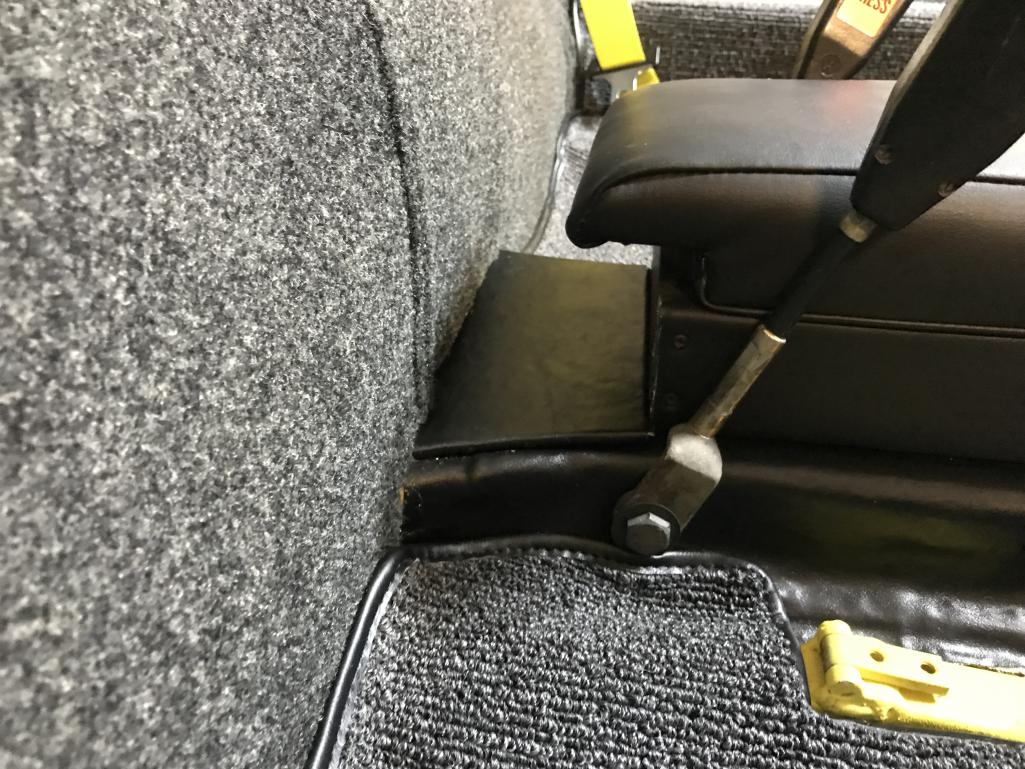
While thinking about the interior, I placed the center arm rest.
Have to do something to cover the exposed bit of tunnel.
And then I got out the seat mounting stuff.
Paint on the frames looks sad, so I took these apart, and to the powder coat shop.
The rails just need some clean-up (and new handles).
Shiny seat tilt teeth.
More little parts installed.
QUOTE(bkrantz @ Jul 9 2021, 06:40 PM) 
And then I got out the seat mounting stuff.
Bob....make sure to tell the powder coater where not to powder coat. Don't make the same mistake I did. That involved hours of sanding/filing/grinding that blasted hard powder coating off of the sliding surfaces. Uggh
Your car and work look incredible.
Fantastic, just fantastic work and progress.
Killing it! Making great progress
Thanks, guys. Progress on the body, but still stalled on the motor. 
To hide the tunnel top exposed behind the arm rest, I made a small cover. I found a small scrap piece of 1/8" masonite.
And a scrap of vinyl on top, and wrapped over the side edges.
Cover in place.
Better.
After that, I got ready to install the gas tank. I finally found some Euro style hose clamps (20 mm) big enough for 1/2" hose. (And not use the American worm drive clamps on fuel lines, as spotted by a couple of you guys.)
All the plumbing is now in place: tank supply to filter to pump to feed line in tunnel, and return line in tunnel to tank.
I did re-use the stock felt pads, but soaked in rust prevent lube.
I also rehabbed the over-flow drain tube. The new hose I got was too large to feed out the bottom hole. The old tube is still flexible, just stained from the damned PO undercoating.
Overflow tube in place.
Tank "dropped" in. This was more fiddly than I expected, to get the tank seated evenly and all the way in.
Overflow hose connected.
And hoses connected to tank fittings.
Fuel level sender plug (with a little bit of edging to protect the wires).
And finally, the hold-down clamp.
Looks absolutely fabulous Bob.
Just some little stuff today. I opened the bag with new trunk hardware, all from 914 Rubber.
Front of the trunk.
And rear.
I also got out my rehabbed door strikers and installed those.
Finally, I found my new hardware for the parking brake cables.
Step 1: swear at the rubber boots to help ease them over the clevis.
Step 2: swear at the retaining clip until it fully seats on the cable ferrule.
Parking brakes work!
Parking brakes work!
QUOTE(bkrantz @ Jul 10 2021, 06:30 PM)
Better.
Looks good, Bob, but didn't your carpet kit come with a small piece to cover that spot ?

QUOTE(euro911 @ Jul 11 2021, 10:28 PM)
QUOTE(bkrantz @ Jul 10 2021, 06:30 PM)
Better.
Looks good, Bob, but didn't your carpet kit come with a small piece to cover that spot ?
Most would not have that small piece.
I put together my own fix on my car.
QUOTE(raynekat @ Jul 12 2021, 08:53 PM)
QUOTE(euro911 @ Jul 11 2021, 10:28 PM)
QUOTE(bkrantz @ Jul 10 2021, 06:30 PM)
Better.
Looks good, Bob, but didn't your carpet kit come with a small piece to cover that spot ?
Most would not have that small piece.
I put together my own fix on my car.
With the stock padded back panel, that spot is not exposed. It shows how much space the stock panel occupies, and gaining that space was part of my motivation for the carpet substitute.
Doug, what did you do?
QUOTE(bkrantz @ Jul 12 2021, 08:40 PM)
Doug, what did you do?
Think I just added some grey perlon in there.
I'll check the pics....
After further review....maybe nothing.
With the backpad in there and the different style center tray thingy, you don't see much.
Click to view attachment
Bet you don't have full length carpets under the seats...huh?
With the backpad in there and the different style center tray thingy, you don't see much.
Click to view attachment
Bet you don't have full length carpets under the seats...huh?
QUOTE(raynekat @ Jul 13 2021, 01:46 AM)
After further review....maybe nothing.
With the backpad in there and the different style center tray thingy, you don't see much.
Click to view attachment
Bet you don't have full length carpets under the seats...huh?
Yup, the stock bulkhead pad obscures that space.
Yeah, my midget carpets only cover the area under the rear half of the seats. You win.

I finally got back to completing the carpet installation, especially for the main footwell pieces.
Here is the driver's side, carpet piece out, and too much and irregular projection of the side pieces onto the floor.
Here is the driver's side, carpet piece out, and too much and irregular projection of the side pieces onto the floor.
I trimmed the side pieces a bit, and neatened up the corners.
To hold the main carpet piece in place, I got this industrial strength Velcro. I left out the floor studs since I did not want big grommets in the carpet. But I still want to remove the main pieces easily.
I stuck the fuzzy side to the floor. The adhesive is very strong, and sticks well--including to the back side of the carpet.
I then placed the hook side onto the fuzzy strip, and took off the adhesive backing. This way I could place the carpet properly, and the Velcro would be lined up.
Carpet in place, and stuck to the Velcro.
I put some weight on top, to make sure the adhesive sets tightly.
This is a "lo-fi" version of our main content. To view the full version with more information, formatting and images, please click here.