Help - Search - Members - Calendar
Full Version: Anyone replaced their tail/crossbody?
914World.com > The 914 Forums > 914World Garage
jaredmcginness
Hey guys,

Next on my list for body work that I've been putting off.
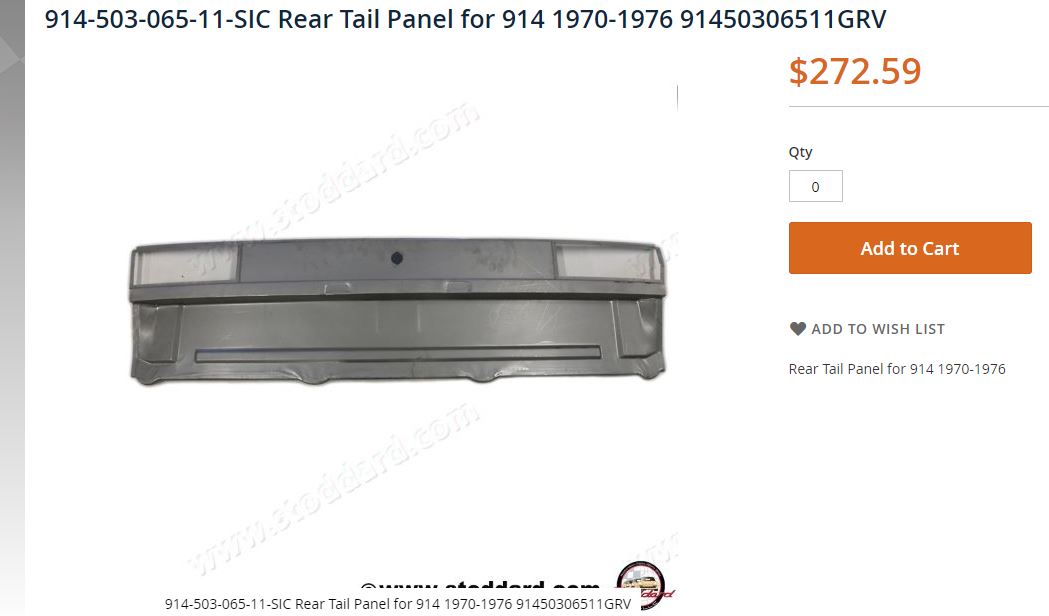
Tail section. I'm having a hard time finding any threads on the subject. I remember reading one with a red car. Lots of sandwich and layered pieces.

IPB Image

Has anyone tackled this, any tips/photos?

Cheers
peteyd
@IronHillRestorations

I believe Perry has installed one.

Pete
SirAndy
QUOTE(jaredmcginness @ Jul 16 2020, 07:48 AM) *
I remember reading one with a red car. Lots of sandwich and layered pieces.

That was probably mine, did that many, many years ago.

There should be a thread here somewhere ...
idea.gif
9146C
I did a "spliced" repair as I didn't want to mess with the driver's side tow pull bracket (there was no corrosion in this area on my car).

The RD panel I bought was a perfect fit to OEM.

The only "issue" I had was getting a good rosette weld on the rolled lip of the trunk pan (which was also replaced)...I wound up through drilling the pan to cross panel seam.

If you look closely at the photos (in my thread) of the left sail panel repair, you'll get a glimpse of the 2x4 I cut to maintain the trunk width before sizing the new panel. Now that the work is complete and I've temporarily fit the rear deck lid, the gaps looks good front to back on both sides. (I don't recall the cross dimension, but it can be found on the dimension specs of this forum.)

http://www.914world.com/bbs2/index.php?sho...42108&st=20
Root_Werks
I might need to do this to my 914. Rear lid is bent, have a replacement and will see how things line up.

Doesn't look easy.
jaredmcginness
Thanks for the good replies guys.

The splicing is not a bad idea, if it the edges are in good shape. I dont think mine are...
I suppose one of my questions was the dimensions. Seeing if anyone has braced the opening to keep it dead on.

I'll try to look through your post history Andy. beerchug.gif
9146C
http://www.914world.com/specs/bodydims.php

These were the dimensions I used...it is the same for the full width of the trunk...I was able to brace mine with a 2x4 as it had a natural tendancy to want to spring inboard.

Good luck!
Mikey914
@cary has done 2 of mine. There is an early late issue
You have to modify floor for late.
dr914@autoatlanta.com
many times, you must salvage pieces from your old rear panel to make this one work. Also the wurth gun with the correct calking it will apply the sealer to the joint in a factory type way. Make sure that your unibody is pulled out straight before installing the rear panel or the rear lid will not fit and the quarter panels will be slightly flared out


QUOTE(jaredmcginness @ Jul 16 2020, 07:48 AM) *

Hey guys,

Next on my list for body work that I've been putting off.
Tail section. I'm having a hard time finding any threads on the subject. I remember reading one with a red car. Lots of sandwich and layered pieces.

IPB Image

Has anyone tackled this, any tips/photos?

Cheers

IronHillRestorations
Although more difficult and involved, replacing the whole panel is probably the best way to go.

The radius on a couple 90* bends is different than stock, so doing a section is going to require some extra "massage to fit", if you choose to go that route.

I cut the top off narrower than the bottom, within the tail light openings, but if I were doing it again, I would indeed replace the whole piece.
bkrantz
I removed and re-installed the rear panel (which was not the original).

One challenge is the seams with the fenders. These are actually triple layer, with the flanges on the rear panel sandwiched between the inner and outer fender edges.
jaredmcginness
QUOTE(bkrantz @ Jul 16 2020, 11:54 PM) *

I removed and re-installed the rear panel (which was not the original).

One challenge is the seams with the fenders. These are actually triple layer, with the flanges on the rear panel sandwiched between the inner and outer fender edges.


Sounds good. I just ordered the replacement. Did you cover this in your build thread at all Krantz?

Edit: Nevermind, found on page 3 and 28. Helpful photos to get a better idea of what i'm dealing with.
cary
I've done 3.
I have another ready to go on another onsite project.

What George and Bkrantz said. The qtrs have to be pulled out a smidgen to get that triple layer section
at the taillight slid in.
This is a "lo-fi" version of our main content. To view the full version with more information, formatting and images, please click here.
Invision Power Board © 2001-2024 Invision Power Services, Inc.