Looking @ChrisFoley ‘s bearing, but the product photo shows a different set up than my ‘74 has, and it looks like Hans or Wilhelm didn’t exactly center the flange either when assembling my car.
Anyone running the Tangerine firewall shift rod bearing on a 74+?
Chris, how will it fit on my car with this alignment?
Full Version: Firewall Shift Rod Bushing/Bearing
That looks normal to me. My bearing should fit fine.
Ordered, thanks Chris. Still happy to hear feedback from folks with install experience. While searching I noticed a few adjustment challenges people had over the years, but I couldn’t tell what years / firewall pass through they had.
QUOTE(Van B @ Feb 17 2024, 09:47 AM) 
Ordered, thanks Chris. Still happy to hear feedback from folks with install experience. While searching I noticed a few adjustment challenges people had over the years, but I couldn’t tell what years / firewall pass through they had.
I think most of the troubles were related to repaired/modified firewalls that had an extra layer of metal, or eliminated the pocket stamped on the original panel.
When I initially designed this I didn't want to require firewall modifications for product installation, so for convenience its surface mounted.
In the past, the overall thickness of the unit could cause minor interference with the knuckle on the shift rod, but which could be eliminated by trimming the aluminum knuckle.
My current product is thinner to minimize the likelihood of such interference. I machine the spherical bearing to be about as narrow as possible without degrading its performance, and I revised how the bearing is retained in the housing to reduce the profile even more.
I installed it in my 1974 with no problems. It was a few years ago so I don't remember exactly what it looked like under there.
I have one of these in a box somewhere. I have a pretty decent shifting car as is. I am not sure I understand how much this improves the shift quality. Chris could you give some feedback?
Isn't there suppose to be a nylon bushing in there too? I see it advertised. My car has one.
![popcorn[1].gif](http://www.914world.com/bbs2/style_emoticons/default/popcorn[1].gif)
PMB puts these on all the cars that go out the door. Chris, they used to be .6 in thick, what is the new thinner measurement?
QUOTE(bobboinski @ Feb 17 2024, 01:30 PM)
I installed it in my 1974 with no problems.
Ditto, easy peasy.
QUOTE(windforfun @ Feb 17 2024, 05:07 PM)
Isn't there suppose to be a nylon bushing in there too?
Stock, yes. But not with Chris' bearing, which uses a phenolic (or ceramic?) insert.
https://tangerineracing.com/shop/ols/produc...ift-rod-bearing
I got tired of hunting and guessing for the next gear. Installed a Renn shifter with Chris Foley's linkage, bearing, and side shifter linkage. Smooth as silk a pleasure to drive.
QUOTE(mb911 @ Feb 17 2024, 04:55 PM)
I have one of these in a box somewhere. I have a pretty decent shifting car as is. I am not sure I understand how much this improves the shift quality. Chris could you give some feedback?
The Nylon bushing wears out pretty quick, introducing slop into your shift. When the nylon is brand new, there likely isn't much difference. The firewall bushing gets a lot of force and movement put against it.
This won't wear out for the life that you own the car. Since the ceramic bushing is sperical, and can move around inside the aluminum housing, its always aligned with the shift rod. Once you get your shifter aligned, its going to stay that way for a very long time.
I've had mine in now for about 10 years and thousands of miles. The only issue I have is that the pop-rivets I aren't as tight now as they were when first installed.
Zach
QUOTE(Geezer914 @ Feb 17 2024, 03:16 PM)
I got tired of hunting and guessing for the next gear. Installed a Renn shifter with Chris Foley's linkage, bearing, and side shifter linkage. Smooth as silk a pleasure to drive.
Awaiting this part as I will likely be going down the TR bearing install this weekend. Even with the instructions in hand, but not yet the part, I am having a hard time conceptualizing how the rivets hold the bearing cage to the car and then screws or rivets, depending on various pictures, (presumably in the same holes that the rivets used?) holds the dust boot retaining plate to the bearing cage.
Has anyone photo documented the install? I have not seen one on line.
On my bucketlist for a while now ...
Cost 70 usd - shipping to Belgium 64.2 usd and then I have to add VAT and tax pffft It will remain on my bucketlist for now
note : if somebody travels to Belgium and can put it their luggage
krgds
Dax
Cost 70 usd - shipping to Belgium 64.2 usd and then I have to add VAT and tax pffft It will remain on my bucketlist for now
note : if somebody travels to Belgium and can put it their luggage
krgds
Dax
QUOTE(Van B @ Feb 16 2024, 10:44 PM)
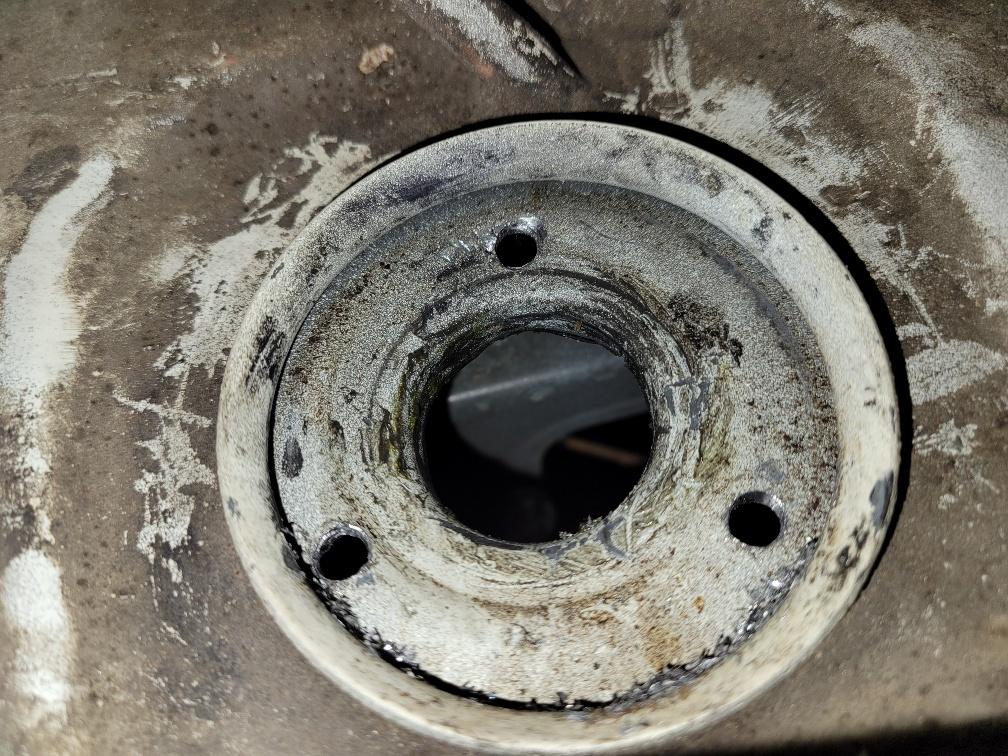
Looking @ChrisFoley ‘s bearing, but the product photo shows a different set up than my ‘74 has, and it looks like Hans or Wilhelm didn’t exactly center the flange either when assembling my car.
Anyone running the Tangerine firewall shift rod bearing on a 74+?
Chris, how will it fit on my car with this alignment?
Van,
I just moved the entire recessed section from my old firewall to a new RD replacement panel. I noticed the hole is slightly off of center, too. Weird.
 After treating for rust, I welded the two pieces exactly where they were to keep it original.
 Click to view attachment
QUOTE(87m491 @ Feb 22 2024, 08:06 AM)
I am having a hard time conceptualizing how the rivets hold the bearing cage to the car...
Don't overthink it, it's very simple.
Once the rear shift shaft is removed you push the forward shaft into the cabin, clear of the firewall (or, if you have a friend to hold it from moving, you can sldie the bearing assembly over the front shaft).
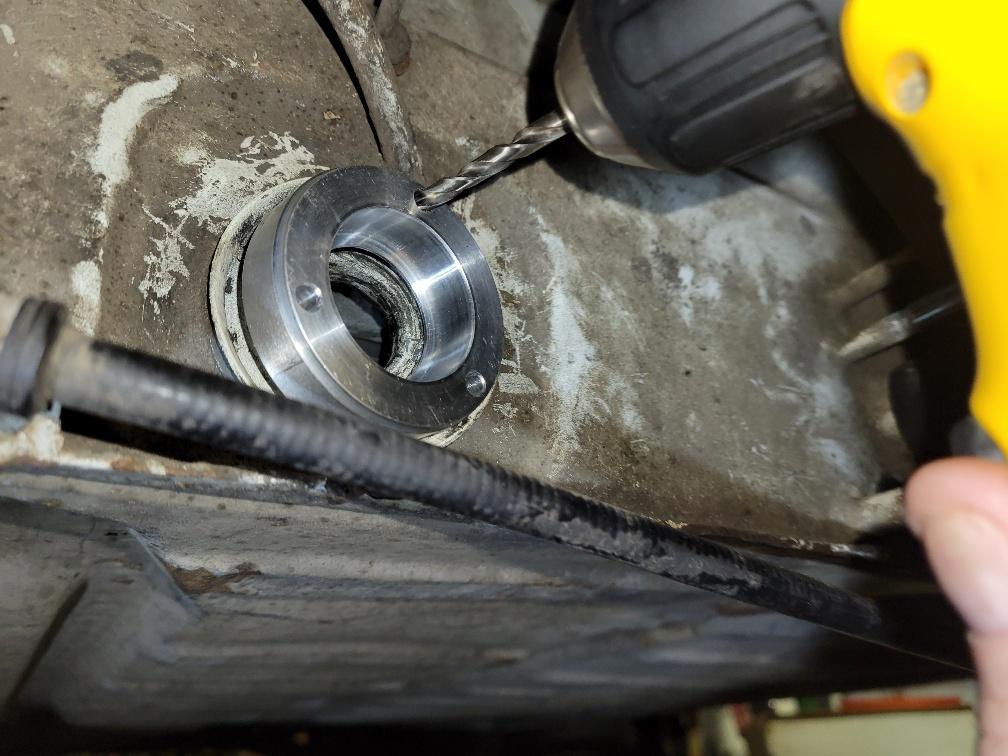
While holding the bearing assembly up against the firewall - it sits flush inside that raised circular flange - you'll use it as a drill guide to drill the three holes through the firewall, then pop-rivet the bearing assembly to the firewall. Done.
The OD of the bearing assembly has a machined groove around which the boot will grab.
Drill, drill bit, pop-rivet gun. Plus handtools for shaft R&R. It's really that simple.
GA
QUOTE(GregAmy @ Feb 22 2024, 07:28 AM)
QUOTE(87m491 @ Feb 22 2024, 08:06 AM)
I am having a hard time conceptualizing how the rivets hold the bearing cage to the car...
Don't overthink it, it's very simple.
Once the rear shift shaft is removed you push the forward shaft into the cabin, clear of the firewall (or, if you have a friend to hold it from moving, you can sldie the bearing assembly over the front shaft).
While holding the bearing assembly up against the firewall - it sits flush inside that raised circular flange - you'll use it as a drill guide to drill the three holes through the firewall, then pop-rivet the bearing assembly to the firewall. Done.
The OD of the bearing assembly has a machined groove around which the boot will grab.
Drill, drill bit, pop-rivet gun. Plus handtools for shaft R&R. It's really that simple.
GA
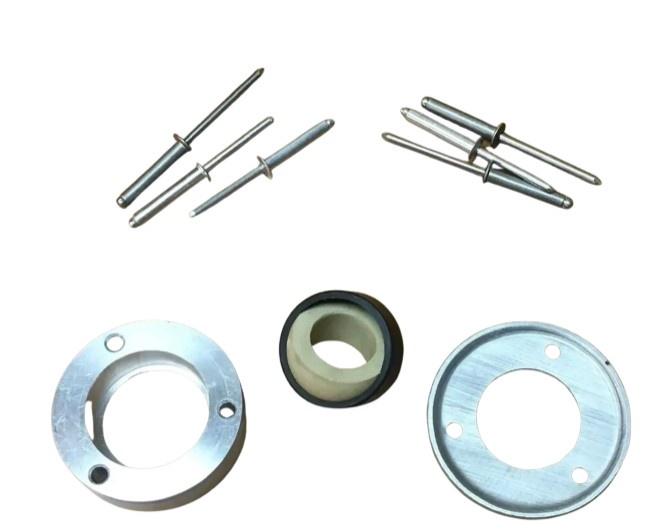
Perhaps the kit has evolved. The boot now grabs a separate flange that attaches with either screws or rivets. I'm guessing it will be self evident once in hand but the drill/rivet recesses in the cage look fairly deep as I'm used to having the rivet gun flush to the mating surface. Guessing the screws use the same recess to hold the flange.
As Greg said, no need to overthink it.
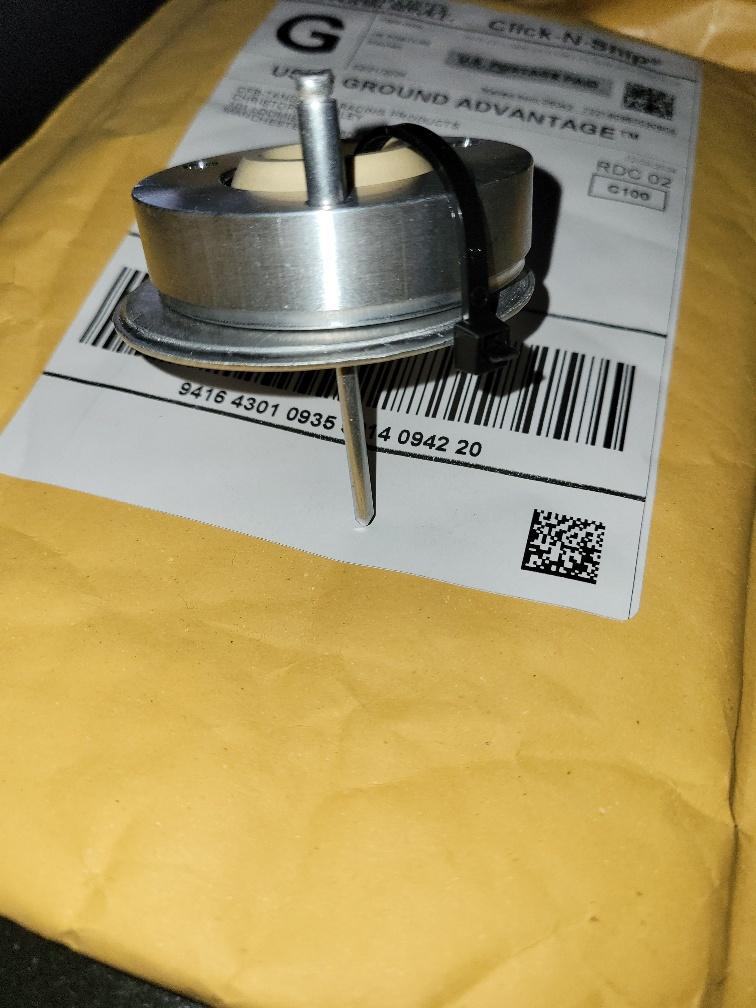
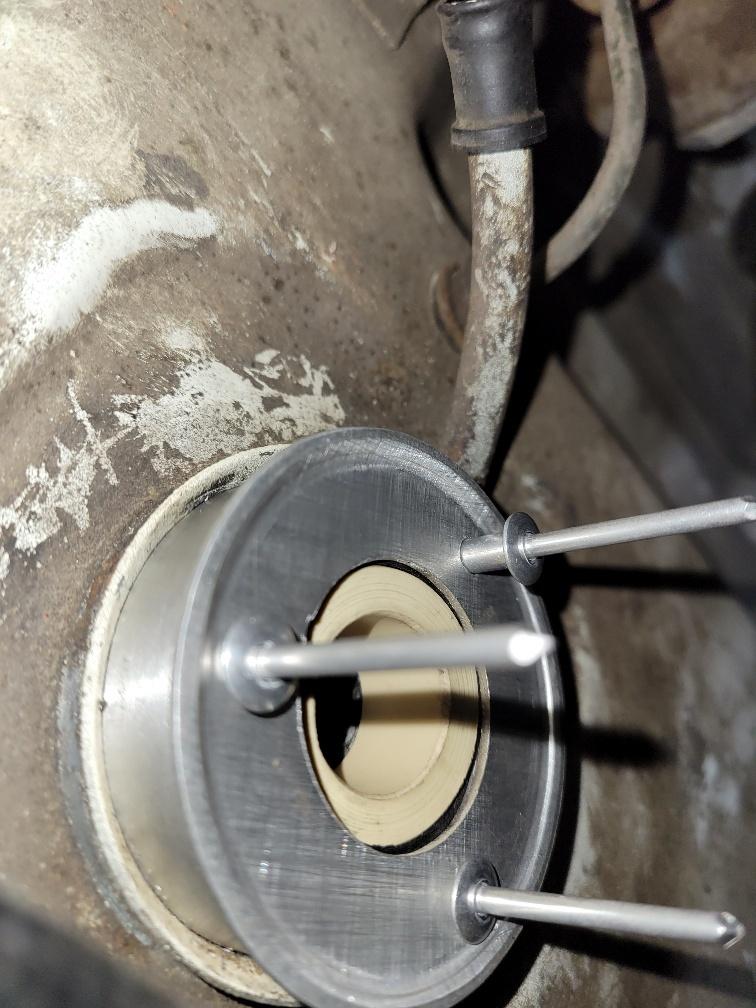
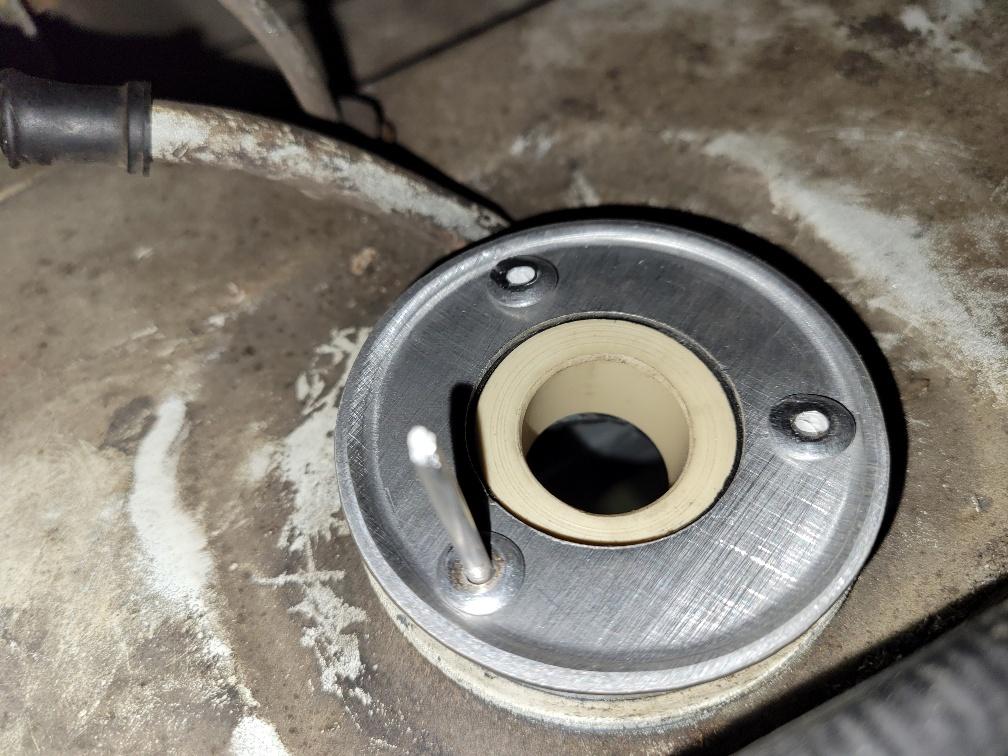
Either rivets or screws, your preference. The entire assembly is held by three fasteners. The boot is held by the raised lip of the bearing retaining plate. A small recess on the frame helps the boot rim fit better. Orientation of the bearing is critical. I zip tie the 3 piece assembly in it's correct orientation before shipping.
Either rivets or screws, your preference. The entire assembly is held by three fasteners. The boot is held by the raised lip of the bearing retaining plate. A small recess on the frame helps the boot rim fit better. Orientation of the bearing is critical. I zip tie the 3 piece assembly in it's correct orientation before shipping.
QUOTE(ChrisFoley @ Feb 22 2024, 05:12 PM)
As Greg said, no need to overthink it.
Either rivets or screws, your preference. The entire assembly is held by three fasteners. The boot is held by the raised lip of the bearing retaining plate. A small recess on the frame helps the boot rim fit better. Orientation of the bearing is critical. I zip tie the 3 piece assembly in it's correct orientation before shipping.
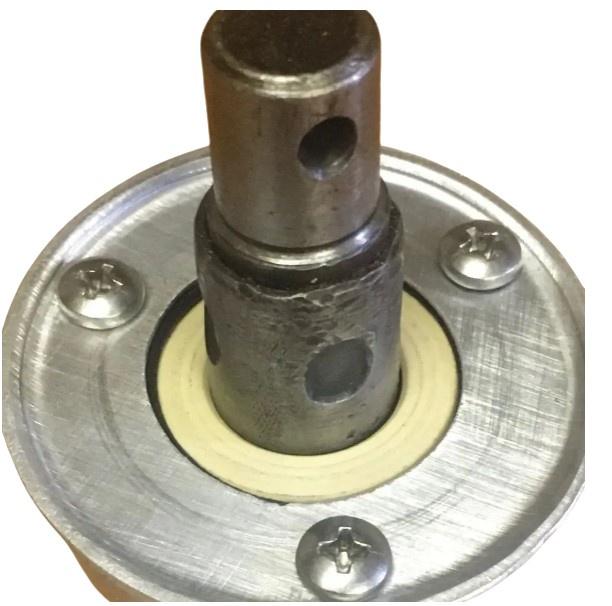
Indeed in hand is more intuitive. That said I think the perspective of the catalog shot aided my confusion. You really don't get the sense how deep the rivets are. They easily go through the bearing cage.
Also in the catalog shot it shows the screws in, (on top of in my mind) the mounting rivets. The instructions clearly then note "alternative mounting option". Confusion lifted!
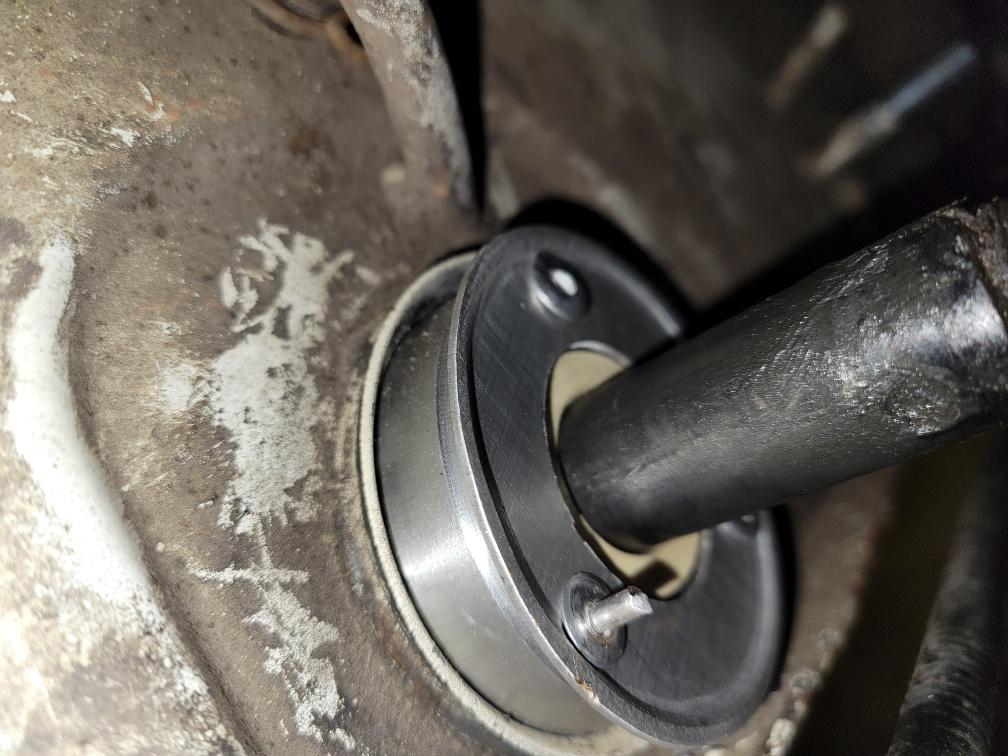
I did not realize until digging in that the firewall pass through is not parallel to the firewall plane. It tilts in towards the drivers side.
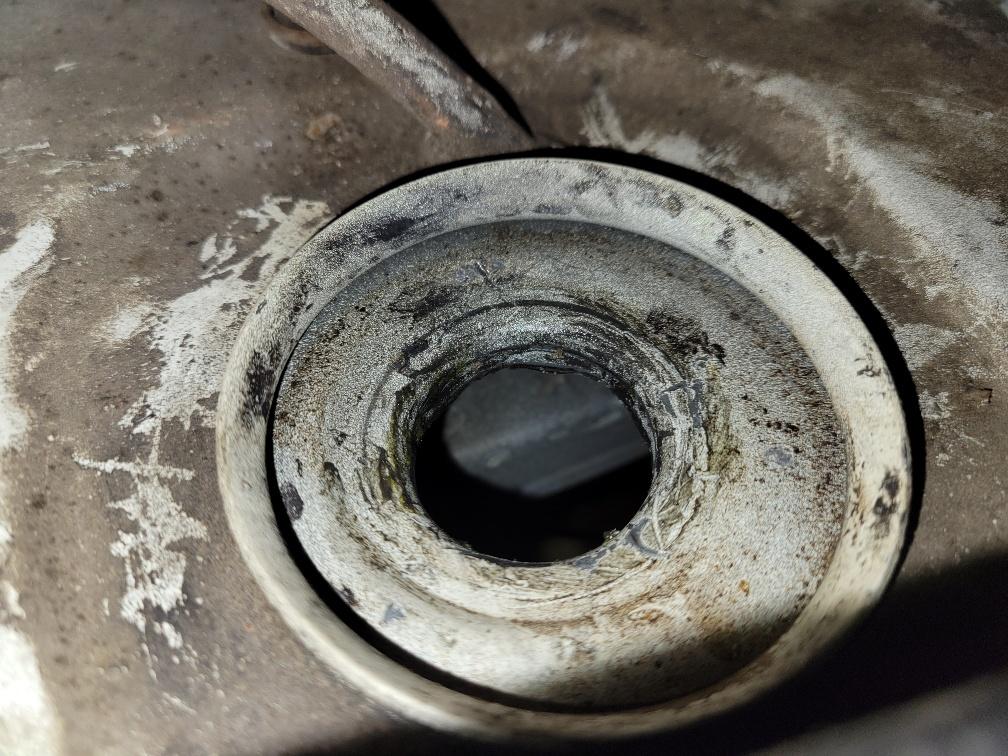
Noted, place the cage but against the opening and drill.
given the slight offset of the of the mounting surface a little widening of the drilled holes was needed to fit the rivets
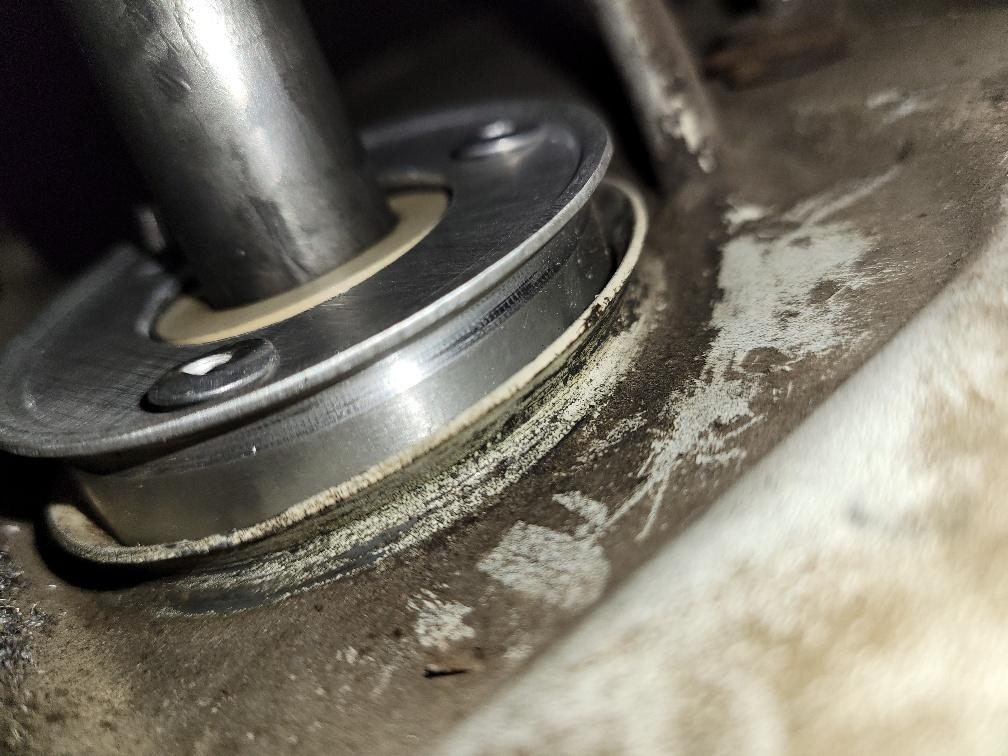
Even then all the rivets did not fully seat
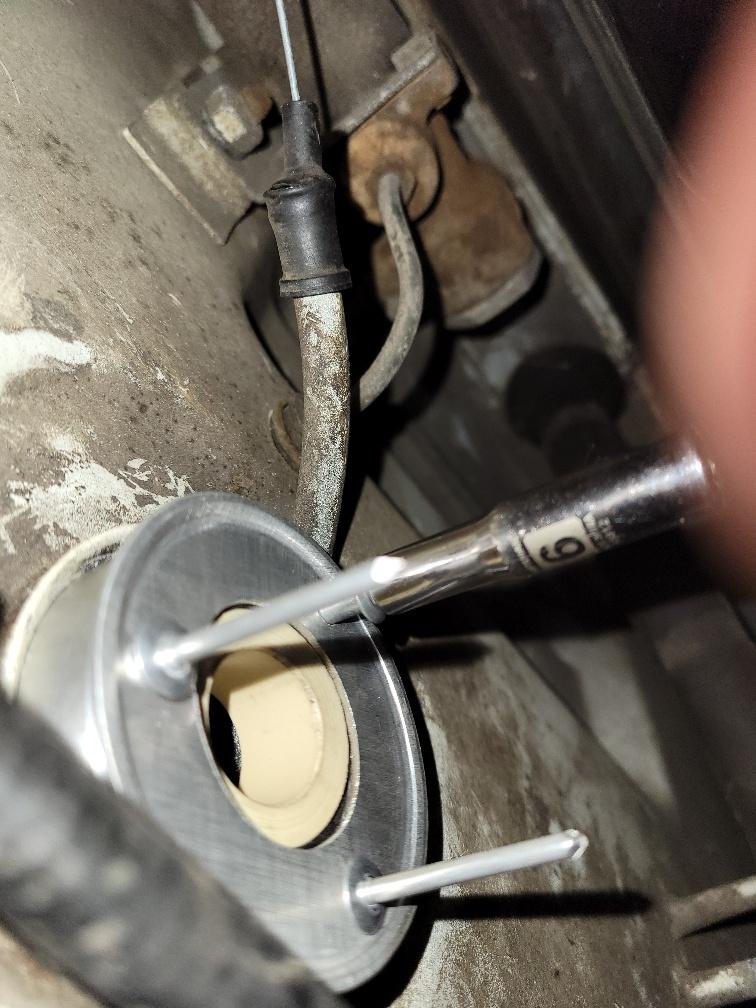
a small deep socket works nicely to tap it down to fully seat.
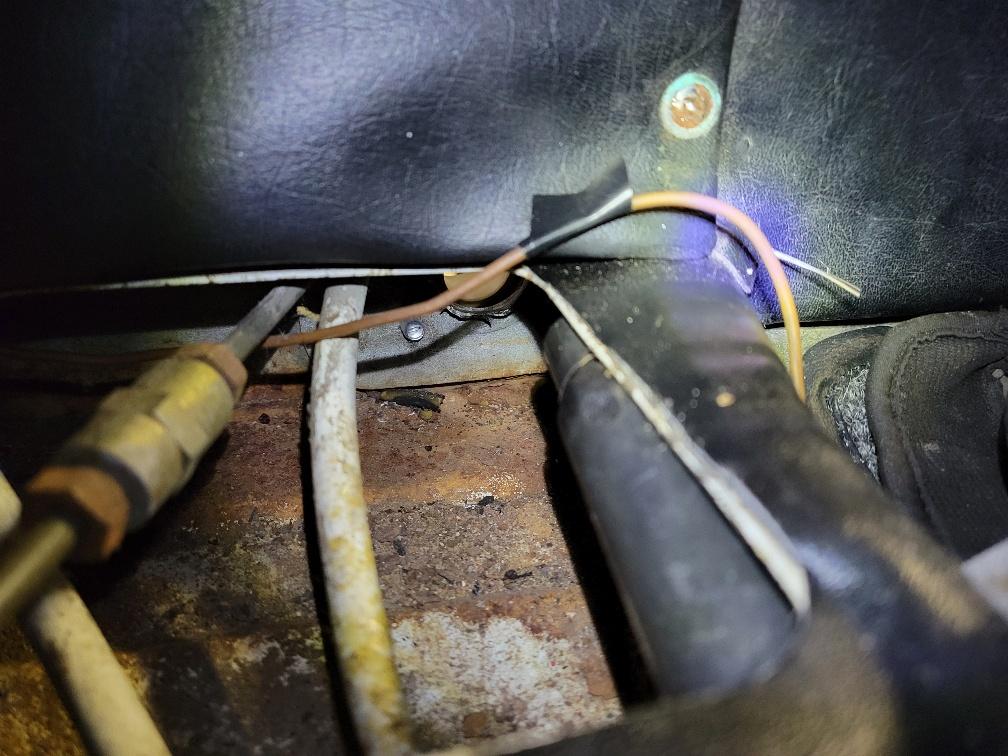
Pulling the rivets was fun on the garage floor with the car 12 inches off the deck.
Interestingly the 7oclock rivet did not self trim the mandrel though the other side mushroomed fine.
ant the 5 oclock rivet "failed" i.e. did not mushroom but seems ok as there was enough tension to cut the mandrel. If it ever fails I'll drill the rivet and use the screw.
Finished
Thx all
QUOTE(87m491 @ Feb 24 2024, 12:53 PM)
Finished

This is a "lo-fi" version of our main content. To view the full version with more information, formatting and images, please click here.