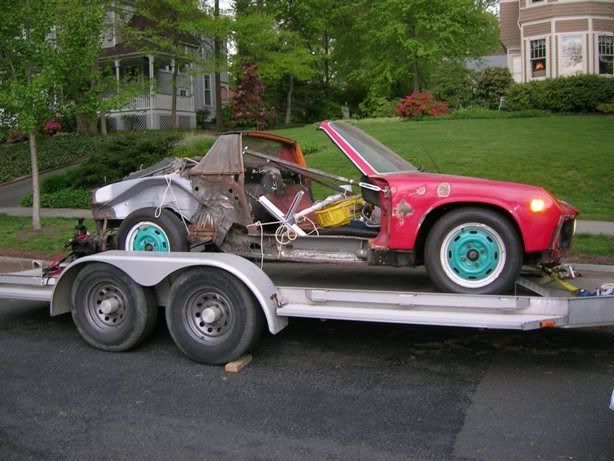
I've had this 71 for 3 years now and I've only driven it for 10 minutes before I bought it. I figure if I haven't made serious progress by the spring, she is getting stripped and scrapped. You'll see why. Its probably only a parts car, but I want to learn how to weld, and if I can get this thing back on the road, I think I will be well on my way. I'll start from the beginning:
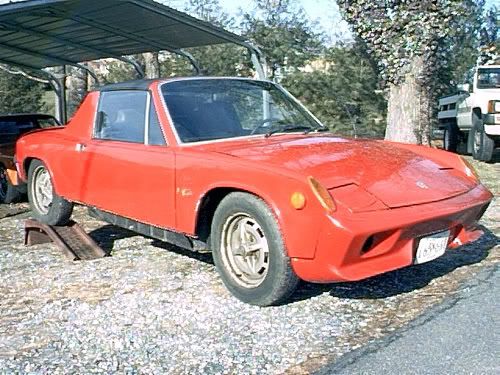
The exterior, looks harmless enough:
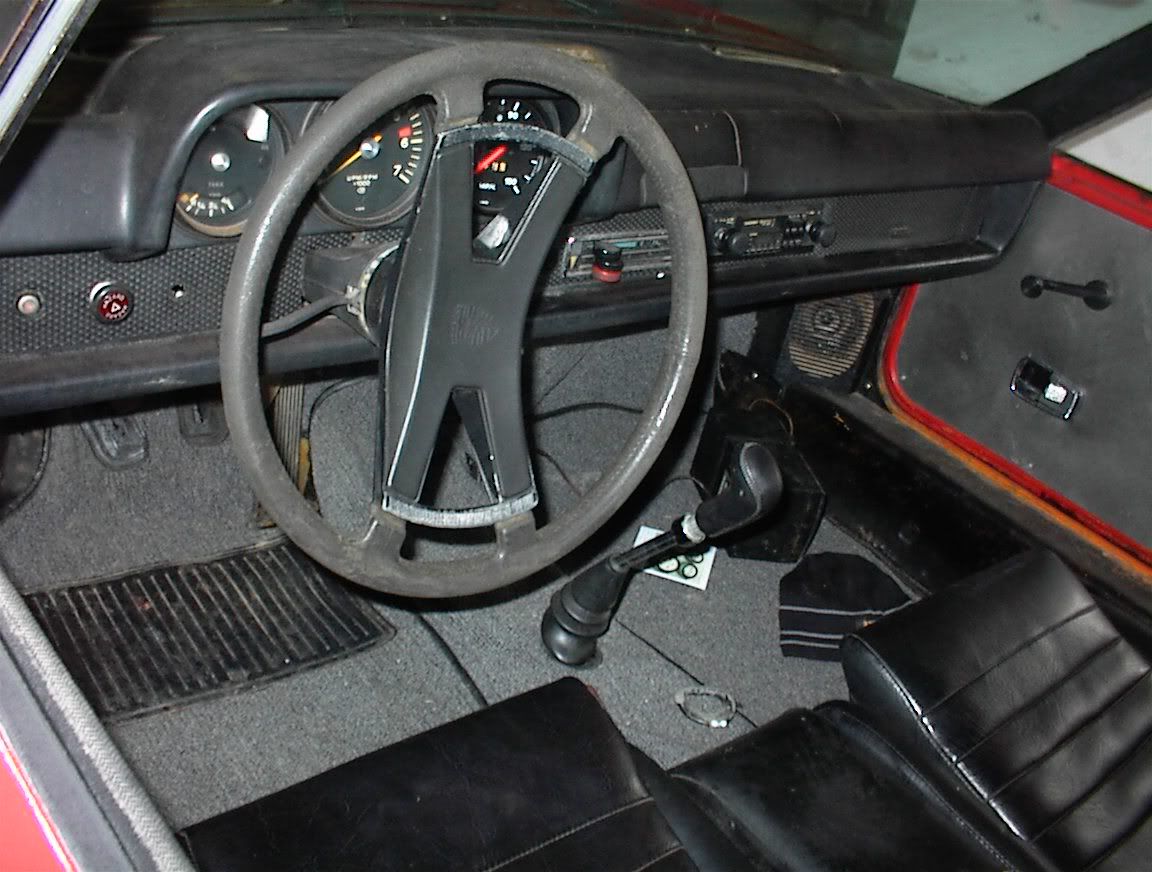
The interior, looks pretty good (wait, what was that saying about wrapping a piece of poo in a pretty package):
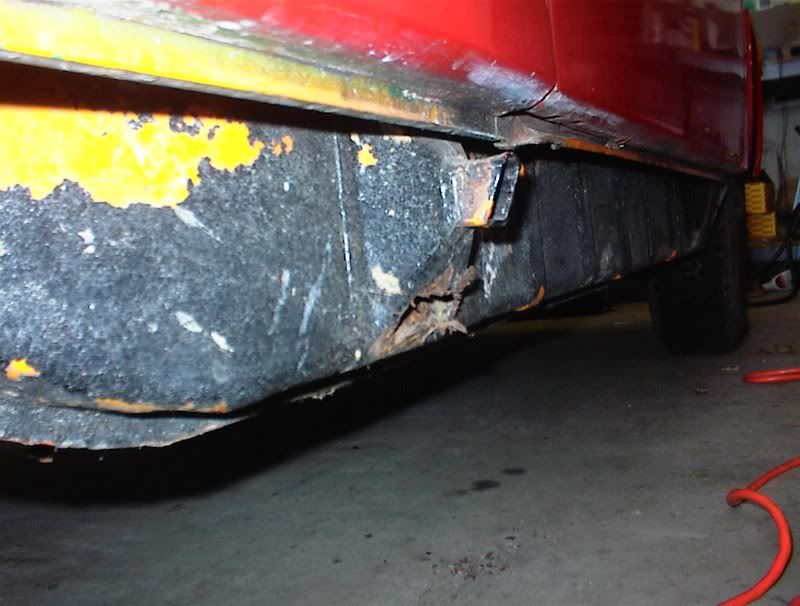
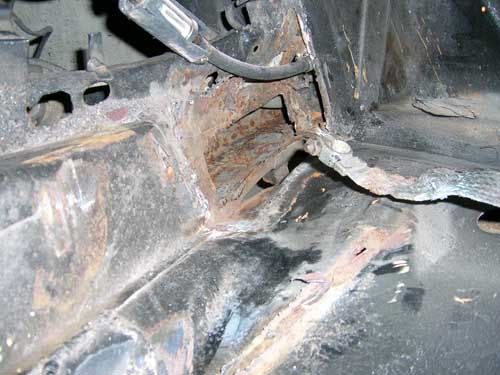
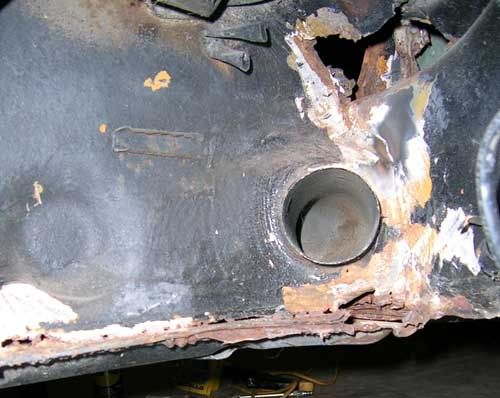
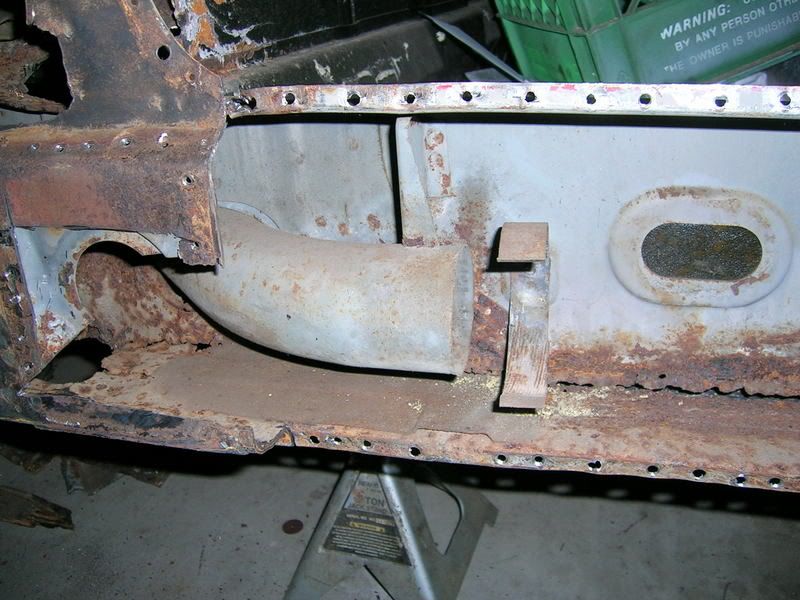
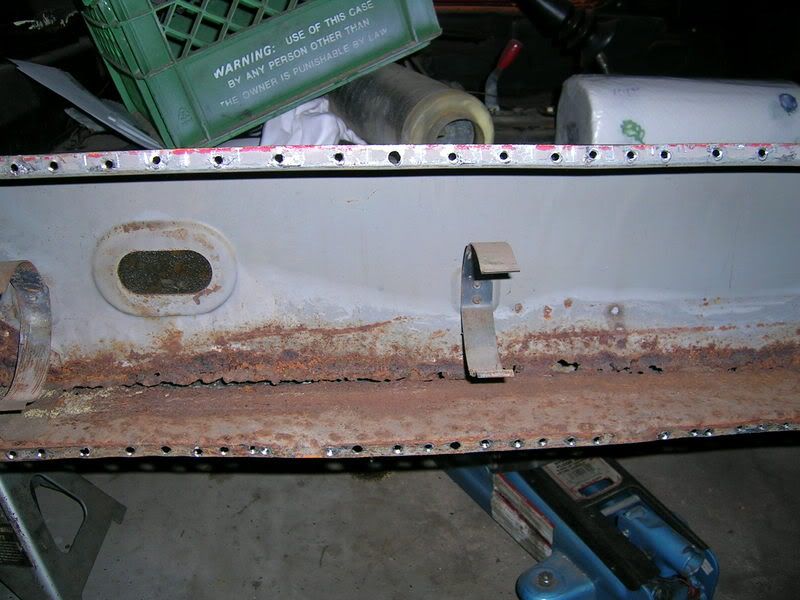
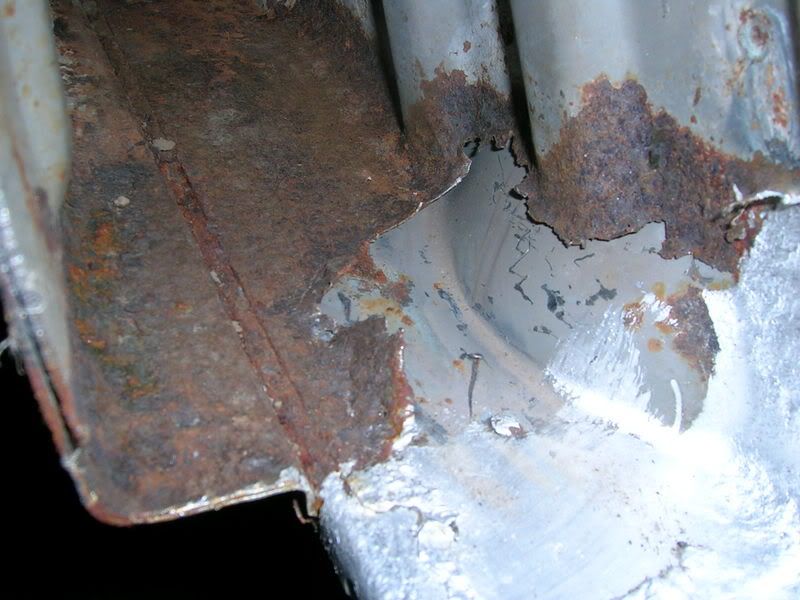
Long looks okay at first glance:
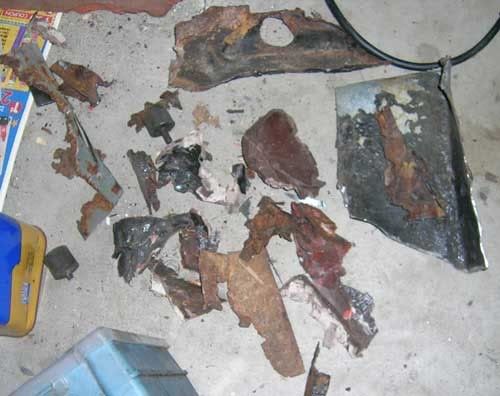
Wait, umm, is this factory installed golf ball sized hunks of epoxy and bondo:
Yum:
Delicious:
Craptacular:
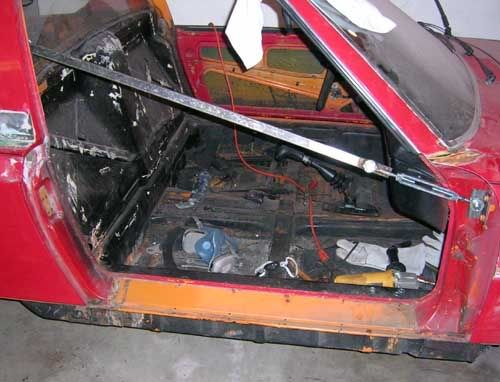
Brace yourself (also have another brace running to the drivers side door jamb, couldn't find that pic):
Couldn't find any pics of the lovely riveting and brazing job a PO did with re-attaching the portion of the fender below the sail, but I hacked that focker off:
Mmm, clean:
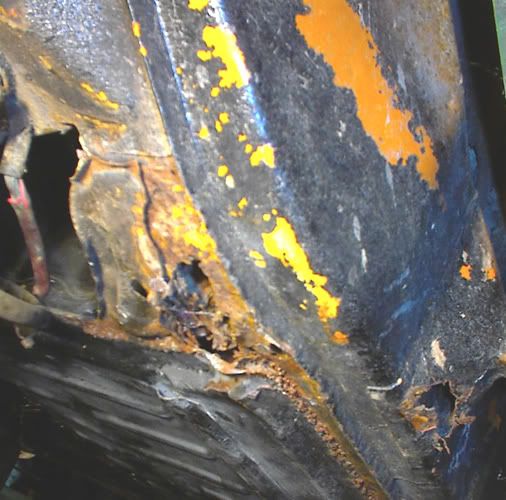
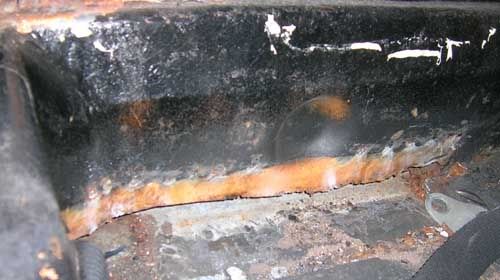
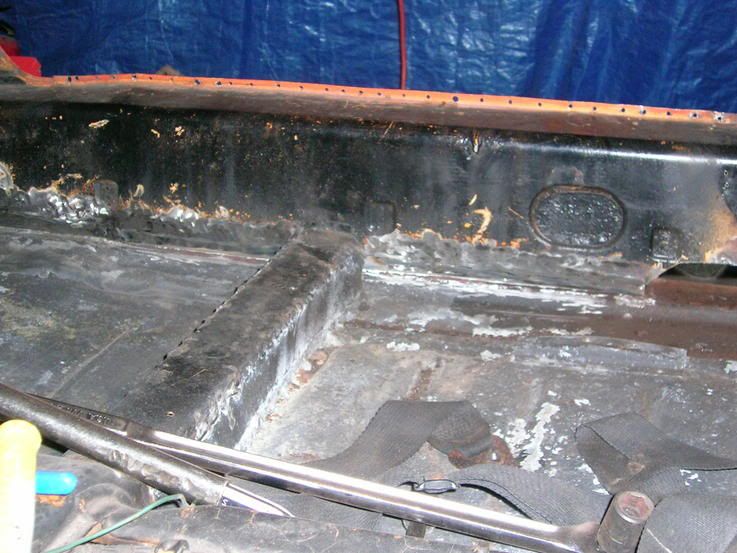
Also found after removing the interior that the passenger side was once used as a pool, the entire lower inner corner of the long and bulkhead was gone. PO crappily arc welded a new floorpan in, but didn't fix any of the other damage:
Quick break, then pics of the repairs so far . . .
type11969
Jan 8 2007, 09:37 PM
Pics too big? I'll resize if needed.
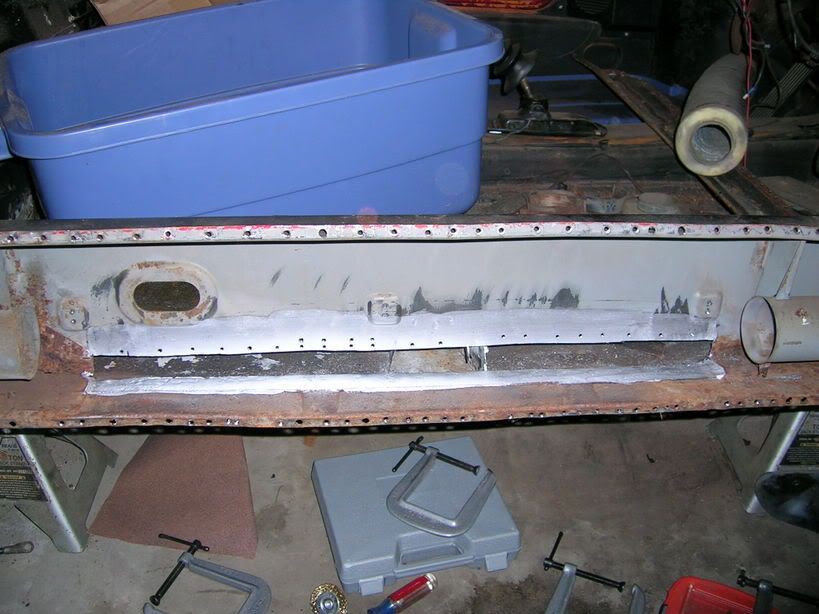
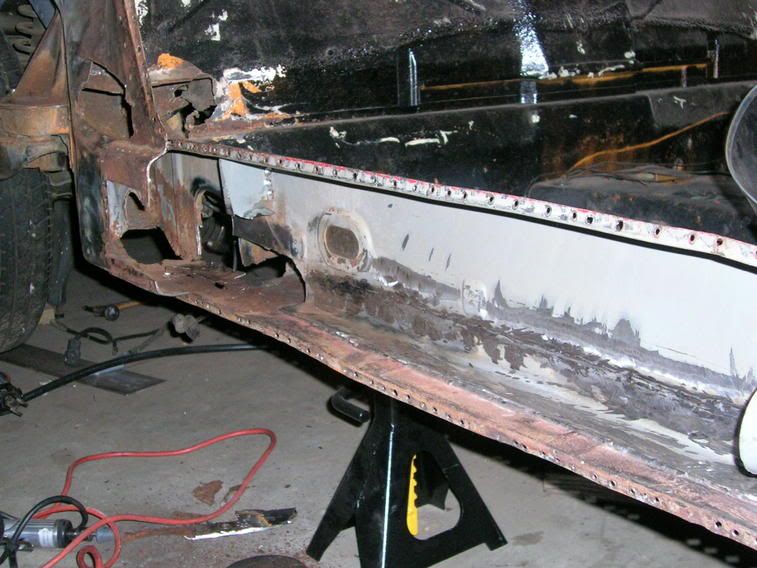
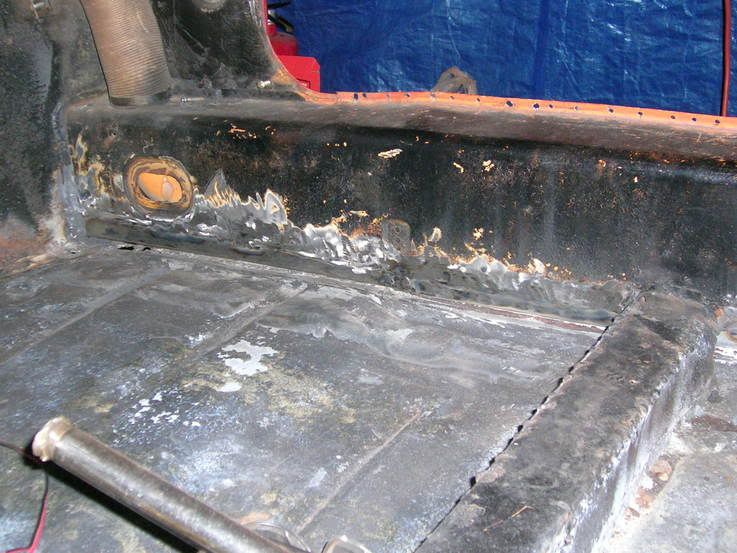
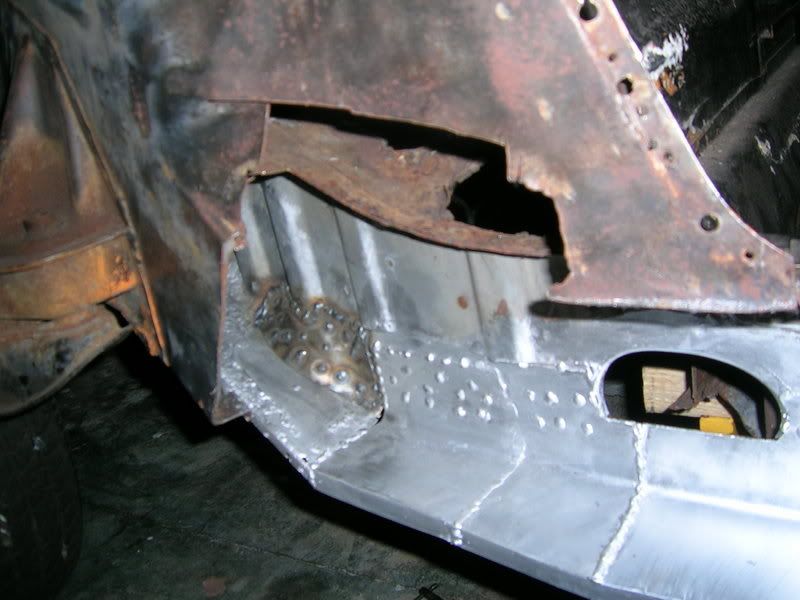
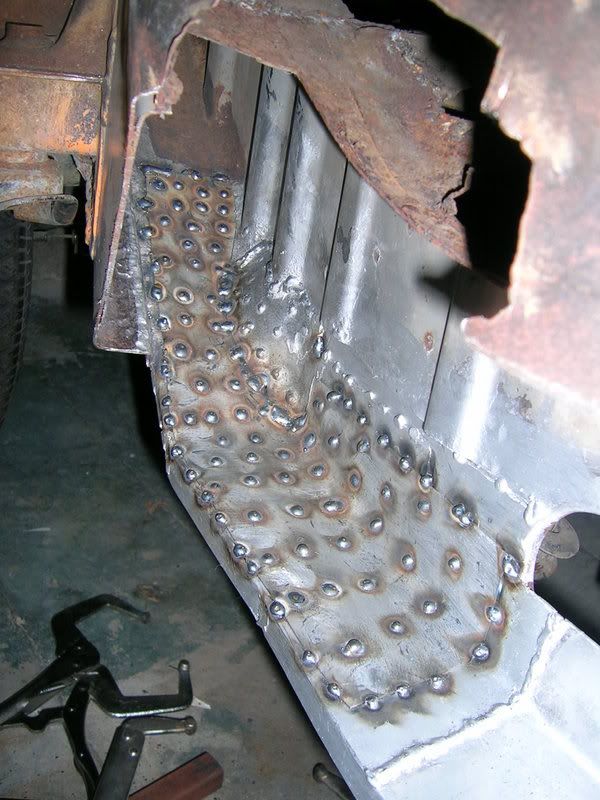
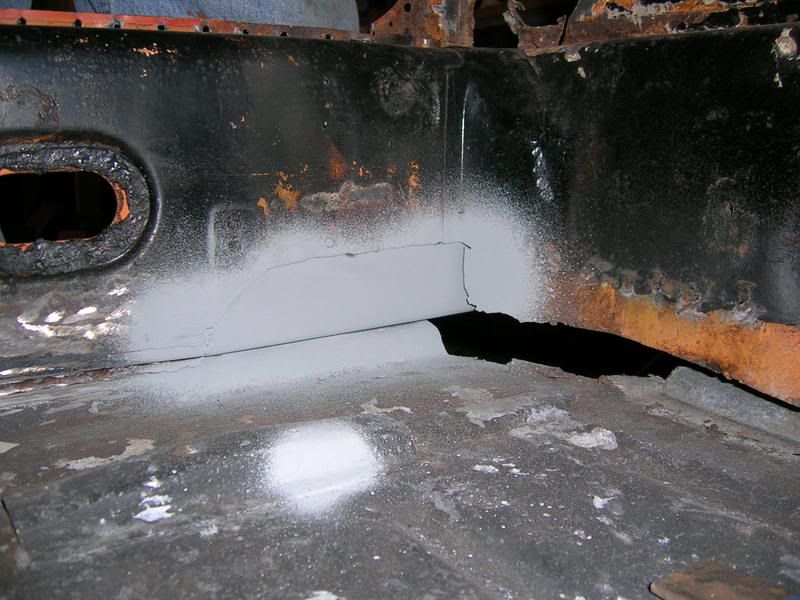
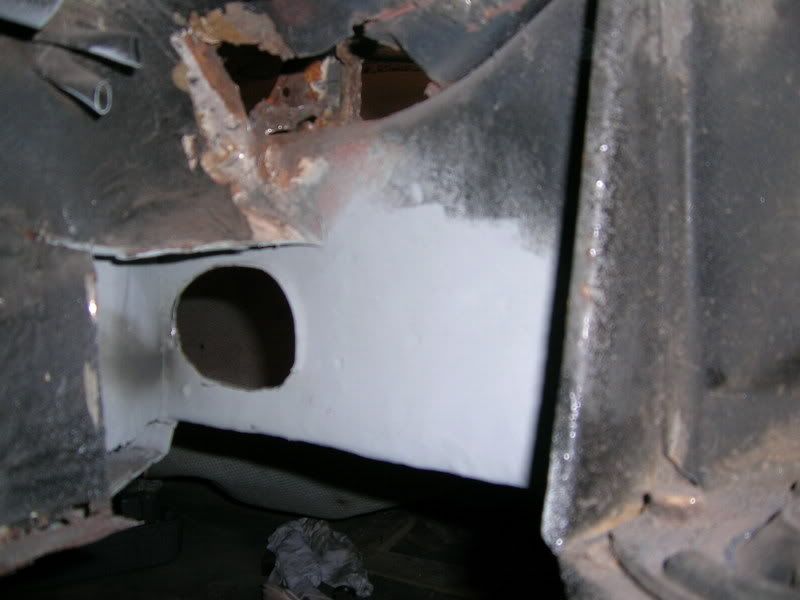
Repairs thus far:
Rotted inner long corner repair:
Inside:
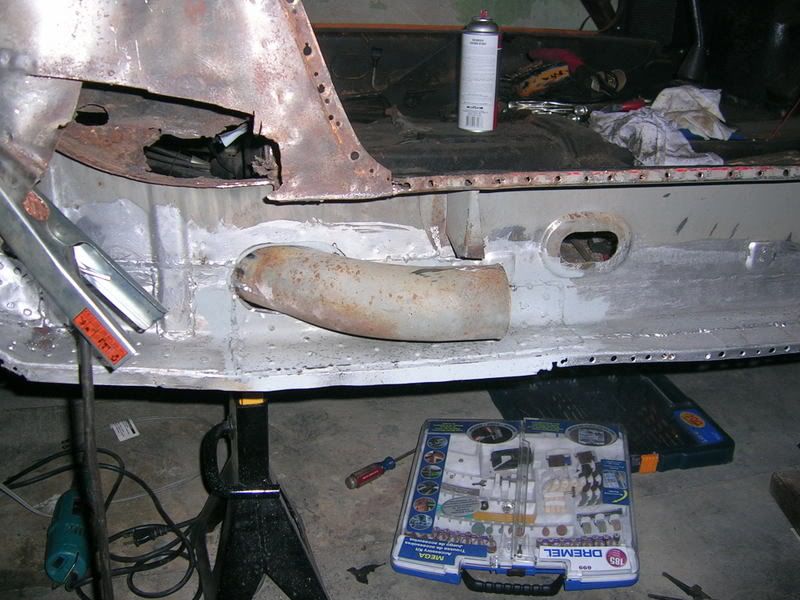
More recent work (skipped the part where I hacked out the heater tube and a bunch more metal, I'll see if I can find those pics too):
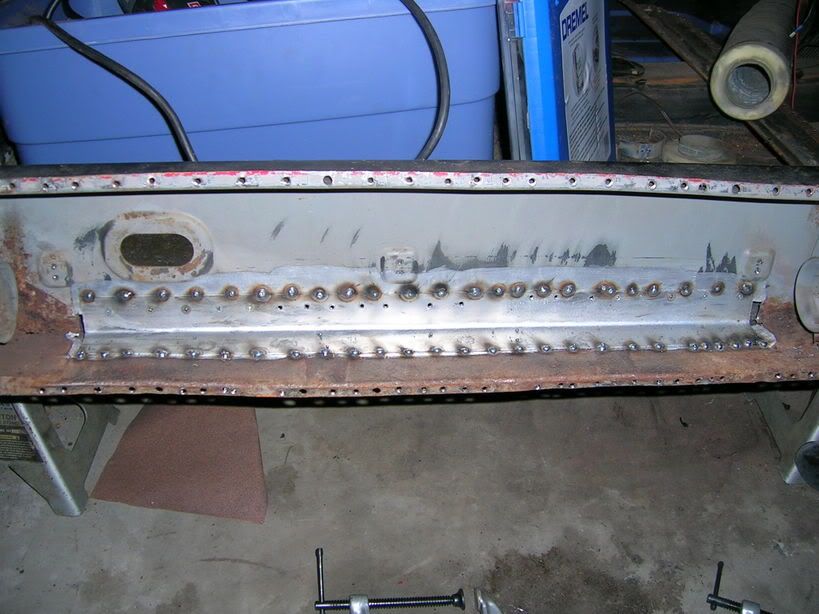
Pieces welded in:
Ground down for another layer:
The next piece to go in:
To be welded in tomorrow. GREs are done, applications are done, its time to get this thing off jackstands.
type11969
Jan 8 2007, 09:40 PM
Last for the night . . . 914 and garage on the move from my rents house to my own garage in Philly:
Open invite to whoever wants to come down to help with this thing, needs help on their 914, or just wants to BS. Grill is only a few steps away from the teener.
-Chris
Hammy
Jan 8 2007, 10:39 PM
Don't scrap. Why give up after you've gone this far?
Eric Taylor
Jan 8 2007, 10:48 PM
yeah man! Awesome work. I really admire people who are willing to do this. I need to learn how to weld too. Hummmm, maybe I should find a rusty old teener. Anyway keep up the good work, it's gona be such a sweet first drive. Eric
markb
Jan 8 2007, 11:37 PM
QUOTE(Hammy @ Jan 8 2007, 08:39 PM)
Don't scrap. Why give up after you've gone this far?
McMark
Jan 9 2007, 12:07 AM
Scrap? Give up? Did I miss something? He's just moving.
Looks great. BTW, is your thread title supposed to be a reference to Arrested Development?
JerryP
Jan 9 2007, 07:24 AM
Nice work Chris. Where are you in Philly? I have a similar project going, hopefully not as extensive as yours but you never know. I've started the cutting but could use some tips and would love to see what you've done. I'm out near King of Prussia.
type11969
Jan 9 2007, 07:32 AM
Not really a reference to arrested development, but it does remind me of Gob using that Europe classic as his theme music. Really just a reference to the song I suppose, made sense considering that if I don't make serious progress in the next few months, I will part this car out. But I am pretty motivated right now, so things are looking up.
-Chris
type11969
Jan 9 2007, 07:36 AM
Jerry-
I'm in Northern Liberties, about 1-1.5 miles north of Center City (between 5th and 6th and close to Girard). If you want to meet up some time, just let me know. I'll be working on my 914 probably every night this week, let me know if you want to stop by. Maybe next week I can stop by KoP to check out what you are up to.
-Chris
type11969
Jan 9 2007, 07:38 AM
Mark, missed the youtube movie you posted until now, great AD clip!
type11969
Jan 10 2007, 07:54 PM
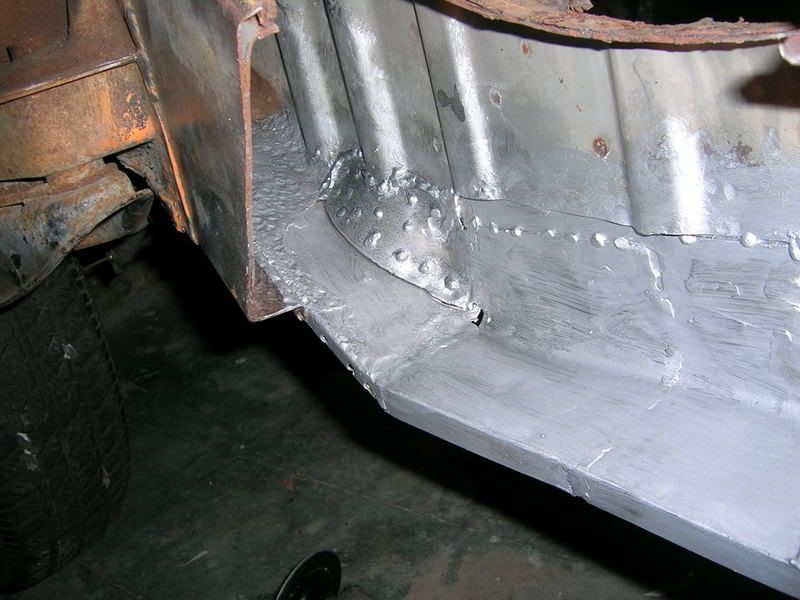
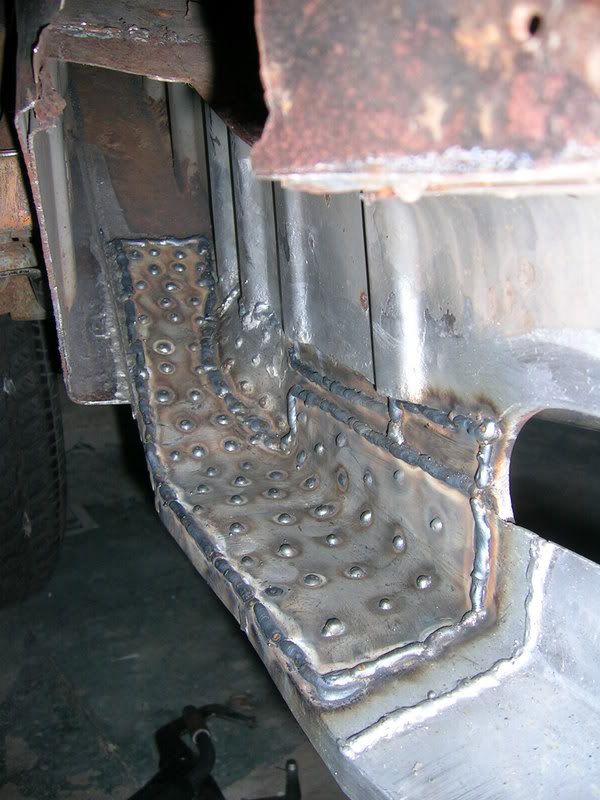
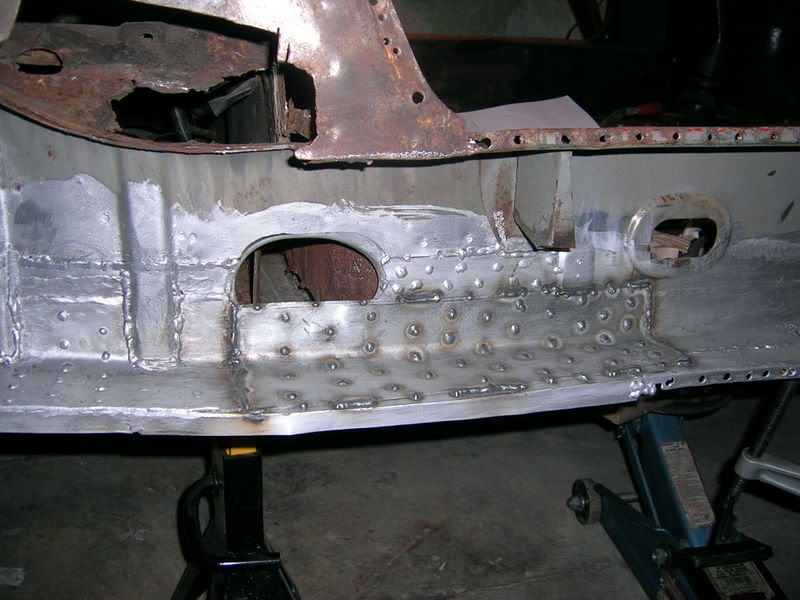
tacked
fully welded
Welds are getting better, starting to get a feel for how to make the bead flow . . .
Next to grind down the welds in the areas of those bump outs, fab the bump outs, and weld in.
McMark
Jan 10 2007, 10:50 PM
Looking good!
Watch out for warpage with those long beads. It's surprising how much a car can bend. It looks like you're doing them in 1" segments which is good. Jump around a lot and let the welds cool. Take your time.
Those are some great shots of the inside of the long. Very informative for people who are wondering "What's in there?"
Keep going!
swood
Jan 10 2007, 10:58 PM
thanks burger boy...I'm going to have that damn Europe song stuck in my head...
type11969
Jan 11 2007, 07:05 AM
QUOTE(McMark @ Jan 10 2007, 08:50 PM)
Looking good!
Watch out for warpage with those long beads. It's surprising how much a car can bend. It looks like you're doing them in 1" segments which is good. Jump around a lot and let the welds cool. Take your time.
Those are some great shots of the inside of the long. Very informative for people who are wondering "What's in there?"
Keep going!
Yeah, I'm jumping around from one location on the patch to the next and joining the tacks, took me at least an hour to tack in then weld that plate. Hopefully that was taking long enough, any good rules of thumb for wait time? Warpage is definitely a concern considering where I am welding, I don't want to throw the rear end out of whack.
-Chris
tdsmoonchild
Jan 12 2007, 09:39 AM
QUOTE(type11969 @ Jan 11 2007, 07:05 AM)
Yeah, I'm jumping around from one location on the patch to the next and joining the tacks, took me at least an hour to tack in then weld that plate. Hopefully that was taking long enough, any good rules of thumb for wait time? Warpage is definitely a concern considering where I am welding, I don't want to throw the rear end out of whack.
-Chris
At the hardware store they sell some spray stuff that keeps the surrounding metal cool. Anyone tried that stuff? Can't remember what it's called, but it seems like if it works it would help, especially with body panels.
highways
Jan 12 2007, 05:35 PM
I was doing 1 inch welds on front fender filling in side marker lights- going slow. I still toasted it and watched it tin-can right in front of my eyes one minute later. Ouch. On the next side I went REAL slow, only tacked small spots, and used a damp cloth to keep things cool and never let heat build up. Turned out much better. I think welding a complete seam is overkill- cars were originally spot welded and seam sealed on the rest. I think if a part is getting too hot to 'nearly' touch it with your bare hand- then it's time to cool down. But also- I'm just a beginner so I don't claim to have infalliable info. Just had 15 minutes of practice on scrap sheetmetal before I fixed my hell hole, rear suspension console, floors, ect. 2 weeks later- car is on four solid wheels again!
type11969
Jan 16 2007, 09:56 PM
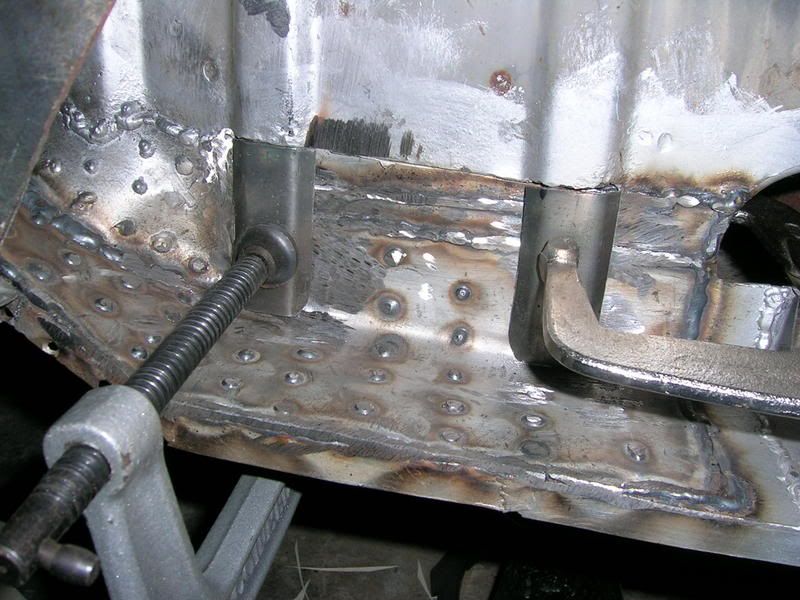
Sadly the weekend was mostly a waste, got a little grinding done but spent most of it either hungover or watching football or both. Fabbed a couple little pieces today to extend the inner long "gussets":
Welding time tomorrow!
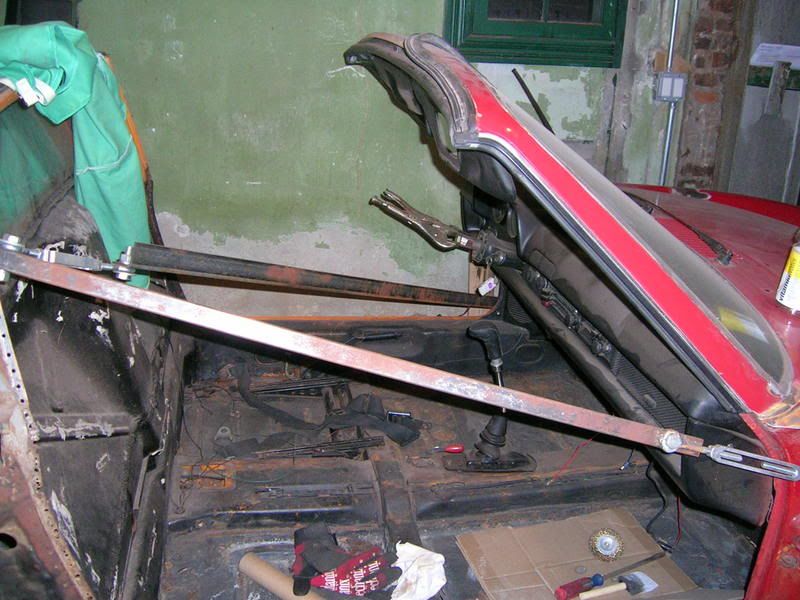
Also nabbed a pic of the adjustable strut/brace setup I have in the car to keep the gap between the targa bar and windshield right:
Please note the high performance steering wheel I have to use now do to the constraints of this new rollcage. Patent pending.
-Chris
nebreitling
Jan 16 2007, 10:05 PM
jesus! that is an insane project. congratulations on making it this far.
type11969
Jan 17 2007, 06:55 AM
Thanks! I wish I was putting all this effort into a 6 chassis, because I know my effort would be more worth it in the end. Then again, I don't think learning to weld on a 6 chassis is a great idea. Really it hasn't cost me very much to get this far, and I don't see it costing me very much either. Some sheet metal, cut off wheels, drill bits, etc. Real expense is just time . . .
type11969
Jan 17 2007, 09:52 PM
Things weren't going my way today. Welds kind of sucked, 3 molten chunks of metal found their way through my clothes (part of the reason why the welds sucked), and I didn't get a whole lot done. Anyway, enough bitchin, here are the "gussets" welded in:
Had to do more grinding than I would have liked, but I think I can declare this area just about done.
McMark
Jan 17 2007, 10:10 PM
That's lookin' really nice.
r_towle
Jan 17 2007, 10:14 PM
I love what you have done there, looks nice and solid...
My advice... BEFORE you pick up the grinder..ask yourself two questions. 1 Will it get in the way if I dont grind it? 2 Will anyone else besides me ever see this?
It greatly reduces the amount of grinding that is needed...
Have fun Rich
Hammy
Jan 17 2007, 10:26 PM
Lookin good..... keep it up
type11969
Jan 18 2007, 07:11 AM
Thanks for the kudos, hopefully it is as strong as it looks. Only did some grinding just to make sure the crappy looking welds were strong. Now I have to make another internal doubler under what will be the cutout for the heater tube and an external piece to complete the shell and this inner long will be done!
With the replacement metal sold online I've noticed that it is only one layer thick . . . do any of you know if that one layer is as thick as the double or triple layers Porsche used from the factory? Seems like if it isn't you could end up with a pretty flexible car if you use them.
-Chris
type11969
Jan 22 2007, 08:05 AM
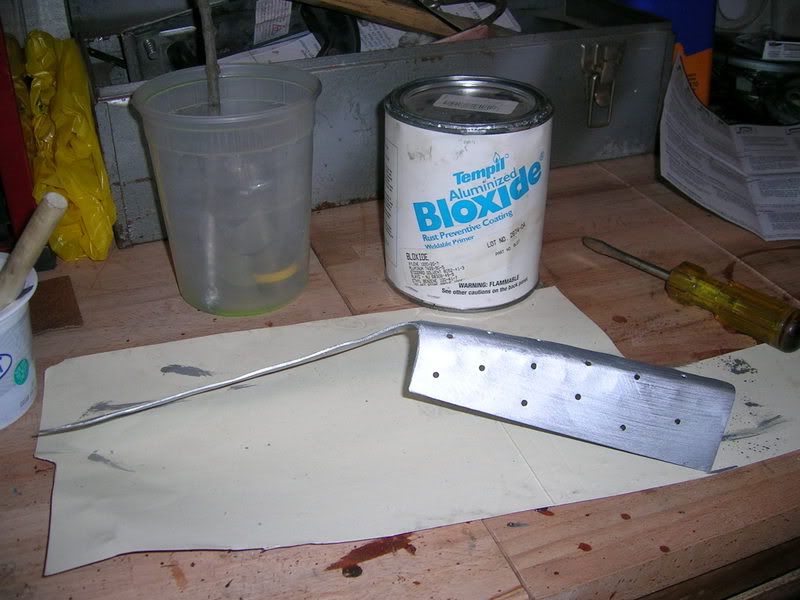
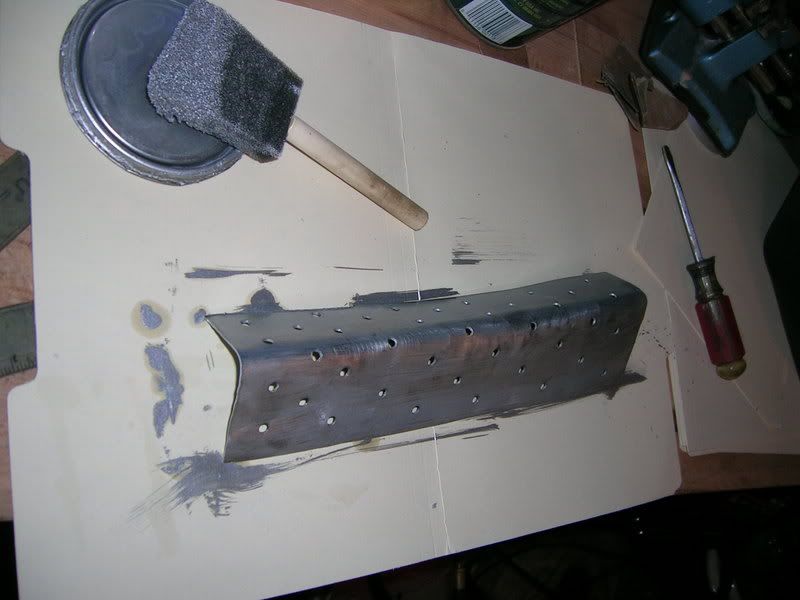
Got a little done this weekend. Ground some welds down for another layer to tie some of the patches together:
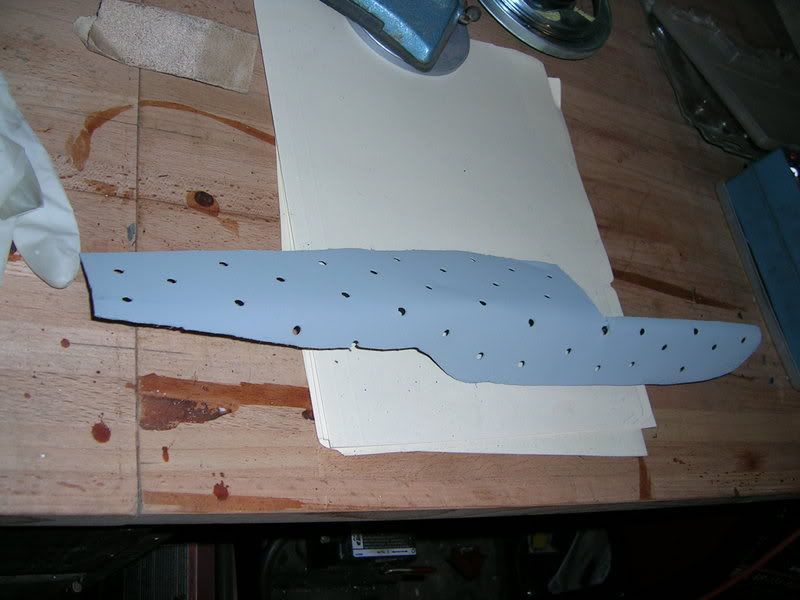
Piece made and primed:
Welded in:
I found that 3/16" holes work much better than the smaller holes I was using previously for the plug welds. Definitely did not need a full seam on this piece.
-Chris
rick 918-S
Jan 22 2007, 08:34 AM
Lookin good!
<<<<<-------
autohausdolby
Jan 24 2007, 08:29 AM
Some serious work there!
type11969
Jan 24 2007, 09:40 PM
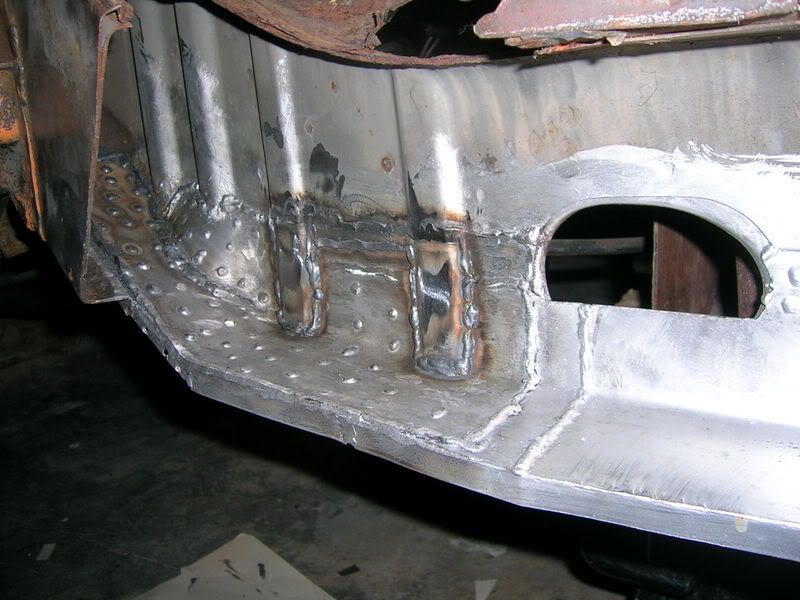
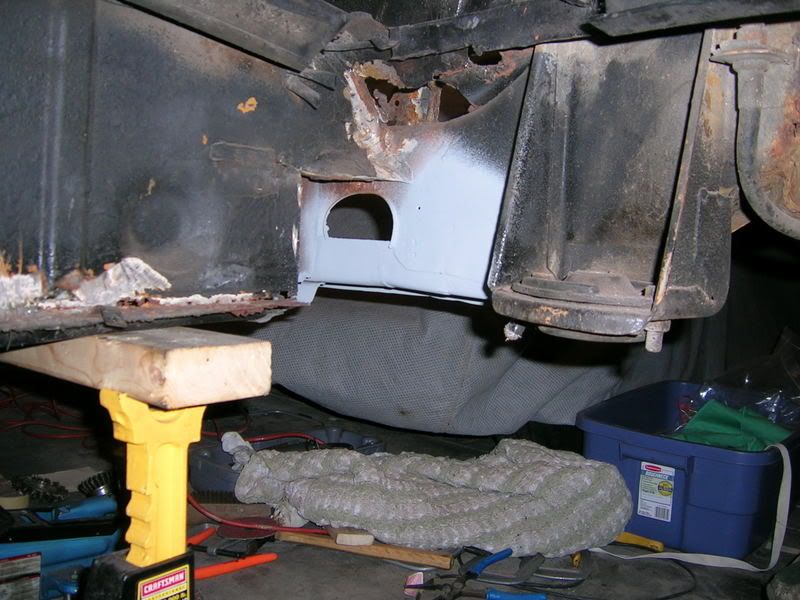
Some more progress, piece fabbed:
Areas cleaned up where the new piece is being added:
Started using a high content zinc weld through primer. Allegedly more durable in the long run than the aluminized primer I have been using, but definitely does not hold up as well to the aluminized stuff when exposed to clamps, etc. Seems to scratch right off. Anyway . . .
Pieces welded in and ground down:
Its time to drill for and weld in the seatbelt mount, then its looking like it is time to finally re-install the heater tube!!
-Chris
dkos
Jan 27 2007, 11:30 AM
QUOTE(type11969 @ Jan 18 2007, 08:11 AM)
Thanks for the kudos, hopefully it is as strong as it looks. Only did some grinding just to make sure the crappy looking welds were strong. Now I have to make another internal doubler under what will be the cutout for the heater tube and an external piece to complete the shell and this inner long will be done!
With the replacement metal sold online I've noticed that it is only one layer thick . . . do any of you know if that one layer is as thick as the double or triple layers Porsche used from the factory? Seems like if it isn't you could end up with a pretty flexible car if you use them.
-Chris
Hi Chirs,
We've been talking about two parts cars I found in the Philly area. I just found your resto thread. My story is similar to yours. Bought a car that looked ok. Started digging and found a big mess hidden under bondo, fiberglass and riveted in scrap metal (I think one piece was an old license plate!). My car's probably not worth repairing, but I'm learning a lot and having fun.
I've been rebuilding my longs in a similar way and was concerned about rigidity too. I bought an aftermarket reinforcement piece made by Brad Mayuers (sp?). It's heavy (at least 1/8" thick), but it's stiff.
dkos
Jan 27 2007, 11:33 AM
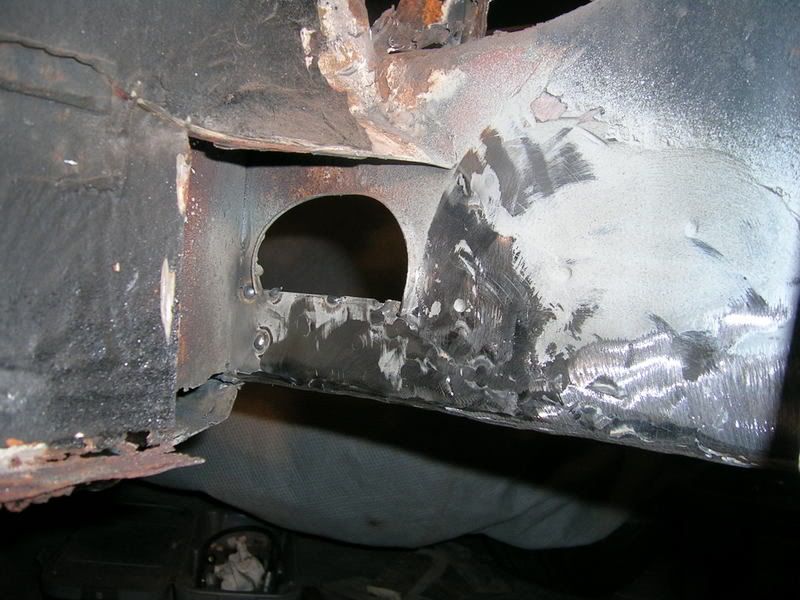
Here are some pics of the Brad Mayuers piece. Top pic shows reinforcement piece on the ground and bottom shows it installed:
dkos
Jan 27 2007, 11:59 AM
how it attaches
SGB
Jan 27 2007, 02:14 PM
GO! GO!
wow. build-it-yerself car. Neato.
incredible job. feel good about it.
type11969
Jan 29 2007, 09:37 PM
Thanks Scott!
Dave, your long looked pretty good, why did you think you needed the extra reinforcement? Definitely plenty strong now, although that doesn't seem like that many spotwelds to attach 1/8" plate to much thinner sheet. I would worry about the spots pulling out, but I think I tend to do things a little overkill. Anyway, I'm sure the guy who made it knows better than I do. I am planning on installing an inner long kit once I have the car back together and a better idea about the gaps. It overlays the exposed long in the passenger compartment and ties them into another plate that overlays the rear firewall. Can't remember off hand who made it, but rest assured, when I get to it, it will be a part of this post.
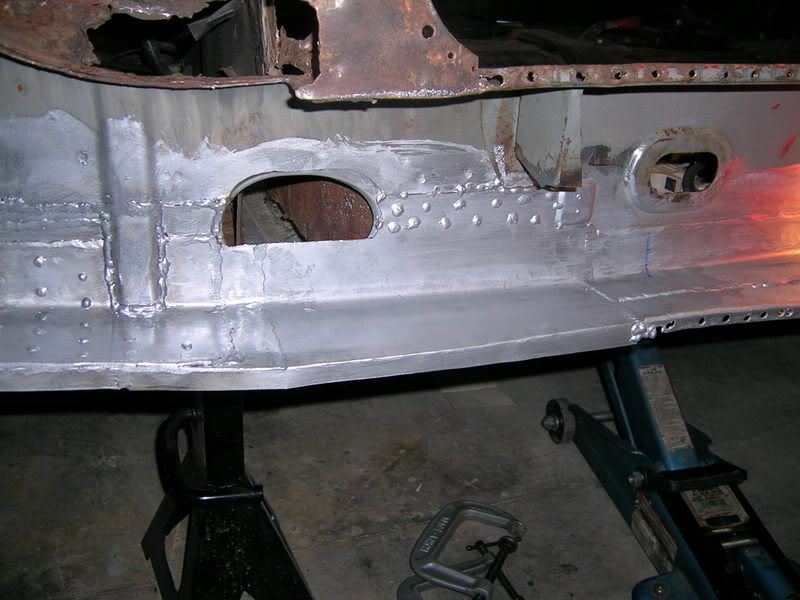
More recent progress, safety first (seat belt mounting plate install):
Roughed out the cutout for the heater tube:
-Chris
dkos
Jan 30 2007, 08:27 AM
Chris,
The reinforcement piece welds in along the whole length of the piece to the botom edge of the inner rocker panel.
dkos
Jan 30 2007, 08:29 AM
My car was in similar condition to yours.
dkos
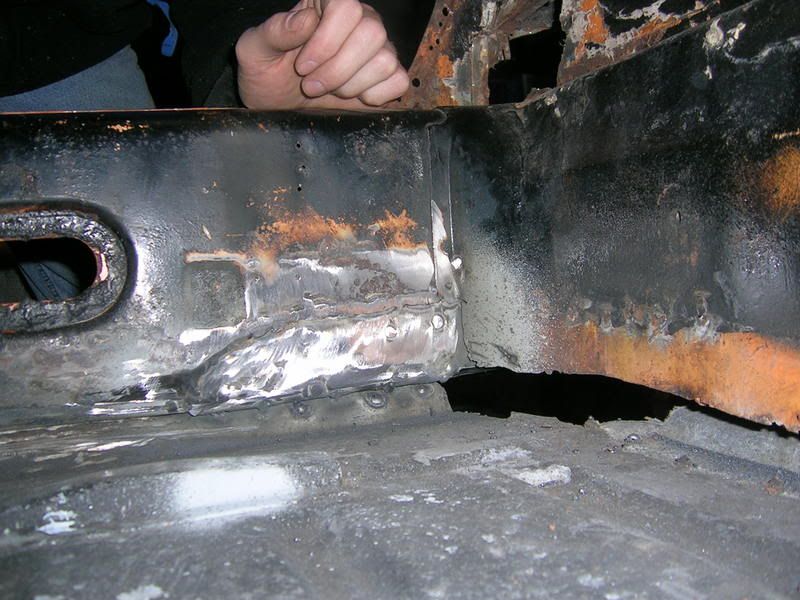
Jan 30 2007, 08:51 AM
I ended up cutting away all that rust and recreating the inside and bottom of the long. The piece I made wraps around the top inside of the long. Unfortunately I don't have a pick from the inside of the car.
dr914@autoatlanta.com
Jan 30 2007, 09:01 AM
my only two comments here are:
1 What a hero to save this 914! 2 Why hours and hours and hours and hours and hours of patching when aftermarket panels are readily available, cheap would have saved hours and hours of hard labor, kept the car more factory original, made it stronger, more valuable, and made it last much much longer?
SGB
Jan 30 2007, 09:13 AM
well, y'know, sometimes we got time, sometimes we got money... (sometimes we got neither!)
dkos
Jan 30 2007, 09:19 AM
My intitial plan was to also fabricate the inner rocker panel myself and then reinforce the whole thing with that 1/8" Brad Mayeur piece, but it was too hard to fabricate an inner rocker panel that BM's part would attach to...so I ended up buying the reproduction part from Restoration Design. It hurt covering that nice new inner rocker panel, but I was already commited to BM's reinforcemnt kit.
If I had it to do over again I would probably go the route you are. get the repro inner rocker and reinforce the long with the Engman inner long kit.
dkos
Jan 30 2007, 09:22 AM
QUOTE(dr914@autoatlanta.com @ Jan 30 2007, 10:01 AM)
my only two comments here are:
1 What a hero to save this 914! 2 Why hours and hours and hours and hours and hours of patching when aftermarket panels are readily available, cheap would have saved hours and hours of hard labor, kept the car more factory original, made it stronger, more valuable, and made it last much much longer?
In my case...I chalk it up to lack of experience and stupidity!!!
dr914@autoatlanta.com
Jan 30 2007, 09:24 AM
QUOTE(dkos @ Jan 30 2007, 07:19 AM)
My intitial plan was to also fabricate the inner rocker panel myself and then reinforce the whole thing with that 1/8" Brad Mayeur piece, but it was too hard to fabricate an inner rocker panel that BM's part would attach to...so I ended up buying the reproduction part from Restoration Design. It hurt covering that nice new inner rocker panel, but I was already commited to BM's reinforcemnt kit.
If I had it to do over again I would probably go the route you are. get the repro inner rocker and reinforce the long with the Engman inner long kit.
We actually developed the rocker clamshell for perfect fit over the factory assembly. It was meant to reinforce a 914 too far gone to repair properly or to reinforce a racing car. Certainly not needed for a stock 914! This is the same part that restoration design now sells.
dkos
Jan 30 2007, 09:36 AM
QUOTE(dr914@autoatlanta.com @ Jan 30 2007, 10:24 AM)
QUOTE(dkos @ Jan 30 2007, 07:19 AM)
My intitial plan was to also fabricate the inner rocker panel myself and then reinforce the whole thing with that 1/8" Brad Mayeur piece, but it was too hard to fabricate an inner rocker panel that BM's part would attach to...so I ended up buying the reproduction part from Restoration Design. It hurt covering that nice new inner rocker panel, but I was already commited to BM's reinforcemnt kit.
If I had it to do over again I would probably go the route you are. get the repro inner rocker and reinforce the long with the Engman inner long kit.
We actually developed the rocker clamshell for perfect fit over the factory assembly. It was meant to reinforce a 914 too far gone to repair properly or to reinforce a racing car. Certainly not needed for a stock 914! This is the same part that restoration design now sells.
Dr.,
I didn't think I had enough of the "factory assembly" left to use your rocker clamshell. I was learning to weld and it seemed like a "fun" project to try to fabricate the pieces myself. There is certainly a sense of satisfaction you get from banging out pieces of metal in your garage and rebuilding a car with it.
Anyway....I don't want my stupidity to take away from Chris' excelent restoration thread. AWESOME JOB CHRIS!! I will fade into the background again.
dr914@autoatlanta.com
Jan 30 2007, 09:53 AM
QUOTE(dkos @ Jan 30 2007, 07:36 AM)
QUOTE(dr914@autoatlanta.com @ Jan 30 2007, 10:24 AM)
QUOTE(dkos @ Jan 30 2007, 07:19 AM)
My intitial plan was to also fabricate the inner rocker panel myself and then reinforce the whole thing with that 1/8" Brad Mayeur piece, but it was too hard to fabricate an inner rocker panel that BM's part would attach to...so I ended up buying the reproduction part from Restoration Design. It hurt covering that nice new inner rocker panel, but I was already commited to BM's reinforcemnt kit.
If I had it to do over again I would probably go the route you are. get the repro inner rocker and reinforce the long with the Engman inner long kit.
We actually developed the rocker clamshell for perfect fit over the factory assembly. It was meant to reinforce a 914 too far gone to repair properly or to reinforce a racing car. Certainly not needed for a stock 914! This is the same part that restoration design now sells.
Dr.,
I didn't think I had enough of the "factory assembly" left to use your rocker clamshell. I was learning to weld and it seemed like a "fun" project to try to fabricate the pieces myself. There is certainly a sense of satisfaction you get from banging out pieces of metal in your garage and rebuilding a car with it.
Anyway....I don't want my stupidity to take away from Chris' excelent restoration thread. AWESOME JOB CHRIS!! I will fade into the background again.
Again my hero for taking the vast time to save this car! WE would love to see the final piece in person.
type11969
Jan 30 2007, 11:22 AM
QUOTE(dkos @ Jan 30 2007, 06:51 AM)
I ended up cutting away all that rust and recreating the inside and bottom of the long. The piece I made wraps around the top inside of the long. Unfortunately I don't have a pick from the inside of the car.
Dave-
That looks really good, definitely puts my fab skills to shame! I can't believe your driver side long looked like that though, what kind of shape was the pass side in? Definitely looks plenty strong though, but the extra outer layers certainly can't hurt! Where are you in Philly? I'd like to check your car/progress out at some point. JerryP is in the area too, maybe we can all get together at some point. It seems we all have the same rusty 914 repairs.
-Chris
dkos
Jan 30 2007, 11:30 AM
QUOTE(type11969 @ Jan 30 2007, 12:22 PM)
QUOTE(dkos @ Jan 30 2007, 06:51 AM)
I ended up cutting away all that rust and recreating the inside and bottom of the long. The piece I made wraps around the top inside of the long. Unfortunately I don't have a pick from the inside of the car.
Dave-
That looks really good, definitely puts my fab skills to shame! I can't believe your driver side long looked like that though, what kind of shape was the pass side in? Definitely looks plenty strong though, but the extra outer layers certainly can't hurt! Where are you in Philly? I'd like to check your car/progress out at some point. JerryP is in the area too, maybe we can all get together at some point. It seems we all have the same rusty 914 repairs.
-Chris
Thanks for the kind word...pics look beter than the real thing. I'm working on the passenger side now...it's in similar shape.
I was clueless when I bought this car. The PO had fiberglass rocker covers on the car hiding all the rust. I didn't know enough to look under them.
I live in Flourtown, just west of Mt. Airy...outside of Philly a few miles.
type11969
Jan 30 2007, 11:37 AM
Fortunately my driver's side seems sound right now . . . Have you braced your car at all? My biggest worry is that when I am all done, the car will be all warped out of shape. Hopefully the bracing I have fabbed will mitigate that.
dkos
Jan 30 2007, 11:40 AM
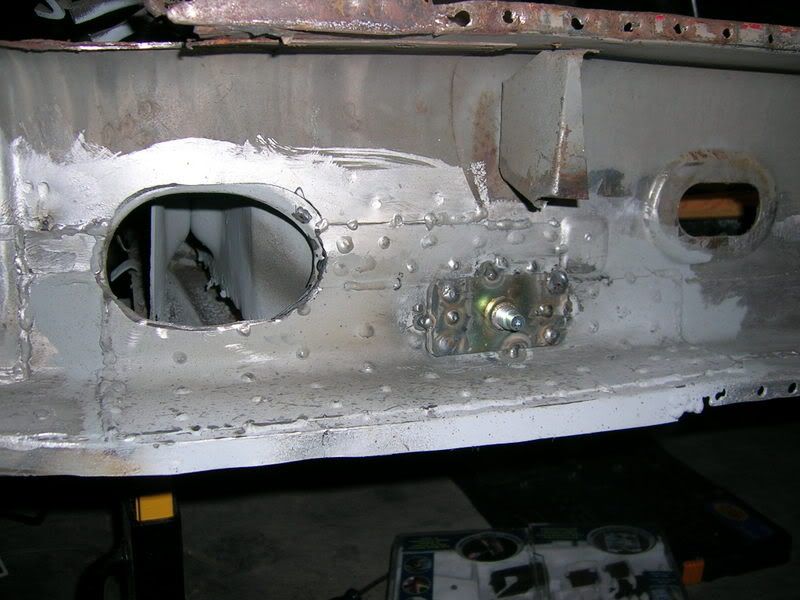
some pics
dkos
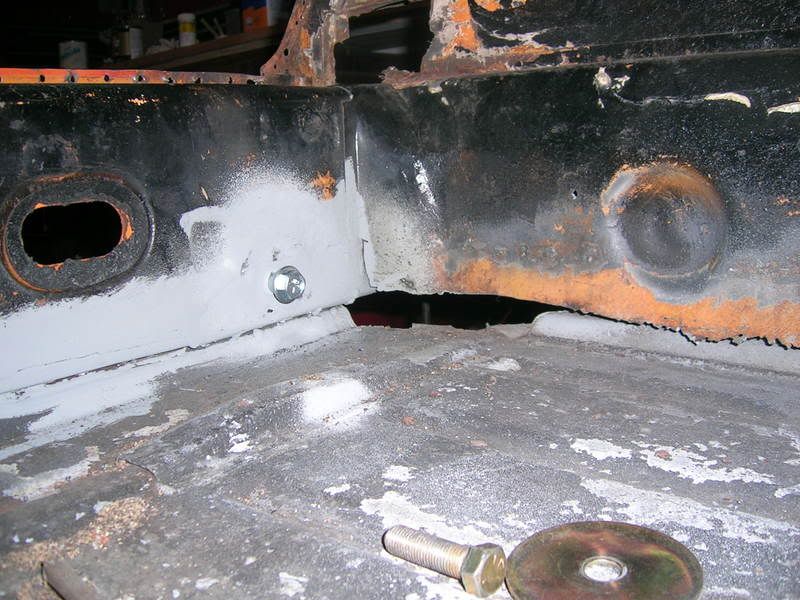
Jan 30 2007, 11:41 AM
more:
dkos
Jan 30 2007, 11:45 AM
QUOTE(type11969 @ Jan 30 2007, 12:37 PM)
Fortunately my driver's side seems sound right now . . . Have you braced your car at all? My biggest worry is that when I am all done, the car will be all warped out of shape. Hopefully the bracing I have fabbed will mitigate that.
yep!
This is a "lo-fi" version of our main content. To view the full version with more information, formatting and images, please click here.


 He's just moving.
Looks great. BTW, is your thread title supposed to be a reference to Arrested Development?
He's just moving.
Looks great. BTW, is your thread title supposed to be a reference to Arrested Development?
 tips and would love to see what you've done. I'm out near King of Prussia.


 I will fade into the background again.
 ![popcorn[1].gif](http://www.914world.com/bbs2/style_emoticons/default/popcorn[1].gif)