Help - Search - Members - Calendar
Full Version: Steve's unending Progress thread
914World.com > The 914 Forums > 914World Garage
Pages: 1, 2, 3, 4, 5, 6, 7, 8, 9, 10
stephenaki
Soooo...I got a lot of things moved around last night and finished moving things out of the way to start the demo of the garage closet this morning.
Click to view attachment
Here is where we started, close to 3 1/2 feet were taken up by the closet as far as space going to the back wall. It was about 20 feet to the point that we took out the wall right next to the water heating unit.

Click to view attachment

My daughter, Rianna, made sure I woke her up around 0730 so she could help. Mike, MBlizzard, showed up around 0745 and you can see the destruction taking place.

Click to view attachment
It took us about 4 hours to tear everything out and clean up. The garage looks much larger now!

We also found some issues that I will have to deal with, termite trail up one 2x4 stud that I need to check to see if it needs replacement.

And what looks to be mold in the ceiling insulation.
Click to view attachment
I'll need to get into the attic and investigate. Needless to say, I can't do much more until I remedy these issues. I'll probably pull the rest of the drywall down tomorrow to check on the stud and make sure there are no other termite trails. I called it quits for today as I'm beat.

Getting closer to being able to get the Teener and MG so I can get back to work on them! sawzall-smiley.gif
stephenaki
Well...The cars are back!! Headed to VA yesterday and met my buddy Leo at the storage unit. It took us about an hour and a half to load the MG and Teener. The Teener was easy, it went on the auto transport; the MG however was an entirely different story!
Click to view attachment

I didn't have the steering unit connected on the MG and neither wheels were connected to the steering rack so the first attempt to bring her up had the front wheels turning the wrong way. OK, lets try bringing her up from the back. NOPE! She would have bottomed out. Damn, now what? headbang.gif

Then Leo had a brilliant idea, lets connect the wheels with a ratchet strap! idea.gif So we ran the straps to the connecting ends of the wheel tie rod arms, tighten just enough so that one wheel causes the other to turn and...VOILA!! Wheels stay straight and we can get her up into the truck! aktion035.gif

We had a 5000 lb ratchet strap we initially used as a come a long but once we got it up on the ramps we both just got behind her and pushed her up the rest of the way. Good thing its just a chassis on wheels! blink.gif

I got back this afternoon and got the Teener off the auto transport and then moved and unhooked the transport. MBBlizzard will be coming to help me unload the MG tomorrow then we start work on the Teener Motor. I'll need a new clutch cable and speedometer cable though. They came loose and 450 miles of dragging on the road kinda hosed them. stromberg.gif Now I gotta go and order me the lift!

I start at General Dynamics on the 11th of April so I need to get as much work done now before I start as I will be doing a lot of traveling. I'm thinking it won't be until May now until I get the lift ordered, delivered and installed.

Let the madness begin again!!!! lol-2.gif lol-2.gif

mb911
QUOTE(stephenaki @ Apr 2 2016, 05:18 PM) *

Well...The cars are back!! Headed to VA yesterday and met my buddy Leo at the storage unit. It took us about an hour and a half to load the MG and Teener. The Teener was easy, it went on the auto transport; the MG however was an entirely different story!
Click to view attachment

I didn't have the steering unit connected on the MG and neither wheels were connected to the steering rack so the first attempt to bring her up had the front wheels turning the wrong way. OK, lets try bringing her up from the back. NOPE! She would have bottomed out. Damn, now what? headbang.gif

Then Leo had a brilliant idea, lets connect the wheels with a ratchet strap! idea.gif So we ran the straps to the connecting ends of the wheel tie rod arms, tighten just enough so that one wheel causes the other to turn and...VOILA!! Wheels stay straight and we can get her up into the truck! aktion035.gif

We had a 5000 lb ratchet strap we initially used as a come a long but once we got it up on the ramps we both just got behind her and pushed her up the rest of the way. Good thing its just a chassis on wheels! blink.gif

I got back this afternoon and got the Teener off the auto transport and then moved and unhooked the transport. MBBlizzard will be coming to help me unload the MG tomorrow then we start work on the Teener Motor. I'll need a new clutch cable and speedometer cable though. They came loose and 450 miles of dragging on the road kinda hosed them. stromberg.gif Now I gotta go and order me the lift!

I start at General Dynamics on the 11th of April so I need to get as much work done now before I start as I will be doing a lot of traveling. I'm thinking it won't be until May now until I get the lift ordered, delivered and installed.

Let the madness begin again!!!! lol-2.gif lol-2.gif


General dynamics of predator drone fame???

Former life did a lot of work with them..
r_towle
GD, good place to land.
stephenaki
QUOTE(r_towle @ Apr 2 2016, 07:51 PM) *

GD, good place to land.


Yup. I was recruited by previous subordinates that I worked with in 5th Special Forces Group. They wanted a Program Manager that they knew would get the job done and already understood the SOF community. I'm looking forward to getting started. beerchug.gif
stephenaki
OK, so Mike came over this morning and we pulled the MG off. I had things pretty much set up and was installing the tie rod ends when he arrived. We hooked up a big ass ratchet strap to the front to control the car coming down then he and I slowly backed it off the trailer and down the ramps. When we got within 6 inches or so of the ratchet strap having tension we chocked each rear wheel and one of us would go up and loosen the strap some more. She came down a lot easier than she went up! happy11.gif

So here is what a truck with two cars loaded up looks like.
Click to view attachment

Here is what is left of the clutch and speedo cables that drug on the ground. Good thing Mike has a couple of spares for me! blink.gif
Click to view attachment

And now the garage is full! I will have the four post ordered next month and hopefully installed before the end of May. I'll start putting the Teener motor together this week.
Click to view attachment

It's kinda hard to see but on the right fender their is a perfect line of rust and paint bubbling. Methinks the previous owner did a shitty repair on the fender! mad.gif I'm gonna have to grind off the paint and see what I am dealing with but I felt a strip of something on the underside of the fender so I'm thinking whoever 'fixed' it only applied a bandaid fix. I'm hoping that I can still salvage it and don't have to do any major repair work, we'll see.
stephenaki
Let the madness begin! Again!

Click to view attachment

After a week on the road with my new job I got back late Friday night. I wanted to start on Saturday but I had some honey do's that I needed to get done and I watched a movie with my daughter. Unfortunately, she also has walking pneumonia so things have been a bit hectic.

I finally got the chance to pull the motor out of the tuff box this afternoon. I cleaned up each case half and will wrap them in plastic to keep any dirt, dust or debri from accumulating. It will have to stay that way until next weekend as I hit the road again tomorrow to work on some production line issues with the vehicle we were contracted to build. Hopefully, my daughter will be well by the time I get back so I can get more done. At least its a start! beer.gif
stephenaki
OK, need some help. Evidently the dowel pin, 111-101-123, straight pin for crankshaft bearing, has fallen out of one of my crankcase halves. I kinda need that to keep the bearing from spinning and ensuring it lines up with the oil lubrication holes.

PP has them for about a $1 but then wants $4.75 to ship the damn thing! headbang.gif

I don't suppose anyone has an extra one they'd like to part with or knows the measurements so I can try to source it that way? confused24.gif

Unfortunately, I don't have anything I need to order from them to make the shipping worthwile.
porschetub
[quote name='stephenaki' date='Apr 24 2016, 11:26 AM' post='2335036']
OK, need some help. Evidently the dowel pin, 111-101-123, straight pin for crankshaft bearing, has fallen out of one of my crankcase halves. I kinda need that to keep the bearing from spinning and ensuring it lines up with the oil lubrication holes.

PP has them for about a $1 but then wants $4.75 to ship the damn thing! headbang.gif

I don't suppose anyone has an extra one they'd like to part with or knows the measurements so I can try to source it that way? confused24.gif

Quote;

Get all new ones and make sure they fit well,order say a couple of oil fiters and other consumables you will always need them,by the way Autohaus have free shipping on orders over $48 dollars at the moment.


stephenaki
QUOTE(porschetub @ Apr 23 2016, 07:07 PM) *


Get all new ones and make sure they fit well,order say a couple of oil fiters and other consumables you will always need them,by the way Autohaus have free shipping on orders over $48 dollars at the moment.


I was heading that way but Autohaus doesn't have everything I need. I did find a site where I got a couple of other parts that PP and Autohaus doesn't carry. I now have them on order so I can work on it when I get back as I am back on the road Tuesday for business. New position at GD has me traveling quite a bit.
stephenaki
OK, it's much harder to put a car together when you're on the road all the time. dry.gif

Anyway, back for the weekend and got some work done.
Click to view attachment
Got these cleaned up, new rings installed and they are ready for install.

Click to view attachment
Got the crank and cam in but the front pulley seal is deformed so I ordered another front and main rear just in case. I had gotten in the locating pins so everything is now good on the crank bearings.

Click to view attachment
May have been able to use this but I wasn't taking any chances.

I'm on the road again tomorrow but hopefully my seals will be in by the time I get back so I can finish putting the case together and install the pistons and cylinders. Slow but steady.
stephenaki
Been a busy month but got some time to work on the motor. Need to add a few more bolts and nuts then torque and she is ready for they cylinder and pistons. Thankfully Mike Blizzard remembered to ask the question about the timing marks on the Cam and crank; I had forgotten about that. It would not have ended well as I had the marks 180 out! blink.gif

Click to view attachment

Click to view attachment

Click to view attachment

I need to pick up a couple more bolts as I bought the wrong length and I'll have everything bolted up and ready to torque. Next the fun begins with installing the cylinder's and pistons, that was always a pain in the butt. dry.gif
DavidSweden
QUOTE(stephenaki @ Jun 18 2016, 02:09 PM) *

Been a busy month but got some time to work on the motor. Need to add a few more bolts and nuts then torque and she is ready for they cylinder and pistons. Thankfully Mike Blizzard remembered to ask the question about the timing marks on the Cam and crank; I had forgotten about that. It would not have ended well as I had the marks 180 out! blink.gif

Click to view attachment

Click to view attachment

Click to view attachment

I need to pick up a couple more bolts as I bought the wrong length and I'll have everything bolted up and ready to torque. Next the fun begins with installing the cylinder's and pistons, that was always a pain in the butt. dry.gif


Its looking good. Its great fun putting an engine together even with the inevitable problems that always seem to turn up.
r_towle
All rotating smooth and easy now?
stephenaki
QUOTE(r_towle @ Jun 18 2016, 02:41 PM) *

All rotating smooth and easy now?

Yep. This part is actually easy when I make sure I do it right. The challenge will be with installing the FI system. I'm a total newb to that set up so it should be interesting.
stephenaki
Hope everyone is having a great 4th of July celebration! beer.gif 351.gif

I spent a long week over in St. Petersburg, FL last week with wife and daughter in tow. They got to go and see things while I spent the week in meetings and working groups at our corporate headquarters. dry.gif At least I spent time out on my bosses boat on Saturday before we came back on Sunday.

I got to work on the motor today and got the passenger's side done with the exception of installing the rocker assembly and push rods. I'll do those after I get the other side put together.

I didn't realize that when you have the case cradle that it hinders your ability to just slide on the piston and cylinder assembly and put in the wrist pins and circlips to connect the piston rods. NOW I understand why Porsche uses the piston ring compressor design they do! Thankfully, I found the damn thing! So here is today's effort, I am taking a break and may go out in a bit and work on the other side.

Click to view attachment
Not how I wanted to put it on!

Click to view attachment
I had removed the head studs to make it easier to maneuver.

Click to view attachment
Time to torque the head.

Click to view attachment
One side down, one side to go!

I chased the exhaust studs before I assembled it to ensure I had no crud built up on it. I'll clean up the intake studs before I start assembling anything else. With any luck, I'll have the base motor done before I have to start traveling again on Wednesday then I get to mess with the FI system.
stephenaki
Other side done, partially installed impeller. fan Will adjust valve clearance tomorrow then, on the road again!

Click to view attachment
stephenaki
Well, I've been a bit busy this weekend. I've been on the road for pretty much four weeks straight and finally got to come home for a week or so. I had done some work about three weeks ago when I was home for the weekend so was able to finish the rest off this weekend. aktion035.gif

First off, one must remember that engine tin goes on UNDER push tubes! headbang.gif It's even worse when you put oil in it then have to take things apart to fix your screw up! dry.gif

That being said, got most of the tin on yesterday but had to pull her off the stand as the cradle interfered with the rest of the tin.

Click to view attachment
Well, my first thought wasn't so smart. I had thought the wife could help, she gave me the, 'your on serious fucking crack!' look. She said, call Mikey! (MBlizzard)

Click to view attachment
Nope, not gonna bother Mikey, I just had to think it through. She came down perfect!

Got a lot put on yesterday before I called it a day. I can tell I am way out of shape, I was aching yesterday after I was done!
Click to view attachment


stephenaki
So today I finished her up and got the dizzy in, all the tin on and gearbox mated up.
Click to view attachment

I have a box full of FI parts that I'll start going through this weekend to see what I have, what needs some help and cleaning, etc. I'm hoping to get it all sorted before I head off to Florida again in a couple of weeks. I am not doing two week stints at our corporate HQ so it makes things a bit more challenging to get to. Progress is being made. Once I get this all sorted it will be time to start prepping the bay for the transition to a side shift setup.
stephenaki
Well, things are moving fast here in TN at least with regards to getting ready to move to Florida. Mike, MBLizzard, came over yesterday and we got three cars ready to move. Put the hard top on the Merc, got the motor into the Teener and got the steering assembly put together for the MG. piratenanner.gif

We learned that there is a significant difference in motor position on the Teener if you don't swap over the front motor mounts from the tail shift to the side shift mounts. Motor sits quite a bit lower! blink.gif

Well this is just to move the car as a unit so it will work; just ordered two from Pelican since I will need them eventually. Also was reminded that the standard bolt size for the MG is 5/16 x 24tp.

House goes on the market in February, just about a year after we bought it, then it is time to search the Florida market! Good thing we don't have to do much for prep as I am playing production and program manager this month since my production manager departed for a different position in VA. Been living in Anniston, AL and commuting home o weekends. dry.gif
stephenaki
And so it begins; house is now on the market. If anyone is looking for a house in the Halls area of Knoxville, let me know and I'll send you the link on Realtor.com! biggrin.gif

Now lets see how long this will take to sell; we'd like a quick sale but we haven't figured out quite yet what we would do if it did sell quickly since we can't leave until the end of May. blink.gif
stephenaki
Well, after a couple of inspections it looks like we are moving ahead with a house in Palmetto, FL. We have to have the VA inspection done before it is all clear but, if all goes well, we'll be closing mid-June.

We've had a couple of offers on our house in TN but we didn't accept them as they were absolutely worthless. Not sure why people think that offering $50K less than the market value and asking for closing costs is an acceptable offer especially in a seller's market. screwy.gif

She'll sell but it may take a bit. I did find a company that will put in my workshop. They'll do the slab and put up the metal building. I plan on putting in a 40x30 slab for a workshop with a metal building. Since we are sitting on a bit over an acre of land I have plenty of room for it! cheer.gif It will also allow me to put in a two post lift which is less expensive than a four post. Can't wait to get things started! piratenanner.gif
stephenaki
Looking for a lift dealer and installer in the Tampa and south area! Anyone got any recommendations?

So we have sold our house here in TN and will be closing on the house in the Palmetto area mid-June. We have to put a new roof on it but I am also putting in a workshop about 30'x50' and looking for a two post lift. I like the rotary lifts but am open to other options. Anyone know of a good dealer down in the Tampa or Bradenton area that they can recommend? popcorn[1].gif
stephenaki
Were here! Been here about two weeks and still unpacking. Should have the new shop up in about three months. And then I can clear out the garage and move everything over. Went with a 30' x 5'' insulated metal building. I'll have to figure out AC as it is hotter than hades and only gonna get hotter.

I know we have members in the area, any St. Pete, Tampa, Palmetto area Teener events coming up?
carr914
QUOTE(stephenaki @ May 29 2017, 08:34 AM) *

Looking for a lift dealer and installer in the Tampa and south area! Anyone got any recommendations?

So we have sold our house here in TN and will be closing on the house in the Palmetto area mid-June. We have to put a new roof on it but I am also putting in a workshop about 30'x50' and looking for a two post lift. I like the rotary lifts but am open to other options. Anyone know of a good dealer down in the Tampa or Bradenton area that they can recommend? popcorn[1].gif


I have a Rotary Lift and used them when I had it installed 12 years ago - I haven't needed them since.

Our Tampa numbers are down as URY, Chad & snakemain moved. SMG, thePaintedMan & I are around.

If you need professional help with a 914, my buddy Carlos has CRS Motorsports in Bradenton. He has 2 914s there now. My Camaro is there too
stephenaki
QUOTE(carr914 @ Jul 2 2017, 06:10 PM) *

QUOTE(stephenaki @ May 29 2017, 08:34 AM) *

Looking for a lift dealer and installer in the Tampa and south area! Anyone got any recommendations?

So we have sold our house here in TN and will be closing on the house in the Palmetto area mid-June. We have to put a new roof on it but I am also putting in a workshop about 30'x50' and looking for a two post lift. I like the rotary lifts but am open to other options. Anyone know of a good dealer down in the Tampa or Bradenton area that they can recommend? popcorn[1].gif


I have a Rotary Lift and used them when I had it installed 12 years ago - I haven't needed them since.

Our Tampa numbers are down as URY, Chad & snakemain moved. SMG, thePaintedMan & I are around.

If you need professional help with a 914, my buddy Carlos has CRS Motorsports in Bradenton. He has 2 914s there now. My Camaro is there too


Does he do MG motors? I need some block and head work on the MG. Haven't done much with the 914 recently.
stephenaki
Sooooo...I've been a bit busy. We moved down to lovely Florida this past June and I have been swamped with both work and house projects. I kinda focused on getting the MG Midget put back together and put the teener on the back burner. I did however manage to finally get my workshop up.

IPB Image
IPB Image

It is a 30' x 50' in the back of the house. I have to run electrical to it which I am working on now and eventually get the plumbing hooked up. I have to finish the interior and will put up OSB to protect the insulation from damage and will eventually put down Polyurea flooring.

I have a lift coming and will hopefully get that installed this coming week. I'm happy with the building, I just need to get some things cleaned up before I start moving everything over. I'm hoping to be able to start operating out of it by the end of January if not sooner.
76-914
That's huge. Fillit up with cars and enjoy the Hell out of it. beerchug.gif
Krieger
Between you and the Doc's cool garage additions. It has me thinking. Some day idea.gif
Coondog
Awesome garage. Congrats
mepstein
That’s a great space. Congrats!

Thanks for the tip in the garage floor coating. I read up on it and it’s what I will lay down in the spring.
stephenaki
QUOTE(mepstein @ Dec 10 2017, 09:40 AM) *

That’s a great space. Congrats!

Thanks for the tip in the garage floor coating. I read up on it and it’s what I will lay down in the spring.


There are three suppliers of the polyurea coating that sell to the general public, I did the math and thus far garageflooringllc.com is the most economical however, they also have the longest cure time, 72 hours. Still, I will probably be going with them.

When you are ready, do a lot of reading on floor prep, this is the most critical aspect of any coating whether it is epoxy or polyurea. The previous owner threw down a cheap epoxy coating in the main garage then stuck self-stick carpet on over it. Because he failed to prep the floor, all the coating came up when the carpet was removed. headbang.gif

Here is the article that I happened upon that explained the difference between epoxy and polyurea. It also lists the other two vendors which although they are more expensive, their cure time is a lot shorter.
http://allgaragefloors.com/polyurea-best-g...r-coating-kits/
mepstein
QUOTE(stephenaki @ Dec 11 2017, 07:51 PM) *

QUOTE(mepstein @ Dec 10 2017, 09:40 AM) *

That’s a great space. Congrats!

Thanks for the tip in the garage floor coating. I read up on it and it’s what I will lay down in the spring.


There are three suppliers of the polyurea coating that sell to the general public, I did the math and thus far garageflooringllc.com is the most economical however, they also have the longest cure time, 72 hours. Still, I will probably be going with them.

When you are ready, do a lot of reading on floor prep, this is the most critical aspect of any coating whether it is epoxy or polyurea. The previous owner threw down a cheap epoxy coating in the main garage then stuck self-stick carpet on over it. Because he failed to prep the floor, all the coating came up when the carpet was removed. headbang.gif

Here is the article that I happened upon that explained the difference between epoxy and polyurea. It also lists the other two vendors which although they are more expensive, their cure time is a lot shorter.
http://allgaragefloors.com/polyurea-best-g...r-coating-kits/

I will grind the floor. Once I clean it out, it really doesn't matter if it takes a day or 3. Its not my main garage.
I read all the articles. Lots of good info. Seems perfect for what I want.
stephenaki
Bit the bullet and dropped the dough on the Polyurea coating system. Wife said it was my Christmas present. beerchug.gif

I spent the last few days prepping the workshop for the coating. It took two full days to grind the concrete and another day to chemically etch the areas that I couldn't get to with the grinder and clean all the dust up.

I got the last part of the system today and will lay the coating down tomorrow. Pictures to follow when I have it done and I'm writing up my experience so I can share it with others, hopefully someone will find it useful when they decide to do it as well. I read a lot of other people's experiences so figured I should share mine once it is done.

BANZAI!!!! happy11.gif happy11.gif happy11.gif
mepstein
QUOTE(stephenaki @ Dec 27 2017, 07:24 PM) *

Bit the bullet and dropped the dough on the Polyurea coating system. Wife said it was my Christmas present. beerchug.gif

I spent the last few days prepping the workshop for the coating. It took two full days to grind the concrete and another day to chemically etch the areas that I couldn't get to with the grinder and clean all the dust up.

I got the last part of the system today and will lay the coating down tomorrow. Pictures to follow when I have it done and I'm writing up my experience so I can share it with others, hopefully someone will find it useful when they decide to do it as well. I read a lot of other people's experiences so figured I should share mine once it is done.

BANZAI!!!! happy11.gif happy11.gif happy11.gif

Interested. Thanks!
stephenaki
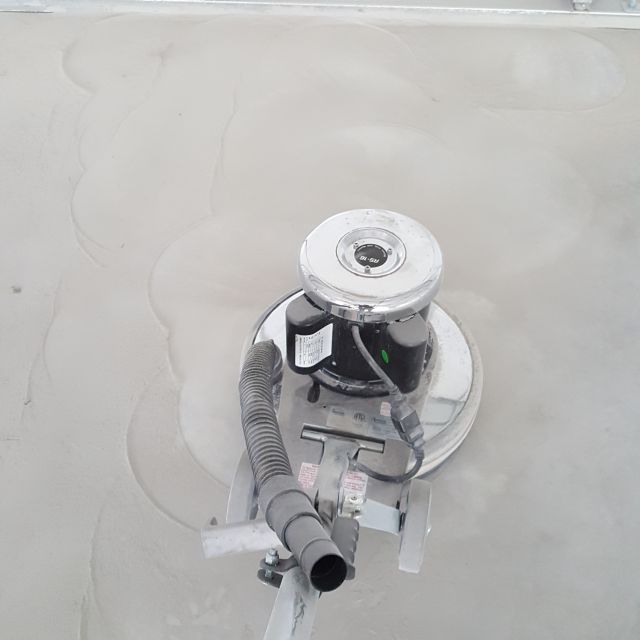
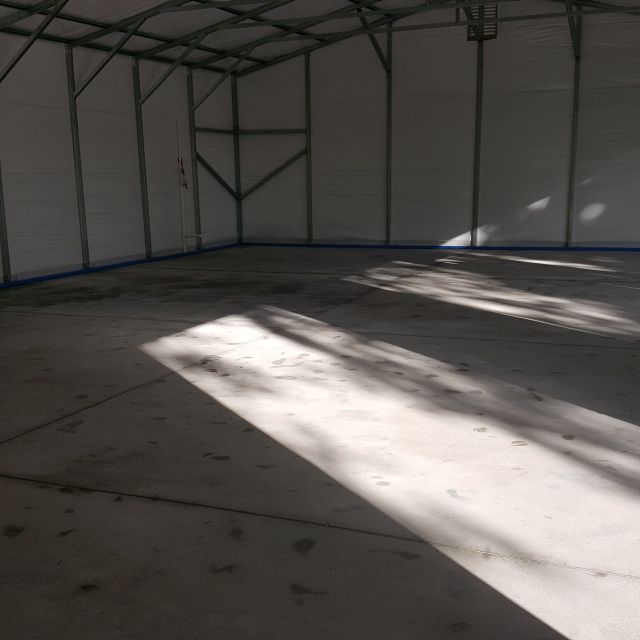
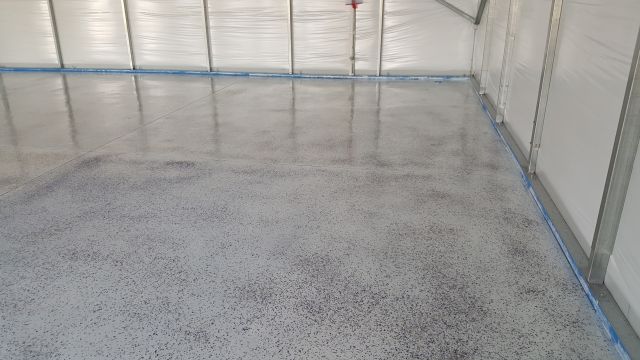
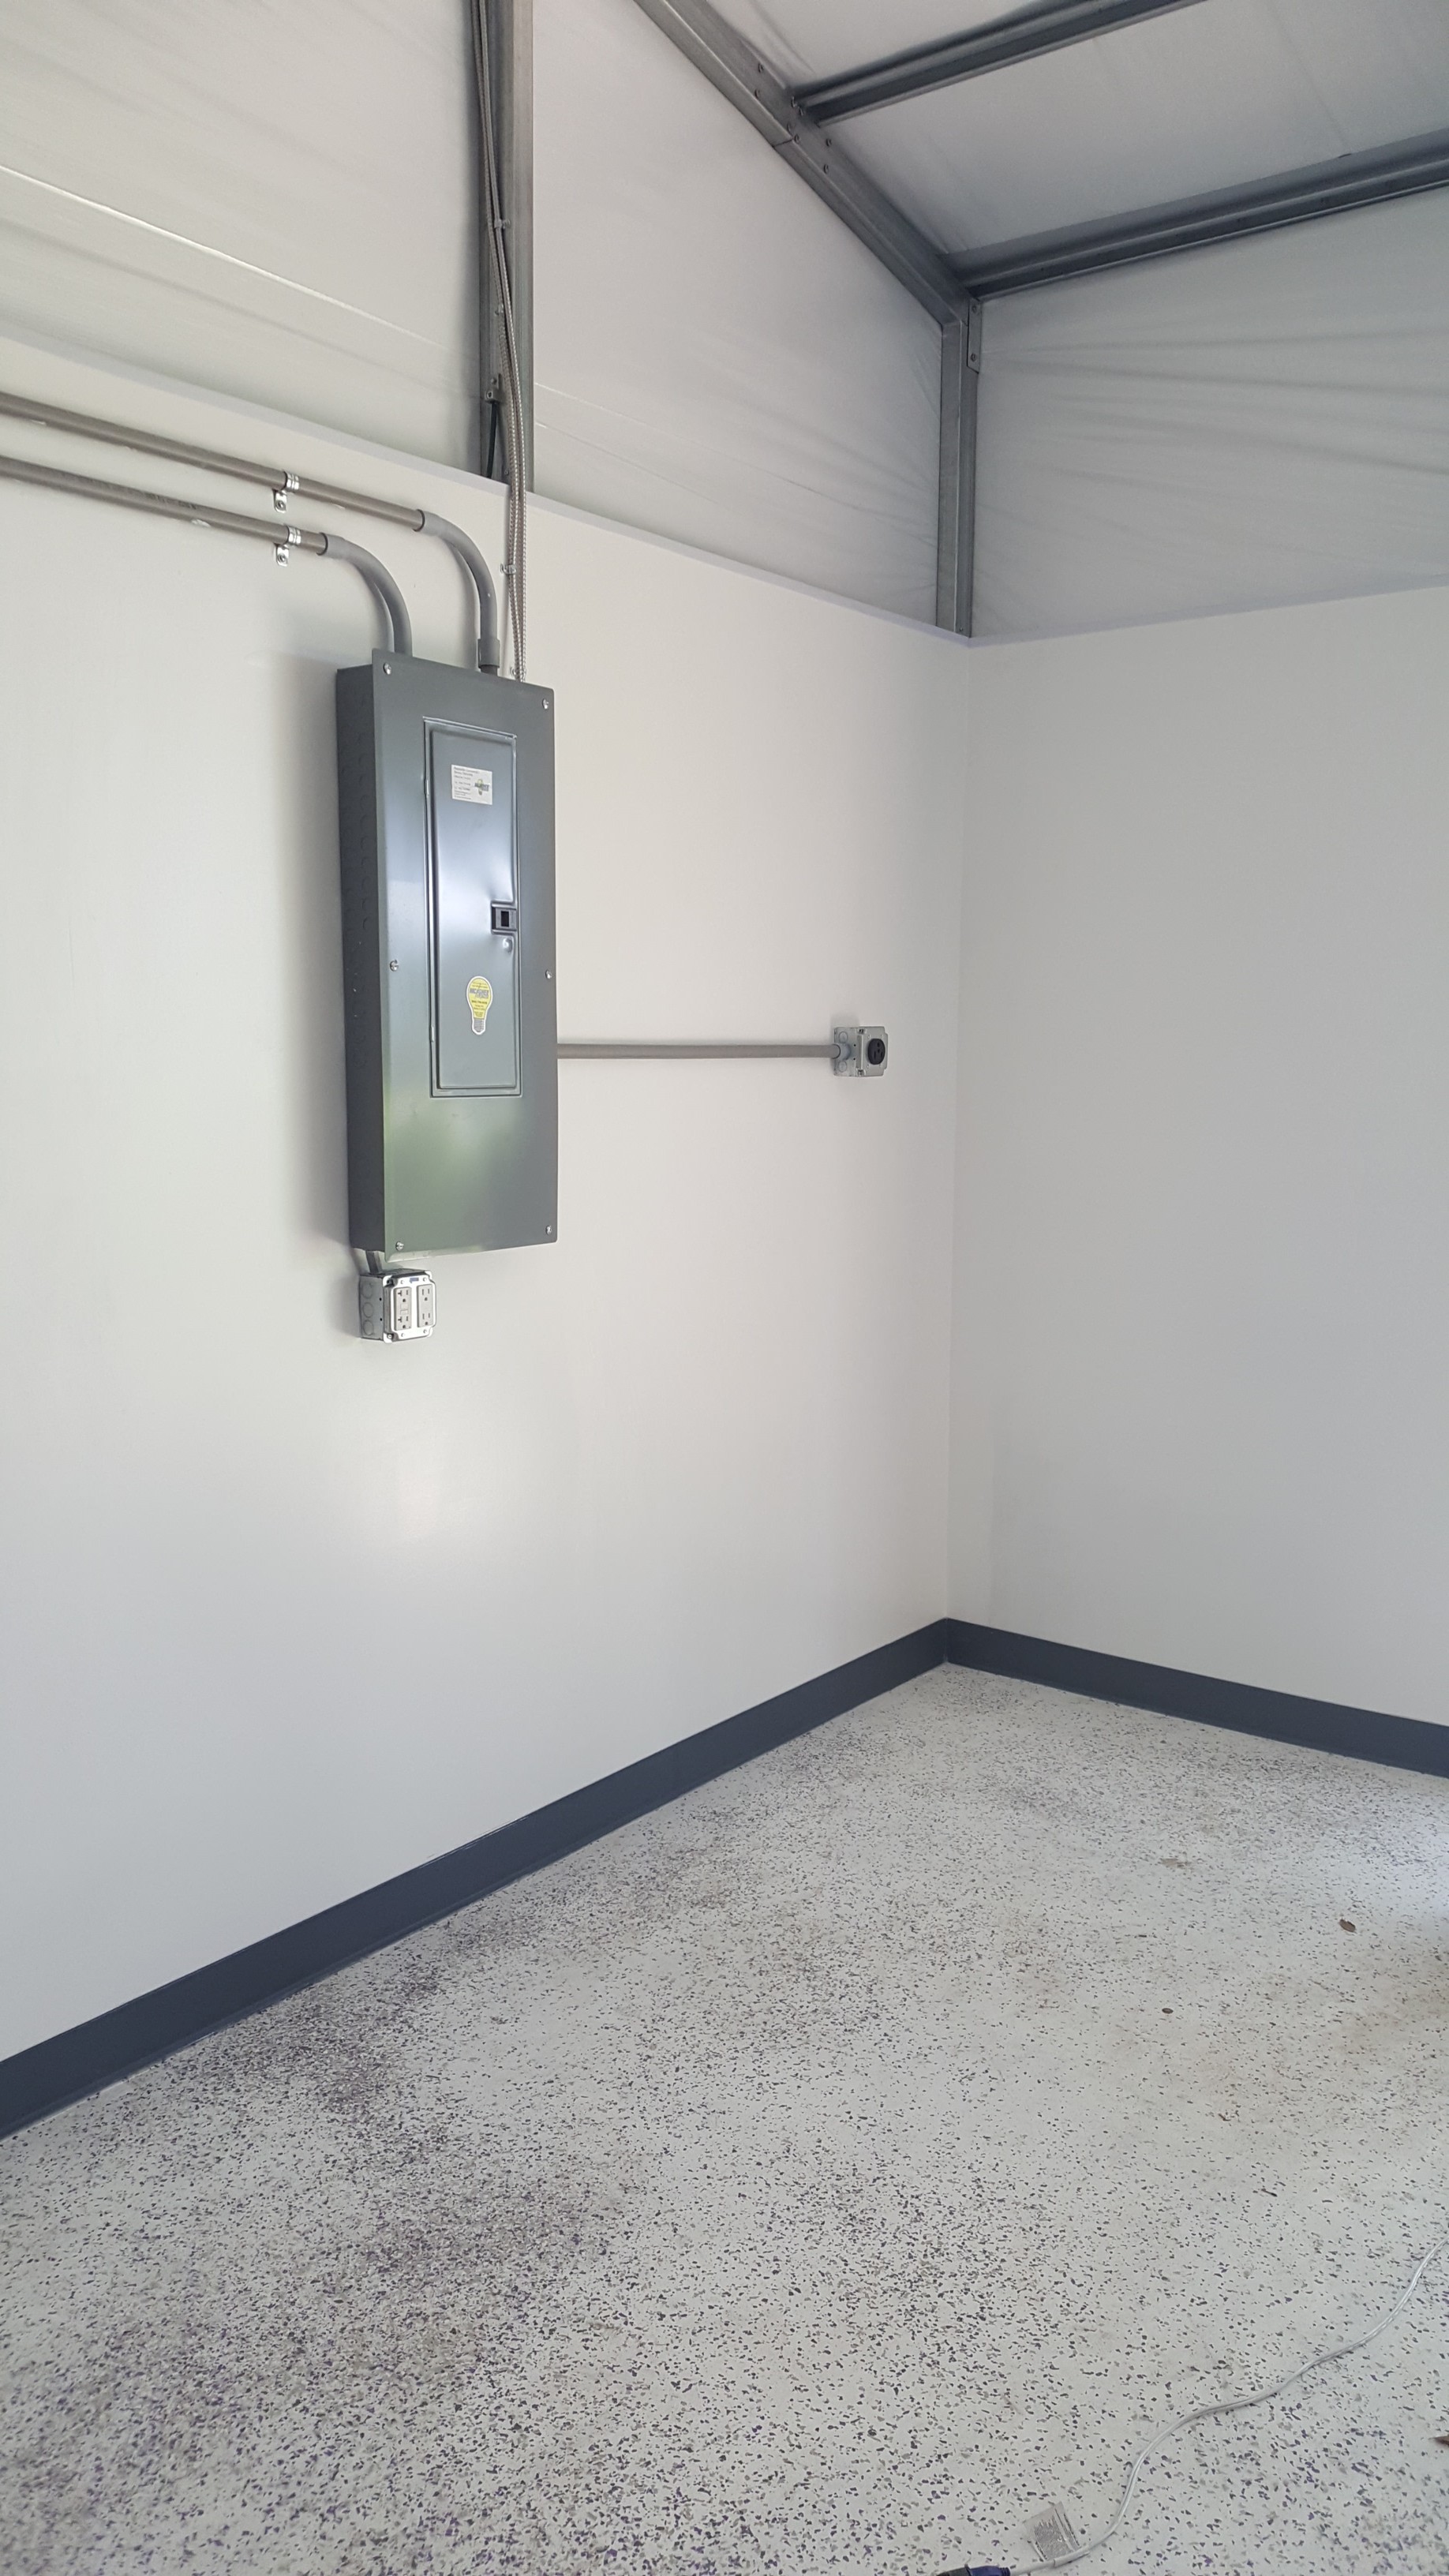
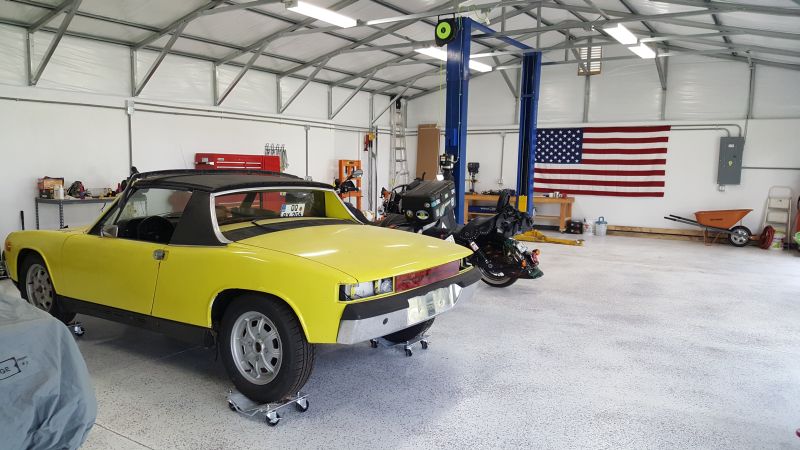
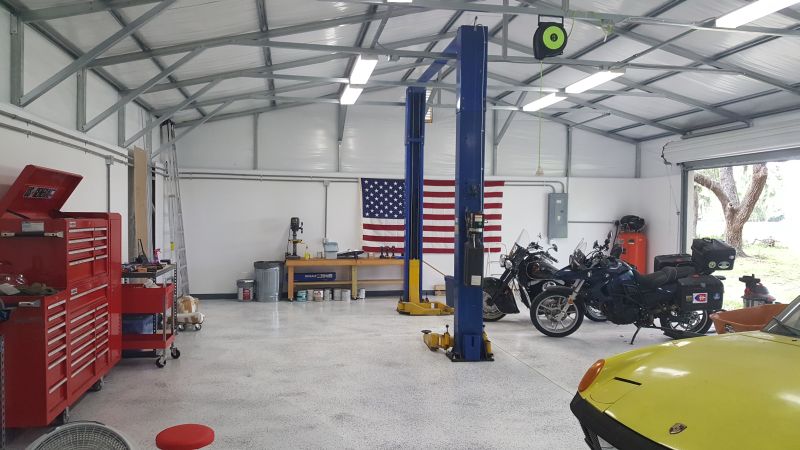
OK, the floor is done. First up observations.

1. 1500 SqFt is an ass kicker! blink.gif
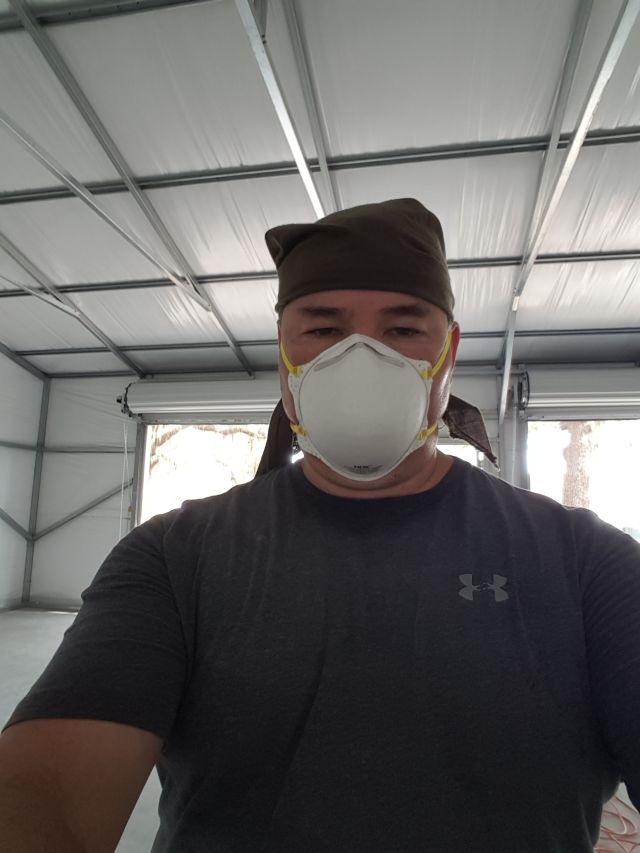
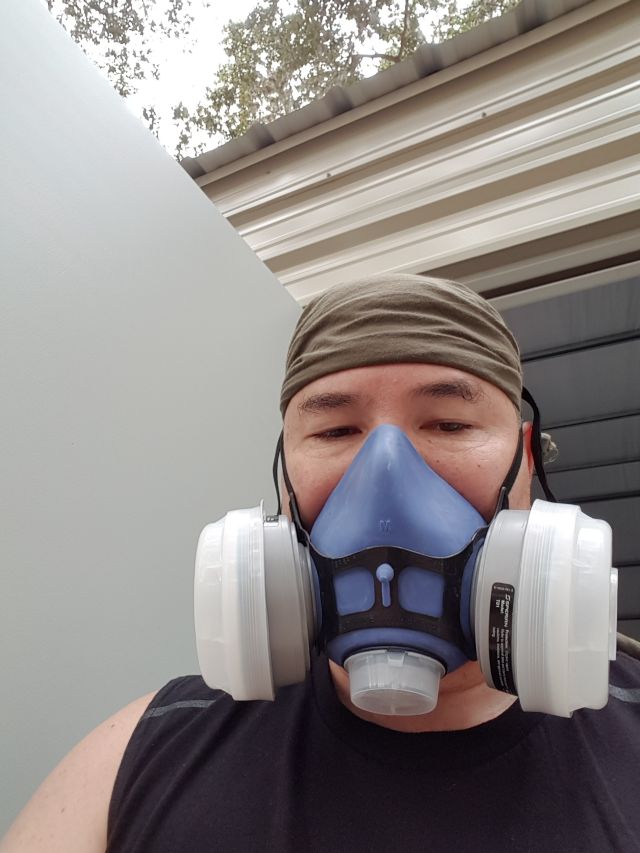
2. Use proper PPE (personal protective equipment) when putting down the coating especially the paint respirator. The fumes are pretty heavy, you NEED a respirator! Use gloves, lots of them. Get a box of nitrile, latex or whatever but use them. You will go through a lot of them. Make sure you have a dust mask if grinding the cement.
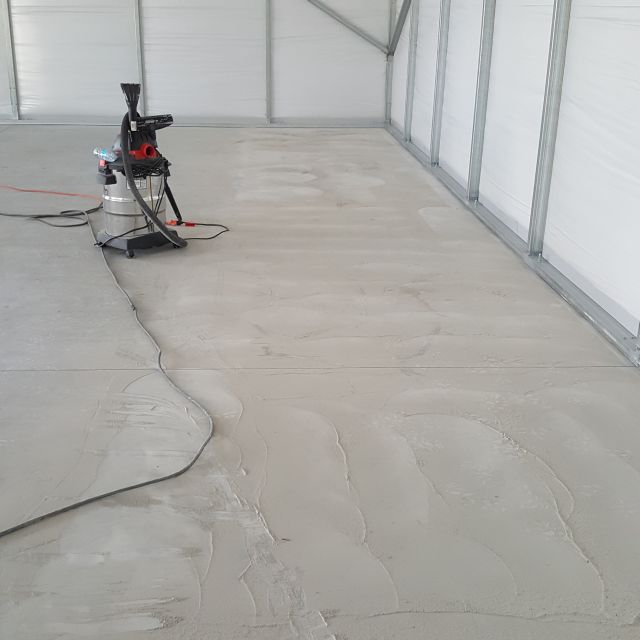
3. Take the time to properly prep the floor. Grinding is the most preferred but also the most labor intensive. I did a chemical etch on the areas that the grinder could not get to.
4. Section off your work and lay the coating by sections. This helps determine how much is needed per section, and gives you a good feel for how thick it should be. I did not do this initially so some areas are heavier than others.
5. Use a hand held quart measure, painter's helper cup, and pour a quart at a time to work with especially the base coat. Don't pour a big glop on the floor, make a ribbon that you work with, it is easier and spreads better.
6. Use spikey shoe strap-ons, you will have to walk on areas where you have laid coating, you will need the spike shoes.
7. Clear coat is really friggin slick!!! Be very cautious when you walk on it with the spike shoes. The anti-skid ingredient, if used, doesn't work until after the floor dries.
8. Clear coat goes on a lot easier and quicker than the base coat.
9. If you grind and use water with the grinder, use two people. The slurry masks the area as you go so you lose site of where you need to grind. The second person can work the hose and help spray the slurry away so you can see what you are doing.
10. If you are dry grinding, get a good vacuum to help keep the dust down. Same issue with slurry, the dust will obscure the area so you can't see what you have done and what you need to do.
11. Make sure the roller you use is for epoxy/polyurea application. DO NOT use just a regular roller. You can get them at Home Depot or Lowes or order them on Amazon.
12. When using the anti-skid in the clear coat, always stir it well before applying to the floor. It is a heavy metal that will sink and settle, you need to make sure you keep stirring it before you scoop any up and apply it.

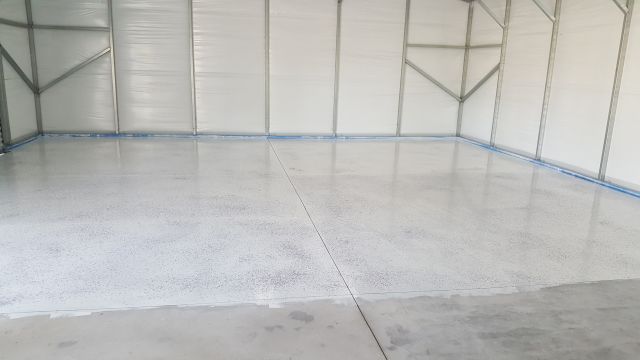
This is not a couple of hour project! It took me two days to grind the concrete and about a half day to remove all the dust and chemical etch the rest of the floor. It took me 7 HOURS to lay down the base coat. So basically, 3 1/2 hours for about 750 SqFt, it is very labor intensive and the base coat is the most challenging to lay down.

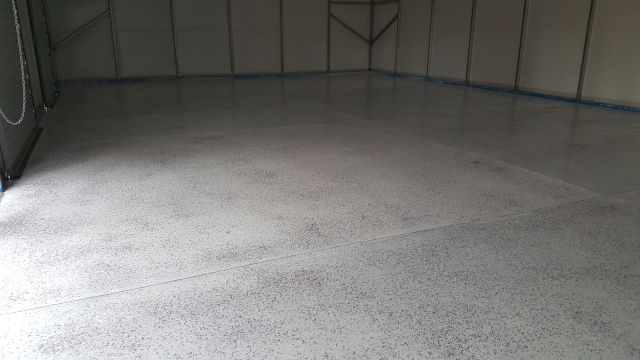
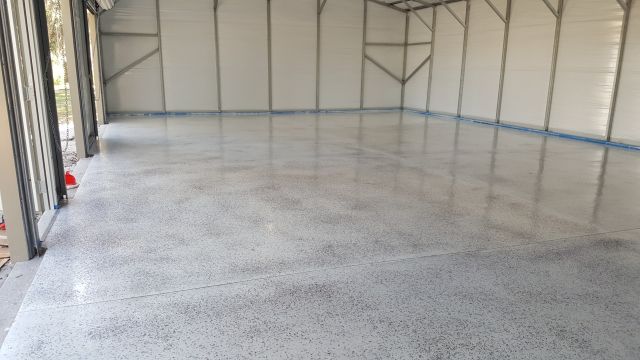
It took me only about 3 1/2 hours to lay down the clear coat as the base is relatively smooth so the clear coat glides on easier. It is a bit more difficult to see the areas you have covered with the clear coat, make sure you have good lighting so you can see the "sheen" of the freshly applied clear coat.

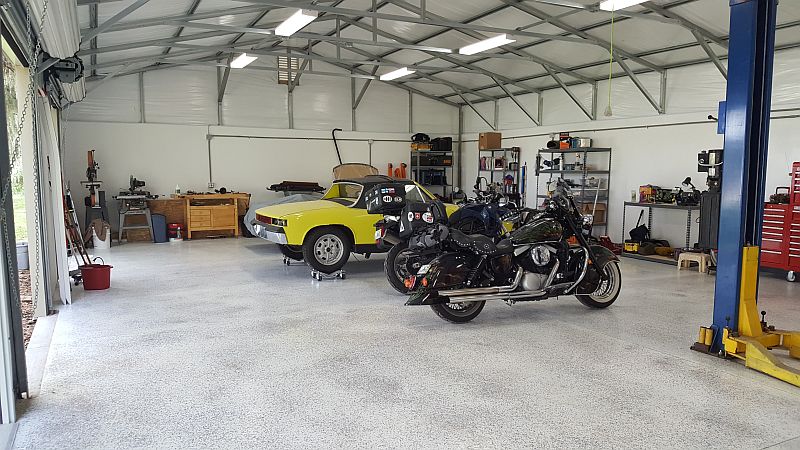
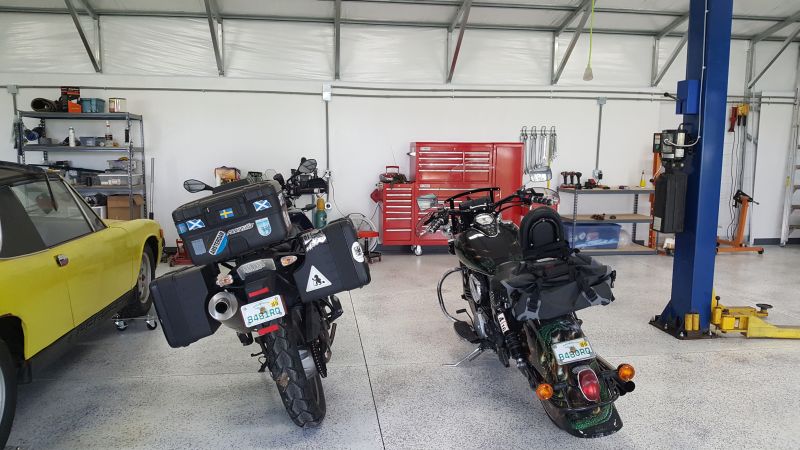
Pictures will follow shortly, they aren't a lot but they will give you the general idea.


billh1963
I used this on my new buildings. Super easy to apply and you can see an immediate difference.

I've had my tractors on it and several trucks and it appears to be working as advertised.

PS104 Lithium Silicate Densifying Sealer

At some point I may add tiles for my working space for comfort and aesthetics.

Click to view attachment
stephenaki
IPB Image
The concrete is new but it is very smooth so will not hold the coating, it needs to be prepped.
IPB Image
This is a regular floor polisher with a Diamabrush concrete prep tool attached. It works well and is cheaper than a grinder. If you have a large space, I recommend a grinder. I switched to a grinder to finish the job
IPB Image
IPB Image
The dust mask is simple but needed, a lot of dust was kicked up, my vacuum couldn't keep up!
stephenaki
IPB Image
Fucking Leaves!! The concrete contractor didn't make sure the leaves were out of the slab so I had several that I had to pick out of the slab prior to laying the floor.
IPB Image
Grinding done, you can see a difference in the floor texture.
IPB Image
Swapped masks for a paint mask. No way you can handle the fumes without one and I had all three garage doors and pedestrian door open!
IPB Image
Halfway done with the base coat.
IPB Image
Base coat done!

You are supposed to wait a minimum of 6 hours before applying the clear coat. I gave it a complete day as I was sore as hell the next day. I finished up the clear coat today in about half the time and not nearly as labor intensive.
stephenaki
Last of the pictures.

IPB Image

IPB Image

These are pictures of the clear coat. You can see the sheen of the coat which is a good way to tell where you have missed. The base coat is somewhat glossy but the clear coat is much shinier when you are applying it and you can see the difference.

Additionally, with the anti-skip applied, the coating is somewhat yellowish so this also helps a bit when applying. With this product it takes 72 hrs to completely cure. There are other products out there from their competitors that take less time to cure but they are almost double the cost.

All I have left is to build cement ramps (easy to do yourself), get the electrical hooked up and start moving things in. I'll probably have things in before the ramps and electrical are in and it looks like the two post lift will go in next weekend. Perfect timing.

If anyone has any specific questions send me a PM and I will answer it best I can.
stephenaki
QUOTE(billh1963 @ Dec 30 2017, 03:17 PM) *

I used this on my new buildings. Super easy to apply and you can see an immediate difference.

I've had my tractors on it and several trucks and it appears to be working as advertised.

PS104 Lithium Silicate Densifying Sealer

At some point I may add tiles for my working space for comfort and aesthetics.

Click to view attachment


Nice, I had looked at several sealers but decided that this is my man cave so I want it to look a bit nicer than just concrete. biggrin.gif
stephenaki
Soooooo...a lot happened the last few weeks. We just got back from scheduled vacation today, we did a cruise to Honduras, Belize and Mexico. I start back tomorrow then on Friday, April 6th I no longer work for General Dynamics. cheer.gif

No, I didn't get fired, on the contrary my boss and the rest of the team tried to keep me but after two years of banging my head against a wall I finally decided I was done. Since I already have a retirement check it's not that big a deal unlike a lot of my co-workers. I have a lot of respect for them as they put up with a lot but, I don't have to.

I'll take some time off to get the garage finished off and I already have an offer from one of our suppliers to be a consultant for them which is I think the road I will go down. I also have a former subordinate of mine who is now retired and running his families coffee farm in Nicaragua who is interested in having me work with him to start doing some strategic messaging and social media outreach for his business. He was my top lieutenant out of the ones I had as a commander and we have stayed in touch throughout the years so I am excited at the chance to work with him again.

Hopefully I can finally start back up on the Teener as well as the MG and get these suckers back on the road! I couldn't do it at GD, I spent an ungodly amount of time at work and on the road. I learned a lot but I had less stress going into combat than I did running the Tactical Vehicle Program I was in charge of! Now I need to go and schedule a doc's appointment to figure out why my thumb and two fingers next to it keep going numb and tingly. I would wager 30 years of service contributed to whatever is causing this. dry.gif
DRPHIL914
congrats on the re-retirement! -
fyi you numbness pattern in 1,2.3 fingers is C6 and C7 - it could be peripheral-pronation syndrome(entrapment of the nerve in the forearm) or lower neck- cervical stenosis from disc and joint degeneration is possible but it crosses 2 nerve levels so if your having symptoms in all 3 fingers its possible its multi-level involvement - x-rays and CT or MRI - most GP's will just refer to neurologist, which is probably the way to go if its coming from the neck- good luck, hope its just nerve irritation-
stephenaki
QUOTE(Philip W. @ Apr 2 2018, 06:10 AM) *

congrats on the re-retirement! -
fyi you numbness pattern in 1,2.3 fingers is C6 and C7 - it could be peripheral-pronation syndrome(entrapment of the nerve in the forearm) or lower neck- cervical stenosis from disc and joint degeneration is possible but it crosses 2 nerve levels so if your having symptoms in all 3 fingers its possible its multi-level involvement - x-rays and CT or MRI - most GP's will just refer to neurologist, which is probably the way to go if its coming from the neck- good luck, hope its just nerve irritation-

We shall see, I have an appointment on Thursday and will probably get referred out. Hopefully it is an easy fix but ya never know. Met a fellow vet at the dog park a couple of weeks ago with the same thing and he said something similar to what you are saying but a lot less technical.
stephenaki
Alright, alright alright... biggrin.gif breaker box and wiring is in from shop to transformer. Inspection is scheduled for Wednesday then I can have Florida Power and Light hook up the wiring and I will have power to the workshop. WOOHOO!

First order of business will be to wire up the lift once I have power. I plan on finishing up the cross members and getting the drywall up hopefully by the end of the week so I can start running conduit and wire to the breaker box. My goal is to have the shop completely wired up by the end of the month.

Since I am no longer working my ass off and traveling I should be able to get it all done then, I can start on the cars! aktion035.gif aktion035.gif
stephenaki
Soooo...I've been a bit busy with the workshop and finally got all the wiring done and it passed inspection. I have the plumber coming out today to give me a quote on plumbing a bathroom and sink. All the walls are painted, J-trim is in place on the drywall and I put in a 4" vinyl wall base that I sealed with silicone to keep water out. Here is a small snapshot of what it looks like, I'm putting things away now and organizing.

IPB Image

So here is my question for those in the know, I need to plan the air compressor system, I plan on running a line from one end to the other and on each side and a ceiling drop near the lift. All in all about 150 feet of line will be needed. Copper seems the way to go but I also saw some info on Rapid Air. Anyone have any recommendations on this?
914forme
I'm old school did it all in copper.

Iron pipe can also be used. Don't forget to put drop legs in it, and have it slope to allow condensation to drain out of the system and collect in the drops.

Also run one by the garage doors, and along the walls. Air is a great resource to have at hand. One by the door has 50 feet of hose on it. Wish it was 100 ft as 50 can be a stretch on a truck and trailer combo.

What no 220v for your compressor?
stephenaki
QUOTE(914forme @ Jun 13 2018, 08:30 AM) *

I'm old school did it all in copper.

Iron pipe can also be used. Don't forget to put drop legs in it, and have it slope to allow condensation to drain out of the system and collect in the drops.

Also run one by the garage doors, and along the walls. Air is a great resource to have at hand. One by the door has 50 feet of hose on it. Wish it was 100 ft as 50 can be a stretch on a truck and trailer combo.

What no 220v for your compressor?


I may have to hit you up on the fittings needed. The plug in the picture is for the compressor and it is 220v. biggrin.gif

I also have a 220v drop center of the shop in the rear for the welder.

I plan on putting four drops on the back wall, two on each side wall and one from the ceiling near the lift connected to a retractable air hose. Did you run 1/2" or 3/4" pipe? For the distance I am covering I think the recommendation is 3/4" pipe.
stephenaki
OK, finally done. Well, with the exception of the air system but I will get that done later. I can now start working on the cars, first up will be the MG then I'll tackle the Teener.
IPB Image
IPB Image
IPB Image
IPB Image

I will start with the wiring harness as it needs to be cleaned up and re-wrapped. Then I need to lay some heat matting before I put the harness into the vehicle. Lets see how quickly I can get things done! Helps that I'm retired and have nothing better to do biggrin.gif
mepstein
Looks awesome. Congrats!
This is a "lo-fi" version of our main content. To view the full version with more information, formatting and images, please click here.
Invision Power Board © 2001-2024 Invision Power Services, Inc.