QUOTE(Cevan @ Feb 12 2009, 11:41 PM) 
Rod, how did you make the sub enclosure? Any pictures of that process?
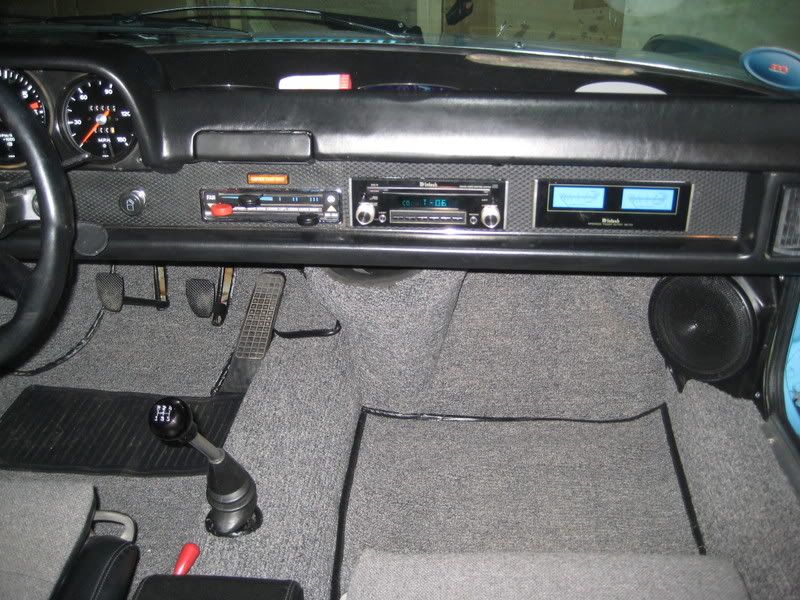
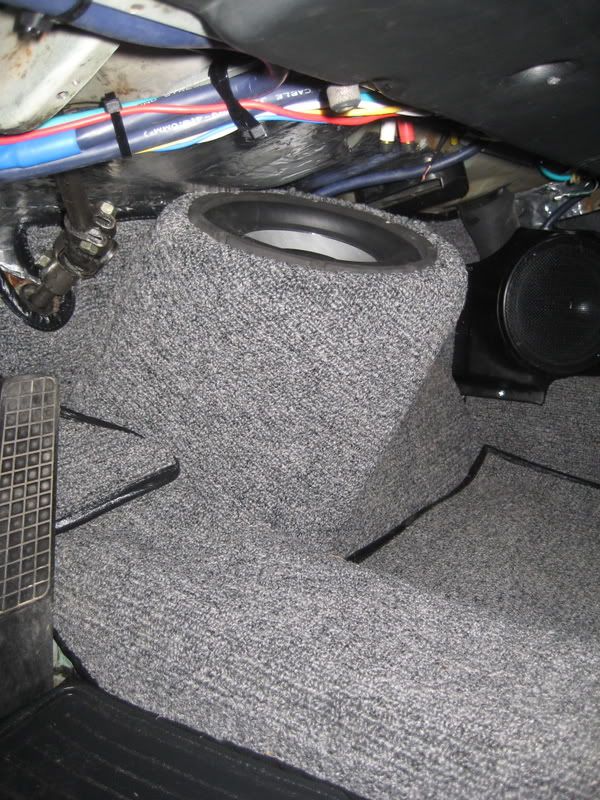
Following on from Cevans request I thought I would do a thread rather than clogging up the original, so here is how I built a sub box for the footwell in a 914.
Remove interior and totally deaden the whole footwell. Masking tape overlapped and then covered in release wax.
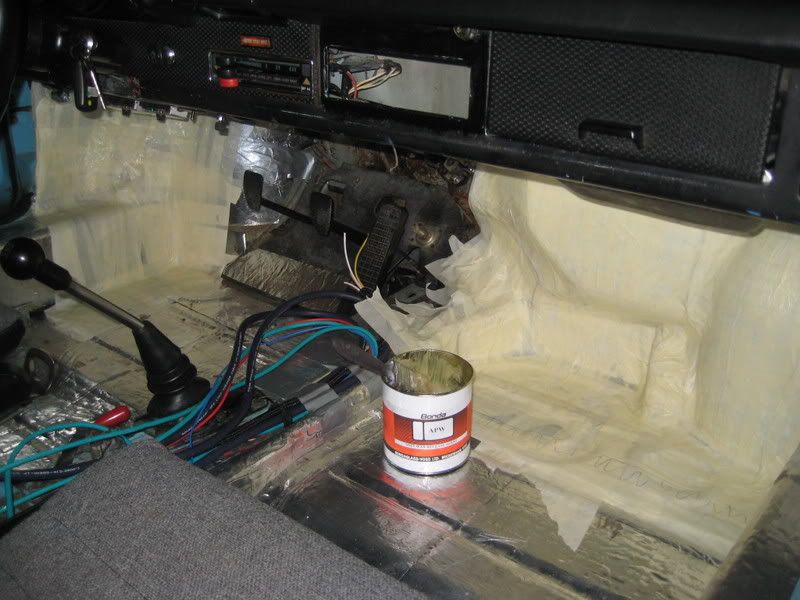
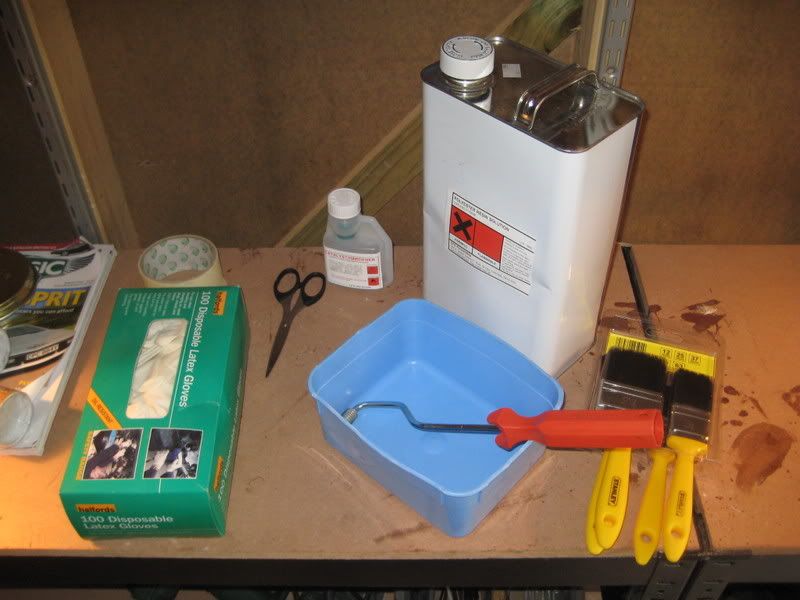
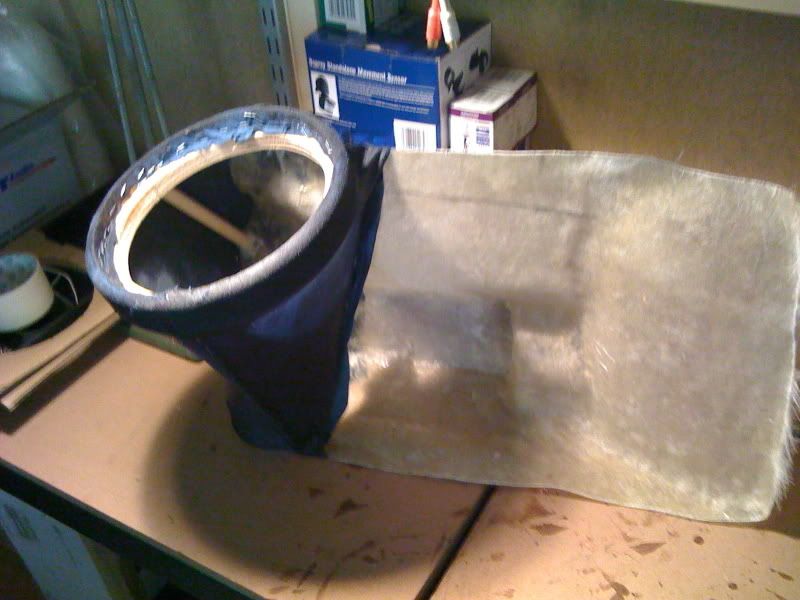
Use fibreglass mat and resin to form the back of the enclosure, push it hard into the firewall - you want to get a tight fit..
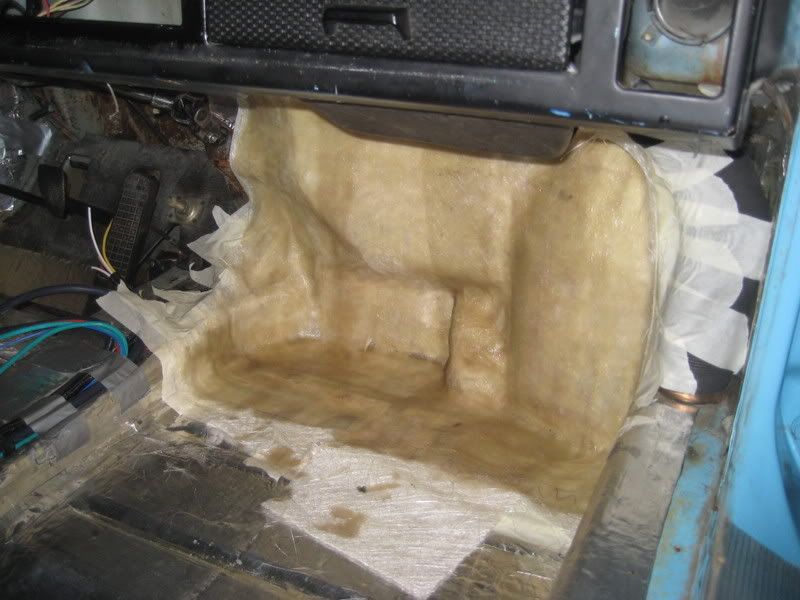
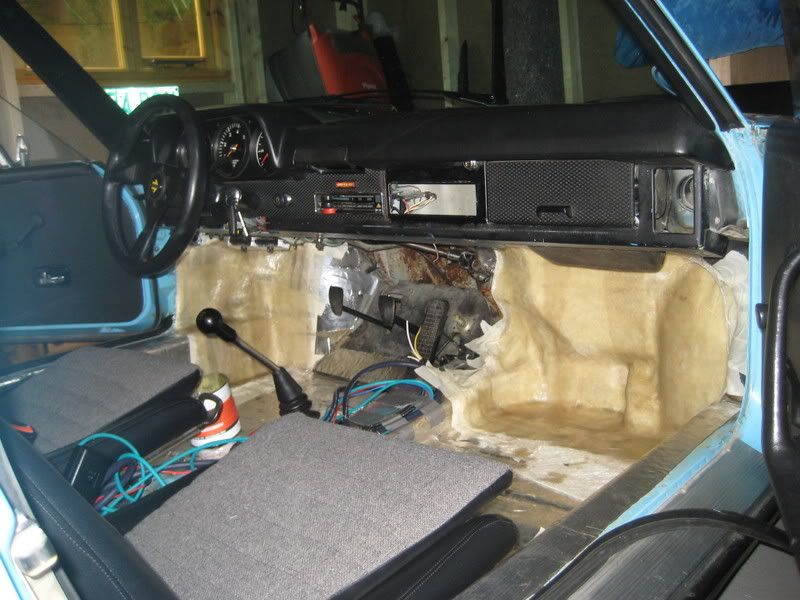
Remove the fibreglass from the car once cured, it should remove easily as the release wax has formed a great barrier. Cut a baffle for the subwoofer you are using (I do a double baffle, so the trim material can be folded over the edge, rather than the sub sitting on top.) Put the Sub IN the baffle and play around with angles - obviously it needs to not hit the firewall, or the enclosure you will be building - the angle of mine faces up under the dash to avoid getting 'kicked'
Once you have finalized the angle, use some hot glue to fix a couple of dowels to the ring and the fibreglass backing to secure the angle and hold the baffle in place. Remove the subwoofer. Get some material, fleece or an old Tshirt and staple this to the speaker ring, stretch it tight to the fibreglass to form a cone in which the subwoofer can sit..
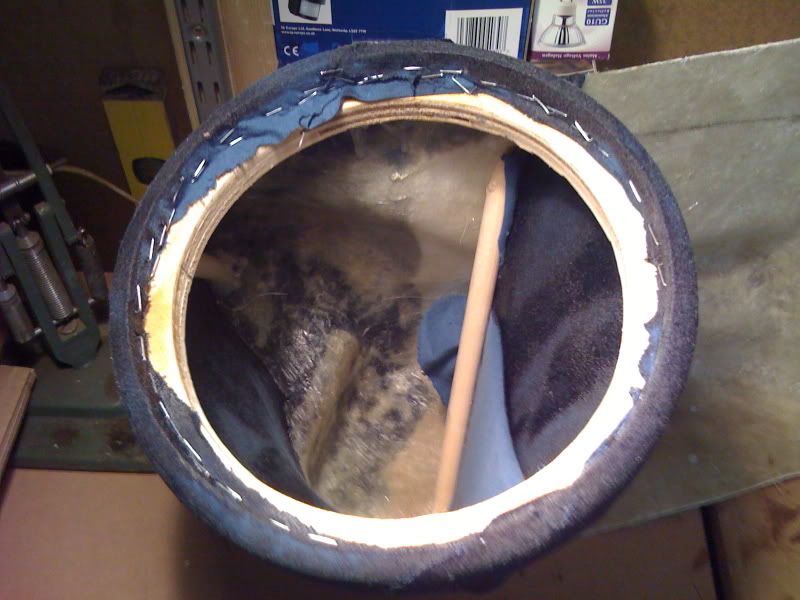
Soak this in resin and wait for it to go off. Now the front of my sub box follows the same line as the original passenger foam pad - this was made by cutting a piece of MDF to fit the front panel - the internal volume of the box extends behind this, I managed to get about 0.7 cubic feet internally..
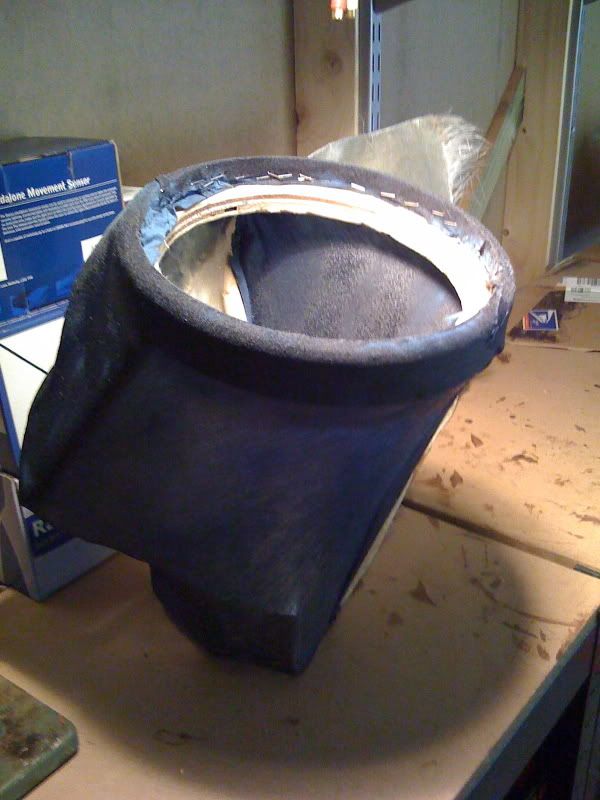
Fibreglass over the whole thing again and again to build up the layers (and strength)
Then cover in carpet - I used the AP carpet set and asked for extra to be sent over so I could cover this box..
Good luck, have fun!!!!

 nice job

 )
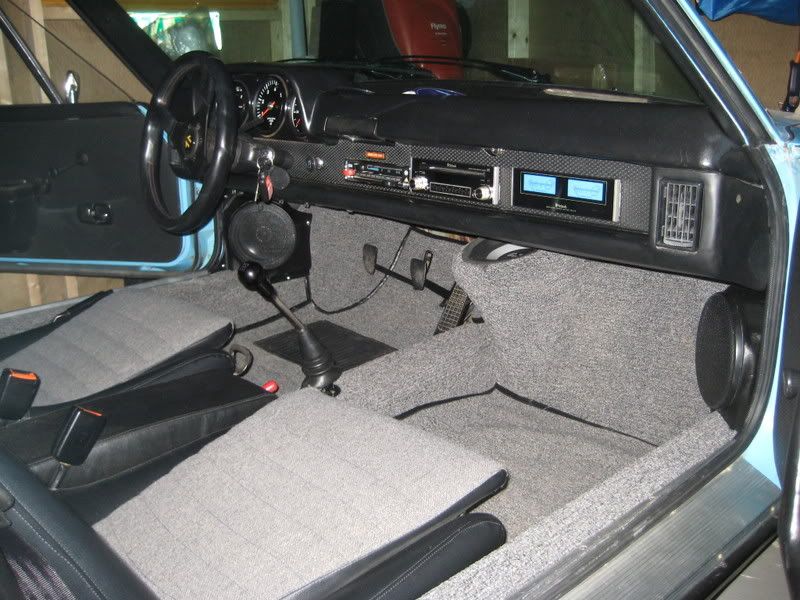
) CDT QES 820.. The problem with moving the footboard forward is that the footwell becomes very small very quickly
  I moved the footboard forward maybe an inch, two maximum, any bigger than that and the passengers knees were in their chest
 I thought about doing something with the foam as well, but the volume just didn't seem like it would be there (with any integrity left). I looked around for a box that would fit (width wise) where the foam is/was. I found that the Sony Explod actually fits pretty well. It is only about 6" and change thick and 17" wide, and just tall enough that it fits right in. Yes, there is a loss of some leg room...but I mostly drive alone. And when I do have a passenger, its usually a hot girl - who loves music!