ghuff
Jun 24 2009, 05:53 PM
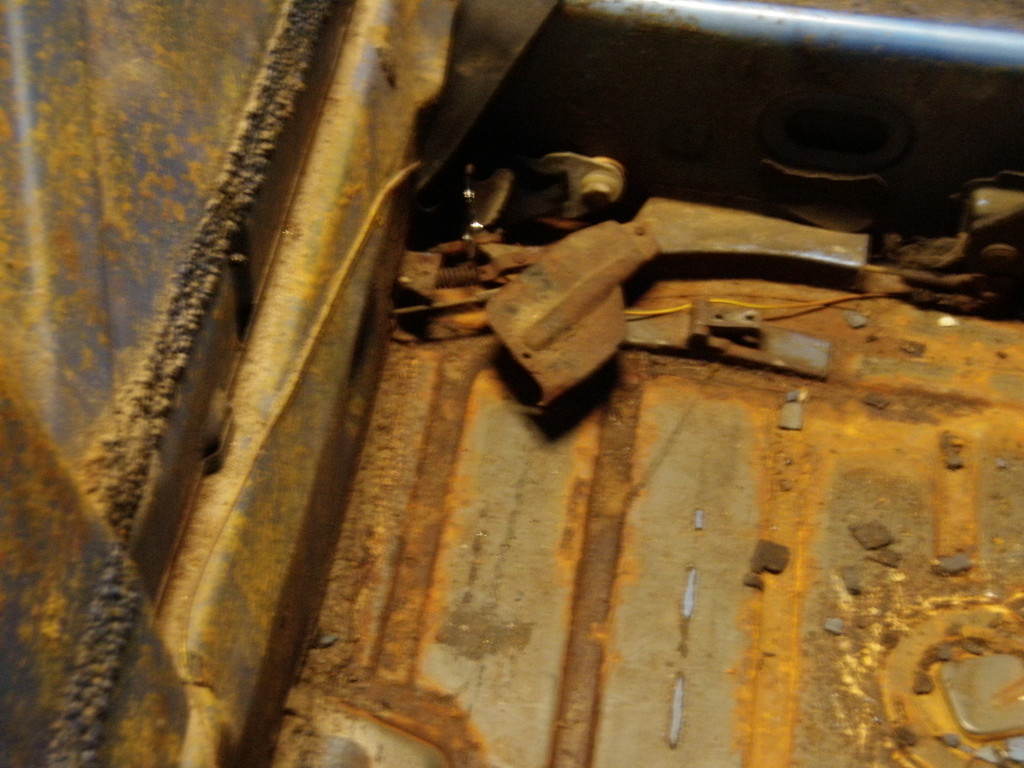
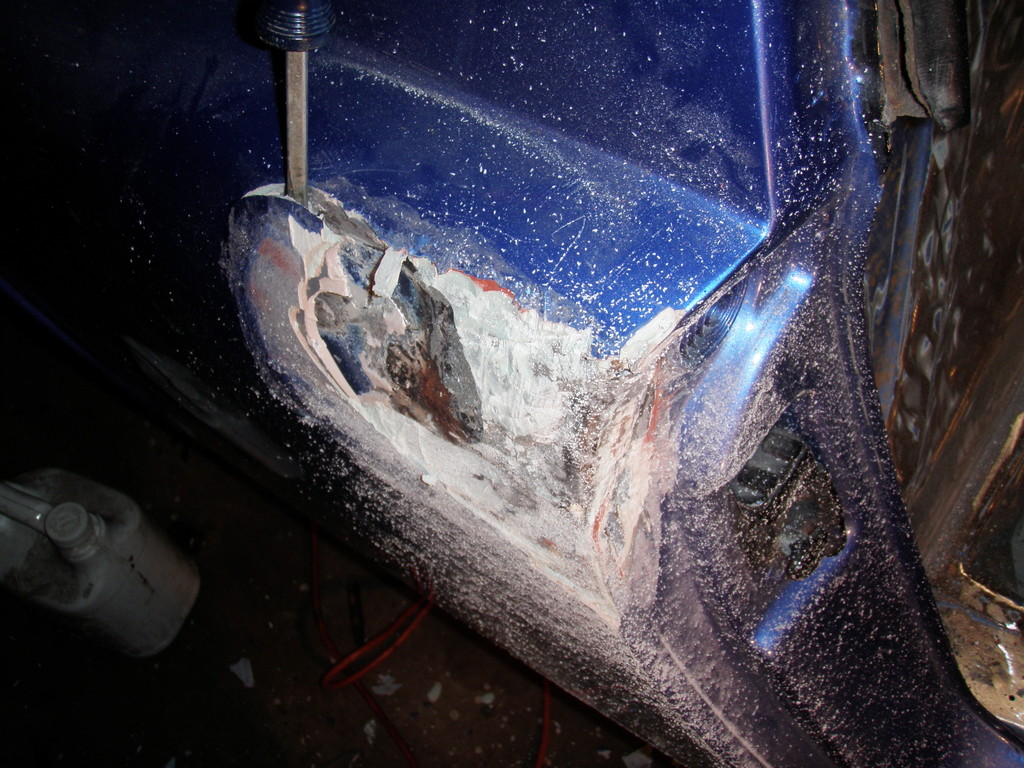
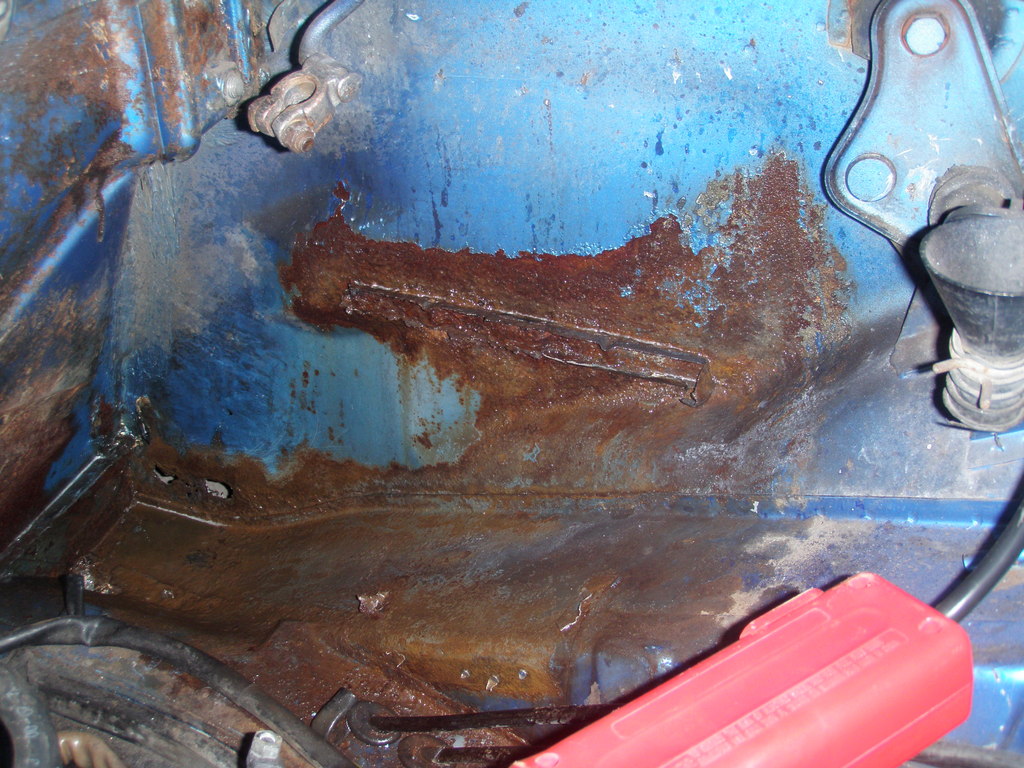
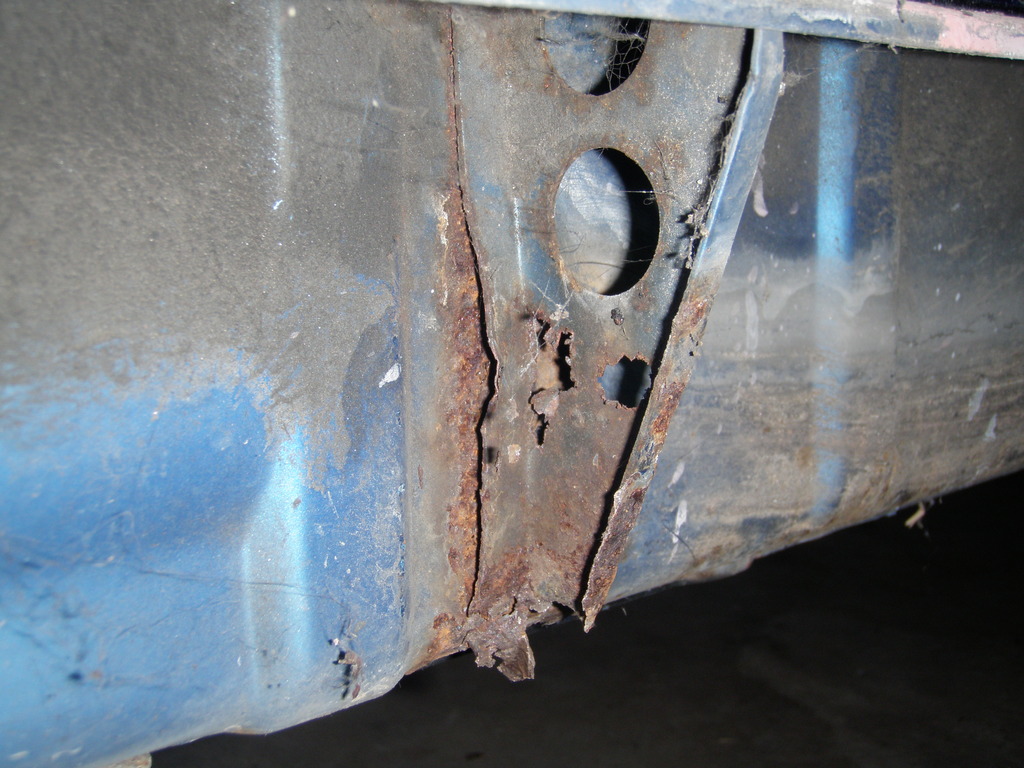
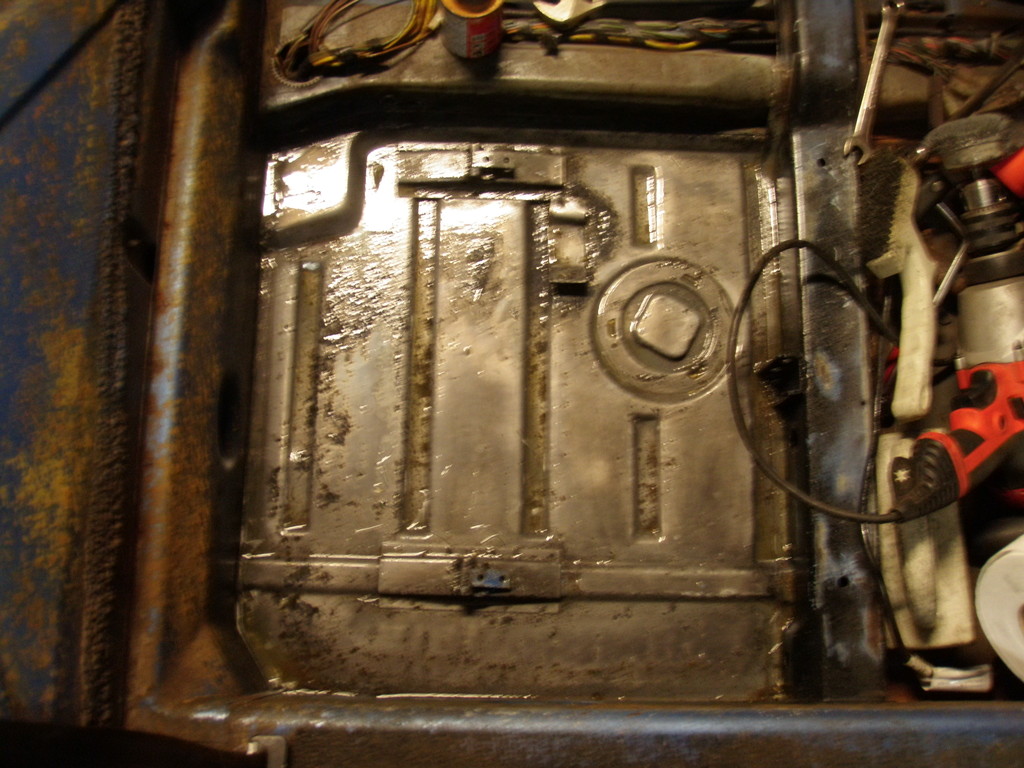
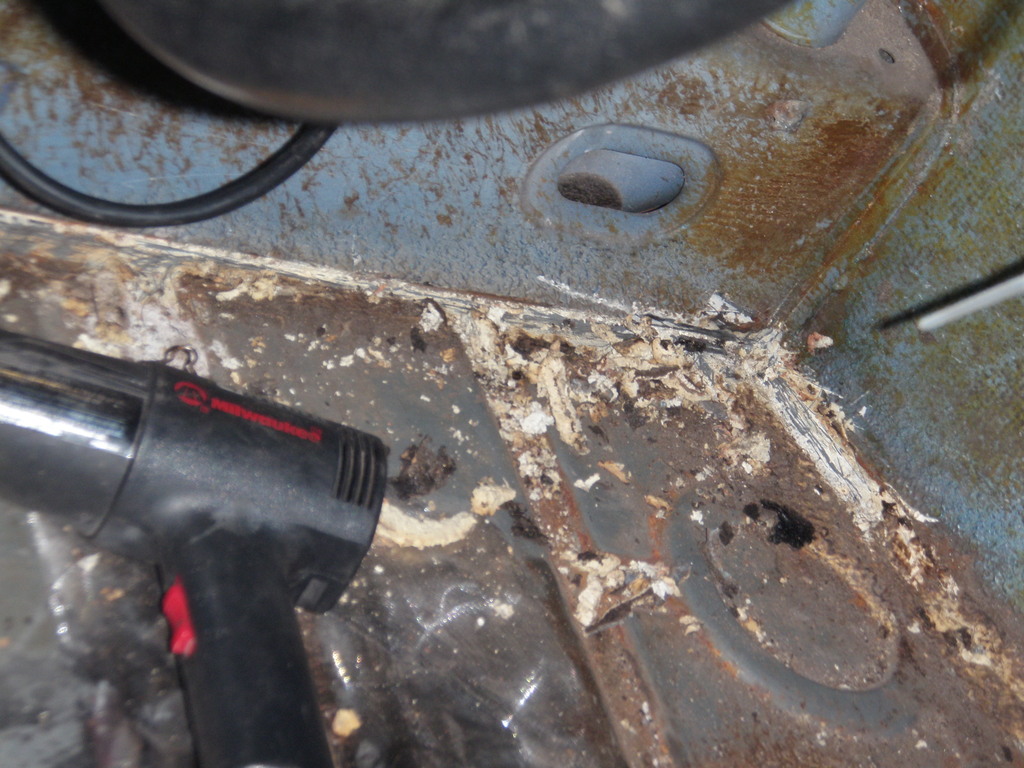
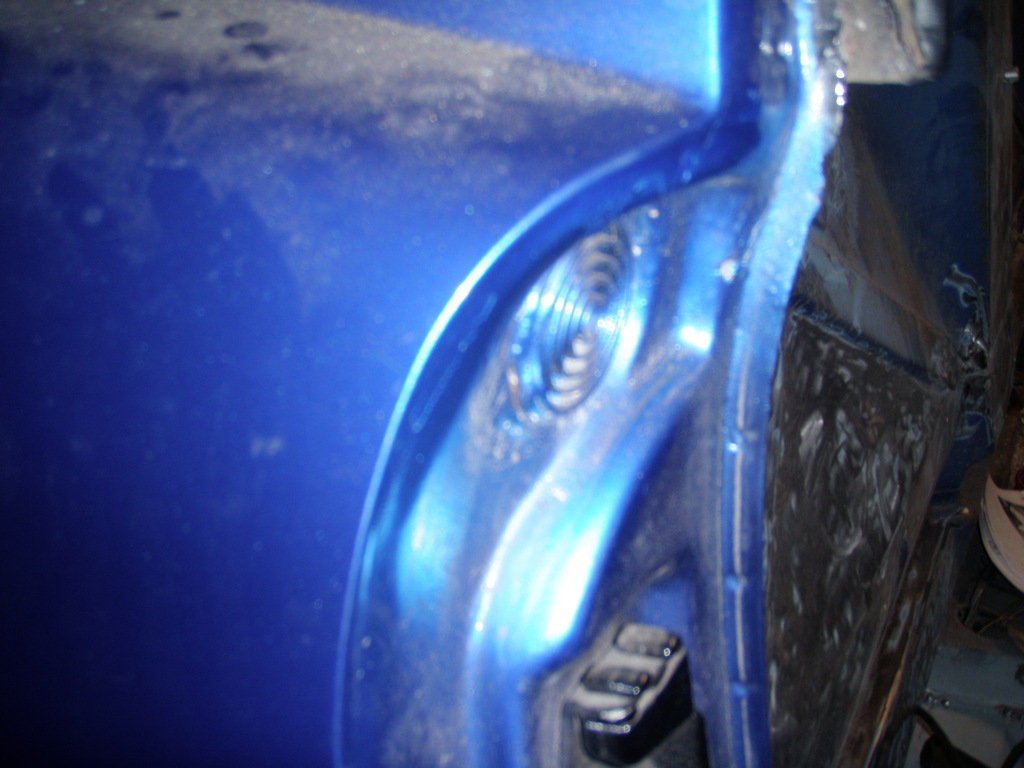
So here is the rust on this one. It's a 75 cali car it's entire life.
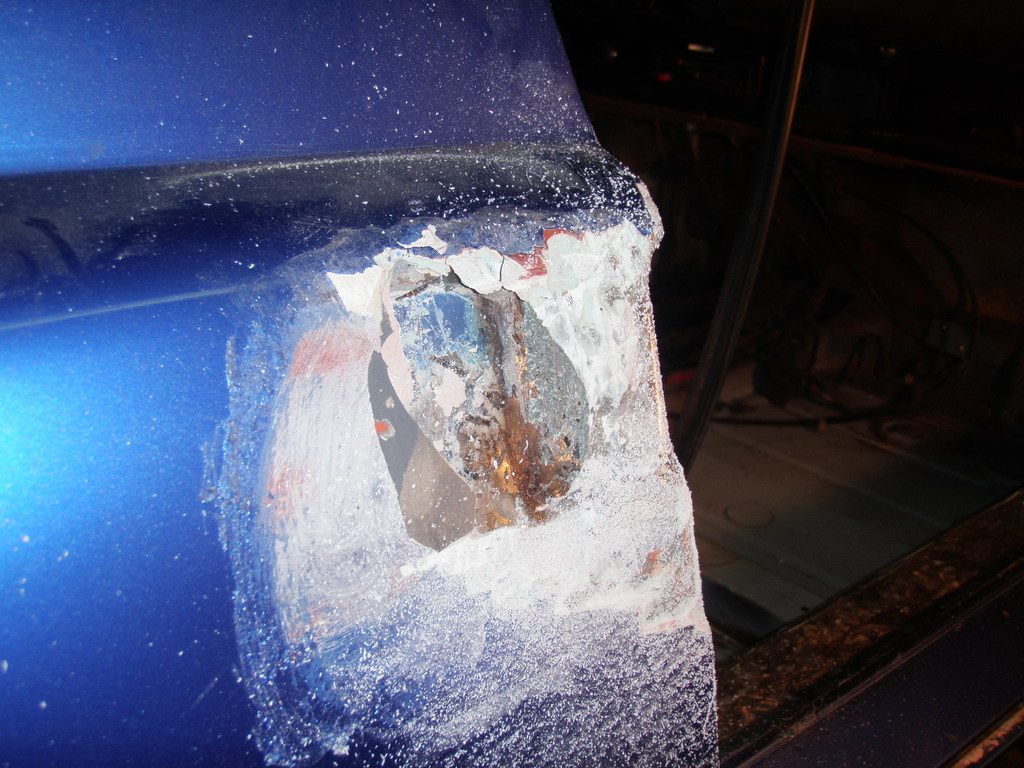
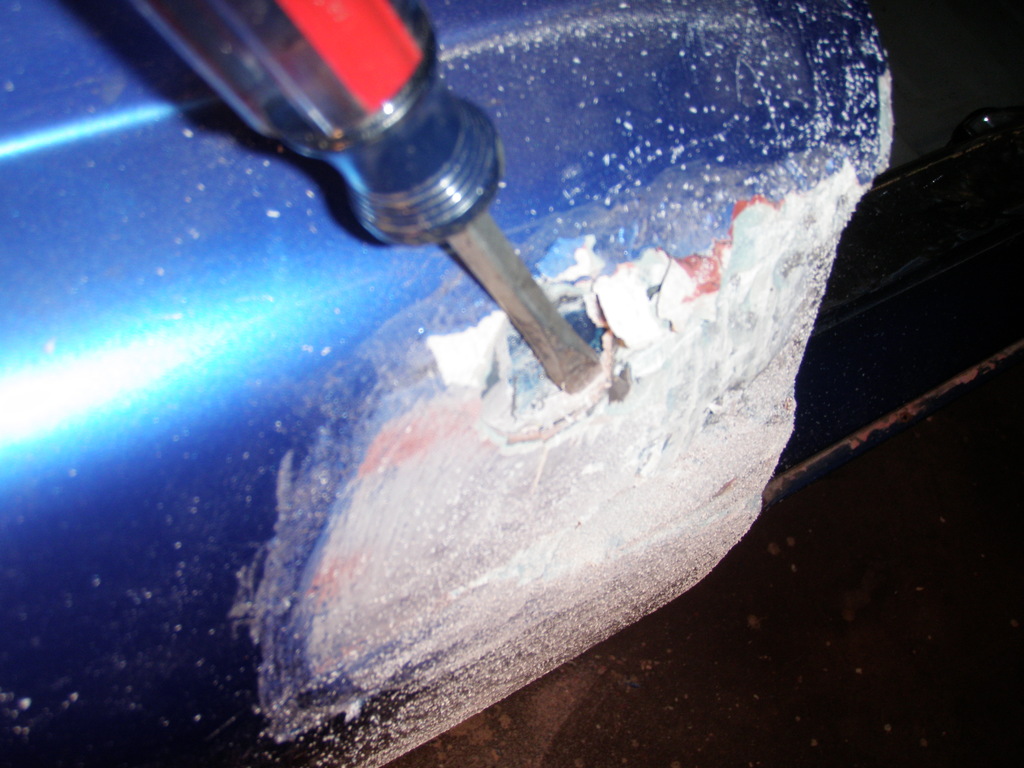
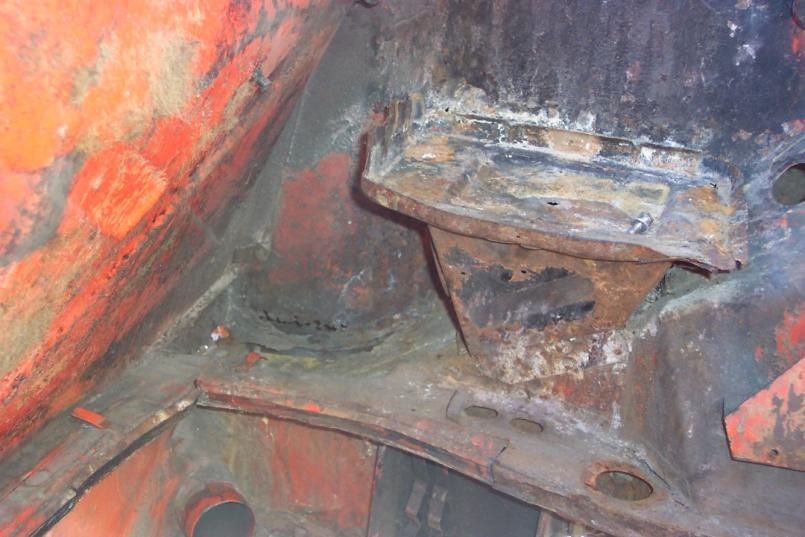
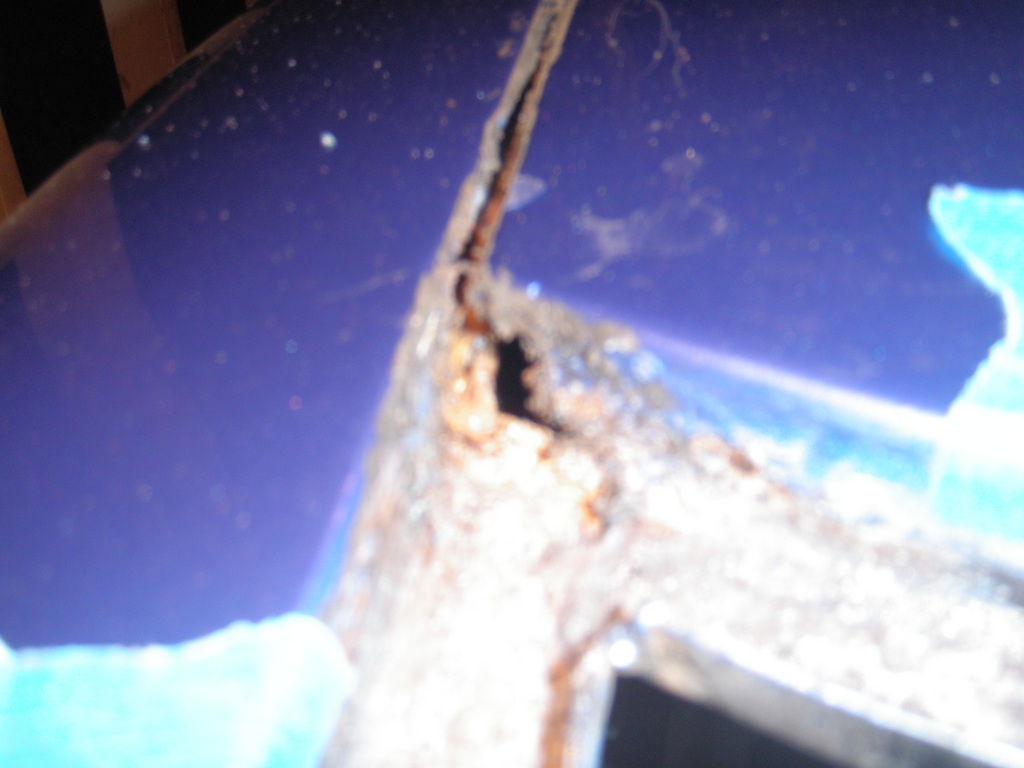
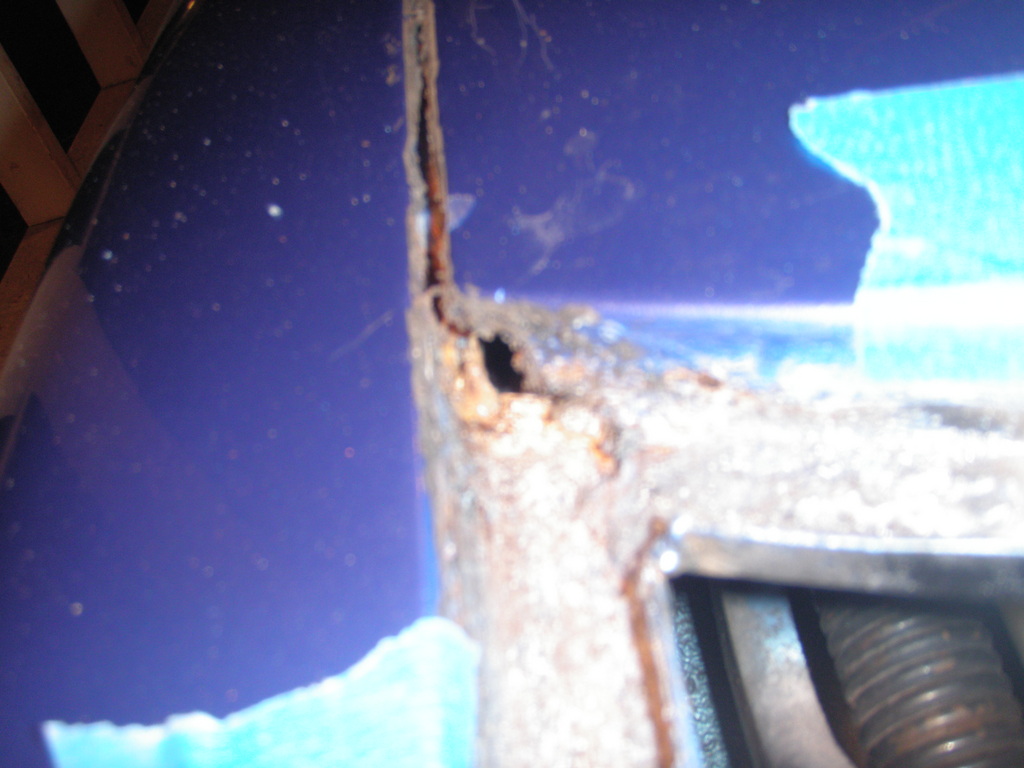
Get the worst over to begin. Let us take a look at the hell hole. It was solid, and even passed teh screwdriver/hammer test....
*until* it soaked in metal ready a while... then the screwdriver test started picking out giant holes which you see here. It is still soaking, and has been on/off for days not to eat away more to see what metal is truly left. Next step is a grinder or non-hand tool of sorts to break deep into the pitting and see what truly is through.
SLITS
Jun 24 2009, 05:57 PM
That's nothing .... never penetrated the long. Only two small holes in the inner wheel house. Cut plates weld 'em in. Wire wheel entire area, paint with Por-15 or Rust Bullet, then cover with color of your choice.
veltror
Jun 24 2009, 06:11 PM
I wish mine was as good as this...
SLITS
Jun 24 2009, 06:14 PM
QUOTE(veltror @ Jun 24 2009, 05:11 PM)

I wish mine was as good as this...
No shit Dick Tracy ...............
VaccaRabite
Jun 24 2009, 06:18 PM
QUOTE(SLITS @ Jun 24 2009, 07:14 PM)
QUOTE(veltror @ Jun 24 2009, 05:11 PM)
I wish mine was as good as this...
No shit Dick Tracy ...............
Seriously!
r_towle
Jun 24 2009, 06:22 PM
That is really in great shape compared to what we see....nice car.
Clean it up, grind off the batter tray lip and weld up those holes.
Easiest way I have found is a small handheld spot blaster...the little self contained sand blaster.
OR
Lots of funky tools and swearing to get all the way into the lower corner.
BTW, you can reach in the wheel well and weld it from the other side to make it ALOT easier to clean up and dress it on the inside.
Rich
ghuff
Jun 24 2009, 06:23 PM
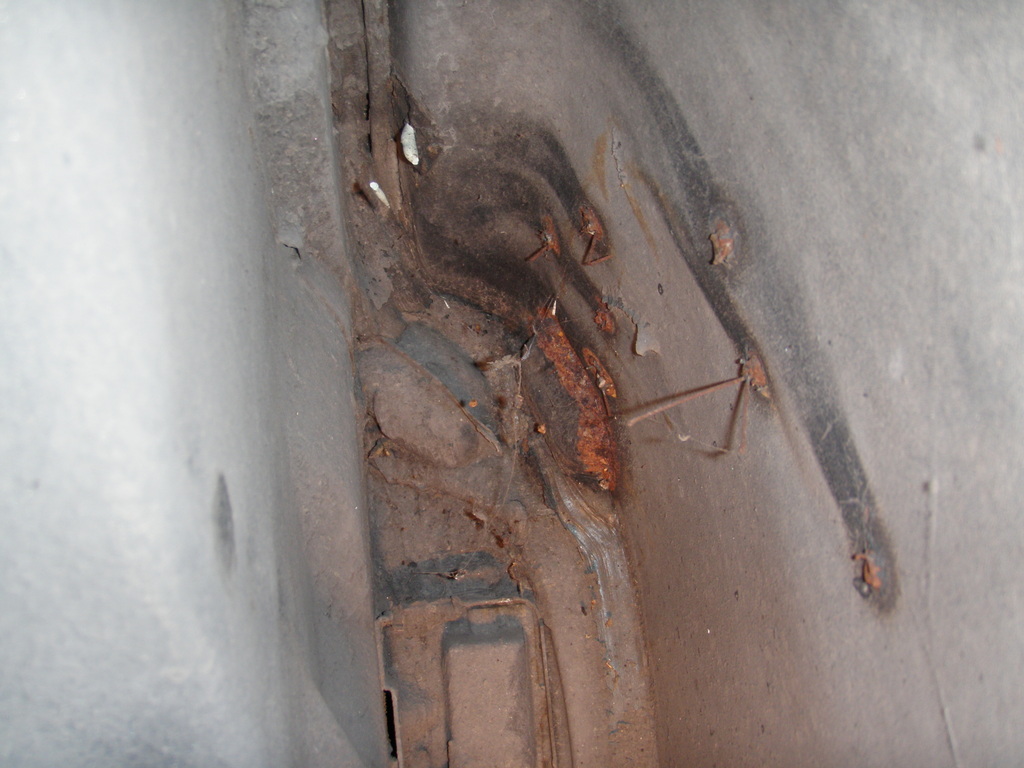
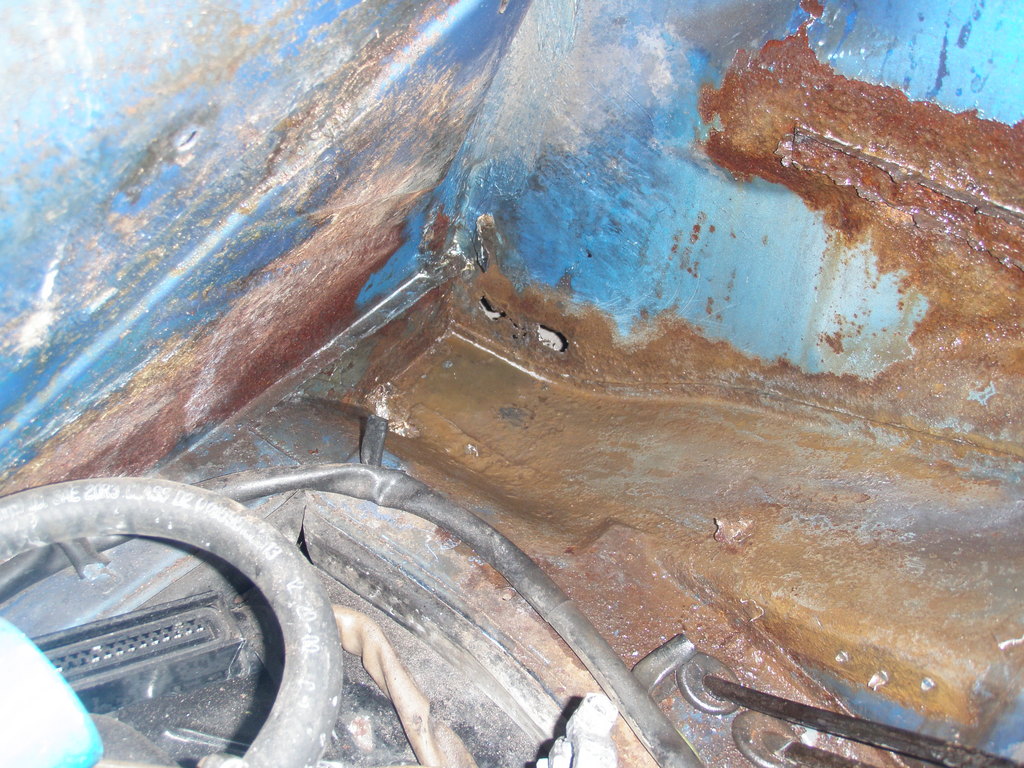
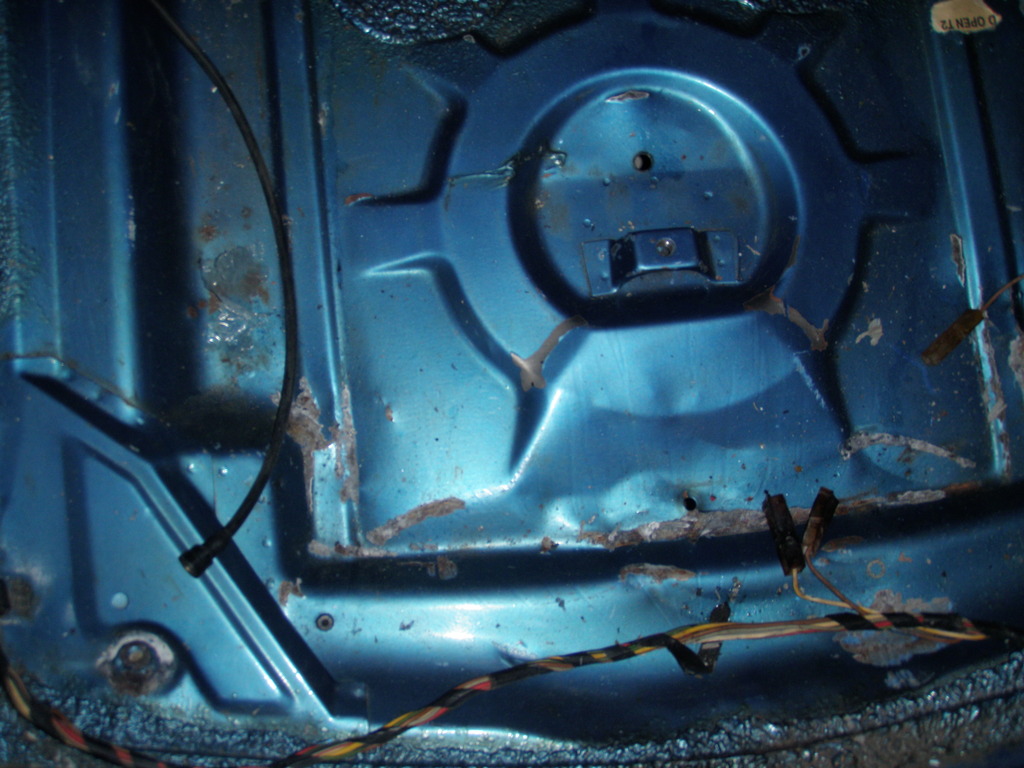
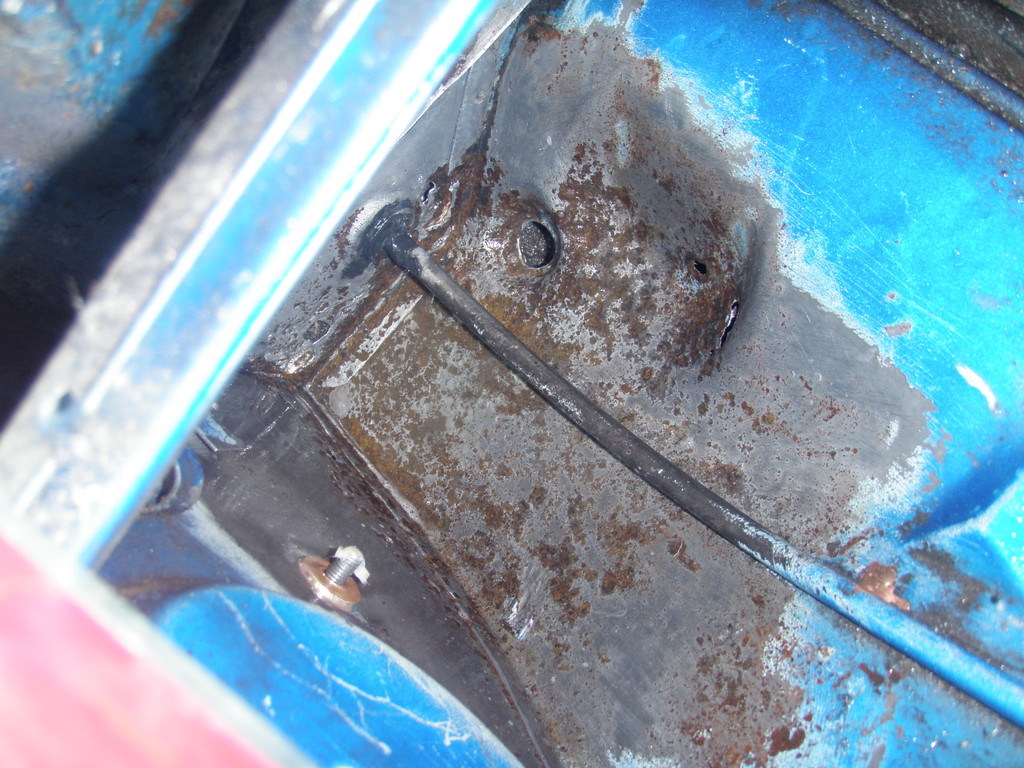
Next up, the side opposite of the hell hole. This side is much much better, with a tiny hole in the firewall section only. Again it is still soaking and getting wirebrushed/sanded then soaking more in por-15 metal ready every day.
In fact all these spots are....
McMark
Jun 24 2009, 06:29 PM
What you've got doesn't need
saving it just needs a little TLC.


This car needs
saving...

ghuff
Jun 24 2009, 06:34 PM
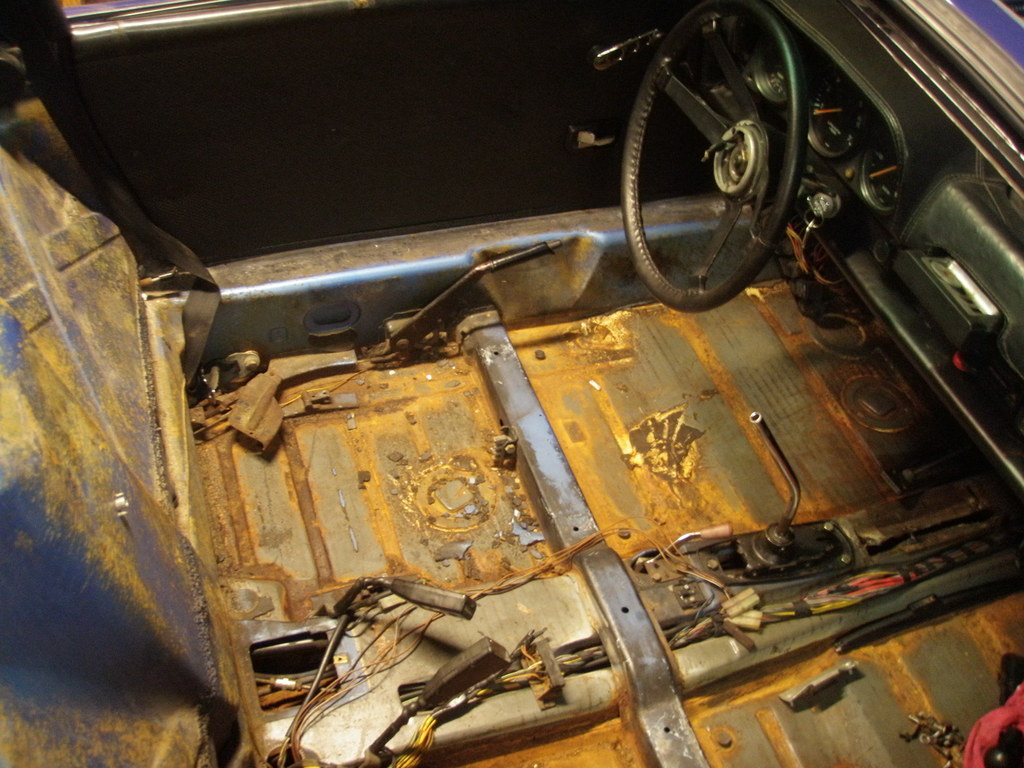
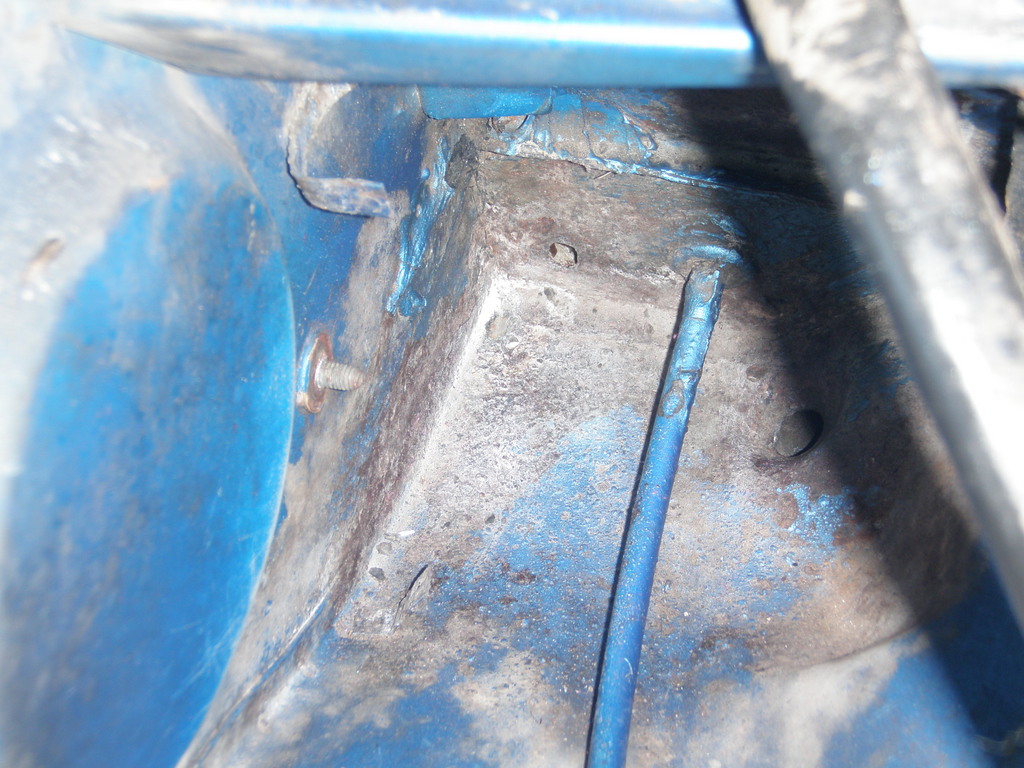
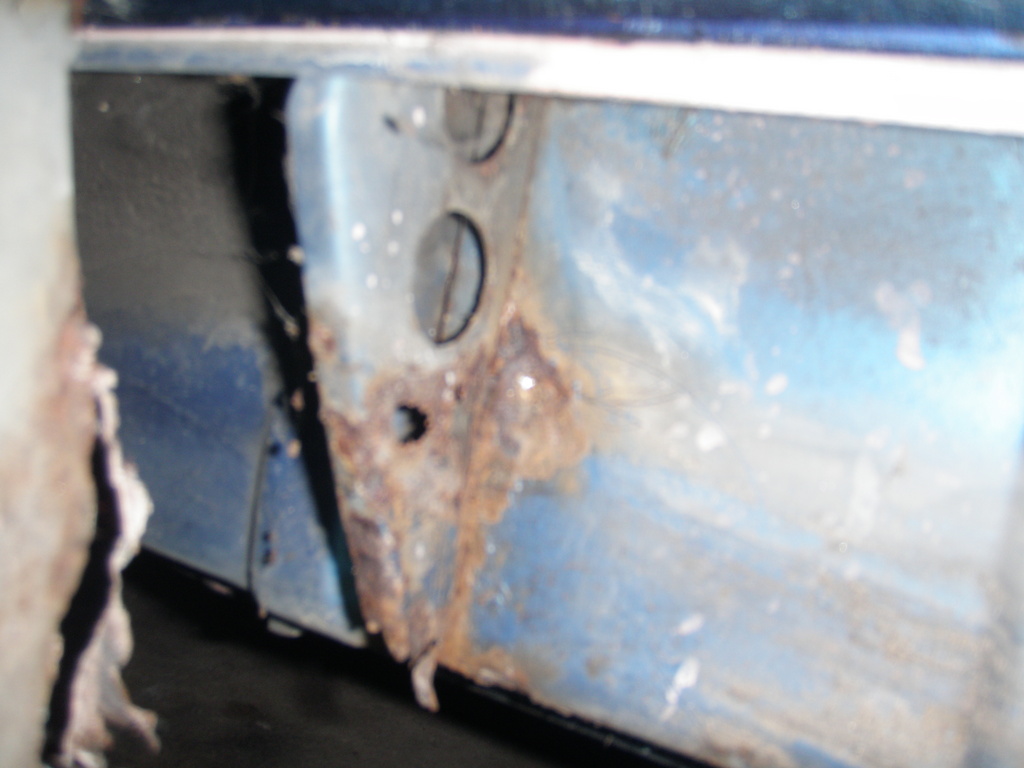
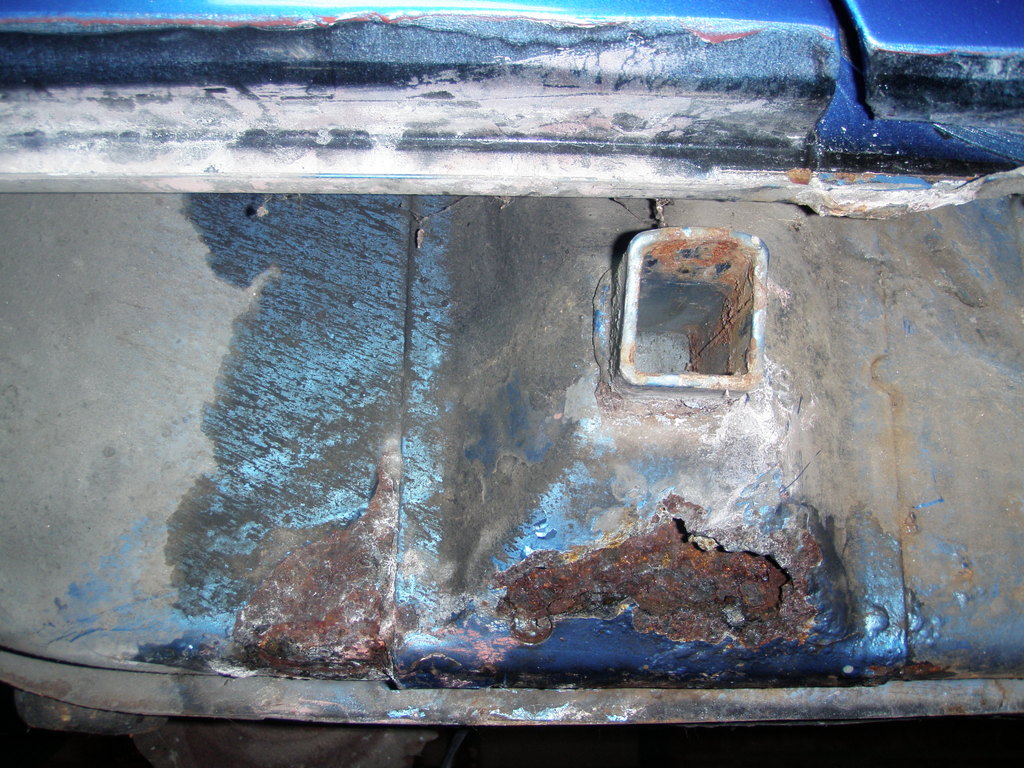
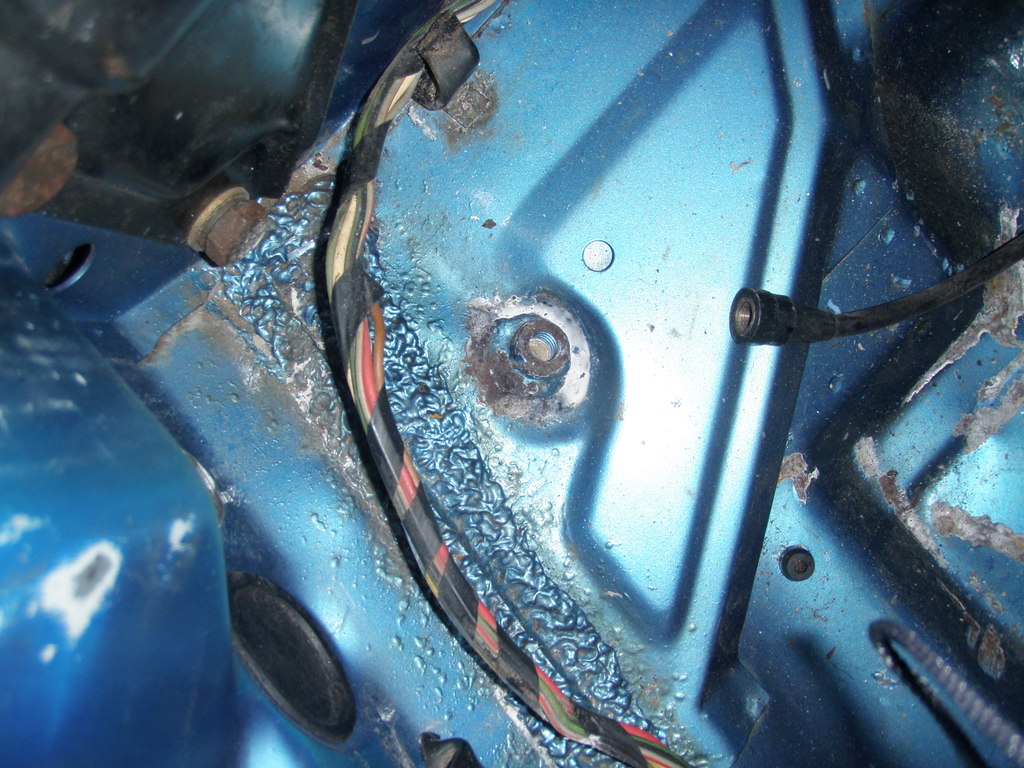
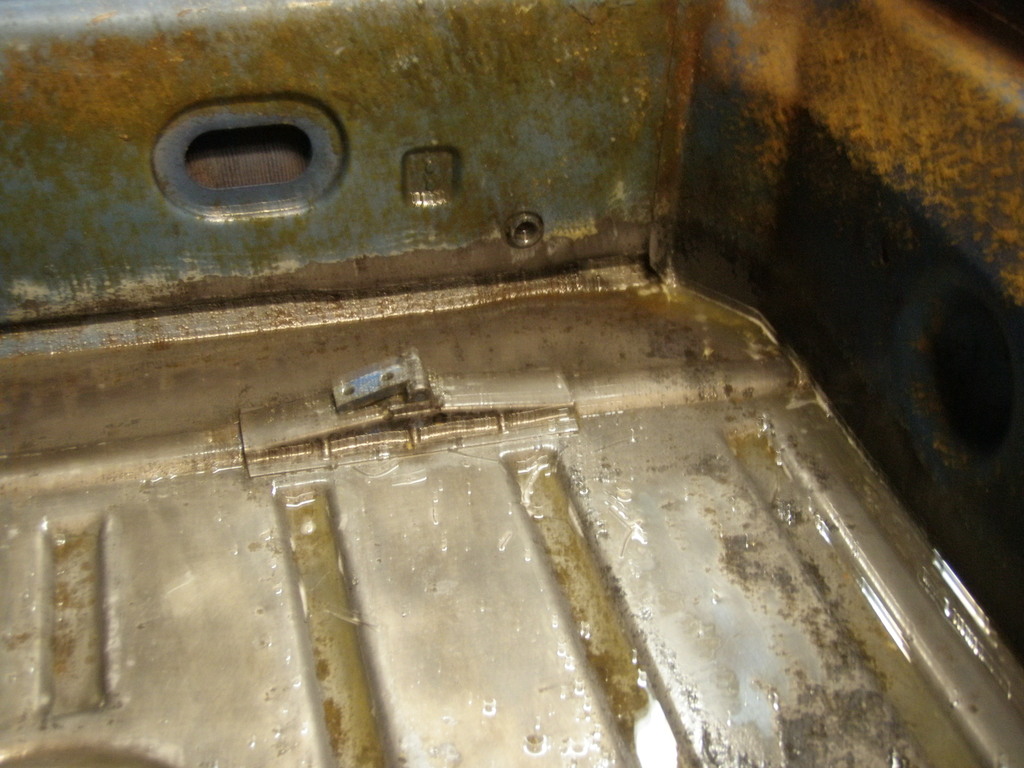
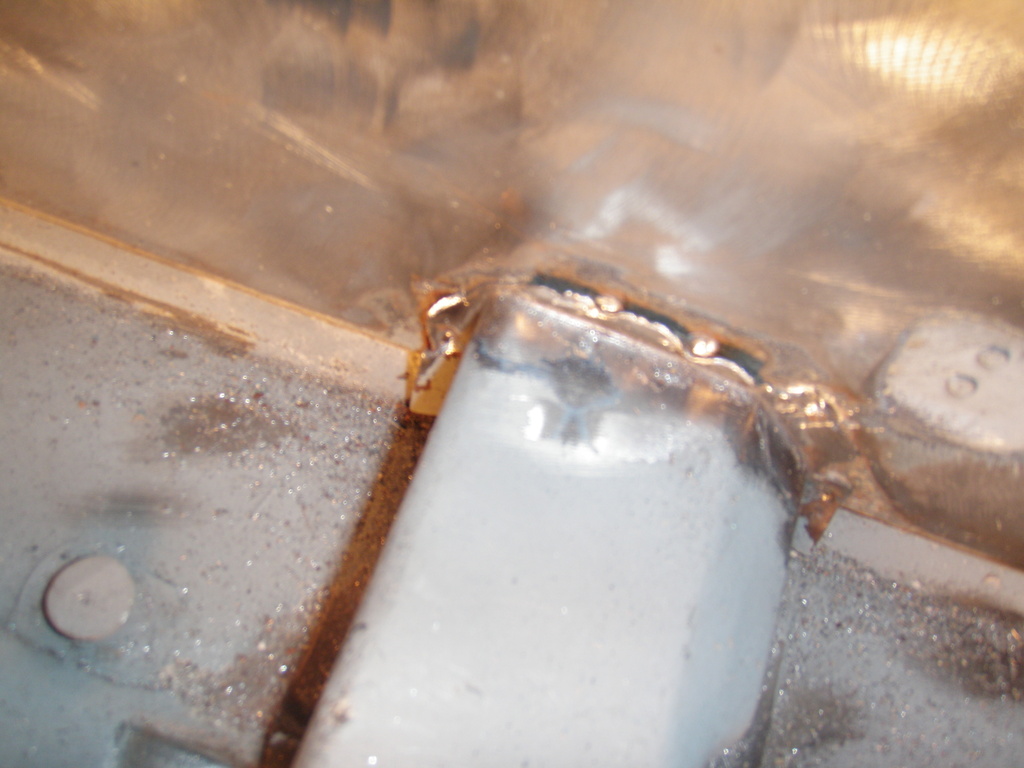
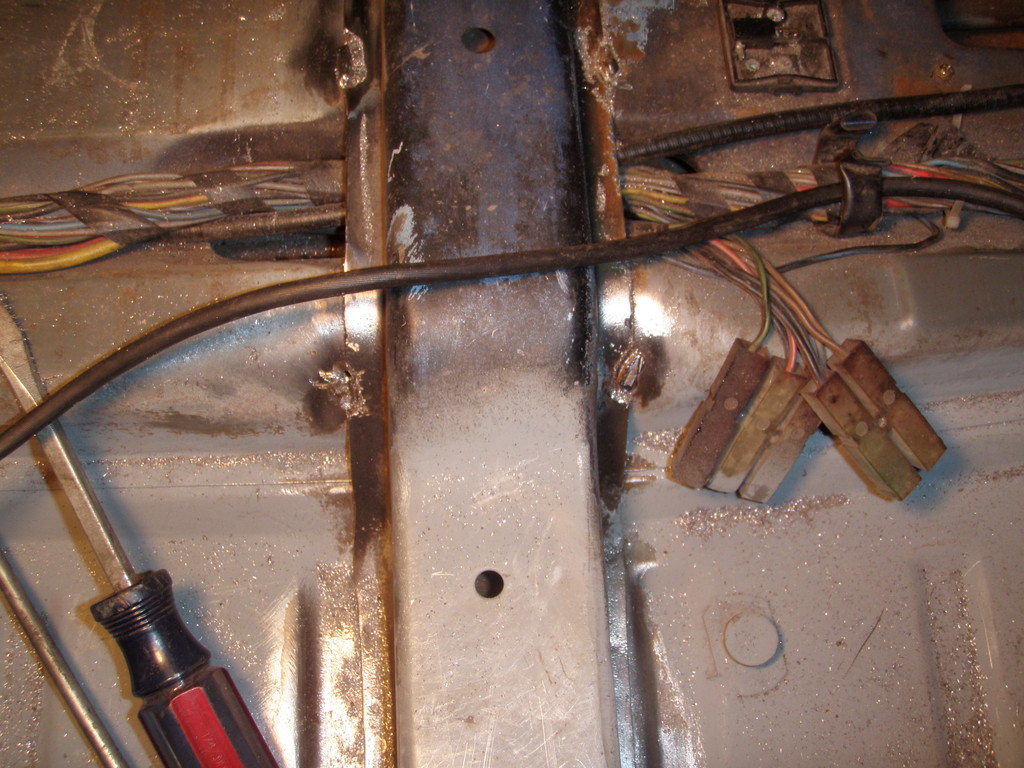
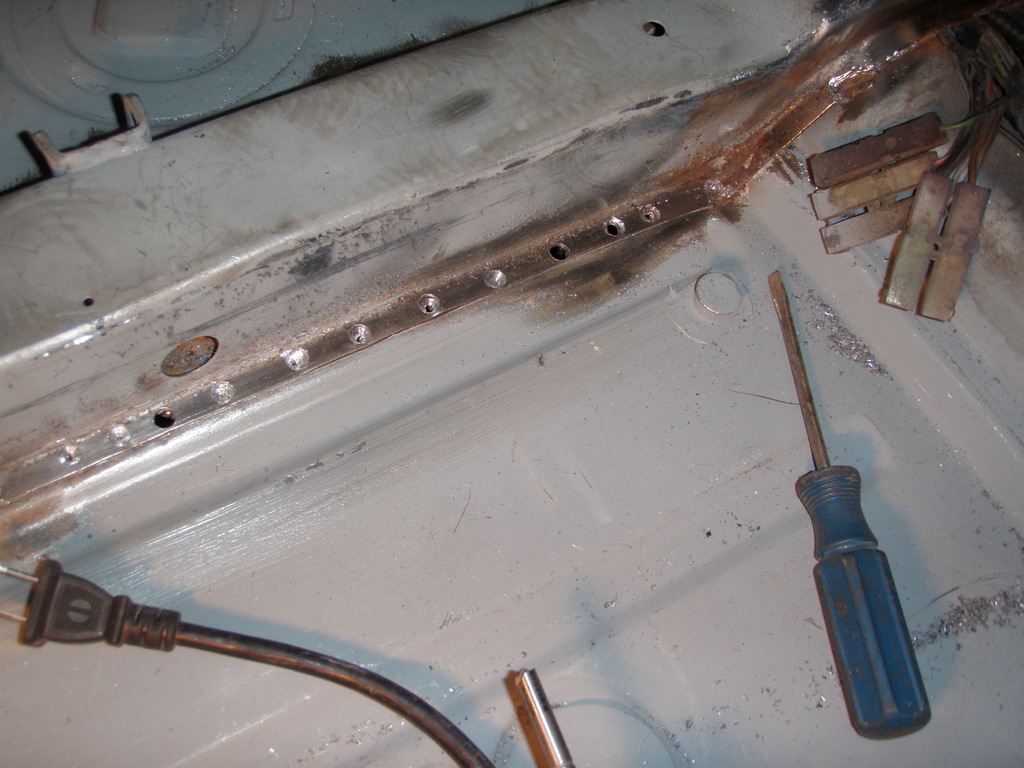
Here is the drivers side hack box, and the center of the long with the sill support.
I am going to cut the jack box off both sides tomorrow morning with the friendly dremel to prevent it from spreading. Inside of both boxes passes the hammer test...... Hopefully hopefully I can run boxless and por-15 under it.
The sill support did not pass, I was able to poke a screwdriver through

FUcking previous owners never removing the rockers for cleaning... *sigh*
ghuff
Jun 24 2009, 06:38 PM
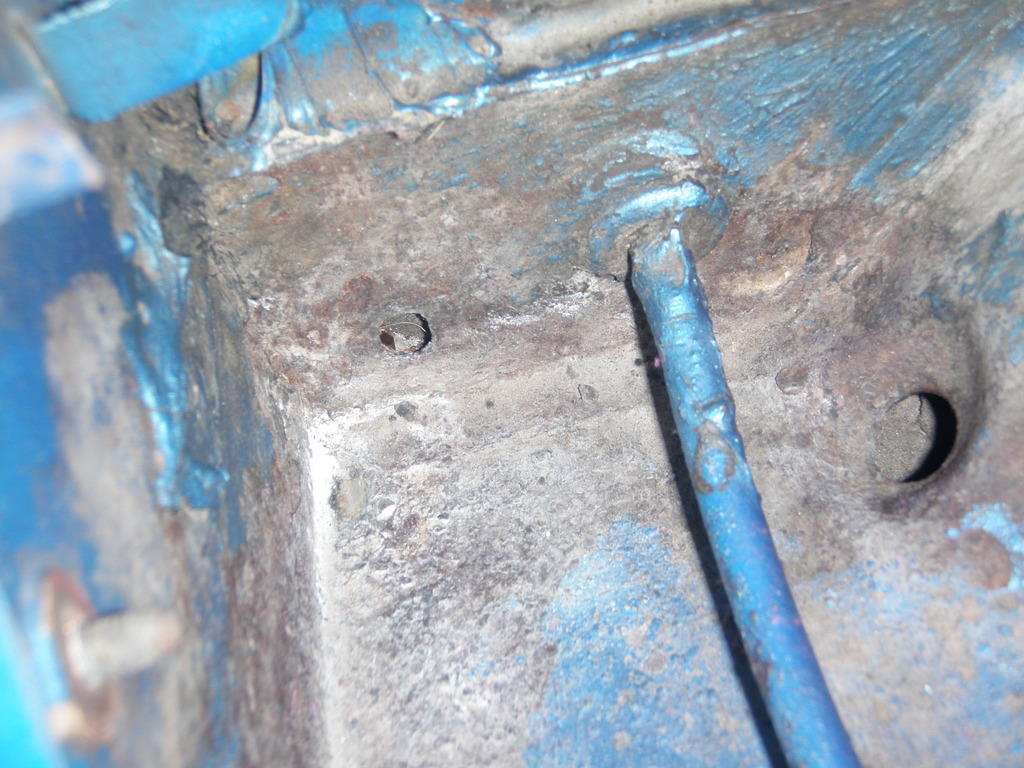
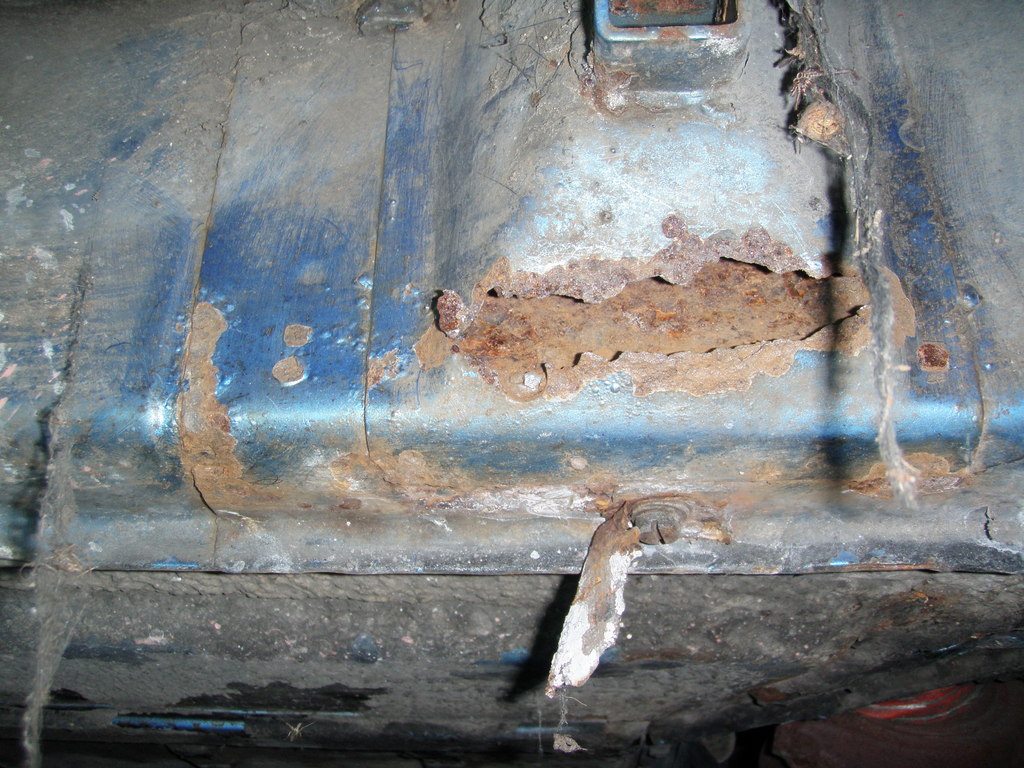
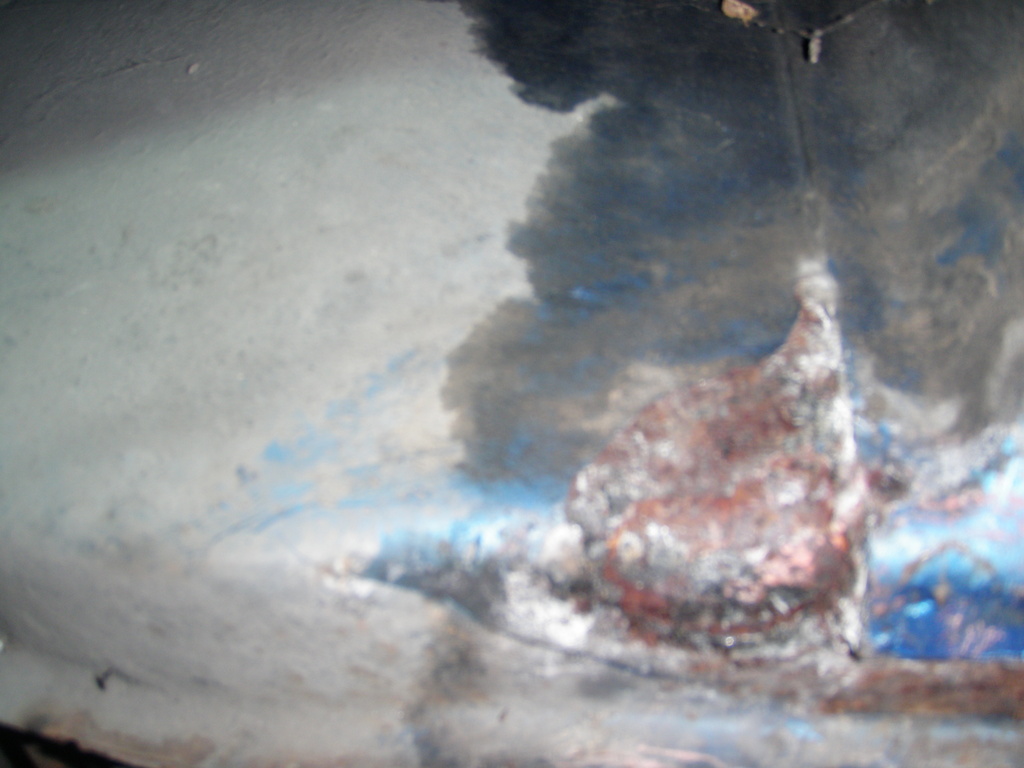
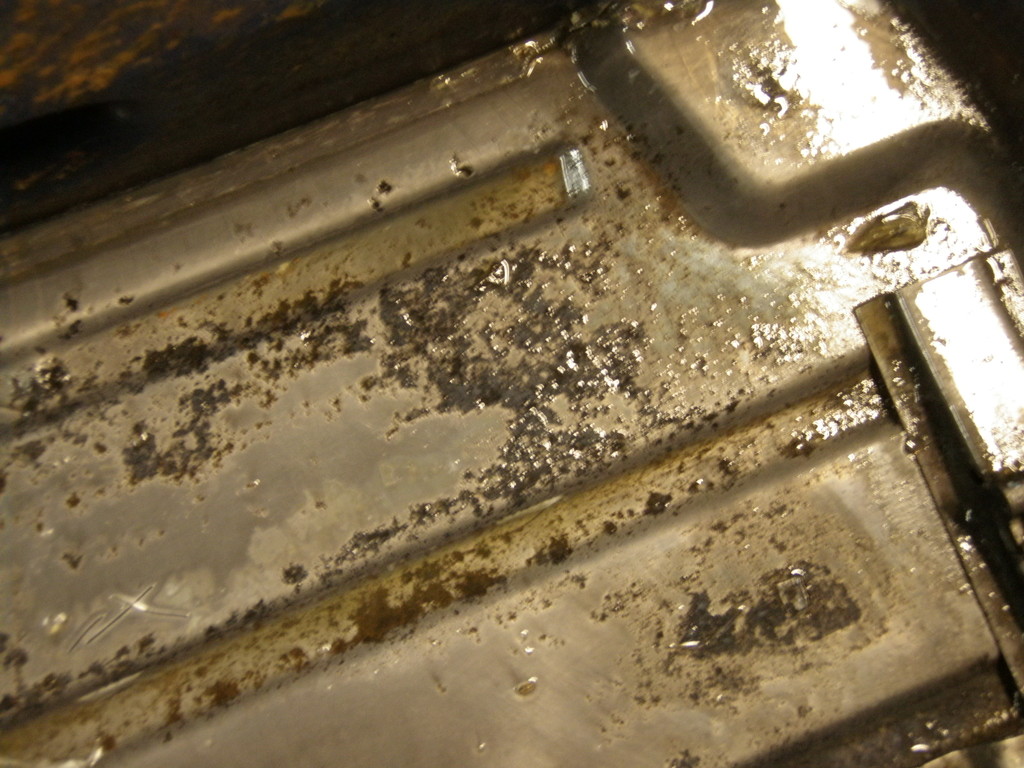
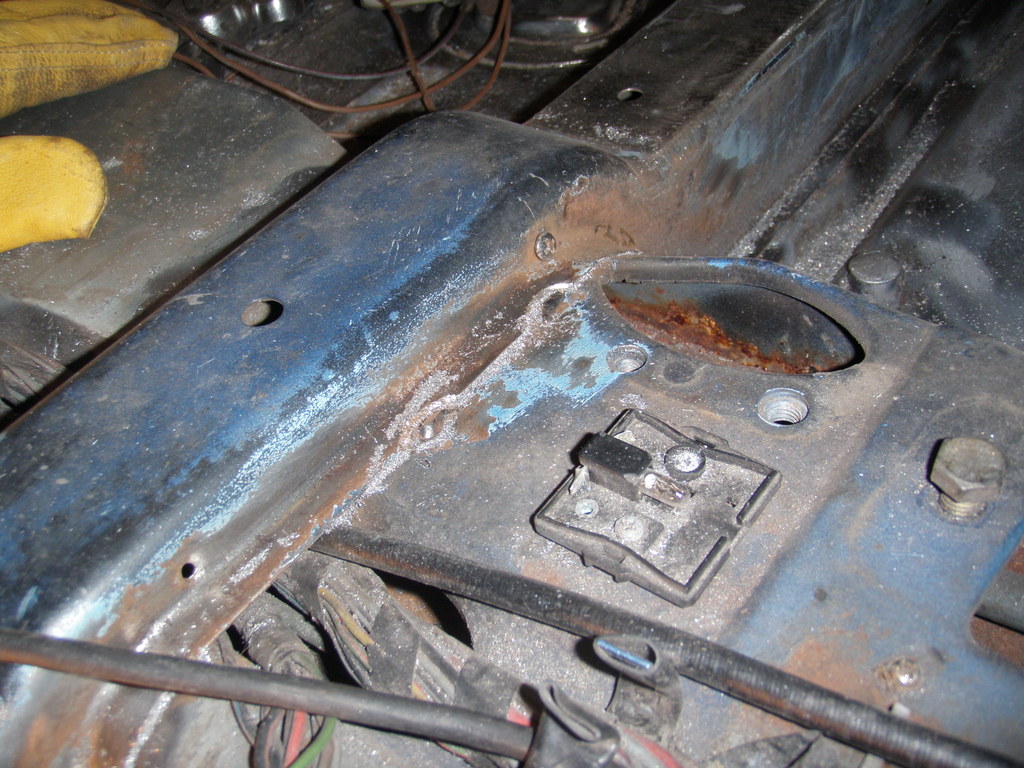
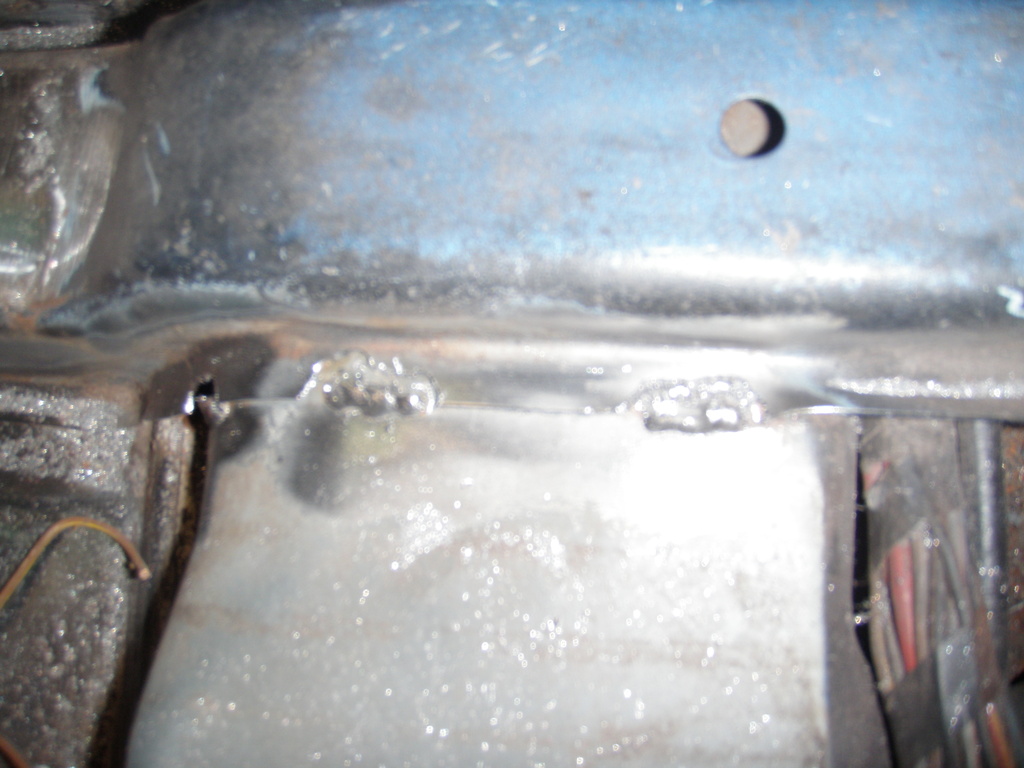
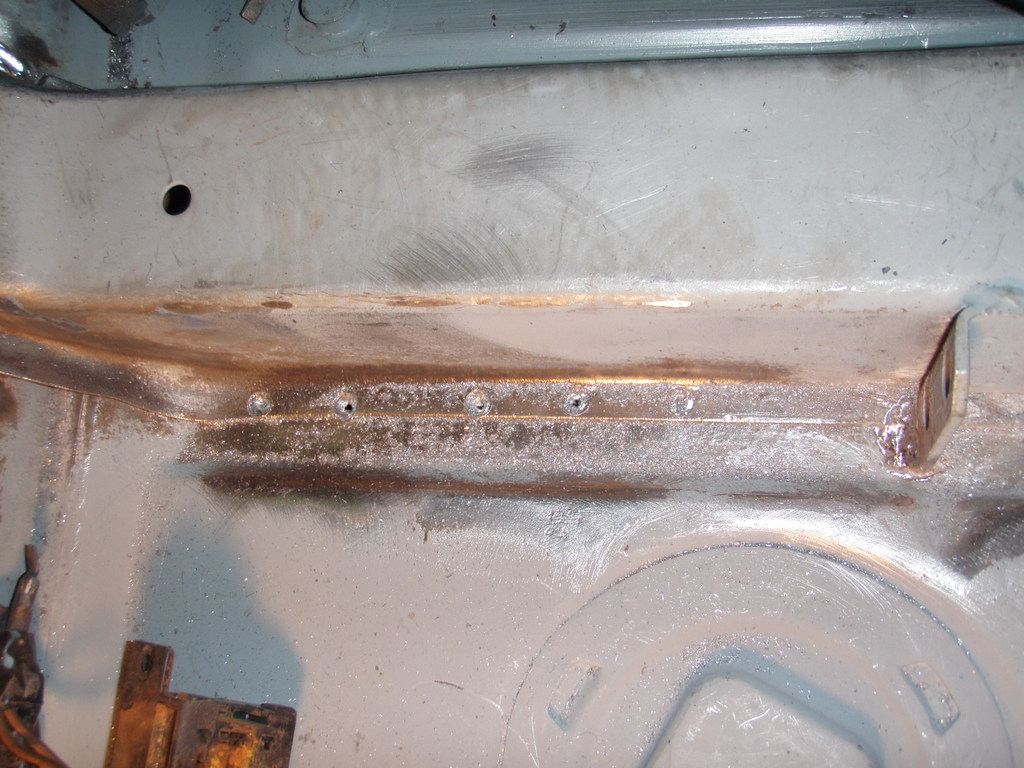
Passenger side jack box and long.
The rear portion of the long in pic 2 passed the hammer test.... it looks like it is through layer 1 however, working into layer 2.
Heeltoe914
Jun 24 2009, 06:47 PM
You have no problems easy fix. All parts you can buy new, good luck. Are you going to try welding yourself?
shoguneagle
Jun 24 2009, 07:03 PM
Your 914 is completely restorable and should be. As McMark says, "the red one needs to be restored and find a new home". The red one would be setting at my house if I was closer to it.
Steve Hurt
tat2dphreak
Jun 24 2009, 07:15 PM
I cut my bad jackpost off, and welded a piece where it was... and yours is in better shape... you'll be fine!
ghuff
Jun 24 2009, 08:47 PM
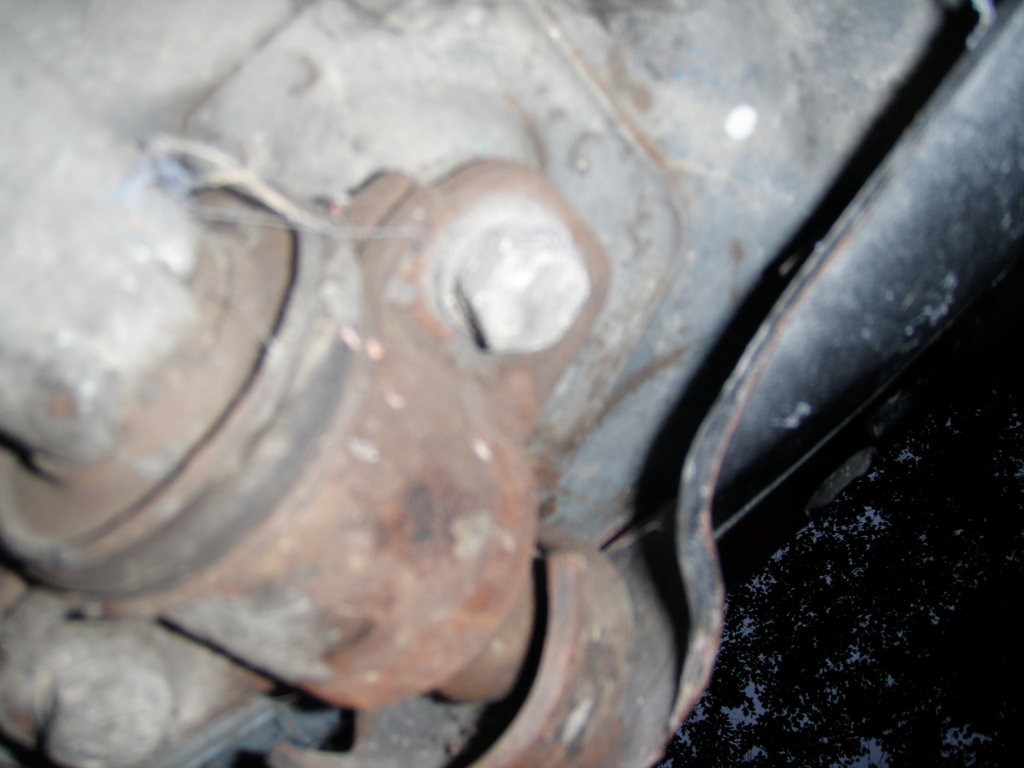
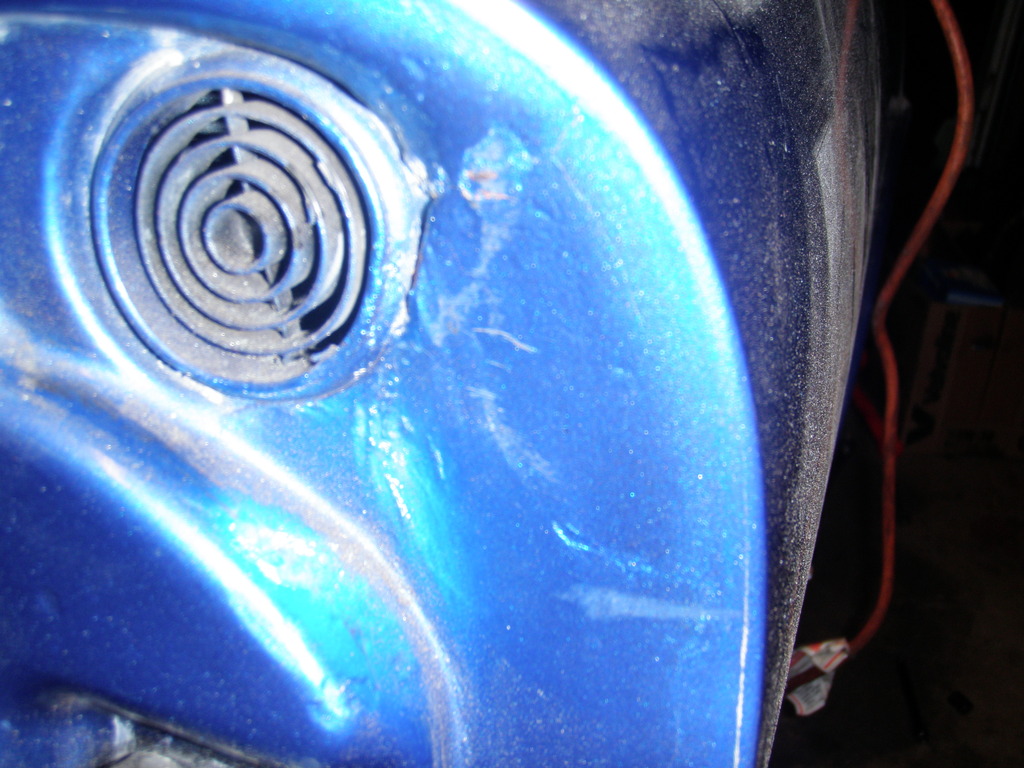
The front trunk looks like it was curbed at some point.
The front control arm locating bolts that are side to side are not disturbed it appears.
The third front bolt on the passenger side however is tweaked and that cover which goes over the bushing and pivot is tweaked kind of.
It looks as if a giant piece of wood and a sledge would talk it back down to being flush like the drivers side. The cover of the control arm bushing was disturbed, but it looks like it can be beaten back down with wood and a sledge hammer.
It looks like this narrowly avoided fucking up the orientation of the front mounting point for the control arm.
Pics for reference.
EdwardBlume
Jun 24 2009, 09:00 PM
I dig that color. Its time for an ez resto.. got cash?
ghuff
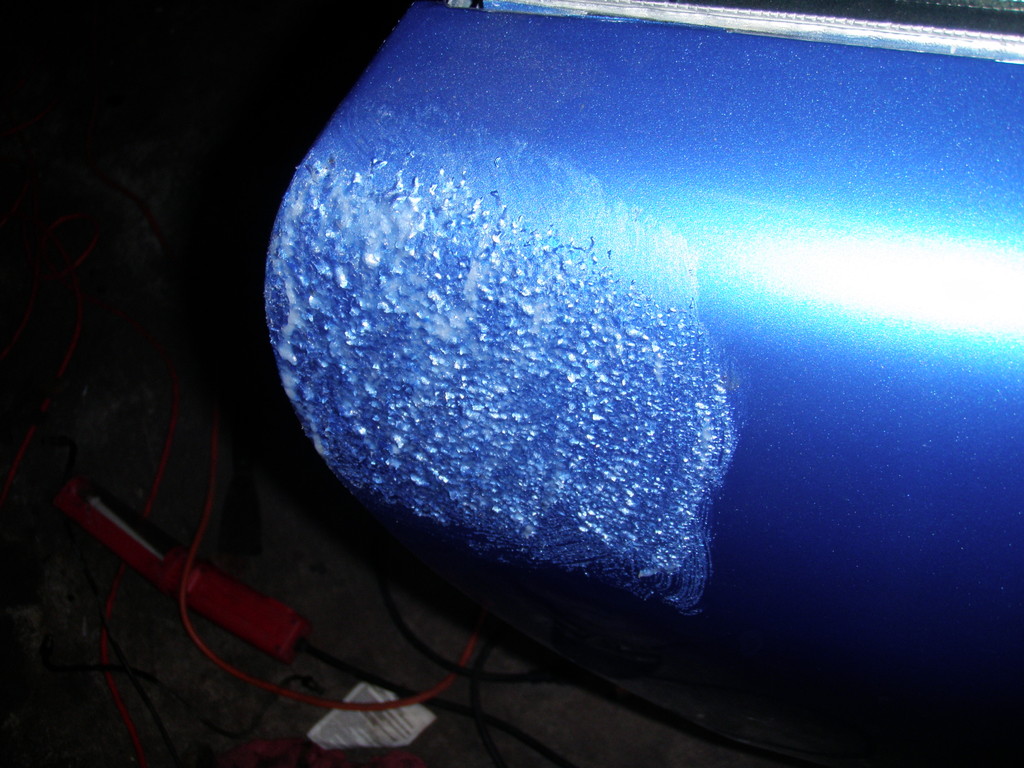
Jun 24 2009, 09:09 PM
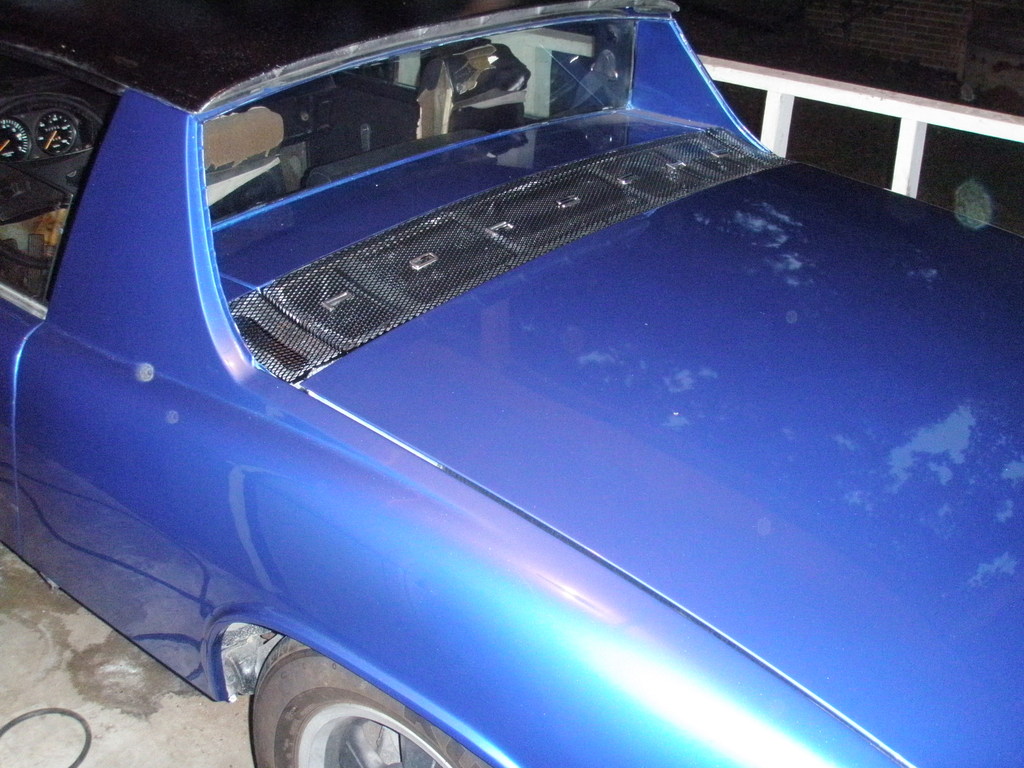
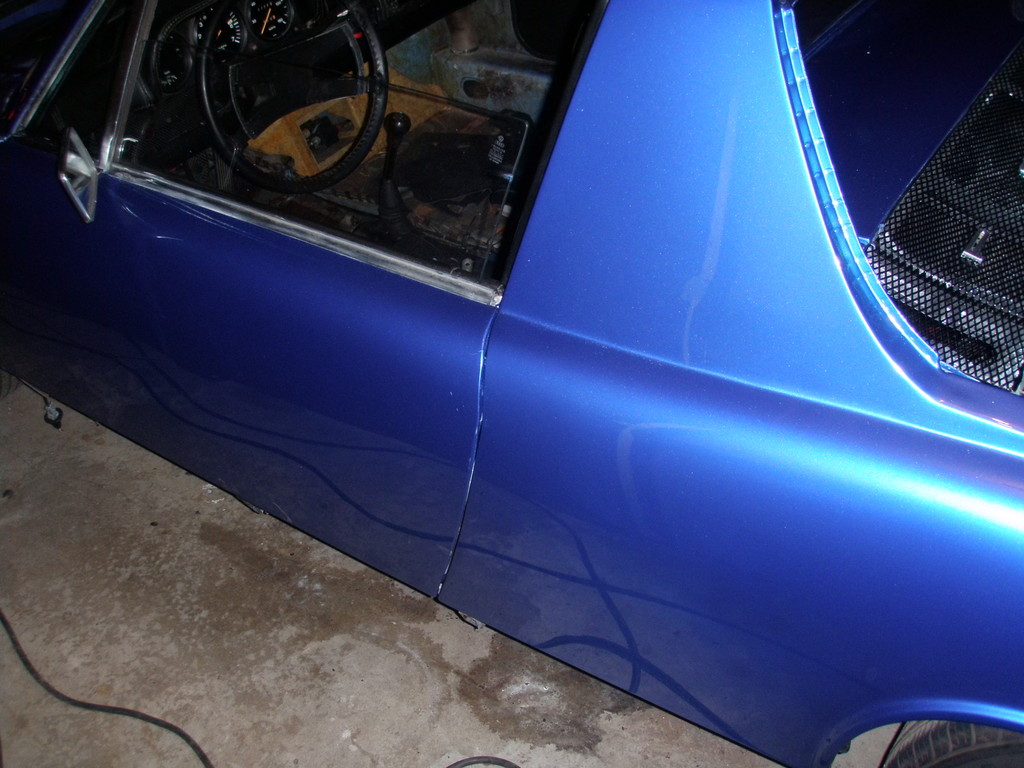
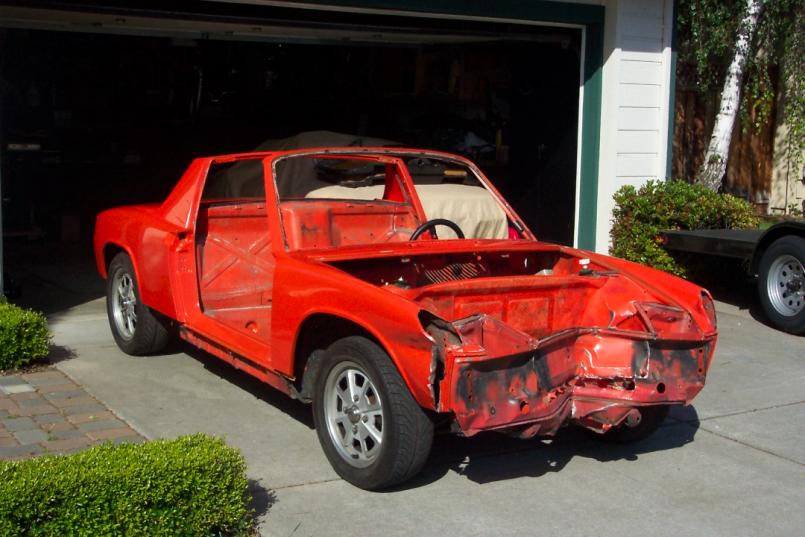
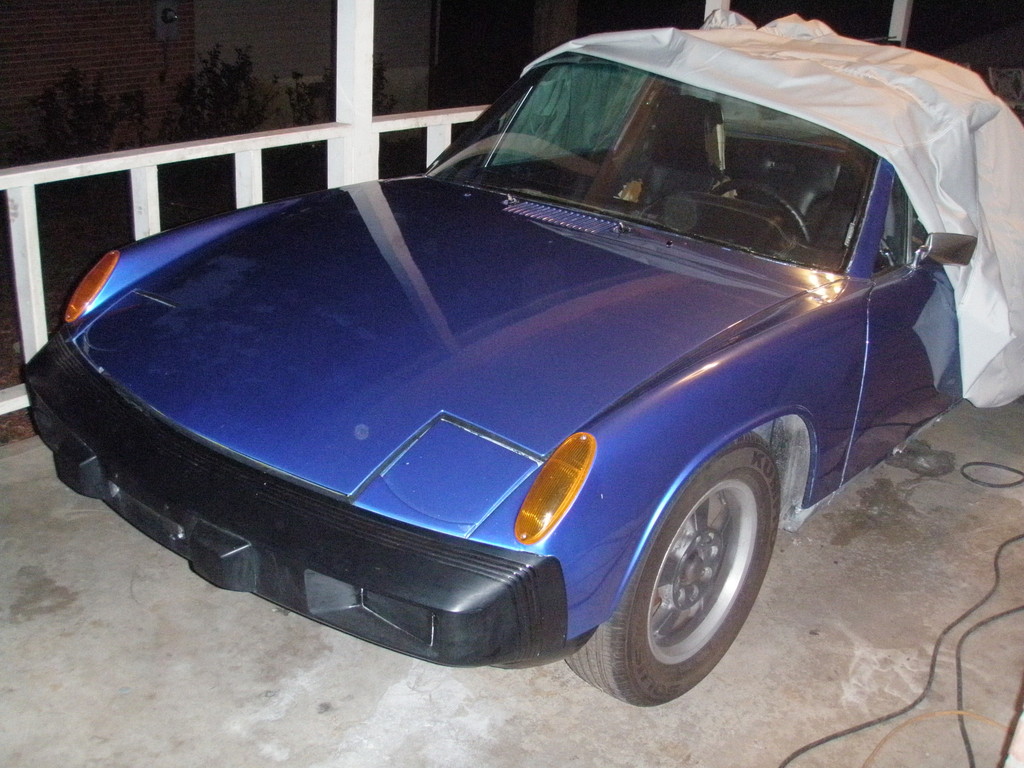
Here is what the exterior looks like.
It was getting dark, I had a hard time taking pictures.
So what do you guys think now that you have seen pretty much all the nasties of the vehicle?
51k original miles.
ghuff
Jun 24 2009, 09:12 PM
QUOTE(RobW @ Jun 24 2009, 07:00 PM)
I dig that color. Its time for an ez resto.. got cash?
Yes hehehe. It is spread between this and my 89 right hand drive Syncro Golf 4 door. But the major cash has been spent rebuilding the motor, gearbox and angle drive for that.
The paintwork on this car is done. It has shaved door handles *UGH* but I am putting door handles back into it and the recess is being brought back into the sail.
After about 20 hours of dicking with the hood seal channel and rebuilding the cowl to fender box out of por patch, it is together.
Few years, or next paint job it will need metal at the fender to windshield cowl joins for sure to replace that por patch. The por patch should keep it sealed for a while.
I just want it to be clean, reliable, quick, and handle well. I plan on a lot of autox, and car shows. Subtle, clean, classy etc.
ghuff
Jun 24 2009, 09:18 PM
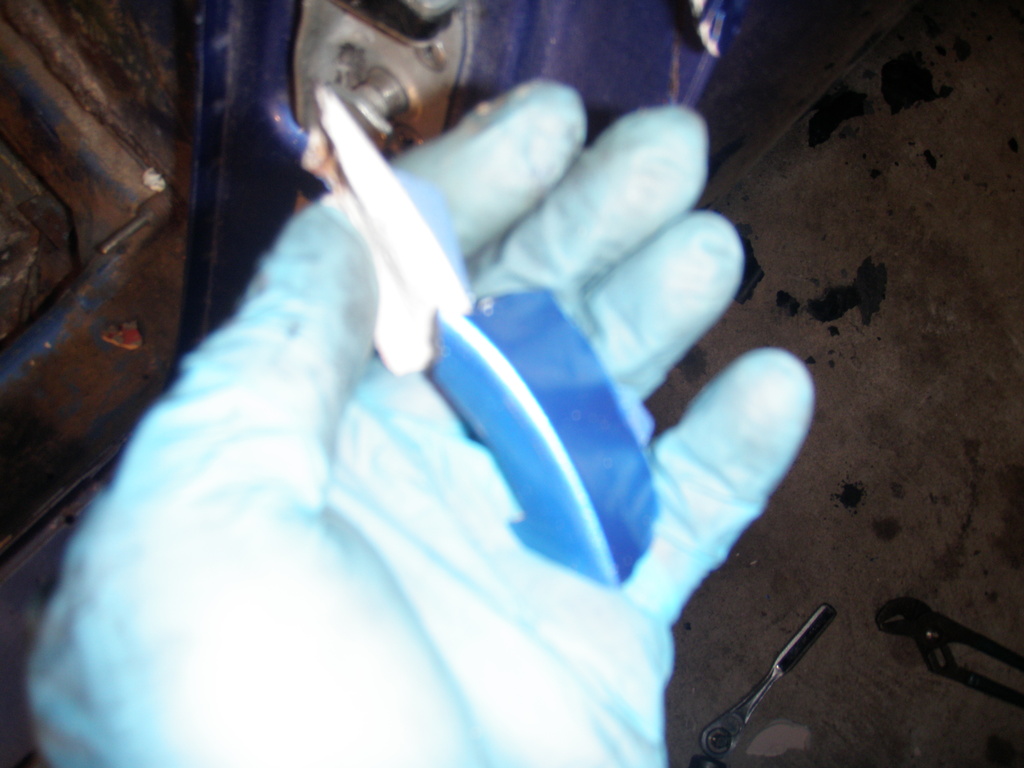
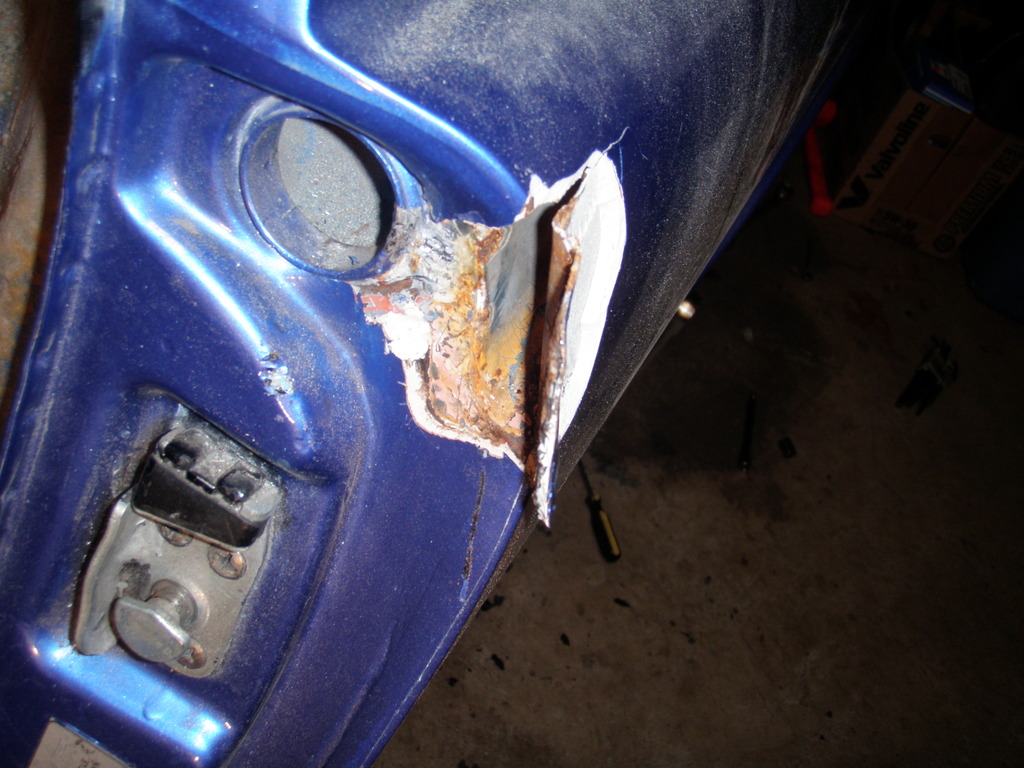
ghuff
Jun 24 2009, 09:30 PM
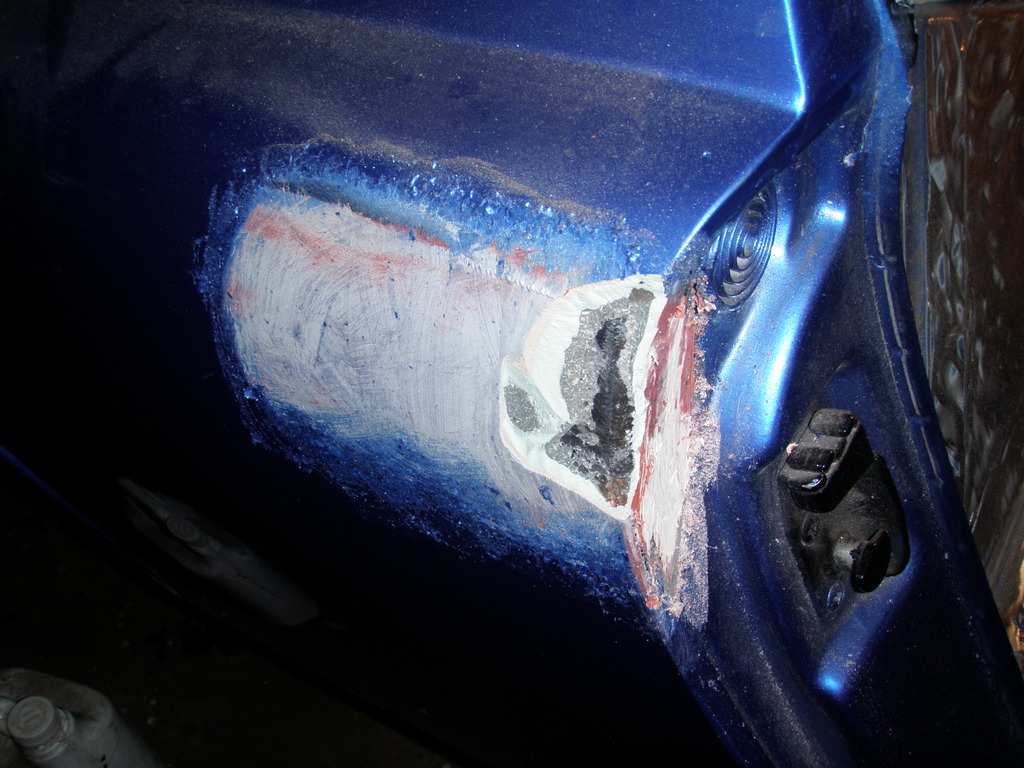
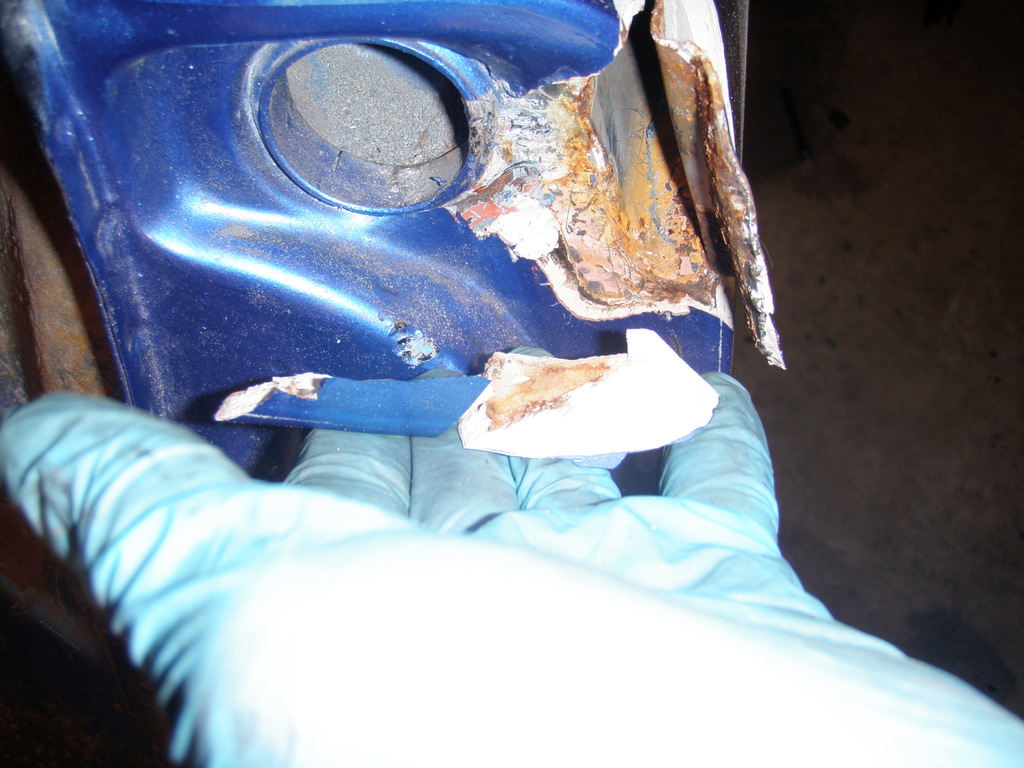
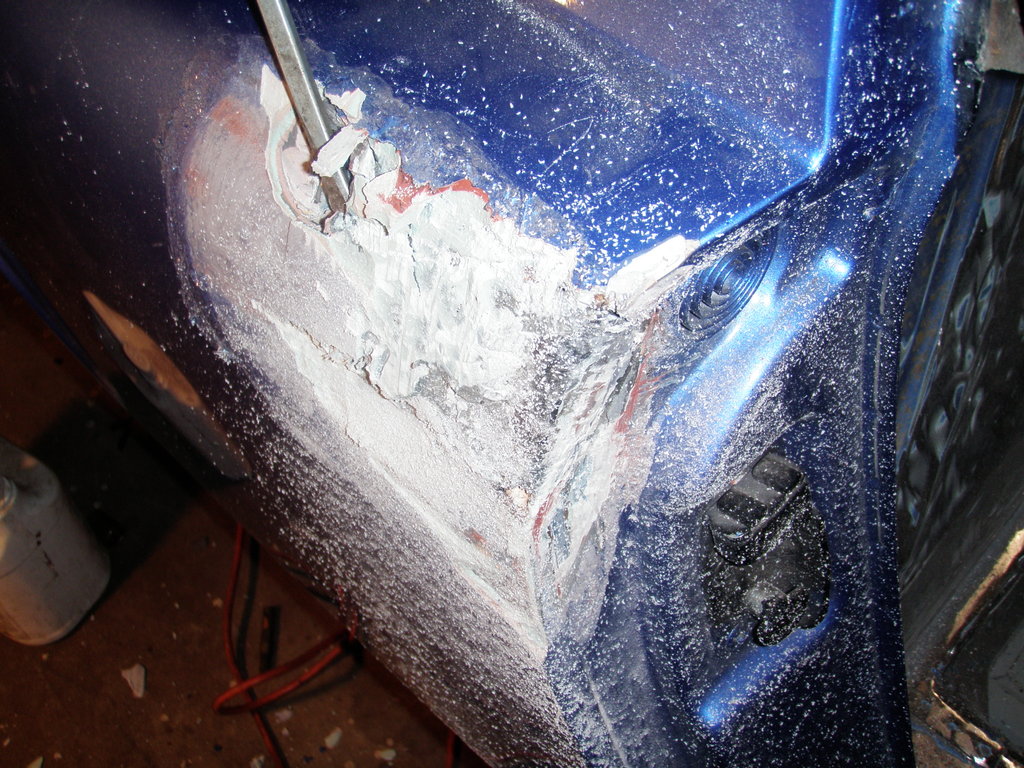
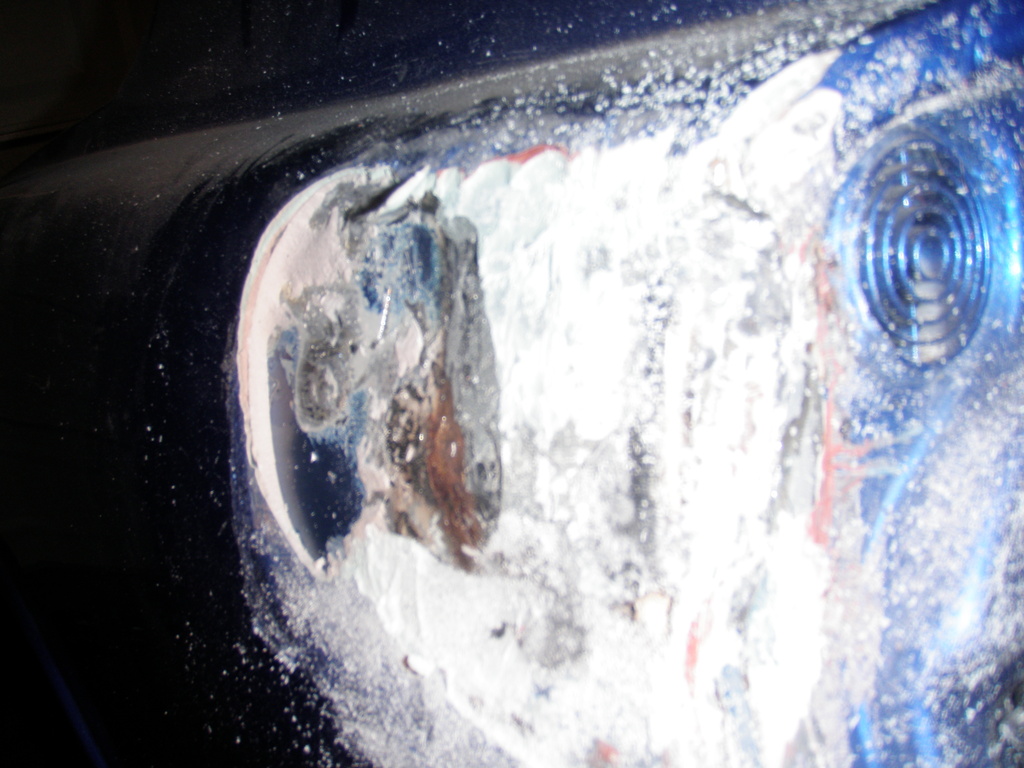
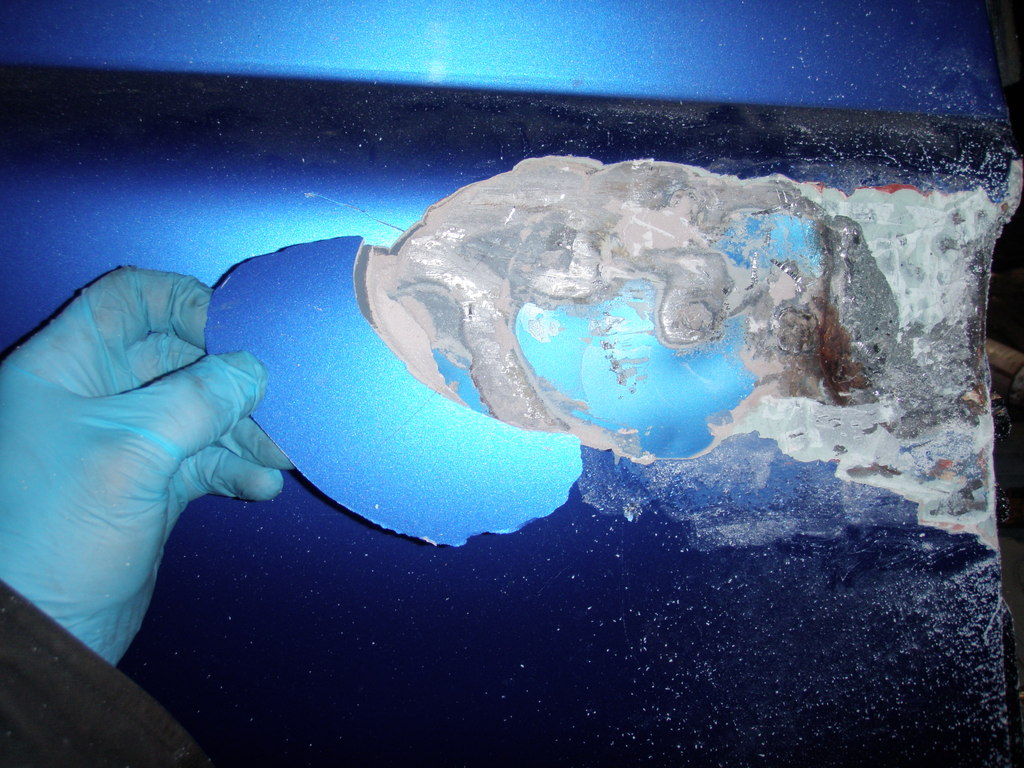
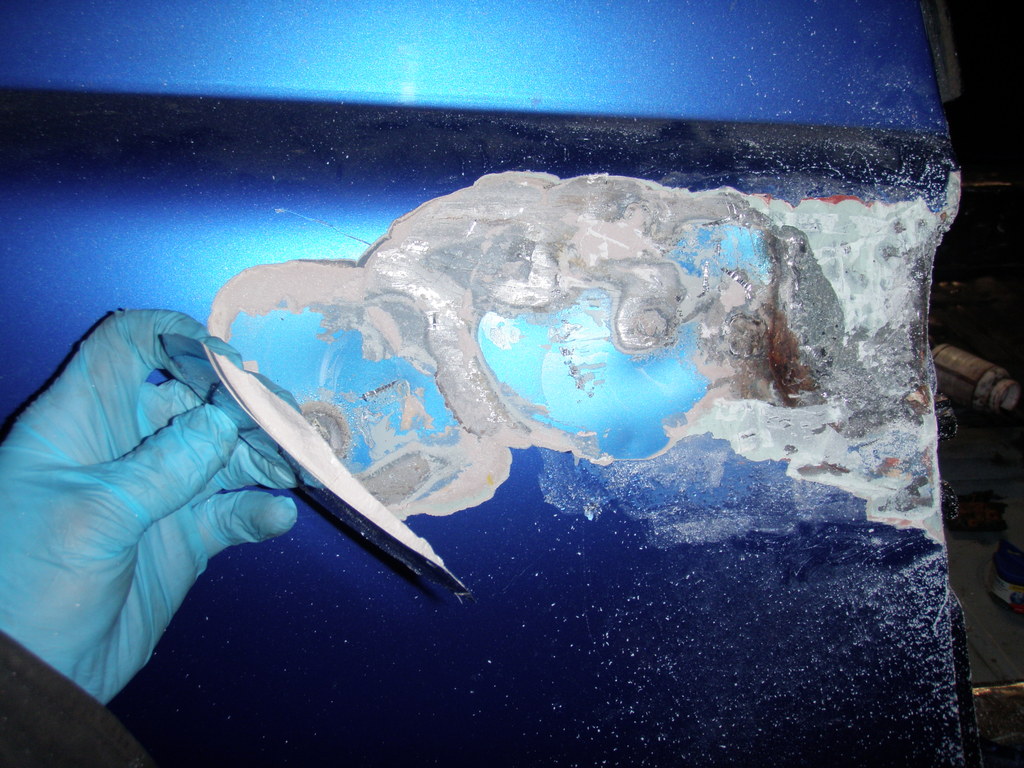
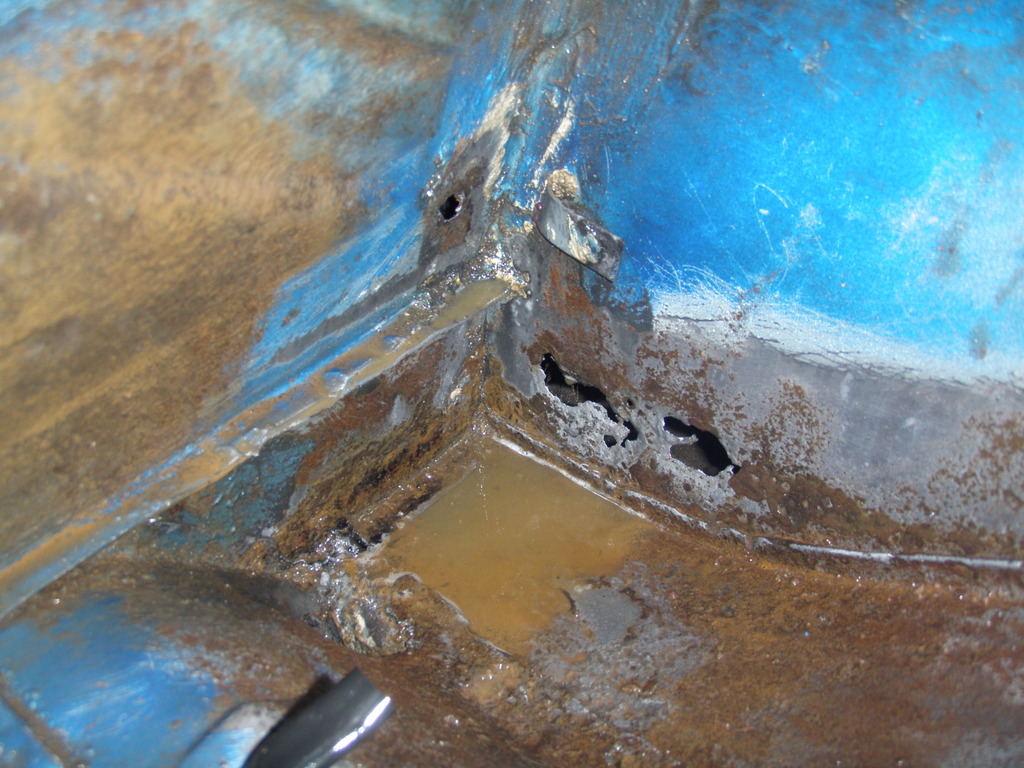
Forgot to add these, this is what I had to sculpt out of por patch after prepping the rust :|
This side was the worst. I also think it ate into the fender some and was filled with filler before paint, but well you can't get a factory garage kept 914 that is perfect, unless you pay a mint. I am not rich.
THe other side was a tiny pinhole, but obviously would soon be like this.
ghuff
Jun 25 2009, 09:06 AM
About the sill to long brace on the drivers side, I looked at my post which did not indicate what was through -- the long took a screwdriver through where the sill brace was mounted to it
So the long needs to be patched there as well, the screwdriver hit the flexible heater pipe inside.
How can that be patched without melting said heater pipe and how can I seal the weld back up inside?
I would hate to replace an entire long over that.
McMark
Jun 25 2009, 04:17 PM
The pipe will be fine 99% of the time.
You won't be able to seal up the inside of the weld. There is always some exposed metal left. That's just life. Replacing the entire long will still leave you with bare metal where the welds are. You just can't get to everything.
But the good news is that as long as you maintain the car correctly you repair will not rust out for a LONG LONG TIME. Long enough to not worry about it.
ghuff
Jun 30 2009, 11:01 PM
QUOTE(McMark @ Jun 25 2009, 02:17 PM)
The pipe will be fine 99% of the time.
You won't be able to seal up the inside of the weld. There is always some exposed metal left. That's just life. Replacing the entire long will still leave you with bare metal where the welds are. You just can't get to everything.
But the good news is that as long as you maintain the car correctly you repair will not rust out for a LONG LONG TIME. Long enough to not worry about it.
Made some progress just have been to busy to update with pictures. I am going to rectify that now. I have hit all the rust with metal ready, then some rattle can self etching for a temporary seal against the weather while I work. The drivers side is complete with por patch and por 15. There was a literal 2 pinholes worth of true rust after many many many many hours with 60 grit, a dremel, and a 1/2" drill with various wire wheels.
To give you an idea of the time spent, I have purple/black bruises in my arm pits from working the hell holes at ground level for so long with 60 grit and a dremel + wire wheel/drill to pull thepitting out and see what metal is really good.
My wife freaked out and I did not put two and two together until I thought about what I had been doing for the past week.
On to the photos!
I ended up getting more of the rust out before it received patch and por 15. The holes were so tiny and completely void of rust after I got to them, that I decided cutting/welding here was not necessary at all and that patch would be fine since they were well under 1cm or so and not structural.
Worse case scenario, in 5-10 years I cut and weld it. Oh well.
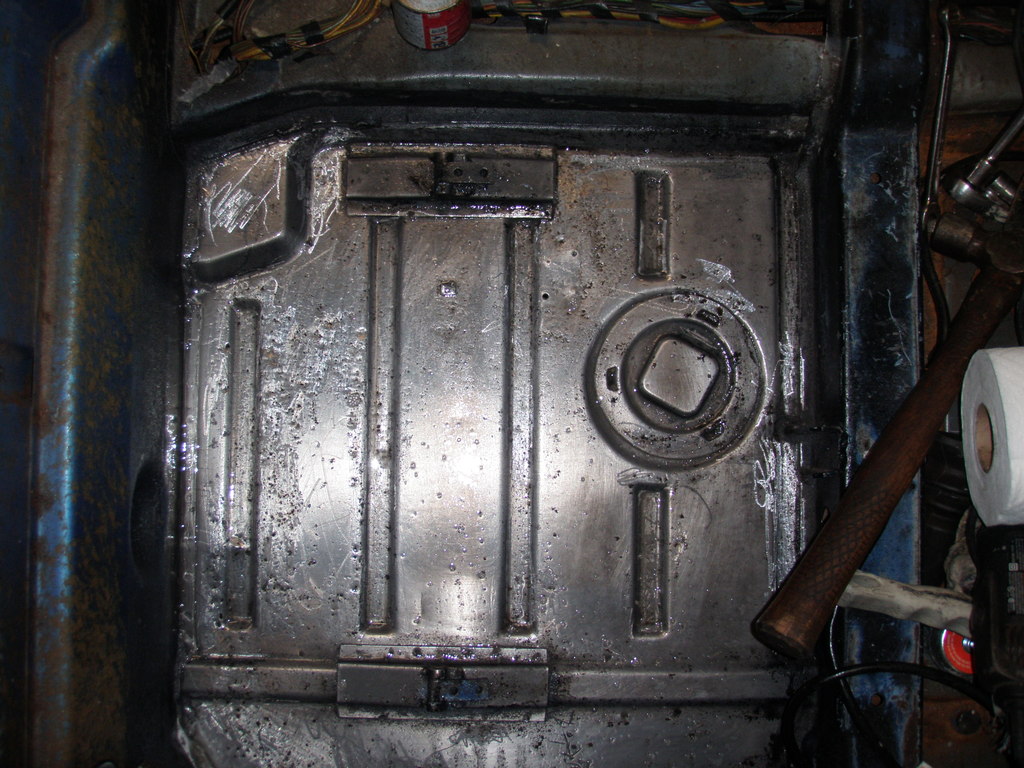
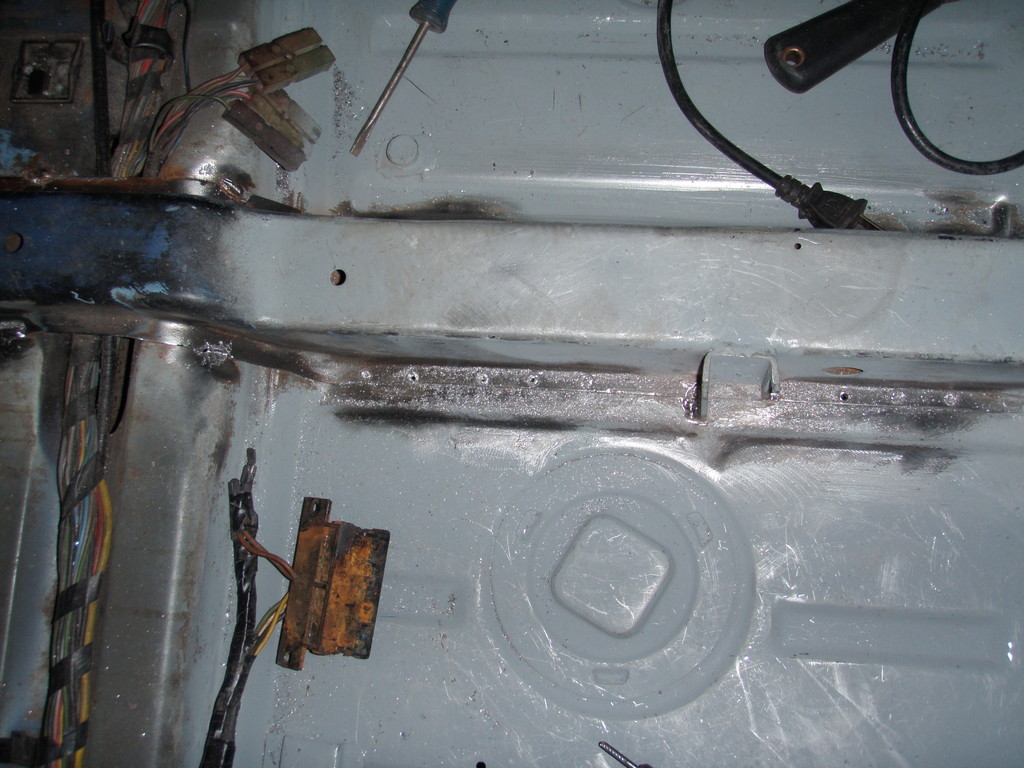
ghuff
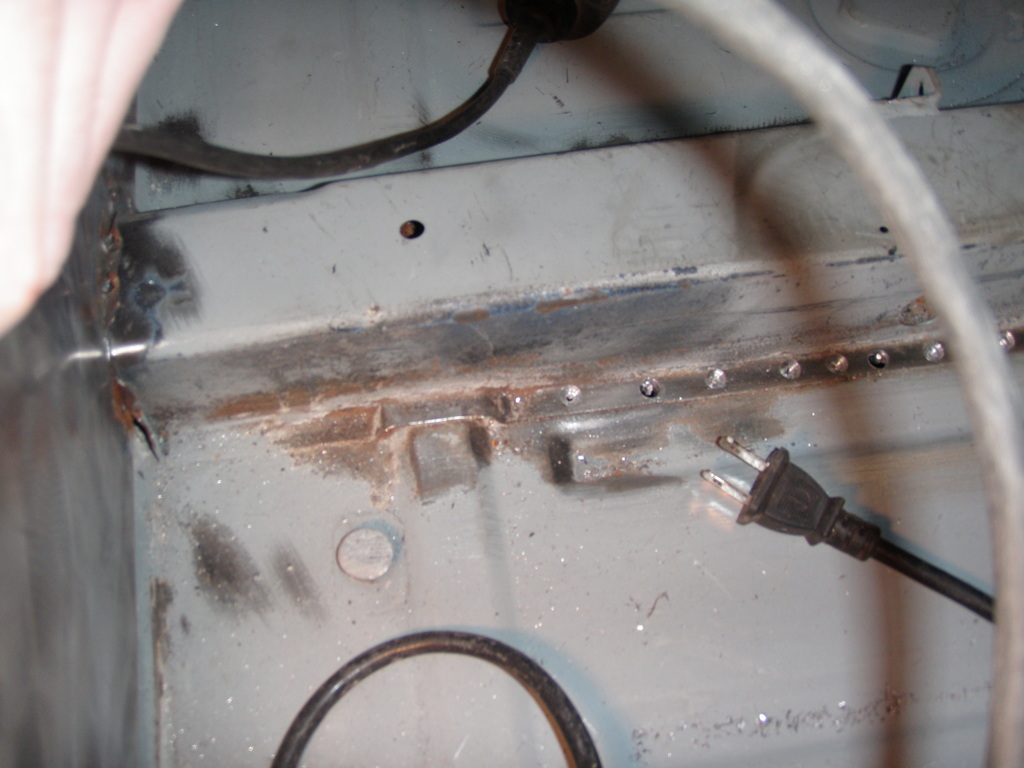
Jun 30 2009, 11:06 PM
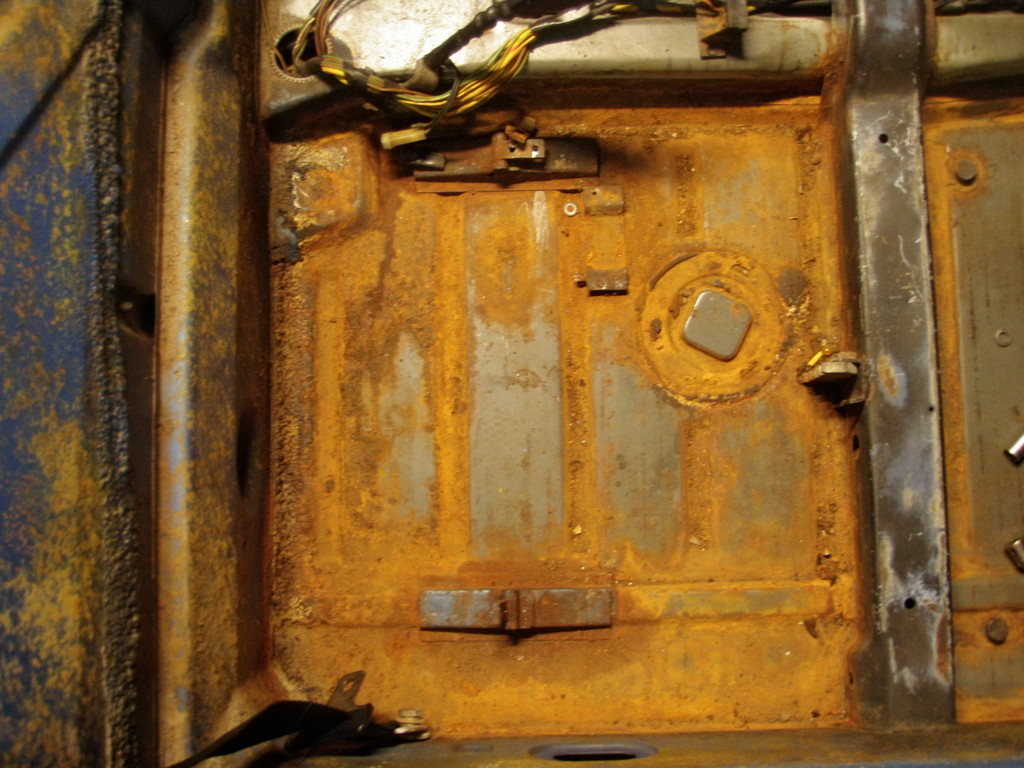
The hell hole, or lack thereof.
The hole in the firewall was under seam sealer and looked perfect. The factory seals the rust in for you on 914's, or the sealer just ages and lets moisture behind it. Either way, I do not think that hole is factory heh.
Again both pictures were taken way early before the por-15 and primer in the case of the hell hole area. Unfortunately I lost my wifes camera battery charger and the battery was dying of course! I will take some pictures of the metal once I get back to strip the primer off, finish removing pitting from the metal and por-15 the hell hole area.
I plan on cutting out a 1.5" x 4" patch across which will leave about .75-1cm of metal from the long to the panel, where the patch will be welded.
There is a chunk of the actually drain missing as well, the metal under it however is fine. I think I am going to clean and por-15 it, not worrying about what it looks like or anything. I guess again if it bugs me in the future, it can be fixed with new metal.
ghuff
Aug 13 2009, 07:35 PM
ghuff
Aug 13 2009, 11:35 PM
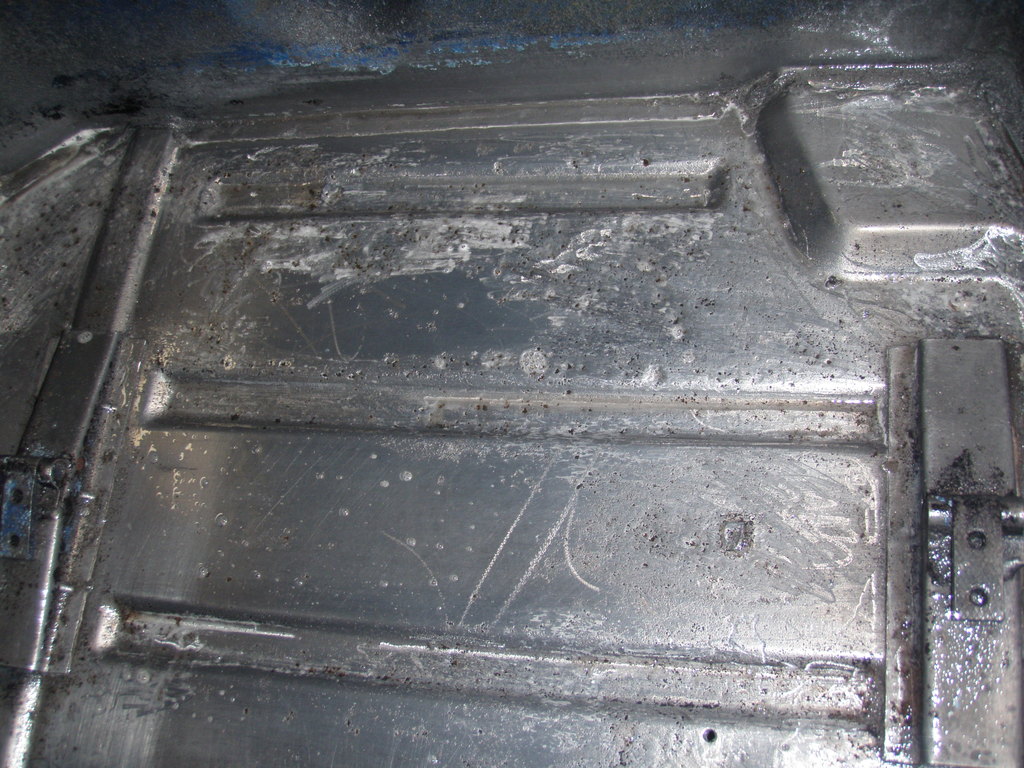
Looked worse than it was. I will be grinding the deeper pitting left and if anything is through just patching it lightly.
Pics of the pass rear floor as it is coming clean.
ghuff
Aug 13 2009, 11:41 PM
How far down does the engman kit come on the longs and rear apron/firewall?
I wonder because I would like to por-15 my floors up until that point so I can easily install an engman kit in the not too distant future and not remove some solid por-15.
Or is this the point it would be wise to begin at?
Also what do you guys prefer to cover bare metal after this sort of cleaning to prevent flash rust/rust from starting pre-paint and etc.?
I have been using self etching rattle can primer but there has to be something easier to clean off.
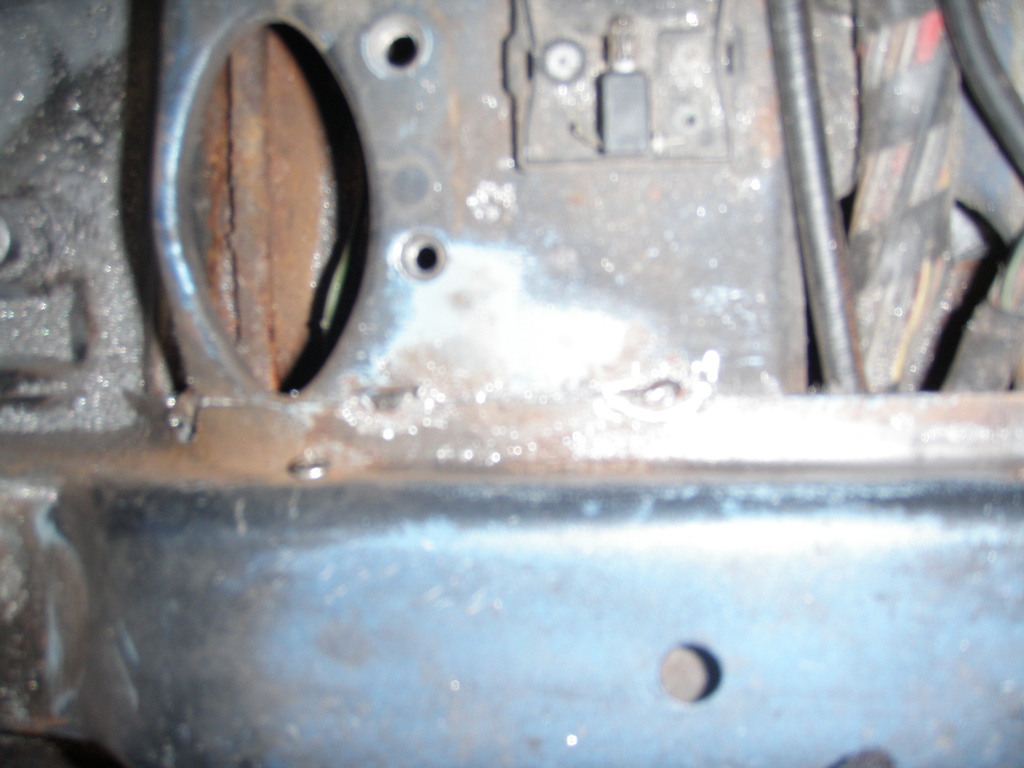
ghuff
Aug 14 2009, 10:47 AM
Cleaner metal
type47
Aug 14 2009, 10:55 AM
Nice work. This car will be one you'll be proud of for all your effort. Do you weld?
ghuff
Aug 14 2009, 11:06 AM
QUOTE(type47 @ Aug 14 2009, 08:55 AM)
Nice work. This car will be one you'll be proud of for all your effort. Do you weld?
Thanks. I started at 9:30pm. I left my new garage at 4:30am. The entire time was focused on this panel and swapping ipods for tuneage.
I am torn, I look at the current pitting left and think "Is that good enough to por-15 and forget about forever?" "Will that pitting spread and come back to haunt me in 10+ years if I do not grind it all out now and soak it in metal ready more to eat it?"
I still have to drill the spot welds on the seat bracket mounts and remove them. There is some surface hiding under them I can see it from the tiny holes in the brackets. I'd hate for it to rot out from under there.
I think I am going to grind more of it out and maybe pickup a 4" disc sander or something to add 60 grit paper to and remove more of the uneven metal/pitting. I want it *clean*.

I want to do this right, and retain as much of the original sheetmetal on the car as possible.
I weld, but I suck. I have been limping along on flux, but I have a bottle capable Lincoln Electric weldpak 3200.
I am going to have to move up, get a bottle and pickup some metal of the floorpan and tunnel gauge to practice spot welding the center tunnel back in to get the settings on the welder right I guess? I was thinking about this last night since the tunnel must come out as must the cross brace. I also am going to have to get the seat brackets back in.........

VaccaRabite
Aug 14 2009, 11:12 AM
Couple small patches in the hell hole - NBD.
Great floors.
I'd grind away the paint on the forward suspension pickup in the front trunk to inspect them, but they are going to be fine.
All these cars have rust somewhere. The only rust free 914 is the one where the owner either does not know where to look, or simply covered it up.
Yours looks fantastic. A great place to start.
Zach
ghuff
Aug 14 2009, 10:19 PM
Thanks for the encouragement. The floorpan is getting even cleaner. I have moved from metal ready to navel jelly.
The navel jelly really seems to be destroying the rust in the pits, and a wire brush brings the new solid gook compound out of the pits leaving them pretty damn clean.
I bought a 4.5" disc sander/grinder and some 24-60 grit wheels for it to knock more metal away and get access to the deeper pitting. i just want to be sure in 5 years or so the por-15 is still happy.
I am going to try using the cold galvanizing compound on all the bare metal I end up with. fourblades reported good results and at 5.50$ a can being 93% zinc + laying like primer I am confident if any moisture settles due to humidity it will be blocked.
I think the metal ready was not thick enough and since you rinse it with water, the moisture settling actually "washed it away" in small spots causing flash to start, then creep around.
I am going to try and get the floors 100% stripped and then in cold galvanizing compound before I move on to drilling spotwelds.
Any tips for removing the center tunnel and the crossbrace? Are the front seat height/bracket things welded to the floor as well, or only to the brace?
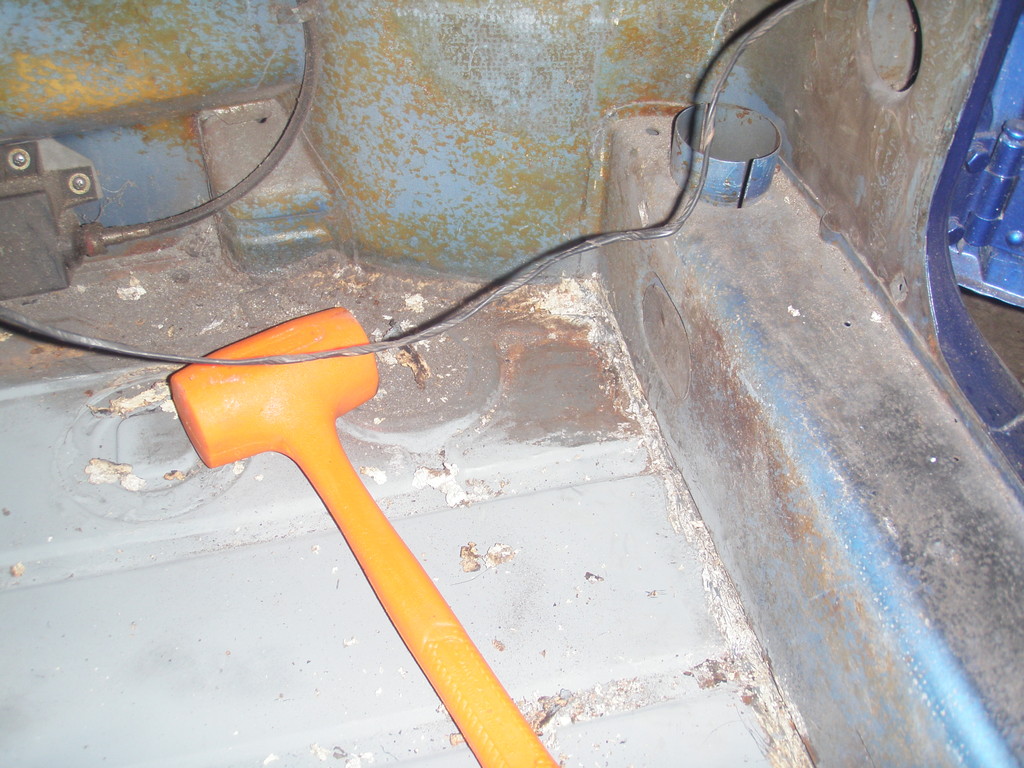
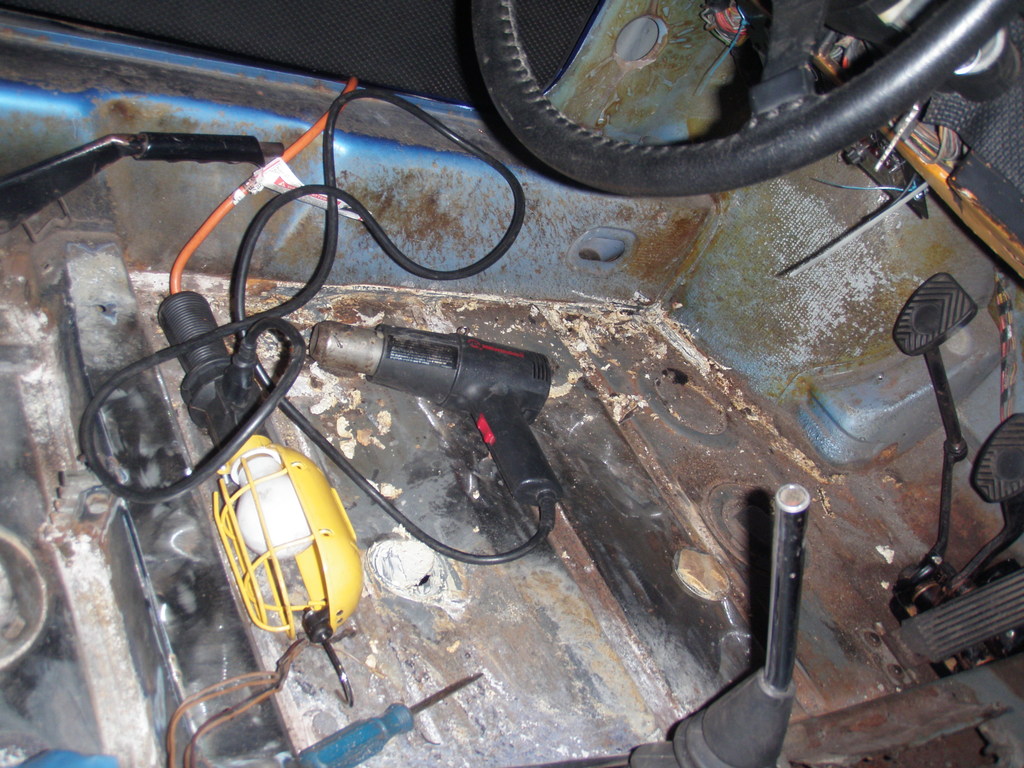
ghuff
Sep 19 2009, 08:44 PM
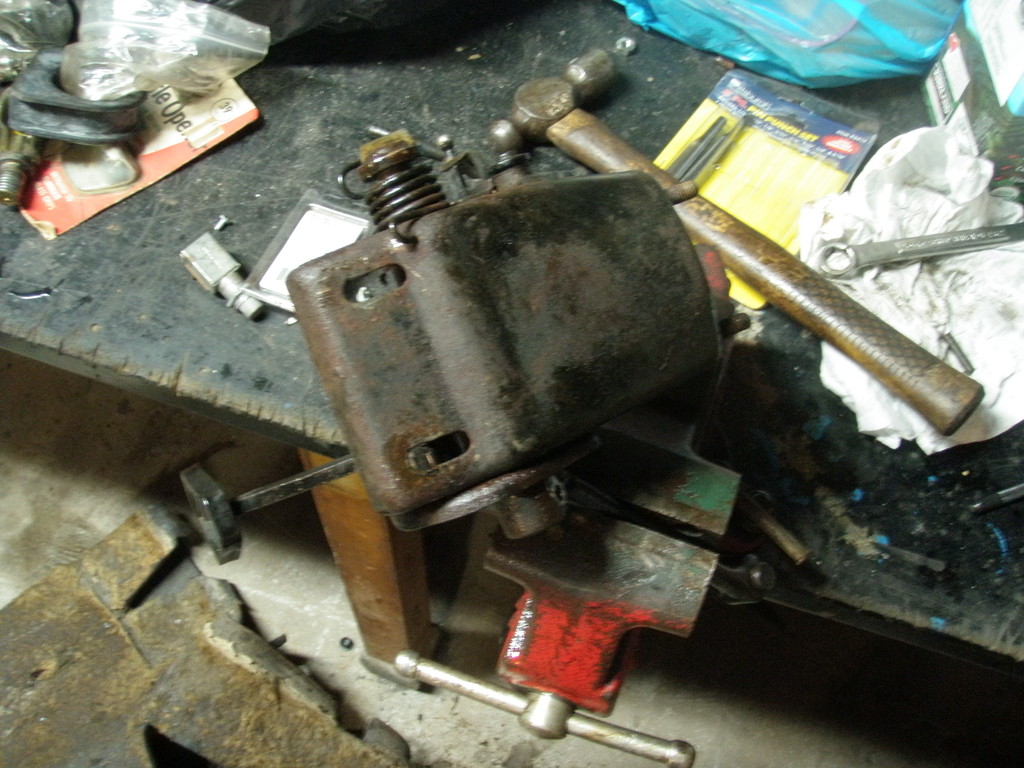
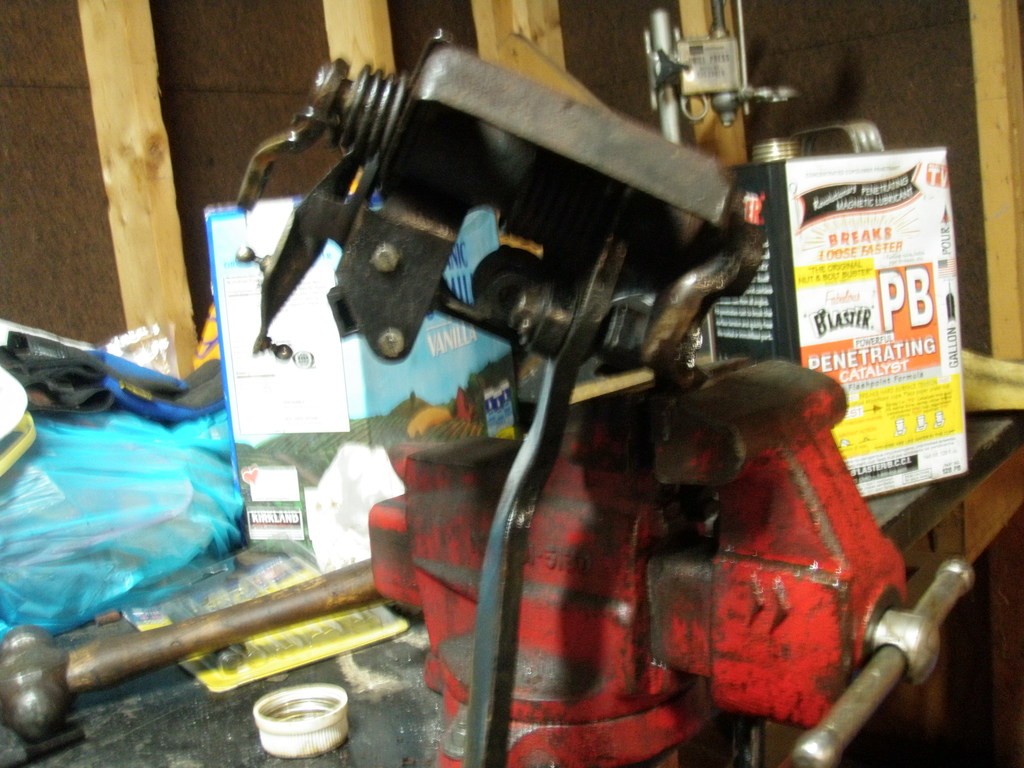
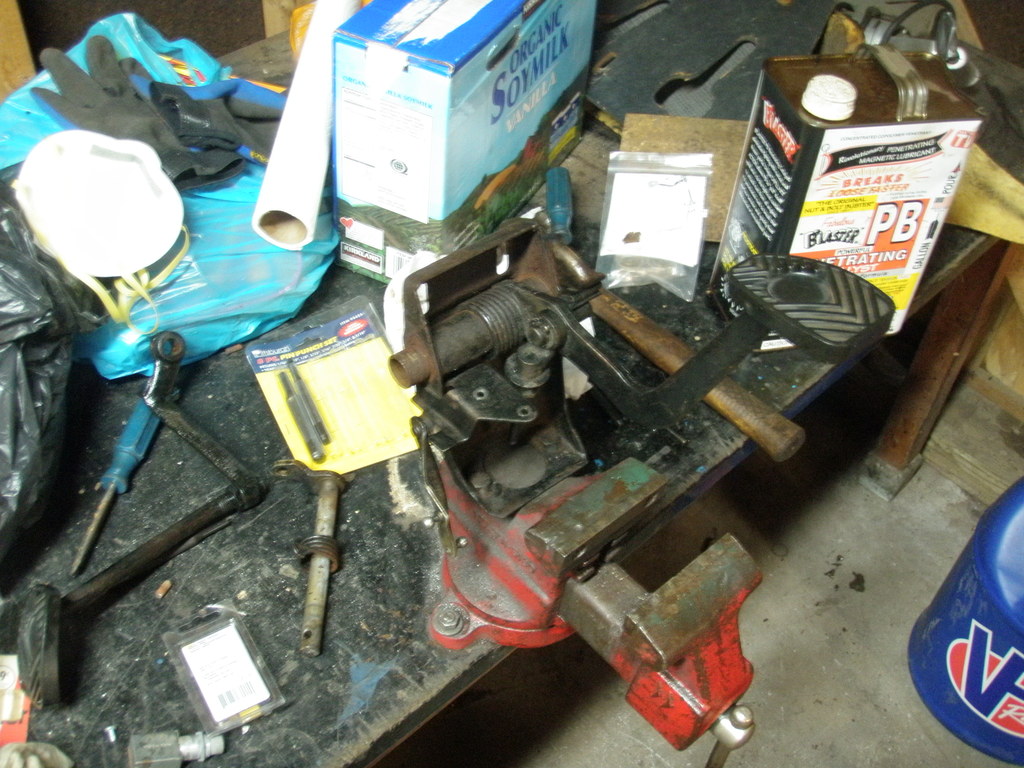
Pedal cluster rebuild is complete with bronze bushings and copper anti-seize as lube. Feels extremely smooth and tight.
I ground the rust off, soaked it in metal ready. Sprayed with rustoleum primer & gloss black. Good enough.
I spent some time with the bench grinder and a washer to tighten up the fit on the brake pedal plunger that goes into the master so it has 0 play but rotates freely.
The old clutch cable was binding horribly and apparently had a bunch of washers and nuts to space it out? I am having a hard time visualizing the movement right now but I am betting it was stretched.
The old accelerator cable was bent in spots, and stretched/binding as well.
All the plastic bushings were 100% shot, almost all of them were broken in half.
I am excited, the pedal and clutch/throttle/brake inputs felt horrible before.
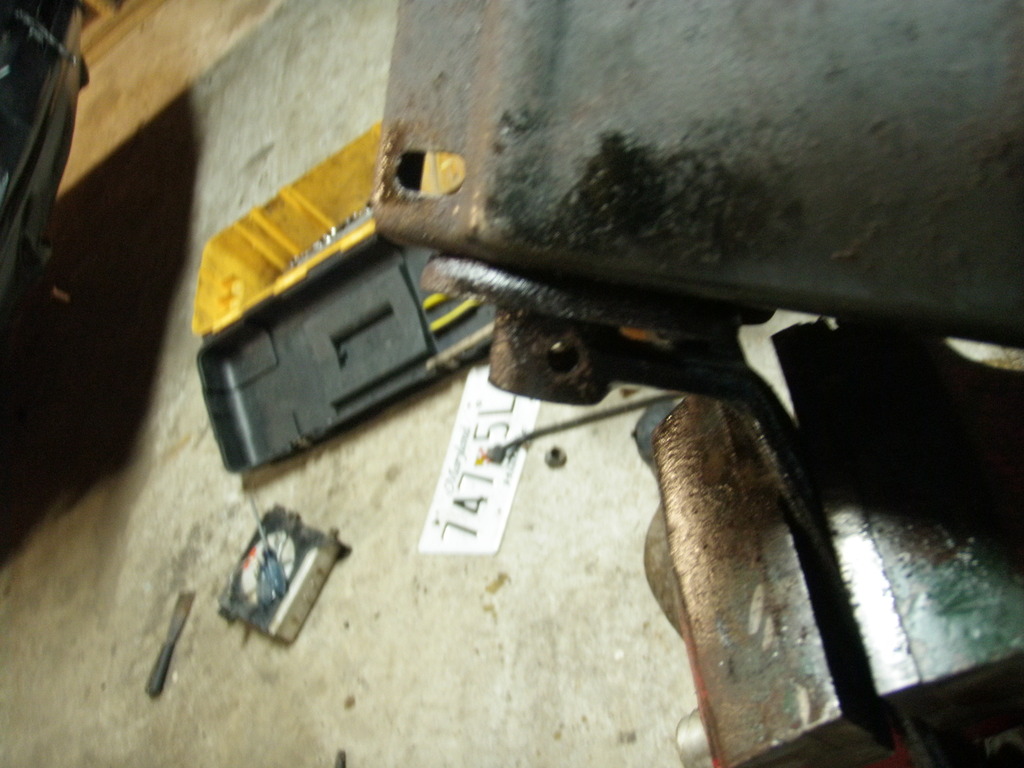
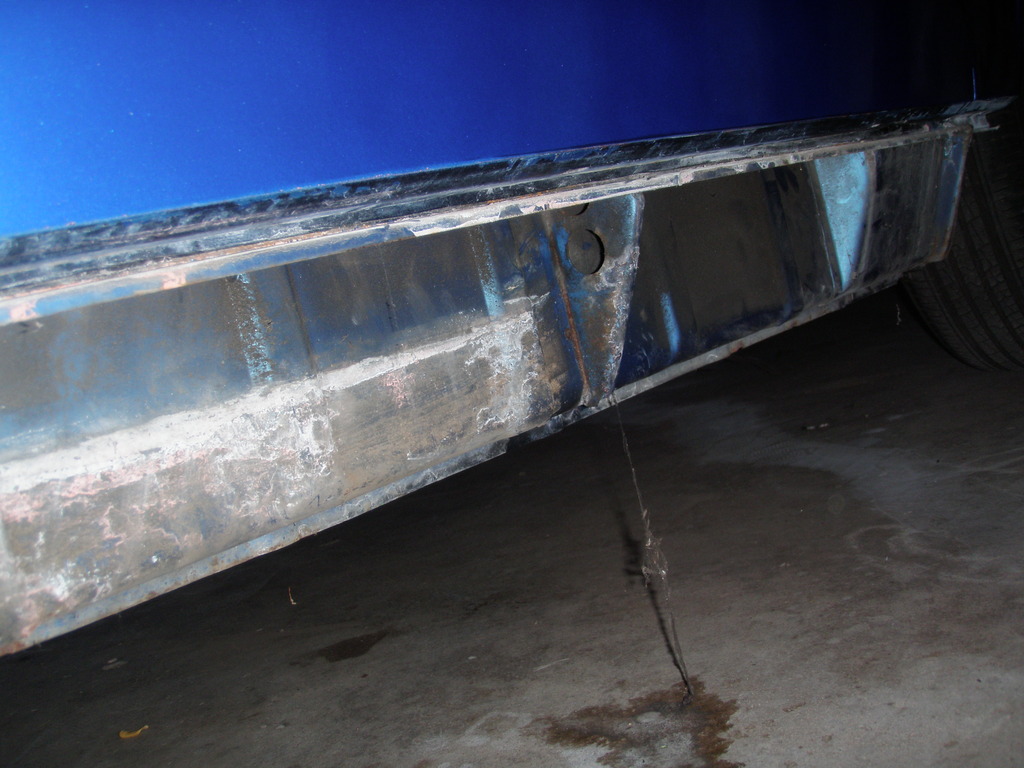
The jackposts/boxes have been cut off with a sawzall and I am slowly removing them off the body with a dremel tool, screwdriver and hammer.
The gearbox is about to come out for a quick check and possibly light freshening. It was crunchy and whiney. Maybe 5-8 bolts away and some wrestling from benig out.
Pretty random update, but I am making progress inbetween life and work.
FourBlades
Sep 19 2009, 09:23 PM
You might want to paint over the clean metal with eastwood rust encapsulator rather than galvanizing compound. You can't paint over the galvanizing compound
but you can paint over the eastwood stuff. You need to remove the metal ready
using a wet sponge or cloth and dry it before painting it. You don't want to leave
the metal ready on there or it can keep eating the metal.
I would think carefully about removing the cross brace and center tunnel. It will
take 150 spot welds to drill, and probably get somewhat bent up in the process.
If your tunnel is really crusty with rust maybe, but otherwise I would soak it with
metal ready, rinse it and spray rust encapsulator.
Your car looks pretty well preserved, it will be a really nice one when you get
it done.
John
ghuff
Sep 22 2009, 12:15 AM
QUOTE(FourBlades @ Sep 19 2009, 07:23 PM)
You might want to paint over the clean metal with eastwood rust encapsulator rather than galvanizing compound. You can't paint over the galvanizing compound
but you can paint over the eastwood stuff. You need to remove the metal ready
using a wet sponge or cloth and dry it before painting it. You don't want to leave
the metal ready on there or it can keep eating the metal.
I would think carefully about removing the cross brace and center tunnel. It will
take 150 spot welds to drill, and probably get somewhat bent up in the process.
If your tunnel is really crusty with rust maybe, but otherwise I would soak it with
metal ready, rinse it and spray rust encapsulator.
Your car looks pretty well preserved, it will be a really nice one when you get
it done.
John
The galvanizing compound is just temporary to keep rust and moisture away while I work the metal and do other things.
I will be stripping it clean again before por 15. I know it's twice the work but really I could not let that rust keep going without doing something. Who knows in a few months it could have been a few holes? These things turn to dust heh.
I just cleaned a bunch of corrosion of the harness to relay board connectors and filled them with ox-gard working them on/off a few times to clean the terminals the best I could. Same to the ECU harness/connector and about to do the same to all of the engine sensors.
Going to pull apart the distributor next and see if I can get it not to stick. Tomorrow morning if all goes well I can start it and then work on the fuel level sender and change out some rubber fuel lines here and there.
The 1975/75 l-jet cars have a fuel line that rubs against the mounting sheetmetal for the airbox. This has to be factory ran fuel line as well. No wonder why these things burn up all the time. I looked at PET and the fuel line routing looked as bad as my 2001 Golf with various charcoal lines and things about.
I can't wait to get the fuel tank out to swap those lines and put a new filter on.
More minor stuff. I need to remove more of the jack boxes and primer back over that before friday's trip.
Friday is a road trip that is 130 miles just over the 125 mile limit for my hagerty emergency roadside assistance towing coverage

ghuff
Sep 22 2009, 01:33 PM
This car has a new head/head(s) on at least the drivers side? 1.8L but I could have eaten off the floors and I saw what looked like a large wide valve guide that was brand new.
I have 1 blue injector with a different part # from my 3 beige injectors. Weird.
I think this thing may have a rebuilt motor or something.
Replaced the 30+ year old fuel rail to injector rubber lines last night. One of them broke wiggling/removing and I am glad I did this. Talk about fire hazard.
Remove the intake manifold half on that side, put 4 hose clamps on the rubber bits going to the plenum. Not sure why this was not done factory? That expands/contracts and probably leaks vacuum.
Replaced the injector o-rings which were semi fresh. and the large rubber o-rings on the injector holders which were at least 20 years old.
Used hondabond ht on the intake manifold gasket, removed the crappy paper layer cleaned up the phenolic plastic spacer and applied hondabond ht lightly to both sides.
Leak free and ready for service on one side of the motor.
The distributor drama I posted another thread about....... removed the trunk lid myself to knee down in the trunk and work that way on the motor.
ghuff
Feb 7 2010, 10:15 PM
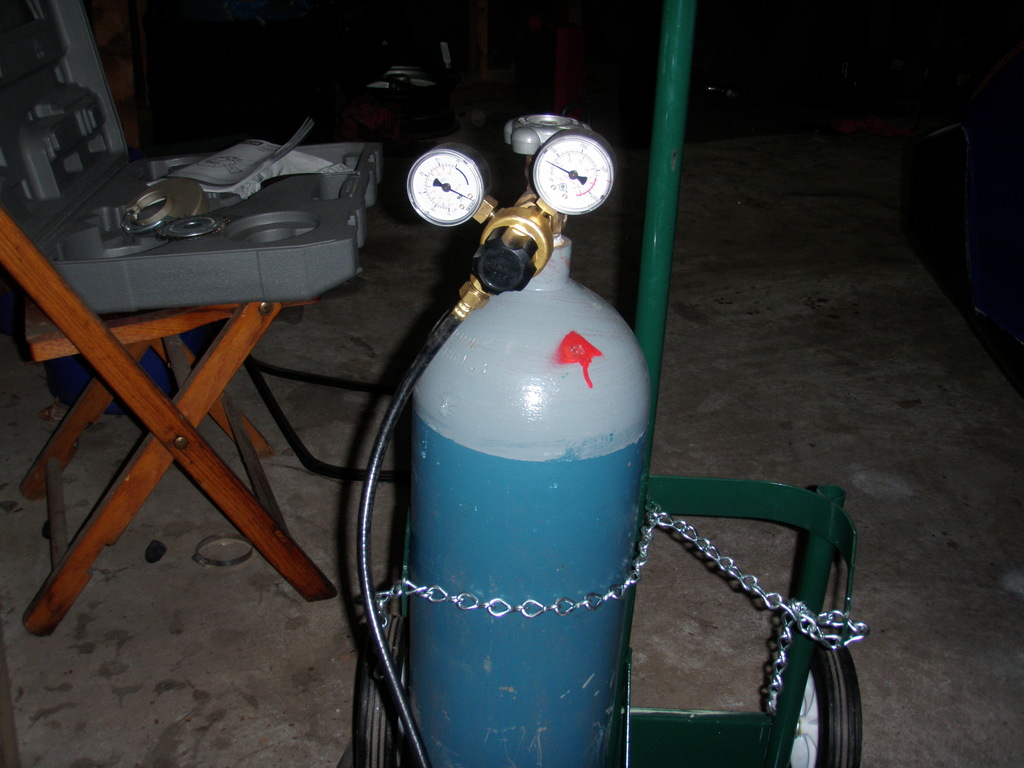
Ok I am motivated again, and now I also have a new toy. A good sized bottle of 75/25 Argon/CO2 to go with the .24 wire in my welder and proper tips and nozzle to boot.
I picked up 2 more thin gauge wire wheels for my 4" angle grinder to clean out nooks and crannies to prep for the engman kit and seam welding.
Here is some prep work for the engman kit.
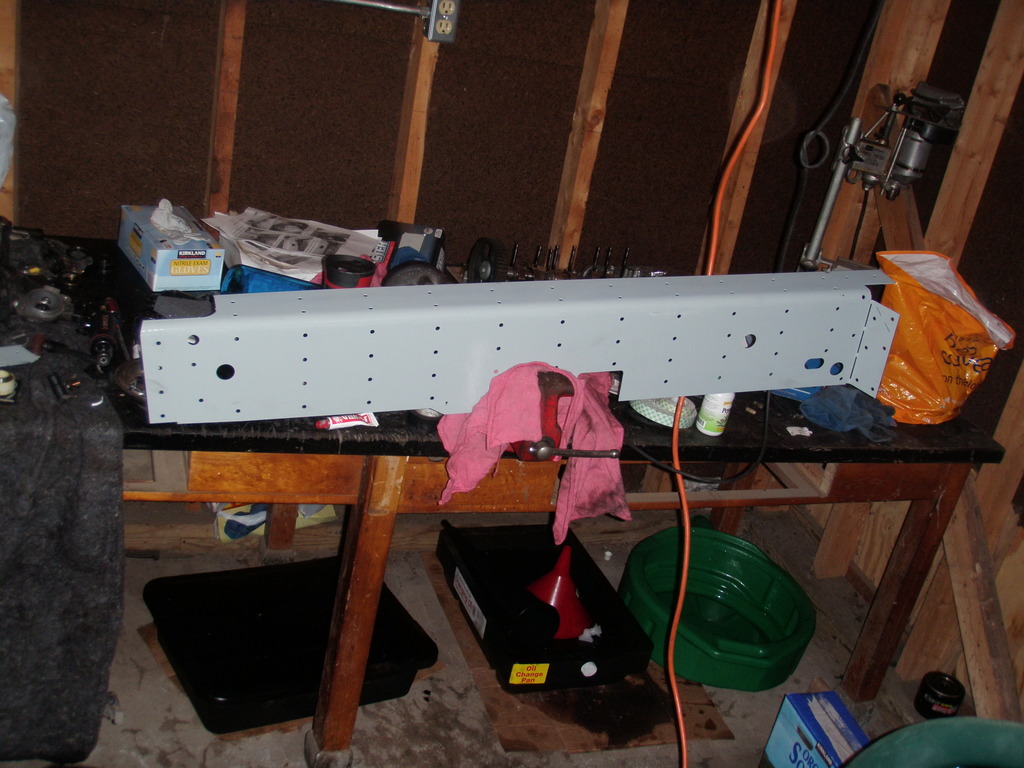
ghuff
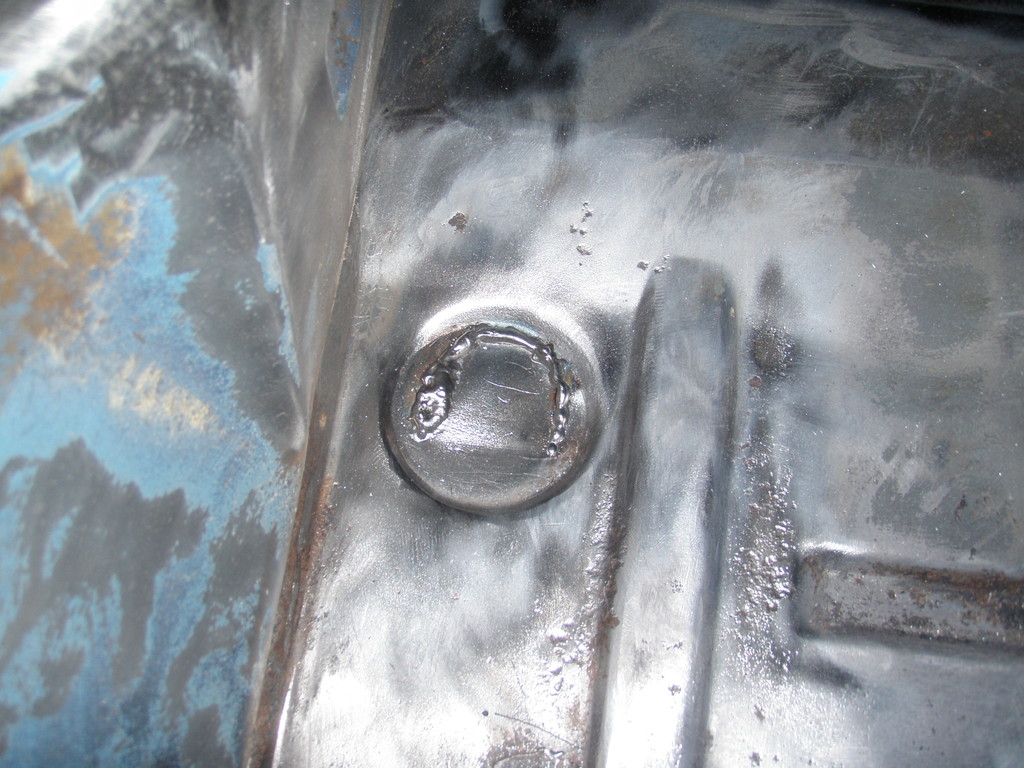
Feb 7 2010, 10:32 PM
Welded up two of these lame u shaped stamps in the floor pan to test the new welder setup and gas. Wow, it is cake. Once I verified the gauge of sheetmetal and set the welder, it was butter.
Super clean.
I even did some 16 gauge stuff as practice.
It is nice having a large bottle of 75% Argon and 25% CO2 around. I think I have enough to do about half the car and the stiffening kit.
Just need to get it on stands, measure some critical areas make sure I am not welding a bent or tweaked chassis and then por-15 & seal it up.
I also need to post some better pictures of my questionable damage spot to address now, sooner rather than later.
I am also about to pull the plug on ordering some nice cobalt spot weld cutters so that I can get this thing apart and back together easier.
I do not want to even mess with anymore spot welds until I get the kit with all the sizes.

ghuff
Feb 9 2010, 08:21 PM
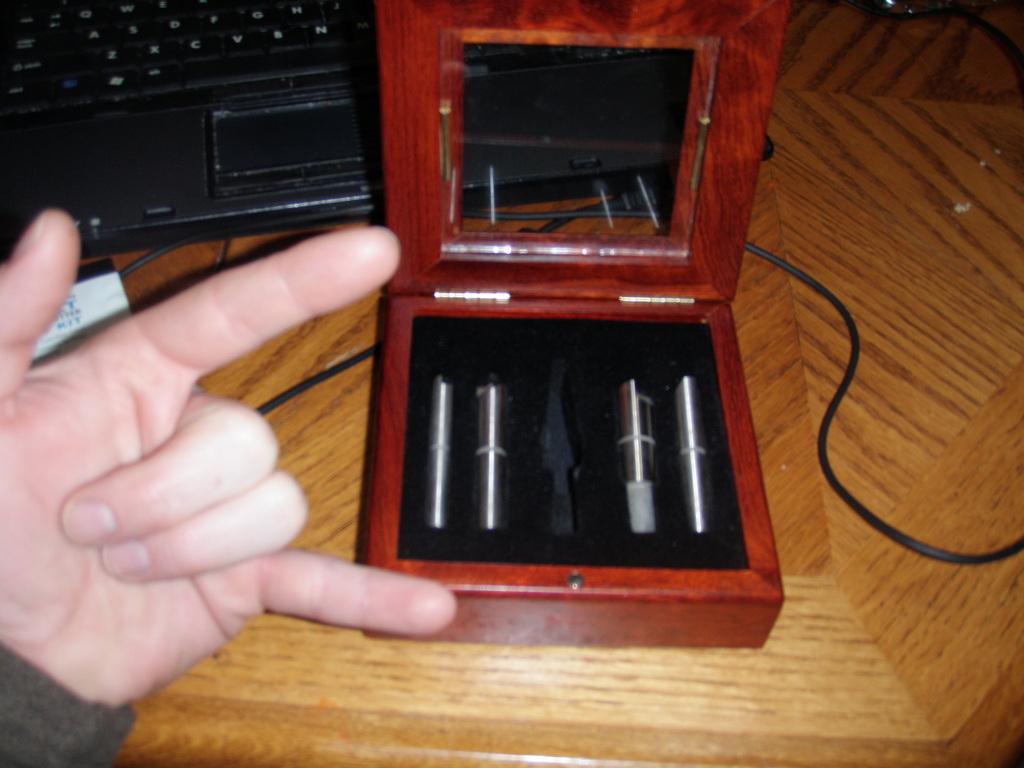
Spotweld cutter kit arrived today.
I sprang 97$ for the cherrywood boxed kit from 1/4" to 1/2" because the sizes of the spotwelds vary on the 914 it seems.
My eyecrometer tells me that most are 7.5-8mm but some go larger and some are just blobs of crap that i need to dremel out.
Once I get done working from home at 11, I am heading out there to hopefully get closer to having the center cross brace from long to long out!
Here are some more boring pics of my method for getting rid of the welds they poop on. I used a tungsten carbide cutting bit and light hand.
I left the welds there to mock line the piece back up later.
I totally hope these things work as expected. I see visions of puppies and rainbows now when I drill them out and they are gone within a few seconds and the metal is that much closer to free.
ghuff
Feb 10 2010, 01:08 PM
These cutters kick ass. The 1/4" is a little too short for getting the drill over the hump in the metal, so I just go at a slight angle, and then go back over it with the dremel tungsten carbide bit to break the spot welds free.
Not quite puppies and rainbows, but maybe close.
Here are some more pictures from a crappy point and shoot. I feel giddy, I took the deadblow and managed to start to seperate a portion of this.
That much closer to coming out. I know you guys think I am nuts and swear this car is clean, but there is rust in here for sure. I can see the flakes inside with a good light.
I can't do that half assed, it will be rotting out from under the engman kit and cause problems in a few years.
I truly plan to keep this one for a long time. I am also finding I enjoy working with sheetmetal and the challenge of this stuff, as well as how tedious it is.

ghuff
Mar 19 2010, 10:10 PM
Lots of progress. I am laying out plants for a rotisserie.
In the meantime I began gutting and stripping everything from the car. I also started stripping and removing the metal riceboy door handle mod.
The last owner really fucked this car up. Look at the garbage bondo job and poor welding. I also can not wait to simply have door handles, this car needs them to look good.
The original paint underneath is appearing in surreal condition at times.....
I was also breaking paint marks on bolts, and I think this car is 100% original suspension wise. The tie rods are destroyed. Ball joints refuse to budge from the knuckle.

ghuff
Mar 19 2010, 10:16 PM
ghuff
Mar 19 2010, 11:10 PM
ghuff
Mar 19 2010, 11:16 PM
Andyrew
Mar 20 2010, 12:36 AM
Thats ugly.
Start sourcing a replacement rear fender.
Damn good bondo work though...
Lets see some of your welds, I can help you dial in your setting. Lay a bead, dont clean it up (just ONE bead, about 2" long) On some scrap metal. Post a pic of it and I'll tell you what you need to do to the welder and to your welding.
Keep at it! Your already this far!!
ghuff
Mar 20 2010, 09:08 AM
They botched the door handle shave so bad they had to fuck the body up and smash it down to recreate the fender out of plastic as you see.
That is nothing under the bondo was a 1/8" layer of plastic or structural adhesive shaped up and such.
UGH
Anyone have a rear fender or Two complete with door handle cut out?
I think I may actually need a set of doors too, I think these doors may be ruined. I need to pull the panels and peer inside.
This is going to be an odd sawzall.
I just talked to scottyb and asked him to take a look here when he had a chance, since it is pretty much certain he will eventually end up with this shell in some sort of sacrificial primer to make look super pretty again.
1968Cayman
Mar 20 2010, 05:45 PM
Eh, just buy some body hammers and a shrinking dolly. You'll have the car in shape in no time.
ghuff
Mar 20 2010, 07:18 PM
QUOTE(1968Cayman @ Mar 20 2010, 03:45 PM)
Eh, just buy some body hammers and a shrinking dolly. You'll have the car in shape in no time.
My sarcasm detector is broken. Are you serious?
If so, I mean hell It can not really get worse than it is now, I mean It is pretty much new rear fenders & doors time so what the hell I guess.
I just bought a milwaukee 5" random orbital sander and a 25 pack of 120 grit pads for it so I can strip the entire car down to bare metal.

ghuff
Mar 21 2010, 05:49 PM
The passenger rear 1/4 and fender are fucked. I am done cutting, sanding or otherwise messing around with the rear fenders of the vehicle at this point.
They beat the corner of the door pocket in, it is too far gone to salvage and the panel is warped on top of that worse than I thought from the heat.
Well it looks like I can do some of the custom metal work I wanted to now, which is get rid of the spot weld seams and trim for the sail panels, so it is body colored then seal it back up from the inside to prevent rot.
The drivers side 1/4 is not as bad, but I am writing it off due to the shit welding and the smashing then filling with what looks like lead or some sort of metal.
On the good side, I now have a bunch of the actual metal my car is made from, so getting my welder settings perfect for 1975 German steel will be easy without fucking anything up.
FourBlades
Mar 21 2010, 05:52 PM
That will be a nice solid car when you are done with it.
What other rice rocket mods did they do besides the door handles?
John
scotty b
Mar 21 2010, 05:52 PM
It's all fixable. Get the paint and bondo off and see what kind of shape the fenders are in before you start buying replacements. Get a knotted wire bruch for your grinder. It will become you best friend and your worst enemy at the same time. Cuts down on the time to clean all that crap out, and makes a LOT of mess. Wear your ear rubbers when using it. always remember:
it will get worse before it gets better
no matter how hot she is, some guy is tired of putting up with her
Don't eat yellow snow
don't eat brown snowballs
This is a "lo-fi" version of our main content. To view the full version with more information, formatting and images, please
click here.