


This isn't necessary if you won't be separating the transmission from the engine.
| Start by disconnecting the battery. Negative side first! Separate the red wires from the black wire on the positive side. The black wire will be going with the engine, the red wires will be staying in the car. If you battery looks like this (wet cell/non-sealed), replace it with a sealed battery (Orbital/Optima). |
|
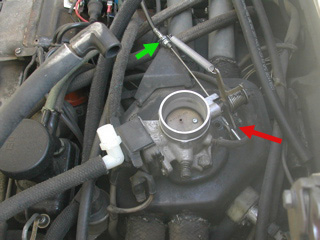
| Remove the air cleaner box and disconnect the throttle cable. The throttle cable has a locking nut (10 mm wrench) indicated with a green arrow and a barrel nut (8 mm wrench) indicated with the red arrow. Once you release the barrel nut it is very smart to pull it from the linkage and reconnect it to the cable. Barrel nuts have a nasty habit of disappearing. Finally, push the cable down through the tin. |
|
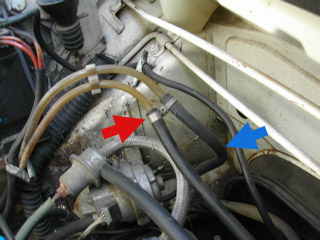
| Disconnect the fuel lines. Watch out for pressurized fuel. It can spray out if you're not carful. The fuel line with the blue arrow should be disconnected at the fuel rail. The fuel line with the red arrow should be disconnected at the plastic fuel line. Once they're both disconnect, hook the plastic lines together so you don't accidentally spill fuel everywhere. |
|
| Take the cover off the relay board and pull the three connections indicated. |
|
| To protect your injectors and fuel hoses, remove the nuts (10 mm wrench) that hold the injectors in place. This is a good time to inspect your injector seals. |
|
| Next detach the ECU from the battery tray by loosening the two mounting nuts (10 mm wrench). There is a third mounting screw back behind the battery. It is usually loose, but could potentially be tight and keep you from being able to remove the ECU. Once the bolts are loose (don't remove them) just pull the ECU towards the engine to detach it. |
|
| If your engine has an oil temp sensor installed this is the wire that feeds it. Disconnect by pulling carefully on both the wires. The plastic housing protects a standard spade connector. Sometimes moving your hand in a circular motion will help convince the connector to separate. |
|
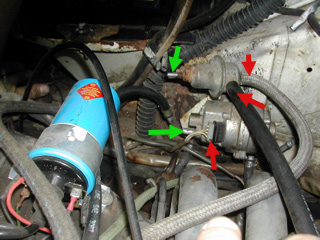
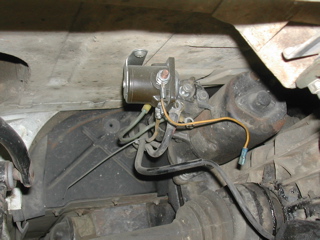
| Remove the four hoses and one electrical connection from the deceleration valve (top) and the MPS (bottom). The two green arrows indicate hoses that have already been removed in this picture. The other end of the black hose (in this picture) connects to the air box and has therefor already been disconnected. It can, optionally, be left connected. |
|
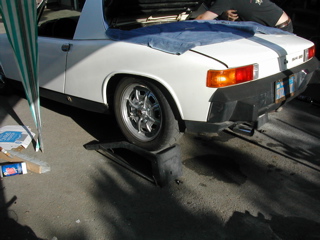
| Everything is done inside the engine bay. Raise the car onto ramps or stands. I use these ramps because I've found that they are the perfect height to pull the engine. |
|
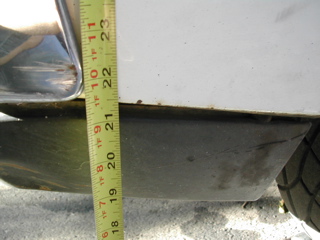
| My ramps raise the back end of the car 21.5 inches off the ground. Remove the rear valence to gain more clearance. It's held on with two bolts (8 mm wrench) in the fender wells and four(?) acccessed just underneath the bumper along the back. |
|
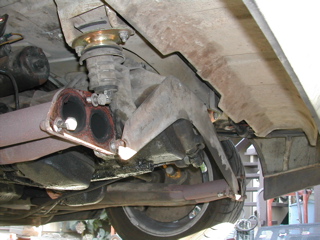
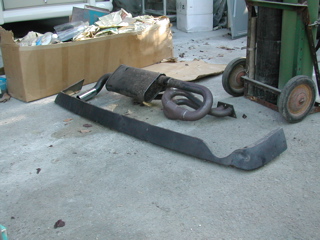
| It's not necessary to remove the muffler to drop the engine, but if you're going to be splitting the engine and transmission now is a good time because you have lots of access. Notice how I put the bolts back where they go so I don't loose them. |
|
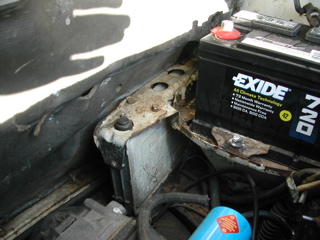
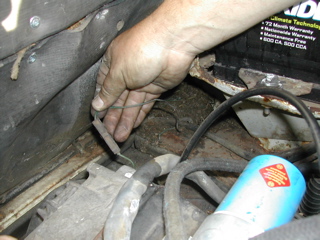
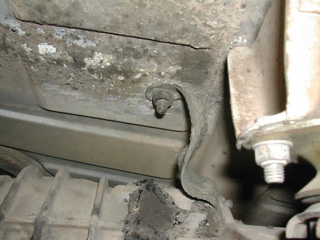
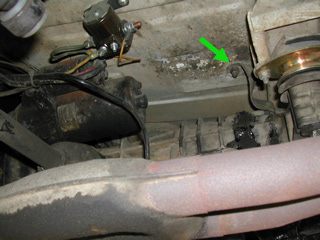
| Disconnect the tranny ground strap (13 mm wrench). Now is a great time to replace it. |
|
| Here's a wide angle shot showing where the ground strap is hiding. |
|
| Muffler and rear valence removed. |
|
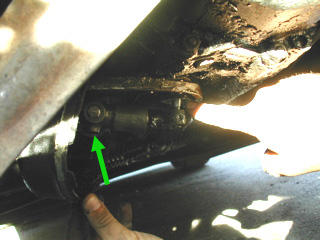
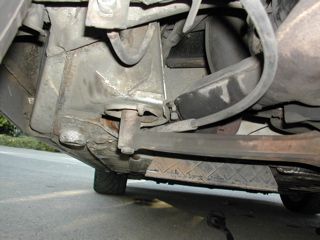
| Disconnect the starter. This car has the questionable secondary relay "upgrade". For cars without this you need to remove the two ring connections (13 mm wrench) and the single spade connector. If your car has the questionable "upgrade" make notes as to where the wires go.
This isn't necessary if you won't be separating the transmission from the engine. |
|
| Remove the cover from the shift console and unscrew the cone screw (4 mm allen) from the shifter ball cup. Pull the ball cup towards the rear to remove it from the shifter shaft. |
|
| Remove the cone screw (4 mm allen) from the front shifter joint. There is a rubber boot that must be pulled out of the way to access the screw. |
|
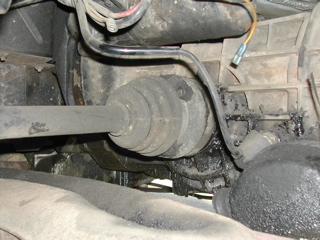
| Pull the two wires from the reverse light switch on the transmission. They are covered by a boot and pull straight out. Disconnect the CV joints from the stub axles. It takes a special 12 mm serrated socket but careful use of an appropriately sized allen wrench can do the job. You may need to raise one side of the car a bit to turn the wheel and access all four bolts. I often don't need to when loosening. The serrated socket is one you'll use more than once over the life of your car. It's recommended you get this right tool to do the job. (Am I making my point clear enough?) The CVs can be difficult to remove from the stub axles. Careful application of hammer and screwdriver can coax it free. |
|
| Remove the heater cables from the flapper boxes (8 mm wrench) and replace the barrel nuts onto the cables once free. |
|
| Disconnect the clutch by clamping pliers or locking pliers onto the cable end (not the actual cable) and removing the nut and locking nut (11 mm wrench). Make sure you have two regular nuts. Nylocks will overheat and loose their "locking" power. Best to just use an additional lock nut. Ratcheting box end wrenches come in really handy here. |
|
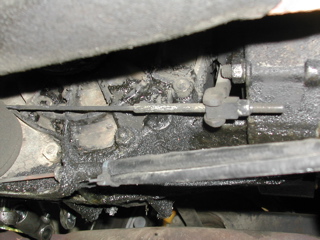
| Loosen (don't remove) the nut on the clutch cable pulley using a cresent wrench. When the pulley is loose enough you will be able to slide the cable out the side between the pulley and the guide. |
|
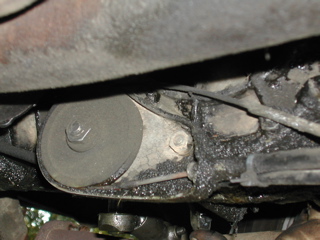
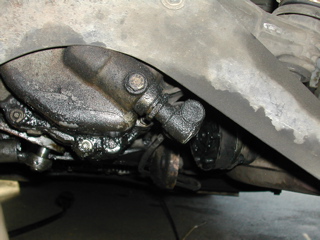
| There is a locking ring behind all that oil that goes around the cable and has a tab that is bent into a hole. Use a screwdriver to pry it free. |
|
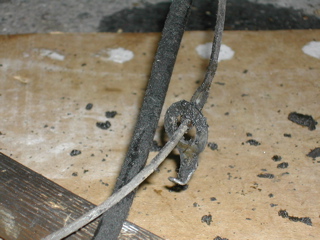
| Here is the locking ring once it's free. You'll need to completely remove the nuts, ring, etc. and pull the cable through the small hole in the engine mount bar. |
|
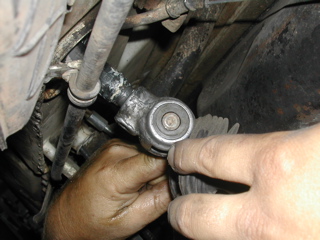
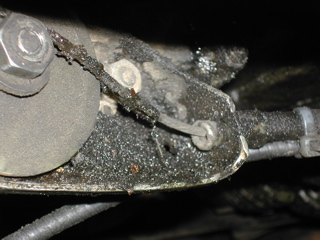
| Remove the speedometer cable connection from the angle drive by unscrewing it. Adjustable jaw pliers or a large cresent wrench may be necessary. |
|
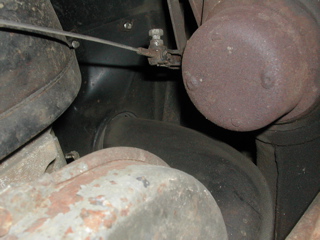
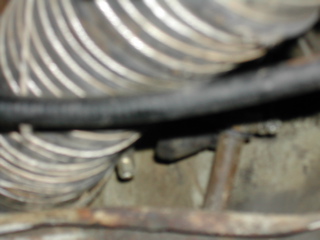
| Disconnect the heater hoses from the flapper boxes. If this picture is still blurry, email markd@mac.com |
|
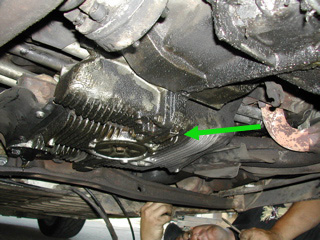
| Time to get the floor jack out. This is the spot you should aim for to get the engine and tranny in decent balance. You can use a block of wood to protect the engine case, but it often makes the assembly too tall to sneak out from under the car. I don't use wood. Once the jack is lifted enough that it raises the car an inch or so you're ready for the final step. |
|
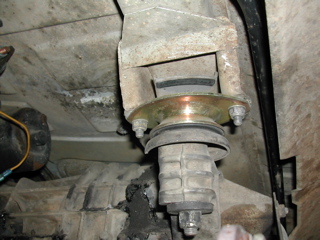
| Undo the tranny mounts (13 mm wrench). You must use a second 13 mm wrench to hold the bolt from turning. |
|
| Finally, remove the engine mount bolts (17 mm wrench top and bottom). The top one is hard to get to. I use a 3/8" drive socket wrench to get down in there. Everything is free, so slowly lower the engine to the ground watching for things that might be hanging up. Once it's fully lowered, pull it out the back of the car. You have to maneuver the drive shafts over the engine as you go. Freedom! |
|