|
|
|
|
|
|
Apparently I haven't been posting my hell hole repair pictures on my blog. So now there all in once place. Lotsa rust on this car. BOOO! But I'm almost done repairing it. So, YAAAA! Anyway, here are the pictures. New engine shelf from Jonathan @ GPR. Attached thumbnail(s) 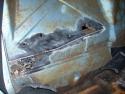 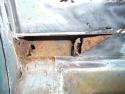 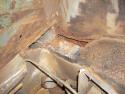 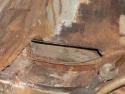 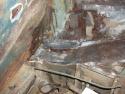 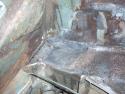 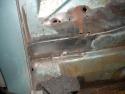 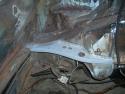
It's been a long time and a lot of little things have happened. Here's an updated list of where I am on my Get-The-Car-Running project. 1. Pull the motor and fix oil leaks, pull the ceramic lifters, clean everything, install carbs (for now). I ended up selling my motor (in a round about way) and so now Jeff Keyzer has it and I have his old 1.7 motor to put in my car. Which is fine with me. As long as it drives, I'm happy. I'm getting a set of VW bus carbs to put on the motor instead of fuel injection. Why, you ask? Two reasons: first because I expect it will get me on the road the quickest, and second because I'll learn something by using them. I expect that they're a great option for small motors. 2. Fix the hell hole and firewall rust, plus weld all the little holes in the firewall. New battery tray and new rear trunk pivots. DONE!!!  3. Fix the 'access hole' some DAPO cut in the rear trunk. The top starter bolt is not THAT hard to get to. DONE!!! 4. Clean and paint the engine bay and rear trunk. Not until the welding work is done. 5. Clean and reseal the transmission and replace the speedo angle drive. DONE!!! I've also decided to execute my five lug conversion while I'm doing the rear end. I already had the drilled hub installed. Marty Yeoman is going to machine some four lug rear rotors for me and I'll get a set of rear calipers rebuild by Eric Shea. DONE!!! The sunny weather is really pressuring me to keep moving on this.
I think it was the Tied House meet that gave me the kick in the pants, but I finally decided to jump in and get started on my car. It's been begging for work for a long time. I'm starting with the rear end sections. Can't wait for it to actually DRIVE!  Here's the list off the top of my head. Here's the list off the top of my head.1. Pull the motor and fix oil leaks, pull the ceramic lifters, clean everything, install carbs (for now). 2. Fix the hell hole and firewall rust, plus weld all the little holes in the firewall. New battery tray and new rear trunk pivots. 3. Fix the 'access hole' some DAPO cut in the rear trunk. The top starter bolt is not THAT hard to get to.  4. Clean and paint the engine bay and rear trunk. 5. Clean and reseal the transmission and replace the speedo angle drive. Here are the pictures from day one. Attached thumbnail(s)  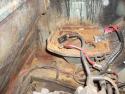 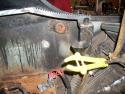 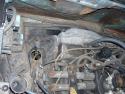 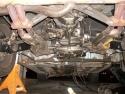 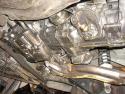 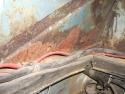 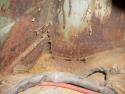 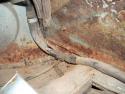 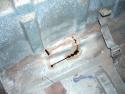 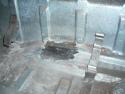 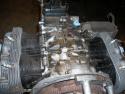
My neighbor has been playing around with pinstriping and so I offered my decklid for practice. Here are the results. Really beautiful. Of course this will go away once I paint the exterior, but it's fun for now. I kind of love having a 'beater' that I can do this kind of stuff to.  Attached thumbnail(s) 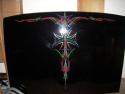
It never ceases to amaze me what a tiny 10 minute drive across town can do to re-establish my love for these cars. 
It pains me to think of all of the little bits and pieces that I am going to inevitably search and search for. Parts which I'm confident that I have had and thrown away/given away/lost over the years. I should have everything I need, but I know I don't.
I'm looking through the PET to establish what I need to order, what things need to be plated, and what things need paint/powerdercoat. The engine section lists part numbers for engine bay stickers: E 022 100 173 - ignition point (all models) E 039 100 175 - valve clearances (2.0) E 022 100 173 B - sticker  (1.8) (1.8)E 022 100 173 C - sticker (1.8 Cal)Case Perimeter Bolts: M 8 X 45 X 22 - Top, at bellhousing M 8 X 95 - Top, one forward from bellhousing M 8 X 65 - Top, two forward from bellhousing M 8 X 88 - Top, three forward from bellhousing M 8 X 113 - Front, above crank M 8 X 42 - Rear, under crank inside bellhousing
The official first part has begun...  These heater controls are the early/european type without words. I like that. Here's what we had to start with: 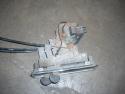 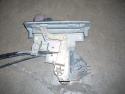 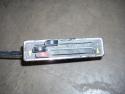 Pulled off the trim ring and hit it with some fine steel wool. Unfortunately the chrome is pitted, so it'll have to be replated. 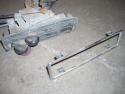 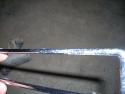 Nasty knobs pop right off. After a thorough cleaning with alcohol and a little polish, they look like new. 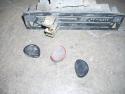 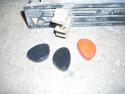 I cut the rivets holding everything together. Two are holding the cast front section to the rear plate. And two are holding the 'circuit board' to the plate. I also removed the control arms by undoing the circlip and pushing out the pivot pin. 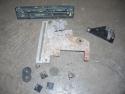 The 'circuit board' cleaned up really nicely with a Dremel using a wire wheel tip for the cleaning and a felt pad tip with Blue Magic metal polish for the shine.  The red and blue colored lenses and the aluminum 'grills' pop out with a little push from the back (through the light bulb hole). 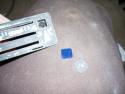 The white and blue accent pieces pop out using the corner and edge of a razor blade. You can see all the blue 'tick marks' and one of the arrows (with a broken tip). 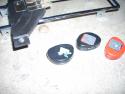 Now that the face was relieved of all the 'extra' pieces, I removed all the old paint and sprayed it with flat black enamel. 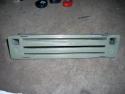 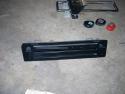 I cleaned each individual blue piece by rubbing it on some 1500 grit sandpaper taped to glass, then rubbing it in some Blue Magic polish. I then glued each one back in with gel type SuperGlue. Keeping track of and working with those little suckers is a major PITA! Then I glued in the lenses, and finally I sanded, painted and glued on the aluminum 'grills'.  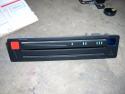 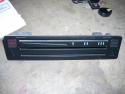 All of the arrows were either broken or missing, so I'll have to search for replacements. I wouldn't mind finding some reflective material to use instead of plain white arrows. The arms and plate will be sent out in a batch of yellow zinc plating. So until those come back from the platers, this episode is over. Time spent this episode: 2.5 hours Total time overall: 2.5 hours Total cost of this episode: $0 Total cost overall: $0
I was working on a customer project recently and occasionally, at the end of the day when I'm all done, I'll pick up a part and 'tweak on it' for awhile. On this particular day I was thoroughly polishing/cleaning/painting the clutch rod from a Bug pedal cluster. You know, the one you'll NEVER see once it's installed. But there is an overwhelming satisfaction for me to do work like this, but I will probably never get to build a car that thoroughly... except my own. So I decided it's time to start a piece by piece, part by part, Tweak Restoration® on my aubergine 914. Since I'll never have the time to block off a few months to complete the work, I've decided to take it one Saturday at a time. I also plan to THOROUGHLY document the project. Each part will get a before, during and after picture. All the details of the process will be included. I will be approaching each part as its own restoration project. I'm very excited about this revelation. I'm very excited to have a stack of pretty parts, ready to install once the body is painted. So, coming this saturday is the first installment of Tweak Restoration® (or is it Tweak-steration®?).
Jim Tabor, Andy Schmidt, Jeff Keyzer, Fiid Williams and I all drove out for this years desert event. We had a great time. My black 914 only made it as far as Reno before I lost a CV joint. The real pisser is that I replaced all four CV joints only around 500-1000 miles ago.  The cage broke right in half. Must'a been that overwhelming 2056 POWER! The cage broke right in half. Must'a been that overwhelming 2056 POWER!  Regardless, I had a great time. It was a real adventure, but at the end of the trip, we were all rolling home under our own power. So I call that a success.  Attached thumbnail(s) 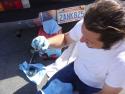 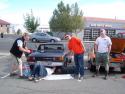 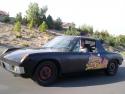 | Search My Blog
Categories
|


 Apr 9 2009, 07:18 PM