|
|
|
|
|
|
Idle started hanging high, then slowly dropping back down. Got worse until it would drop any more. Typically, fast idle on Djet=vacuum leak. But I've been through the entire system, replaced all the seals and hoses, eliminated several (aar, decel valve, cold start valve, etc.), and problem persisted. Timing on. Checked the vacuum canister on the dizzy and found it would not pull a vacuum at all. So my theory is the canister was failing, which would cause it to not pull hard enough to promptly retard the timing at idle. But it would come down after a few seconds. Once it failed completely, it would never pull it down. So, got a good deal on a good vacuum canister, and refurbed the dizzy to make sure the advance/retard plates were working properly. Bottom line, it's all good now. Here are a few photos and notes from the dizzy cleanup... Removed the dizzy. Noted where the rotor was pointing, pulled it, noted where the notch was facing so I wouldn't risk putting it back 180 degrees off. Loosened the long timing adjustment nut so dizzy would rotate freely. Rotated CCW far enough to expose the hold-down nut (which was hiding under the vacuum canister). Removed nut and pulled dizzy out. Pay attention to the coil wires, positive and negative. My Pertronix wires are red and black / pos and neg, but with points note which terminal the green wire goes to. Removed vacuum canister (c-clip inside, screws on outside). Removed cap retainer clips. Now the plates can come out... work them around so the cutout in the plates clears the wires. Work up and out. A small flat screwdriver is hand for pushing and prying. Of course, paying attention where things go. It's not complicated, so don't sweat it. Just pay attention and it will go back together with no worries. The ground wire between the plates can be fragile. If yours is in good condition, don't put stress on it. Mine was shot, so I just cut it loose. At this point I would have just cleaned the plates, lubed with grease, and put everything back together. But my braided grounding wire between the plates was in bad shape. So, intermediate repair... Using dremel tool, cut the braided wire loose, and cleaned up the copper pads where it was soldered to the plates with a wire wheel on the dremel. For each plate, put it in a vise, heated the back side with a butane solder torch right behind that copper patch until solder would melt to it on the other side. This "tinning" process makes it easier to solder the wire to it later. I just used "solder wick" to replace that braided grounding wire. It's the same deal, flat braided copper wire. Using a high-power soldering iron with a flat tip that gets real hot, it was easy to get the new wire soldered back to the plates where I had tinned them. Note though, to get a good solder connection, it is important to use a soldering iron that gets hot enough to melt that solder patch. Anyway, back together and running well. Photos... Attached thumbnail(s) 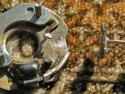 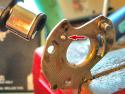  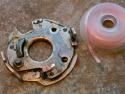 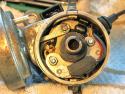
One of these days I'll post more pics. What a hell hole. Short summary is it's now stronger than new, but still needs some finishing up when I drop the engine. It's a daily driver, so this has been an engine-in project. I put a reinforcement/scab plate at the rear shock tower to brace the factory gap between the end of the frame rail and shock tower, and have a good base to weld a tube to. Tube runs from there to the middle of the longs. One piece, right through the firewall, to a long scab plate on top of long next to front of passenger seat. It doesn't interfere with getting in and out of the car and makes an extremely strong triangle. The front scab plate wraps down the inside of the long and is long enough forward to cover the forces transferred up there by the tube. So with that done to stabilize things, it's just a matter of cutting out rot and welding in new sheet metal. I've just been forming the sheet metal myself. I don't care about making it look factory, only about making it strong. Everything gets painted with Hammerite Rustcap to prevent future rust. The battery is in a box in the trunk. Attached thumbnail(s) 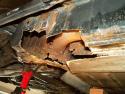
Handy for referring to images in threads. [edit - less so since the forum was upgraded] Attached thumbnail(s) 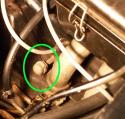  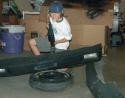 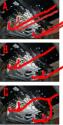 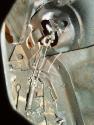  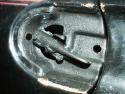 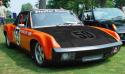 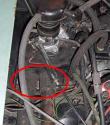 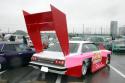 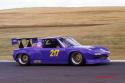 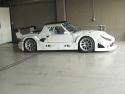 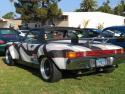 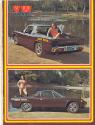 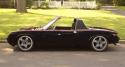  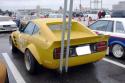  
Pacific Raceway (Seattle/Kent), July 2, 2005 Attached thumbnail(s)  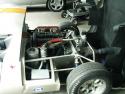   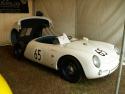 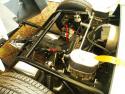 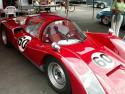    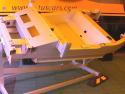 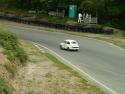 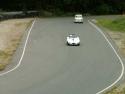   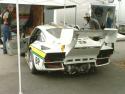   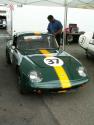 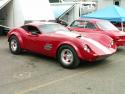 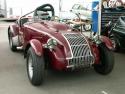 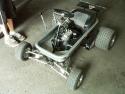 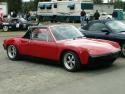
I wanna build a 550 Spyder someday. Kits are available from a few sources, including... http://www.beckspyder.com/ http://www.thunderranch.com/550.html Need to research who has the best frame and suspension design. Or maybe a trick 356 Speedster with bulging fenders and a low profile removable hard top.... Attached thumbnail(s) 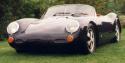  
I have a black '75 2.0 daily driver (photo below). Got it for $2k and it runs and drives perfect. Good deal. Some things I've worked on so far: Headlights. That was the problem I knew about when I bought it... they wouldn't pop up. Starter... Drove it home, parked it in the driveway. Organized the garage to make room. Went to pull it in, and wouldn't start. Doh! Didn't think I would have problems that quick! Ok... check battery and ground connections. Good. Jump start failed. Has a new battery. Screwdriver trick (a quick short between hot terminal at starter and solenoid tab) made it crank. Probably the ignition switch circuit then. Sure enough, ignition switch was cracked. Fixed. Headlights work flawlessly after ignition switch fix. Two birds with one stone. Yes! Tail lights and left turn quit working right. Checked for power at the lights. Power was getting to the light enclosure, but no power at bulb contacts. Cleaned all terminals and everything works. The rear tail light assembly was full of rust and corrosion. Rust. Of course, it's a 914. Removed interior carpet and firewall covering (in cab and engine compartment). Not too bad. Been wire brushing, treating with Ospho, and painting as I go. Continually simplifying... If it's not needed, get rid of it. Will have to write some log entries on the details. Check out the front spoiler skirt. CSOB trick... lawn edging from Home Depot! Ok, rust was worse than I thought. The hell hole was really bad and everything below... noticed top passenger door gap was closing and could flex the car (top off, straddle passenger door standing on long, bounce... see the door gap change). Ran a brace from top of rear shocktower, through firewall, to top of long about mid-cabin. Then cut out the rot and welded good sheet metal in where I could with engine in. It's rock solid now, but will finish up when the engine is out. Added a VDO head temp gauge. CB Performance had a good deal. Replaced injector seals and all rubber fuel lines in engine compartment. Will replace the lines in the tunnel when engine is out. Removed the tar from the floor. Found some rust. Wirebrushed, gave it the Ospho treatment, painted with Hammerite. Attached thumbnail(s) 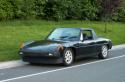 |


 Sep 11 2006, 04:22 PM