|
|
|
|
|
|
After looking at several ideas for engine removal devices I begain thinking of another option. What if I had a set wheels that were bolted to the engine or maybe the engine crossbar that I fabricated? I rounded up some angles and some caster wheels and came up with a plan. I welded 3/16" x 2" x 2" angles to a 1/4" plate that I bolted the caster wheel to. I first bolted the angles through the crossbar than I removed the engine. Once the engine was out of the car I removed the crossbar and welded the small angles to the bar. Than they are always in the correct location and makes things much easier. Here is how it works... 1. Jack up the car so it is level. 2. Bolt the angles with the wheels to the crossbar. 3. Place the floor jack under the front of the engine. 4. Place my cheap tranny jack under the tranny. 5. Unbolt the engine crossbar bolts and the rear tranny bolts and lower the engine to the ground. 6. Jack up the car high enough that the engine can clear the car. 7. Roll it out. 8. Have a cold imported beer.  BTW, I removed the engine from start to finish in 45 minutes by myself. Could have been quicker if I had all the tools laid out and took the body sides off. (4 engine bolts, 4 wires at the dizzy, cl/th cables, fuel line, 2 wires to the starter, 2 axles, shift rod)  Attached thumbnail(s) 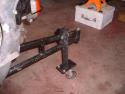 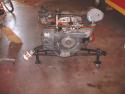 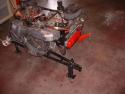  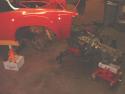 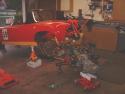 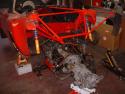
I ran a PCA event today. I was fourth overall. A Boxster with a four time National Champ driving, a 996 GT3 and a early 911 beat me. My group ran last in the hottest part of the day and I was sliding all over the place. This time the frontend was sticking and the backend was loose. Also the oil leak is back but it is not the v-cover gaskets, it seems to be a p-rod tube seal on the right side. I'm going to adjust the valves before the next event so I'll fix it than. I have another idea at the front on the engine that I need to look at too. Now for the rant: This was a "multi event weekend" hosted by the Citrus Region of PCA. It is held in Mt. Dora FL, a little village type town with shops and a old hotel that is the main site. The typical PCA weekend get-a-way. I only attend the a/x as I can't drive my car in the rally and my car is not really concours prepped. We have a ten year old daughter and there nothing for her to do. The entire weekend is $2-$300. I go to register of the a/x and the entry fee is $50.00 fuching dollars!!! And the kicker is because I only am registering for the a/x and not the entire weekend I don't get classified with the other cars. This means no trophy if I win. I could get FTD and don't get anything. $50.00 for 4 runs with no stupid trophy? There were only 6 guys that showed up for the a/x and each of us were saying we won't be back. I spoke to a few of the people and they were saying the intent is to have you sign up for the entire weekend and each event of the weekend will be cheaper. So they may have made $300 from the six of us this year but they will make $0 from us next year. If they would charge $20-30 as most regions do for a typical a/x I'd be back. Instead of making a little money, they will be making no money next year. Who is the marketing wizard that put this plan together? Rant #2: The average age of the people at the event had to be 55 or older. At this rate the PCA will be gone in 15 years. Attached thumbnail(s)      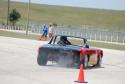 
I ran my first a/x with my new Hooiser slicks and I won FTD!  The car ran strong but not without a few problems. On my third run I was slinging oil over the place and in my car that means on the back of my seat and helmet, on the inside of the door panels, the roll bar etc. When I got home I clean it up and found a valve cover gasket had been sucked up and was leaking (see the pic below) Never had this happen before. The car ran strong but not without a few problems. On my third run I was slinging oil over the place and in my car that means on the back of my seat and helmet, on the inside of the door panels, the roll bar etc. When I got home I clean it up and found a valve cover gasket had been sucked up and was leaking (see the pic below) Never had this happen before.  I also found I had the damn valve covers on the wrong sides. So I flipped them. And the throttle cable was a little loose. I also found I had the damn valve covers on the wrong sides. So I flipped them. And the throttle cable was a little loose. Here are some pictures Attached thumbnail(s)  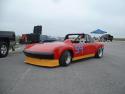 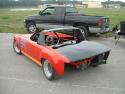 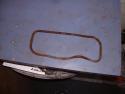
I need to fabricate a engine lid. Someday I'm going to beat someone and they're going to protest that I don't have a proper "hood" on my car. Rules do say you need someing over the engine. I thinking I add a cover that also has a scoop so I can bring some cool air to the carbs for a few extra HP. And besides it will look cool. The first picture is a Ferrari but I don't like how it sticks over the top of the bar. The Ferrari 333 had the scoop sticking thru the roll bar which is what I want to do. I found a Baja bug oil cooler scoop on Samba.com for $40.00. It is in the last picture below. With a little work it will be perfect. 4-7-06: I recieved the scoop to day. It will be a great starting point. 5-24-06: I've been working on the scoop and have extended it about 12". I decided to mount it so it is OVER the TOP of the roll bar. 6-26-06: I've now decided to duct it to the air cleaners. It will sit on a cross bar which will be held in with pins so it can be removed quickly. The bottom of the scoop with be formed so it directs the air. There will be a seperate bottom piece which will mount under the carbs and remain in place. The carbs will only be 1/2 covered with the scoop. 10-22-6: Ran my first a/x with the new scoop. It didn't fly off at speed so that a good thing. I realize it's not making me faster but it is getting cooler air to the carbs and that was the point. See the pics below of the finished product. It must have done something good. I set the fastest time of the day. Attached thumbnail(s)  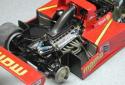 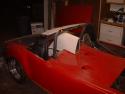 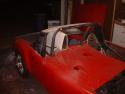 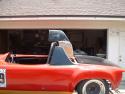 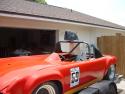  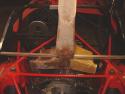 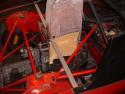 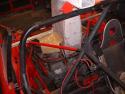 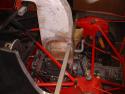 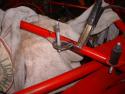 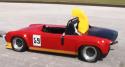 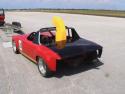 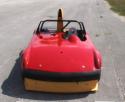 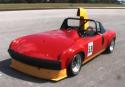
ELECTRICAL KILL SWITCH
I had to move my kill switch. (I wish people would call it something else). It was mounted right on the battery which sits beside me in the passenger floor area. Now with the tonneu cover on, I need to move it up so it can be reached. I decided to mount it on the bar which is right next me and stick the "key" though the cover. I welded a little tab to mount it to but it is hard to see in the picture. Pretty tricky mounting the switch below the cover and than drilling a hole from above.  I need to get one of those offical looking decals with the lighting bolt on it so you can see the key in the sea of red. I need to get one of those offical looking decals with the lighting bolt on it so you can see the key in the sea of red. Attached thumbnail(s)   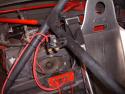
WHEELS POLISHED AND PAINTED
I bought the stuff to polish my wheels myself. I picked up the buffing wheels locally and I got the compounds from Eastwood's. I maybe spent 25$ on the stuff. I just used my 3/8" drill. I also decided to paint the centers flat black. It makes them look more like 3-piece wheels (thier not). This first picture is from when I first got them, no polishing done at all. Second picture shows on the right a hand polished wheel that I spent about 10 minutes on with a hand paste polish. On the left is my first drill polished with the compound. Third pic is my first two done. Attached thumbnail(s) 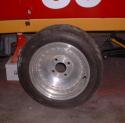 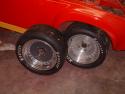 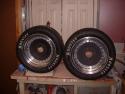
My console.... The "boot" that goes around the shifter is not original and something has chewed on it a little. The console itself is in fair shape. Maybe some Armorall will clean it up a little. I wiped it down to get the dust off of it and it looked good when it was still damp. But when it dried it could have looked better. The console has been sold.[b] Attached thumbnail(s) 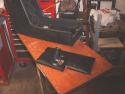 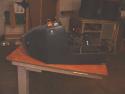 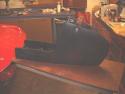 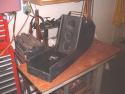 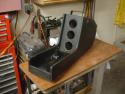
More doors handles have been repaired. These are for Jim Tab. One of the "fingers" on the "arm" of the "flapper" was broken on the one he sent me so I replaced it. You can see it in the first picture. Attached thumbnail(s) 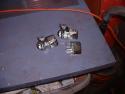 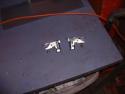 
Let me explain the ins and outs of one of the poorest designed aspects of the 914; the outside door handles. They can break in several different ways and without warning, but they can be repaired and broken parts can be replaced. New repacement handles are about $200.00 from the retail outlets. Why it breaks: First an overview. The handle is made of "pot metal" which is a cheap material which is cast in a mold and than chrome plated. I believe there are several things that cause the handle to fail. 1. First of course is simple abuse. People pull on the handle as if it were a door on a truck. Pulling too hard will cause the handle to bottom out and puts way too much stress on several different parts. Don't pull the handle to open the door. Only pull the handle with enough force to hear it "click" and release. The hatch is spring loaded and the door will pop out when the handle releases the latch. 2. The pivot pin becomes clogged up with 30+ years worth of crap and the handle become harder to release, so you pull harder on it. See item #1. 3. As the cars become older and when rust starts in the longs this weakens the structure of the car, the car sags at the doors. The door gap begins to close up. This effects the alinement of the door latch and the pin that is mounted on the body of the car in the jamb. As the door gap changes the pin and the door latch become harder to release. So you pull harder on the door handle. See #1 again. Parts of the Handle and How They Can Break: Handles are different from the right side and the left side and they have a "R" and "L" on the back to indentify them. The difference is the flapper piece is shaped different to follow the curve of the door. You can use a right side handle on the left side and vis-a versa. But a right side flappers can not be used on a left side handle. 1. The "Slider" is the plastic piece that actually strikes the release piece in the door to unlatch it. This can break in a couple of different places but when it is broken your door can not open. It is plastic and over the years get hard and brittle and breaks. The slider has a tab on it that pushes on the door latch, this tab is what break off in most cases. When you go to remove you handle you'll find this little piece of plastic in the bottom of your door. The good news is this piece is being reproduced and sold by Pelican Parts and several other suppliers. It costs less than $20.00 to buy it but you do need to take the handle off of the door to replace it. It can be replaced without taking the handle apart but be careful with the arms of the "flapper" when you do it as the arms are also a weak point and will break. See the first picture below. It shows a stock yellowing one, the broken one in the middle and the black replacement from Pelican. 2. The "Flapper" is the hinged piece that you grab and pull to release the door latch. The flapper has two "arms" or "fingers" which break off. The handle will work with one of the arms broken but not for long. A broken arm allows for the flapper to hit the body of the handle and the other arm will soon break. Once both arms are broken, the handle won't unlatch the door. The left (driver's) side being that it gets used the most use, is the most likey to break. Pelican has them in thier catalog but the are "NLA" (no longer avaible). Mid America has them in thier printed catalog but not in thier on-line catalog. (Mid America's 2004 catalog had them listed for $49.99 and the 2005 catalog has them listed as $129.99!) When I spoke to them they said thier vendor dropped out about 6 months ago. Finding good left side flappers is getting harder and harder. You have to shop for one in the classifieds, find a shop with one or hope one is being sold on ebay. Picture #2 below shows broken flappers, the one on the left has a crack in the arm and is ready to break, the right one is broken off. The fifth picture below shows two left flappers with the arm cracked. Be careful when shoping for a good handle. This crack is hard to spot. To remove a flapper you'll need to grind/file the pin head off and than drive it out of the handle body. But putting it all back together with the spring is a PITA. Go slow and easy and you'll get it after several trys. 3. The rear mounting "Tab" often breaks off the body of the handle. The tab is the piece that you can see when you open the door and look under the flapper. The tab has a short stud, nut and small rubber gasket which holds the rear of the handle to the door. When the tab breaks off the handle will become loose on the door, but in most cases you can still get in the car by holding the handle tight against the door with one hand and pulling the flapper with the other. The stud can also pull out of the tab. This can be repaired by drilling a hole through the tab and installing a bolt and nut. You don't need to remove the handle to do this, but be careful. You will now have to be careful when reaching for the flapper that you don't jamb the end of your fingers into the head of the bolt. I can repair a broken tab but you need to remove it from the door and send it to me. I take two pieces of aluminum angle and file them to fit inplace of the plastic bushing which are on the pivot shaft. I need to fit the pieces to the handle and drill a hold for a tension pin to hold it all together. I also provide a stainless steel counter sunk machine screw and nut. I counter sink the the head in to the new aluminum tab so that you can't catght you finger on it. I made my first one of these 20 years ago and no one have ever come back to me and said it failed. The third picture below is of a broken tab on the left and a original tab on the right. The forth picture is of one of my repaired handles with the new aluminum tab.. Changing a Lock Cylinder in a Handle: If you have found a handle with a good flapper and mounting tab to replace your broken one, you don't need to take it apart to exchange good parts for bad. Just switch out the lock cylinders. Remove the handle from the door and put the key in the lock. Remove the small phillips head screw that is on the back end of the cylinder. Carefully pull off the gray end piece which has the offset pin on it. There is a spring below this piece so don't let the spring fly across the room. The spring returns the cylinder to vertical when you turn the key. With the key still in the handle, push the cylinder out of the handle body from the back side. Don't pull on the key or it will just back out of the lock. Once the cylinder is out of the body of the handle DO NOT remove the key form the cylinder. If you do the small key plates that the key is holding in the cylinder will fall out on the floor. The plates (my word for them) are what your key is matched to. If the plates get out of order your key won't work. It is a PITA to figure out the order they all are arranged in to fit your key. I've had to to this before. Tips for Longer Door Handle Life: 1. Keep the pivot pin and return spring clean by shooting it with some WD40. Open the door, pull the flapper out and you can see the pivot pin and return spring. 2. Never force the handle if you think there is a problem. Go around to the other side and open it first and open your door from the inside. 3. The door will still latch without having a handle on the door. And you can get in from the outside by sticking your finger in the door and pushing on the plate which releases the door. So if you need to send me your handle you can still get in and drive, but of course you can't lock it. 4. Most importantly, to extend the life of the Flapper, ALWAYS PULL THE FLAPPER USING YOUR LEFT THUMB. Sounds stupid I know. If you pull on the handle with your right hand you end up pulling too hard and you usually "over-pull" the flapper. This causes too much stess on the weak flapper. Just pull with your thumb with enough force to release the latch. Here is a link on how to remove the handle from the door. http://www.pelicanparts.com/techarticles/9...door_handle.htm And another from a member: http://www.icbm.org/erkson/personal/porsch...replacement.htm If you have questions PM me. Attached thumbnail(s)  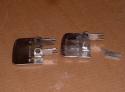 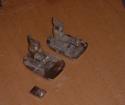 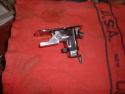 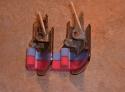
Stuff I need to get rid off: Rust free front hood Rust free rear hood Stock left side door w/ all the window works removed Stock metal right side with the beam cut out, and window parts removed 2.0 (94mm) Cylinders which can be taken out to 96mm 2.0 long block-crank/cam/case (no heads) 1.7 Complete engine 1.7 case, open and hot tank cleaned 1.7 heads, ugly but will clean up nicely Headlight parts, motors, bits and pieces Rear window glass Stock starter Stock FI fuel pump Boxes of odds and ends Engine fan housing and sheet metal USED Long block w/ big valves heads, 1.7 counterweighted crank, 96mm NPR p/c Stock metal rocker panels Outside and inside door handles Single progessive weber carb
Pictures of the weigh in at Sebring on 2/12/06
1,407 pounds. I put too much gas in the tank.  Attached thumbnail(s) 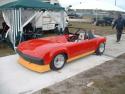  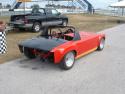 
This is my blog and this is what I think about that... Everyone here does an pretty good job of self-policeing lately. This is not a free speak issue. This board is privately owned and run and we are all guests here. Play by the rules or go start your own board. OT Threads: Just what is considered OT? Being that this is a car board I would think just about anything not related to cars is OT. I use the Sandbox for all very OT topics. When it is car related I post in the Garage. When I post in the Garage and it is not 914 related or car related I lable it OT. If I find a site or post a picture of a car or tools or something I still post in the Garage. Because the Garage is about cars, tools, P-cars, etc. But if I need help with my computer or taxes or my want to list my favorte dance song I do it in the SandBox. Nothing in the Sandbox should be labled OT. If I find a joke that may offend someone I post it in the Sandbox in the "Do Not Look " thread. BTW: I have no problem looking or seeing naked women. But I think I should be the one that decides when I should view them. Thread Labling: Several months ago I started a thread and complained that people need to better explain the subject or topic of thier thread. Naming a thread "Look what I did" and than it being about how they built a rock garden is not right. More to follow...
2/10/06
Painted the rockers and the sail panels and installed the dzus fasteners to the body. Attached thumbnail(s) 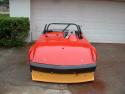 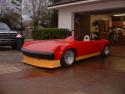 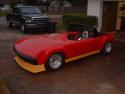 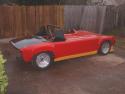
Florida 914ers unite!!! Attached thumbnail(s)
This weekend is the PCA Club race at the track in Sebring. This is my annual trek to get it weighed. So I need to get a few things done before I can present it to the masses. Those 911 Club racers can to a tough crowd for a 914 guy.
I need to: 1. fix the gas drip at the pump. (done) 2. Paint the rockers yellow. Done 3. Get the trunk covered or painted black (painted today) 4. Install the dzus fastenrs on the body panels. I have three more to do. 5. Weld the tonneu cover support to the roll bar. (Done) 6. Paint the wheels centers black (Done)
Super Bowl Sunday...PAINT! PAINT! PAINT! 
Last night I painted the front hood, the tonnaeu cover and both one-piece sides. Results: from best to worst... Tonnaeu cover: Paint is thin but no orange peel, I'll keep it. Front hood: Orange peel, but only a few thin spots. I'll keep it as is. Left side: a few sags and orange peel, but no thin spots. Repaint it. Right side: OMG! Did I do this with my eyes shut? Sigs all over, thin spots where you can see the primer and orange peel llike 30 grit samd paper. Complete sand and repaint required. I reshot the left side this morning. Much better job. But I'll have to spend a few nights working on the right side before being able to reshoot it. Attached thumbnail(s) 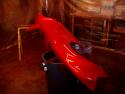   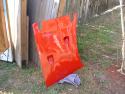 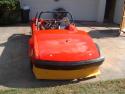 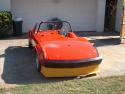 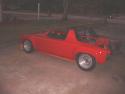 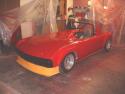
I primed the sides and the front hood last Saturday. Planning on final paint this weekend.
After priming I found several areas that need work but will be easily fixed before the weekend. If you think your car is ready to paint, roll it out into the sun and you'll see you hav e more work to do.  Attached thumbnail(s) 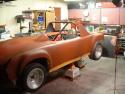 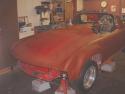 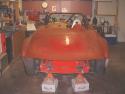 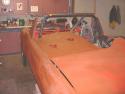
I'm progressing on getting it ready to paint and one item that I need to finish is the "tonneau cover" over the passenger seat area. I decided to add these two NACA ducts that I have been carrying around with me for 15 years. They are fiberglass and will mold in to the cover real easy. I don't know if they will really do anything but they may suck some air down into the engine. I'll tape some 3" hoses to them and stick the discharge end into the cooling fan.
I have to change the cover because I changed the roll bar supports. I used to have a big bar going to the top of the main hoop but that was changed and lowered to the center. This required the cover to be changed. It now can be molded to match the left side radius and I'm adding a 3/8" edge flange for strength. I'm kinda going for the 908-3 look. Attached thumbnail(s) 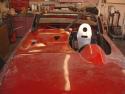 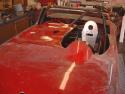 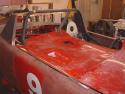 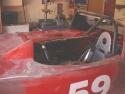 
The Gunnar 914-6 Pick-up.
These photos are VERY rare. Kevin Jeannette would not allow me take pictures of this car when I was at his shop. But I found these on another site. These photos show the car in the same condition as it was when I saw in the summer of '05. We talked more about this car than the other 904's, 935's, 906's that were in his shop at the time. He said he gets visitors from all over that go thru the shop, but I was the first to want to talk about the 914 P/U.  He said he would never sale it, but he would give it to his son to have. He said he would never sale it, but he would give it to his son to have.
I told him about the 914club and he said he would one day come on the board and tell the whole story of it. Attached thumbnail(s) 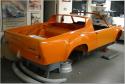 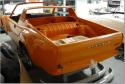  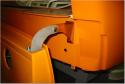 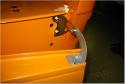 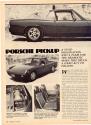 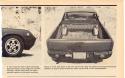 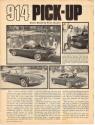 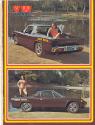
Left side one piece. Attached thumbnail(s) 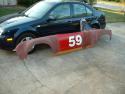 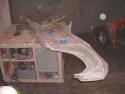 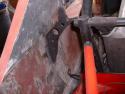 |


 Jun 4 2006, 08:51 PM