|
|
|
|
|
|
Sheetmetal at pedals. Surface rust only. Studs are there as are the threaded holes for the gas pedal.
Attached thumbnail(s) 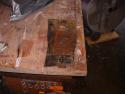  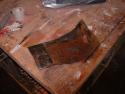
Sump...
Is cracked. I got it tig welded.  Attached thumbnail(s)   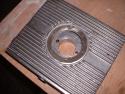 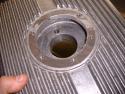 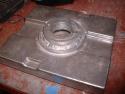 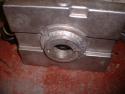
I bought the car in May(?) of 1979. I found it in an ad in the local Auto Trader. I paid $3500 for it. I traded the owner my '70 VW Bug ($1000), I had $1000 in cash and I borrowed $1500 from the bank as a personel loan that my Dad co-signed. I made payments of $78 a month. It was my daily driver until I brought a Jeep Cherokee in 1985 after college. I found out after I bought it, it had been rear ended. Trunk lid was not original and the left rear fender had about 1/4" of bondo on it. Also the rear window had been broken, 'cause I found glass under the seats. Within a few months after buying it I started on the bodywork. I finshed it up in the fall of '79 and got it repainted. I also picked up the American Racing wheels you see on it in the first picture below. The car was very clean and I left it stock with a 1.7 in it. I drove the hell out of it.
A trip down memory lane.. Pic #1- 1982 from my dorm window. Pic #2- 1995 Sebring PCA Club race Pic #3- 2002 Pic #3- 2002 Pic #4- 2003 norrow body, 7" wheels Pic #5- 2005 GT flares, 8" wheels Attached thumbnail(s)  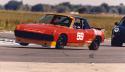 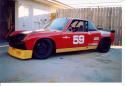 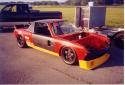 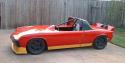 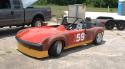
FIBERGLASS TARGA BAR
I also have to make a targa bar as the stock one just had to go. When I cut it off it bent like hell so there is no using it for a mold for a fiberglass piece. So I started thinking  I need to keep the shape of the stock one. It has a arc to it and if I made a flat piece it wouldn't look right. I came up with using the chrome trim piece to form the shape. First I tried cardboard but it wasn't smooth enough. Than I hit upon using foam board. Two layers of 1/8" form board fits inside the trim piece and will hold the arc shape. I taped the two pieces of foam board together and they will hold the shape when the trim is removed. I won't use this a mold, I'll use it as a foam core and cover it with f/g cloth. The third picture below shows a side shot. I added a 1" wide strip of foam board to it to get the right thickness. You can see how two layers of board fit in the trim piece. I need to keep the shape of the stock one. It has a arc to it and if I made a flat piece it wouldn't look right. I came up with using the chrome trim piece to form the shape. First I tried cardboard but it wasn't smooth enough. Than I hit upon using foam board. Two layers of 1/8" form board fits inside the trim piece and will hold the arc shape. I taped the two pieces of foam board together and they will hold the shape when the trim is removed. I won't use this a mold, I'll use it as a foam core and cover it with f/g cloth. The third picture below shows a side shot. I added a 1" wide strip of foam board to it to get the right thickness. You can see how two layers of board fit in the trim piece.
I also plan on mounting it on top of the existing sail panels. This will allow it to be at the same height as the roll bar. So it is not be below the roll bar but behind it and not out in the wind. Also opens up the area above the engine a little bit. Unless you really know to look for it I don't think anyone will notice. 
UPDATE 4-4-06: This is what it looks like now (look at the last three pictures below) BTW this is more work than I thought but isn't it always. Attached thumbnail(s) 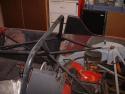 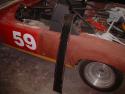 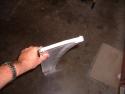 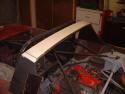 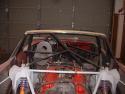 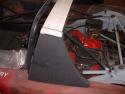 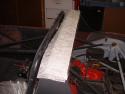 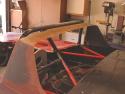  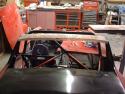 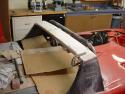 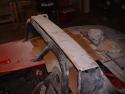
REAR TRUNK LID
I'm in the process of re-working my rear trunk lid. I felt it was too heavy and needed to be cleaned up. Originally this was a AIR unit with about a 4" lip on the back. I changed it to have about a 8" lip which I made out of 1/8" wood covered with fiberglass and molded it in. I ran it for several years like this but now that I have changed the rear fenders to be removable I need to add about a 1/4" to one side to fill the fender to trunk gap. I've always through it was too heavy so I decided it was time to put it on a diet. The part that was adding the weight was the inner supports ribs. They are the same size and shape as the ribs in a stock lip, but they are f/g. So the plan was to cut them off and add something simple and light. Once I began cutting the ribs out I found that they were not bonded very well to the lid. I could almost just pull them off with my hands. Overall I would say that this lid was a piece of crap when it left AIR. It also had one rear corner which was not inline with the other one but I fixed this years ago. The first picture shows the inside of the lid before I cut out the ribs. The next two pictures show the new ribs I added back on. I used 1" PVC pipe that I split in two. You have to take sandpaper and rough up the surface to get the resin to stick to the PVC. The split pipe is flexible enough to bend and take the shape of the lid. You have to use clamps to tighten it down and hold it. Than you take 1" x 3" f/g mat strips and wrap it over the pipe. Once the strips cure you can remove the clamps. Than you can add f-glass the entire lenght of the pipe. It makes for a very strong support and lightweight! It takes several operations to get all the pipe ribs on there but it's done now. It is much lighter and actually stronger (stiffer). I also plan on removing the f/g covered wood lip pieces. These pieces also added some unneeded weight as I had to use bondo to get it to look right. I currently have my oil cooler mounted in a cut out in the middle of the lip. I don't run the stock oil cooler on my engine, I only run the sandwich cooler. But now with a new RAT engine I going to change my thinking on oil coolers. I'm thinking I should run the stock cooler and delete the sandwich cooler. I only run autox's and I don't build up a lot of heat in the oil. The stock cooler will have constant air blowing through it from the fan. Also I can delete that heavy braided oil lines and block off plate and fittings. I've decided not to have a lip on the back at all. It is just going to be a stock looking lid. I don't think they really do anything anyway. OK they look cool but it too much work for no gain. I've done a little research and very feww autox 914 run them. The fourth picture is the oil cooler in the lip as it is currently. The fifth picture is of one side of the lip cut off. 
Pictures 6 & 7 are of the rear edge being shaped. I had a template of the raduis of the stock lid edge and I'll use it to work the f/g down. I weighed it and it is 6 pounds. Attached thumbnail(s) 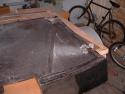 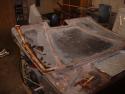  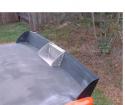 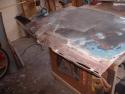 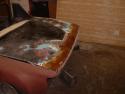 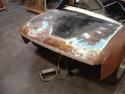
FIBERGLASS DOOR SKINS
I make fiberglass door skins... First two pictures are of the mold. Third picture is of the mat in the mold Fourth is Joe's door after a skim coat of bondo and some filler. Last picture is TimT's door after it was primed. A door skin weighs just under 5 pounds.  Attached thumbnail(s) 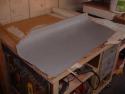 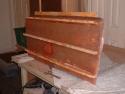 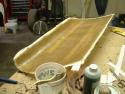 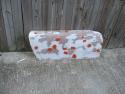 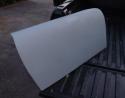
markb,
Here are your SS heater boxes. The first picture is the one I haven't cleaned up yet, but I will before I send it to you. Attached thumbnail(s) 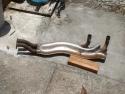 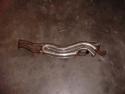 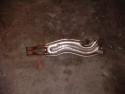
OK, I'm getting a Rat. Deal is done.
It is a semi-used "loaner" engine. It was used as a dyno test engine than used as a loaner to guys while thier engines were being rebuilt. It should last forever in my autox car. Now I'll have to pull my engine and finish up my rear tubing items and paint the back end. Than finish up body and paint it. Sounds sooooo easy.
I spoke to Jake last night. The 2316 Rat deal is coming together. Should have it in a few weeks.
My cc to lbs ratio will be greatly improved. Stock: 1,700 cc's to 2,200 pounds With new engine: 2,316 cc's to 1,400 pounds 
As I as stripping this car down I'm weighing each piece so here is what I've found:
Front hood with latch, 38 pounds Rear trunk lid with catch pin, 35 pounds EARLY doors ( no beam) with glass, interior panel, pocket/arm rest, handles (both), 45 pounds. Engine lid, 12 pounds The weights can change a little due to the amount of bondo and the number of repaints but the weights will come down a few pounds for a completely stock hood/door. Paul
I paid $250.00 for this FINE 914. If the tag is correct it hasn't been driven since 1995!
A few pieces are already spoken for but if you see something you want/need, PM me. Attached thumbnail(s) 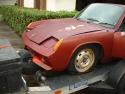 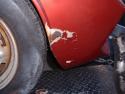 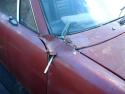 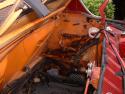   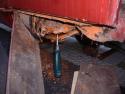 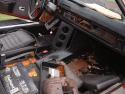 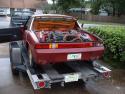 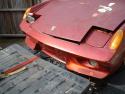
The door handle pictured below is Dave Eddy's. 
Attached thumbnail(s) 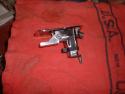 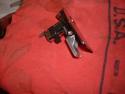
I need to: Next thing to do: 1. Complete the wing. 2. 3. 4. 5. Future: 1. 2. Cut some holes in the front wheel wells. (no hurry) 3. Clean up the underside. (no hurry) 4. Mallory Dizzy 5. Rebuild the Konis 6. RennShift! 7. Done: Pull the engine and weld in the 3/4" tube to the inner ear to the firewall. (DONE) Complete the installation of the shoulder belt bar than install the belts. (DONE) Grind/cut off the old tabs on the upper roll bar where it connected to the targa bar. (DONE) Install a reduction gear starter and save 7-10 pounds! (DONE) Grind/clean up the welds on the bars. (DONE) Patch over the drivers side jack hole. (DONE) Rework the tonneu cover to fit the new bar layout. (DONE) Weld in the main hoop at the floor and remove the bolts. (One side DONE) Attach a bracket to the back of the seat for support. (DONE) Move the sub belt to under the seat. (DONE) Make the body panels fit. (DONE) Remove the dust covers from the front struts. (DONE) PAINT! (Done) Need to mount slicks Weld gusset to right side door bars Move the electical kill switch to the top for access Polish and paint wheels Attached thumbnail(s)   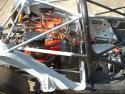 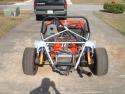 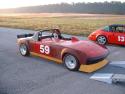 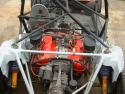 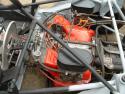 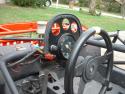  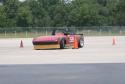 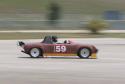 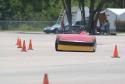 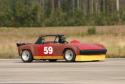
I feel so special, I have my own blog.  |


 Aug 7 2005, 05:52 PM