|
|
|
|
|
|
A few shots from the long weekend. Battery tray is in! And I'm pleased to report the completion of all welding activities for this stage of the repairs. Down the road there are a couple of tiny things I'd like to fix but I cant see doing it unless I'm redoing the whole enchilada. I did have a casualty though on Sunday. My safety eyewear were some blue and red pieces of crap I got working on another project, cheap basically. They didn't fit well at the sides and a bit of debris came in and attached itself to my cornea. Small but painful. Hence I forgot to set my camera back to color. Stoked on how the dash is looking, even if I can only see with one eye. Attached thumbnail(s) 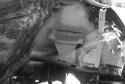 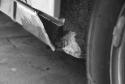 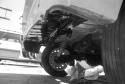 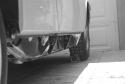  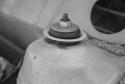 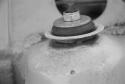 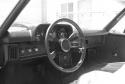 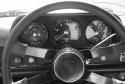
Another couple months gone by, and still more work to be done. Lately I've focused on the engine, but that is on hold for a week or two so back to the "grind". Sanded and cleaned the inner rockers, cleaned up some rust with the dremel, wire brush and a screwdriver. It hurt poking that hole in the paint but rust bubbles mean rust so it had to happen. The PO hadn't killed the rust in that spot properly when he painted it. It lasted about 4 years before the bubbles started to appear from what he said. Now its being done all over again. To get it right I'll have to remove the door at which point I may, since I'll have paint, redo the jamb and inner door faces and rebuild that door. Jackpoints look great in person. I used a marine grade polyeurethane seam sealer over the edges and the welds, so that combined with the gloss black POR makes them look poor in the picture I think. Next with those it to drill a tiny hole in the top and fill them with paint, then drill the drain holes in the bottom corner so they'll be painted inside. Attached thumbnail(s)  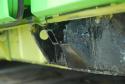 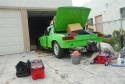 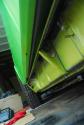 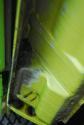 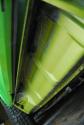 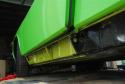 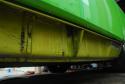 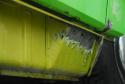 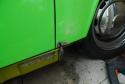 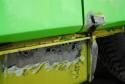
I've come along a bit. Here' some photos of my jackpoints and patches. I used UPOL High Zinc Content weld Through Primer on all the metal pieces.. and am contemplating drilling a hole to fill them with point once grinding is finished. I ground down one and it looks awesome. Just needs a coat of hi build primer, seam sealed and painted. Nearly (for me at least) a perfect repair. As far as removing the whole jack point.. I ground the old ones back until I hit thick metal. At that point it was either cut the quarter panel and go the rest of the way or just patch it. Being So Cal I figured it will be along time before they will need to be done again if ever. So just patch work. Yet to jack it up on them. Attached thumbnail(s) 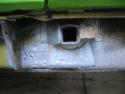 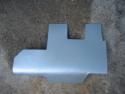 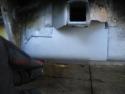 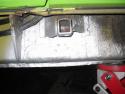 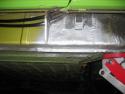 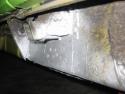 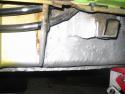 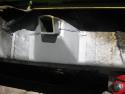 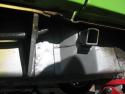 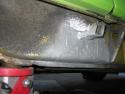 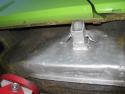 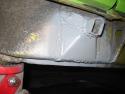
Ok, so i've never claimed to be some sort of expert, but for a first timer I dont think it looks too bad. right? Over Christmas I was talking with my cousin who builds old school hotrods from junkyard parts and he laughed at the fact that I started on aluminum. WTF though right? these are the 2L heads from my second motor, done by Tuttle in L.A. Low miles and there were at least 6 or 7 major cracks that i'm trying to fix. They wont be perfect when all is said and done, but at least I'll know exactly what was done. Welded spark plug holes for a 12mm plug... larger seats and 44 x 38 (?) valves. If they come together well they'll be put in the CNC for some very fine concentric fillets in the intakes and exhausts to increase mixing (der flow). werd. Attached thumbnail(s) 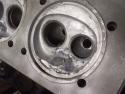 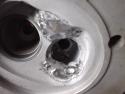 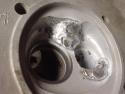 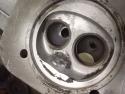  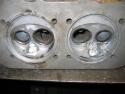  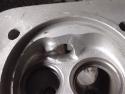
Pulled my heat sheild to repair the rust holes in my trunk. I had an early one that I thought I'd replace it with, but found that it is not the same as the one I pulled off. Now thinking of just rewelding my old one up. Attached thumbnail(s) 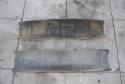 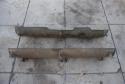 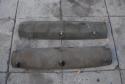
Pulled the car out for the first time in quite a few months to clean it and the garage up. Lately i've been working on gettting the back half to progress in anticipation of the engine being built.... eventually. More grinding in the hell hole and metal ready. Cut out some small pieces but the majority of the metal is still there albeit thin and pitted. I could cut it out, fabricate and replace it, or just patch the thin parts. Still haven't decided which to do. What i'd really like to do is get a web cam with a light that I can drop down into the hole in the long and see whats inside! removed the battery tray and support as the PO did a half ass job replacing it. Don had a spare set that he hooked me up with and that is now almost ready to get going on. After washing and cleaning the car I drilled the rivets and pulled the rockers. As expected I found the jack plate to have turned into dust and become one with the giant dirt clod that had collected there. Both side, but i'll find out tomorrow how superficial it is when I take the grinder to it. The rest looks great! and it cool to see the original L99A still in nice shape under there. I've got the Alloy 951 wheels i've been collecting on there to roll it around. These will be my practical wheels, with a 195-65 sport/touring tire of some type. Not sure what yet, but its giving me time to see how I like em.. Keep the Fuchs with the 50 series for special occasions.  Attached thumbnail(s) 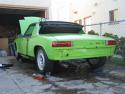   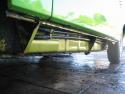 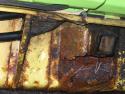 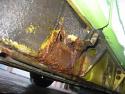 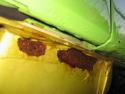 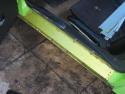 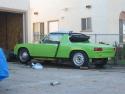 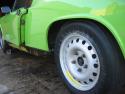 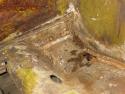 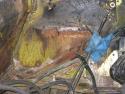 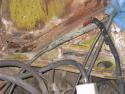 
After the rear consoles were installed I pulled the engine pad and climed in the a vacuum and some simple green to clean out the engine compartment. Its really mess and a coat of paint will be needed before the motor is put back in for sure. drivers side looks awesome. some light corrosion and most of the paint is still intact. Firewall looks like shite in the photos from the backpad glue but it too is still good. Now the battery tray had been replace... poorly, but its hanging in there and the wall it attaches too is still solid with only surface corrosion. Engine shelf is corroded but in tact. Hellhole is well.... a hole. I could see some through holes over the fuel pump at the mounting screws. There is also a couple through holes leading towards the cabin (?) bottom corner of the firewall. One small through hole into the wheel well and unfortuneately a medium size hole heading into the longitudinal.  This is bad as its the first time i've really dug into the car, and not having had the rockers off yet has been a form of ignorant bliss. I know that when a hole developes there that water and acid just drain into the long, so i started poking from underneath with a screw driver and stabbed right through the passenger side jack point.  kept stabbing until a 3 inch or so hole had developed. kept stabbing until a 3 inch or so hole had developed. Looks like the next step after the wheels are bolted back on the rear is to roll it out and pull the rockers to see exactly how bad it is. Then to find an experienced welder who can fix this the way i'd like to see it fixed. This will need to be done before the motor goes back in. At least the garage will be empty for the engine build. Also looks like the passenger side suspension ear has been patched. Previous had told me it had been in a minor fender bender so this my have been from that?? No other visible corrosion on the structure there or around it. ![popcorn[1].gif](http://www.914world.com/bbs2/style_emoticons/default/popcorn[1].gif) pictures look horrendous because i attacked it with a wire wheel and then sprayed it with metal ready. Holes are pretty clear, but i suspect they are boring to look at. We've all seen it before. Attached thumbnail(s) 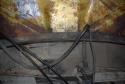 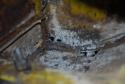 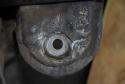 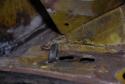 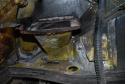 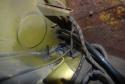  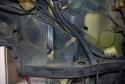 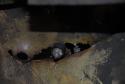
Managed to get a few things in today. assembled the shocks with 165# springs. painted the fan housing in preparation for the engine build that still has no completion date. Crank, Rods, case and NOS 1.7 high compression piston set were dropped off at Costa Mesa R&D a week ago for checking and rebuilding and balancing. Not sure when i'll be picking them up.... or their condition for that matter. Case had been align bored once which is all they can take from what i hear. On assembling the Polybronze setup in the trailing arms i found that the 45degree zirc fittings fouled with the body. That combined with the cheap quality of the ones that were provided (one has already broke) made it obvious that if anyone other than myself was to unhook the shock and let the arm drop a zirc would be snapped off. So i picked up some better quality zirc fittings, the short stubby kind without any bends and installed those. They have a more substantial thread 6mmx1 and when installed, in the locations as the instructions indicated, they do not hit the body or the trailing arm bracket throughout its full movement. drilled and zip tied the springs and assembled the consoles in the car. Man they look great. Now, as long as the welder doesn't screw them up with the future repairs I should remain happy.  Attached thumbnail(s) 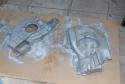 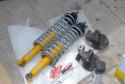 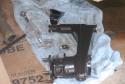 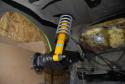
Started on the 5 bolt conversion and put a halt to some corrosion in the trunk caused by leaking tail light seals.
Items going back in: triad exhaust and SSI heat exchangers. 165lb springs shift bushings and temp sender Polybronze suspension bushings Get the rear out of the way and the front will have to wait a little while to dive into. Why did i go back to school? <_< Attached thumbnail(s) 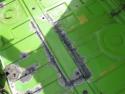 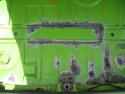 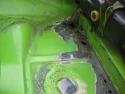 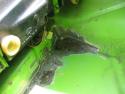 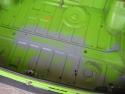 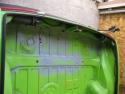 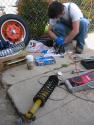 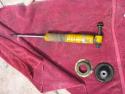 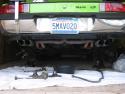 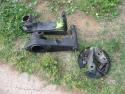 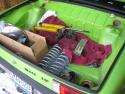
Statement of Belifes (version 1)
Original is cool but not law. I've always loved originality when purchasing a vehicle, but being raised in Ventura and surrounded by beach and hot rod culture I have a deep respect for Hot Rods in general. It is one of the few cultural elements that California can call its own invention. There's surfing too, but the Hawaiins get pissed off about that one. The whole notion of taking a car and making it yours, a work of folk art supercedes the rule of originality for me. edit: yes i was at a car show that day, any ideas of flaming my 914 have passed. |


 May 29 2007, 12:31 AM