|
|
|
Porsche, and the Porsche crest are registered trademarks of Dr. Ing. h.c. F. Porsche AG.
This site is not affiliated with Porsche in any way. Its only purpose is to provide an online forum for car enthusiasts. All other trademarks are property of their respective owners. |
|
|


| mr914 |
 Oct 10 2003, 02:08 PM Oct 10 2003, 02:08 PM
Post
#1
|
|
914 Hillbilly  Group: Members Posts: 576 Joined: 11-January 03 From: Lincoln NE Member No.: 131 Region Association: None |
2013 note...
Lesson 1- before attempting this at home, get the alignment checked on a frame machine. I built custom door/chassis reinforcement bars before going on the rotisserie. Assuming that the PO had repaired the longitudinals correctly. After 12 years, the car finally landed on the jack stands. As the original Dorris were thoroughly rusted out, I had replacement doors. Bolted the replacement doors on, and the don't fit. Bolted original doors on and they do with funky gaps.... Put the reinforcement bars on and the fit like I had built them.. (IMG:style_emoticons/default/huh.gif) looked at how the front strut upper plates were located. One has never moved based on factory tar, the other one had been moved 1/4-3/8" Damn, why didn't I catch that years ago... (IMG:style_emoticons/default/headbang.gif) (IMG:style_emoticons/default/headbang.gif) (IMG:style_emoticons/default/headbang.gif) Did test assemble, top, doors gaskets. Car is square but the longs appear to be bowed, fortunately evenly. Put the reinforcement bars on and they fit like I had built them.. (IMG:style_emoticons/default/headbang.gif) (IMG:style_emoticons/default/headbang.gif) Based on the targa top fitment, it Looks like the car is bowed 1/8-3/16". With the replacement doors, the front gap is good and even, the rear is 3/8" high at the body line (stack of 5 US Quarters). Hung the original doors, drivers door is spot on, rusted at the bottom and evidence of a cut and re weld between the hinges. Damn-it, unbolted the doors, put them on the shelf in the basement and ignored them for 10+ years About .040 in shims and the new doors are on and the gap varies by about 1/8" More of that story, at the end of the post Back to the original post... Well, I have the car mostly stripped and up on a rotiserie. When I got the car I saw the rust on the Sail panel, cowl, edges of the rear fenders and 2 small holes in the floor board. Now that I have stripped it, It's much worse. It's a '70 914-6 #269 What do you think? CAUTION: SCROLLING DOWN MAY MAKE YOU SICK (IMG:style_emoticons/default/barf.gif) or DRINK HEAVILY (IMG:style_emoticons/default/beer3.gif) Attached image(s) 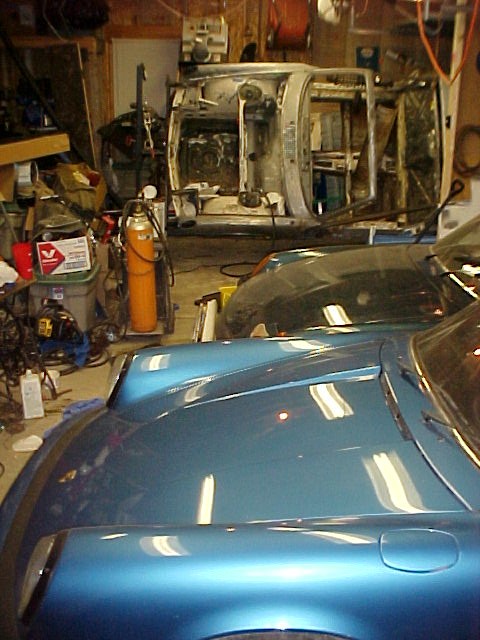
|
   |

 
|
  |
Replies(80 - 99)
| veltror |
Nov 24 2011, 02:45 PM
Post
#81
|
|
Senior Member Group: Members Posts: 928 Joined: 27-April 08 From: Potters Bar Herts UK Member No.: 8,978 Region Association: None |
QUOTE(mr914 @ Nov 22 2011, 08:36 PM)  Wow, I just looked at veltror's rustoration thread. Amazing percervience. My hat is off to you Veltror (IMG:style_emoticons/default/beer3.gif) #269 is no where near as rusty. Then fix it... (IMG:style_emoticons/default/smile.gif) |
|
|
|
| mr914 |
Mar 10 2012, 07:35 PM
Post
#82
|
|
914 Hillbilly Group: Members Posts: 576 Joined: 11-January 03 From: Lincoln NE Member No.: 131 Region Association: None |
Got warmer here today.
Decided it was time to fiddle with the 6 for a few days. This is turning into a rustoration project... Had to extend the upper frame of the rotiserie to get enough heght to flip the car on its back like a turtle to partially fit the floor pans and see what's left to patch.... Planning on putting a couple of spot welds on the pans and mostly use aircraft fasteners (cheleco's) to hold the pan in place till its on a frame machine. So far with the pan laying on top. It appears to be about 1/8"-1/4" longer than the existing pans. Attached thumbnail(s) 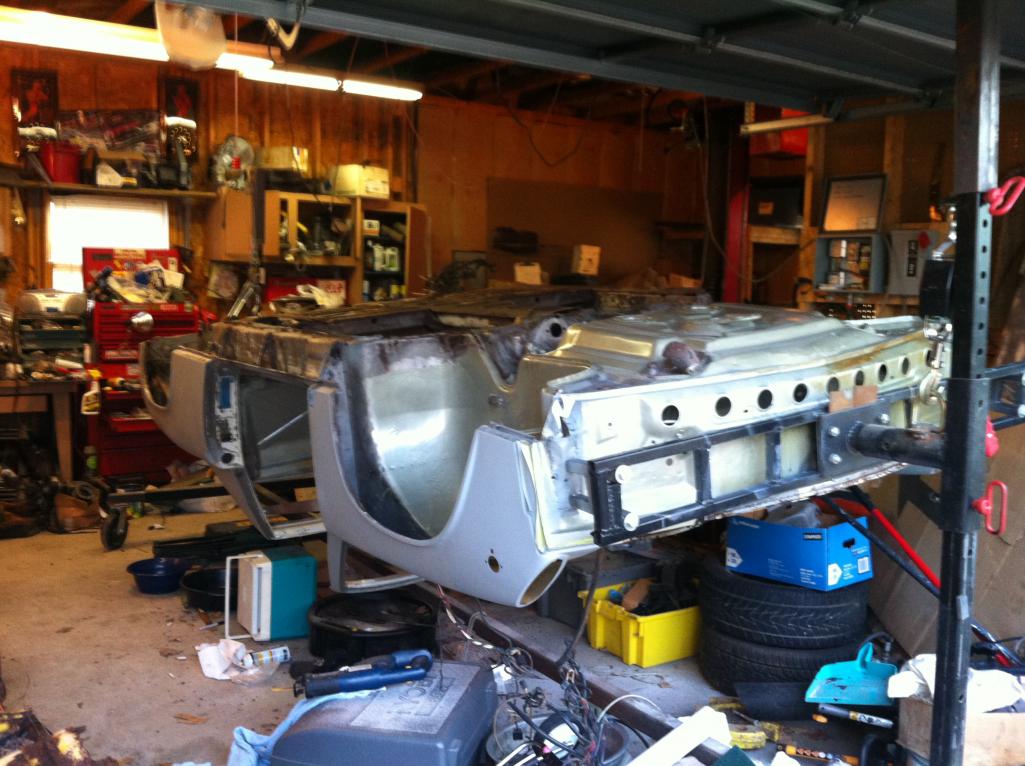 Attached image(s) 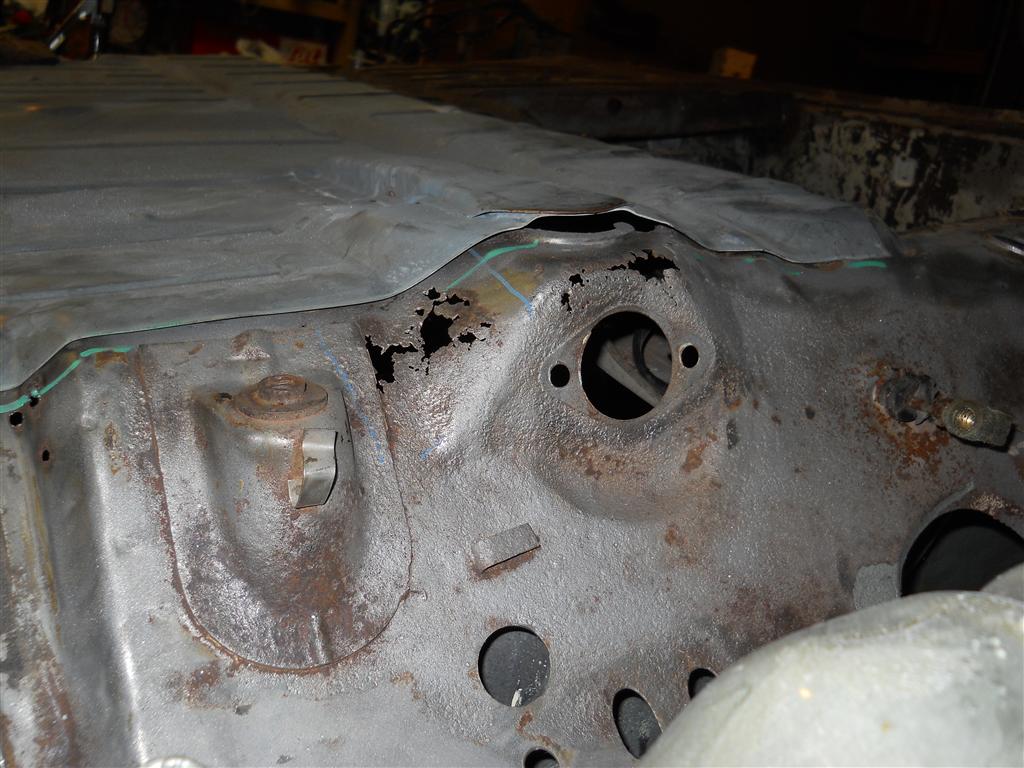  
|
|
|
|
| mr914 |
Mar 10 2012, 07:37 PM
Post
#83
|
|
914 Hillbilly Group: Members Posts: 576 Joined: 11-January 03 From: Lincoln NE Member No.: 131 Region Association: None |
Question for those of you who have replaced both complete pans.
Would you leave the metal below the hell hole in place and weld/fasten the pans to them? It seems to me that it would add at least some additional stiffness. BTW. Looks like someone tried to lift the car from body just in front of the motor mount. Bent it in about 1/2" Thanks for your opinion. |
|
|
|
| pete000 |
Mar 10 2012, 08:35 PM
Post
#84
|
|
Senior Member Group: Members Posts: 1,885 Joined: 23-August 10 From: Bradenton Florida Member No.: 12,094 Region Association: South East States |
Being from Michigan I am always surprised to see how many 914s are still around. Now I live in Ca and they are so much less rusty !
Save that early six !!!!!!!!! |
|
|
|
| Midman914 |
Mar 21 2012, 07:15 PM
Post
#85
|
|
Newbie Group: Members Posts: 9 Joined: 20-December 09 From: Ann Arbor, Michigan Member No.: 11,152 Region Association: Upper MidWest |
How close are you to Ann Arbor? I would be interested in buying some parts off of your parts cars, when I get going on my project again. Keep the faith with the 6. I hope you stay with it and finish it.
|
|
|
|
| mr914 |
Jun 6 2012, 09:56 PM
Post
#86
|
|
914 Hillbilly Group: Members Posts: 576 Joined: 11-January 03 From: Lincoln NE Member No.: 131 Region Association: None |
Spent hours on what looked like a good custom cut. Cleaned, Seperated, rustproofing and bond off and guess what. Swiss Cheese.
Anybody have a good cut of the yellow peice? For both sides... Also, I am in need of a Rear Torsion Bar pivot rod. Broke the threads off during removal. Attached thumbnail(s) 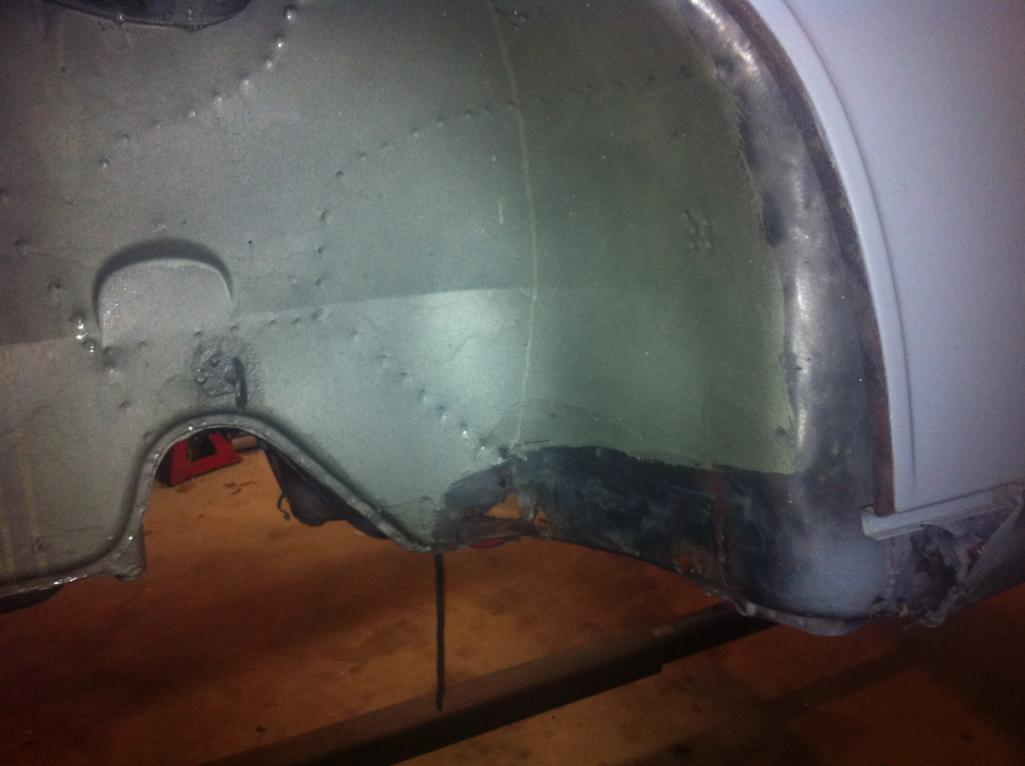 Attached image(s) 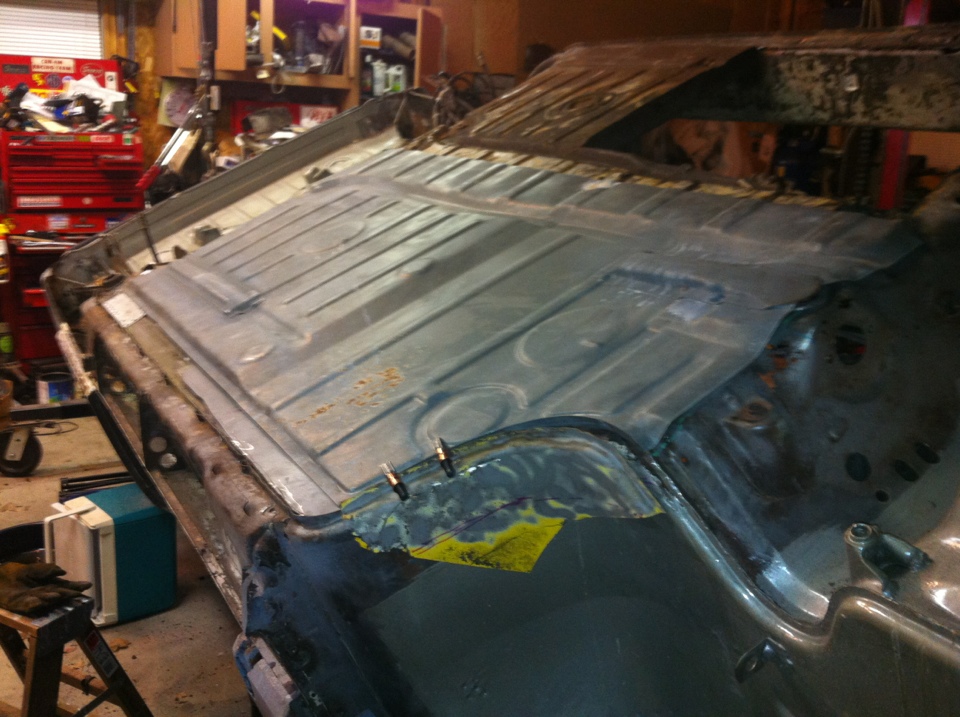
|
|
|
|
| Mr.242 |
Jun 6 2012, 10:16 PM
Post
#87
|
|
May your glass be smaller so it's always FULL! Group: Members Posts: 1,079 Joined: 10-June 08 From: Seattle Member No.: 9,160 Region Association: Pacific Northwest |
Fix it...it is too much like having a hot girlfriend breaking up with you if you sell it.
You got it...thing is, no one cares how long it takes to finish it. It's yours and it will be done when you decide it will be done. |
|
|
|
| rick 918-S |
Jun 6 2012, 11:11 PM
Post
#88
|
|
Hey nice rack! -Celette Group: Members Posts: 20,474 Joined: 30-December 02 From: Now in Superior WI Member No.: 43 Region Association: Northstar Region |
I have a California car here that had an engine and interior fire. I don't have time to cut it up right now. I'm working a storm. Remind me I posted here in a couple weeks.
|
 |
|
| mr914 |
Apr 14 2015, 08:08 PM
Post
#89
|
|
914 Hillbilly Group: Members Posts: 576 Joined: 11-January 03 From: Lincoln NE Member No.: 131 Region Association: None |
Been too long since I did an update.
A lot of progress, paint. But no motor yet Attached thumbnail(s) 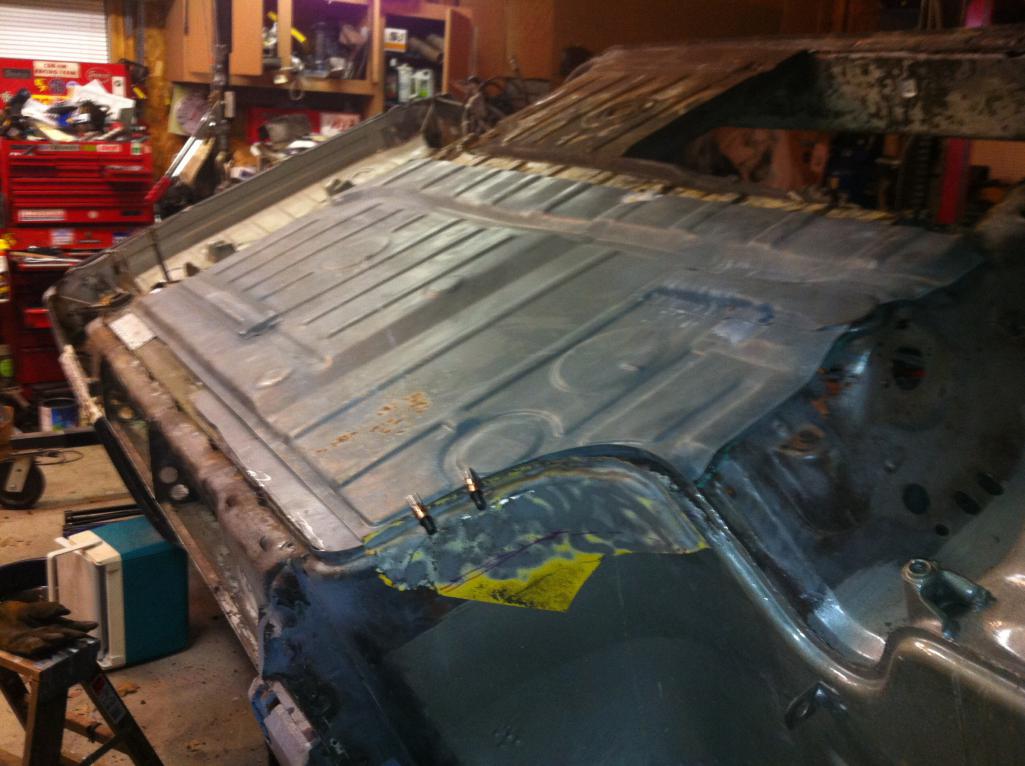
|
|
|
|
| mr914 |
Apr 14 2015, 08:10 PM
Post
#90
|
|
914 Hillbilly Group: Members Posts: 576 Joined: 11-January 03 From: Lincoln NE Member No.: 131 Region Association: None |
Patch for longitudinals to mount pan to
Attached thumbnail(s) 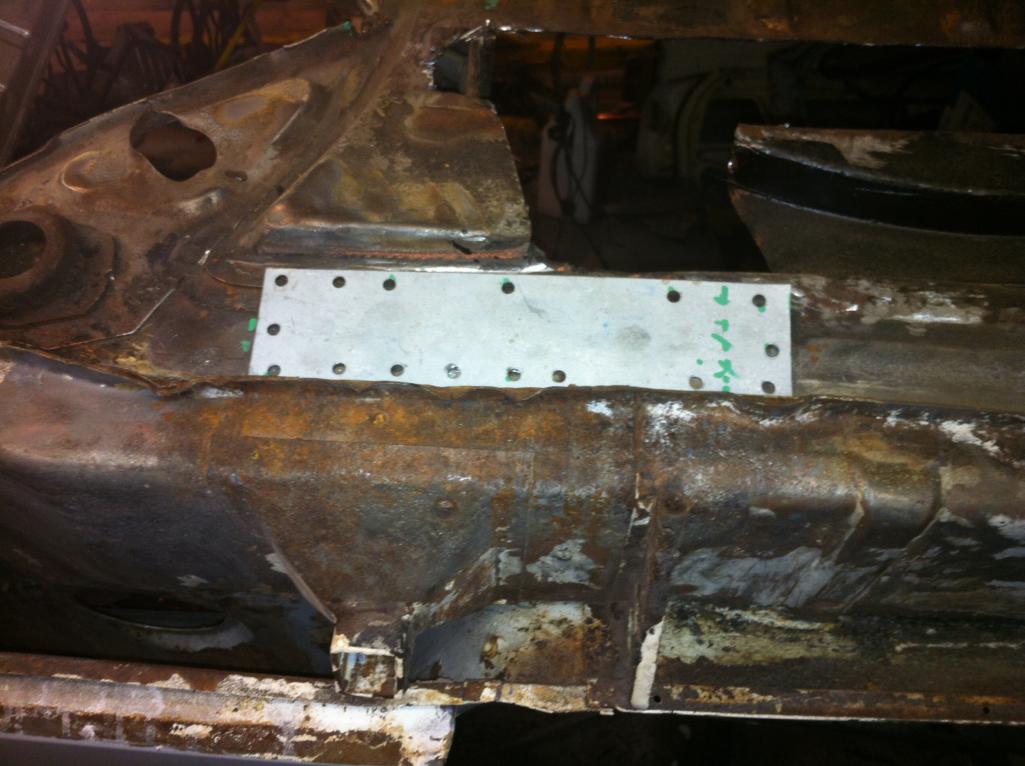
|
|
|
|
| mr914 |
Apr 14 2015, 08:13 PM
Post
#91
|
|
914 Hillbilly Group: Members Posts: 576 Joined: 11-January 03 From: Lincoln NE Member No.: 131 Region Association: None |
RD inner longitudinal trim to fit
Attached thumbnail(s) 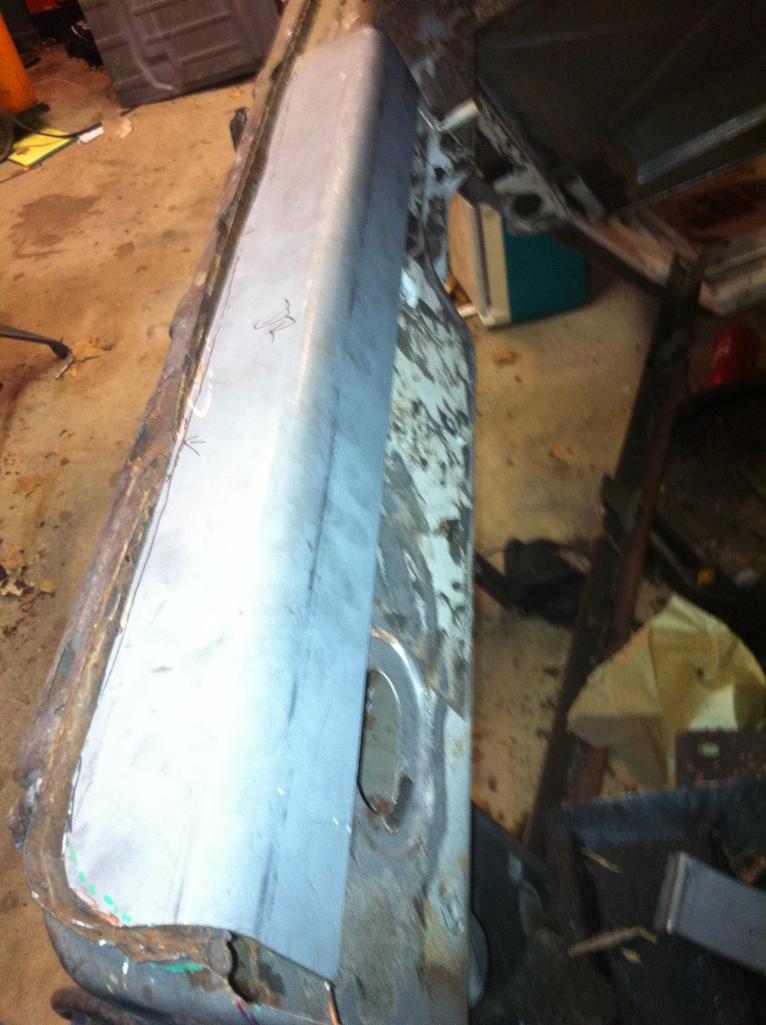
|
|
|
|
| mr914 |
Apr 14 2015, 08:15 PM
Post
#92
|
|
914 Hillbilly Group: Members Posts: 576 Joined: 11-January 03 From: Lincoln NE Member No.: 131 Region Association: None |
Pan overplayed for test fit
Attached thumbnail(s) 
|
|
|
|
| mr914 |
Apr 14 2015, 08:16 PM
Post
#93
|
|
914 Hillbilly Group: Members Posts: 576 Joined: 11-January 03 From: Lincoln NE Member No.: 131 Region Association: None |
Of course there is always areas that the patch panels don't fit
Attached thumbnail(s) 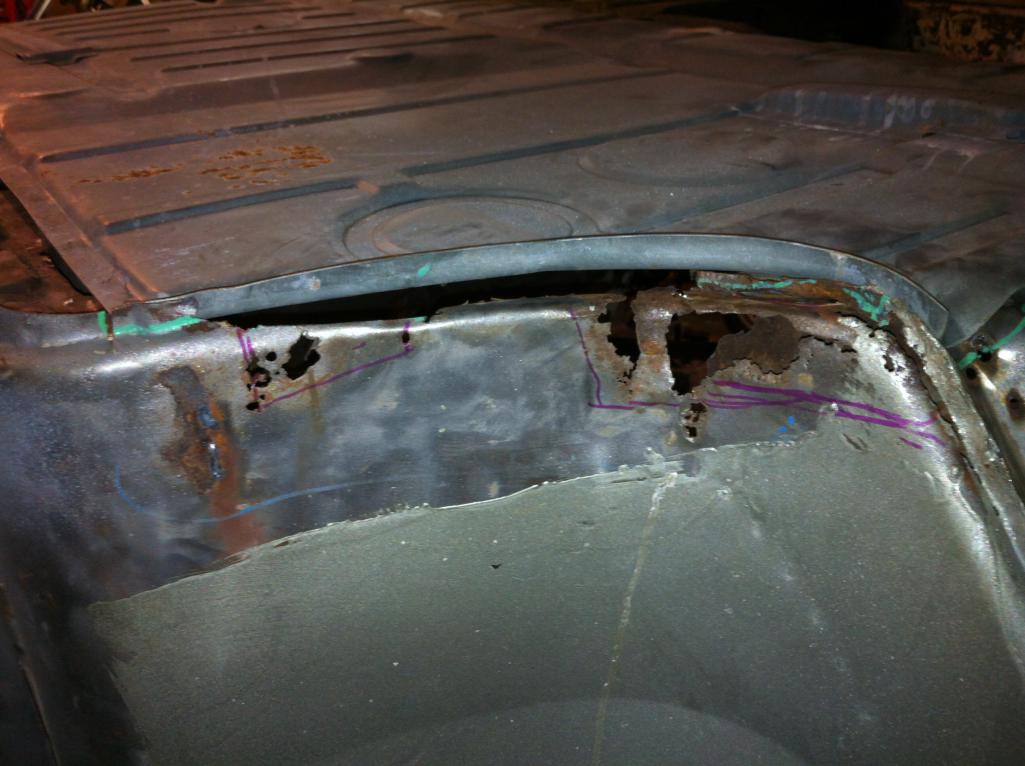
|
|
|
|
| mr914 |
Apr 14 2015, 08:23 PM
Post
#94
|
|
914 Hillbilly Group: Members Posts: 576 Joined: 11-January 03 From: Lincoln NE Member No.: 131 Region Association: None |
Thanks bdstone for the Cali rust free cuts
Took 3 Michigan rust cuts separated them, cleaned up to find rust... Attached thumbnail(s) 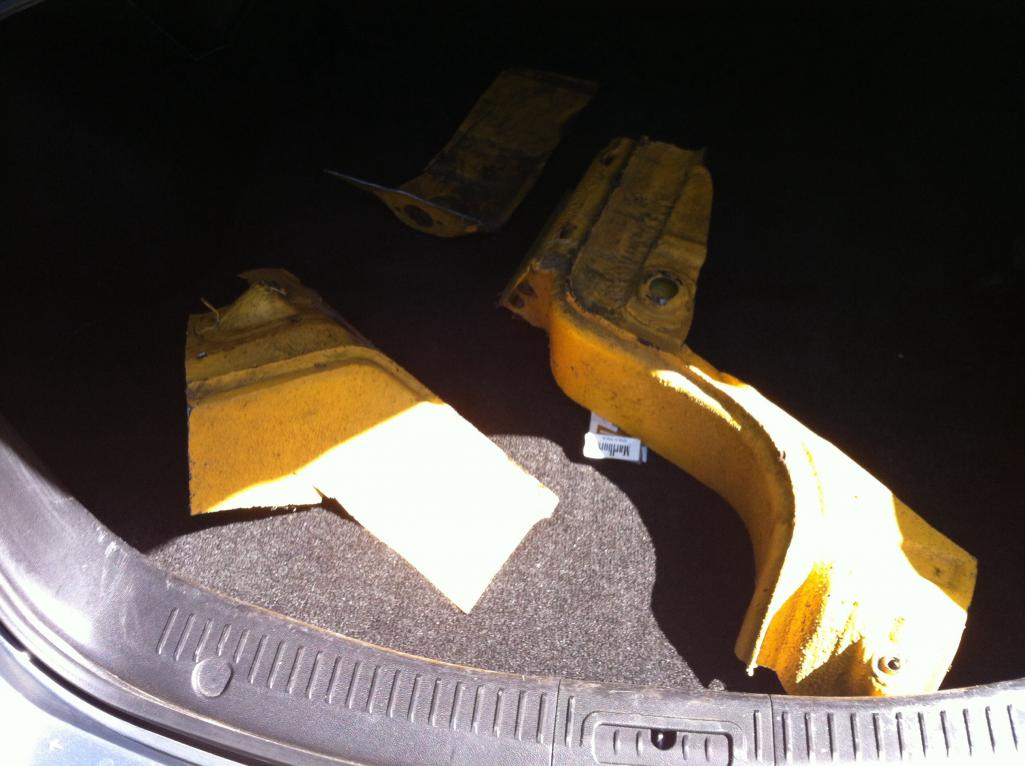
|
|
|
|
| mr914 |
Apr 14 2015, 08:24 PM
Post
#95
|
|
914 Hillbilly Group: Members Posts: 576 Joined: 11-January 03 From: Lincoln NE Member No.: 131 Region Association: None |
One side repaired
Attached thumbnail(s) 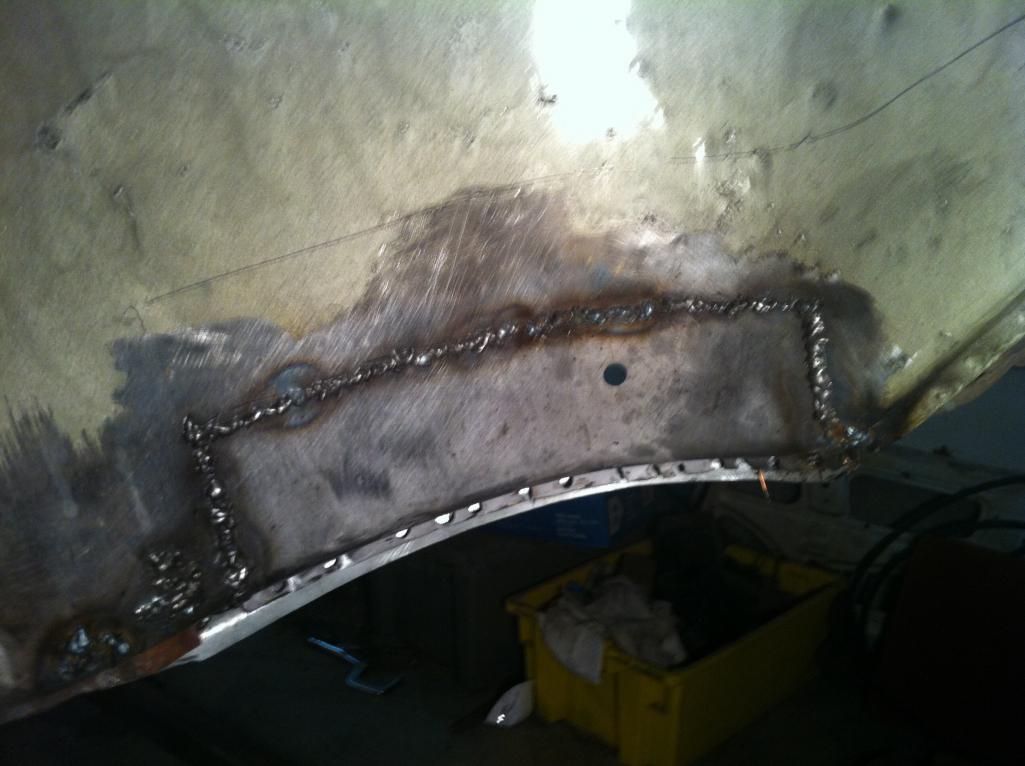
|
|
|
|
| mr914 |
Apr 14 2015, 08:25 PM
Post
#96
|
|
914 Hillbilly Group: Members Posts: 576 Joined: 11-January 03 From: Lincoln NE Member No.: 131 Region Association: None |
And the other
Attached thumbnail(s) 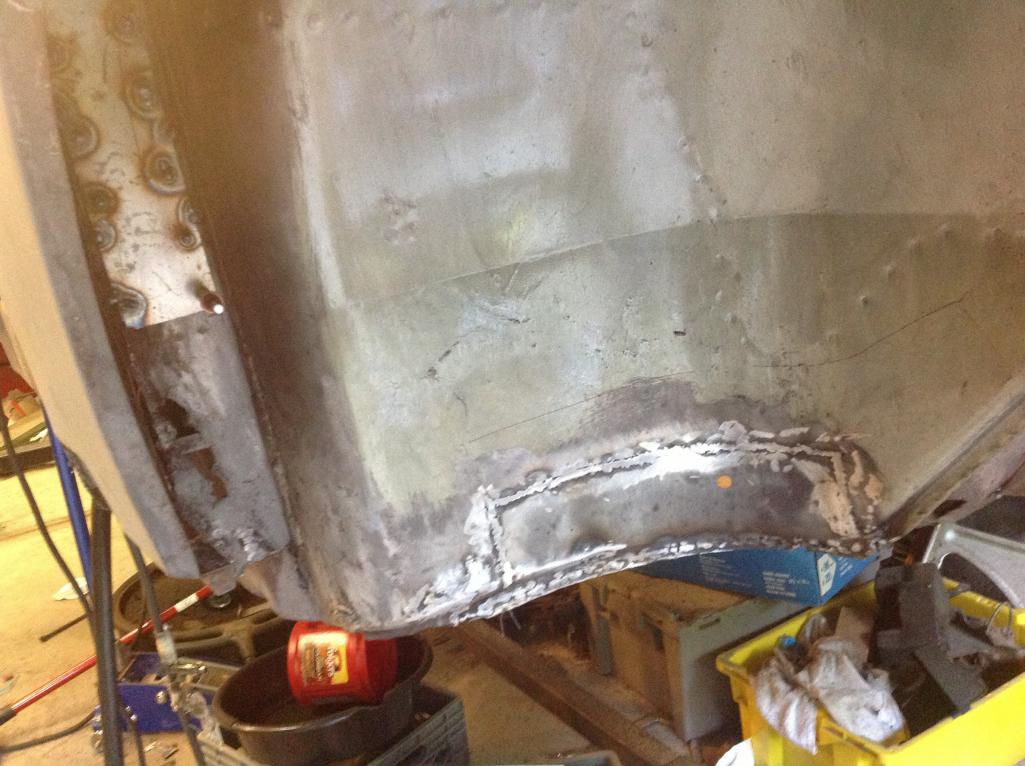
|
|
|
|
| mr914 |
Apr 14 2015, 08:27 PM
Post
#97
|
|
914 Hillbilly Group: Members Posts: 576 Joined: 11-January 03 From: Lincoln NE Member No.: 131 Region Association: None |
3 dimensional welding....
Fender/door jamb/threshold welded in as one peice Attached thumbnail(s) 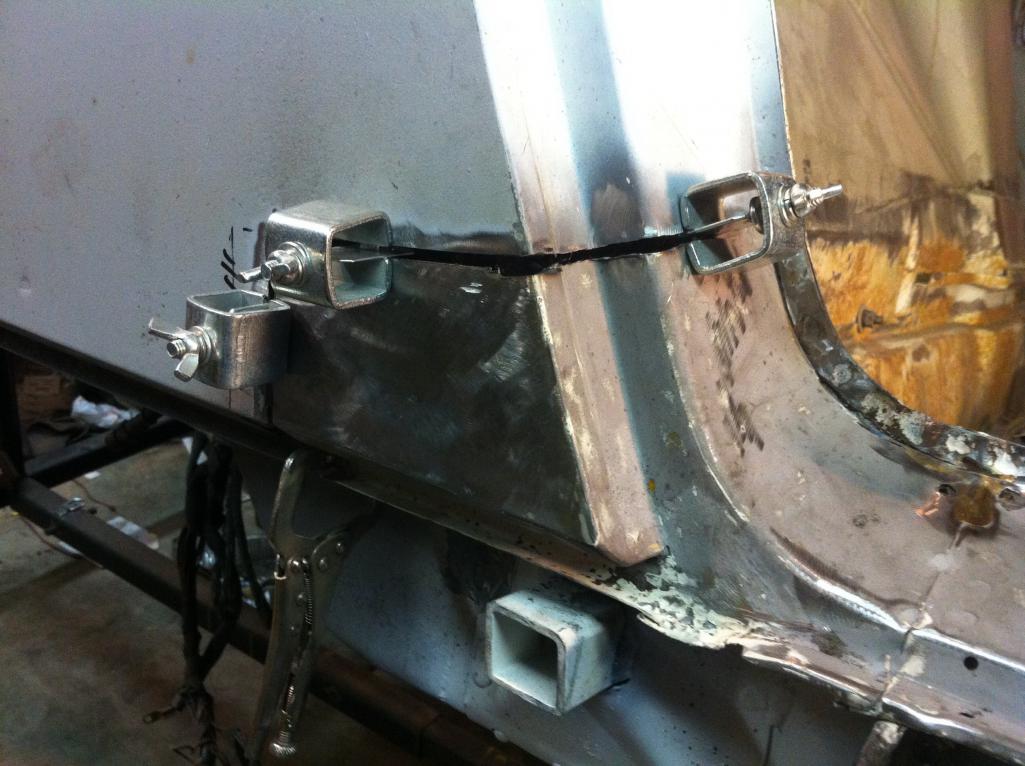
|
|
|
|
| mr914 |
Apr 14 2015, 08:29 PM
Post
#98
|
|
914 Hillbilly Group: Members Posts: 576 Joined: 11-January 03 From: Lincoln NE Member No.: 131 Region Association: None |
Tacking in
Attached thumbnail(s) 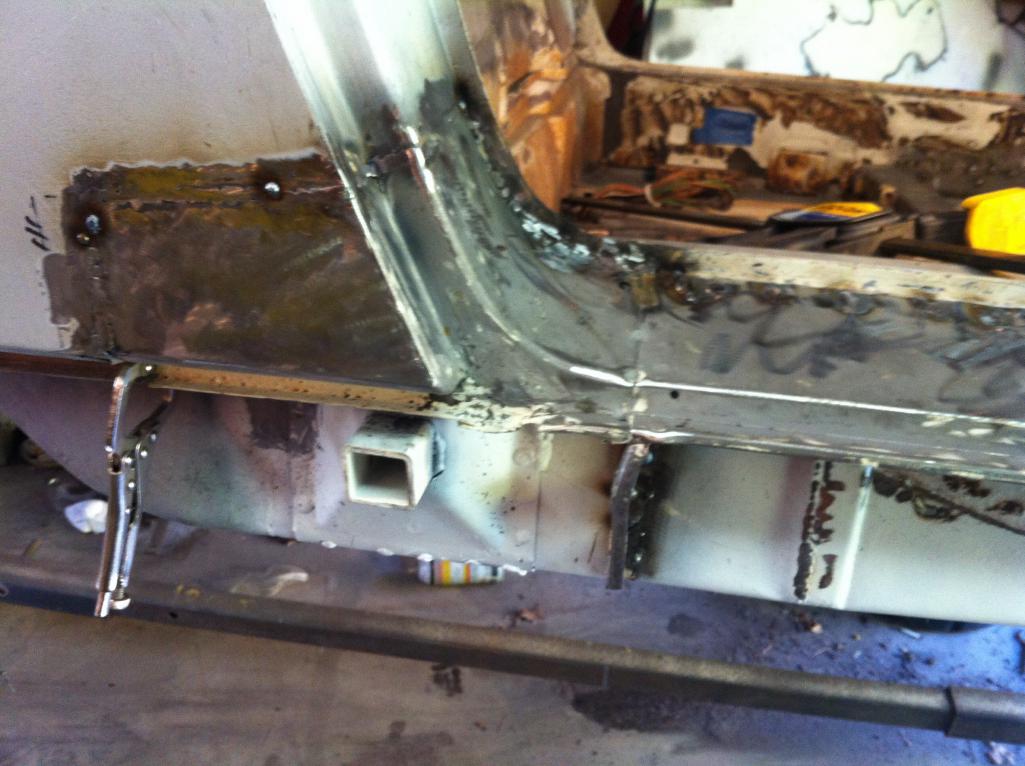
|
|
|
|
| mr914 |
Apr 14 2015, 08:30 PM
Post
#99
|
|
914 Hillbilly Group: Members Posts: 576 Joined: 11-January 03 From: Lincoln NE Member No.: 131 Region Association: None |
Welded in. Worked out to be about .050 negative
Attached thumbnail(s) 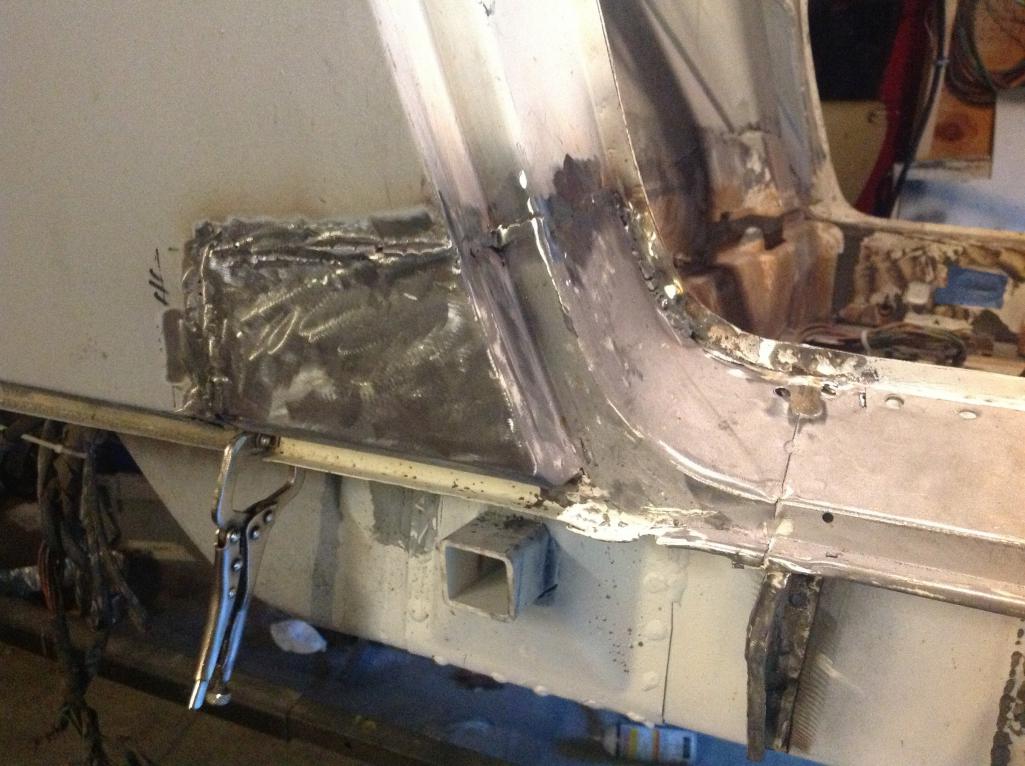
|
|
|
|
| FourBlades |
Apr 14 2015, 08:30 PM
Post
#100
|
|
From Wreck to Rockin Group: Members Posts: 2,055 Joined: 3-December 07 From: Brevard, FL Member No.: 8,414 Region Association: South East States |
|
|
|
|
|
1 User(s) are reading this topic (1 Guests and 0 Anonymous Users)
0 Members:

|
Lo-Fi Version | Time is now: 2nd June 2024 - 10:38 PM |
Invision Power Board
v9.1.4 © 2024 IPS, Inc.