|
|
|
Porsche, and the Porsche crest are registered trademarks of Dr. Ing. h.c. F. Porsche AG.
This site is not affiliated with Porsche in any way. Its only purpose is to provide an online forum for car enthusiasts. All other trademarks are property of their respective owners. |
|
|

  |

| Jeff Hail |
 Apr 11 2008, 09:18 PM Apr 11 2008, 09:18 PM
Post
#241
|
|
Senior Member  Group: Members Posts: 1,141 Joined: 3-May 07 From: LA/ CA Member No.: 7,712 |
Welded up the right rocker. I plug welded the top from inside the car. No holes were punched on the new outer panel....the lower was done from underneath the car.
First -it's easier welding thru old steel into new metal Second- no grinding a gazillion plugs on the exterior. No pin holes on the outside to leak. Butt weld with a backer at the front and seam welded the rear outer wheelhouse (another area that is prone to water because the outer panel faces towards the front of the car) Attached image(s) 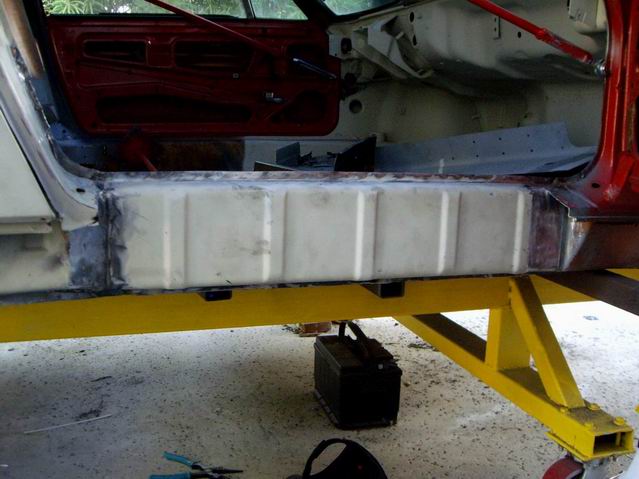 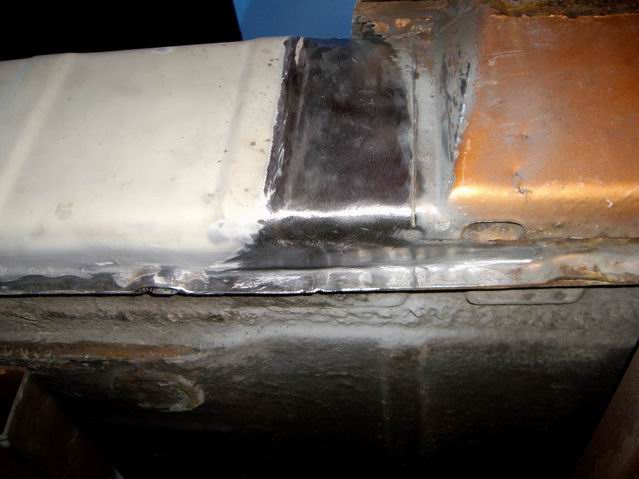 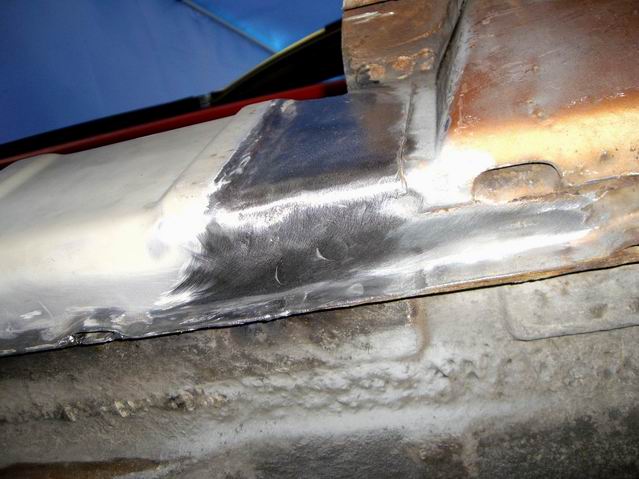
|
   |

 
|
| Jeff Hail |
Apr 11 2008, 09:40 PM
Post
#242
|
|
Senior Member Group: Members Posts: 1,141 Joined: 3-May 07 From: LA/ CA Member No.: 7,712 |
Can someone clarify if this is what a 914 rocker is supposed to look like?
I am kind of new at this and mine originally came with the translucent iron oxide version! (sick 914 humor) (IMG:style_emoticons/default/av-943.gif) I also misplaced some measurements I noted somewhere. Now where the hell did I put them? Body panels make great sticky notes! (IMG:style_emoticons/default/dry.gif) Day is done for now. A quick squirt of primer and its time for a (IMG:style_emoticons/default/beer.gif) Attached image(s) 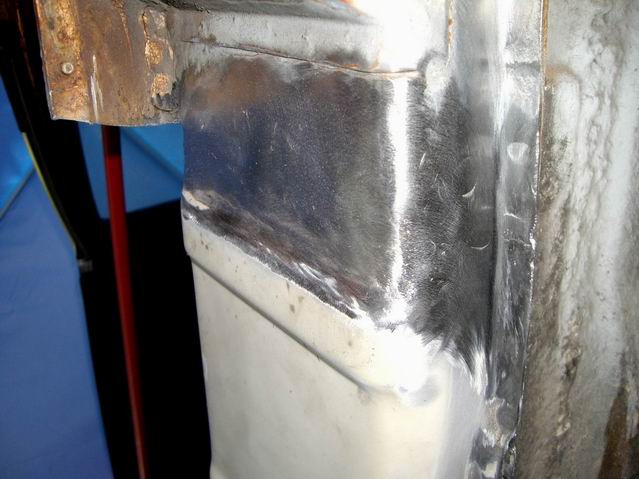 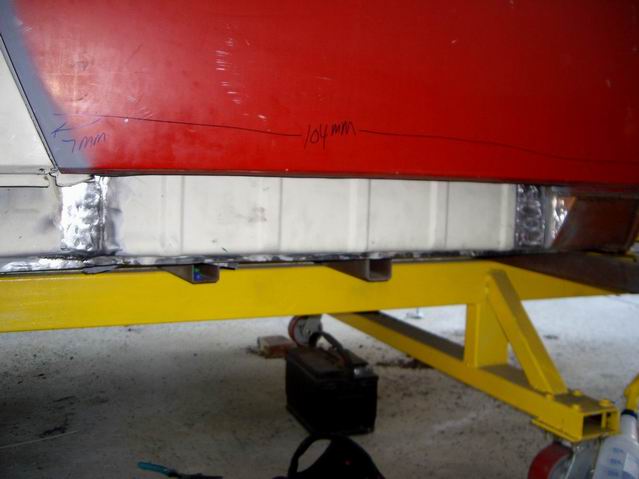 
|
|
|
|
| Jeff Hail |
Apr 20 2008, 10:38 PM
Post
#243
|
|
Senior Member Group: Members Posts: 1,141 Joined: 3-May 07 From: LA/ CA Member No.: 7,712 |
Passenger side sill plate is in.
Ran out of C02/Argon so I couldn't weld the sill triangles in. Good tip....do not throw out those old weatherstrips. They are still important when fitting parts such as the sill to make sure you get a proper seal on the door shell. Attached image(s) 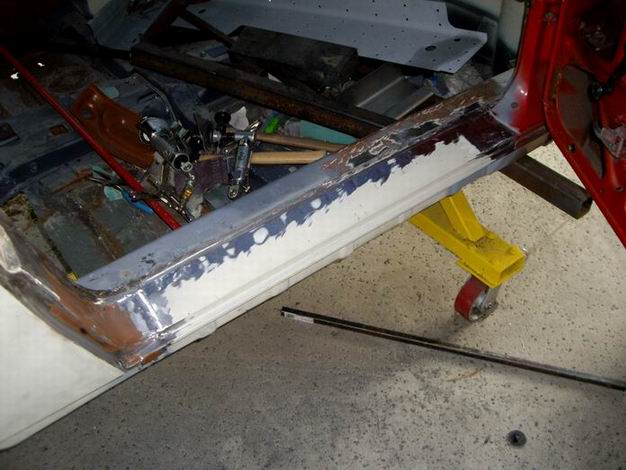 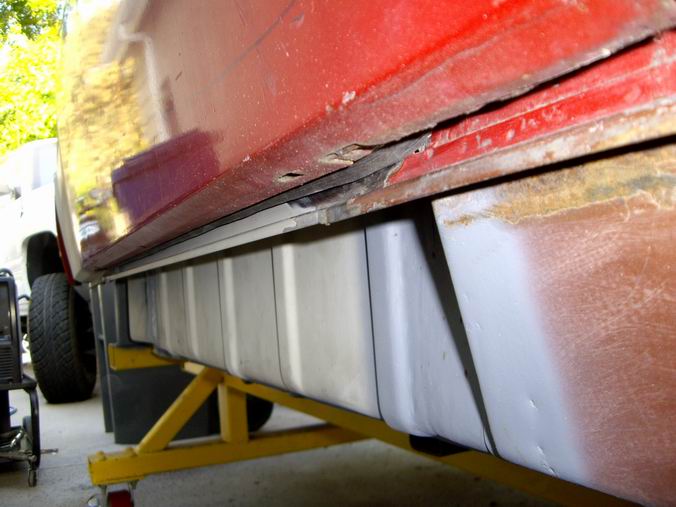 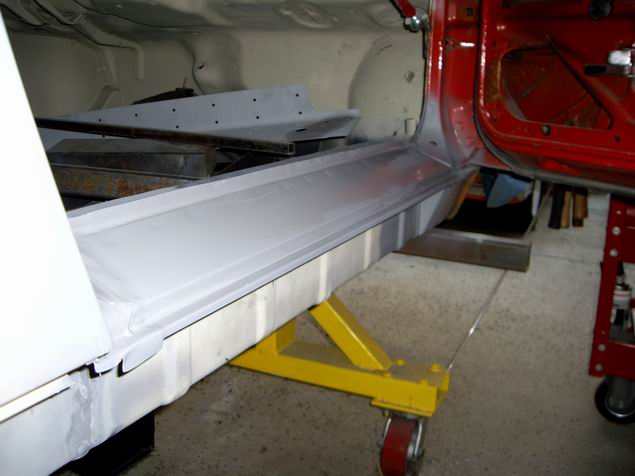
|
|
|
|
| Jeff Hail |
May 3 2008, 10:21 PM
Post
#244
|
|
Senior Member Group: Members Posts: 1,141 Joined: 3-May 07 From: LA/ CA Member No.: 7,712 |
Lite duty this week. Carpal Tunnel sucks.
Welded in the sill triangles I fabricated and prepped the threshold area. Attached image(s) 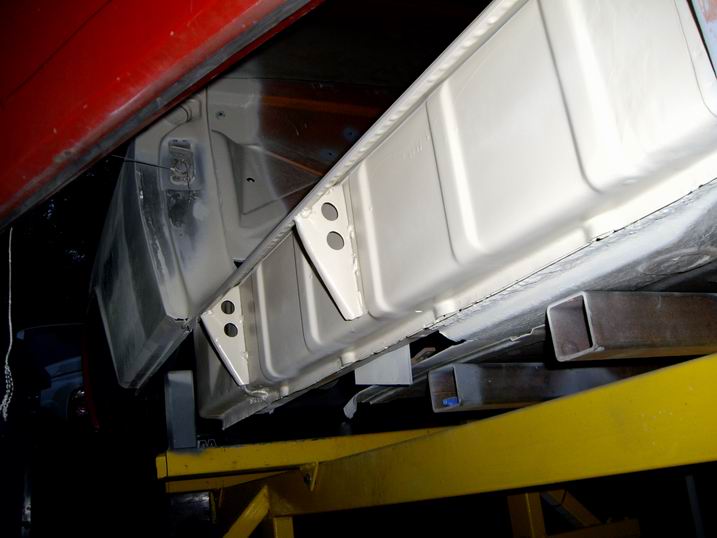 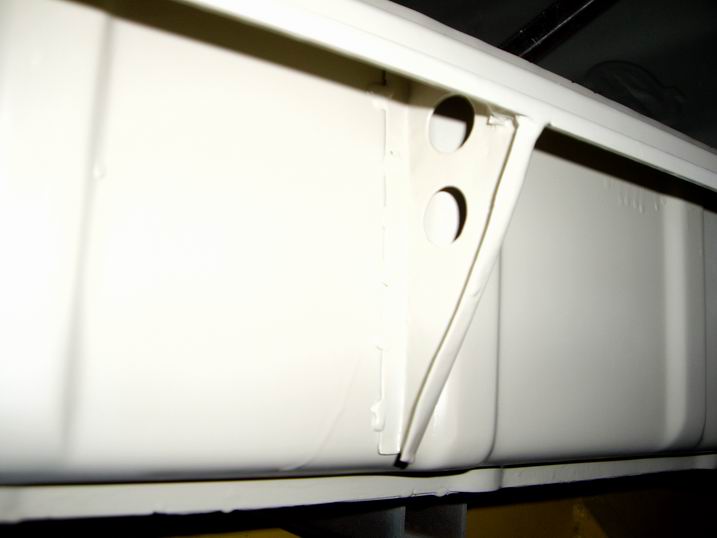 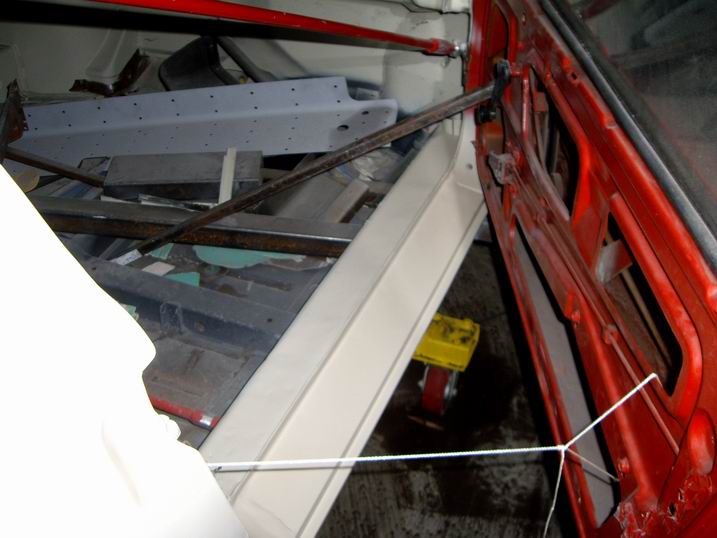
|
|
|
|
| Jeff Hail |
May 3 2008, 10:26 PM
Post
#245
|
|
Senior Member Group: Members Posts: 1,141 Joined: 3-May 07 From: LA/ CA Member No.: 7,712 |
Tomorrow I will coat the gap where the rocker and sill plate meet with Wurth Seal Fix. WSF is closed cell sealer and semi rigid. Water and moisture will not get past it like the factory sealer.
Notice I installed the triangles flat side forward. The factory should have done this so as not to be a catchers mitt for road debris. Attached image(s) 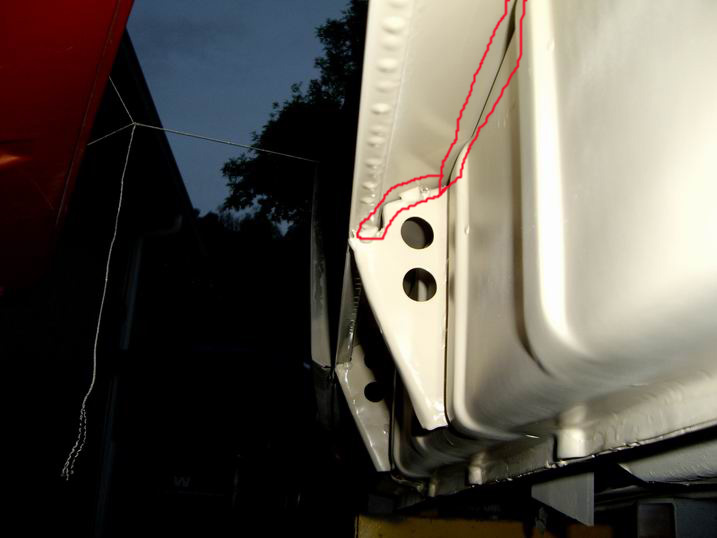 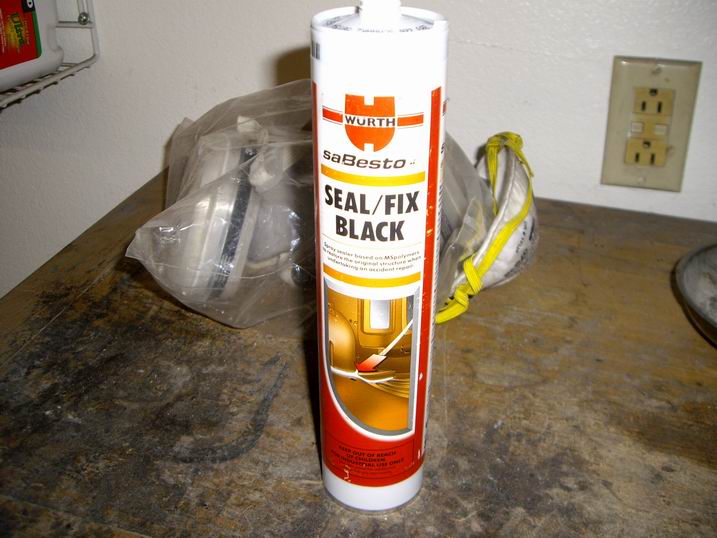
|
|
|
|
| Jeff Hail |
May 3 2008, 10:31 PM
Post
#246
|
|
Senior Member Group: Members Posts: 1,141 Joined: 3-May 07 From: LA/ CA Member No.: 7,712 |
The right tool for the job.
Stripped the right front wheelhouse of its undercoating in about 3 minutes. Elbow grease....Not! (Brake Cleaner also works like a charm and strips about everything else in the process if you don't want to invest in one of these.) Attached image(s) 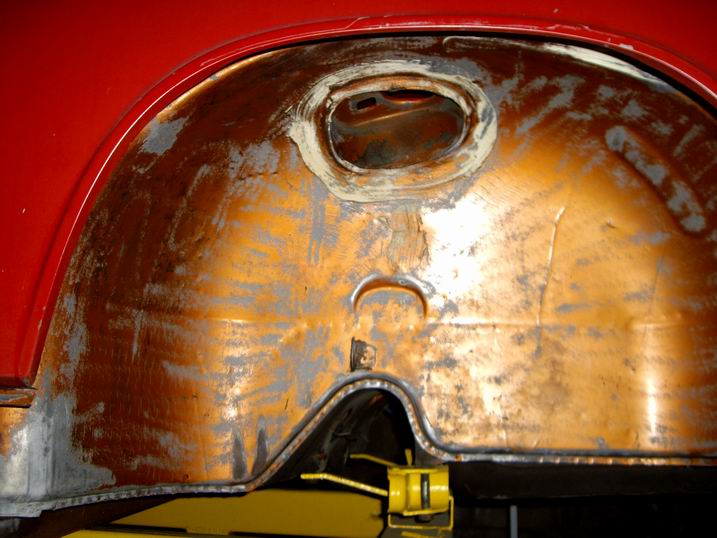 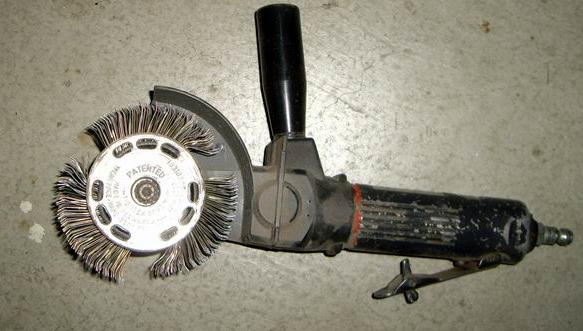
|
|
|
|
| Zimms |
May 4 2008, 06:45 AM
Post
#247
|
|
Senior Member Group: Members Posts: 1,416 Joined: 11-February 06 From: Michigan Member No.: 5,565 Region Association: Upper MidWest |
NICE WORK! Keep it coming!
|
|
|
|
| Eric_Shea |
May 4 2008, 08:55 AM
Post
#248
|
|
PMB Performance Group: Admin Posts: 19,304 Joined: 3-September 03 From: Salt Lake City, UT Member No.: 1,110 Region Association: Rocky Mountains |
QUOTE if you don't want to invest in one of these What's that called again? |
|
|
|
| Jeff Hail |
May 4 2008, 02:08 PM
Post
#249
|
|
Senior Member Group: Members Posts: 1,141 Joined: 3-May 07 From: LA/ CA Member No.: 7,712 |
QUOTE(Eric_Shea @ May 4 2008, 07:55 AM)  QUOTE if you don't want to invest in one of these What's that called again? Wurth DBS 3500 (aka "the flail") |
|
|
|
| Eric_Shea |
May 4 2008, 02:25 PM
Post
#250
|
|
PMB Performance Group: Admin Posts: 19,304 Joined: 3-September 03 From: Salt Lake City, UT Member No.: 1,110 Region Association: Rocky Mountains |
@ $479.00 that may be worth it for even one car... kinda pricey though when considering a soda blast for $600.
Cool tool. (IMG:style_emoticons/default/wink.gif) |
|
|
|
| Jeff Hail |
May 4 2008, 02:31 PM
Post
#251
|
|
Senior Member Group: Members Posts: 1,141 Joined: 3-May 07 From: LA/ CA Member No.: 7,712 |
QUOTE(Eric_Shea @ May 4 2008, 01:25 PM) @ $479.00 that may be worth it for even one car... kinda pricey though when considering a soda blast for $600. Cool tool. (IMG:style_emoticons/default/wink.gif) They can be found for much less used. DynaBrade also makes a similar one for less. BTW,What did you find out on the brake parts cost? |
|
|
|
| Eric_Shea |
May 4 2008, 02:50 PM
Post
#252
|
|
PMB Performance Group: Admin Posts: 19,304 Joined: 3-September 03 From: Salt Lake City, UT Member No.: 1,110 Region Association: Rocky Mountains |
I found that the pound is $1.95 now! (IMG:style_emoticons/default/ohmy.gif)
They should be here at the end of the week. http://www.pmbperformance.com/catalog/item...563/5825883.htm |
|
|
|
| sixnotfour |
May 4 2008, 05:39 PM
Post
#253
|
|
914 Wizard Group: Members Posts: 11,272 Joined: 12-September 04 Member No.: 2,744 Region Association: NineFourteenerVille |
Soda Blast wont remove the nasty seam sealer.
I just did mine and thought the blasting would remove the little I left , Nope had the body shop kid wire wheel the rest, as I was Done. |
 |
|
| Eric_Shea |
May 4 2008, 06:37 PM
Post
#254
|
|
PMB Performance Group: Admin Posts: 19,304 Joined: 3-September 03 From: Salt Lake City, UT Member No.: 1,110 Region Association: Rocky Mountains |
QUOTE Soda Blast wont remove the nasty seam sealer. I just did mine and thought the blasting would remove the little I left , Nope had the body shop kid wire wheel the rest, as I was Done. Yeah I know... (IMG:style_emoticons/default/sad.gif) Send him my way when you're done! (IMG:style_emoticons/default/wink.gif) |
|
|
|
| Jeff Hail |
May 11 2008, 12:16 AM
Post
#255
|
|
Senior Member Group: Members Posts: 1,141 Joined: 3-May 07 From: LA/ CA Member No.: 7,712 |
Stripped the underside rear of the tub to metal and epoxy primed.
First I used the Wurth "flail" to remove the old undercoating. This also removed the majority of original paint. The rest I machine sanded with a Mini DA and a few spots I used Starblast media (transmount bracktets and crossmember). Then some good old fashion elbow grease hand sanding and some solvent. I removed all of the seam sealer where the inner wheelhouse/ quarter panels meet the floor at the rear. Needed to see if any issues were under there. None found. (IMG:style_emoticons/default/aktion035.gif) I did leave intact the sealer where the shock tower pockets are. Just took it down a little to have something to bite into and tidy it up. The Kent solvent kicks ass. Attached image(s) 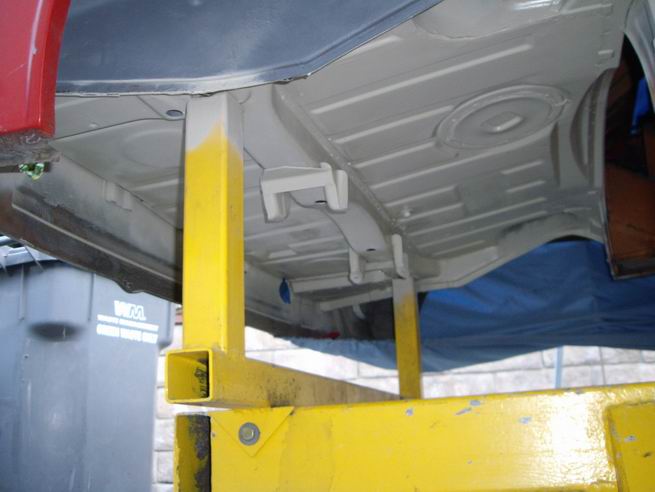  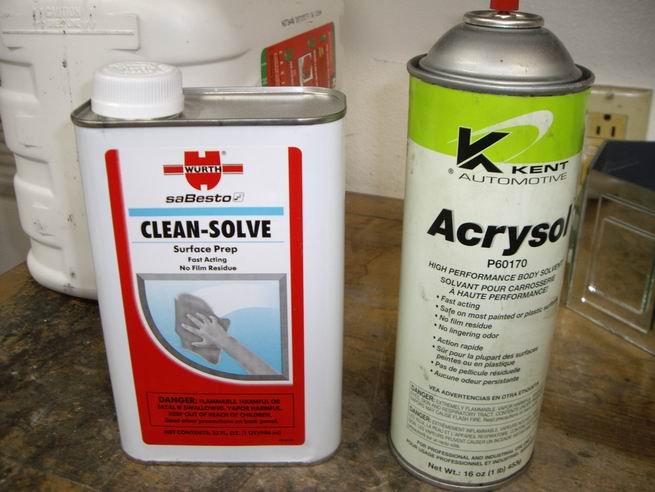
|
|
|
|
| Jeff Hail |
May 11 2008, 02:38 AM
Post
#256
|
|
Senior Member Group: Members Posts: 1,141 Joined: 3-May 07 From: LA/ CA Member No.: 7,712 |
It's midnight and a knock at the door!
Who the hell is at my door at this hour? Hey dude.... Whoa those came out bitch'n.......... What do I owe you?......A couple cold beer's! It's nice when the Powder Coater is your bud! Price was right. 2 Stage Powder Coating rocks! Attached image(s) 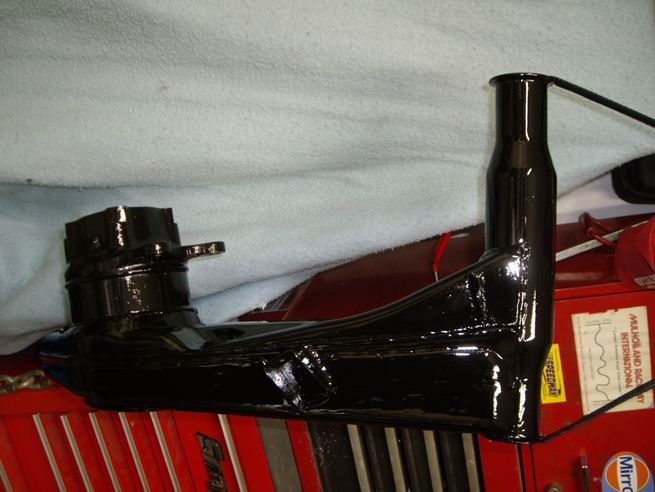 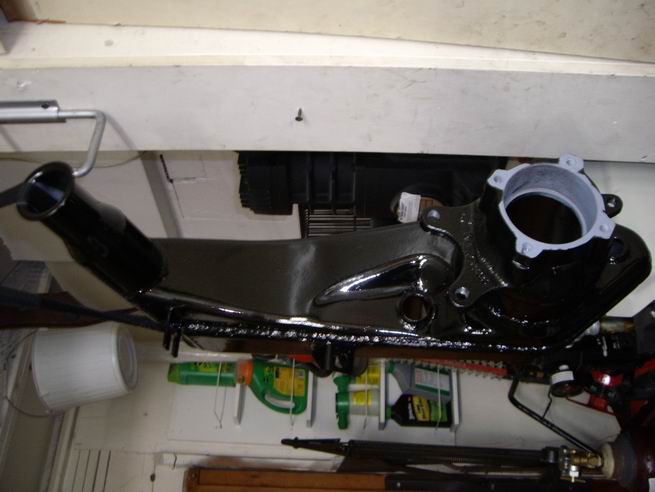
|
|
|
|
| Jeff Hail |
May 12 2008, 10:30 PM
Post
#257
|
|
Senior Member Group: Members Posts: 1,141 Joined: 3-May 07 From: LA/ CA Member No.: 7,712 |
Awesome....printed on the side of a box of Porsche Exhaust Headers. Even the UPS guy had to take time out to read it. Way cool.
AUTHOR: Walter D. Wintle QUOTATION: If you think you are beaten, you are; If you think you dare not, you don’t. If you’d like to win, but think you can’t, It’s almost a cinch you won’t. If you think you’ll lose, you’re lost, For out in the world we find Success begins with a fellow’s will; It’s all in the state of mind. If you think you’re outclassed, you are; You’ve got to think high to rise. You’ve got to be sure of yourself before You can ever win a prize. Life’s battles don’t always go To the stronger or faster man; But soon or late the man who wins Is the one who thinks he can. Now who can guess what brand they are? |
|
|
|
| porsche914gt |
May 13 2008, 12:27 AM
Post
#258
|
|
Member Group: Members Posts: 87 Joined: 20-January 04 From: Los Angeles, CA Member No.: 1,581 Region Association: None |
Stahl
New York Right? I remember mine had that. |
|
|
|
| Jeff Hail |
May 13 2008, 06:57 PM
Post
#259
|
|
Senior Member Group: Members Posts: 1,141 Joined: 3-May 07 From: LA/ CA Member No.: 7,712 |
QUOTE(porsche914gt @ May 12 2008, 11:27 PM) Stahl New York Right? I remember mine had that. I recall that Stahl stopped making 914/6 headers although you are correct on the box. I got a kick out of the verbiage on the box. The headers are George Narbel's (ERH) . I had them thermal coated and they shipped em in a Stahl box. |
|
|
|
| Katmanken |
May 13 2008, 07:42 PM
Post
#260
|
|
You haven't seen me if anybody asks... Group: Members Posts: 4,738 Joined: 14-June 03 From: USA Member No.: 819 Region Association: Upper MidWest |
Jeff,
Something I've been meanign to ask... Who makes this tram gauge? It looks like something I could use. Ken Attached image(s) 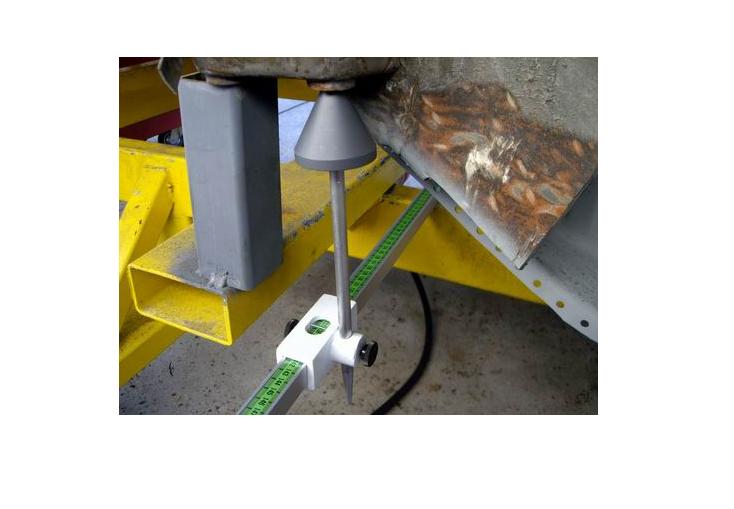
|
|
|
|
|
1 User(s) are reading this topic (1 Guests and 0 Anonymous Users)
0 Members:

|
Lo-Fi Version | Time is now: 16th June 2026 - 09:20 AM |
Invision Power Board
v9.1.4 © 2026 IPS, Inc.