|
|
|
Porsche, and the Porsche crest are registered trademarks of Dr. Ing. h.c. F. Porsche AG.
This site is not affiliated with Porsche in any way. Its only purpose is to provide an online forum for car enthusiasts. All other trademarks are property of their respective owners. |
|
|

  |

| Jeff Hail |
 Jan 20 2011, 02:24 AM Jan 20 2011, 02:24 AM
Post
#521
|
|
Senior Member  Group: Members Posts: 1,141 Joined: 3-May 07 From: LA/ CA Member No.: 7,712 |
Chris,
My friend really admired your pickups. He (quote) said..." simple, structurally sound design, robust and well thought out" after looking at the old factory stamped sheetmetal pickups. Like Mikey he hates everything BUT to get a compliment like that from him is real. |
   |

 
|
| Jeff Hail |
Jan 20 2011, 02:48 AM
Post
#522
|
|
Senior Member Group: Members Posts: 1,141 Joined: 3-May 07 From: LA/ CA Member No.: 7,712 |
For us old guys who wear reader/ progressive len's. I am really a young 45 years old.
Safety glass's with magnifiers. I swiped these from the rocket scientist in exchange for installing his exhaust. Took me thirty minutes to install the silencer that was really throaty (cool facter). I put these on and WOW. Great for welding when your eyes are old and you have to lift your welding helmet to inspect your welds. They are available in 1.0, 2.0 and 3.0 power. I felt like Eddie Murphy... "I can see, I can see". Goverment Services Pricing: $100.00 (sorry no toilet seat) Granger/ AutoBody Toolmart $10.00 "There are Some Things Money Can't Buy. For Everything Else, there's stealing your rocket scientist pal's safety glass's". PRICELESS!!! He ain't getting them back! Attached image(s) 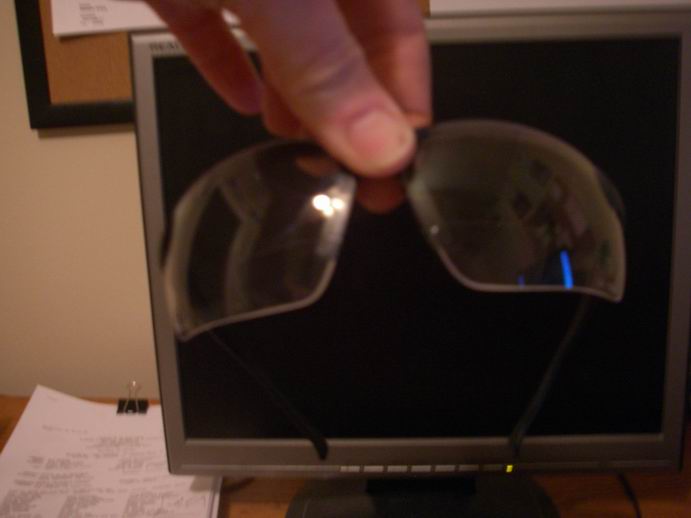
|
|
|
|
| Krank |
Jan 20 2011, 08:30 PM
Post
#523
|
|
Member Group: Members Posts: 140 Joined: 11-October 09 From: Winnipeg, MB Member No.: 10,922 Region Association: Canada |
And if you are working on something close just above your line of sight....wear them upside down. Yeah, I'm old too!
|
|
|
|
| Eric_Shea |
Jan 21 2011, 01:18 AM
Post
#524
|
|
PMB Performance Group: Admin Posts: 19,304 Joined: 3-September 03 From: Salt Lake City, UT Member No.: 1,110 Region Association: Rocky Mountains |
|
|
|
|

| Jeff Hail |
Jan 23 2011, 10:47 PM
Post
#525
|
|
Senior Member Group: Members Posts: 1,141 Joined: 3-May 07 From: LA/ CA Member No.: 7,712 |
|
|
|
|
| Jeff Hail |
Jan 23 2011, 11:04 PM
Post
#526
|
|
Senior Member Group: Members Posts: 1,141 Joined: 3-May 07 From: LA/ CA Member No.: 7,712 |
A few hours spent today installing the outer reinforcement, finish grinding and tidying up the left side. I didn't like the condition of the pinch weld just forward of the pickup soooooooo I flat bottomed the entire rail. One big piece of 16 gauge steel shaped like a "C" , plugged, seamed welded from inside to underside to outside. Look's clean and stout. I will duplicate the same on the right side.
Attached image(s) 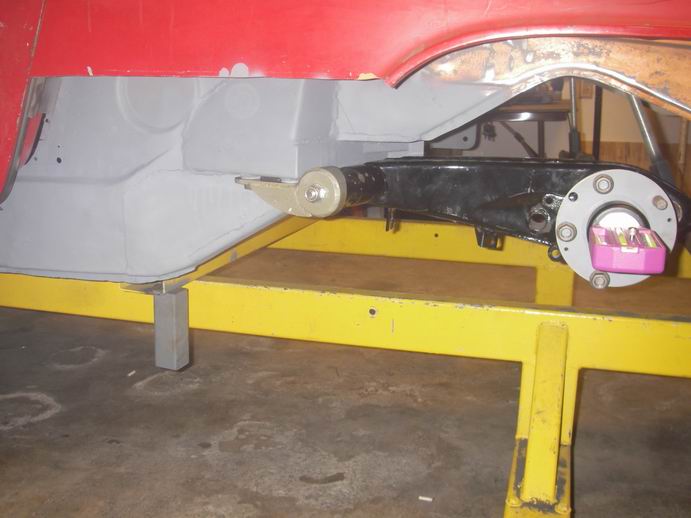 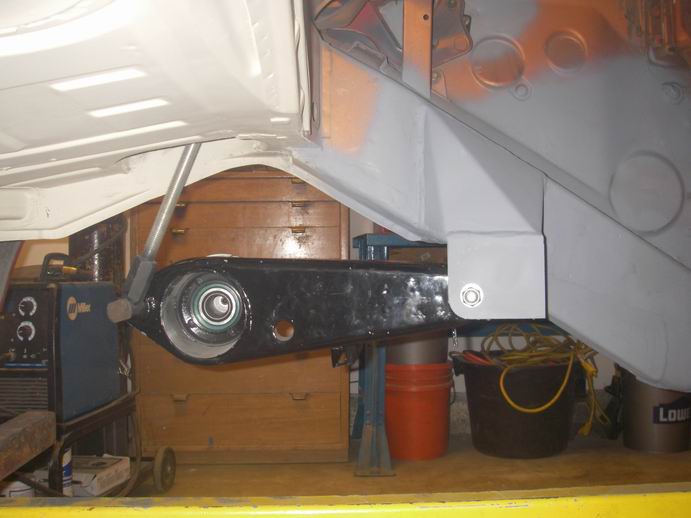 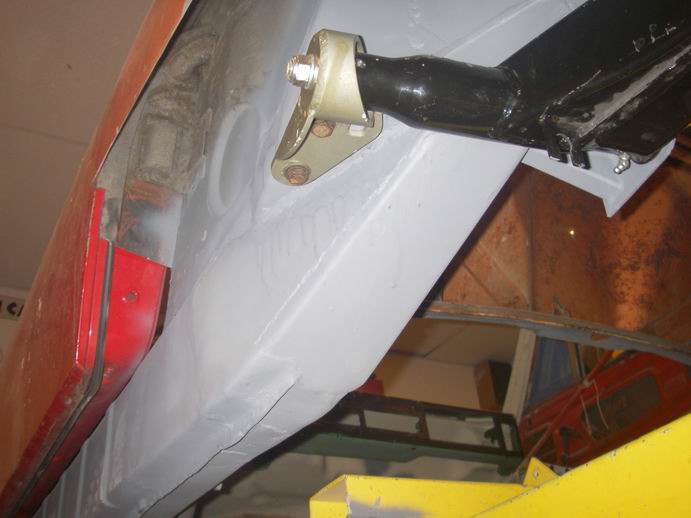 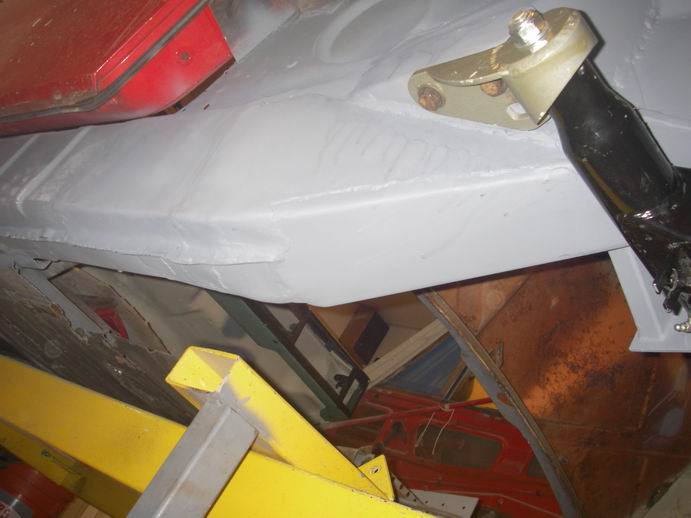
|
|
|
|
| Hontec |
Jan 24 2011, 04:05 AM
Post
#527
|
|
I see things..... Group: Members Posts: 261 Joined: 23-September 10 From: Netherlands Member No.: 12,210 Region Association: Europe |
Nice solution! pickups not only look way better than stock!
|
|
|
|
| P.Rocket |
Jan 26 2011, 03:25 AM
Post
#528
|
|
Member Group: Members Posts: 54 Joined: 17-March 08 From: Abbotsford BC Member No.: 8,822 Region Association: None |
This thread is briliant!
Very well documented. A very useful tool for what I have in store. My 15yo son and I just rolled the 73 914 into the shop last weekend, to lift it up on the hoist and have a look around to assess the extent of rust and poor previous repairs. Wow this will be one big project, for sure (IMG:style_emoticons/default/sawzall-smiley.gif) . Like I said to my son, atleast you'll know how to weld when we're done. (IMG:style_emoticons/default/welder.gif) Thanks for the quality information. (IMG:http://www.914world.com/bbs2/uploads_offsite/farm6.static.flickr.com-8822-1296033906.1.jpg) |
|
|
|
| Jeff Hail |
Feb 5 2011, 12:22 AM
Post
#529
|
|
Senior Member Group: Members Posts: 1,141 Joined: 3-May 07 From: LA/ CA Member No.: 7,712 |
While waiting for my date to arrive to go out for a bite I got bored.
Installed a backer plate behind the pillar. Then butt welded the lower lock pillar in. The bottom is loose at the sill so I can shift it as needed when the sill goes in. Didn't even get dirty! Bon Appétit (IMG:style_emoticons/default/chowtime.gif) Attached image(s) 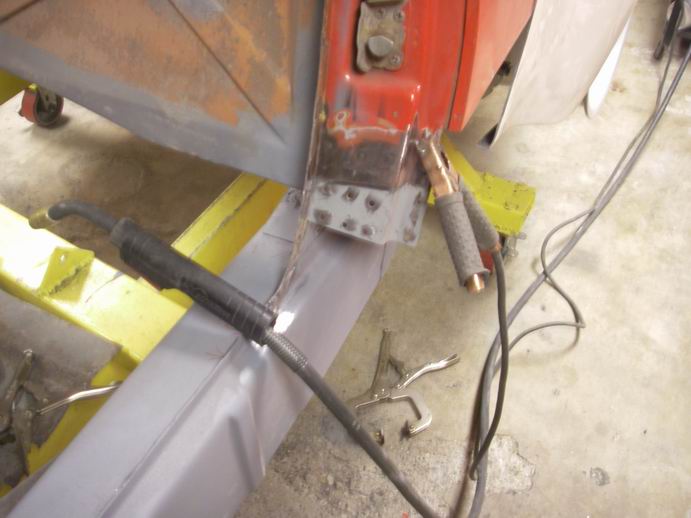 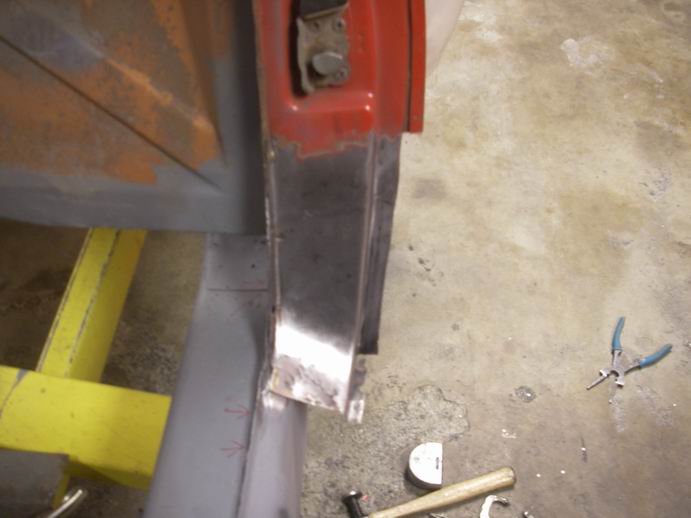
|
|
|
|
| sixnotfour |
Feb 5 2011, 11:26 AM
Post
#530
|
|
914 Wizard Group: Members Posts: 11,272 Joined: 12-September 04 Member No.: 2,744 Region Association: NineFourteenerVille |
date "oh jeff you smell great ,what cologne do you have on ?"
"Metal Man" |
 |
|
| Jeff Hail |
Feb 5 2011, 11:59 AM
Post
#531
|
|
Senior Member Group: Members Posts: 1,141 Joined: 3-May 07 From: LA/ CA Member No.: 7,712 |
QUOTE(sixnotfour @ Feb 5 2011, 09:26 AM)  date "oh jeff you smell great ,what cologne do you have on ?" "Metal Man" Hugo Boss -Dark Blue Accents my Miller 180 (IMG:style_emoticons/default/av-943.gif) |
|
|
|
| Jeff Hail |
Feb 5 2011, 11:27 PM
Post
#532
|
|
Senior Member Group: Members Posts: 1,141 Joined: 3-May 07 From: LA/ CA Member No.: 7,712 |
Repeat of a previous hat trick except in reverse. A few tiny pin holes in the butt weld to fix later. I will have to stretch the bead area via hammer form a little as it sucked in from the heat. It happens.
Bottom of the lock pillar still left loose for wiggle room when I install the sill and final fitment. Attached image(s) 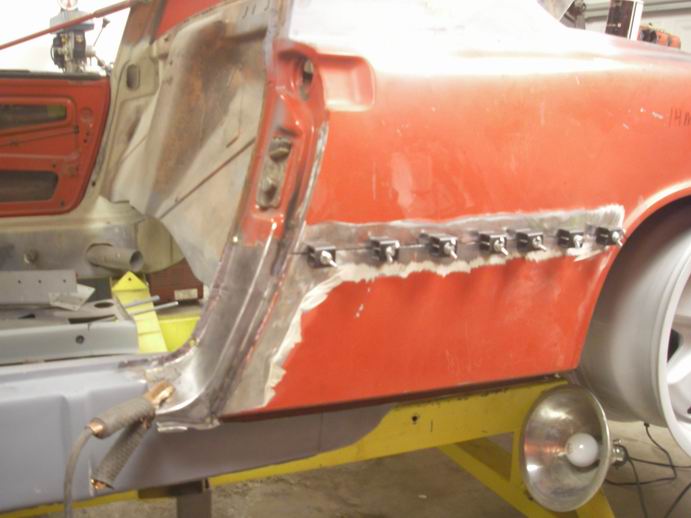 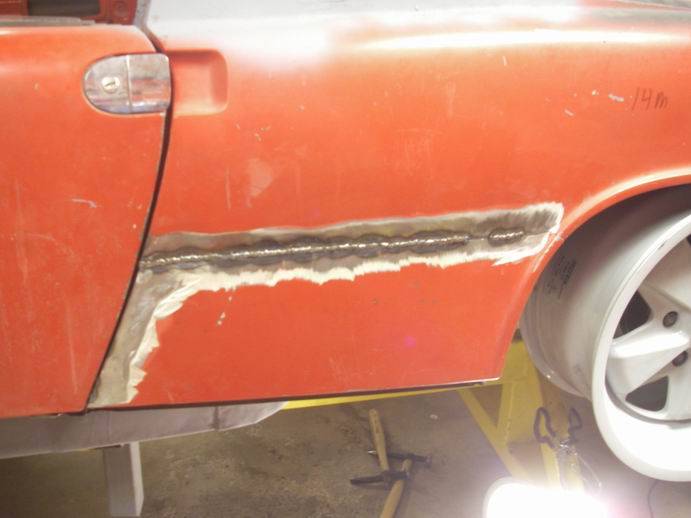 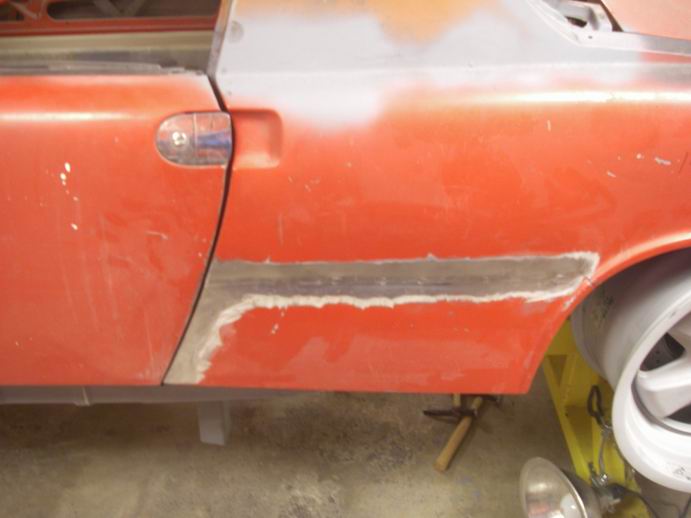 
|
|
|
|
| Eric_Shea |
Feb 6 2011, 03:25 PM
Post
#533
|
|
PMB Performance Group: Admin Posts: 19,304 Joined: 3-September 03 From: Salt Lake City, UT Member No.: 1,110 Region Association: Rocky Mountains |
|
|
|
|
| majkos |
Feb 6 2011, 10:22 PM
Post
#534
|
|
Senior Member Group: Members Posts: 1,370 Joined: 29-February 04 From: Mile High 914 Member No.: 1,729 Region Association: Rocky Mountains |
|
|
|
|
| Jeff Hail |
Feb 11 2011, 07:12 PM
Post
#535
|
|
Senior Member Group: Members Posts: 1,141 Joined: 3-May 07 From: LA/ CA Member No.: 7,712 |
Driver side sill in. Need to finish grind the plugs and pillar joint, then install the triangles.
Attached image(s) 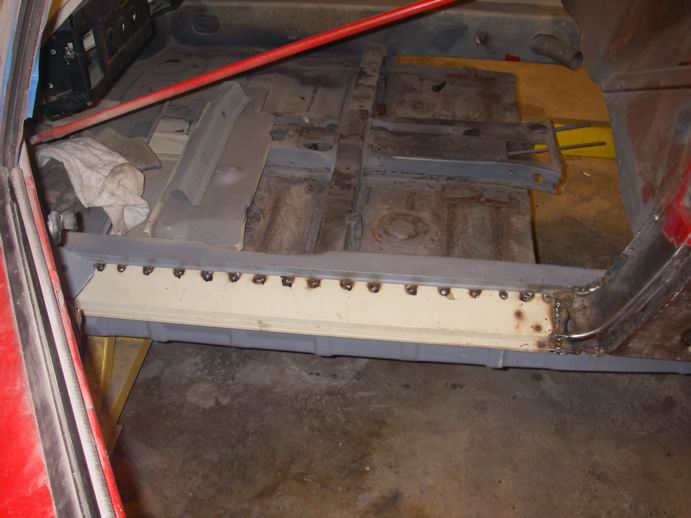
|
|
|
|
| Jeff Hail |
Feb 11 2011, 07:14 PM
Post
#536
|
|
Senior Member Group: Members Posts: 1,141 Joined: 3-May 07 From: LA/ CA Member No.: 7,712 |
Thats a floor Eric. Say ahh!
Attached image(s) 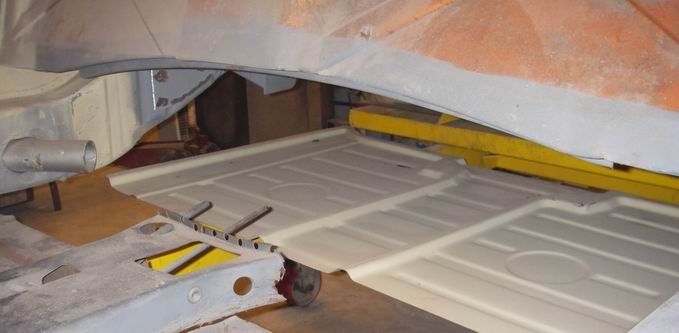
|
|
|
|
| Jeff Hail |
Feb 13 2011, 10:11 PM
Post
#537
|
|
Senior Member Group: Members Posts: 1,141 Joined: 3-May 07 From: LA/ CA Member No.: 7,712 |
Chipping away one piece at a time. Metal finishing on the sill and lock pillar done. Sill triangles installed. Deleted the dome light switch holes.
Thought I had some epoxy primer left (It's somewhere or maybe I am out) Sucks because I hate using etching primer on an area thats done and wont need to come back to until final prep for paint. Oh well it will sand off easily later. Attached image(s) 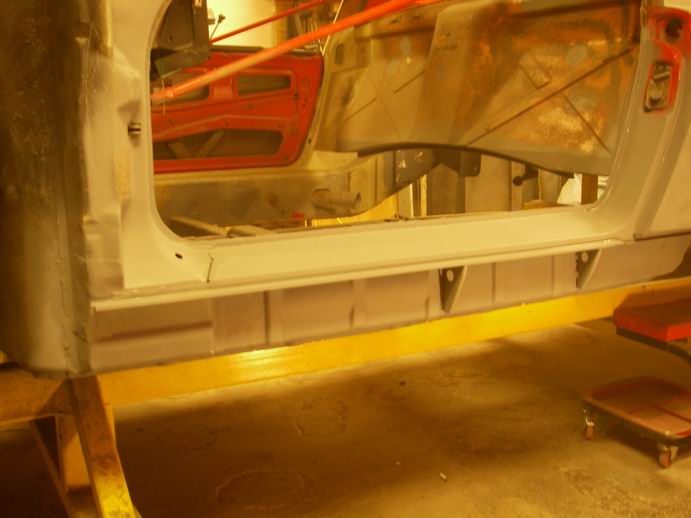 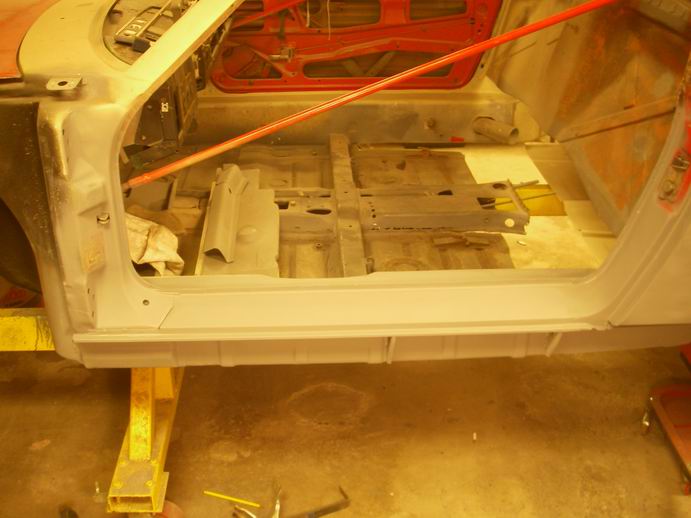 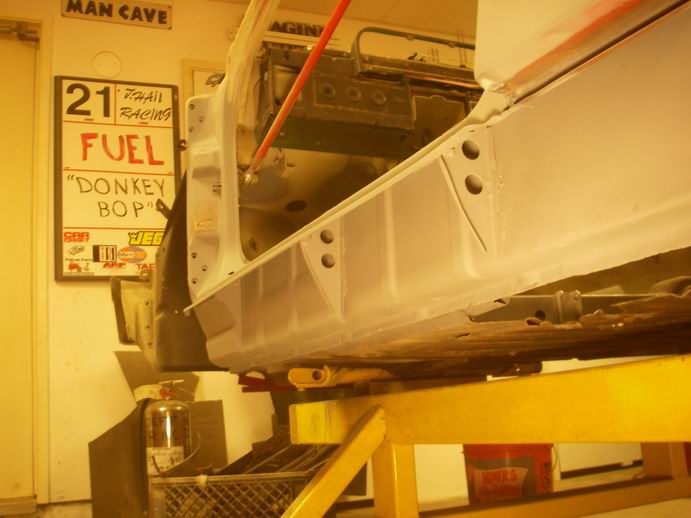
|
|
|
|
| ONTHEGRIND |
Feb 13 2011, 10:15 PM
Post
#538
|
|
Member Group: Members Posts: 286 Joined: 10-November 08 From: California Member No.: 9,738 Region Association: None |
I am doing alot of metal work myself and have etching primer that I used on my trunk what are the benefits of using the epoxy ?
|
|
|
|
| Jeff Hail |
Feb 13 2011, 10:19 PM
Post
#539
|
|
Senior Member Group: Members Posts: 1,141 Joined: 3-May 07 From: LA/ CA Member No.: 7,712 |
My good friend Victor Van Tress (1987 SCCA Nationals SSB champion winning 505 Turbo) snapped this photo a while back.
Awesome tow vehicle. Priceless pic. Makes you smile because you wonder what else does the owner have in his garage? Attached thumbnail(s) 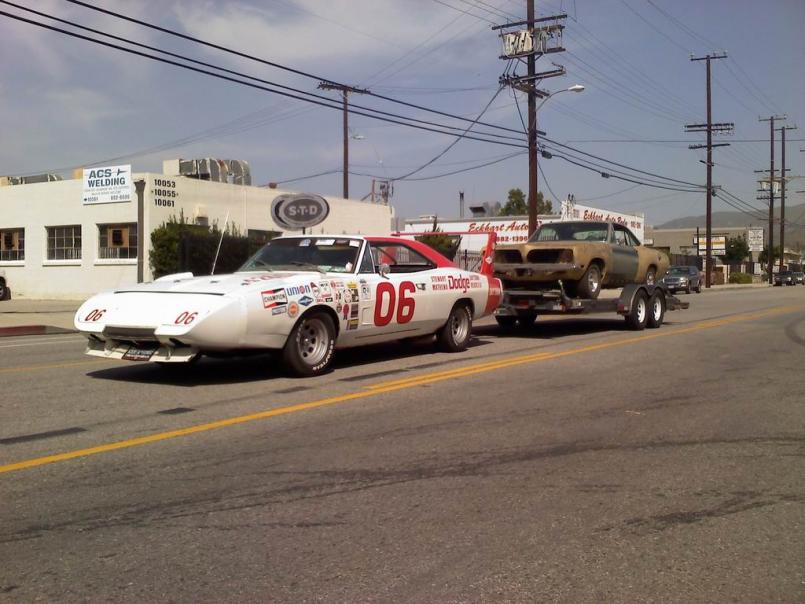
|
|
|
|
| Jeff Hail |
Feb 13 2011, 11:22 PM
Post
#540
|
|
Senior Member Group: Members Posts: 1,141 Joined: 3-May 07 From: LA/ CA Member No.: 7,712 |
QUOTE(ONTHEGRIND @ Feb 13 2011, 08:15 PM) I am doing alot of metal work myself and have etching primer that I used on my trunk what are the benefits of using the epoxy ? Etching primer is good for bare metal. Its comprised of acid, zinc and binders. SEP will fend of surface rusting but it does not seal metal as epoxy does. Being my project sits sometimes I would rather not worry whats going on under the surface over time so I use epoxy primer. Personally I think epoxy has a better bite also. Refinishing products are meant to be applied with time limits.. and not long intervals between application of say primer's and basecoats. In my experience etching primers and 2K primers are not and do not hold up unless colorcoat/ clear applications are done in short order as moisture can penetrate if let to sit. SEP and 2K primers have good adhesion properties if top coats are applied very soon. Additionally if filler is being applied they can be done under or on top of epoxy primer. (this one is always open to debate). I personally would never apply filler over or under etching primer... as acid can get into and soften filler. For me I prefer metal conditioning as a separate process. Bottom line every paint manufacturer has a system with products and the order to be used in. |
|
|
|
|
2 User(s) are reading this topic (2 Guests and 0 Anonymous Users)
0 Members:

|
Lo-Fi Version | Time is now: 16th June 2026 - 09:20 AM |
Invision Power Board
v9.1.4 © 2026 IPS, Inc.