|
|
|
Porsche, and the Porsche crest are registered trademarks of Dr. Ing. h.c. F. Porsche AG.
This site is not affiliated with Porsche in any way. Its only purpose is to provide an online forum for car enthusiasts. All other trademarks are property of their respective owners. |
|
|

  |

| jonferns |
 Feb 23 2012, 07:41 PM Feb 23 2012, 07:41 PM
Post
#101
|
|
Advanced Member  Group: Members Posts: 2,081 Joined: 29-March 07 From: New Jersey Member No.: 7,631 Region Association: North East States |
You're really making some progress! Can't wait to see the firewall finished! Awesome job so far (IMG:style_emoticons/default/smilie_pokal.gif)
|
   |

 
|
| Bob L. |
Feb 23 2012, 09:13 PM
Post
#102
|
|
Senior Member Group: Members Posts: 851 Joined: 7-August 11 From: Austin TX Member No.: 13,411 Region Association: Southwest Region |
(IMG:style_emoticons/default/popcorn[1].gif)
Me too. ...Riveting! I'll be referring to this when I do mine. |
|
|
|
| ThePaintedMan |
Feb 24 2012, 06:27 AM
Post
#103
|
|
Advanced Member Group: Members Posts: 3,887 Joined: 6-September 11 From: St. Petersburg, FL Member No.: 13,527 Region Association: South East States |
Thanks fellas. Again, the only thing I can stress if you're going to refer to this one is to buy as much of the hard to form stuff as possible. You won't save all that much money forming them yourself and you will be much more likely to get everything to line up the way its 'sposed to in the end. However, there are some parts that can't be bought. Don't quote me on this, but I don't think Restoration Design has the inner side of the longitudinals, either the inner skin or the outer skin. If your car is as bad off as mine (which most people in their right minds never would have bothered with in the first place!) then you would have to resort to doing things this way. In this case, I guess I'm glad I bought pieces cut out of other cars (thanks Bruce and Mark) because it helped me see what I needed to do and what was missing in the first place.
Another point to mention I suppose. Even as far gone as this car was, its surprising how well it drove when I last took it around the street. Granted, I don't think it should have been on the road because it was a ticking time bomb. But, I think it says something about the engineering that went into it. Even with the suspension console and motor mount just about rusted through, there was enough metal where it counted to keep it together. Can't wait to see what its like now! |
|
|
|
| ThePaintedMan |
Mar 28 2012, 09:36 PM
Post
#104
|
|
Advanced Member Group: Members Posts: 3,887 Joined: 6-September 11 From: St. Petersburg, FL Member No.: 13,527 Region Association: South East States |
This is probably going to piss a bunch of you off, since I have not updated in some while, but guess what? IT RUNS! I busted ass over my Spring Break, desperately trying to get the car ready to make it to Sebring. Unfortunately that was not to be. However, when I got back all it took was a little tweaking here and there to get it to run. The following posts will be a little recap of what I've done since I last posted.
The last post I made was showing the work on the firewall. This is a pic of it nearly finished. I primed it prematurely as there were still plenty of pinholes to finish welding up. Eventually I just gave up and used a little filler, lol. Attached thumbnail(s) 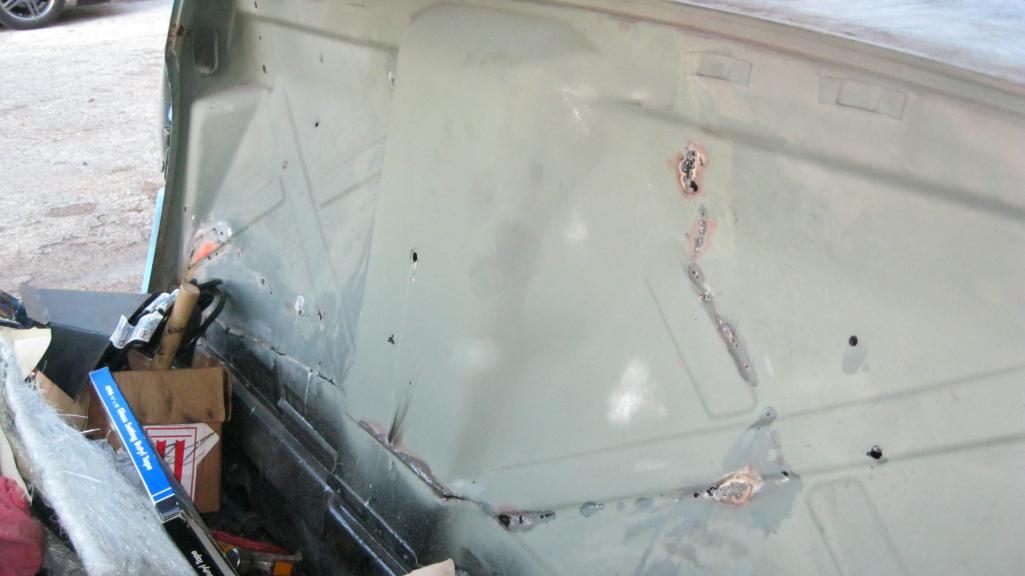
|
|
|
|
| ThePaintedMan |
Mar 28 2012, 09:46 PM
Post
#105
|
|
Advanced Member Group: Members Posts: 3,887 Joined: 6-September 11 From: St. Petersburg, FL Member No.: 13,527 Region Association: South East States |
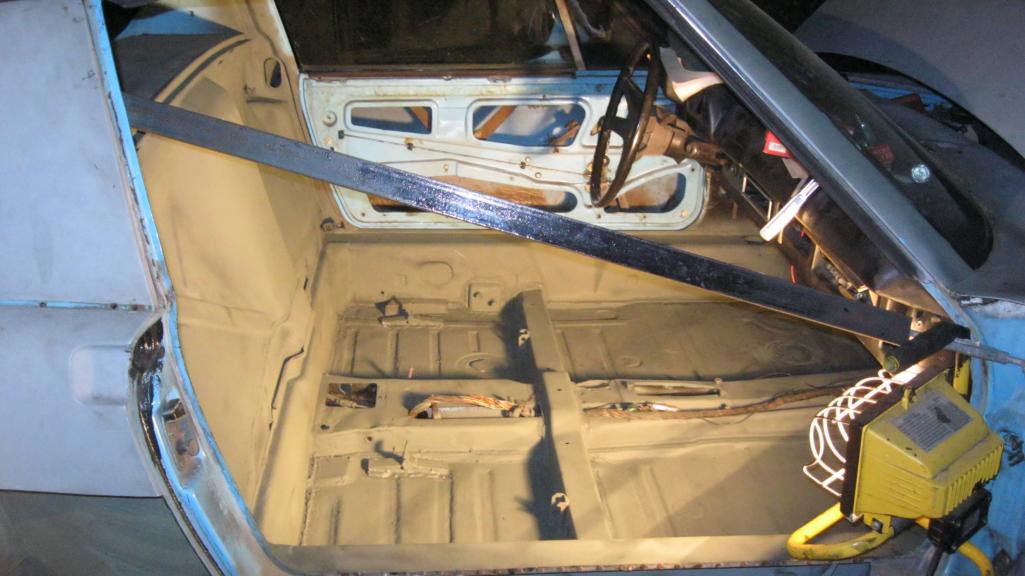
Doh! Since I guess I still haven't reached enough posts to be able to post pictures back to back, you guys will have to refer to my previous posts to see how back the pedal area was. This picture is the area welded up and POR'd. This actually was one of the easier pieces to fabricate! Cut it out, and basically just hammered with a ball peen and a piece of wood with a valley in it till I got the shape right. Don't skimp in this area - use good heavy gauge steel. One, to give some wiggle room in case it rusts in the future (doubtful). But also because there is PLENTY of flex in the floor in this area when under threshold braking. Even though I thought I did a pretty good job here, when we were bleeding the brakes I could see quite a bit of deflection. I'm planning on putting in something similar to Chris' Tangerine Racing MC brace to help cure this.
Attached thumbnail(s) 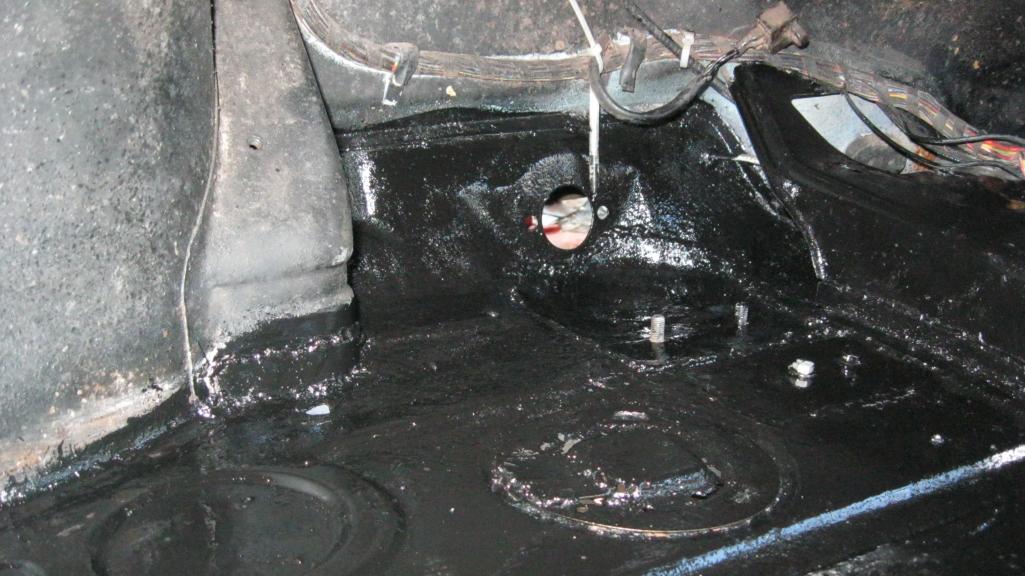
|
|
|
|
| ThePaintedMan |
Mar 28 2012, 09:49 PM
Post
#106
|
|
Advanced Member Group: Members Posts: 3,887 Joined: 6-September 11 From: St. Petersburg, FL Member No.: 13,527 Region Association: South East States |
Floorboards with POR. BTW - as if using POR could be anymore of a pain in the ass, doing it outside sucks. There is nearly no way to keep stuff from getting stuck in it. But then again, I'm not going for perfection.
Attached thumbnail(s) 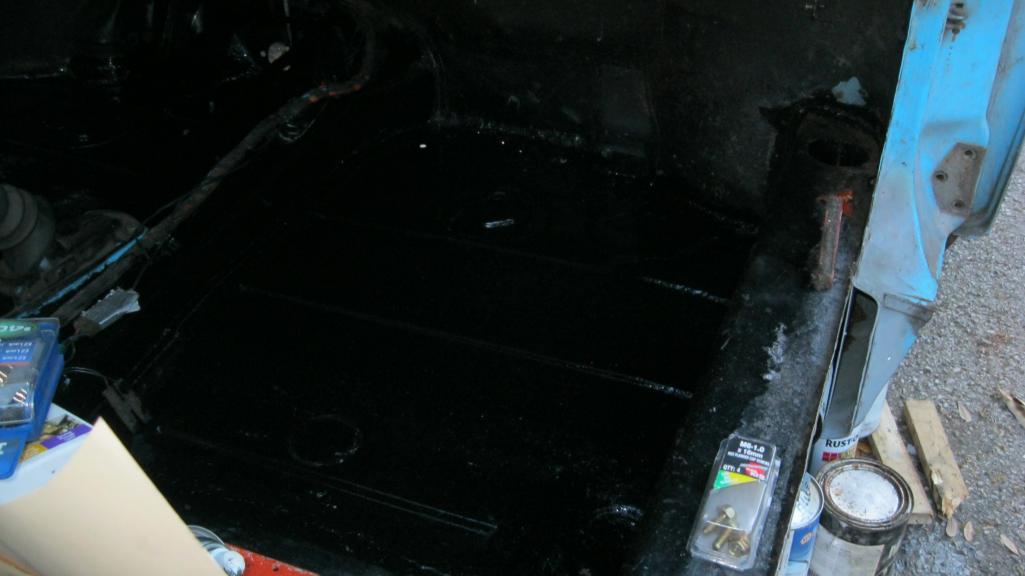
|
|
|
|
| ThePaintedMan |
Mar 28 2012, 09:53 PM
Post
#107
|
|
Advanced Member Group: Members Posts: 3,887 Joined: 6-September 11 From: St. Petersburg, FL Member No.: 13,527 Region Association: South East States |
Seat brackets and the sliders installed. I actually bolted the brackets to the sliders first to help me locate where they needed to be welded.
Attached thumbnail(s)  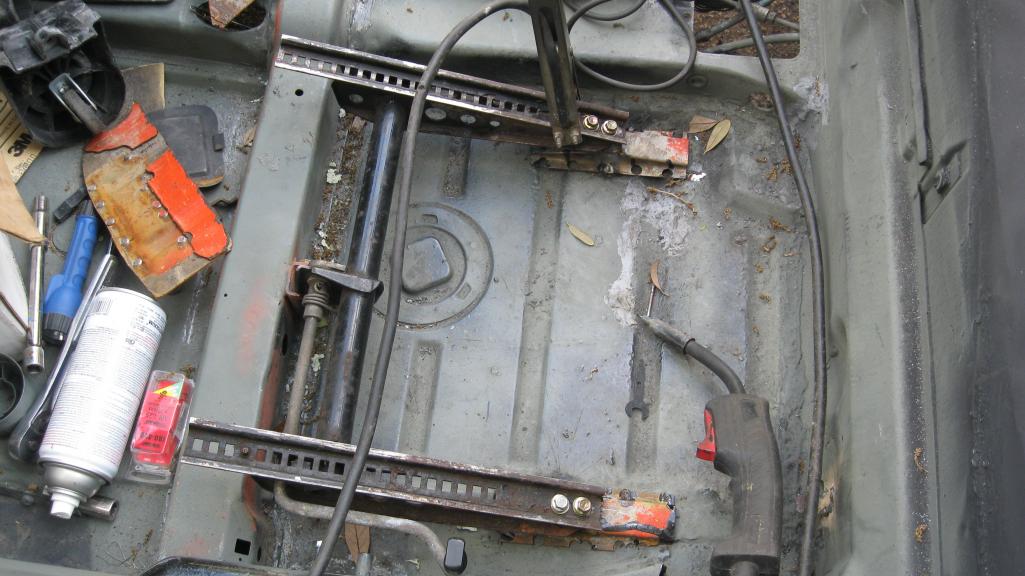
|
|
|
|
| ThePaintedMan |
Mar 28 2012, 09:54 PM
Post
#108
|
|
Advanced Member Group: Members Posts: 3,887 Joined: 6-September 11 From: St. Petersburg, FL Member No.: 13,527 Region Association: South East States |
Seats!
Attached thumbnail(s) 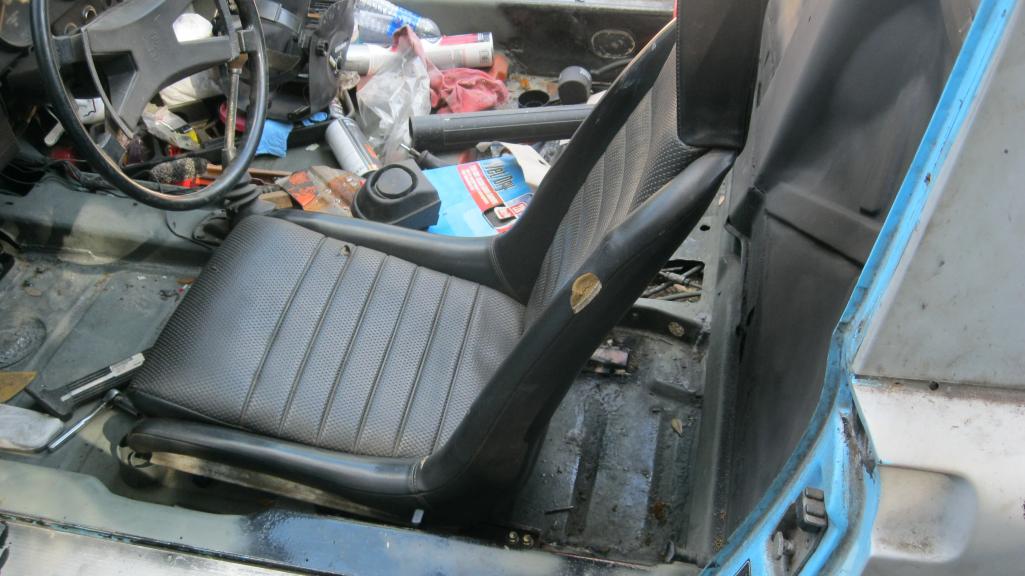
|
|
|
|
| ThePaintedMan |
Mar 28 2012, 10:02 PM
Post
#109
|
|
Advanced Member Group: Members Posts: 3,887 Joined: 6-September 11 From: St. Petersburg, FL Member No.: 13,527 Region Association: South East States |
Once I was satisfied I had everything pretty well in place, I made the repairs to the outer portion of the long and welded it up. It had a few holes in it initially, but I'm pretty happy with the end result. I still have no idea why I get the flash rust after treating with Metal Prep/Ready.
 Also, I swear I thought I was going nuts. I had a dream that I welded that sucker back together and forgot to put the heater tube back inside, lol. Since I won't be hooking the heat up for awhile, I'm just praying that I got it right (trust me, I would be the person to have found a way to install it wrong). Attached thumbnail(s) 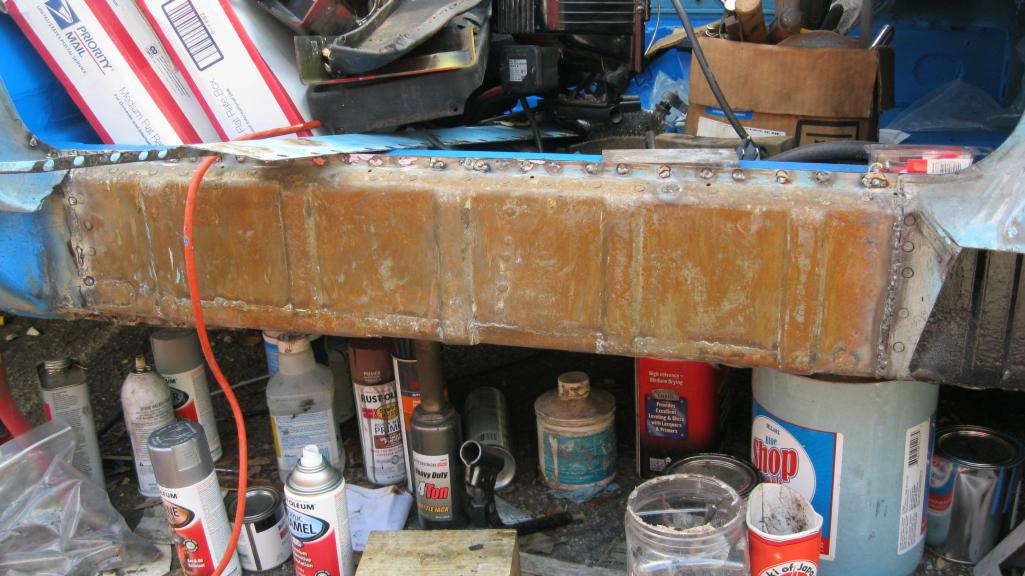
|
|
|
|
| ThePaintedMan |
Mar 28 2012, 10:08 PM
Post
#110
|
|
Advanced Member Group: Members Posts: 3,887 Joined: 6-September 11 From: St. Petersburg, FL Member No.: 13,527 Region Association: South East States |
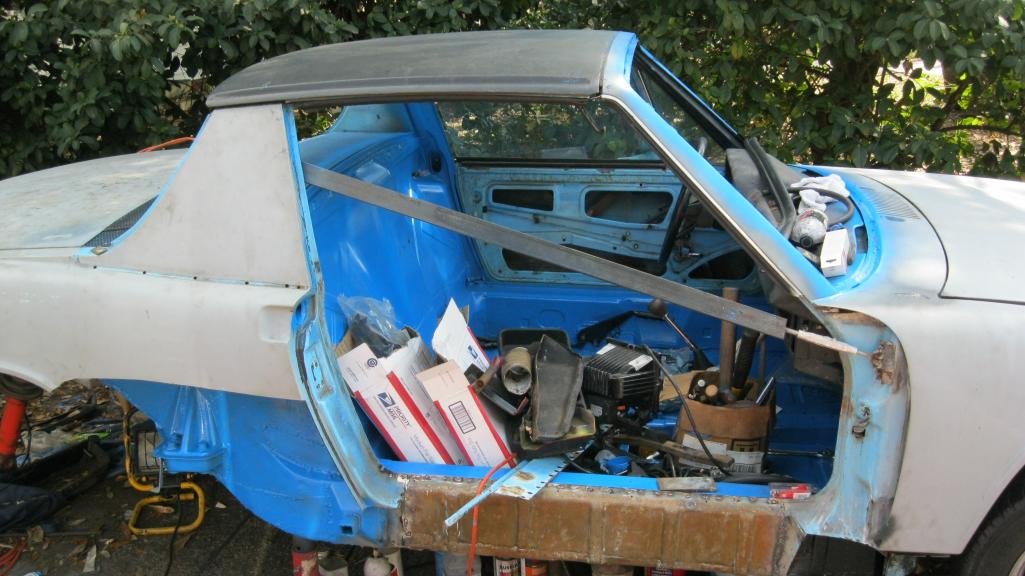
Final priming and prep the night before painting.
 And...... PAINT! No, its not a factory Porsche color, I know. Again, in my defense there is nothing original left about this car and its a 1.7 anyway. However, I'm curious if anyone can guess the color? Hint: its domestic. Some might hate it or wonder why I chose this color, but it'll make sense later. I only did the interior and windshield areas for now using a Preval Sprayer just to get it back together. I'll go back to some of these areas later when I spray the whole car. 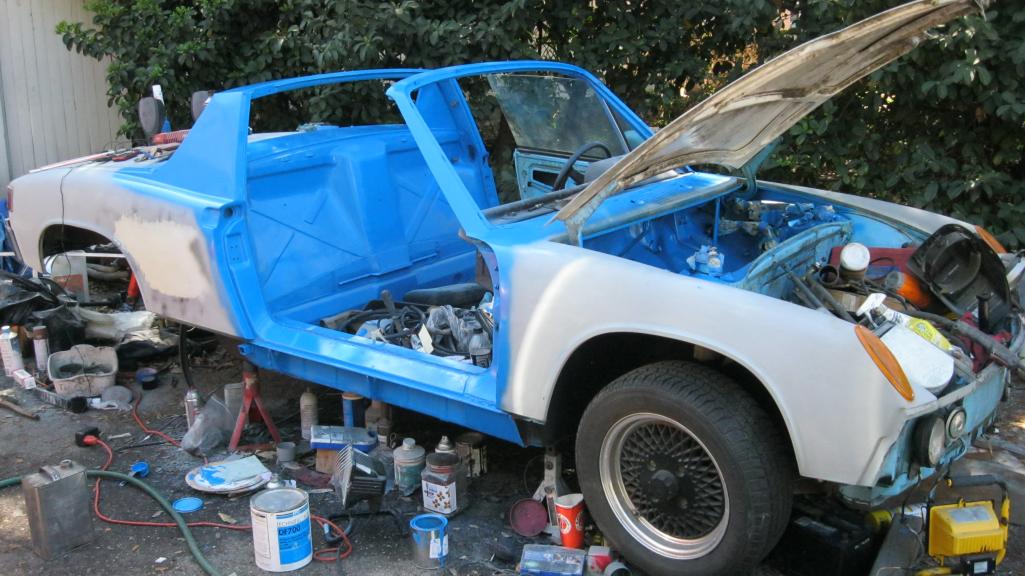 |
|
|
|
| ThePaintedMan |
Mar 28 2012, 10:11 PM
Post
#111
|
|
Advanced Member Group: Members Posts: 3,887 Joined: 6-September 11 From: St. Petersburg, FL Member No.: 13,527 Region Association: South East States |
Engine bay and the breather bottle
Attached thumbnail(s) 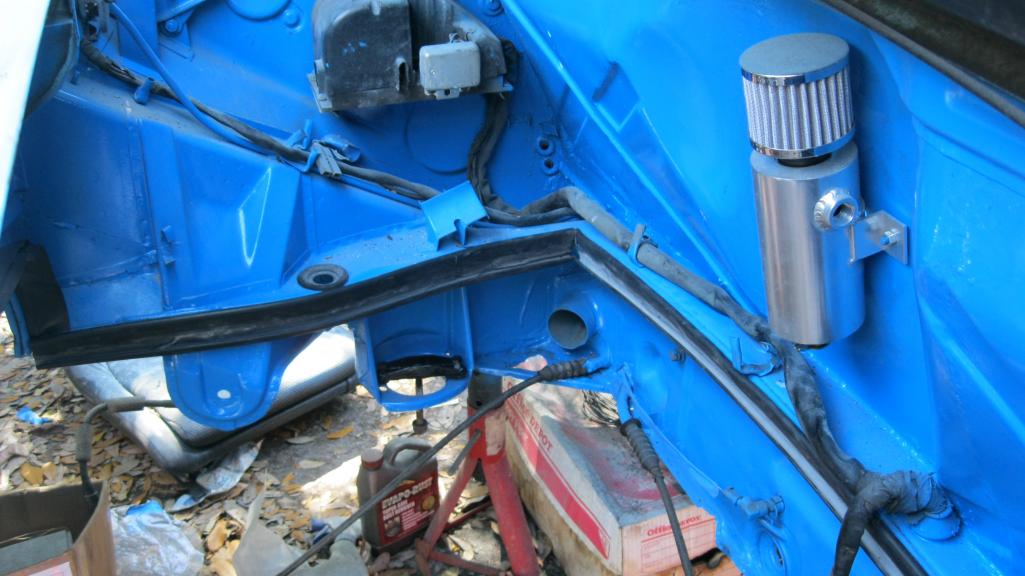
|
|
|
|
| ThePaintedMan |
Mar 28 2012, 10:13 PM
Post
#112
|
|
Advanced Member Group: Members Posts: 3,887 Joined: 6-September 11 From: St. Petersburg, FL Member No.: 13,527 Region Association: South East States |
My buddy and I pulled several long nights trying to get the car to Sebring, as I mentioned previously. We ran into some issues, as expected. Most of it was due to fitting the dual carbs and wishful thinking that the bits of linkage I had would all match up, since the car had a progressive on it originally. Again, wishful thinking.
Attached thumbnail(s) 
|
|
|
|
| ThePaintedMan |
Mar 28 2012, 10:20 PM
Post
#113
|
|
Advanced Member Group: Members Posts: 3,887 Joined: 6-September 11 From: St. Petersburg, FL Member No.: 13,527 Region Association: South East States |
Here is something else we noticed. I ordered new intake gaskets from Pelican, which had three holes. Unfortunately this car has four studs? Did I miss something here? Ended up re-using the old ones.
Attached thumbnail(s) 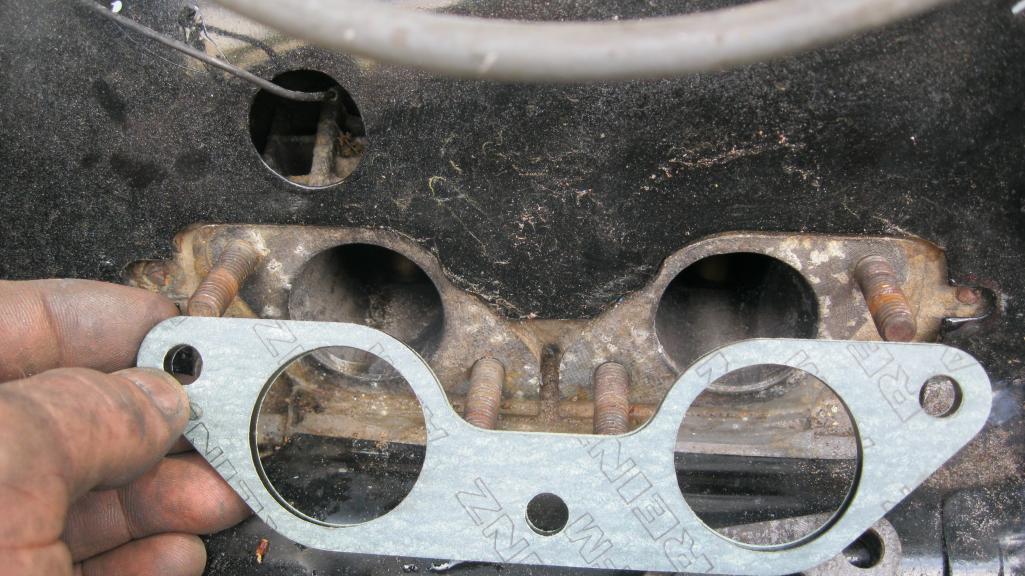
|
|
|
|
| ThePaintedMan |
Mar 28 2012, 10:28 PM
Post
#114
|
|
Advanced Member Group: Members Posts: 3,887 Joined: 6-September 11 From: St. Petersburg, FL Member No.: 13,527 Region Association: South East States |
So here she is on all fours, just the way I like (IMG:style_emoticons/default/biggrin.gif) I do have an issue with the door gap, but not to fear. I think. This door is in dire need of new hinge pins so I can't get it aligned right currently. Even though its really close at the top near the door handle, there is a significant gap at the upper front part part of the door. This tells me that once I get new hinge pins we should be able to correct this.
On that note - does anyone have a set of decent used pins? Or at least know where to get new ones? Also, as we really rushed to get the car back together I didn't do a good job taking pictures. I did weld the lower rear quarter panel back on with minimal flex in the metal. This was accomplished with low heat, really taking my time spacing the spot welds out and using a damp cloth to cool after each weld. I never expected it to be flush and nowhere near the quality of the work of people like Scotty B. However, I ended up with a very thin coat of Evercoat over the top, which I can live with. One day I'd like to learn how to do this without any filler at all. Attached thumbnail(s) 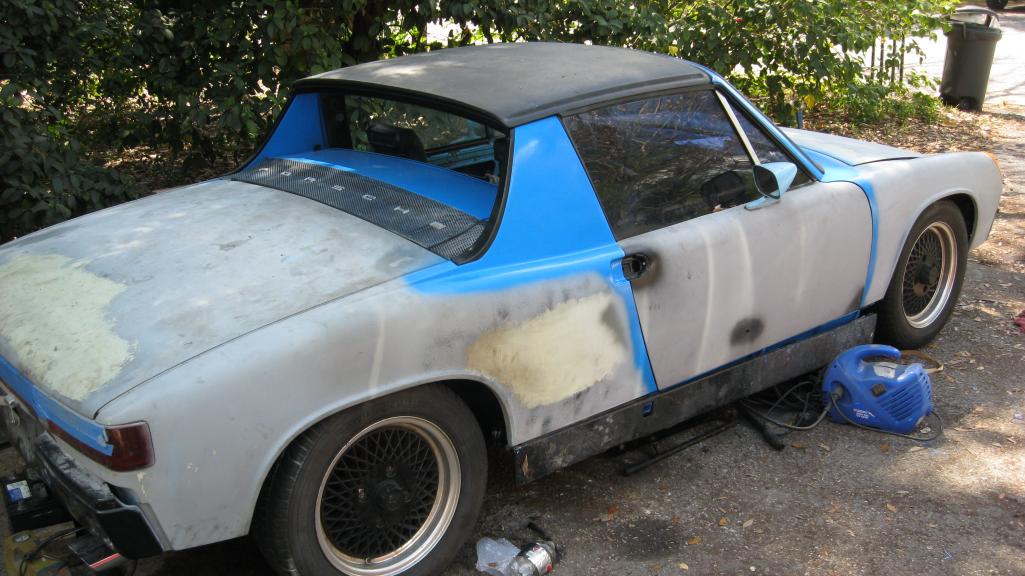
|
|
|
|
| ThePaintedMan |
Mar 28 2012, 10:35 PM
Post
#115
|
|
Advanced Member Group: Members Posts: 3,887 Joined: 6-September 11 From: St. Petersburg, FL Member No.: 13,527 Region Association: South East States |
And to finish for now, the last picture I have currently is one of my very rednecked linkage setup. For what its worth, the way I have it has allowed me to drive the car to and from campus every day this week! I even took the plunge and drove it over the bridge to Tampa (about 30 miles away) and the car ran great. The carbs are about as synched as I could imagine they could be. However, there is a spot at about 1/3rd throttle where they get out of synch. The good news is they're synched again at full throttle! (IMG:style_emoticons/default/smile.gif) This makes for some interesting looks and some very spirited driving, lol. I've ordered a new linkage kit which I hope to receive any day now.
Once I got the motor in, I also went ahead and adjusted all the valves, replaced all pushrod tube seals, valve cover gaskets, etc. This motor is, from what I can tell, original in every way and doesn't leak a DROP of oil. What a freakin blast! Another quick note. I'm learning all kinds of things from this. I rebuilt both carbs prior to installing them with the Redline kit. However, I guess I didn't clean them out adequately. I started the car and got it running, but for the life of me couldn't synch them. I drove it around the block a few times, assuming it was the linkage. After driving it hard I brought it back into the driveway and realized I had one exhaust pipe that was darn near cool to the touch. Turns out I had one mixture screw that didn't seem to do anything at all. I then came off the 30 bucks and bought a gallon of B-12 Chemtool. I disassembled the carb once again and dipped it for a couple hours. Slapped it back on and immediately the car ran better. I can only assume there was some dried gas within the idle circuit of the carb, but the B-12 seems like it got it. I would recommend that anyone rebuilding old carbs go ahead and buy a can of it. Its well worth the investment and you can use it again and again. Attached thumbnail(s) 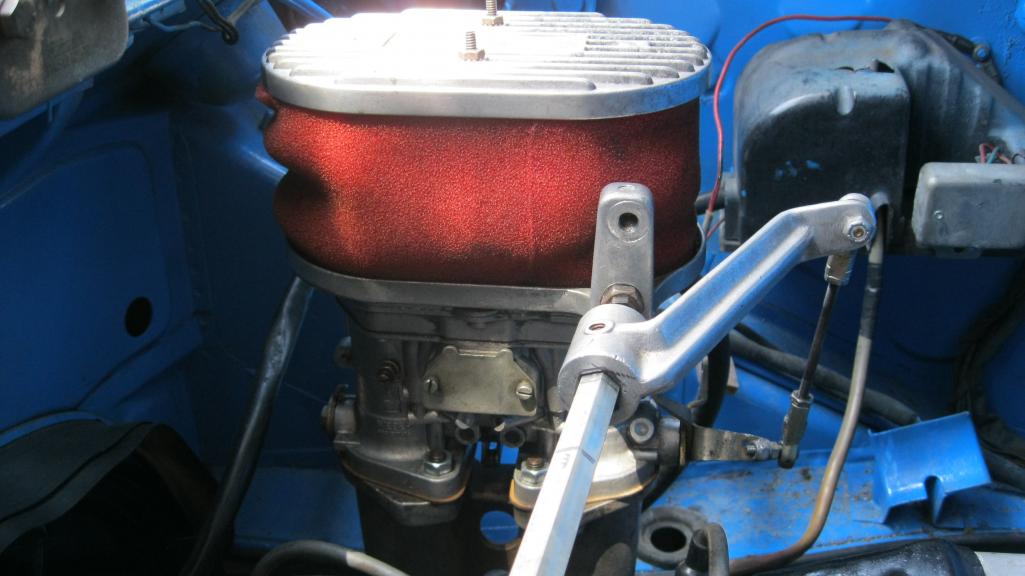
|
|
|
|
| carr914 |
Mar 29 2012, 05:52 AM
Post
#116
|
|
Racer from Birth Group: Members Posts: 131,949 Joined: 2-February 04 From: Tampa,FL Member No.: 1,623 Region Association: South East States |
As far as posting more pictures, try resizing them down to about 900x600, then you will be able to Post more.
The Intake Gaskets look like you got the ones for a different size motor. You're doing such a good job, you want to come over & put an engine in with me? |
|
|
|
| rwilner |
Mar 29 2012, 06:12 AM
Post
#117
|
|
No Ghosts in the Machine Group: Members Posts: 953 Joined: 30-March 10 From: Boston, MA Member No.: 11,530 Region Association: North East States |
go George! (IMG:style_emoticons/default/smilie_pokal.gif)
|
|
|
|
| ThePaintedMan |
Mar 29 2012, 08:50 AM
Post
#118
|
|
Advanced Member Group: Members Posts: 3,887 Joined: 6-September 11 From: St. Petersburg, FL Member No.: 13,527 Region Association: South East States |
Thanks fellas! T.C., sure thing bud. You name the day!
|
|
|
|
| carr914 |
Mar 29 2012, 02:32 PM
Post
#119
|
|
Racer from Birth Group: Members Posts: 131,949 Joined: 2-February 04 From: Tampa,FL Member No.: 1,623 Region Association: South East States |
QUOTE(ThePaintedMan @ Mar 29 2012, 12:08 AM)  And...... PAINT! No, its not a factory Porsche color, I know. However, I'm curious if anyone can guess the color? Hint: its domestic. Looks like the Blue on New Mustangs ( and since you DD a Mustang) so that's my guess QUOTE(ThePaintedMan @ Mar 29 2012, 10:50 AM) Thanks fellas! T.C., sure thing bud. You name the day! I'm getting a Motor delivered tonight |
|
|
|
| ThePaintedMan |
Mar 29 2012, 04:37 PM
Post
#120
|
|
Advanced Member Group: Members Posts: 3,887 Joined: 6-September 11 From: St. Petersburg, FL Member No.: 13,527 Region Association: South East States |
QUOTE(carr914 @ Mar 29 2012, 04:32 PM) Looks like the Blue on New Mustangs ( and since you DD a Mustang) so that's my guess Yep, Grabber Blue. Again, not original and some would say stupid, but I'm hoping the eventual result will be fun. Will explain later. You're getting a motor tonight? I'll assume this isn't for the GT, since that one has a great motor sitting there ready to go. I'll be out of town till Sunday afternoon, but could come over after that. PM me and I'll send you my number again if you don't have it. |
|
|
|
|
2 User(s) are reading this topic (2 Guests and 0 Anonymous Users)
0 Members:

|
Lo-Fi Version | Time is now: 31st March 2026 - 07:23 PM |
Invision Power Board
v9.1.4 © 2026 IPS, Inc.