|
|
|
Porsche, and the Porsche crest are registered trademarks of Dr. Ing. h.c. F. Porsche AG.
This site is not affiliated with Porsche in any way. Its only purpose is to provide an online forum for car enthusiasts. All other trademarks are property of their respective owners. |
|
|

  |

| al weidman |
 Jan 26 2012, 09:44 PM Jan 26 2012, 09:44 PM
Post
#81
|
|
Al Weidman  Group: Members Posts: 156 Joined: 22-February 08 From: Oroville, Ca. Member No.: 8,736 Region Association: Northern California |
George, you are doing great and you will have a good portion of self satisfaction. I do some things just to see if I can. (IMG:style_emoticons/default/sawzall-smiley.gif) (IMG:style_emoticons/default/welder.gif) (IMG:style_emoticons/default/beer.gif)
|
   |

 
|
| shuie |
Jan 26 2012, 10:09 PM
Post
#82
|
|
Member Group: Members Posts: 352 Joined: 17-May 04 From: baton rouge, la Member No.: 2,075 |
With the POR cans...
I usually just buy the little cans and cover one small area at a time, but you can drill a hole in the lid and then use a cork from the hardware store to re-seal them if you don't want to use the entire can at once. They don't get exposed to too much air and will keep for a little while like this. |
|
|
|
| ThePaintedMan |
Jan 26 2012, 10:35 PM
Post
#83
|
|
Advanced Member Group: Members Posts: 3,887 Joined: 6-September 11 From: St. Petersburg, FL Member No.: 13,527 Region Association: South East States |
QUOTE(al weidman @ Jan 26 2012, 10:44 PM)  George, you are doing great and you will have a good portion of self satisfaction. I do some things just to see if I can. (IMG:style_emoticons/default/sawzall-smiley.gif) (IMG:style_emoticons/default/welder.gif) (IMG:style_emoticons/default/beer.gif) Thought I hadn't quite said it that way, this is exactly what goes through my mind, lol. Much to my girlfriend's chagrin, however. Thanks for the kind words! |
|
|
|
| ThePaintedMan |
Jan 26 2012, 10:37 PM
Post
#84
|
|
Advanced Member Group: Members Posts: 3,887 Joined: 6-September 11 From: St. Petersburg, FL Member No.: 13,527 Region Association: South East States |
QUOTE(shuie @ Jan 26 2012, 11:09 PM) With the POR cans... I usually just buy the little cans and cover one small area at a time, but you can drill a hole in the lid and then use a cork from the hardware store to re-seal them if you don't want to use the entire can at once. They don't get exposed to too much air and will keep for a little while like this. Shuie, I had heard/seen that as well. May try that if I find myself getting to a stopping point with an open can. However, so far I've done a pretty good job of predicting what I would need before I started. Also, have heard that keeping them in the fridge helps once opened. Of course, I don't have kids, so I would be EXTREMELY careful if I did! |
|
|
|
| OU8AVW |
Jan 27 2012, 10:06 AM
Post
#85
|
|
Yacht Rigger Group: Members Posts: 1,804 Joined: 1-October 08 From: Granbury, TX Member No.: 9,601 Region Association: Southwest Region |
QUOTE(ThePaintedMan @ Jan 26 2012, 08:37 PM) QUOTE(shuie @ Jan 26 2012, 11:09 PM) With the POR cans... I usually just buy the little cans and cover one small area at a time, but you can drill a hole in the lid and then use a cork from the hardware store to re-seal them if you don't want to use the entire can at once. They don't get exposed to too much air and will keep for a little while like this. Shuie, I had heard/seen that as well. May try that if I find myself getting to a stopping point with an open can. However, so far I've done a pretty good job of predicting what I would need before I started. Also, have heard that keeping them in the fridge helps once opened. Of course, I don't have kids, so I would be EXTREMELY careful if I did! Open the can then put saran wrap over allowing the wrap to contact the paint. Then put the lid back on. The wrap contacting the paint keeps all the air out. Then you can wad up the saran wrap when you're done, put it in a paper sack and have a good ole' huffin' time.... (IMG:style_emoticons/default/piratenanner.gif)  |
|
|
|
| mepstein |
Jan 27 2012, 10:17 AM
Post
#86
|
|
914-6 GT in waiting Group: Members Posts: 20,580 Joined: 19-September 09 From: Landenberg, PA/Wilmington, DE Member No.: 10,825 Region Association: MidAtlantic Region |
QUOTE(ThePaintedMan @ Jan 24 2012, 05:40 PM) Also, one of these posts I'm going to list some of the "do's" and "I wouldn't if I were you's" that I've learned. I've been keeping a running tally on what I've been spending and in some areas what I initially thought would be saving money probably has cost me some. The floorboards come to mind. While I'm happy with the way they've turned out, I do think that some parts should just be purchased instead of being fabricated. For example, I've bought well over $150 in Dremel and angle grinder discs which I had not accounted for at the beginning. If you buy pre-made parts you're not going to spend as much time or money cutting and grinding. It certainly equals out if not completely outweighing the money saved by making hard to replicate pieces on your own. Plus, no matter how much better I've gotten at fabricating, the replacement pieces are always going to look better. Like I said, this is a learning process (IMG:style_emoticons/default/smile.gif) Exactly what Scotty B told me at the start of my project. Buy everything you can and it will still need work but at least you're 90% of the way there. |
 |
|
| rwilner |
Feb 23 2012, 02:42 PM
Post
#87
|
|
No Ghosts in the Machine Group: Members Posts: 953 Joined: 30-March 10 From: Boston, MA Member No.: 11,530 Region Association: North East States |
updates?
I like this thread |
|
|
|
| ThePaintedMan |
Feb 23 2012, 06:32 PM
Post
#88
|
|
Advanced Member Group: Members Posts: 3,887 Joined: 6-September 11 From: St. Petersburg, FL Member No.: 13,527 Region Association: South East States |
Man, I had no idea anyone was even really following this. Thanks for the reminder to update this! Well, as the semester has worn on, time to work on the car has been limited. However, I have finally gotten the suspension console done and fully buttoned up. This is what it looked like first, after I took the console itself off. BTW, this is a chore, if no one has done it yet. The spot welds are one thing, but cutting through the brace from the inside<-> console is a whole other story.
Attached thumbnail(s) 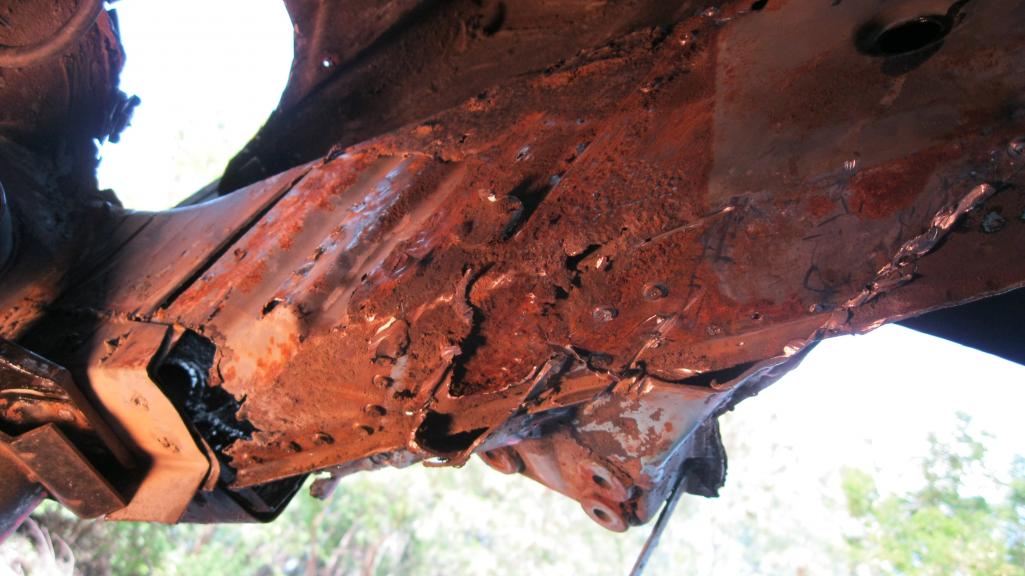
|
|
|
|
| ThePaintedMan |
Feb 23 2012, 06:35 PM
Post
#89
|
|
Advanced Member Group: Members Posts: 3,887 Joined: 6-September 11 From: St. Petersburg, FL Member No.: 13,527 Region Association: South East States |
Obviously the outer skin on the inside was trash. So I carefully cut through it to keep the inner intact. The inner wasn't ALL that bad, I suppose as you can see below. Initially I was just going to re-skin the outer section of the inner long. However, as you'll see on the next page, I had some issues.
Attached thumbnail(s) 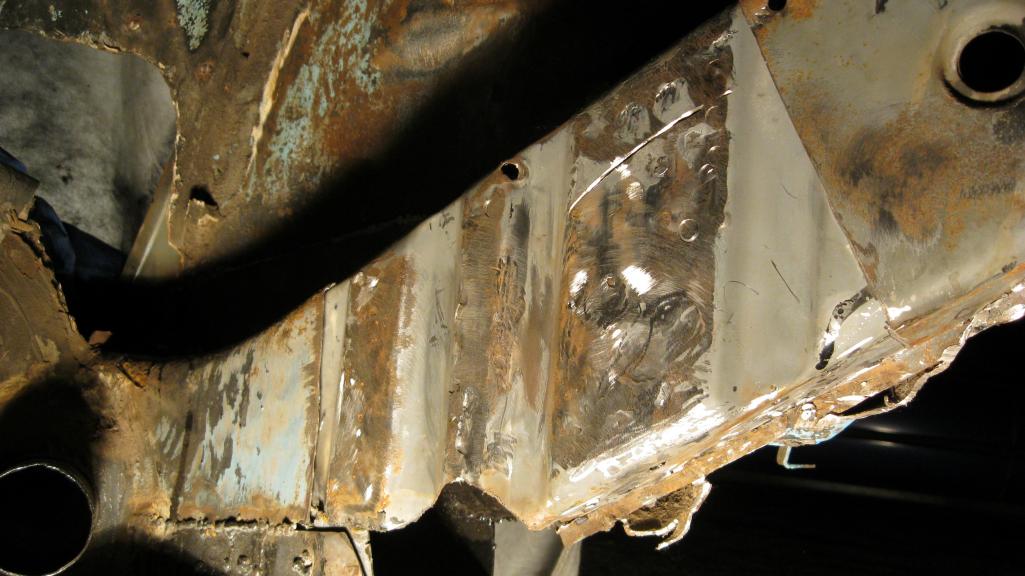
|
|
|
|
| ThePaintedMan |
Feb 23 2012, 06:39 PM
Post
#90
|
|
Advanced Member Group: Members Posts: 3,887 Joined: 6-September 11 From: St. Petersburg, FL Member No.: 13,527 Region Association: South East States |
Bruce Stone (bdstone914) sent me a whole inner frame section from a parts car. This is the console with several pieces including the engine shelf removed. The problem with using non-replica parts is whatever you cut out, you're going to have to do it TWICE. I drilled out all the spot welds on this suspension console, only to get to the point where I could not figure out what was keeping it attached to the remaining frame piece. So I got frustrated and....
Attached thumbnail(s) 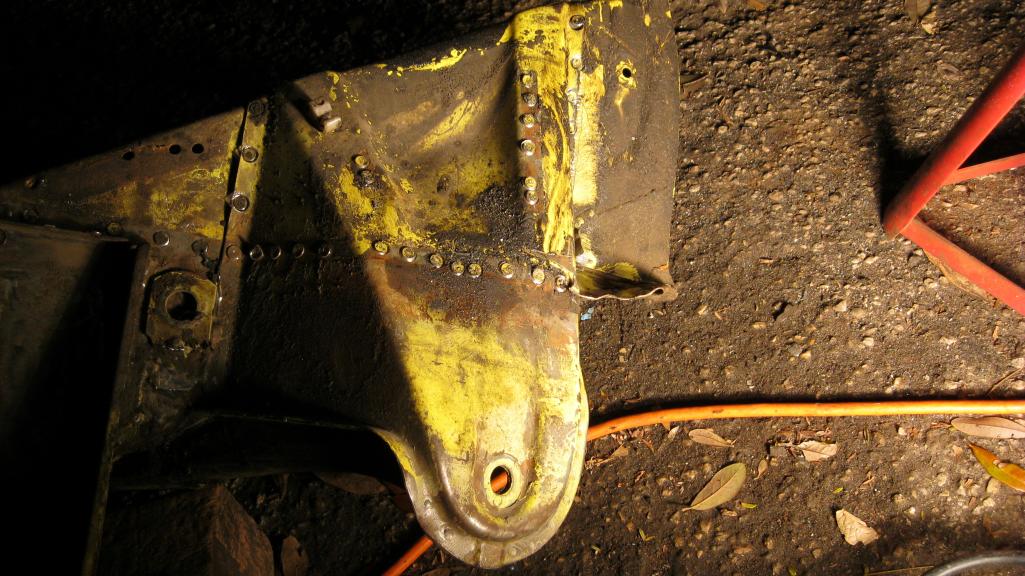
|
|
|
|
| carr914 |
Feb 23 2012, 06:40 PM
Post
#91
|
|
Racer from Birth Group: Members Posts: 131,949 Joined: 2-February 04 From: Tampa,FL Member No.: 1,623 Region Association: South East States |
George, I'm sure there are a bunch of us following this ( Check the Views) You're doing Great (IMG:style_emoticons/default/piratenanner.gif)
|
|
|
|
| dlee6204 |
Feb 23 2012, 06:41 PM
Post
#92
|
|
Howdy Group: Members Posts: 2,162 Joined: 30-April 06 From: Burnsville, NC Member No.: 5,956 |
Yeah dude. We are all watching and waiting. (IMG:style_emoticons/default/popcorn[1].gif) Keep up the good work. (IMG:style_emoticons/default/beerchug.gif)
|
|
|
|
| ThePaintedMan |
Feb 23 2012, 06:44 PM
Post
#93
|
|
Advanced Member Group: Members Posts: 3,887 Joined: 6-September 11 From: St. Petersburg, FL Member No.: 13,527 Region Association: South East States |
Cut the whole thing out to replace it all as once piece. In hindsight, probably NOT the best solution, since its very easy to weld in the whole piece too far in any direction. As you can see in the next post (GD post size limit! (IMG:style_emoticons/default/headbang.gif) ) , I used the old piece to line up my cut lines on the "new" piece.
Attached thumbnail(s) 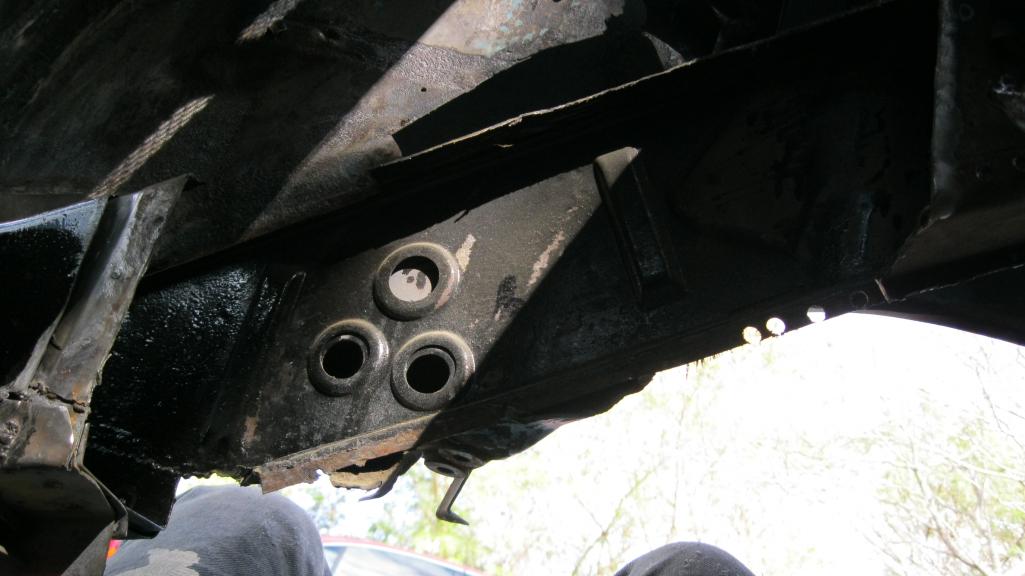
|
|
|
|
| ThePaintedMan |
Feb 23 2012, 06:45 PM
Post
#94
|
|
Advanced Member Group: Members Posts: 3,887 Joined: 6-September 11 From: St. Petersburg, FL Member No.: 13,527 Region Association: South East States |
The "new" piece.
Attached thumbnail(s) 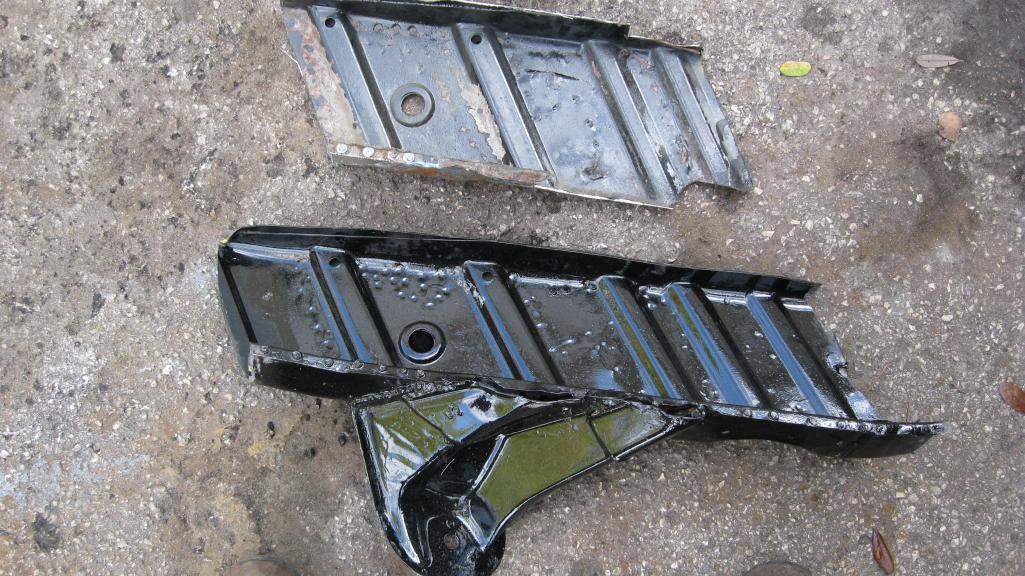
|
|
|
|
| ThePaintedMan |
Feb 23 2012, 06:48 PM
Post
#95
|
|
Advanced Member Group: Members Posts: 3,887 Joined: 6-September 11 From: St. Petersburg, FL Member No.: 13,527 Region Association: South East States |
And the portions I used to line up the cuts. If you look closely, you can see I sectioned the original piece where the folds in the inner section are. Also, those round holes helped line it up. Otherwise I would have been fuched.
Attached thumbnail(s) 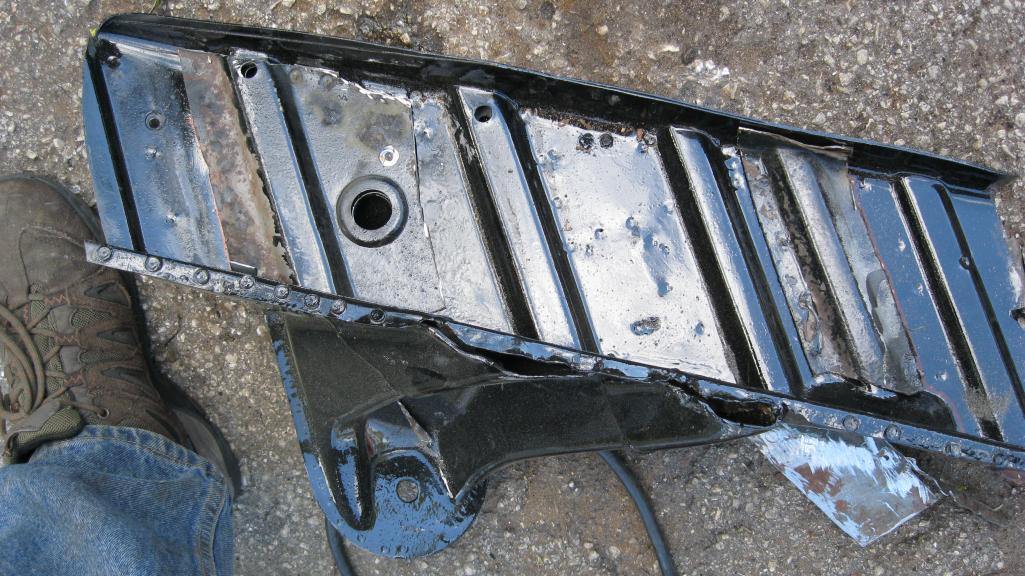
|
|
|
|
| ThePaintedMan |
Feb 23 2012, 06:51 PM
Post
#96
|
|
Advanced Member Group: Members Posts: 3,887 Joined: 6-September 11 From: St. Petersburg, FL Member No.: 13,527 Region Association: South East States |
Once I got the piece cut to size, I then had to go and cut the outer skin off about 1/2 in on both sides as well as the outer skin on the remaining section of the frame on the car. Not sure how to explain this, but it allows you to weld the inner skins together first. Then you grind this down and weld in your outer skin patch so that the seams of the welds aren't in the exact same place. If anyone is curious I could post a picture with a diagram of what I mean.
Attached thumbnail(s) 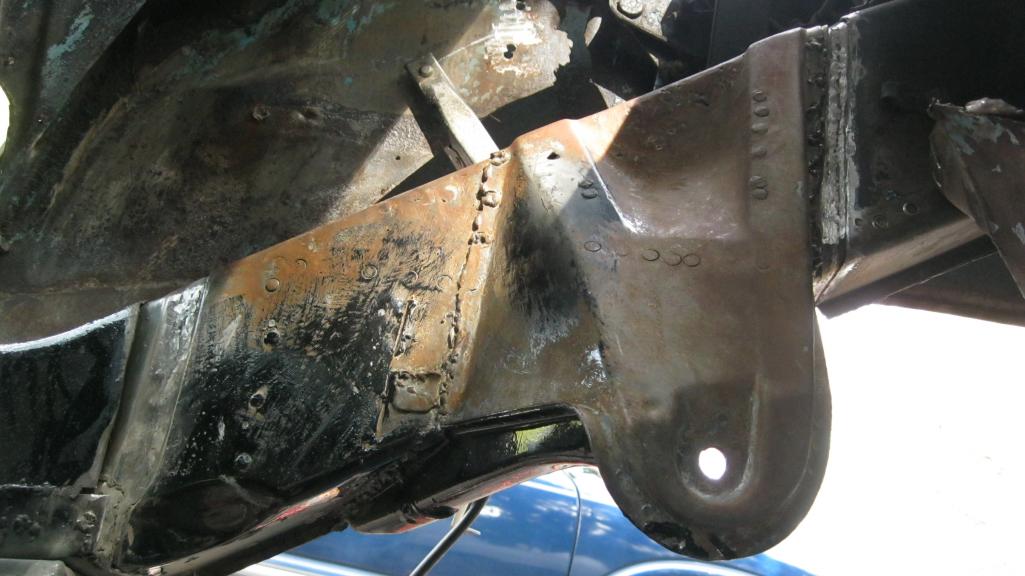
|
|
|
|
| ThePaintedMan |
Feb 23 2012, 06:55 PM
Post
#97
|
|
Advanced Member Group: Members Posts: 3,887 Joined: 6-September 11 From: St. Petersburg, FL Member No.: 13,527 Region Association: South East States |
Of course, I took measurements before all of this. I had no friggin idea how to follow the measurements provided in body dimensions section, to be honest. So I used the drivers side console as a reference. I ended up with the exact same length from the center of the console bolt hole to the large dimples on the bulkhead, maybe +/- 1 mm. Obviously, its pretty hard to get the thing out of line on the Y or Z axis, since the flanges of the two frame halves should match up.
Attached thumbnail(s) 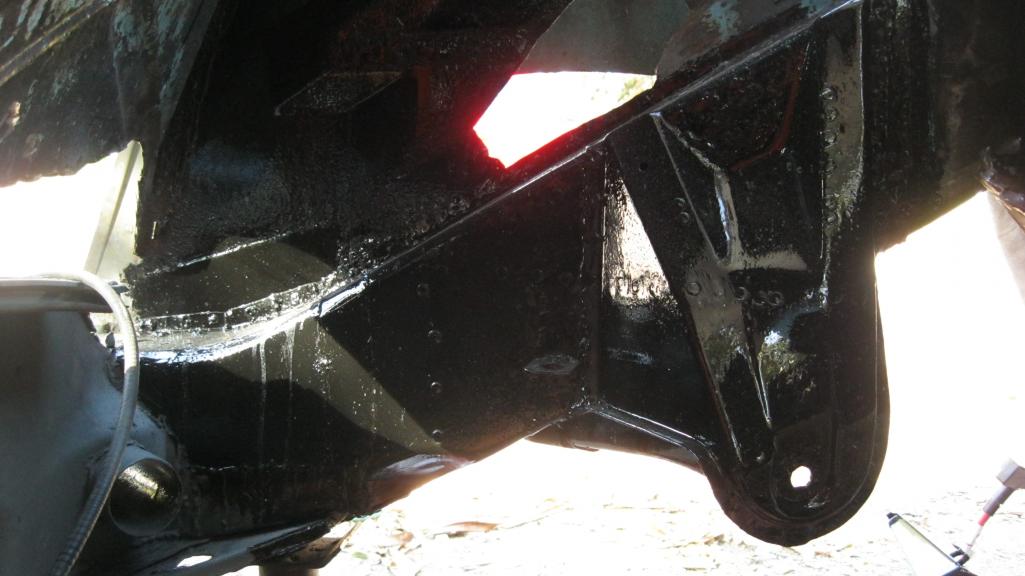
|
|
|
|
| ThePaintedMan |
Feb 23 2012, 07:01 PM
Post
#98
|
|
Advanced Member Group: Members Posts: 3,887 Joined: 6-September 11 From: St. Petersburg, FL Member No.: 13,527 Region Association: South East States |
A couple other things are done (well actually a lot, but I just don't have pictures at the moment.) The jack point is below. I ordered the support plate from RD, which in hindsight, I should have ordered all of this stuff from them. Long story short, if is not a flat piece of metal, or a since 90 deg. bend, just order the shit. Its going to cost you more in grinding/cutting discs than its worth. I might have saved a few hundred dollars here, but thats about it. Of course I learned a ton though and got to (IMG:style_emoticons/default/beer.gif) (IMG:style_emoticons/default/headbang.gif) (IMG:style_emoticons/default/sawzall-smiley.gif) (IMG:style_emoticons/default/welder.gif) - all of my favorite pastimes. Note: the cool thing about doing this yourself though is you get to make your own "modifications." As far as I can tell, my jack receiver tube is at least twice as thick as the RD version, which I did not order. I'm hoping it'll stick around a little longer than most of them seem to do.
Attached thumbnail(s) 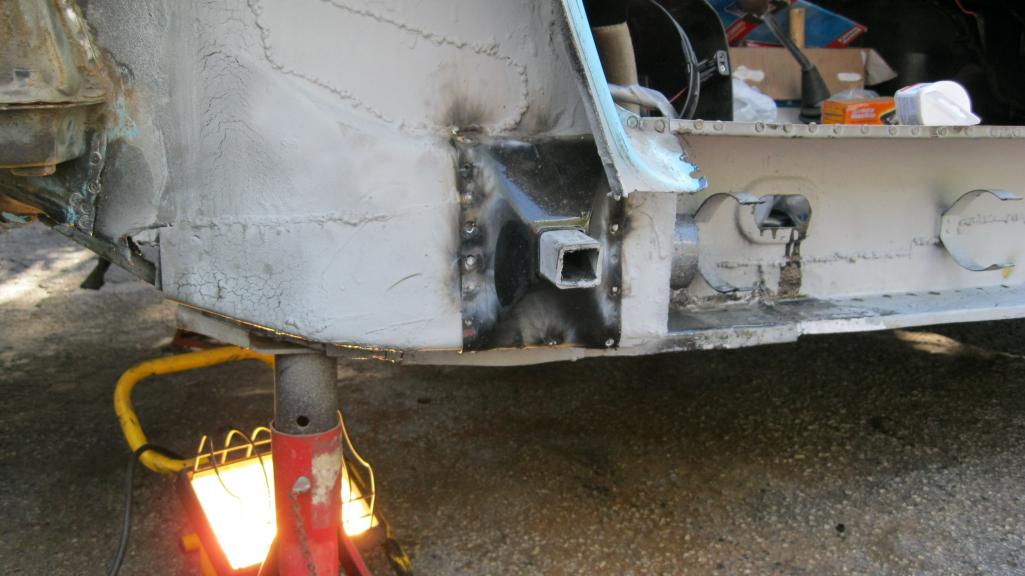
|
|
|
|
| ThePaintedMan |
Feb 23 2012, 07:03 PM
Post
#99
|
|
Advanced Member Group: Members Posts: 3,887 Joined: 6-September 11 From: St. Petersburg, FL Member No.: 13,527 Region Association: South East States |
Hole that existed before, plus a little extra cut out to get rid of all the damn brazing.
Attached thumbnail(s) 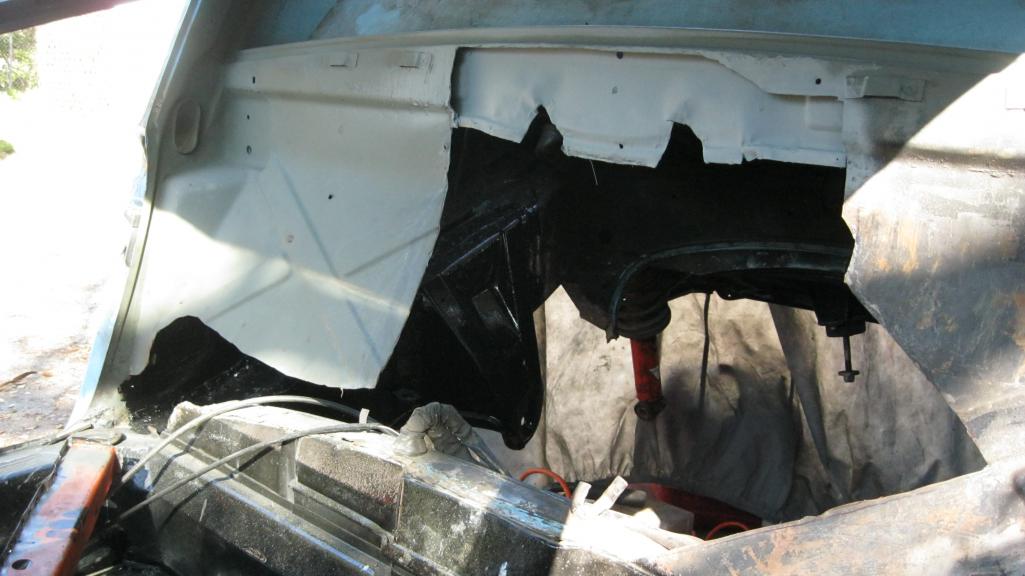
|
|
|
|
| ThePaintedMan |
Feb 23 2012, 07:06 PM
Post
#100
|
|
Advanced Member Group: Members Posts: 3,887 Joined: 6-September 11 From: St. Petersburg, FL Member No.: 13,527 Region Association: South East States |
The piece that Mark (76911s) sent me cut and fitted. FYI, this guy is one of the many people who went FAR out of their way to help me in this endeavor. He went out and cut seat hinges, a parking brake mount, the center cross beam and the firewall hump out of one of his parts cars in the F'ing snow. Truly this car will be a testament to all of you guys as much as it is to me.
The next few posts will skip ahead, since I've gotten all of these holes filled and welded since I last took pictures. Its no fun not being able to reach through the firewall anymore to grab tools laying on the floorboards! Attached thumbnail(s) 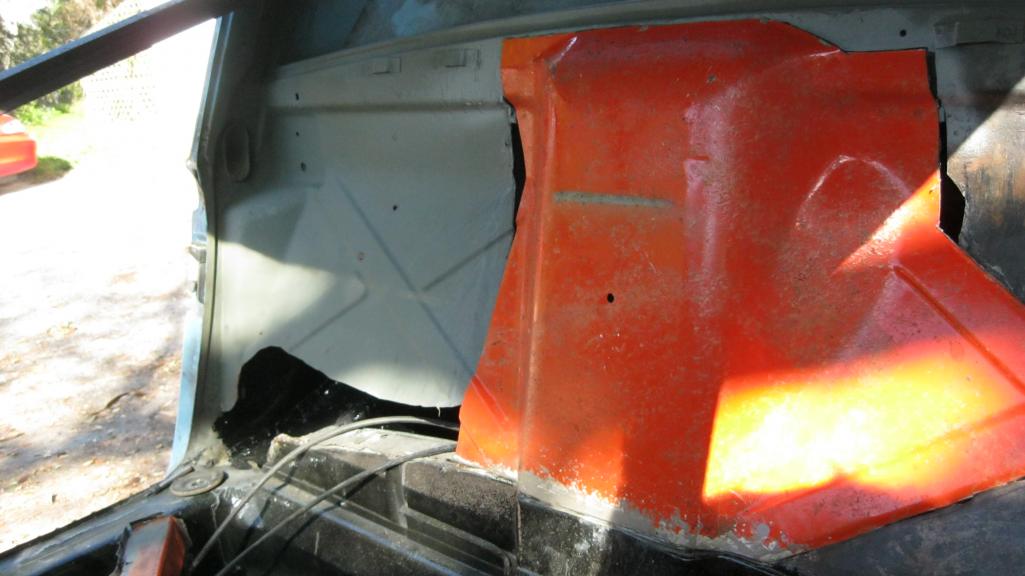
|
|
|
|
|
2 User(s) are reading this topic (2 Guests and 0 Anonymous Users)
0 Members:

|
Lo-Fi Version | Time is now: 31st March 2026 - 05:58 PM |
Invision Power Board
v9.1.4 © 2026 IPS, Inc.