|
|
|
Porsche, and the Porsche crest are registered trademarks of Dr. Ing. h.c. F. Porsche AG.
This site is not affiliated with Porsche in any way. Its only purpose is to provide an online forum for car enthusiasts. All other trademarks are property of their respective owners. |
|
|

  |

| 914_teener |
 Jun 21 2013, 06:14 PM Jun 21 2013, 06:14 PM
Post
#1
|
|
914 Guru  Group: Members Posts: 5,268 Joined: 31-August 08 From: So. Cal Member No.: 9,489 Region Association: Southern California |
Ok...so ready to dip in and re-hab the rear suspension. Part collection is almost complete except new shocks. So a couple of question for the group since I have never taken the CV's apart.
I have read all the other posts and watched the CV You Tube rebuild, and a couple of questions came up in my mind. 1. As of right now there is no "clunking" so I assume that they are not overly worn since they are NLA. Should I just "flip" them when I am done upon reassembly? 2. Do I just flip them end over on the same side of the car? The video didn't explain it very well. So I would assume just reassemble them as they are now and them flip them right? 3. If I see bad pitting or fracturing....should I just look for a used one now and hang on to it? I have read about all the replacement options, must of them require some machining. I don't want to do this one again very soon so I want to make sure I do it right since the rest of the rear suspension will be getting re-habed. Thanks all in Advance: Rob |
   |

 
|
| ThePaintedMan |
Jun 21 2013, 09:11 PM
Post
#2
|
|
Advanced Member Group: Members Posts: 3,887 Joined: 6-September 11 From: St. Petersburg, FL Member No.: 13,527 Region Association: South East States |
I just disassembled them, cleaned all the old grease out, installed NEW boots and repacked with quality grease. If you want to flip them (I did as well), all you need to do is mark which end is the inner/outer on each side of the car. Rebuild each side of each half and install them with the old outer side as the new inner. That way they will rotate in the opposite direction.
|
|
|
|
| 6freak |
Jun 21 2013, 09:51 PM
Post
#3
|
|
MR.C Group: Members Posts: 4,740 Joined: 19-March 08 From: Tacoma WA Member No.: 8,829 Region Association: Pacific Northwest |
QUOTE(ThePaintedMan @ Jun 21 2013, 08:11 PM)  I just disassembled them, cleaned all the old grease out, installed NEW boots and repacked with quality grease. If you want to flip them (I did as well), all you need to do is mark which end is the inner/outer on each side of the car. Rebuild each side of each half and install them with the old outer side as the new inner. That way they will rotate in the opposite direction. Not saying you can`t but IMO they rotate on the same surface area just a different direction,,,anywho if you see pitting and fretting there done for and need replace,like you said do it right the first time,spend the money and buy new used is just that ..JMO good luck and use Molylub (IMG:style_emoticons/default/smile.gif) |
|
|
|
| 914_teener |
Jun 22 2013, 10:29 AM
Post
#4
|
|
914 Guru Group: Members Posts: 5,268 Joined: 31-August 08 From: So. Cal Member No.: 9,489 Region Association: Southern California |
QUOTE(6freak @ Jun 21 2013, 08:51 PM) QUOTE(ThePaintedMan @ Jun 21 2013, 08:11 PM) I just disassembled them, cleaned all the old grease out, installed NEW boots and repacked with quality grease. If you want to flip them (I did as well), all you need to do is mark which end is the inner/outer on each side of the car. Rebuild each side of each half and install them with the old outer side as the new inner. That way they will rotate in the opposite direction. Not saying you can`t but IMO they rotate on the same surface area just a different direction,,,anywho if you see pitting and fretting there done for and need replace,like you said do it right the first time,spend the money and buy new used is just that ..JMO good luck and use Molylub (IMG:style_emoticons/default/smile.gif) Thanks guys...... Oh though.....using Swepco for the grease. Thanks for the help. Hopefully everything goes back together well. |
|
|
|
| rjames |
Jun 22 2013, 01:14 PM
Post
#5
|
|
I'm made of metal Group: Members Posts: 4,354 Joined: 24-July 05 From: Shoreline, WA Member No.: 4,467 Region Association: Pacific Northwest |
You'll probably see pitting. If you do, replace them. There are a couple of vendors that sell modified type I replacements.
|
|
|
|
| 914_teener |
Aug 13 2013, 11:08 PM
Post
#6
|
|
914 Guru Group: Members Posts: 5,268 Joined: 31-August 08 From: So. Cal Member No.: 9,489 Region Association: Southern California |
Okay....update.
Yes for all that have not done these.....they are not only a pain to find, but a nasty dirty job. I ended up going with the type I replacements as I could not locate any good used ones. Mine were so scored and pitted I didn't want to do them again anytime soon. Couple of additional questions for the World though some may have run into. 1. The Type I's have a recess here shown where the boot mates up against the CV. The fit up isn't great. Should I RTV this side so the boot won't possibly sling grease? 2. Going without the paper gaskets as I have heard stories from others that they will loosen the bolts over time. Any suggestions on the RTV to use? I was thinking the most grease resistant and temperature resistant possible. Thanks all in advance. 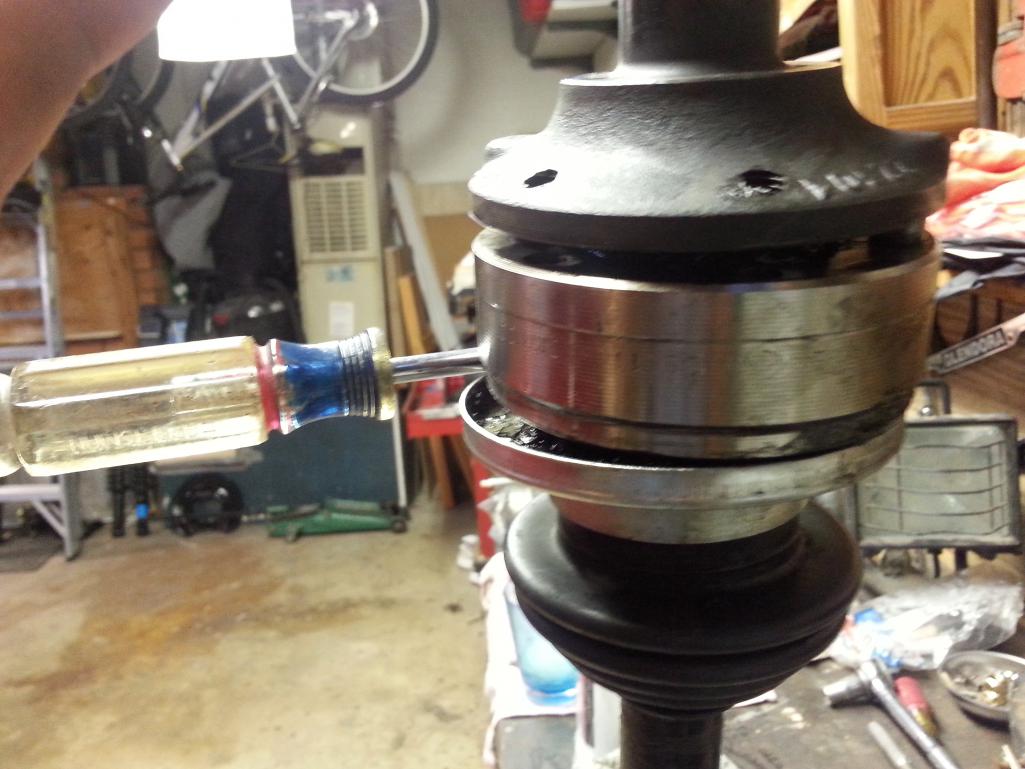 |
|
|
|
| 76-914 |
Aug 14 2013, 08:10 AM
Post
#7
|
|
Repeat Offender & Resident Subaru Antagonist Group: Members Posts: 13,786 Joined: 23-January 09 From: Temecula, CA Member No.: 9,964 Region Association: Southern California |
Rob, they never slung any grease out of that side when I ran them. And I will guarantee you that they come loose if you use a gasket.
|
|
|
|
| Chris H. |
Aug 14 2013, 08:44 AM
Post
#8
|
|
Senior Member Group: Members Posts: 4,063 Joined: 2-January 03 From: Chicago 'burbs Member No.: 73 Region Association: Upper MidWest |
QUOTE(914_teener @ Aug 14 2013, 12:08 AM) Yes for all that have not done these.....they are not only a pain to find, but a nasty dirty job. You got that right! Just did mine as well. Messiest thing I ever did on the car. Because of the massive 72hp power plant there was no pitting, scoring, damage, etc. Looked like new except for a slight shine shine in certain areas. They will probably shatter when I use them with the Subie. |
|
|
|
| 914_teener |
Aug 14 2013, 09:31 AM
Post
#9
|
|
914 Guru Group: Members Posts: 5,268 Joined: 31-August 08 From: So. Cal Member No.: 9,489 Region Association: Southern California |
QUOTE(Chris H. @ Aug 14 2013, 07:44 AM) QUOTE(914_teener @ Aug 14 2013, 12:08 AM) Yes for all that have not done these.....they are not only a pain to find, but a nasty dirty job. You got that right! Just did mine as well. Messiest thing I ever did on the car. Because of the massive 72hp power plant there was no pitting, scoring, damage, etc. Looked like new except for a slight shine shine in certain areas. They will probably shatter when I use them with the Subie. Mine were shot....They were definitely the originals. I don't plan on putting any more than 120 horsepower through these. Thanks.....yes.... Kent.... understand the tension should keep all in place..... Thanks for the parts. All is key in keeping the parts in tension....my quess is that is why the engineers used the thicker backing plates to better distribute the tension from the screws. Any suggestions on the RTV on the other side......your right...I am not going to use the gaskets....hence the question. Thanks in Advance. |
|
|
|
| 76-914 |
Aug 14 2013, 04:06 PM
Post
#10
|
|
Repeat Offender & Resident Subaru Antagonist Group: Members Posts: 13,786 Joined: 23-January 09 From: Temecula, CA Member No.: 9,964 Region Association: Southern California |
Rob, I was trying to say they won't or didn't leak on that side so I'd say no to RTV on that side. Also, it might be a Royal FPITA to split that cup side apart after siliconing w/o doing some damage to the cover (thinner) side.
|
|
|
|
| 914_teener |
Aug 16 2013, 12:18 PM
Post
#11
|
|
914 Guru Group: Members Posts: 5,268 Joined: 31-August 08 From: So. Cal Member No.: 9,489 Region Association: Southern California |
Ok.
Decided to use 500 degree and most grease resistant Permatex RTV...it is black. Goal is to have the car on the ground....with wheels and suspension in. Gonna replace the trans mounts "while I'm there". HOT today...shiza..it was cool. At least I have a helper! 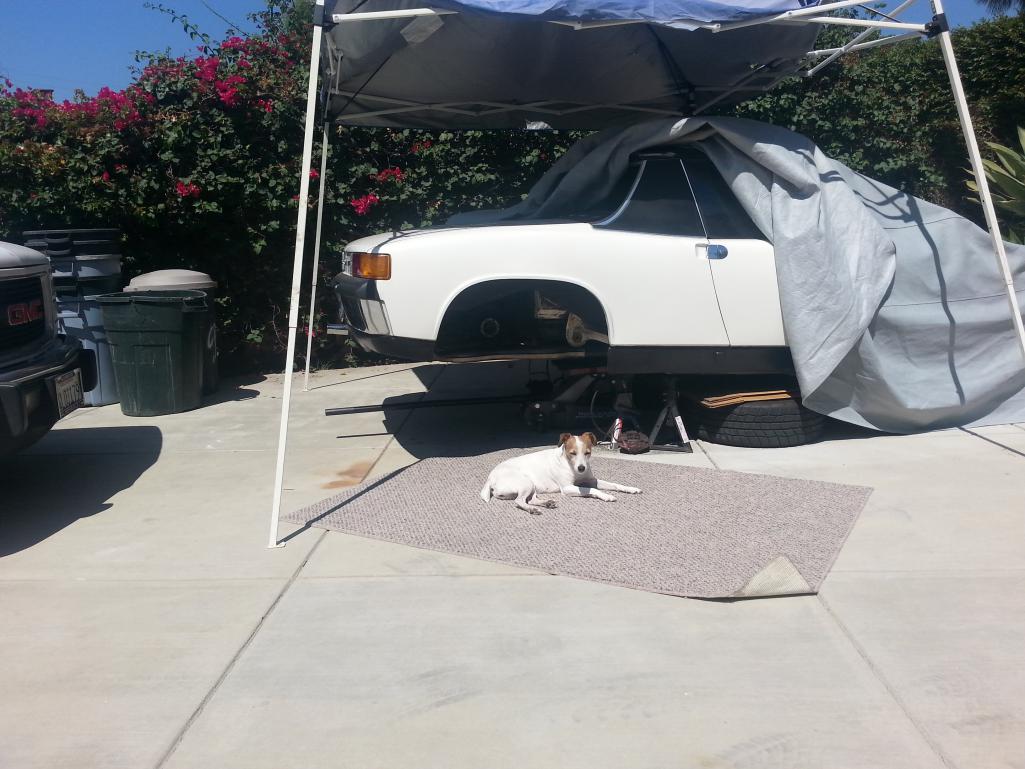 |
|
|
|
| 76-914 |
Aug 16 2013, 01:53 PM
Post
#12
|
|
Repeat Offender & Resident Subaru Antagonist Group: Members Posts: 13,786 Joined: 23-January 09 From: Temecula, CA Member No.: 9,964 Region Association: Southern California |
Rob, after you do this once you can be a professional like the rest of us. (IMG:style_emoticons/default/prop.gif)
|
|
|
|
| cwpeden |
Aug 16 2013, 03:38 PM
Post
#13
|
|
Great White North, huh? Group: Members Posts: 916 Joined: 20-August 06 From: Victoria BC Member No.: 6,693 Region Association: Canada |
QUOTE(76-914 @ Aug 14 2013, 07:10 AM) Rob, they never slung any grease out of that side when I ran them. And I will guarantee you that they come loose if you use a gasket. Guarantee? So you will come and fix mine when they come loose? (which has never happened in my 20+ years, 15 as a daily driver 365 days a year.) (IMG:style_emoticons/default/poke.gif) More important would item would be to replace the schnorr washer. http://www.schnorr.com/docs/Safety%20Washer.pdf |
|
|
|
| 76-914 |
Aug 16 2013, 07:06 PM
Post
#14
|
|
Repeat Offender & Resident Subaru Antagonist Group: Members Posts: 13,786 Joined: 23-January 09 From: Temecula, CA Member No.: 9,964 Region Association: Southern California |
You did see where these are modified type 1's?? And they do come loose if you use a gasket. Guarantee it!!! It happened to me,
|
|
|
|
| 914_teener |
Aug 16 2013, 09:33 PM
Post
#15
|
|
914 Guru Group: Members Posts: 5,268 Joined: 31-August 08 From: So. Cal Member No.: 9,489 Region Association: Southern California |
QUOTE(76-914 @ Aug 16 2013, 12:53 PM) Rob, after you do this once you can be a professional like the rest of us. (IMG:style_emoticons/default/prop.gif) Hah....no thanks I'll keep my day job Kent. Everything fit up well. New bolts, schoor washers and shocks from PMB. New control arms all purty from Bruce Stone and bushings with zerks....gonna bolt everything in tomorrow. Only thing I screwed up was the perches on the shocks. The hole is supposed to go towards the trans. This brought up a question: When you re-install the spring, the Hayes manual doesn't say to or how much your should 'pre-load" the spring. It shows a spring compressor taking the spring off but doesn't mention putting it back on...what's the deal there? Picture.....and yes...that is my daughters fingernail polish on the CV screws as tattletale marks.....just in case... (IMG:style_emoticons/default/laugh.gif) 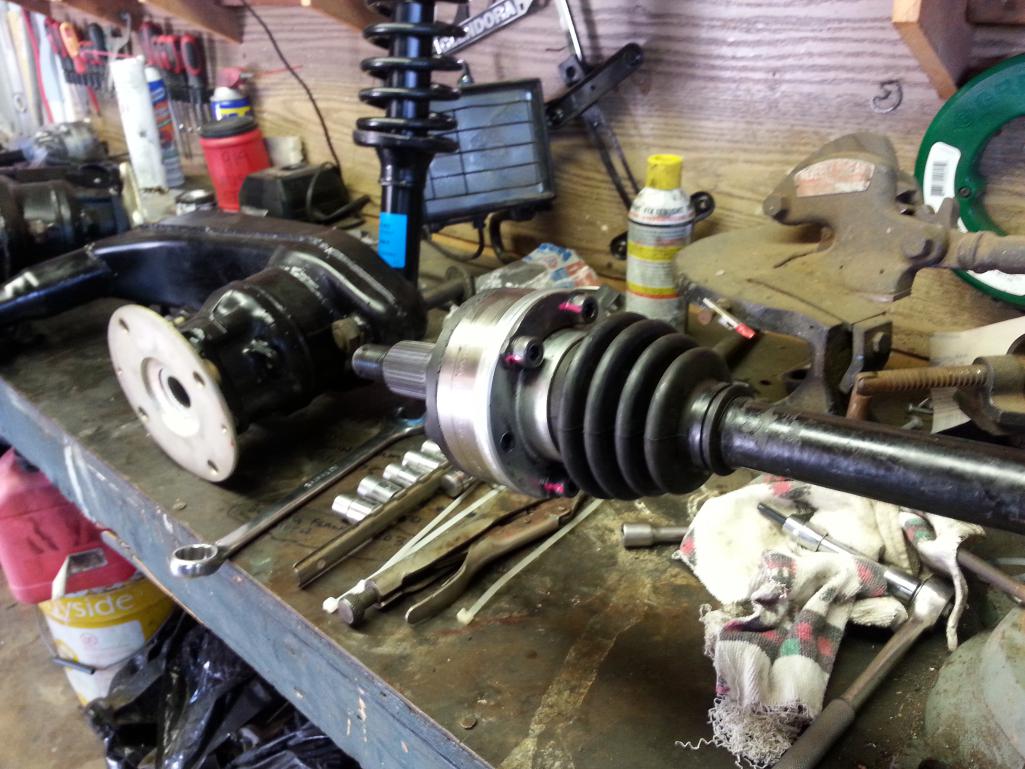 |
|
|
|
| cwpeden |
Aug 25 2013, 11:38 AM
Post
#16
|
|
Great White North, huh? Group: Members Posts: 916 Joined: 20-August 06 From: Victoria BC Member No.: 6,693 Region Association: Canada |
QUOTE(76-914 @ Aug 16 2013, 06:06 PM) You did see where these are modified type 1's?? And they do come loose if you use a gasket. Guarantee it!!! It happened to me, Ok, I see. Its the modified Type 1 thats the issue? Learn something new today. (IMG:style_emoticons/default/beerchug.gif) |
|
|
|
| 914_teener |
Aug 25 2013, 12:42 PM
Post
#17
|
|
914 Guru Group: Members Posts: 5,268 Joined: 31-August 08 From: So. Cal Member No.: 9,489 Region Association: Southern California |
QUOTE(cwpeden @ Aug 25 2013, 10:38 AM) QUOTE(76-914 @ Aug 16 2013, 06:06 PM) You did see where these are modified type 1's?? And they do come loose if you use a gasket. Guarantee it!!! It happened to me, Ok, I see. Its the modified Type 1 thats the issue? Learn something new today. (IMG:style_emoticons/default/beerchug.gif) Yep.....torquing them down as we speak....another freakin hot day...... almost done. No problems except I forgot if the brake backing plate goes on the inside of the control arm and the caliper sandwiches against it? |
|
|
|
| 76-914 |
Aug 25 2013, 12:45 PM
Post
#18
|
|
Repeat Offender & Resident Subaru Antagonist Group: Members Posts: 13,786 Joined: 23-January 09 From: Temecula, CA Member No.: 9,964 Region Association: Southern California |
Yes and Erc along with others warned me. Being old school I installed with gaskets, torqued, new washers and 22 hr's later they were finger loose or tight, depending on how you view it. That being said, the halves were still firmly together and reguired the usual force to separate them. (IMG:style_emoticons/default/WTF.gif) Same gasket as the T4 but they will compress on these CV's and as I have learned, loose bolts.
|
|
|
|
| 914_teener |
Aug 25 2013, 01:31 PM
Post
#19
|
|
914 Guru Group: Members Posts: 5,268 Joined: 31-August 08 From: So. Cal Member No.: 9,489 Region Association: Southern California |
ok.
CV's are in. NO gaskets but black hi torque RTV. Are these brake rotor gravel shields in right? This seems the only way they can bolt in and my Hayes manual is too faded to tell. I like the new shocks....they replaced the Kill Ya Backs's. We see what the difference is. The passenger side caliper is alot tighter and really dragging on the rotor. The vent clearances were fine when I took them off. How could anything have changed? Thanks for everyone's help. 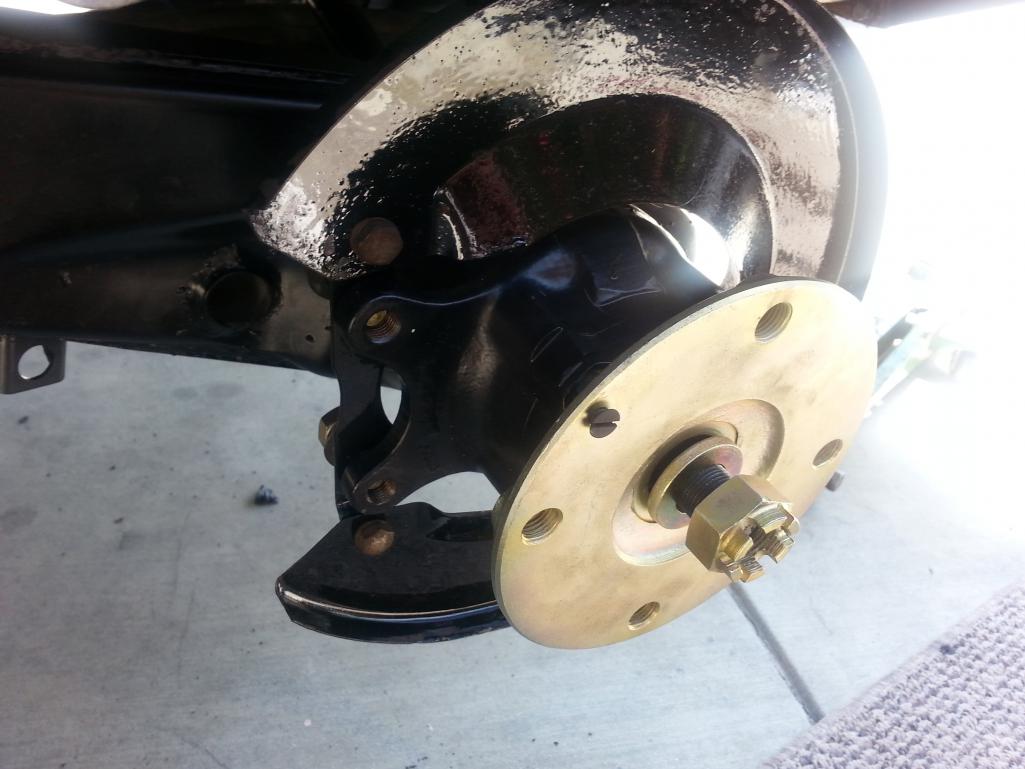 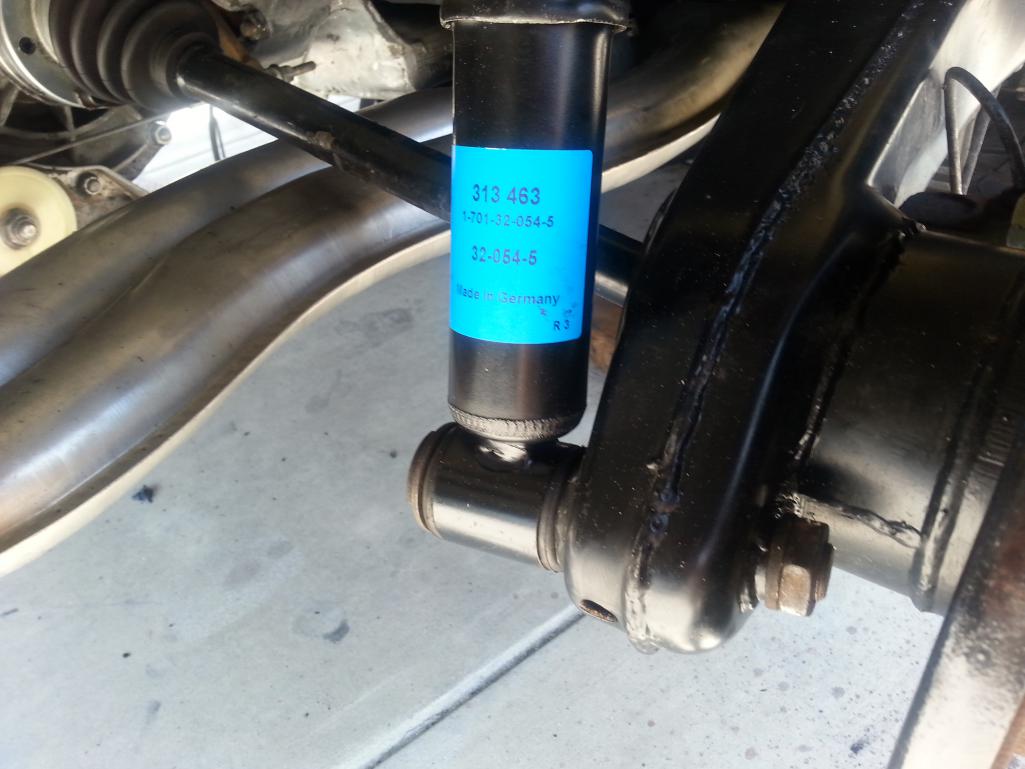 |
|
|
|
| 914_teener |
Aug 27 2013, 11:46 PM
Post
#20
|
|
914 Guru Group: Members Posts: 5,268 Joined: 31-August 08 From: So. Cal Member No.: 9,489 Region Association: Southern California |
Whew....finally done after about two months up on the jack stands in the driveway.
Ended up doing the entire rear suspension. New shocks Control arm bushings....complete powder coating and all the replated bling. Rear bearings and plated hubs New CV's cause they were shot. New trans and motor mounts. For whatever reason, the passenger side rear caliper got hung up. I think when I power washed the underside and cleaned everything water may have hung a piston up. It seems to be free now but I think all the calipers may need a rebuild. Maybe late this Winter. For now I wanna drive the sucker a little bit. Thanks for all that had the parts and knowledge. On the ground. 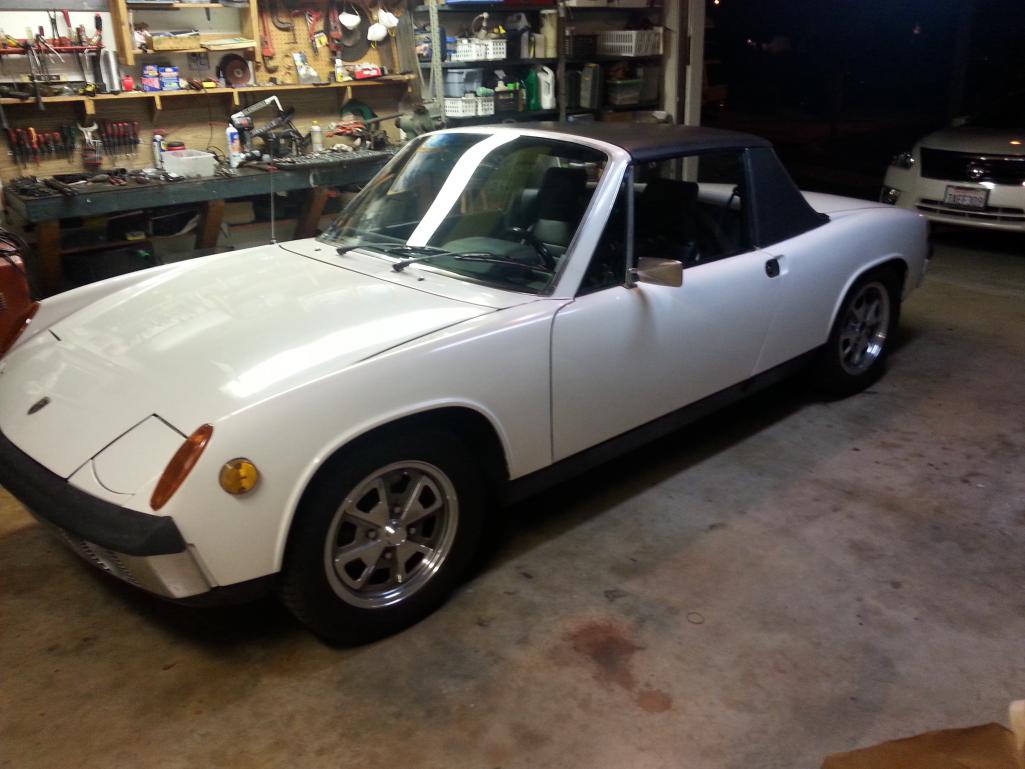 |
|
|
|
|
1 User(s) are reading this topic (1 Guests and 0 Anonymous Users)
0 Members:

|
Lo-Fi Version | Time is now: 31st August 2025 - 12:07 PM |
Invision Power Board
v9.1.4 © 2025 IPS, Inc.