|
|
|
Porsche, and the Porsche crest are registered trademarks of Dr. Ing. h.c. F. Porsche AG.
This site is not affiliated with Porsche in any way. Its only purpose is to provide an online forum for car enthusiasts. All other trademarks are property of their respective owners. |
|
|

  |

| jimkelly |
 Sep 16 2013, 12:45 PM Sep 16 2013, 12:45 PM
Post
#1
|
|
Delaware USA  Group: Members Posts: 4,969 Joined: 5-August 04 From: Delaware, USA Member No.: 2,460 Region Association: MidAtlantic Region |
wiring my v8
and tell me what I have wrong or missing. my bad for never labeling the wires (IMG:style_emoticons/default/headbang.gif) distributor is msd 8360 but you guys are smart (IMG:style_emoticons/default/smoke.gif) and yes - I better connect that oil guage line or I will have a mess on my hands. Attached thumbnail(s) 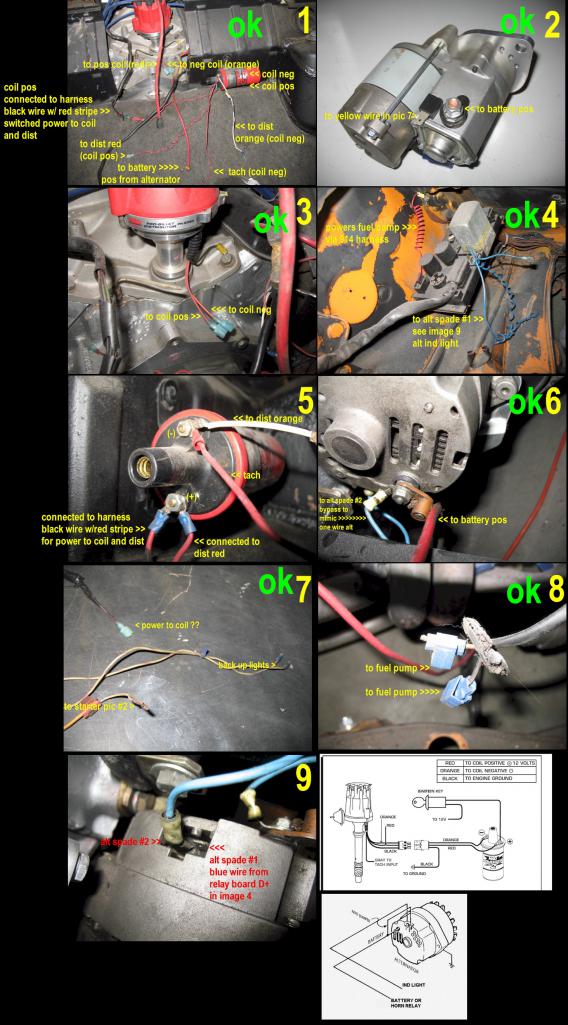
|
   |

 
|
| 3d914 |
Sep 16 2013, 01:01 PM
Post
#2
|
|
Senior Member Group: Members Posts: 1,275 Joined: 24-September 03 From: Benson, AZ Member No.: 1,191 Region Association: Southwest Region |
IIRC the yellow wire goes to the positive side of the starter solenoid - what you labeled as ingition switch/pos toggle.
|
|
|
|
| jimkelly |
Sep 16 2013, 01:05 PM
Post
#3
|
|
Delaware USA Group: Members Posts: 4,969 Joined: 5-August 04 From: Delaware, USA Member No.: 2,460 Region Association: MidAtlantic Region |
thank you - I am editing my collage as we go.
jim |
|
|
|
| Spoke |
Sep 16 2013, 02:13 PM
Post
#4
|
|
Jerry Group: Members Posts: 7,300 Joined: 29-October 04 From: Allentown, PA Member No.: 3,031 Region Association: None |
Page 5: Red wire from harness is 12V power to coil and distributor.
Page 6: Blue wire is from original voltage regulator. Unless that goes to a sender on the new alternator, you don't need this. You also don't need the original voltage regulator. Page 6: The red wire to the battery doesn't look good at that terminal block. Also you need some sort of rubber cover for that connection. Touching that to any grounded point will result in fireworks as there is nothing to limit the current from the battery except the wire. Page 6: Where does the blue wire go? |
 |
|
| jimkelly |
Sep 16 2013, 02:30 PM
Post
#5
|
|
Delaware USA Group: Members Posts: 4,969 Joined: 5-August 04 From: Delaware, USA Member No.: 2,460 Region Association: MidAtlantic Region |
spoke
I am pretty sure my ignition switch was partially bad - I had it partially bypassed and rigged with alternate switches but will replace the ignition switch asap. and thank you for that other info!!! the red wire to positive coil and distributor coming from harness, comes off this black wire with red (or maybe orange) stripe. makes sense. I think I am using the black/red wire (fuel pump wire) for switched power?? http://www.914world.com/bbs2/index.php?sho...ndicator+lightl 1 = yellow, power to the starter 2 = blue, from alternator indicator light to D+ (red) on alternator harness 3 = grey/brown, from brakelight switch 4 = grey/brown, to brakelights 5 = green/red, oil-pressure sender to oil-pressure warning light 6 = not used 7 = black/purple, to tachometer, comes from pin #1 on coil 8 = black, from fuse #8, power for relays, goes to pin #15 on coil 9 = green/white, from heater blower switch to blower 10 = brown, to main ground connector 11 = green, to heater fan 12 = red, to battery 13 = black/red, to fuelpump 14 = red, to battery Attached image(s) 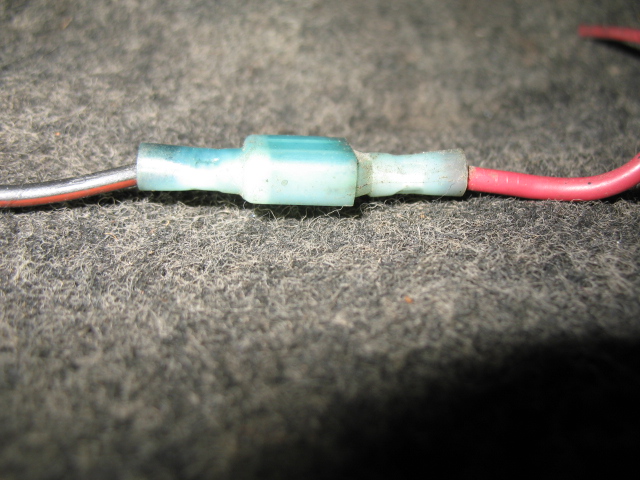
|
|
|
|
| jimkelly |
Sep 16 2013, 07:31 PM
Post
#6
|
|
Delaware USA Group: Members Posts: 4,969 Joined: 5-August 04 From: Delaware, USA Member No.: 2,460 Region Association: MidAtlantic Region |
spoke
image 6 - the blue wire loops around and connects to one oft eh two recessed spades. I think this threat explains the thinking behind it. http://www.jalopyjournal.com/forum/showthread.php?t=687122 I wonder if my blue wire in image 4 went to my alternator? this thread indicates that alt ind light is pin D+ on relay board which appears where my blue wire is connected in image 4. http://www.914world.com/bbs2/index.php?sho...indicator+light Attached image(s) 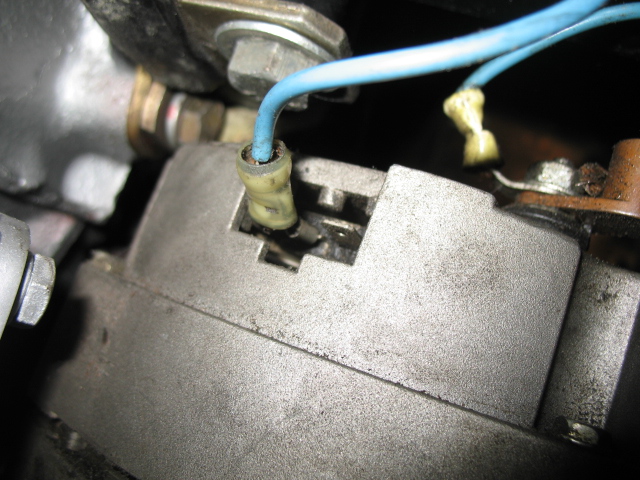 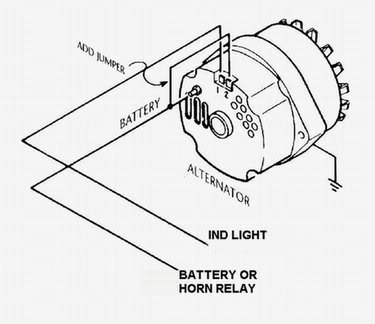 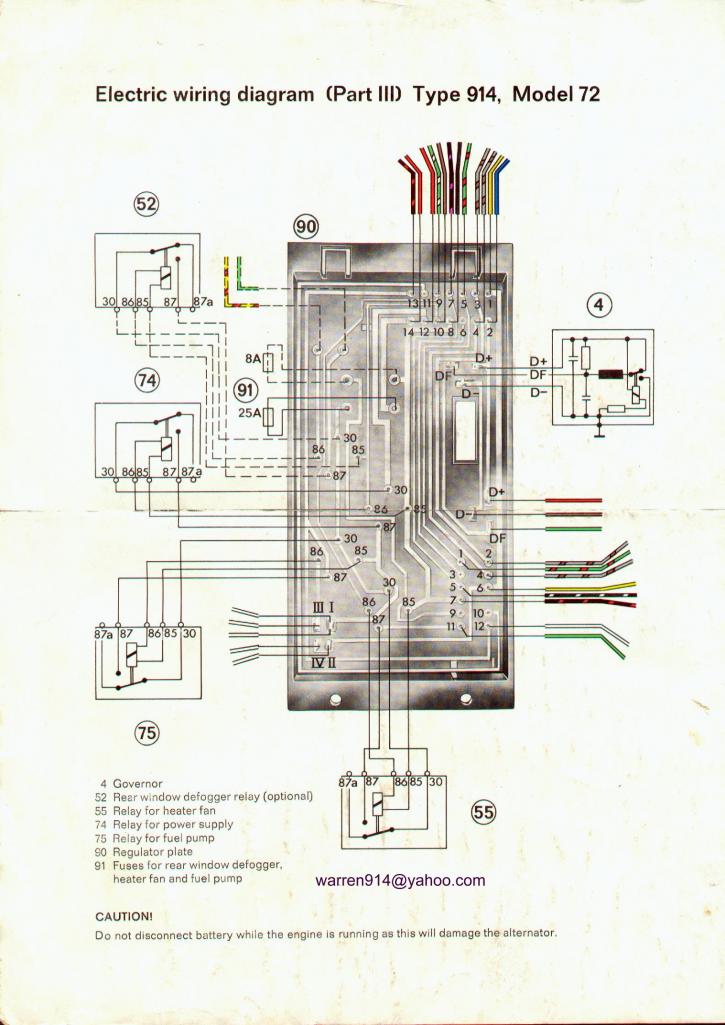
|
|
|
|
| jmmotorsports |
Sep 17 2013, 04:15 AM
Post
#7
|
|
Member Group: Members Posts: 308 Joined: 15-August 06 From: Kelso,Wa. Member No.: 6,658 Region Association: Pacific Northwest |
QUOTE(jimkelly @ Sep 16 2013, 01:30 PM)  spoke I am pretty sure my ignition switch was partially bad - I had it partially bypassed and rigged with alternate switches but will replace the ignition switch asap. and thank you for that other info!!! the red wire to positive coil and distributor coming from harness, comes off this black wire with red (or maybe orange) stripe. makes sense. buy a renegade harness save tourself a lot of troublej |
|
|
|
| chads74 |
Sep 17 2013, 06:19 AM
Post
#8
|
|
Member Group: Members Posts: 386 Joined: 13-March 12 From: Tampa, FL Member No.: 14,252 Region Association: South East States |
QUOTE(jmmotorsports @ Sep 17 2013, 03:15 AM) QUOTE(jimkelly @ Sep 16 2013, 01:30 PM) spoke I am pretty sure my ignition switch was partially bad - I had it partially bypassed and rigged with alternate switches but will replace the ignition switch asap. and thank you for that other info!!! the red wire to positive coil and distributor coming from harness, comes off this black wire with red (or maybe orange) stripe. makes sense. buy a renegade harness save tourself a lot of troublej I got the renegade harness and it was VERY easy to install. I ended up not using a couple of the wires, but it plugged right into the relay board and tells you exactly where the wires go. Took about an hour to run all the wires. |
|
|
|
| dwillouby |
Sep 17 2013, 06:42 AM
Post
#9
|
|
Member Group: Members Posts: 395 Joined: 27-December 02 From: Mt Washington, KY Member No.: 29 Region Association: None |
I dont use the relay board. You need a switched 12 v and 12 v starter signal. Installed a 1 wire alt. I am using a MSD / Mallory system with Fast fuel injection. Very simple wiring setup
David |
|
|
|
| Spoke |
Sep 17 2013, 06:49 AM
Post
#10
|
|
Jerry Group: Members Posts: 7,300 Joined: 29-October 04 From: Allentown, PA Member No.: 3,031 Region Association: None |
QUOTE(jimkelly @ Sep 16 2013, 09:31 PM) spoke image 6 - the blue wire loops around and connects to one oft eh two recessed spades. I think this threat explains the thinking behind it. http://www.jalopyjournal.com/forum/showthread.php?t=687122 I wonder if my blue wire in image 4 went to my alternator? this thread indicators that alt ind light is pin D+ on relay board which appears where my blue wire is connected in image 4. That makes sense. That blue wire goes to the GEN light and to the open spade on your alternator. You can remove the voltage regulator as that function is done inside of the new alternator. |
|
|
|
| jimkelly |
Sep 17 2013, 07:03 AM
Post
#11
|
|
Delaware USA Group: Members Posts: 4,969 Joined: 5-August 04 From: Delaware, USA Member No.: 2,460 Region Association: MidAtlantic Region |
I was thinking that since it seems to be the only male spade remaining.
main image revised again. thanks jim |
|
|
|
| jimkelly |
Sep 17 2013, 08:01 AM
Post
#12
|
|
Delaware USA Group: Members Posts: 4,969 Joined: 5-August 04 From: Delaware, USA Member No.: 2,460 Region Association: MidAtlantic Region |
finally going to put my crimper and heat shrink to good use.
though I am not liking that the male double crimp connector has a different DOUBLE CRIMP portion than the female. in fact, it seems to me, that the napa tool does not work on this male connector and despite mcmaster carr selling them as double crimp, I don't feel they are truly double crimp, as they don't really provide as decent of stress relief as the female's as they don't crimp well onto the wire insulator. it seems to me, that my other crimp tool is better for these male's. see pics. and some connector clean up. preparing to start engine. Attached image(s) 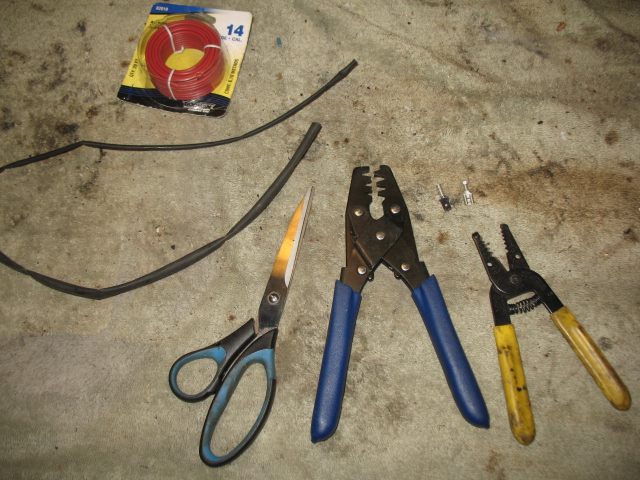 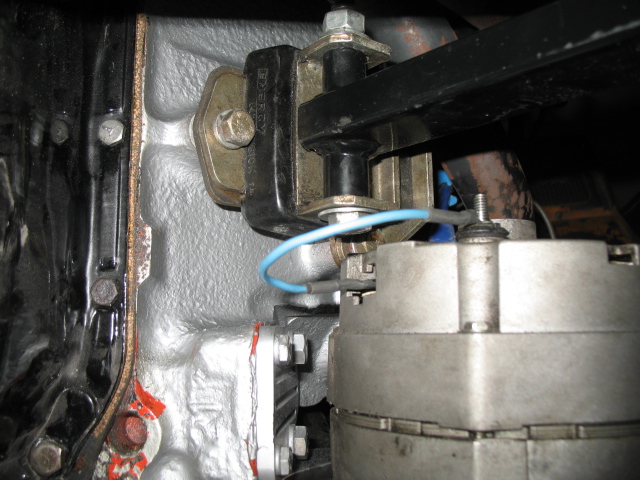 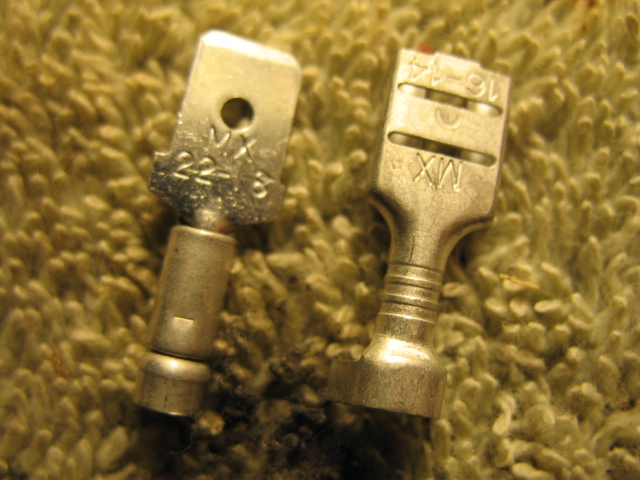 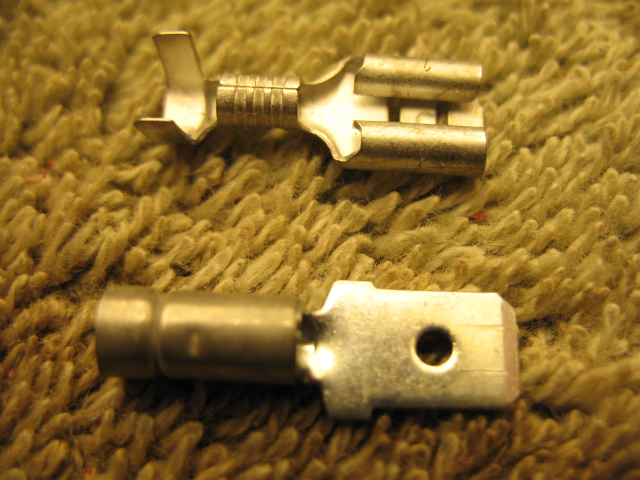 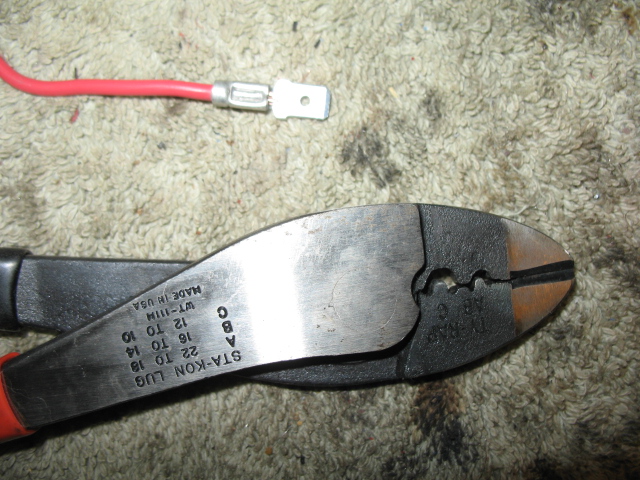 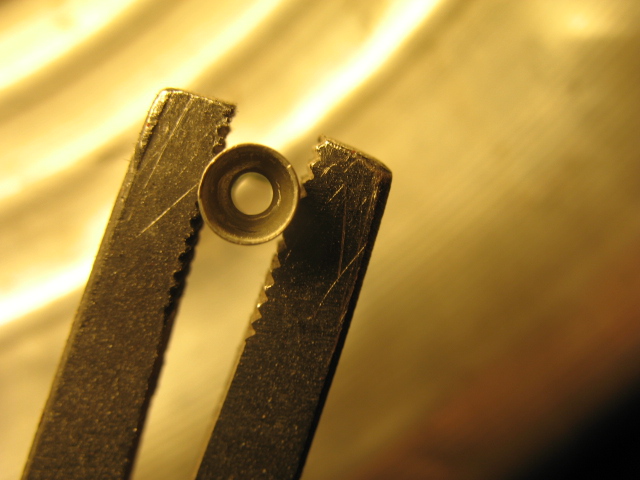 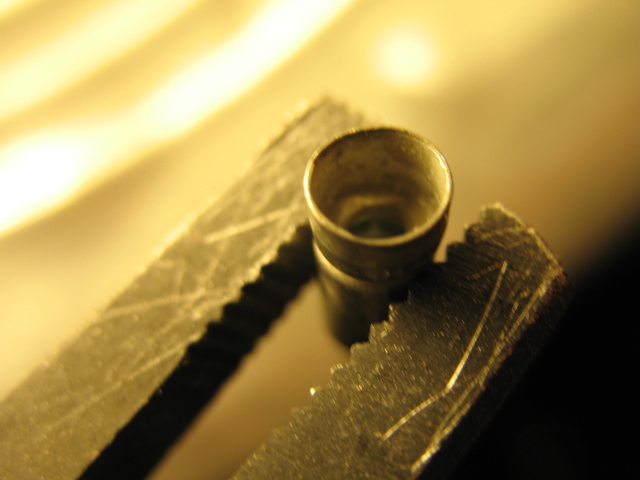 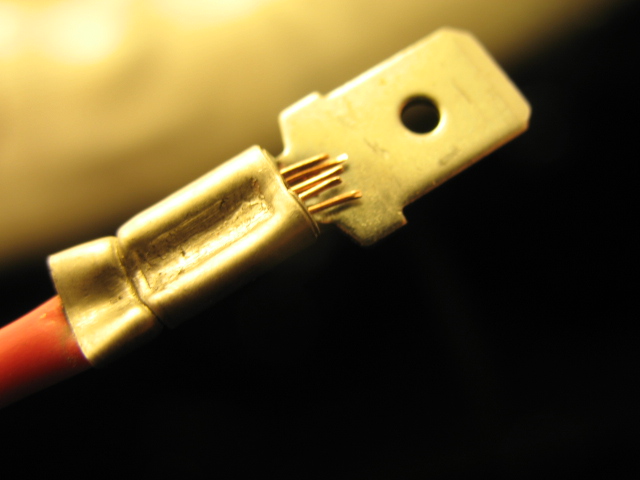 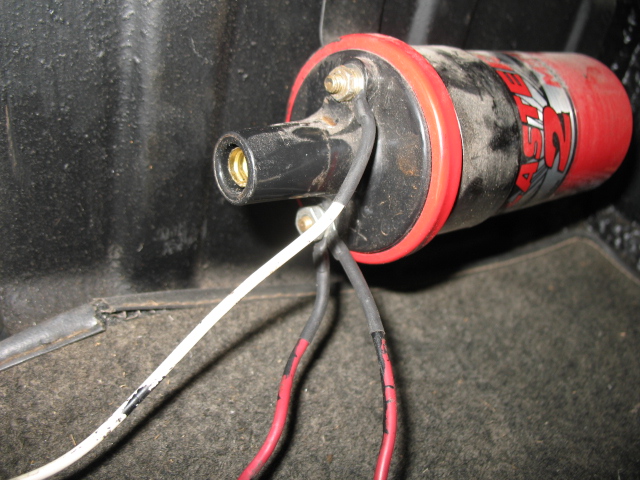 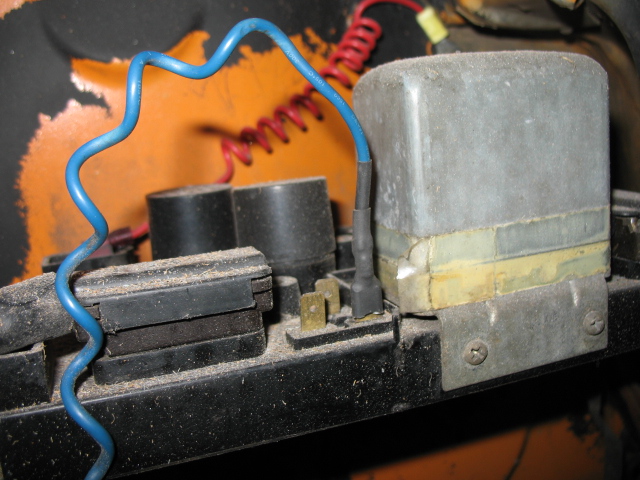 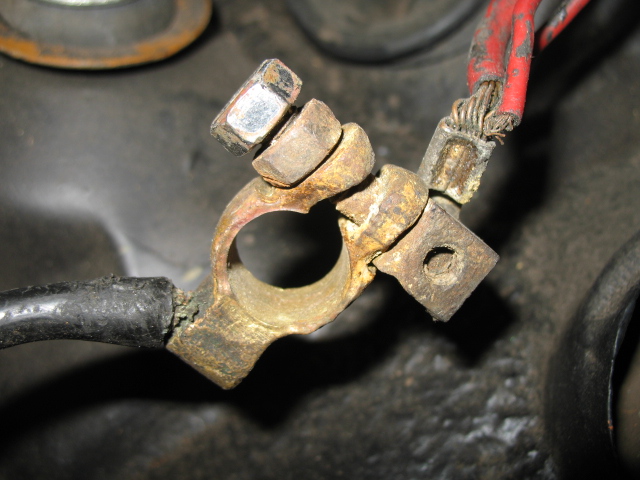 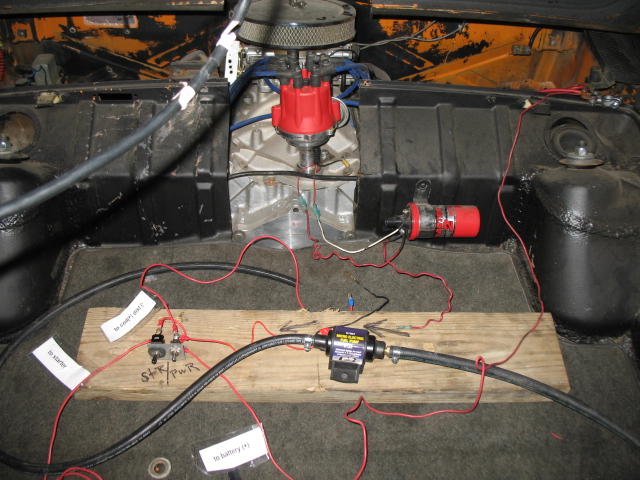
|
|
|
|
| jimkelly |
Sep 20 2013, 12:45 PM
Post
#13
|
|
Delaware USA Group: Members Posts: 4,969 Joined: 5-August 04 From: Delaware, USA Member No.: 2,460 Region Association: MidAtlantic Region |
starter, shift linkage, gear oil, coolant fill neck, installed
Monday I swap out the early for late soft front passenger side brake line and add fluid and bleed. for a whole this morning, I thought I had the firing sequence all buggered up, but after looking at it over and over again, i think it is ok. waiting on ebay to deliver my CHROME dip stick and tube, I am sure engine is empty. getting the correct grommets for front trunk is hell!!! one hose is 1.5 ID and the other is 1.7 ID, the bigger one is more of a challenge and the thicker the better as to have more rubber between hose and sheet metal, as mu old thinner grommets wore thru. stock engine bay shift bar is 39.25" and renegade suggests adding 1.5" to this. the modified bar I have is 40" and should be fine but I will try to weld up a new straight one. as before I was using a custom engine bar, not renegade's.. Attached image(s) 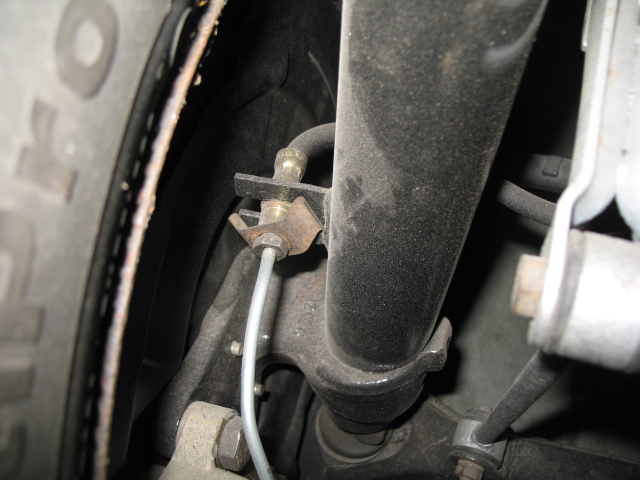  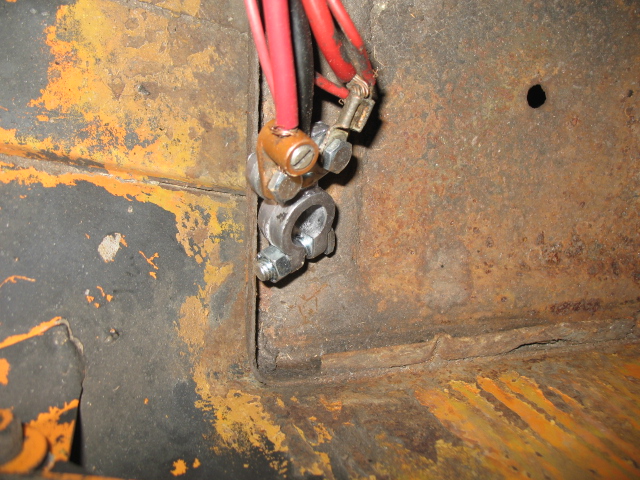 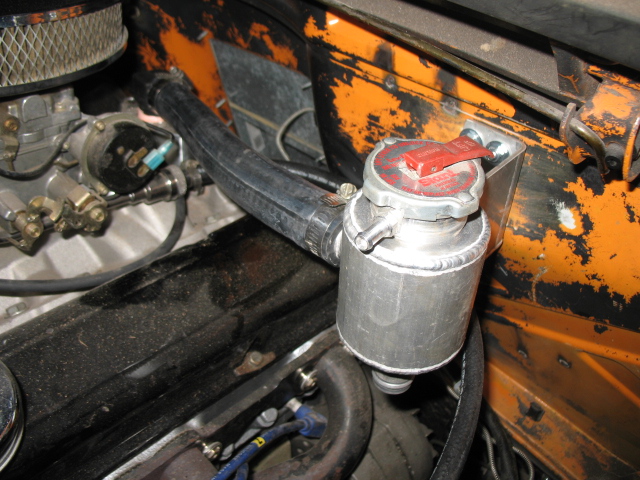 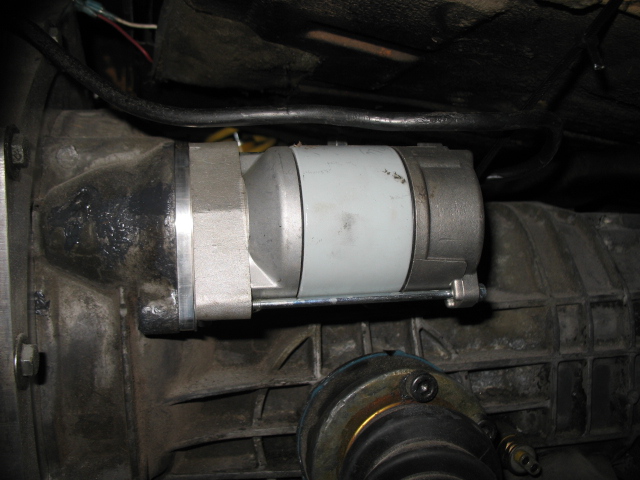 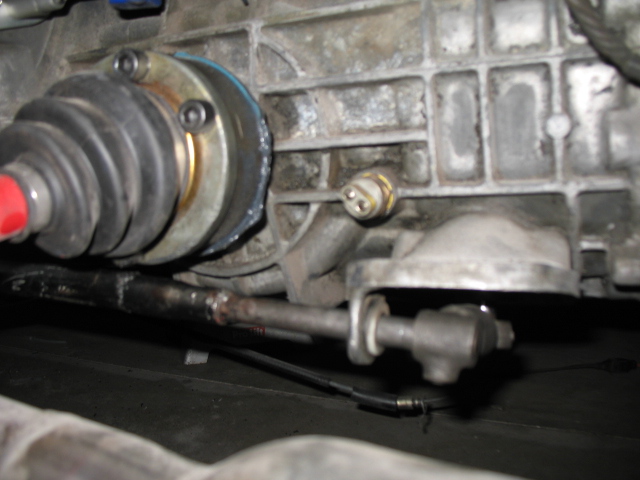 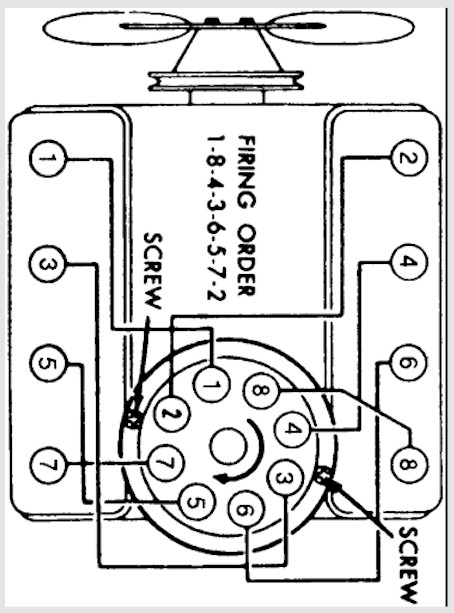  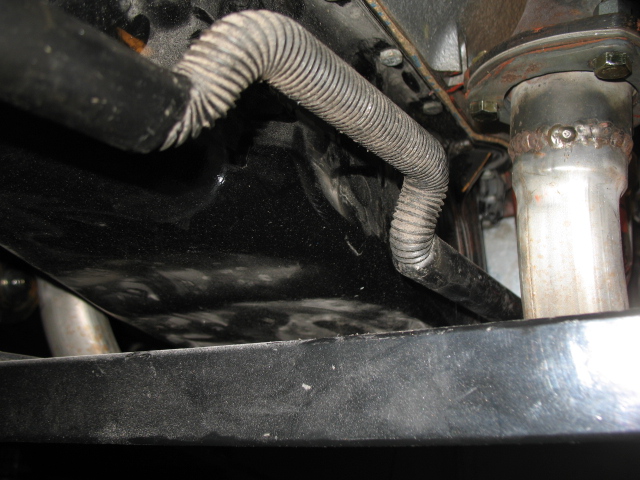
|
|
|
|
| 76-914 |
Sep 20 2013, 02:19 PM
Post
#14
|
|
Repeat Offender & Resident Subaru Antagonist Group: Members Posts: 13,837 Joined: 23-January 09 From: Temecula, CA Member No.: 9,964 Region Association: Southern California |
Jim, are you doing this and the Suby conversion or did the Suby get shit canned?
|
|
|
|
| jimkelly |
Sep 20 2013, 03:24 PM
Post
#15
|
|
Delaware USA Group: Members Posts: 4,969 Joined: 5-August 04 From: Delaware, USA Member No.: 2,460 Region Association: MidAtlantic Region |
I simply want to get the 1972 V8 running and functional - and then I want to focus, as resources allow, on my 1975, to be suby powered.
in all honesty, the V8 sucks gas and shifts like a 914. I look forward to NOT SUCKING and SHIFTING modernly (IMG:style_emoticons/default/driving-girl.gif) now that I have a MIG up and running, I feel much more confident. thanks jim Attached image(s) 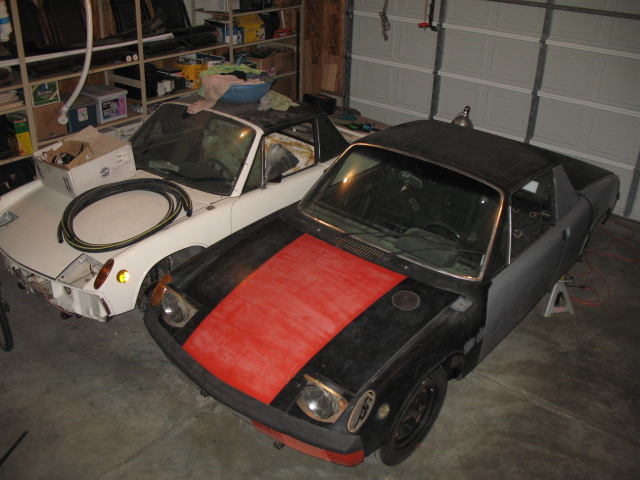 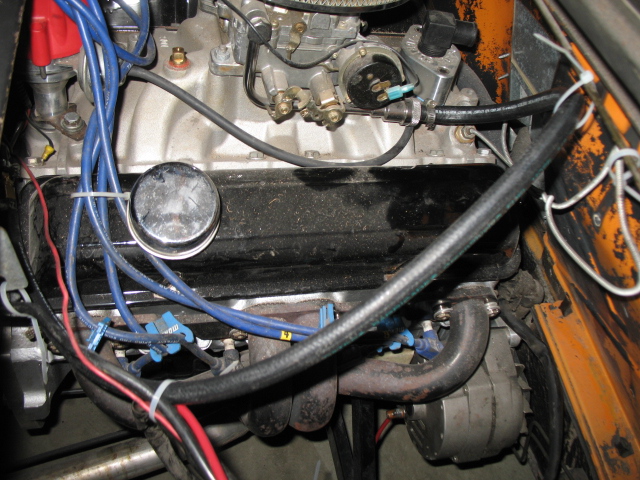 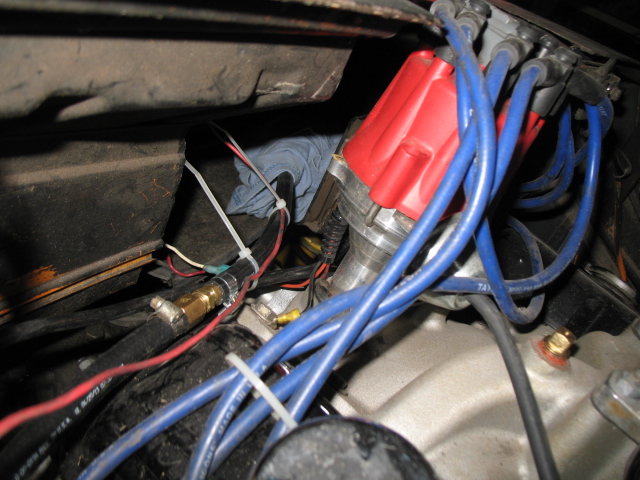 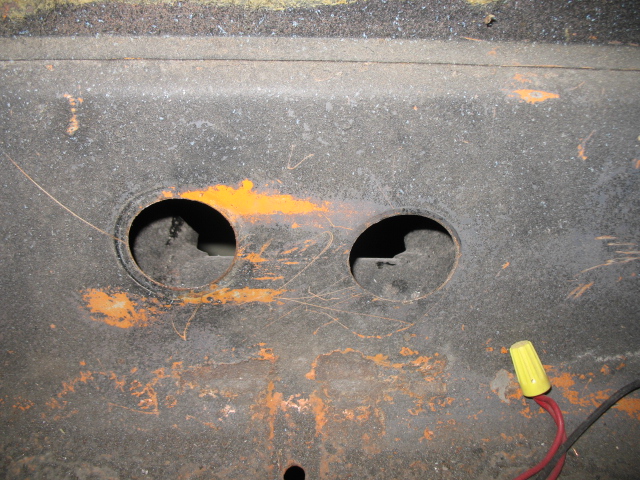 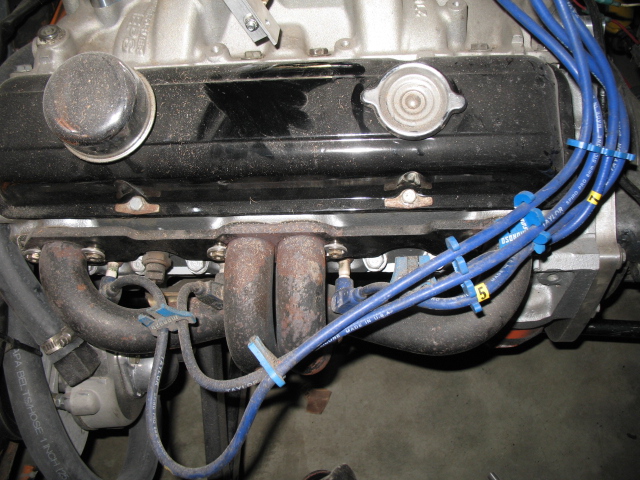 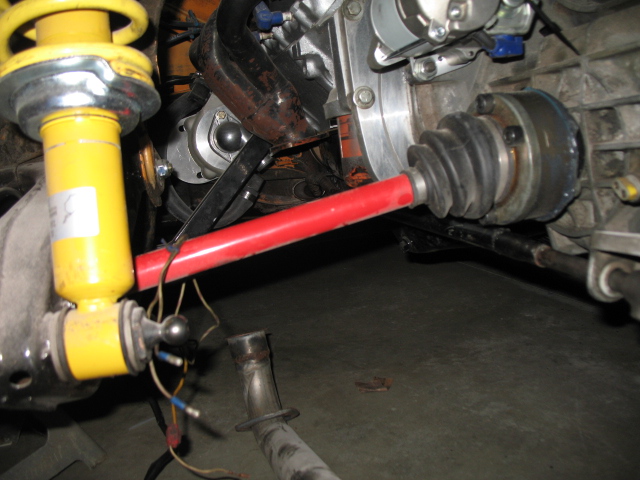 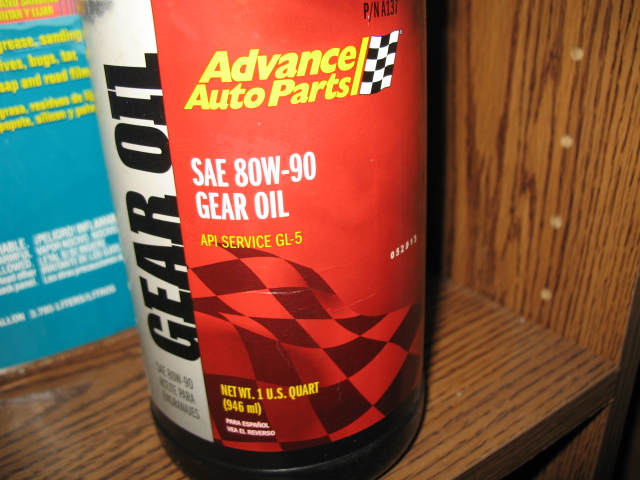
|
|
|
|
| jimkelly |
Sep 21 2013, 08:34 AM
Post
#16
|
|
Delaware USA Group: Members Posts: 4,969 Joined: 5-August 04 From: Delaware, USA Member No.: 2,460 Region Association: MidAtlantic Region |
just goofing around, since I already have a bar that fits.
I put a cut off wheel in my mitre box and cut some tailshift linkage and side shift linkage, both engine bay rods. correction: cutting both bars just before the bends will give me a modded bar almost exactly 39.75" long tip to tip, 1" too short - i will ad 1", to get to 40.75". stock is 39.25". note: it is odd that the side shift engine bay bar is neither totally straight, nor are the holes for the conical screws perfectly lined up. I will be ignoring this, since both are cocked ever so slightly. also, I have to say, a flap disc kicks ass. grinds better than a grinding wheel in many cases. never expected that. Attached image(s) 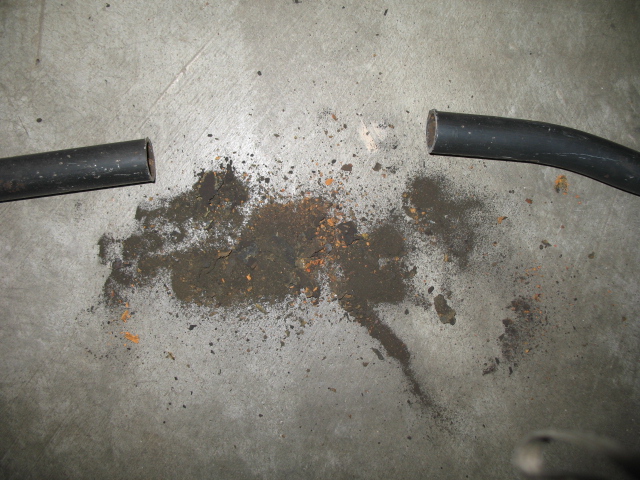 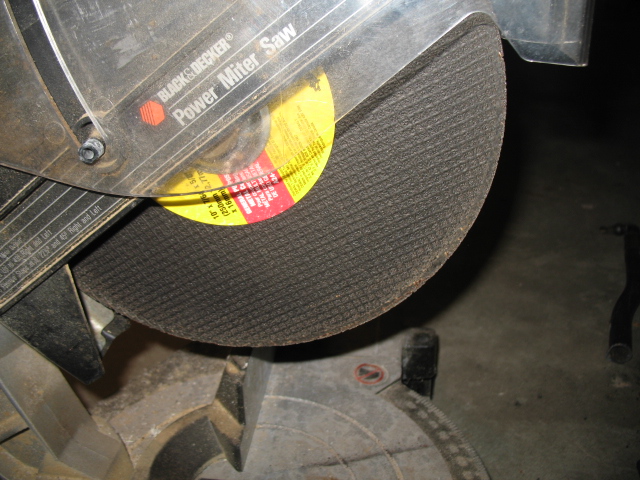 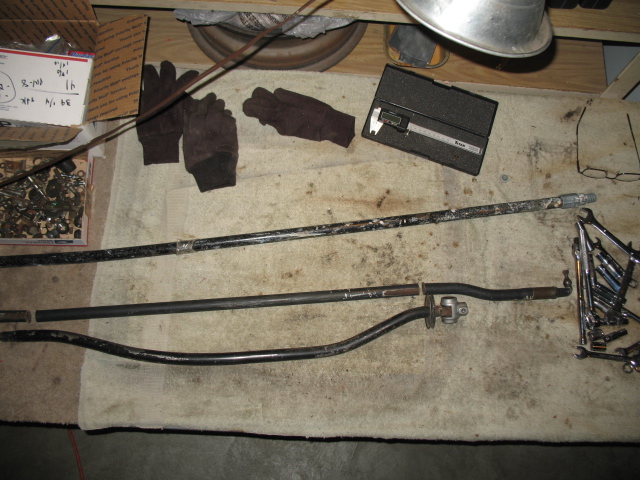 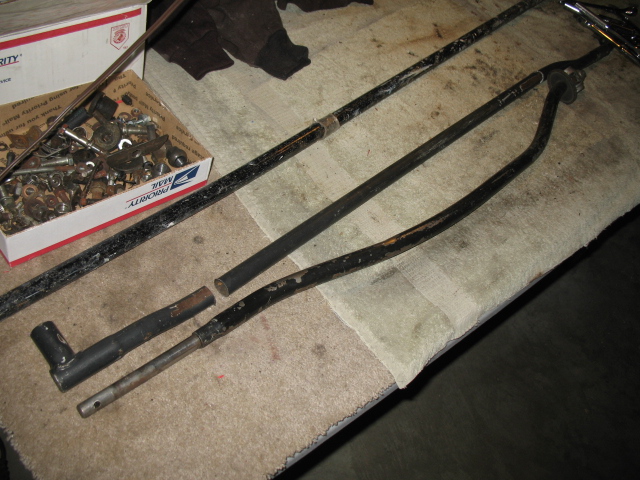 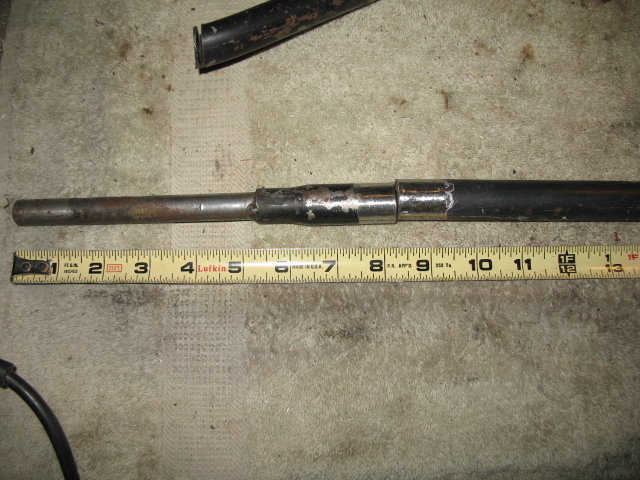 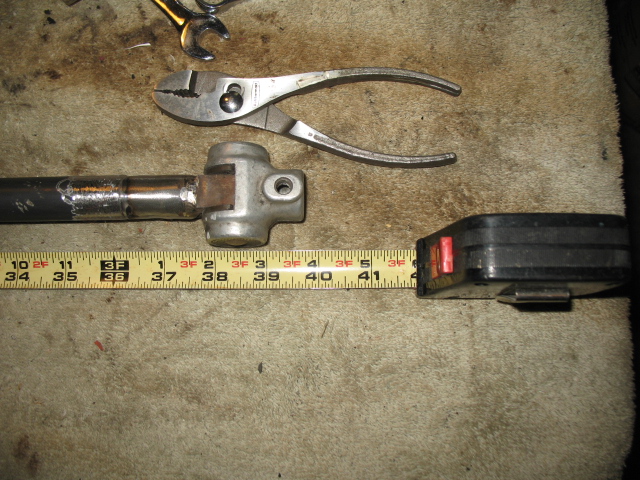 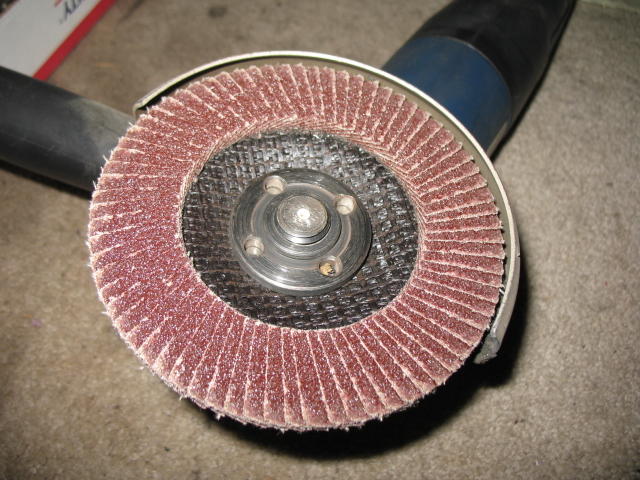
|
|
|
|
| zambezi |
Sep 21 2013, 12:31 PM
Post
#17
|
|
Senior Member Group: Members Posts: 711 Joined: 14-April 08 From: Lafayette, LA Member No.: 8,920 Region Association: South East States |
yes they grind better and produce less heat. Easier to control the amount you are grinding too so you don't grind away too much.
|
|
|
|
| jimkelly |
Sep 21 2013, 01:15 PM
Post
#18
|
|
Delaware USA Group: Members Posts: 4,969 Joined: 5-August 04 From: Delaware, USA Member No.: 2,460 Region Association: MidAtlantic Region |
engine bay shift rod done : )
40.75" it is pretty darn straight, but I think the tang that goes into the console is tweaked - so I will tweak it back to straight a tiny bit. and got my dip stick in the mail - made in korea of all places - and of course it won't seat fully, about 1/4 inch shy. I found that after grinding an area, taking a DA sander to the area, makes it real nice. ok - she is in - and she is pretty ; ) Attached image(s) 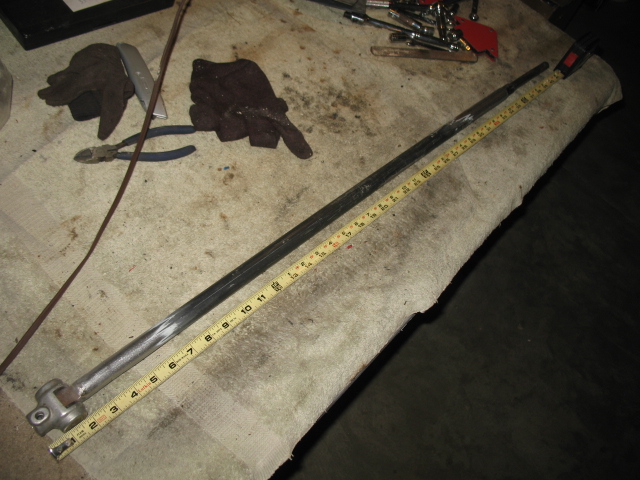 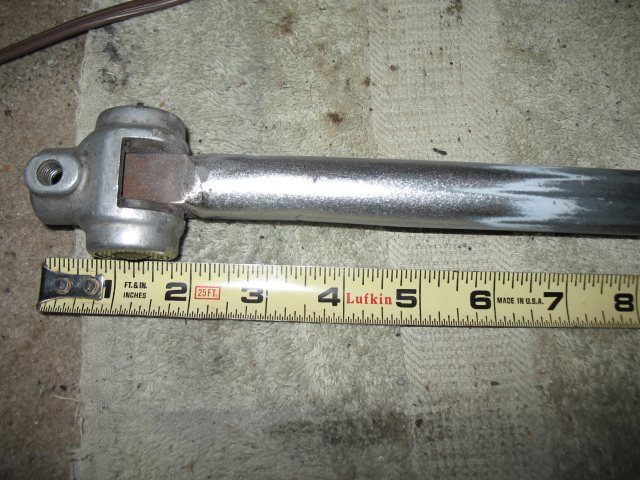 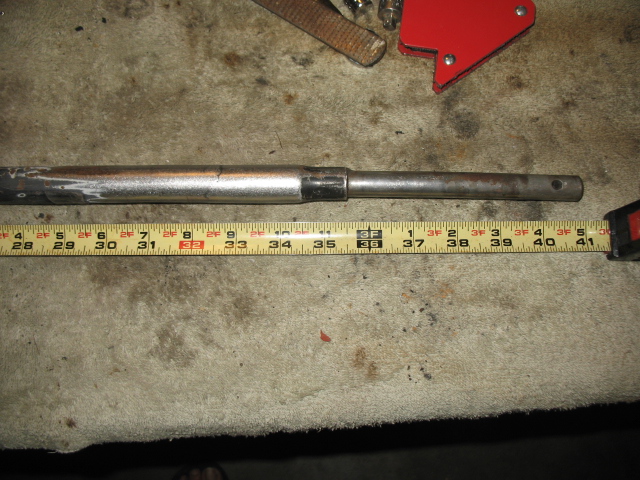 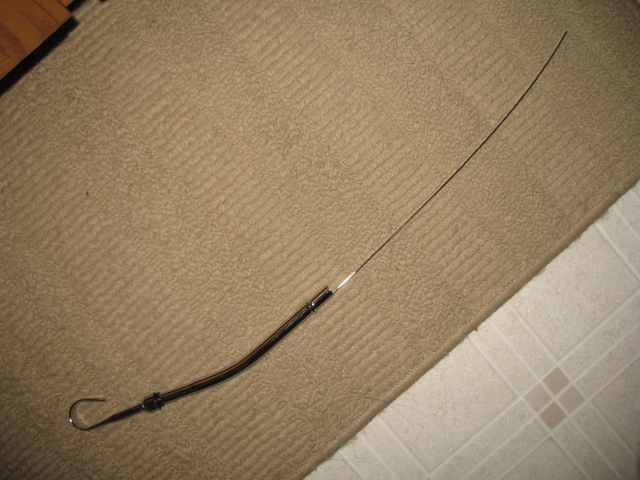  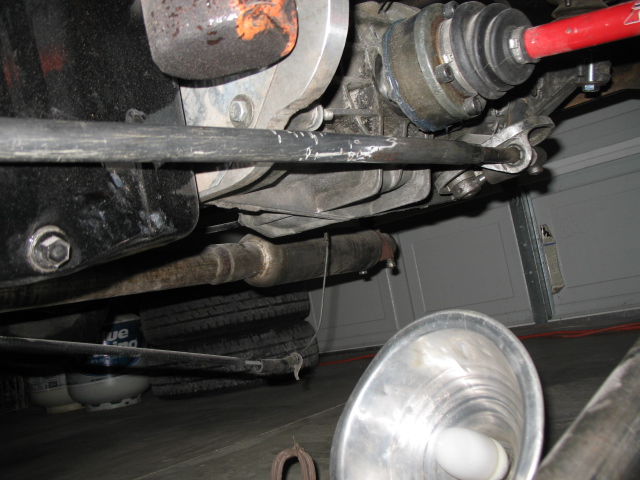
|
|
|
|
| jimkelly |
Sep 22 2013, 11:22 AM
Post
#19
|
|
Delaware USA Group: Members Posts: 4,969 Joined: 5-August 04 From: Delaware, USA Member No.: 2,460 Region Association: MidAtlantic Region |
some random pics
Attached image(s) 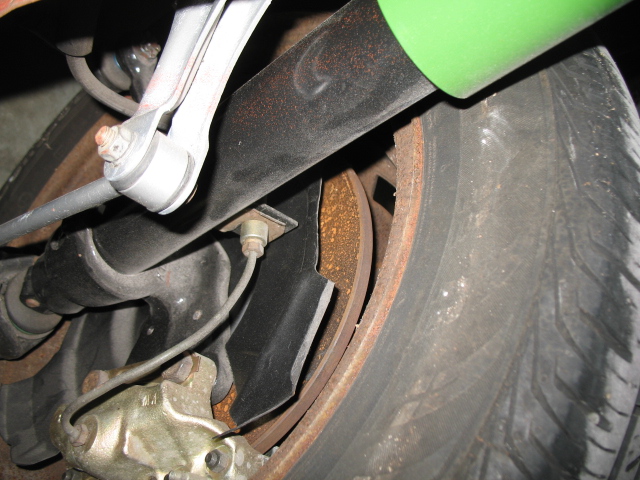 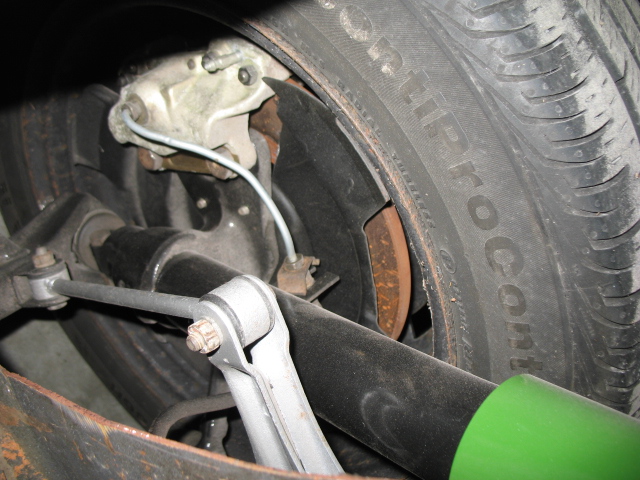 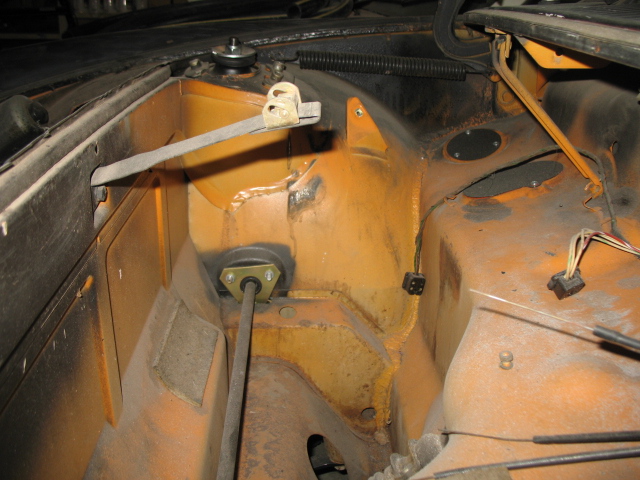 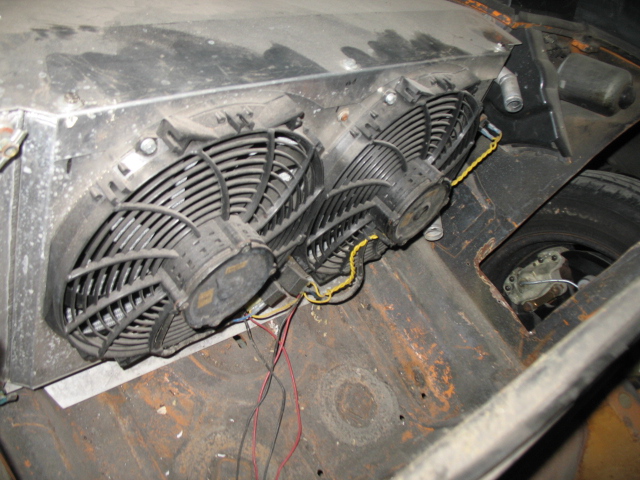 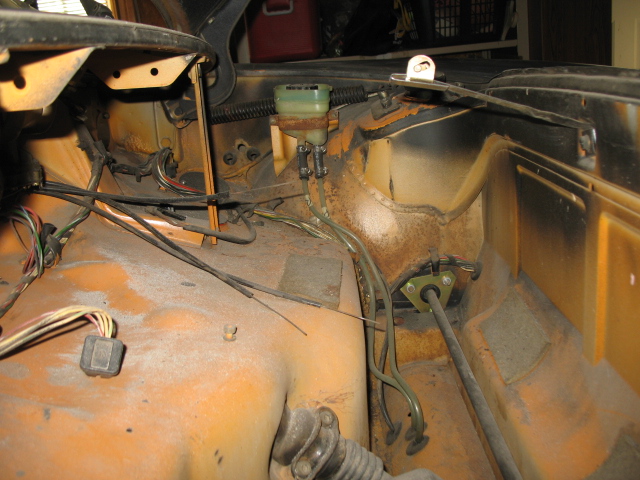 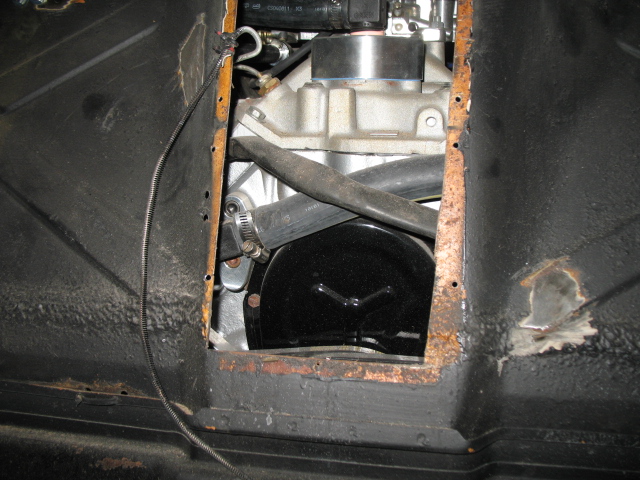  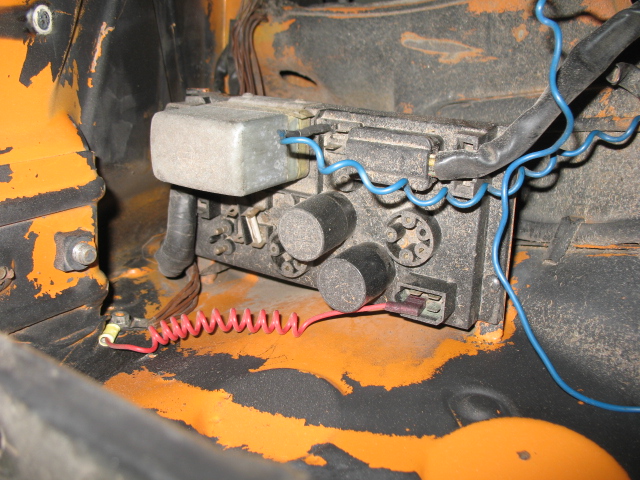 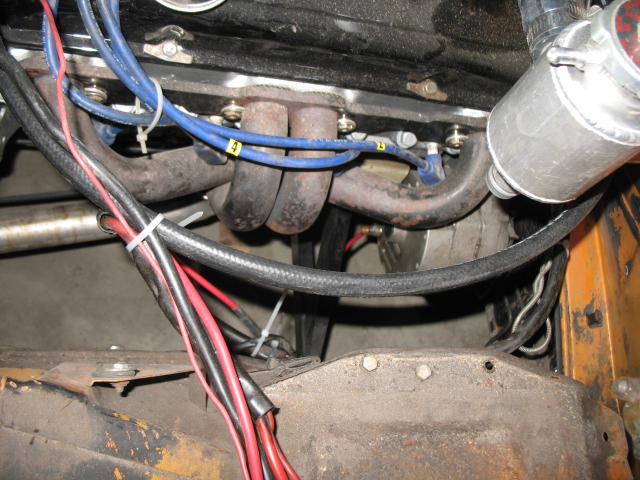 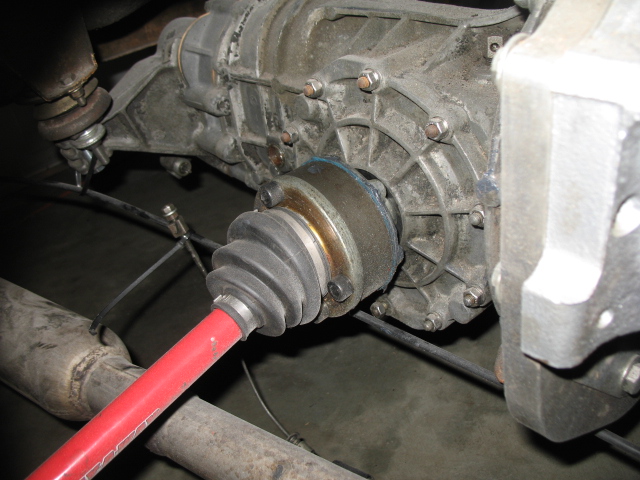 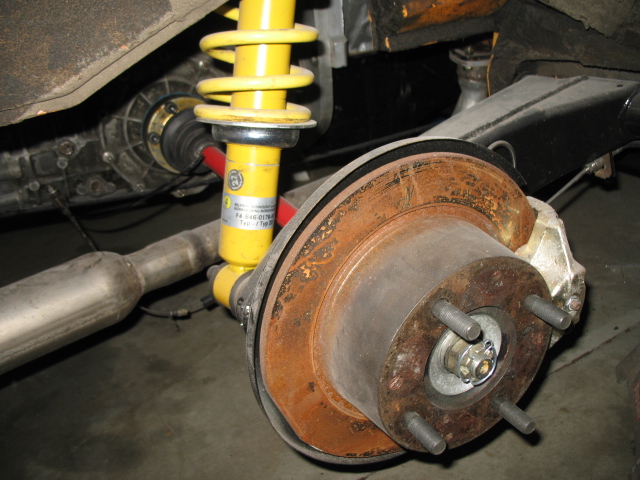 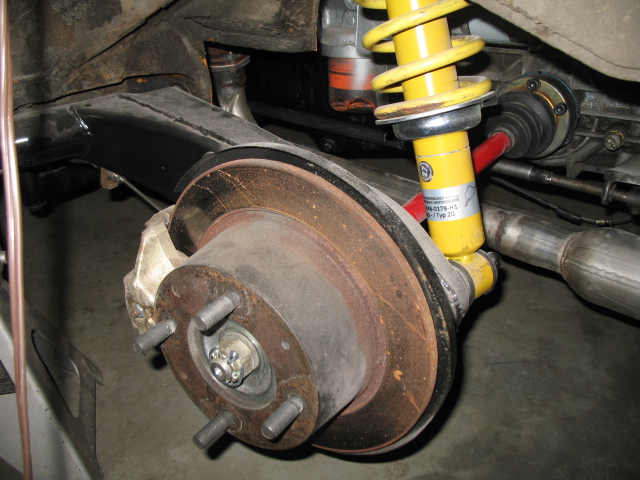
|
|
|
|
| Mike Bellis |
Sep 22 2013, 07:17 PM
Post
#20
|
|
Resident Electrician Group: Members Posts: 8,347 Joined: 22-June 09 From: Midlothian TX Member No.: 10,496 Region Association: None |
Your lower spring perch is upside down... (IMG:style_emoticons/default/sad.gif)
(IMG:http://www.914world.com/bbs2/uploads/post-2460-1379870527.jpg) |
|
|
|
|
1 User(s) are reading this topic (1 Guests and 0 Anonymous Users)
0 Members:

|
Lo-Fi Version | Time is now: 12th January 2026 - 02:50 AM |
Invision Power Board
v9.1.4 © 2026 IPS, Inc.